• Home
  • Page Layouts
  • Page Templates
  • Theme Colors
    • Lifestyle Pro Blue
    • Lifestyle Pro Green
    • Lifestyle Pro Mustard
    • Lifestyle Pro Purple
    • Lifestyle Pro Red
    • Lifestyle Pro Teal

Relish The Bite

Taste of happiness

  • HOME
  • ABOUT
  • RECIPE INDEX
    • SNACKS & APPETIZERS
    • BREAKFAST
    • BAKED RECIPES
    • LUNCH & DINNER
      • RICE/BIRYANI VARIETIES
      • SIDES
        • DRY CURRY/STIR-FRY
        • SOUTH INDIAN CURRY/KUZHAMBU
        • NORTH INDIAN CURRY/DAL
        • RAITA/DIPS/CHUTNEY
        • Soups/Salads
      • PASTA PIZZA & TACOS
      • BREAD
      • CHINESE ASIAN INSPIRED
    • NON-VEG RECIPES
    • DESSERTS
    • BEVERAGES
  • SNACKS
  • BREAKFAST
  • NON-VEG RECIPES
  • RICE/BIRYANI VARIETIES
  • LAMB
  • SOUTH INDIAN CURRY/KUZHAMBU
  • VEGAN
  • NORTH INDIAN CURRY/DAL
  • DRY CURRY/STIR-FRY
  • PASTA & TACOS
  • CHINESE ASIAN INSPIRED
  • BAKED RECIPES
  • COLLECTIONS
  • BREAD
  • BEVERAGES
  • DESSERTS
  • FESTIVAL RECIPES
    • SNACKS & APPETIZERS
    • SWEETS/DESSERTS
  • RESOURCES
    • HOW TO START A BLOG
    • TITBITS
    • PRESS
  • CONTACT
You are here: Home / 2015 / Archives for March 2015

Archives for March 2015

Sweetened Condensed Milk Toast with Orange zest

March 31, 2015 by Suki 10 Comments

Condensed Milk Toast-6name

Condensed Milk Toast-6name

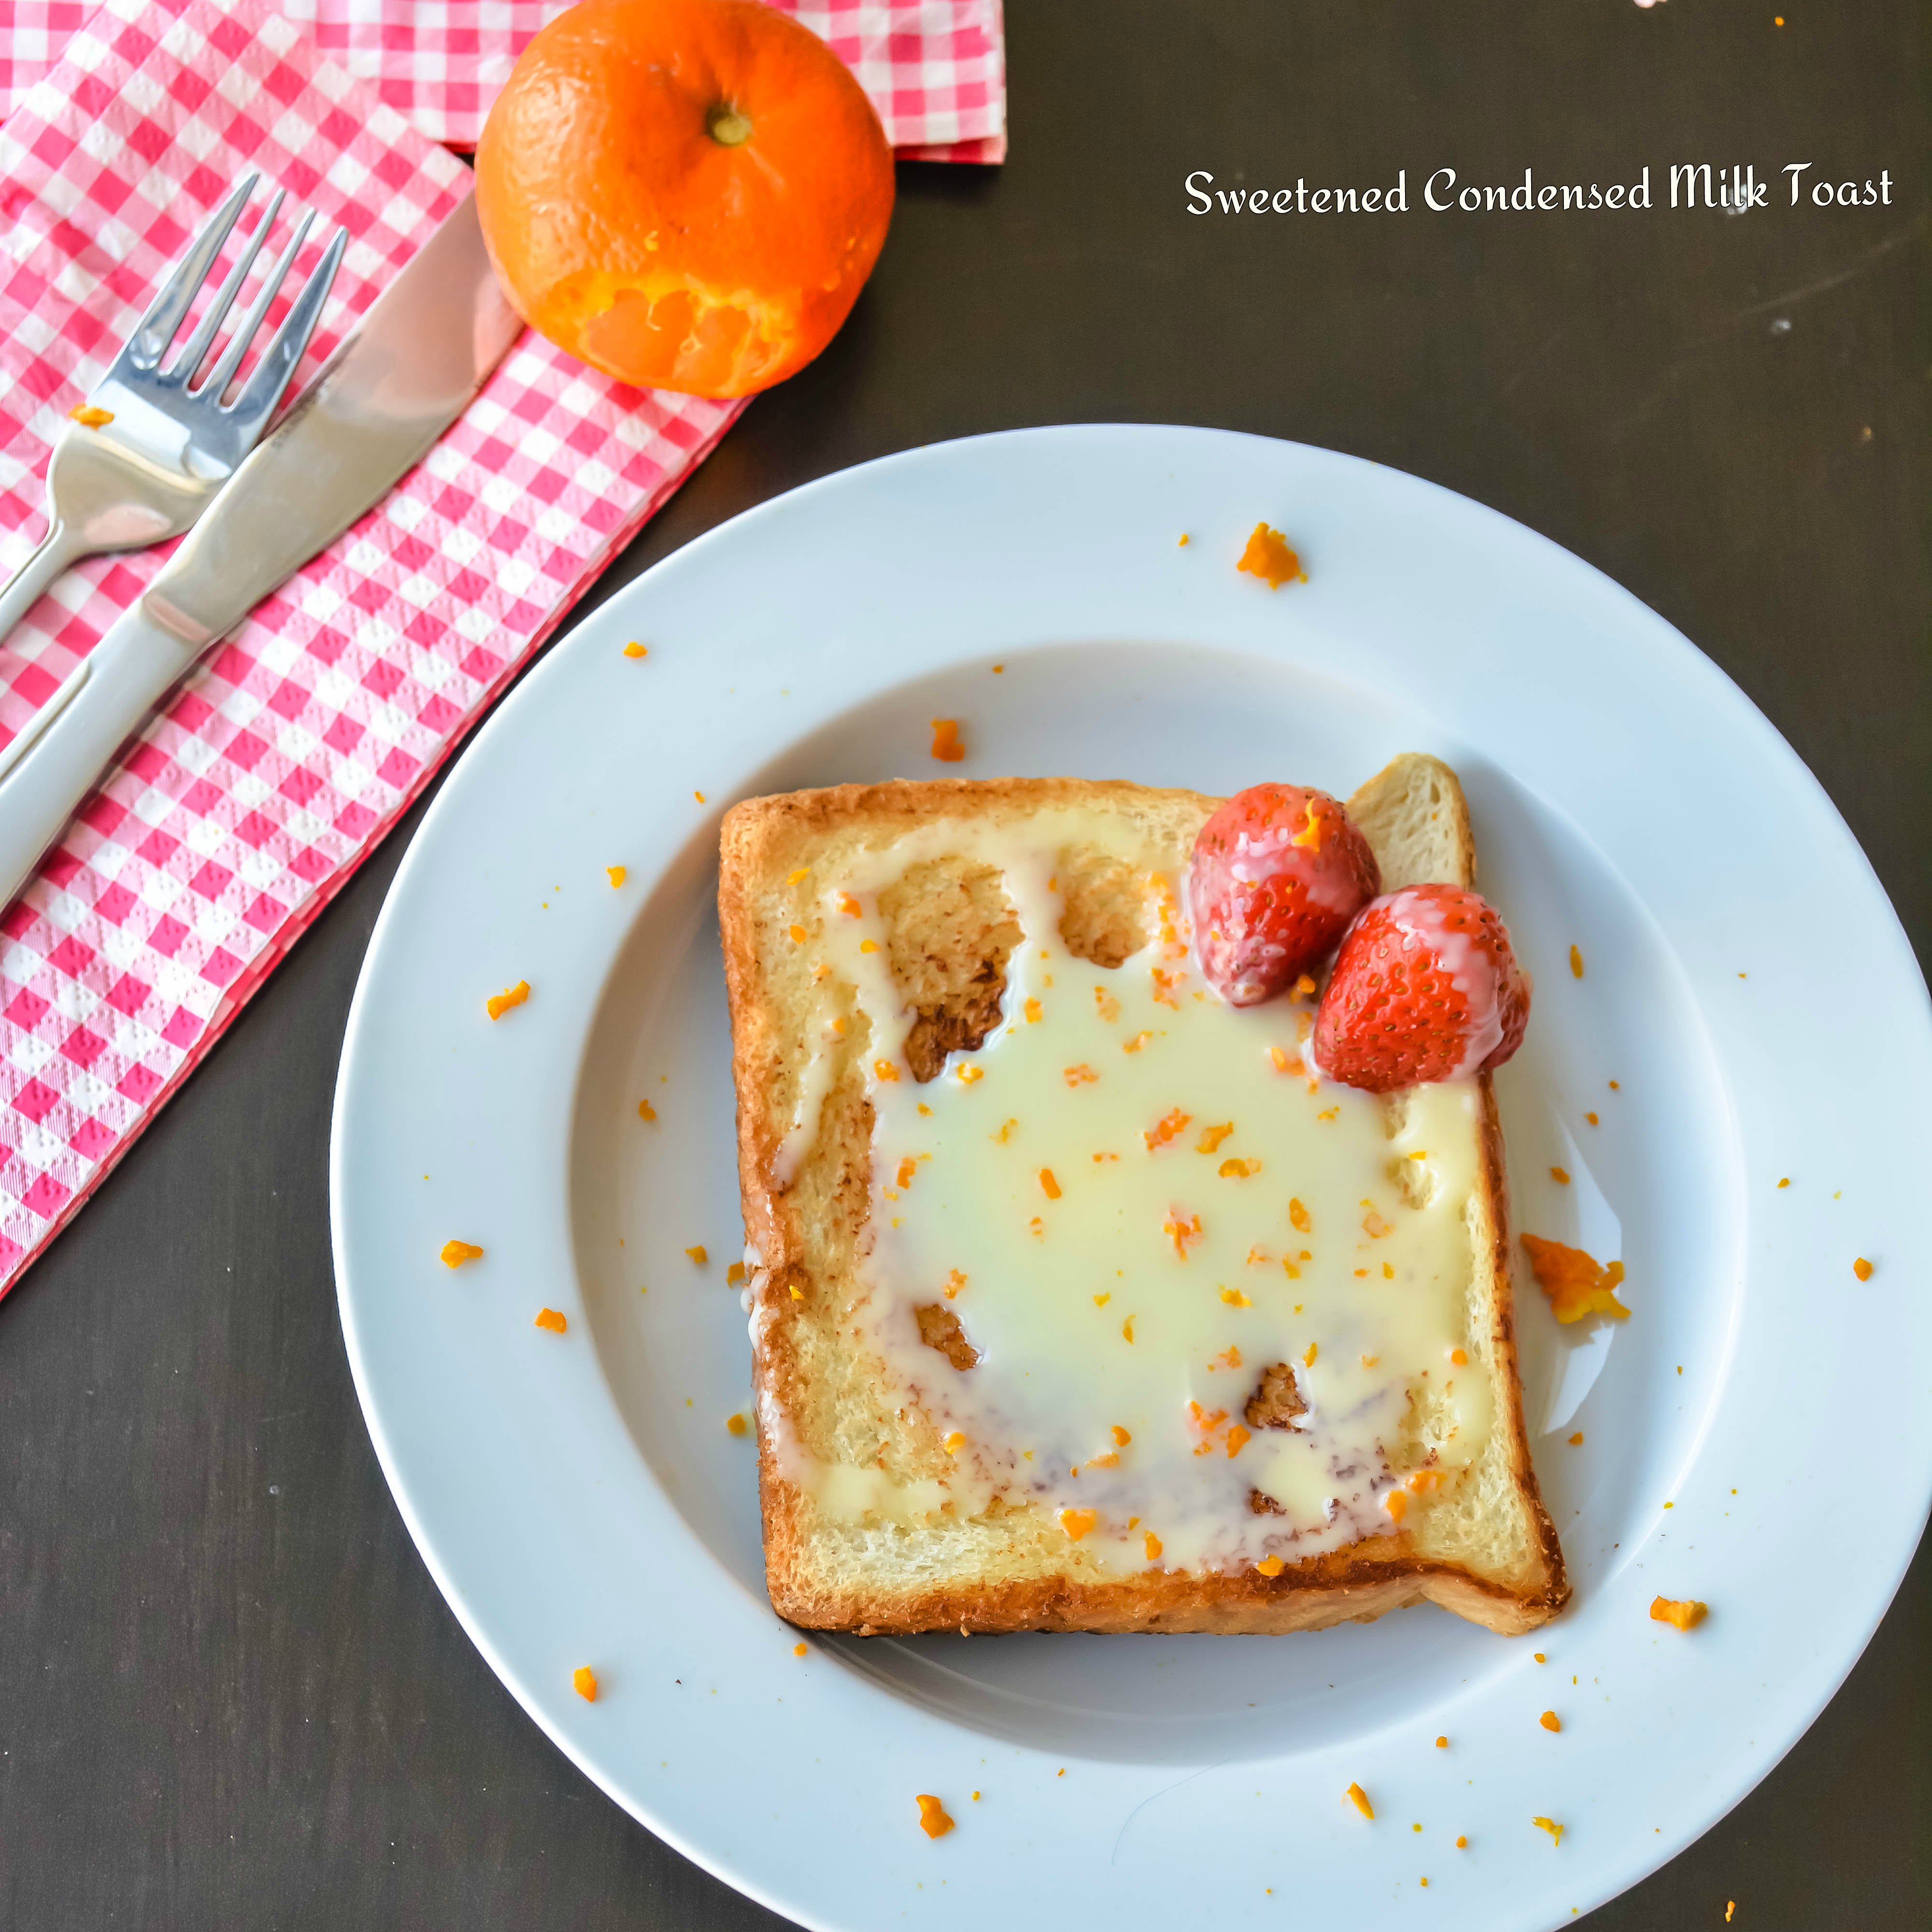
Takes only 5 minutes to prepare – Toasting bread with butter, raining it with milk and some orange zest! Sweet & refreshing! Definitely decadent.

Prepare this when you want to have it right away. I am saying this because the condensed milk would melt on the butter toasted bread  thumbsupdelicious! Orange zest is fresh to have as soon as you grate them. I was thinking as I was making it that it would be really sweet but trust me it was perfect!

Condensed Milk Toast-4

Everybody loves quick and simple recipes. Kids would love this recipe because of the taste combination and sweetness. You can make this in 5 minutes in the morning or as a snack. Perfect for a breakfast I would say!  as I made this twice already.giggle

White bread lightly toasted with just butter is so good on its own but just a drizzle of this sweetened condensed milk is delicious. We do not want to have this on a daily basis; it might be sweet and then would get bored on few days. Indulge once in a while with this sweet toast with refreshing orange zest. I always love sweetened condensed milk. It is so delicious. I can take a spoonful of the sweetened condensed milk from the jar 🙂 Not more than a spoon but for sure. And most times I eat Nutella 😉 from the jar. Many does that 😉 I am sure!!! If you have this stored, there are lots of quick recipes you can do with this. I have already made a coconut ladoo/balls, saffron coconut Fudge/Burfi using sweetened condensed milk. I even made a carrot ladoo using the same.

Condensedmilk1

 I used the store bought sweetened condensed milk. But I have made this sweetened condensed milk many times. It will thicken when you keep it in fridge, but it won’t be as thick as store bought but surely it is of same good taste. I had the leftover condensed milk I used for carrot coconut ladoo. I wanted to use for something quick and tasty.  Here comes the recipe for it. I also prepared a recipe note for sweetened condensed milk. You can always prepare and use it later.

 Sweetened Condensed Milk recipe:

It will make around 1 cup

Ingredients:

Whole milk – 2 cups

Granulated sugar – 3/4 cup

Vanilla extract  – ¼ tsp

Method:

Take a heavy bottomed sauce pan, mix together milk and sugar. Warm until steaming. Lower the heat and simmer for 2 – 2 ½ hours or until it thickens slightly. 

When reduced to half, stir in the vanilla extract. Switch off and store in an airtight container and cool it. Keep it in fridge for 2 weeks.

Vanilla extract is optional here.

Vegan Note: You can use coconut milk to make the sweetened condensed milk. You can skip the butter and toast it plain 🙂

Condensedmilk2

Print
Sweetened Condensed Milk Toast with Orange zest
Author: Suganya Hariharan
Recipe type: Breakfast
Cook time:  5 mins
Total time:  5 mins
Serves: 2 bread slices
 
Ingredients
  • Butter – 1 tbsp
  • Bread slices – 2
  • Fruits – few (I used strawberry)
  • Orange Zest – 2 tsp
  • Sweetened condensed milk – drizzle as per your taste
Instructions
  1. Take a skillet and heat 1 tbsp of the butter on medium heat until melted.
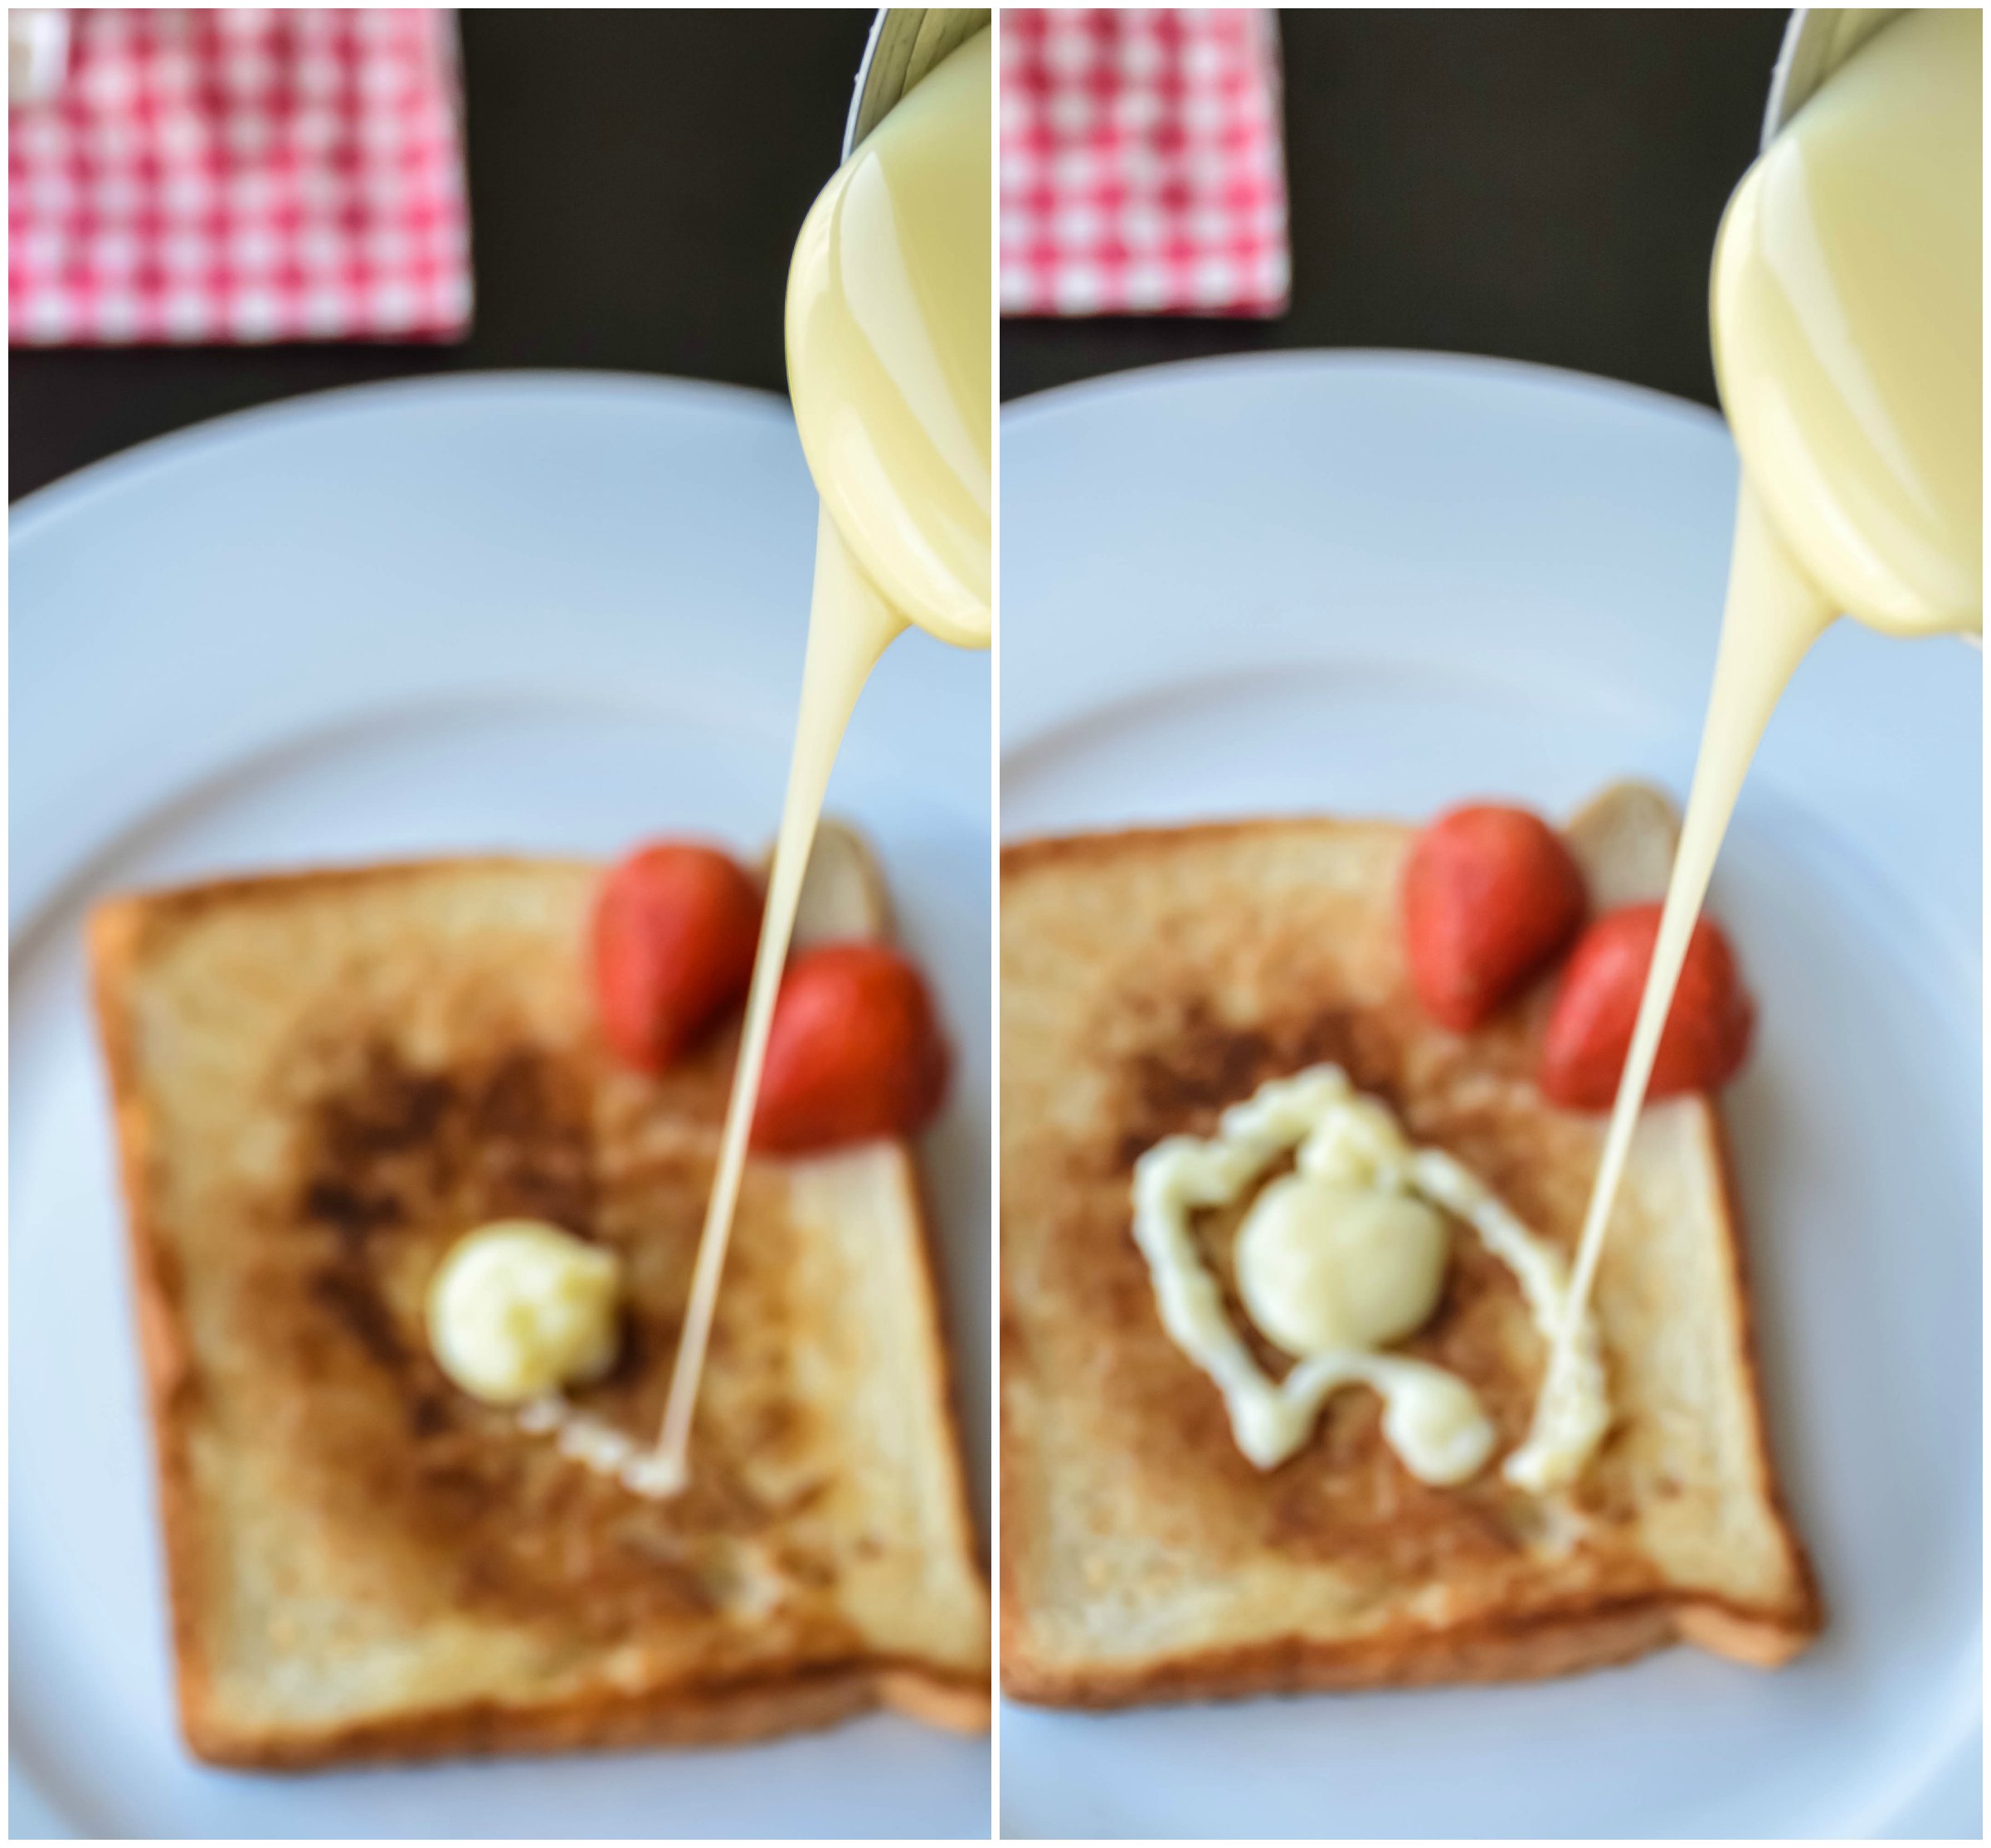
  2. Place the bread slices into the butter and toast it for a minute until golden brown. Now flip the bread and toast for another minute. Switch off.
  3. Place the toasted bread on serving plates with some fruits. Drizzle condensed milk over the toasted bread (generously). Grate some orange zest on it and serve immediately.
Wordpress Recipe Plugin by EasyRecipe
3.2.2885

 Condensed Milk Toast-5


Filed Under: BREAKFAST, DESSERTS Tagged With: 4 Ingredient breakfast recipe, How to prepare sweetened condensed milk, Jams and dips for bread recipes, Kids breakfast recipes, Orange recipes, Orange zest recipe, quick breakfast recipes, quick desset recipes, Sweetened condensed milk toast, Sweetned condensed milk recipes, sweets desserts, vegetarian breakfast recipe

Ridge gourd chutney/ Peerkangai Thogayal

March 27, 2015 by Suki 4 Comments

PeerkangaiChutney-3

PeerkangaiChutney-4nameOne of the easiest spiced healthy dip made with few ingredients 🙂 Absolutely delicious!

It can be kept in fridge and can be used for 2-3 days. You can skip onions if you do not want to add it. My mom makes without onion. But I like it with onion. Thogayal/chutney is a saviour for us on weekdays. I make coconut chutney, mint chutney, carrot chutney, eggplant chutney, tomato chutney, pumpkin chutney, channa dal chutney, coriander chutney and so on. It taste best with plain rice and chips/papad. I always make them on a busy weekday night and next day I will have it with a quick dosa/idli/paniyaram.

PeerkangaiChutney-3

On a weekday night it is so hard to cook after the work and that too on a long day, it is even harder. And that time, I used to think any recipes under 20 minutes and not more than that. I will cook them quick and sit in my couch till I sleep watching TV 🙂 I am sure a couch potato on weekday nights. I am sure many are 😉 . Ok enough of my blah..blah..blah! Lets go straight to the recipe today 🙂

PeerkangaiChutney-2

5.0 from 1 reviews
Print
Ridge gourd chutney/ Peerkangai Thogayal
Author: Suganya Hariharan
Recipe type: side dish
Cuisine: Indian
Prep time:  5 mins
Cook time:  15 mins
Total time:  20 mins
Serves: 1 cup
 
Ingredients
  • Ridge Gourd/ Peerkangai – 1 medium sized(peeled roughly and chopped roughly), gives about 2½ cups
  • Onion – 1, chopped roughly
  • Green chillies – 3, chopped roughly
  • Red chillies -3
  • Tamarind – small marble size (Soaked in 1 tbsp of water)
  • Coconut – 2 tbsp
  • Salt – ½ tbsp
  • Oil - 1tsp
    [To temper]
  • Oil – 1tsp
  • Mustard – ¾ tsp
  • Red chilli -1, broken
  • Urad dal – 1 tsp
  • Asafoetida – a pinch
  • Curry leaves – 1 sprig
Instructions
  1. Peel the skin (it is alright if you cant peel it totally), wash and chop the ridge gourd roughly.
  2. Heat a pan with a tsp of oil and then add the onions and sauté tll transparent along with green chillies and red chillies.
  3. Add the chopped ridge gourd and salt. Cook it covered till the ridge gourd softens and also it will reduce in volume. Switch off.
  4. Cool completely and blend them smoothly with tamarind and coconut.
  5. To temper, add oil in a small pan, add the mustard seeds, when it cracks and now add the urad dal and red chilli till it turns golden brown. Add the red curry leaves and switch it off.
  6. And add the tempered ingredients to the chutney and enjoy with some rice, dosa, idli.
Wordpress Recipe Plugin by EasyRecipe
3.2.2885

Taste great with rice and papad, idli, dosa, paniyaram and so on.

PeerkangaiChutney-4

Filed Under: RAITA/DIPS/CHUTNEY, VEGAN Tagged With: coconut recipes, Dipping curry sauce recipe, dosa chutney recipes, dosa side dish recipes, idli chutney recipes, Indian dipping recipes, peerkangai thogayal, peerkangairecipes, Ridge gourd chutney/ Peerkangai Thogayal, ridge gourd recipes, thogayal recipes, vegetarian chutney recipe

Mushroom Tofu Veggie Potstickers with Chili Hoisin Ginger sauce

March 24, 2015 by Suki 7 Comments

Dumplings-18

Exotic chinese dumplings for appetizer or dinner – pack them with any filling of your choice, pan fry,steam, freeze or eat fresh! 

Dumplings-18

I have never had homemade potstickers before. I have had it once in a restaurant but I always loved to have it. It is just that it is so hard to find a pure vegetarian one at a restaurant here. So, I made these homemade potstickers for me. The best thing about potstickers is that it is so easy to customize the fillings as you fancy. I have heard pork and shrimp dumplings are great to taste. I might make some next week and post recipe for that. But now it is my customized fillings time 🙂 You can add your veggies that is available at your house. These mushrooms gives an earthy flavor. The filling here is an even mixture of mushrooms, tofu, shredded carrots and cabbage.

Dumplings-22

It is also great to make homemade potstickers, because you can make a huge badge of them and pop them right in the freezer in a zip lock. That way you can indulge these delicious beauties whenever you want! I have made a note how to freeze them for future use. You know it is homemade, fresh and great to prepare them on a weekday when you are tired but still want to eat something delicious with your favorite fillings.

Dumplings-19

Dumpling4.jpg

By this method of cooking, I made them with  maximum crispy crunchy surface.

How to froze potstickers:

Prepare the potstickers with filling and place them on a baking sheet for 10-15 minutes outside. Now place the baking sheet in freezer for 4-5 hours. Now throw them into a freezer bag. When you are ready to eat, just toss them into an oil greased skillet.  It might take little longer to cook than usual (may be 3-4 minutes more) because it’s frozen. Do not try to defrost them and then cook. It is not the best idea. But trust me, the taste is going to be same. You can store them for a month for sure and it is still going to be yum!

Dumpling3.jpg

Dumplings2.jpg

How to fill and fold the potstickers:

The filled dumplings should form a slight crescent shape. You can fold in anyways. Do not fret if you don’t get it 🙂 or try two to three times more! 🙂

When you are ready with the filling, you can get ready to assemble the dumplings:

  1. Defrost the wonton/dumpling wrappers overnight in fridge or defrost by keeping them outside for 2-3 hours. I kept them outside for an hour and then just microwaved them for 20 seconds. (Don’t do it more).
  2. Separate them and keep them on a baking sheet or tile.
  3. Wet the edge which will help seal the edges.
  4. Add a tsp of filling.
  5. Fold in half with no air gaps inside.( like half moon)
  6. You can just use them like this or pick some shapes to do like below. 
  7. The method below: Start pleating from right to left side of the dumpling and pinch it. 
  8. Or pinch the center together. Starting from the center,make 3 pleats to the right side of the dumpling. Repeat with the left side of the dumpling so that all the pleats point together towards the center.

how to make potstickers


Here comes the recipe 🙂 Now

Print
Mushroom Tofu Veggie Potstickers
Author: Suganya Hariharan
Recipe type: Main
Cuisine: Chinese
Prep time:  30 mins
Cook time:  15 mins
Total time:  45 mins
Serves: 35
 
Ingredients
  • For Filling:
  • Cabbage – 1 cup, shredded
  • Carrot – 1 cup, grated
  • Garlic – 3 cloves, finely minced
  • Shallots – 2 tbsp, finely chopped
  • Fresh ginger- 2 teaspoons, finely chopped
  • Green onions – 2 , finely chopped
  • Coriander leaves – 1 tbsp, finely chopped
  • Green chillies – 1, finely chopped
  • Sriracha - 1tsp
  • Black pepper – 1 tsp
  • Salt – 2 tsp
  • Soy sauce – 2 tsp
  • Wonton wrappers – 30
  • Cooking oil – 2 tbsp
    [br[To blend:
  • Tofu – 4 ounces, chopped (I used extra firm)
  • Mushrooms – 2 ounces, stems removed, chopped


  • Dipping Sauce:
  • Hoisin – ½ cup
  • Sriracha – 2 tsp
  • Ginger – 1 tbsp, freshly grated
  • Soy sauce – 2 tbsp
  • Sesame oil – 2 tsp
  • Red chili peppers – 3 dried,crushed
  • Garnish
  • Sesame seeds – ½ tsp
  • Green onion – 1 tbsp, sliced
Instructions
  1. In a blender, add the ingredients under to blend (mushrooms & tofu). And give a 2 pulses blend so that so are slightly blended but should not have smooth texture.
  2. In a mixing bowl, add all ingredients under “for filling” except oil and wrappers. Mix the blended mushrooms & tofu to it. And keep aside.
  3. To wrap:Defrost the wonton/dumpling wrappers overnight in fridge or defrost by keeping them outside for 2-3 hours. I kept them outside for an hour and then just microwaved them for 20 seconds. (Don’t do it more).Separate them and keep them on a baking sheet or tile.
  4. Wet the edge which will help seal the edges.Add a tsp of filling.
  5. Fold in half with no air gaps inside.( like half moon).You can just use them like this or pick some shapes to do like below. The method below: Start pleating from right to left side of the dumpling and pinch it. (picture above)
  6. When ready to cook, take a non-stick skiller, heat 1 tbsp of oil over medium high heat. When the oil is hot, add the potstickers to the pan in a single layer. Do not crowd the pan by placing 1 potstickers on another. Cook until browned on one side. It will take about 3 minutes.
  7. Now flip and add 2 tbsp of water to the pan. Close the lid. And let them steam for 3-4 minutes and when you are hear sizzling sound or when the water has evaporated. Open the lid and when the other side has turned brown, Just remove the pot stickers and continue with the next batches.
  8. Prepare the dipping sauce by whisking together all the sauce ingredients in a pan and heat them in low –medium heat for 5-6 minutes till they thicken. And garnish them with sesame seeds and sliced green onions.
Wordpress Recipe Plugin by EasyRecipe
3.2.2885


You can serve them with just soy or *sriracha sauce if you do not want to prepare the dipping sauce

 Dumplings-17

Note: *Sriracha sauce is an Asian-style hot chili sauce and you can find them in most local grocery store in the Asian section.

Filed Under: CHINESE ASIAN INSPIRED, SNACKS & APPETIZERS, VEGAN Tagged With: asian quick recipes, BEst appetizer recipes, Chinese recipes, dumplings recipes, Mushroom recipes, Mushroom Tofu Veggie Potstickers, Potstickers recipes, quick potstickers recipes, steamed asian recipes, Tofu recipes, Vegan potstickers recipe, vegetarian potstickers recipe

Vazhakkai Fry/ Raw Banana Fry

March 21, 2015 by Suki 6 Comments

VazhakaiFry_name

VazhakaiFry_namePerfectly roasted plantain with curry leaves and spices.

I usually prepare the raw banana in two other different styles. One is by chopping them in circles, marinate in the masala and pan roasting them. Other is by grinding few masala with coconut and cooking raw banana with the masalas. And the one I am doing now is a classic recipe at my house 🙂 My mom does this for some rice and rasam. Because this one is crispy, it tastes great with any rice. My dad actually makes this at my place. My mom makes raw banana podimas by boiling it and mixing with few masalas. OMG! I am drooling! Even if I cook the best recipe of mine or have my favorite food in my favorite restaurant, my vote and my option is for my Moms food at any day. I guess it is the same for most of us. 🙂 I was raised having this comfort food and I love them.

I noticed that there are no raw banana recipes in my site. I noted 😉 in my list to add few more.

VazhakaiFry-3

VazhakaiFry-2

5.0 from 1 reviews
Print
Vazhakkai Fry/ Raw Banana Fry
Author: Suganya Hariharan
Recipe type: Main
Cuisine: Indian
Prep time:  10 mins
Cook time:  20 mins
Total time:  30 mins
Serves: 2 cups
 
Ingredients
  • • Raw banana/ vazhakkai – 2 medium sized( 2 cups), thinly sliced into circles
  • • Oil - 2 tbsp
  • • Mustard seeds - ¾ tbsp
  • • Cumin seeds (Jeera) - 1 tsp
  • • Urad dal - 2 tsp
  • • Curry leaves - 5
  • • Turmeric powder - 2 tsp
  • • Sambhar powder - 1 tbsp
  • • Chilli Powder - 1 tbsp
  • • Sugar - 1 tsp
Instructions
  1. Wash raw banana and peel the outer layer. Chop them finely into small cubes. Soak them in water till you use them.

  2. Heat 1 tbsp of oil in a pan in medium heat, add mustard, after it crackles, add urad dal,curry leaves and jeera.
  3. Bring the heat to low, and add turmeric powder, sambar powder, chilli powder,salt and asafetida Stir well. But make sure not to burn them, so keep it in low heat.
  4. Now add the chopped raw banana and bring the heat to medium. Sprinkle 1 tbsp of water, close the lid and cook for 5-7 minutes.

  5. Add 1 tsp of sugar and keep frying until the raw banana gets roasted here and there in color. Takes around 5-7 minutes again. Switch off the flame.
Notes
Adding sugar makes retain the color and turns it crispy.
Wordpress Recipe Plugin by EasyRecipe
3.2.2885

Taste great with rice and sambar or rasam or milagu kuzhambu or vengaya kuzhambu or dal fry. You can have them plain as snacks 🙂

VazhakaiFry-4

Filed Under: DRY CURRY SIDE DISH/ STIR-FRY, VEGAN Tagged With: Raw Banana Fry recipe, sambar recipe, Side dish for rasam, Side dish for rice recipe, Vazhakkai Fry recipe, vazhakkai kari recipe, vazhakkai poriyal recipe, vegan plantain recipe, vegetarian indian recipes, vegetarian south indian recipe

Mushroom Biryani

March 19, 2015 by Suki 7 Comments

mushroomBiryani

Mushroom Biryani-7

A plate full of hot, fragrant rice and mushroom cooked with crispy onions and spiced yoghurt sauce.

I have already 5 Biryani recipes 🙂 which means you would have known by now that I love cooking Biryani. Many find it difficult but it is not and it is worth the time it takes. I am not saying this 😉 Just like that! Trust me! I remember when I first tried to cook biryani before 3 years I would always make the rice mushy so I never liked to do Biryani after it. I will motivate again myself to do it and tried. I somehow found the tricks after a first few times 🙂 Now I am sure a pro 😀 proudly would say that! Never failed 🙂 And I still love to get comments even I know that it is good 😀 Like today when I received a comment for my sambar 😉 I went all blushing! 😀 May be I got the comment to see me blush 😉 whatever..:)heart It is always that comments and love heartwhich makes me cook next time!

mushroomBiryani

To be honest, it does take time to cook biryani than many easy 10 minutes food. I even don’t like to post time consuming recipes but it is so tasty that I could not resist myself not posting it. The best thing about biryani is that it tastes great even the next day and the day after. It will save you from cooking for next three days and it will never be like you are tasting leftover food! Awesome right?

Mushroom Biryani-5

Biryani is one of the most favorite dishes. My mom has never cooked mushroom when I was a kid, so I used to be hesitant to eat or cook them. Then had it when I went out with friends and I found it tasty and no harm cooking them 🙂 . May be I will cook this for her sometime 🙂 and also I realized that I don’t have a lot of mushroom recipes somehow. I always add them to noodles and pastas but I don’t tend to make them on weekends 🙂 somehow and here is the mushroom Recipes that I have – Mushroom Pepper Mini Quesadilla, Malai Pepper Mushroom with some colourful mushrooms.

I have some good biryani collection recipes. 🙂 If you would like to view it – Restaurant style vegetable Biryani, Paneer Biryani, Hyderabadi Egg Biryani, Restaurant style Lamb Biryani, Prawn Biryani.

To make it vegan, skin the yogurt or replace with vegan yogurt. And also replace ghee with oil.

Mushroom Biryani-2

Print
Mushroom Biryani
Author: Suganya Hariharan
Recipe type: Main
Cuisine: Indian
Prep time:  20 mins
Cook time:  45 mins
Total time:  1 hour 5 mins
Serves: 3 cups
 
Ingredients
  • • Oil – 1tbsp
  • • Bay leaf – ½
  • • Cinnamon – 1 thin piece
  • • Cloves – 3
  • • Cardamom pods -2
  • • Yogurt – 2 tbsp
  • • Basmati Rice – 3 cups
  • • Biryani Masala – 1 tbsp
  • • Red chilli powder – 1 tsp
  • • Garlic – 4, chopped
  • • Green chilli – 2, slit into two

    for garnish:
  • • Saffron – ½ tsp dissolved in ½ cup warm milk
  • • Ghee – 2 tbsp (or oil)
  • • Mint – 2 tbsp finely chopped (to garnish)

    For fried onions:
  • • Onions – 2 small onions, ½ cup, sliced thinly
  • • Oil – to fry (3 - 4 tbsp)

    For rice masala:
  • • Cashew nuts – 6
  • • Khus khus (white poppy seeds) – ½ tbsp.
  • • Cumin seeds/ jeera – ½ tbsp
  • • Fennel seeds – 1 tbsp.
  • • Garlic – 4 pods
  • • Ginger – 1 inch
  • • Green chilli – 6
  • • Tomato – ½, medium sized, chopped
  • • Mint – ½ cup, chopped finely
  • • Coriander leaves – ½ cup, chopped finely.
Instructions
  1. Wash and soak rice for atleast 30 -40 minutes.

    For Fried onions:
  2. Heat a pan with oil, add the sliced onions and cook in medium heat till turn golden brown. Stir in the middle so that it does not stick to the bottom. Set aside.

    For masala:
  3. Grind the garlic, ginger, mint, coriander, cashews, poppy seeds, fennel seeds, tomatoes, cumin seeds, chillis with two tbsp. of water into a smooth paste.
  4. Now take a big pan, add oil or ghee in medium heat, add the spices (cardamom, bay leaf, cinnamon, cloves), and add garlic and chillies and sauté for a minute. Now add the grinded paste and sauté them till the raw smell leaves and little oil oozes out.
  5. Now add the mushroom, yogurt, chilli powder, biryani powder and mix well. I always move the skillet away from the heat when adding yogurt which prevents it from curdling.
  6. Now after returning the skillet back to the stove, add the rice and salt and water. ( Quantity of water to be added is for one cup of rice , it is 1.5 cups of water). Mix well and close the lid tight and keep it in medium heat for 10 minutes. Now add the marinated fried onions and chopped mint for garnish and keep it in low for 5 minutes.
  7. Drizzle the saffron milk over the rice and Switch off, and keep it closed for another 5 minutes. They will help the rice to get the saffron flavors and vice versa.
Wordpress Recipe Plugin by EasyRecipe
3.2.2885

It taste great with a raita (Garlic Raita / Cucumber carrot Raita), or Mirchi ka salan or even plain biryani will taste delicious 🙂

Mushroom Biryani-3

Filed Under: RICE/BIRYANI VARIETIES, VEGAN Tagged With: Biryani Recipe without marination, biryani recipes, Indian biryani recipe, Mushroom Biryani recipe, Mushroom recipes, Mushroom Vegetarian recipe, quick Biryani recipe, Tasty biryani recipe, vegan biryani recipe, Vegetarian biryani recipe

Spicy Garlic Tofu in 10 minutes

March 16, 2015 by Suki 45 Comments

TOFU-4

TOFU-4

Truly fancy, delicious, restaurant style, vegan dish in 10 minutes. This is a recipe which will come to your rescue when you haven’t planned a meal on a week day.

It is a great vegetarian /vegan dish for any day,especially when it takes only 10 minutes to make. If we are given a choice of preparing a delicious dish in 10 minutes for dinner, we would choose it without thinking. 🙂 Will we not ;)! Or Is it just me 😀


TOFU-3

TOFU-2

It is a great dish to entertain with. You can either serve it as an appetizer with tooth picks, or serve it as main dish with plain or fried rice. You can press it between two slices of bread for a healthy quick breakfast.

I am usually very content eating humble food on the weekdays. It is more regional food that I grew up or sometimes salads (if I am lazy to stand up in the kitchen or if I am guilty having too much of junk foods 😉 which is most times!). But on the weekends, I tend to make and love to experiment in the kitchen. It is because I have more time on the weekends, and also I wanted to make myself occupied and busy the weekends.I really don’t want to get bored or else my mind would go wander about all thoughts. J And top of all this, I love to eat and I get to that all weekend :)! So, I made this for the weekend when I had some leftover rice from Friday evening and wanted to finish it up on Saturday. I wanted to make something quick to just eat with the rice which is tasty and filling. I did not want to stand in the kitchen for a long time 🙂 I knew I had some plans of going out for dinner. 😀

This was quick, flavorful and I love the addition of garlic with skin! You can serve this with some soy sesame sauce dip. You can even use the same method and do the recipe with paneer or baby corn. You can even fry the tofu and toss in this spice mixture.


TOFU-6

TOFU-2-2

TOFU

4.5 from 10 reviews
Print
Spicy Garlic Soy Tofu in 10 minutes
Author: Suganya hariharan
Recipe type: Main
Prep time:  4 mins
Cook time:  6 mins
Total time:  10 mins
Serves: 2 cups
 
Ingredients
  • Tofu – 500 Grams (Extra firm) (Chopped to bite size cube pieces)
  • Garlic – 7-8 cloves (don’t peel the skin)
  • Ginger – 2 inch
  • Dry red chillies – 8-10
  • White sesame seeds – 1 tbsp
  • Salt – 1 tsp
  • Soy sauce – 2 tsp
  • Sesame oil – 2 tbsp
  • Black Pepper powder (or crushed pepper) – 1 tsp
  • Chopped Green onions – to garnish
Instructions
  1. Place the chilis, Ginger, sesame seeds,salt and garlic (with skin) in a blender and pulse it for 3-4 times. It should not be a smooth paste and it should turn into a coarse paste.
  2. Heat oil in pan in medium to low heat, add the spice mix and fry for 30 seconds and add then add the soy sauce, pepper powder and tofu cubes.
  3. Toss well for the spices and soy sauce to coat the tofu well. Fry for 2 minutes or so, till the tofu turns slightly golden and crispy on the outside.
  4. Garnish with chopped green onions or sesame seeds.
Notes
1. You can even fry tofu and add this to the spice mixture if you want it very crispy.
2. You can skip the ginger if you do not like it.
3. You can use paneer, baby corn for the same recipe.
4. If you can’t take this spicy tofu, use 4-5 chillies.
Wordpress Recipe Plugin by EasyRecipe
3.5.3251

 TOFU-5

Filed Under: CHINESE ASIAN INSPIRED, SNACKS & APPETIZERS, VEGAN Tagged With: Asian inspired recipes, Dinner recipe in 10 minutes, spicy garlic recipe, Spicy Garlic Soy Tofu in 10 minutes, spicy garlic tofu, tofu in 10 minutes, Tofu recipes, vegan appetizer, vegan dinner recipe, vegan recipe

Kala Jamun/ Fried milk sweet dumplings

March 12, 2015 by Suki 9 Comments

kalajamun-2-2

kalajamun-2-2


A double fried dark colored jamuns soaked in rose scented sugar syrup. This is a darker version of famous Indian dessert Gulab jamun. Gulab jamuns are fried milk dumplings in rose scented sugar syrup. These are larger in size when compared to the gulab jamuns and also much tastier.

It gets dark color from the sugar added in the dough. I have used color inside the jamun, you can even use nuts inside and make them. It takes more soaking time than normal gulab jamuns. SO do not try to taste them in 30 minutes.I have a normal gulab jamun recipe in my list. No one would say no to that as well. But if you have tasted kala jamuns from India, you would just go yum! They are beautiful sexy dark colored jamuns which is sweeter than normal jamuns.

kalajamun-3-2

 Tips to make them perfect: (almost similar to gulab jamun tips)

If you get the right consistency in the gulab jamun dough, you will never buy in the stores. I have mentioned some tips and suggestions, which might help.

  1. If you are making this with readymade mix, just mix it with milk till you get the right consistency, (not dry crumble but stickly soft)
  2. For sugar solution, on cooling if the sugar syrup crystallizes, then just add two or three tablespoons of water and warm the syrup again. It will be back to the syrup consistency.
  3. Apply some oil on your palms and make smalls balls from the dough. It may double the size after soaking in water, so be careful to make them small sized.
  4. There should be no cracks on the dough balls. They should be smooth, If there are cracks, then just add some 1 oe 2 tbsp of yogurt/milk and continue making the balls.
  5. Do cover them and keep aside for ten minutes before frying them. it makes a great difference.
  6. Do not make the jamun dough hard, it should be soft or else the syrup will not go inside after soaking.
  7. When you fry them, when the oil becomes medium hot, lower the flam, add a small in the oil, it should slowly rise to the top from bottom. If it rises instantly, then the oil is too hot to fry which is not good. One jamun should get fried for about 6 -8 mins, its that slow for a perfect jamun.
  8. If jamun cracks while frying, then add 1 or 2 tspof flour to the dough and form the balls again.
  9. Don’t crowd the pan when deep frying, it might make the oil totally zero hot.
  10. Fry the jamuns for 5-6 minutes, remove from heat. Drop the jamuns again after 10 minutes, and fry them for 3-4 minutes till they are dark brown colored jamuns.
  11. Use a wooden spatula to rotate the oil after adding the jamuns without touching them, so that they are evenly gold.

I have few other delicious sweet dessert recipes in my website. 

kalajamun-4-2

5.0 from 1 reviews
Print
Kala Jamun/ Fried milk sweet dumplings
Author: Suganya Hariharan
Recipe type: Dessert
Cuisine: Indian
Prep time:  30 mins
Cook time:  30 mins
Total time:  1 hour
Serves: 20
 
Ingredients
  • Khoya (milk solid) – 2 cups, homemade or store bought
  • Crumbled Paneer – 1 cup, homemade or store bought
  • All-purpose flour – 5 tbsp
  • Baking powder – a pinch
  • (or)
  • Ready made gulab jamun mix - 3 cups


    For Inner jamuns:
  • Cardamom powder – 1 tsp
  • Sugar – 2 ½ tbsp.
  • Color – green/red (optional)
  • Ghee – 1 tbsp (to knead)
  • Ghee/oil – for deep frying


    For sugar syrup:
  • Sugar – 5 cups
  • Water – 2.5 cups
  • Rose essence – 1 tsp
  • Saffron – a pinch
  • Cardamom powder – 1 tsp
Instructions
  1. To prepare the sugar syrup:
  2. Mix water, sugar, cardamom and saffron in a pan, heat it till you get a syrup consistency. There should not be any thread formation, as it might form crystals later. Usually it takes around 8 – 10 mins for that consistency in medium flame.
  3. Add the rose water and keep it aside.


    To prepare the jamuns:
  4. In a wide bowl, add the crumbled khoya, all-purpose flour, paneer and baking powder. Mix it gently. Or you can use ready-made gulab jamun mix.
  5. Add little bit of water and make it into a smooth dough and knead the dough well. Use 1 tbsp of ghee and knead.
  6. Take ¼th of the dough, add cardamom powder, sugar, color and mix well.( you can even add chopped nuts to it). Make small balls.
  7. Divide the colored and white dough into equal portions.
  8. Take the white dough spread, spread it and then stuff the coloured dough into it and close. Make a round shape or bullet shape ball. Keep aside and repeat the same process for entire dough.
  9. Once the jamuns are ready, Heat oil. In a low flame, fry the jamuns till they are golden brown for 5-6 minutes.
  10. Remove (with no oil totally) and keep aside for ten minutes.
  11. And fry the jamuns again after ten minutes in low flame for 3- 4minutes; they will get a black color outside. But do not keep in high heat and burn them.
  12. Add these jamuns to hot sugar syrup soak for atleast 3 hours and serve.
Wordpress Recipe Plugin by EasyRecipe
3.2.2885

 kalajamun-5

Filed Under: DESSERTS, SWEETS/DESSERTS Tagged With: diwali recipes, dumpling recipes, Eggless dessert recipe, Festival Indian Sweet recipes, Fried milk sweet dumplings, indian dessert recipes, Kala Jamun, kala jamun recipe, milk recipes, sweet dumpling recipes

Gujarati Surati Dal / Peanut Tomato Lentil Recipe

March 11, 2015 by Suki 7 Comments

Dal-4

Dal-4Sweet, sour and crunchy lentil curry with peanuts and tomatoes – simple, flavorful and delicious!

I make dal always at least once in a week. But I really do not take pictures of it as it will be very late for me for have the food. I always feel it is delicious and comfort food. And also healthy 🙂 This dal recipe has sweet and sour taste together and still it is delicious. And that peanut gives the extra crunch to it. Sweet, sour, crunchy -this combo looks crazy but trust me, Its yum!!!

I have other lentil recipes: Garlic dal, Chana dal Paratha,tomato dal rasam and Sambar.

Dal-2 Dal-3

Print
Gujarati Surati Dal / Peanut Tomato Lentil Recipe
Author: Suganya Hariharan
Recipe type: Main
Cuisine: Indian
Prep time:  5 mins
Cook time:  30 mins
Total time:  35 mins
Serves: 3 cups
 
Ingredients
  • Pigeon Pea Lentils/ Tuvar Dal – 1 cup
  • Tomatoes – 2 medium sized, chopped
  • Onions – 1 medium sized, chopped
  • Green Chilli – 1, chopped
  • Ginger – ½ inch, finely chopped
  • Red chili powder – 1 tsp
  • Turmeric powder – ¼ tsp
  • Cumin powder – ½ tsp
  • Garam Masala – 1 tsp
  • Jaggery – ½ tbsp
  • Unroasted raw peanuts – 2 tbsp
  • Lemon juice – ½ tbsp
  • Dry Methi leaves – 1 tsp
  • Salt – 2 tbsp

    For Tempering:
  • Mustard seeds – ½ tsp
  • Dry Red chillies – 3, broken
  • Asafoetida – a pinch
  • Curry leaves – 1 sprig
Instructions
  1. rinse lentils and keep it in pressure cooker with tomatoes, onions, green chilles with 3.5 -4 cups of water for 7-8 whistles in medium heat.
  2. Mash the lentils using a wooden spoon or a masher to a smooth mixture.
  3. Add the peanuts, turmeric powder, red chilli powder, cumin powder, garam masala,ginger and salt to the dal.
  4. Bring the dal to boil in medium-low heat for 5 minutes and add jaggery and methi leaves to it in this step. If you find the consistency to the dal becomes thick, add more water. If you think its too liquidy, boil it for few more minutes.
  5. Its time to temper by heating oil or ghee in a pan, then add the mustard seeds and then when its pops, add the asafetida, curry leaves and red chillies. Fry for a few seconds but don’t burn it.
  6. Pour the tempering on top of dal. and squueze some lemon juice and stir with the seasonings. Garnish with coriander leaves.
Notes
1. If you think its too spicy, you can reduce the green chillies.
Wordpress Recipe Plugin by EasyRecipe
3.2.2885

Dal

Serve the hot surati dal with parathas,rotis or rice and side dish like potato roast.

Filed Under: NORTH INDIAN GRAVIES/DAL/CURRY, VEGAN Tagged With: best dal recipes, dal recipes, Gujarati Surati Dal recipe, lemtil recipes, lentil recipes, no garlic dal recipes, Peanut tomato lentil recipes, veg recipes, vegan lentil recipes, vegetarian lentil recipes

Rice Kheer / Milk & Rice Pudding:

March 5, 2015 by Suki 6 Comments

Ricekheer-4_name

Ricekheer-4_nameRich, creamy and delicious kheer infused with cardamom, garnished with almonds & pistachios & the addition of saffron makes it more flavorful.

This rice kheer is a simple Indian dessert made of rice and milk and can be made for any festival or celebration. This is very easy to make and does not need much cooking skills 😉 ! I don’t make them much but when I wanted something sweet, quick and easy to make, I tend to make these. If I wanted to make for any festivals in the mornings before I go to work, I make this rice kheer 🙂 Perfect! Sometimes I even make these with left over rice. But the one I have posted here was made from scratch. You can add any dry fruits of your choice to garnish 🙂

Ricekheer

Print
Rice Kheer / Milk & Rice Pudding:
Author: Suganya hariharan
Recipe type: Dessert
Cuisine: Indian
Prep time:  5 mins
Cook time:  30 mins
Total time:  35 mins
Serves: 2
 
Ingredients
  • Milk – 5 cups ( I used full fat 3.25% milk)
  • Rice – 3 tbsp (raw rice or basmati rice)
  • Ghee – 1 tsp
  • Sugar – ½ cup
  • Salt – a pinch

    Garnish:
  • Ghee – 2 tsp
  • Cashews – 4 (broken)
  • Almonds – 4 (Blanched and sliced)
  • Pistachios – 2 ( broken)
  • Raisins – 4
  • Saffron – a pinch
  • Cardamom powder – 1 tsp
Instructions
  1. Method:
  2. Heat a pan and add 1 tsp of ghee and roast the rice in medium flame. Keep it aside.You can break the rice (powder the rice). Optional.
  3. In the same pan, pour milk and bring to boil. When it is boiling, add the rice and cook in slow flame for 20 minutes or pressure cook for a whistle.
  4. When the rice is boiled, now add the sugar, pinch of salt and continue boiling in low flame for another 10 minutes until you a thick consistency.
  5. In a small pan, add the ghee for garnish, when it is hot, add the cashews, pistachios, almonds and when the cashews are golden brown, switch off and add the raisins.
  6. Top the rice kheer with the garnish nuts, saffron and cardamom.
  7. Can be served hot or chill
Wordpress Recipe Plugin by EasyRecipe
3.2.2885

 Ricekheer-2

Filed Under: DESSERTS, SWEETS/DESSERTS Tagged With: easy dessert recipe, eggless dessert recipes, festival dessert recipe, Indian festival sweet recipes, krishna jayanthi sweet recipe, milk dessert recipe, Rice Kheer / Milk & Rice Pudding recipe, simple sweet recipe, tamil new year sweet recipe

Vegetable Bread Toast Sandwich:

March 2, 2015 by Suki Leave a Comment

BreadToast-3

BreadToast-3This is one of my favorite open faced sandwiches. Easy, Quick and tasty one. Takes about 10 minutes to get ready and are super fresh and delicious. Bored with your toast? Spread this delicious homemade vegetables sauce on your bread and enjoy!

BreadToast-4

I have had this bread toast in India in a bakery called “Iyengar bakery”.  If you have tried this in that bakery, you will surely say how tasty it is. I got a lot of request for sandwich recipes. It is just I try lot of sandwiches recipes in the morning but never take pictures as they have become a day to day morning routine. I mainly did this recipe as I wanted to make in pan rather than sandwich makers. You can keep this as open sandwiches or closed sandwiches. I left it as open sandwich to remind me the bakery sandwich. Do not add water to the vegetables and make it mushy, the vegetables should be crunchy in this. I still remember, my dad used to get this sandwich from a bakery when I was doing my third grade in Madurai. My sister was in sixth grade only, but still she used to get me this after school for me with her pocket money 🙂 ! This bread toast is easy to fix up with less effort for kids. I made this on a weekend with some avocado and banana coffee milkshake.

BreadToast-2

Print
Vegetable Bread Toast Sandwich:
Author: Suganya Hariharan
Recipe type: Breakfast
Cuisine: Indian
Cook time:  10 mins
Total time:  10 mins
Serves: 2
 
Ingredients
  • Bread slices – 4
  • Oil – 1 tsp
  • Cumin seeds – ¼ tsp
  • Onion – 1, finely chopped
  • Green chilli – 1, finely chopped
  • Tomato – 1, finely chopped
  • Carrot – 1, finely chopped/ grated
  • Bell pepper/capsicum – 1 small, finely chopped
  • Salt – 2 tsp
  • Red chilli powder – ¼ tsp
  • Chaat masala – ¼ tsp
  • Tomato ketchup – ¾ tsp
  • Butter – to toast bread
  • Coriander leaves – 2 tsp, finely chopped to garnish
  • Lemon juice – 1 tsp, to garnish
Instructions
  1. In a pan, add oil and add in the cumin seeds and then add the chopped onions and green chillies. Sauté till the onions are light golden brown.
  2. Add in the carrots, bell pepper, chopped tomatoes,chaat masala, red chilli powder, salt and the tomato ketchup.
  3. Sauté in a low flame for 5 minutes and switch it off.
  4. Place a pan and when the pan is hot, toast the bread with little butter on both sides.
  5. Spread the filling on the top side and garnish with coriander leaves. Squeeze some lemon/lime juice to garnish.
Notes
1. You can leave it as open or closed sandwiches.

2. Do not add water and make the vegetables mushy. The vegetables should be crunchy here,

3. You can add any vegetables of your choice like potatoes, cabbage, peas or beans.
Wordpress Recipe Plugin by EasyRecipe
3.2.2885

 BreadToast

Filed Under: BREAKFAST, VEGAN Tagged With: Bread recipes, Bread sandwich recipe, Bread toast sandwich recipe, Sandwich curry recipes, sandwich recipes, Vegan recipes, Vegetable Bread Toast Sandwich:, vegetable recipes

  • Facebook
  • Google+
  • Instagram
  • Pinterest
  • Twitter

LOOKING FOR SOMETHING?

logo
Food Advertisements by
logo
Food Advertisements by

Categories

STAY CONNECTED

  • Facebook
  • Google+
  • Instagram
  • Pinterest
  • Twitter

SUBSCRIBE BY EMAIL

SEARCH RELISH THE BITE

logo
Food Advertisements by

Copyright © 2025 · Lifestyle Pro Theme on Genesis Framework · WordPress · Log in