• Home
  • Page Layouts
  • Page Templates
  • Theme Colors
    • Lifestyle Pro Blue
    • Lifestyle Pro Green
    • Lifestyle Pro Mustard
    • Lifestyle Pro Purple
    • Lifestyle Pro Red
    • Lifestyle Pro Teal

Relish The Bite

Taste of happiness

  • HOME
  • ABOUT
  • RECIPE INDEX
    • SNACKS & APPETIZERS
    • BREAKFAST
    • BAKED RECIPES
    • LUNCH & DINNER
      • RICE/BIRYANI VARIETIES
      • SIDES
        • DRY CURRY/STIR-FRY
        • SOUTH INDIAN CURRY/KUZHAMBU
        • NORTH INDIAN CURRY/DAL
        • RAITA/DIPS/CHUTNEY
        • Soups/Salads
      • PASTA PIZZA & TACOS
      • BREAD
      • CHINESE ASIAN INSPIRED
    • NON-VEG RECIPES
    • DESSERTS
    • BEVERAGES
  • SNACKS
  • BREAKFAST
  • NON-VEG RECIPES
  • RICE/BIRYANI VARIETIES
  • LAMB
  • SOUTH INDIAN CURRY/KUZHAMBU
  • VEGAN
  • NORTH INDIAN CURRY/DAL
  • DRY CURRY/STIR-FRY
  • PASTA & TACOS
  • CHINESE ASIAN INSPIRED
  • BAKED RECIPES
  • COLLECTIONS
  • BREAD
  • BEVERAGES
  • DESSERTS
  • FESTIVAL RECIPES
    • SNACKS & APPETIZERS
    • SWEETS/DESSERTS
  • RESOURCES
    • HOW TO START A BLOG
    • TITBITS
    • PRESS
  • CONTACT
You are here: Home / 2016 / Archives for May 2016

Archives for May 2016

Chicken Drumstick Masala

May 26, 2016 by Suki 23 Comments

ChickenDrumstickMAsala

ChickenDrumstickMAsala
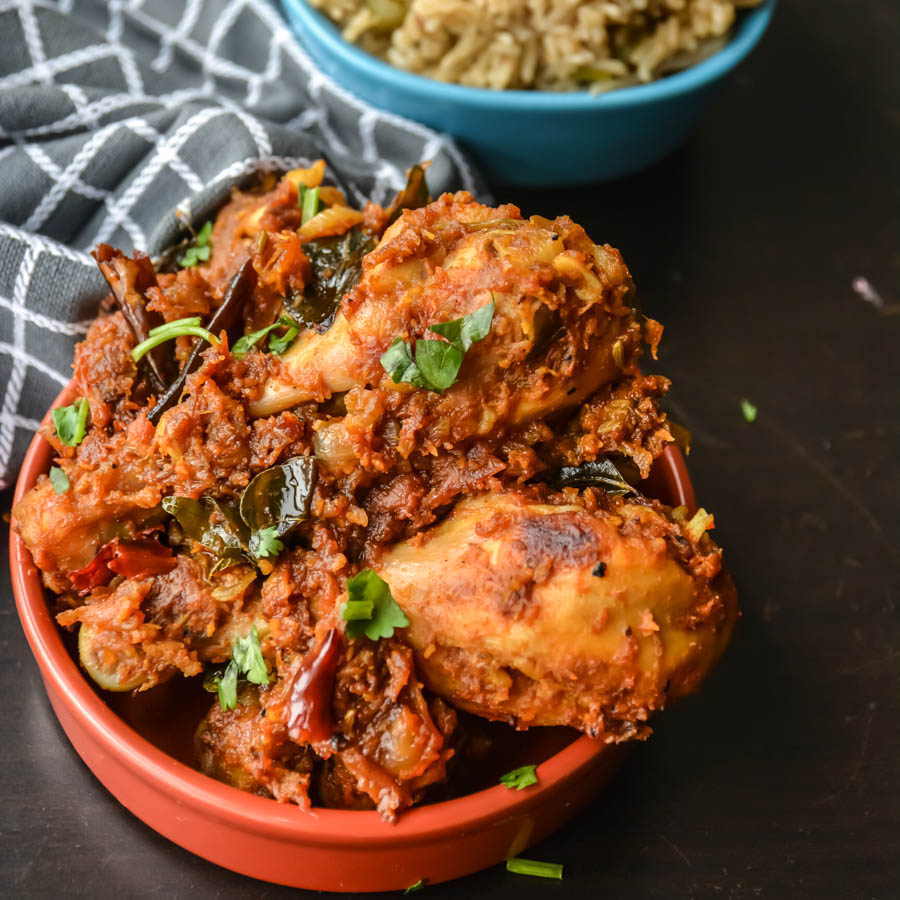
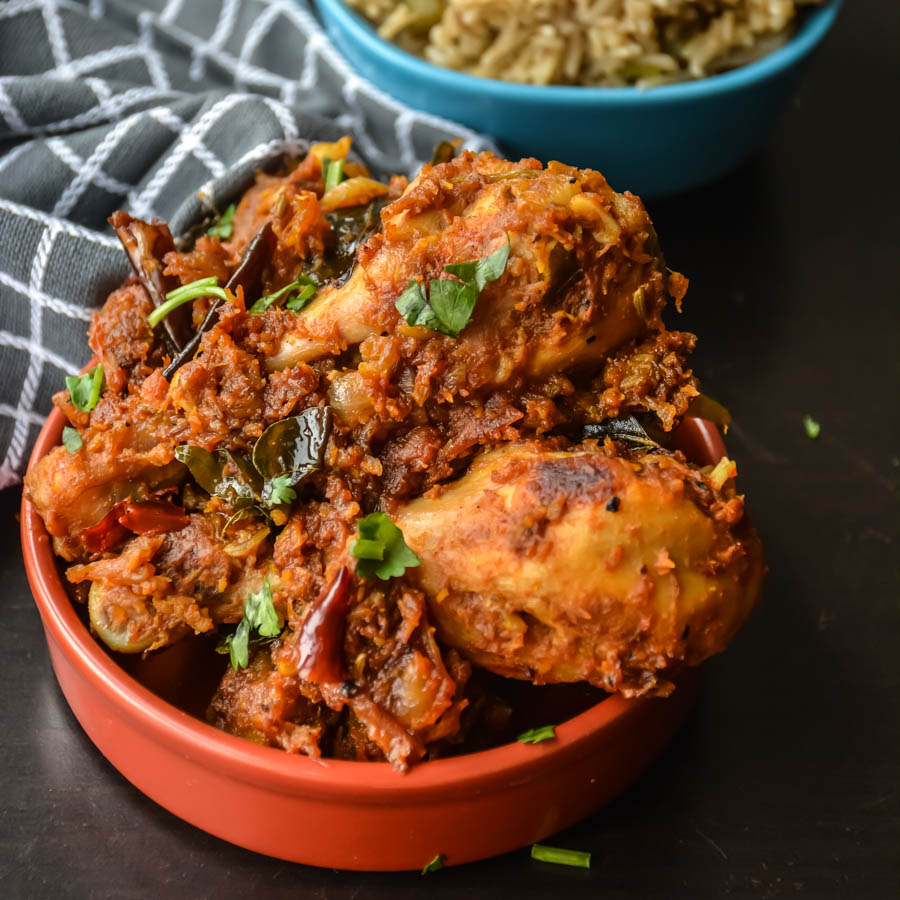
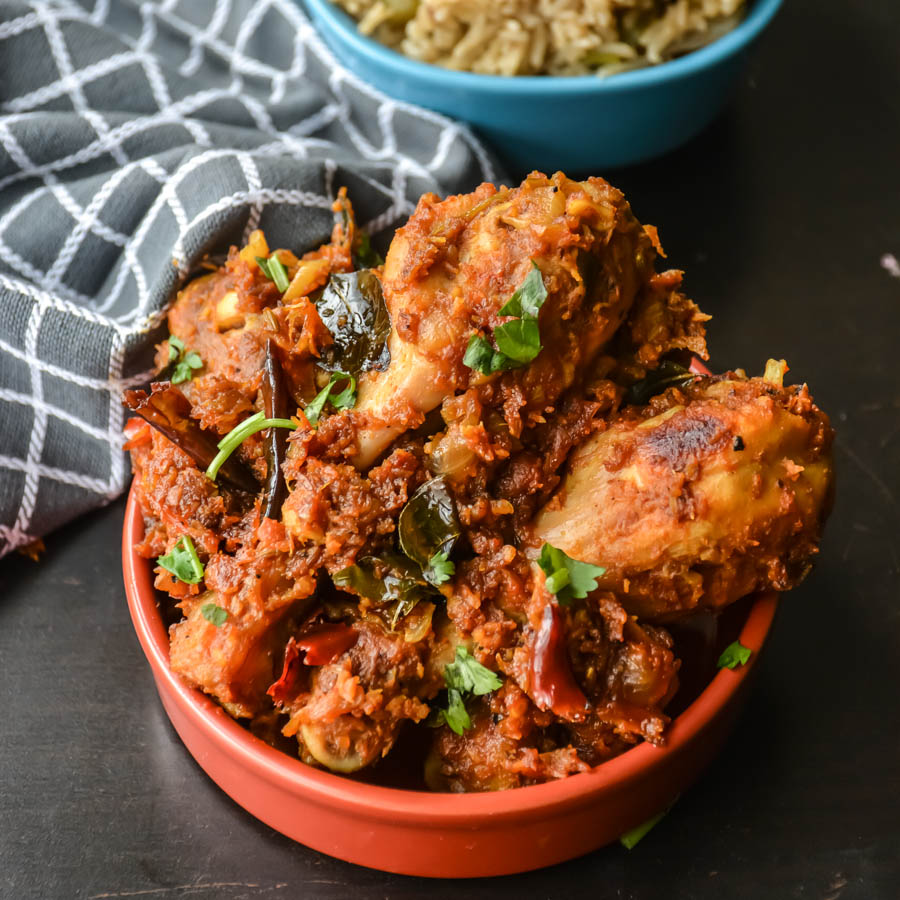
Spice coated chicken cooked and slow roasted in the hot pan scraping up the juices.

This is one of the easy and delicious ways of preparing chicken in Indian style. It is very simple and straight forward. This recipe is very easy to make, it took me 40 minutes totally with chopping. It taste great with rice,biryani, roti, paratha or even with dosa, idli.

I made this for my friend Kripa for her birthday two weeks back with lamb Biryani and mixed vegetable garlic raita. She liked it a lot 🙂 Cooking gives happiness when you prepare it for someone. Birthdays are always special to me 🙂 that is a kid typing from inside. 😉 I usually prefer to cook with drumsticks than chicken breast. I feel sometimes if the chicken breast is not good, it gets rubbery. Even though I am a vegetarian, I do have my own craving to cook chicken or lamb for my close one. It totally makes me happy.

I make different styles of chicken each time; I usually tend not to make the same recipe again and again. There are so many recipes to try, why to waste on that.  We have thousands of recipes to try in every cuisine.   Few comfort foods are the ones I try always. But these days, I am trying to even change that.

My other chicken recipes: chicken 65, Spicy chicken roast, pepper chicken curry, sweet and spicy garlic chicken drumsticks, spicy chicken egg fry noodles, Home style spicy chicken roast, butter chicken roast

ChickenDrumstickMAsala-3

4.8 from 6 reviews
Print
Chicken Drumstick Masala
Author: Suganya Hariharan
Recipe type: main
Cuisine: Indian
Prep time:  10 mins
Cook time:  30 mins
Total time:  40 mins
 
Ingredients
  • • Chicken Drumsticks - 6
  • • Oil – 2 tbsp
  • • Curry leaves – 1 spring
  • • Cumin seeds/ Jeera – 1 tsp
  • • Coconut – 2 tbsp, grated or desiccated coconut
  • • Onions – 2, medium, sliced finely
  • • Tomatoes – 1, medium, chopped finely
  • • Green Chillies – 2, sliced
  • • Garlic – 5, chopped finely
  • • Ginger – 1 inch, chopped finely
  • • Turmeric powder – a pinch
  • • Pepper powder – 1 tsp
  • • Coriander powder – 1tbsp
  • • Fennel powder – 1 tsp ( I crushed some fennel seeds and added)
  • • Chilli powder – 1 tbsp
  • • Garam Masala Powder – 1 tsp
  • • Coriander leaves – 1 tbsp, chopped, for garnish
  • • Salt – as needed
Instructions
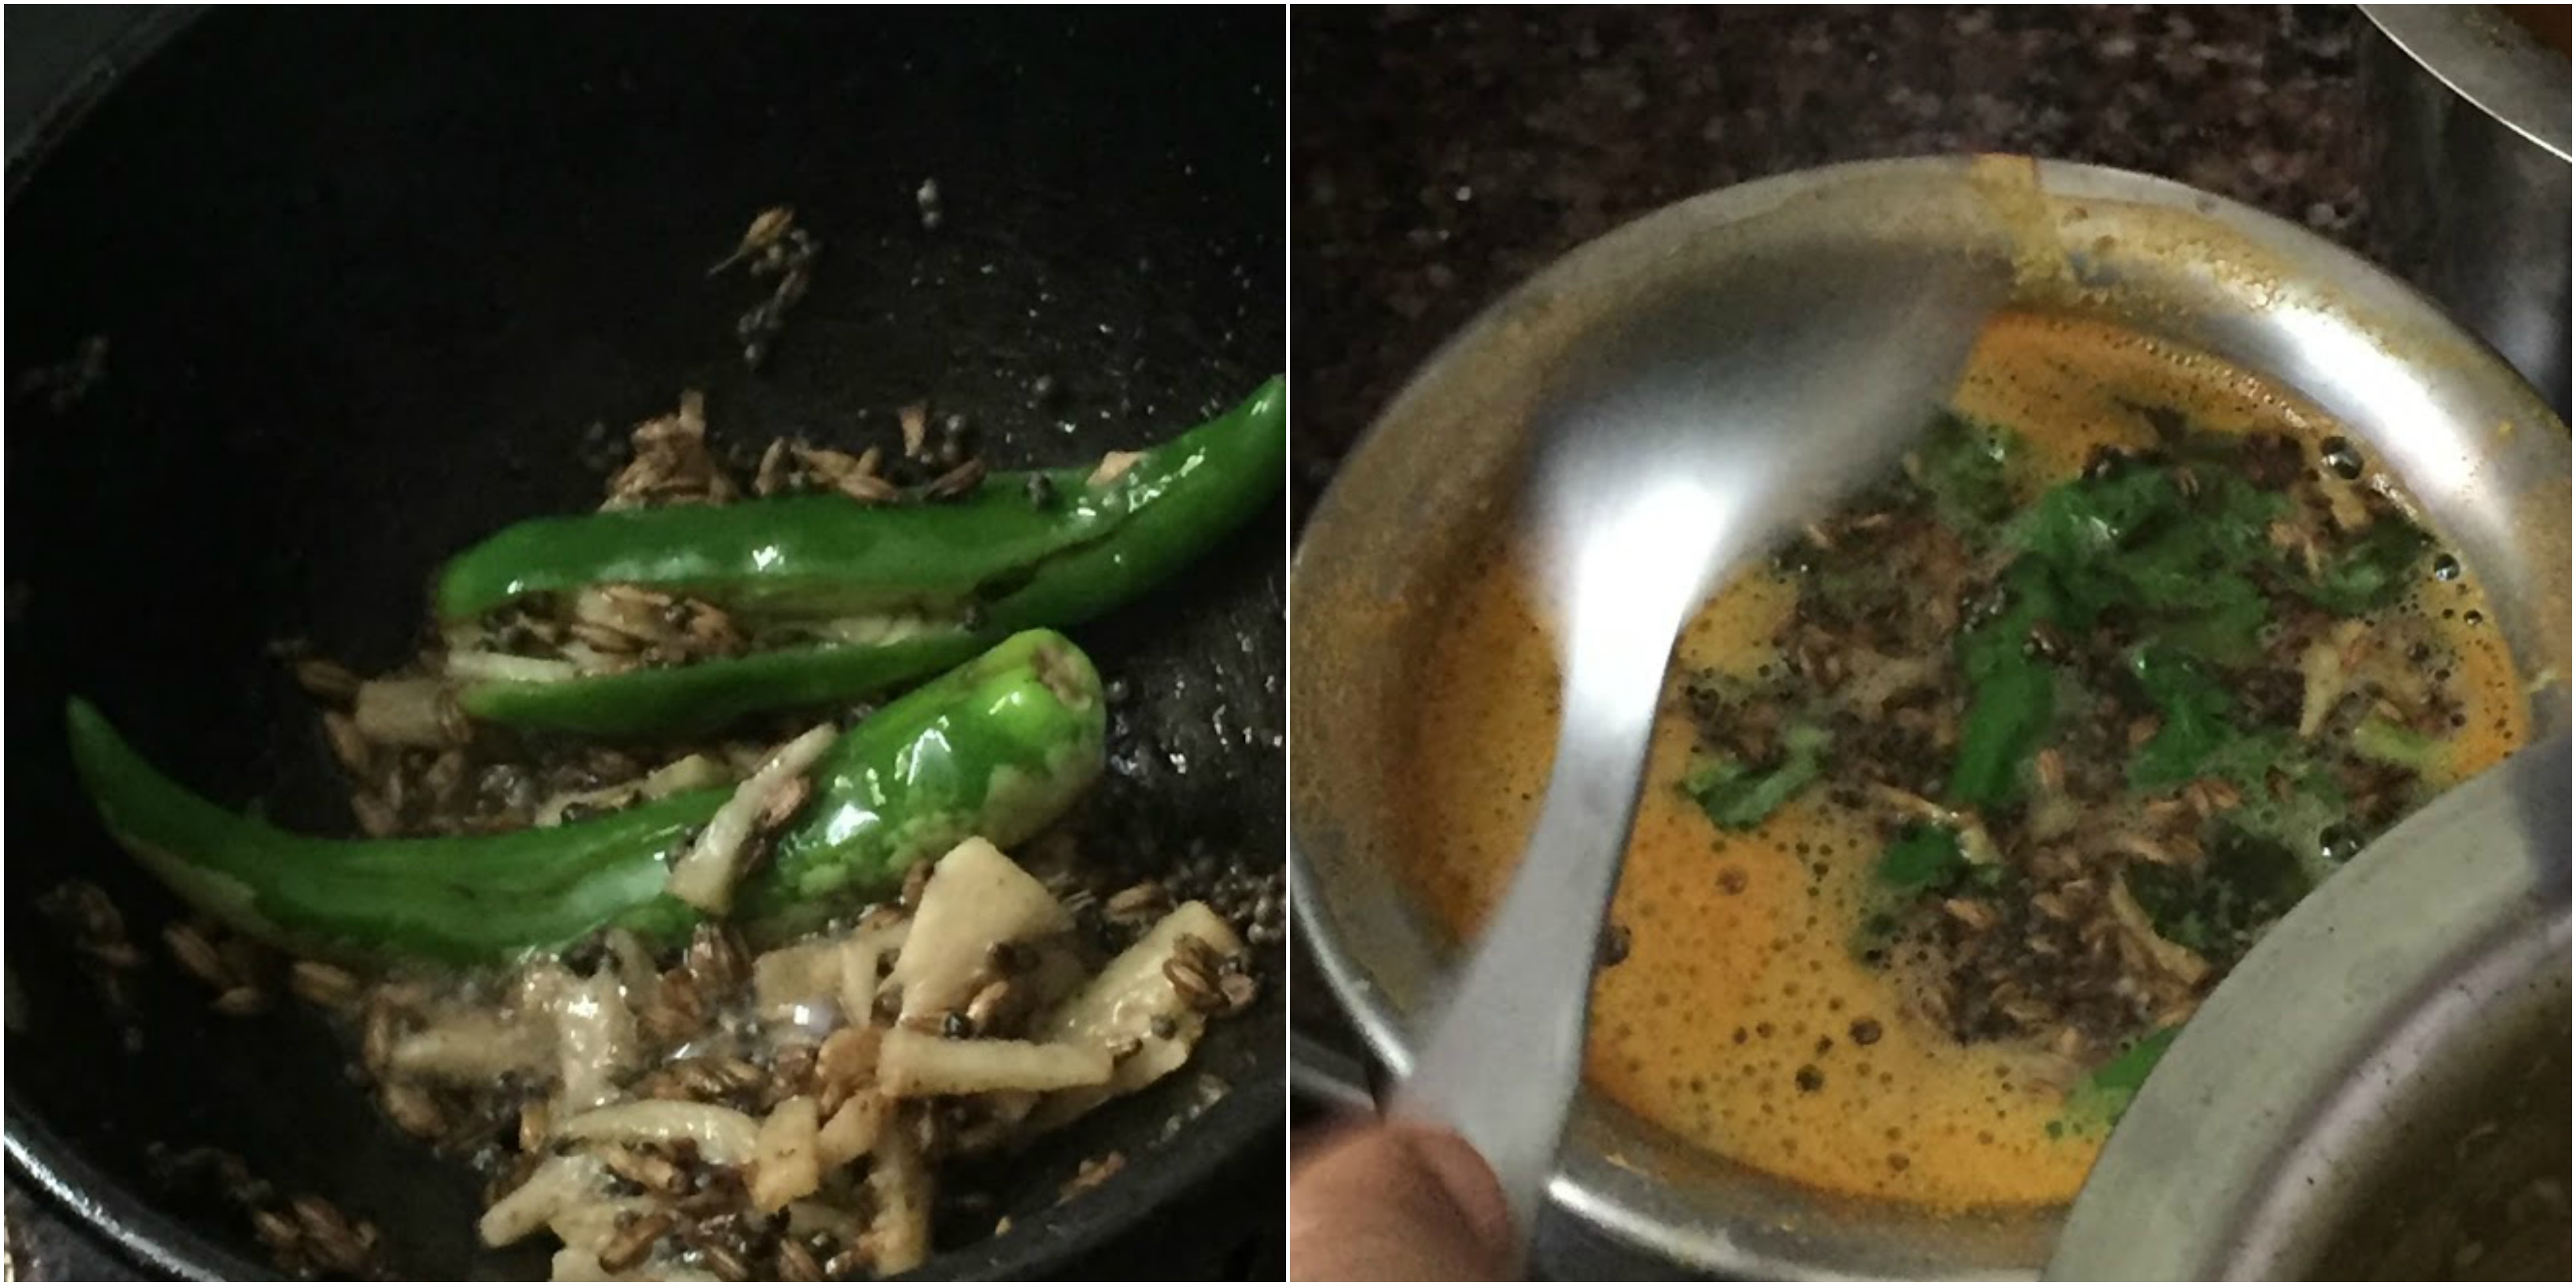
  1. Take a pan and oil in medium flame, cumin seeds and when their color changes, add cumin seed. When it turns brown, add onions, garlic, ginger, green chillies and curry leaves.
  2. After the onion is sautéed, add tomato, turmeric powder, keep stirring and make sure it sautéed well for a minute.
  3. Add the chilli powder, coriander powder, cumin powder, fennel powder, garam masala powder and sauté well till it oozes out oil.
  4. Add the coconut and sauté well.
  5. Add the chicken and mix well.
  6. Close it with the lid , keep it in medium to low flame and add 2 tbsp of water. Let the chicken cook from the water that chicken oozes out.
  7. Once it is almost 90% done till the chicken is dry and roasted. Keep the vessel open and not close it with lid now.
  8. When it is perfectly roasted, garnish with chopped coriander leaves.
Notes
If you find the spice level to be high, reduce the chilli powder to half.
Wordpress Recipe Plugin by EasyRecipe
3.5.3208


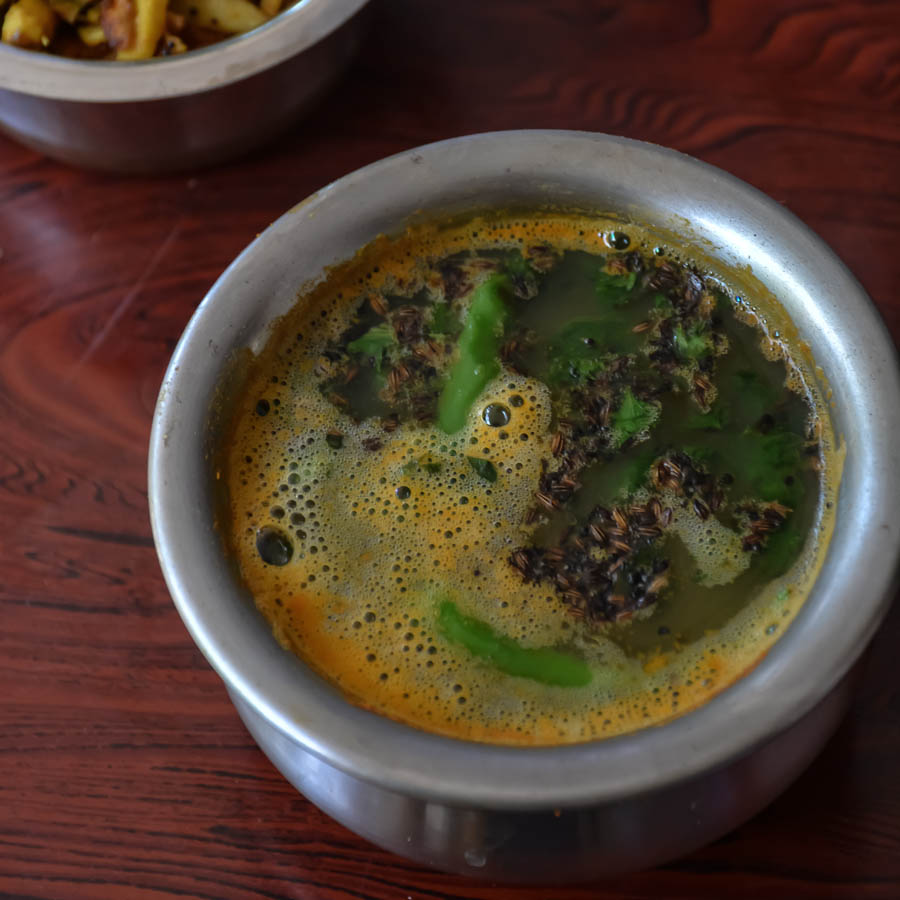
Taste great with lamb biryani/ egg biryani, fish curry or simple rasam/sambar.

ChickenDrumstickMAsala-6

Filed Under: NON-VEG RECIPES Tagged With: Andhra style chicken roast recipe, butter chicken recipe, chciken thokku recipes, Chicken Andhra style, chicken curry, Chicken Drumstick Masala, chicken drumsticks recipe, chicken gravy recipe, chicken iguru recipe, chicken kuzhambu recipe, chicken recipes, Chicken roast Indian style, Chicken roast recipe, chicken spicy roasted recipe, Coconut Butter Chicken Roast, coconut chicken recipe, dry chicken recipe, dry chicken recipes, healthy chicken recipe, Home Style Spicy Chicken Dry Roast, indian chciken curry recipe, Indian chicken recipe, Indian chicken recipes, Indian food recipes, Indian Recipes, Kozhi milagu curry recipe, madras chicken curry., non vegetarian Indian recipes, pepper chicken gravy recipe, pepper chicken recipe, quick indian chicken recipe, side dish for biryani recipe, side dish for fish curry recipe, side dish for fish kuzhambu recipe, south indian chicken recipe, Spicy chicken recipe

Sweet corn Bell pepper Pulav

May 19, 2016 by Suki 4 Comments

CornCapsicumPulao-7

CornCapsicumPulao-7
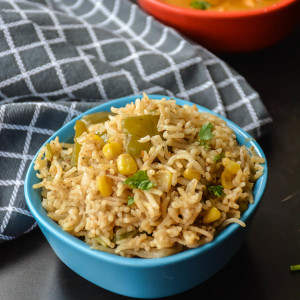
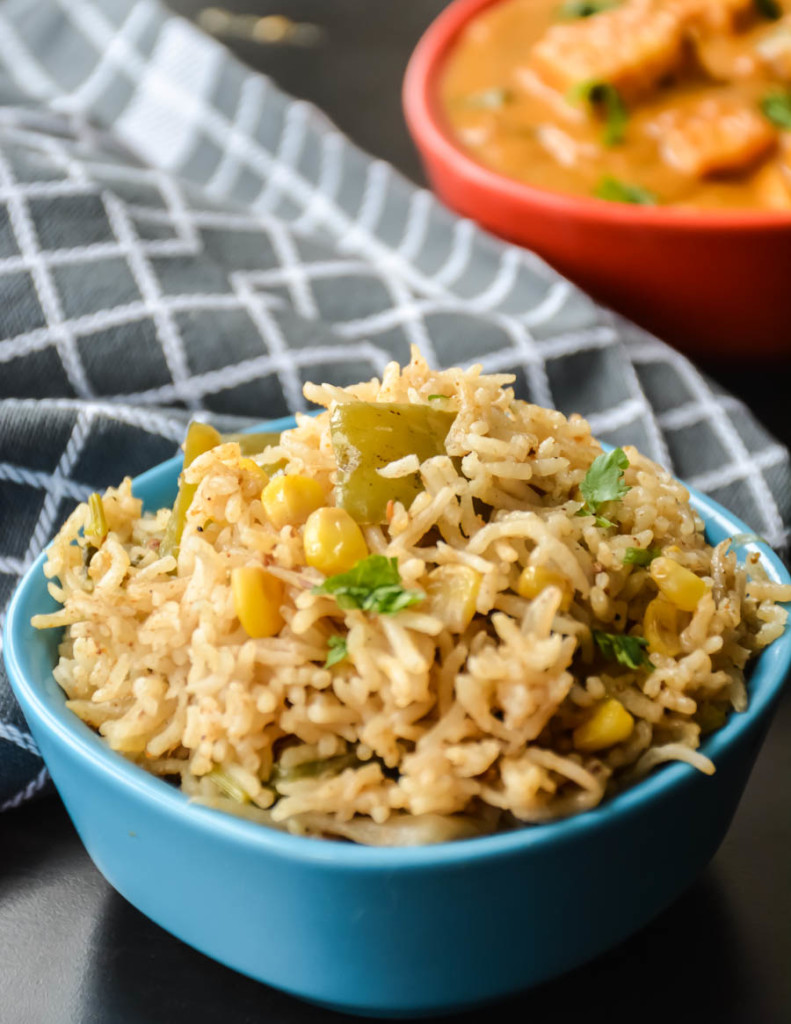
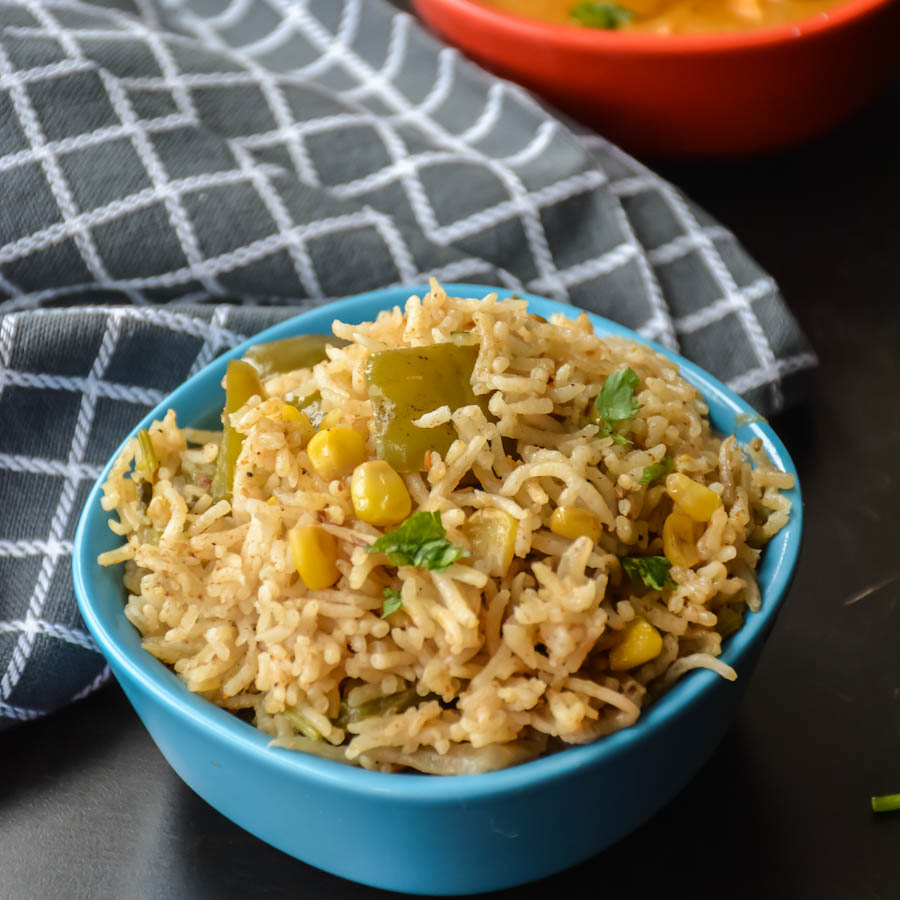
Corn Capsicum pulao is a simple, elegant and flavorful one pot meal recipe. It is aromatic. You can use fresh sweet corn or frozen sweet corn for this. But I feel frozen corn is losing its flavor and taste over a period of time. It is a quick one pot meal and perfect to use any left over rice. For variation, I have added capsicum in this pulao. I made this last week for my friend’s birthday lunch. Any gravy recipe is fine to go with this. I made it with paneer Masala. It is great for kid’s lunch box. When you have some potluck get together or party, it is the best option to do this.

When I was in India, when we first got the electric cooker in Madurai, we started doing the pulao at home. Every Sunday my dad and mom used to prepare this pulao at home. They used to make it as vegetable pulao. I am just making it as sweet corn pulao. So Sunday and pulao makes me really nostalgic. I usually make peas pulao, sweet corn pulao, capsicum pulao, Channa pulao, spinach pulao, aloo pulao, gobi pulao. This time I made corn capsicum pulao.

Vegan note: replace ghee with oil.


CornCapsicumPulao-5

Other Rice/Biryani varieties : ghee rice, Peas Pulao, coconut rice, Restaurant style vegetable biryani, Ginger rice, Curd rice, Veg fried rice.

5.0 from 1 reviews
Print
Sweet corn Bell pepper Pulav
Author: Suganya Hariharan
Recipe type: Main
Cuisine: Indian
Prep time:  5 mins
Cook time:  30 mins
Total time:  35 mins
Serves: 2.5 cups
 
Ingredients
  • • Basmati rice – 1.5 cups
  • • Sweet corn - 1 cup, fresh or frozen
  • • Cardamom – 2
  • • Cloves – 2-3
  • • Bay leaf – 1
  • • Cumin seeds – 1 tsp
  • • Ginger garlic paste – 2 tsp
  • • Green chillies – 2 , slit
  • • Mint – 2 tbsp, chopped
  • • Coriander – 2 tbsp, chopped
  • • Pulao masala powder – 2tsp or (Chilli powder – 1 tsp, garam masala powder – ½ tsp and coriander powder – 1 tsp)
  • • Yogurt – 1 tbsp
  • • Capsicum – 1 , diced
  • • Onion – ½ cup, thinly sliced
  • • Salt – 1 tbsp
  • • Ghee/oil – 2-3 tbsp (preferably 2 tbsp ghee and 1 tbsp oil)
Instructions
  1. Wash the basmati rice and soak the rice for 30 minutes. Drain and keep aside.
  2. Heat oil or ghee or both mixed in a pot /pan and crackle the cumin first. Then add the whole spices ( bay leaf, cloves and cardamom).
  3. Fry till the spices release their aroma and then add the sliced onions and slit chillies. Stir and fry till the onions are golden or caramelized. Then Add the ginger garlic paste, mint and coriander leaves and fry for a minute.
  4. Add the capsicum, sauté for a minute and then add sweet corn, pulao powder or (chilli powder , garam masala powder and coriander powder )
  5. Mix and Saute for 2-3 minutes. Add the yogurt , mix well and switch off.
  6. Take an electric cooker, add the drained basmati rice, add the sauted capsicum corn masala , salt and add required amount of water. ( for 1.5 cups , I added 2.75 cups water)
  7. Check for salt at this time. It should be little salty.
  8. Close the electric cooker, switch on and it will switch off when it is done.
  9. If you are cooking in pan, just add the rice and water to the masala. Cover the pot tightly with a lid and cook the rice till all the water is absorbed. Cook in medium for 15 minutes and slow for 10 minutes. Switch off.
  10. Fluff the rice and serve with onion tomato raita or some paneer gravy.
Notes
1. Make sure to soak rice for atleast 30 minutes.
2. You can even add cashews to it.
Wordpress Recipe Plugin by EasyRecipe
3.5.3208


Taste great with chicken curry, paneer makhanwala, Malai methi paneer / aloo gobi masala/ Mushroom peas masala.

CornCapsicumPulao-4

Filed Under: RICE/BIRYANI VARIETIES Tagged With: corn capsicum pilaf, corn cpasicum recipes, corn pilaf, corn pulao, Corn pulav recipe, Corn recipes, easy corn pulao recipe, easy corn recipes, easy lunch box ideas, easy pulao recipes, easy pulav recipes, how to make sweet corn pulao, kids recipes, lunch box recipes, peas corn pulao, prepare sweet corn pulav at home, quick and easy 30 minute rice recipes, Quick vegetarian party recipes, quick weeknight recipes, rice recipes, Sweet corn Bell pepper Pulav, sweet corn pulao, sweet corn pulav, sweet corn pulav recipe, sweet corn recipes, weeknight 30 minutes recipes

Lamb Vindaloo

May 17, 2016 by Suki 16 Comments

Lambvindaloo-5

Lambvindaloo-5
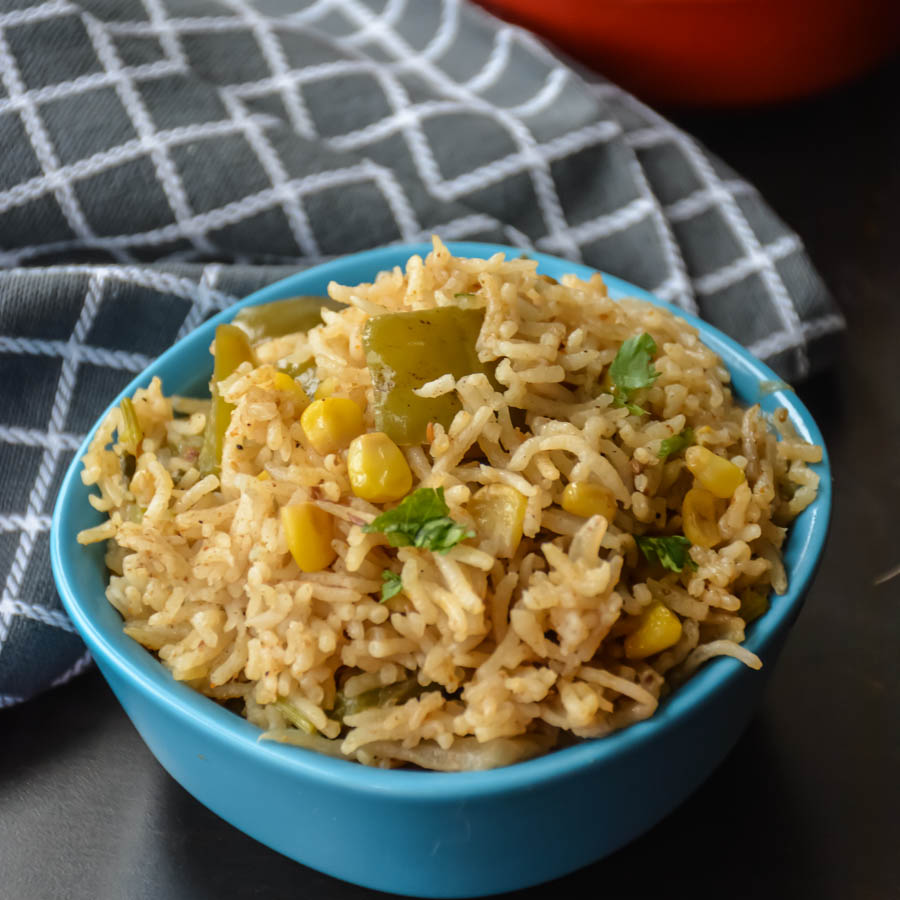
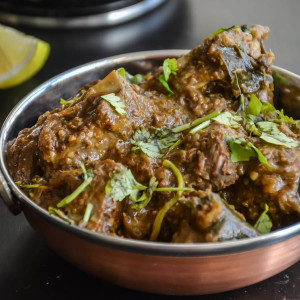
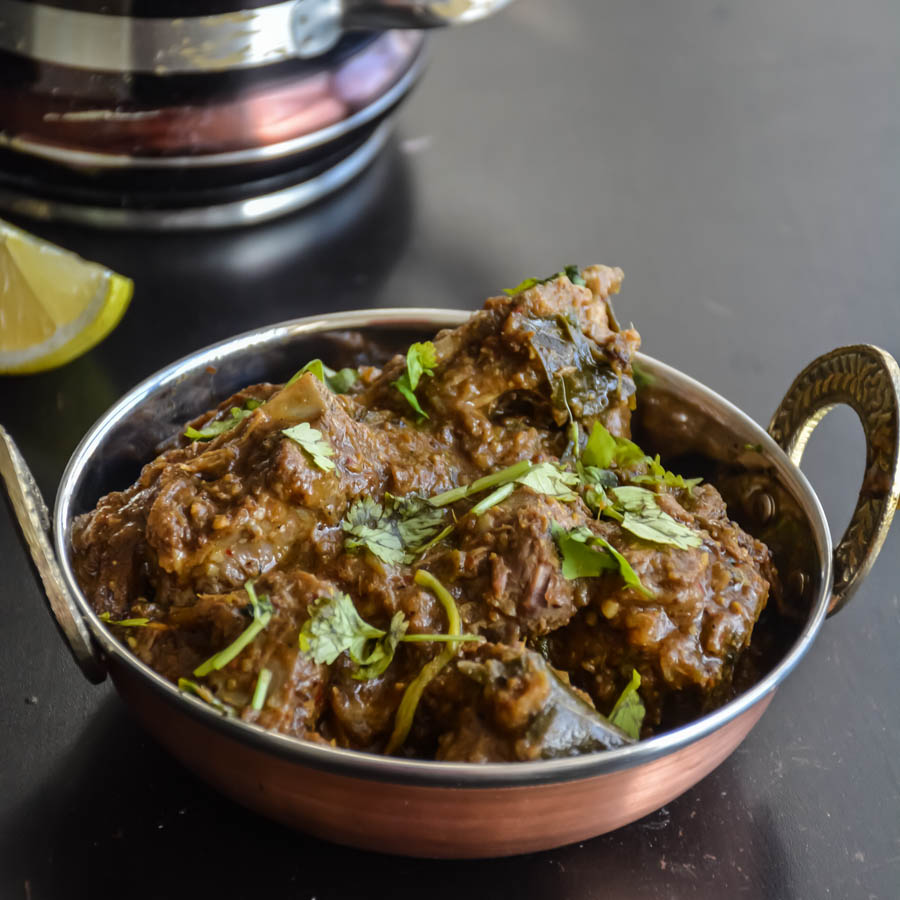
A Classic Indian spicy thick curry made with lamb meat in vinegar and spices!

It tastes great with steamed rice. I heard this recipe as a Portuguese recipe and people started to change it and made it Indian. This gravy is colorful, flavorful and it’s perfect with ghee rice or roti. I always had this on my list to do for a long time. I have always seen “lamb/chicken vindaloo” in the Indian restaurants. So, it was pending for a long time. It is very famous here and I have seen my friends order this. So I wanted to post this recipe. The name looks complicated but super easy to prepare. Then prepared it, but took a long time to post it. I finally got some time to post this recipe. You can use the slow cooker for this recipe or use a pressure cooker or even cook in the pan for a long time. You can always cook this vindaloo recipe with chicken, prawn, potatoes or fish.

People tend to cook more chicken or beef as few people tend to get intimidated by it and think it involves a lot of hard work to cook lamb. It is really easy and quick to make lamb. For Indian recipes, you can pressure cook it for 4-5 whistles before adding them to the gravy. And if you are baking it, seal it and roast it in pan and bake according to the way you want the lamb to be cooked. For every 500g of meat, a rough guide to cooking your lamb in an oven is about 40 minutes for well done, Medium is about 30 minutes, Medium rarely is about 25 minutes and rare is about 20 minutes. Everyone has his or her own preference of cooking the lamb. I always feel lamb recipes are easy to make and taste great. You have to be careful with the oil you use as lamb itself oozes out oil from its fat.

Other favorite Lamb recipes: Spicy Honey Garlic rack Of lamb, Lamb spinach curry/Saag gosht, Kadai Ghost/Lamb curry, Hyderabadi Lamb Biryani, Restaurant style lamb biryani, Lamb pepper curry roast, Mutton Sukka/goat curry, lamb shami kabab, mutton biryani

Lambvindaloo-7

4.5 from 2 reviews
Print
Lamb Vindaloo
Author: Suganya Hariharan
Recipe type: Main
Cuisine: Indian
Serves: 3 cups
 
Ingredients
  • Lamb – 500 gms, cut into small pieces
  • Dry red chillies – 10
  • Vinegar – 2 tbsp
  • Poppy seeds/khus khus – ½ tsp
  • Black peppercorns – 8
  • Cloves – 5
  • Turmeric powder – 1 tsp
  • Cardamom pods - 3
  • Green chillies -4
  • Cumin seeds - 1 tsp
  • Fennel seeds – 1 tsp
  • Ginger – ¼ inch
  • Garlic – 6
  • Cinnamon – 1 inch
  • Vegetable oil – 3.5 tbsp
  • Onions – 2 medium, finely sliced
  • Salt – to taste
  • Coriander leaves – to Garnish
  • Lemon lime – 1 tbsp juice
Instructions
  1. Soak red chillies, turmeric powder, black peppercorns, poppy seeds, cloves, green chillies, cardamom pods, cumin seeds, fennel seeds, ginger, garlic, cinnamon in vinegar and 2 tbsp of oil for 30 minutes.

  2. Blend these soaked spices with vinegar and oil also into a fine paste.
  3. Take your lamb pieces into a bowl and add required amount of salt. Apply the blended paste to the lamb pieces and marinate for at least 2 hours or overnight.

  4. I cooked the marinated lamb in a pressure cooker for 5 whistles but you can cook in a pan for 45 minutes or even slow cooker for 2-3 hours.
  5. Heat oil/ghee in a pressure cooker, add the onion slices, sauté them till golden brown in color. Add the marinated lamb in it. Sauté them for a minute. Then add 2.5 cups of water or add water till the lamb is almost covered. Let it go for 5 whistles. Switch off,wait for the pressure to release, open and mix well. If you find it the consistency to be watery, open it and cook for 5-7 minutes. I did open and boiled it for 5-7 minutes over medium heat.
  6. Garnish with coriander leaves and squeeze some lime on it.
Wordpress Recipe Plugin by EasyRecipe
3.5.3208

Perfect with ghee rice/ plain rice and Mumbai-style egg  bhurji.

Lambvindaloo-8

Filed Under: LAMB, NON-VEG RECIPES Tagged With: classic indian recipes, colorful lamb recipes., goat curry recipes, Indian quick lamb recipes, Indian quick recipes, lamb curry recipes, lamb mutton recipes, lamb quick recipes, lamb recipes, Lamb vindaloo, lamb vindaloo recipes, pepper lamb recipes, potluck indian recipes, pressure cooker lamb recipes, Quick indian recipes curry, Restaurant style lamb vindaloo recipes, slow cooker lamb vindaloo, South Indian lamb recipes

Maavadu / Vadu Mango Pickle – Mom’s Recipe

May 13, 2016 by Suki 1 Comment

Maavudu-4

Maavudu-4
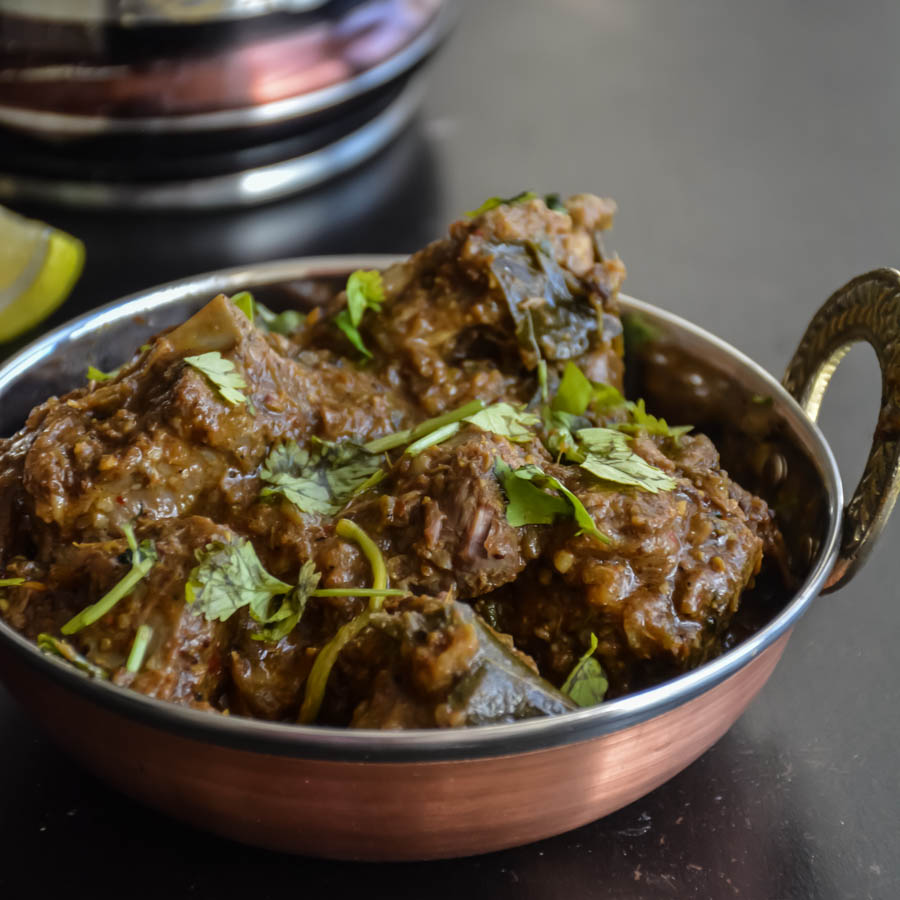
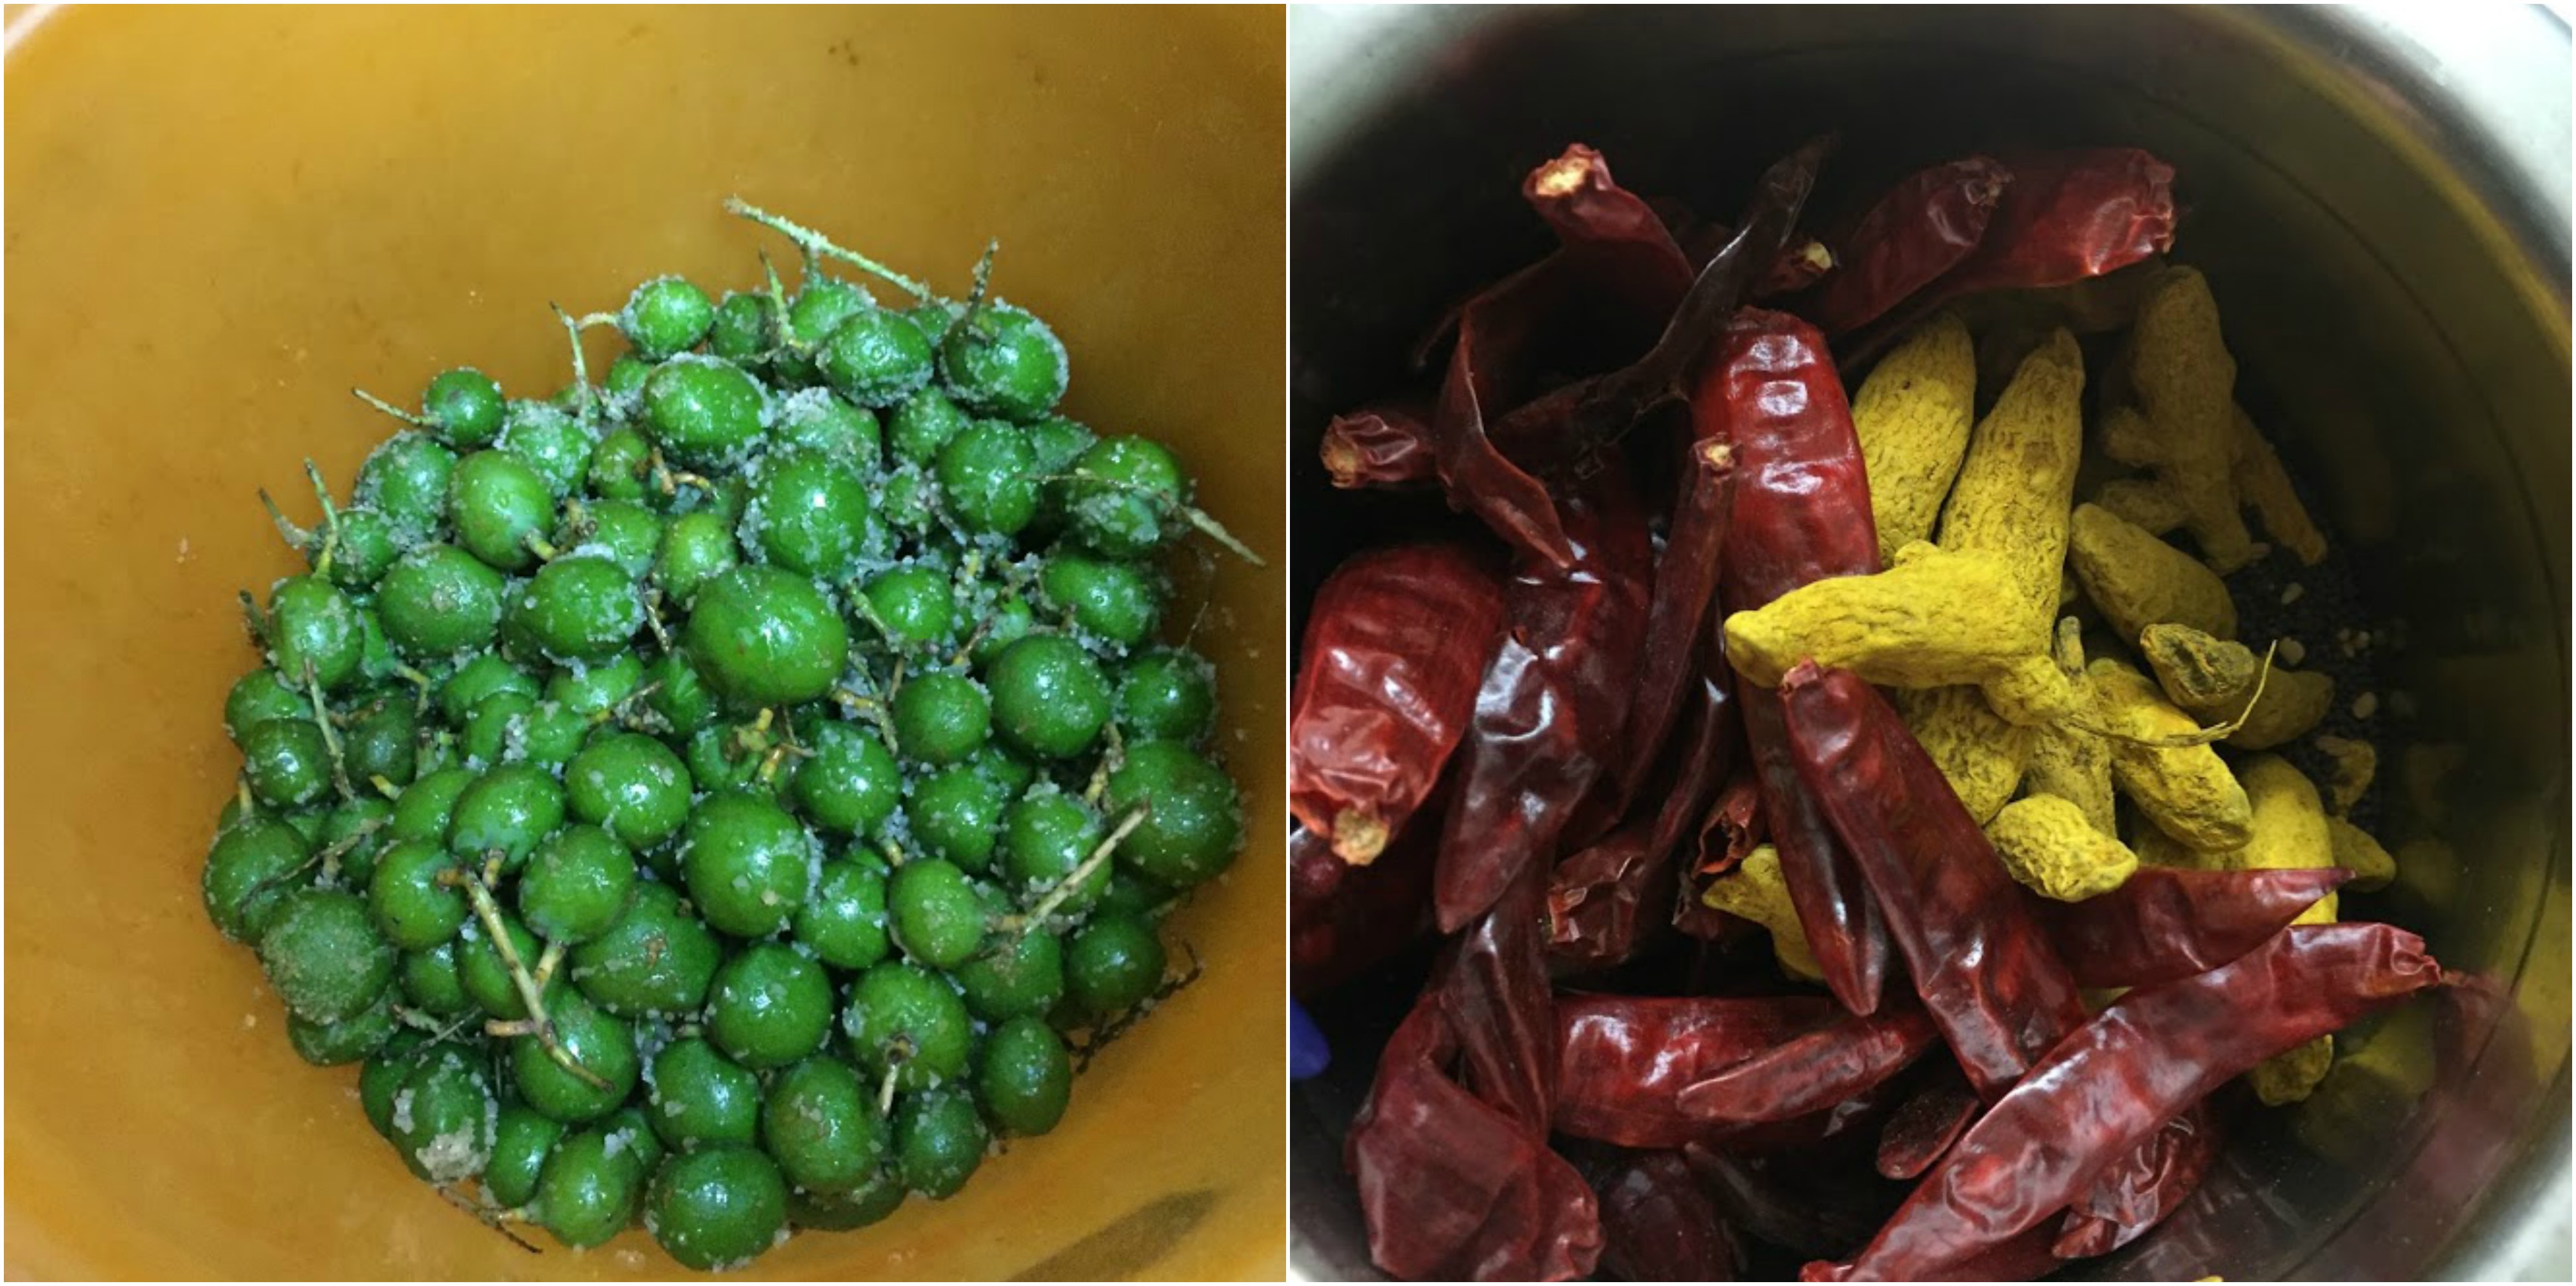
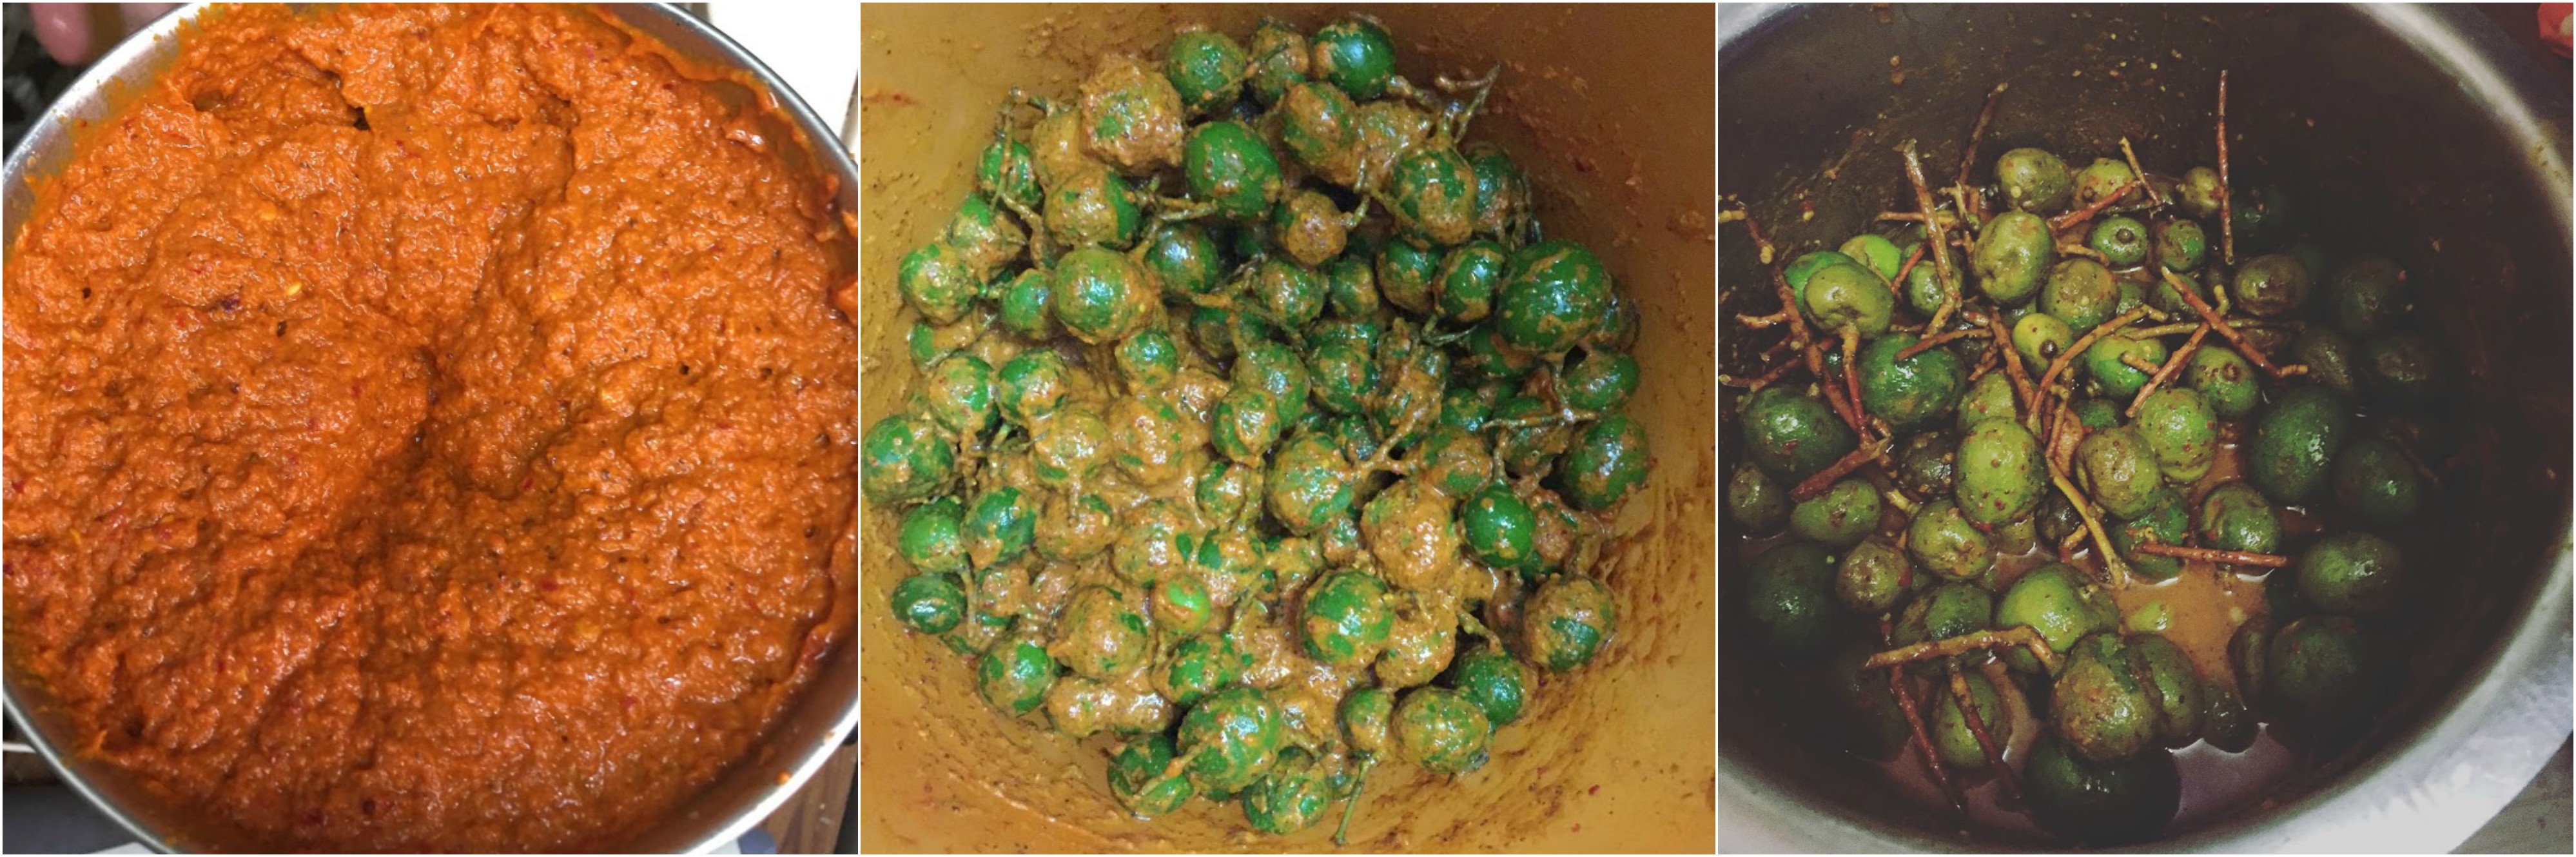
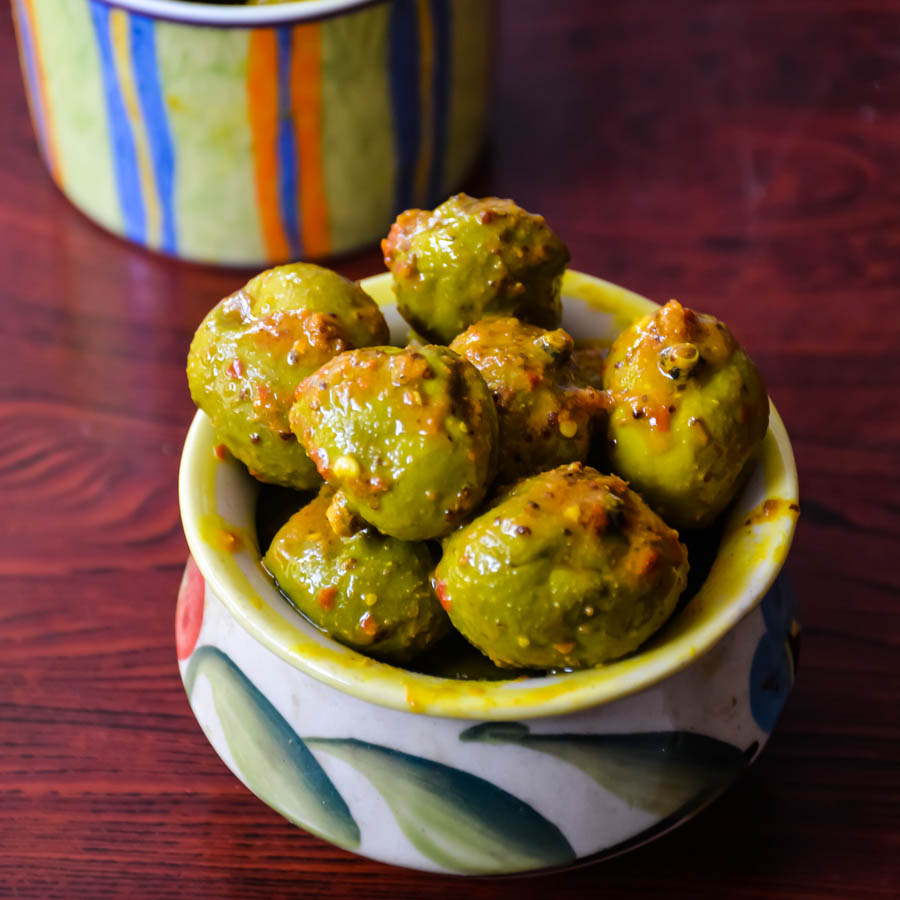
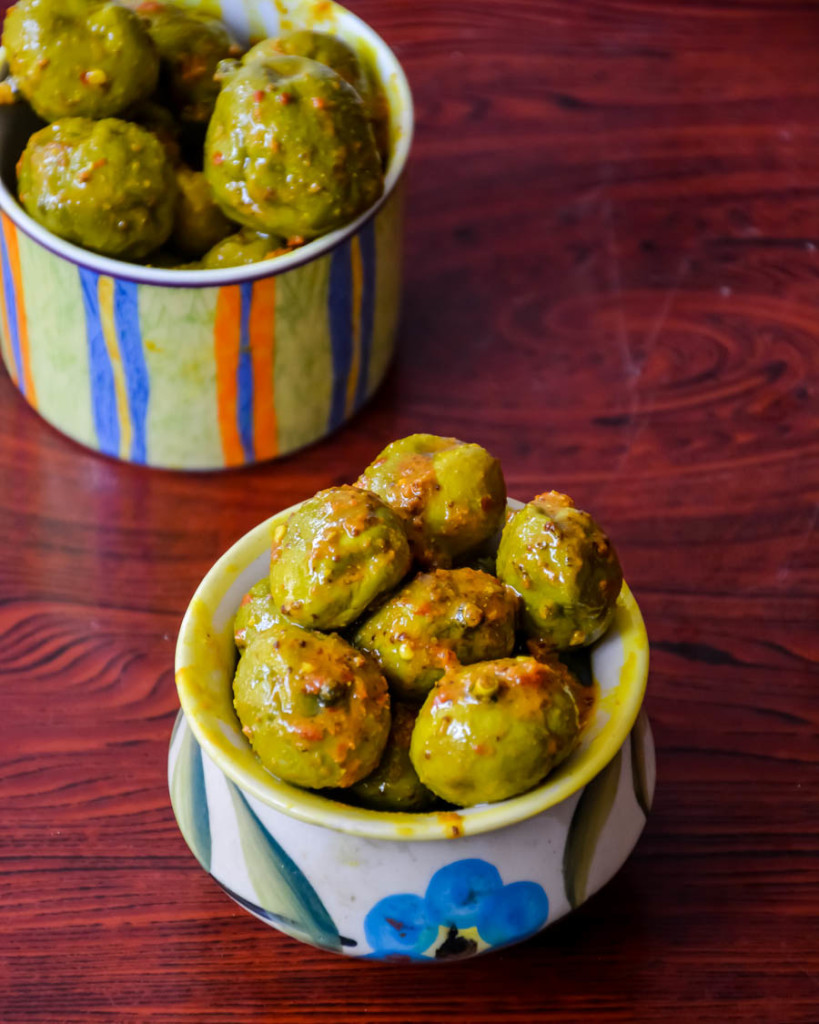
South Indian famous Tiny, tender and pickled baby mangoes. Perfect with curd rice!

It is surely considered a favorite in Tamil households. Tender mango has vitaminsA,C and E. These are pickled whole with chillies and a spice, these baby mangoes remind the coming of summer in South India. It takes us to a next level. We get this in summer. My mom gets this in bulk during the start of summer so that we can enjoy the whole year. Almost every year she prepares it in summer as we won’t get these mangoes the rest of the year. This time, I was there when she made it and of course I took a note of how she made it and clicked my pictures. Everyone has their own way to prepare these but I personally love my mom’s recipe and sharing it with you here now. I took the pictures in 2 days after she made it. If you wait for 1 week, they will ooze out the lot of water 🙂 and the mangoes will shrink. She packed some for me and my sister. Sometimes love is just a small thing that you can’t see. My sister totally loves this maavudu with curd rice! It is a perfect combo 🙂 “Thayir sadham and maavudu” only the few will understand this classic combo :D. The first day when she soaked them with castor oil and salt 😉 itself , I started drooling! Few like them even with tomato rasam or sambar.

My mom likes to keep it with stalk as it can stay  for a year if its with stalk.

My other pickle recipes: Instant mango pickle, big mango pickle, Pavakkai thokku/pickle

Maavudu-6

5.0 from 1 reviews
Print
Maavadu / Vadu Mango Pickle - Mom’s Recipe
Author: Suganya Hariharan
Recipe type: Main
Cuisine: Indian
Serves: 6-7 cups
 
Ingredients
  • Raw tender Mango/Maavadu – 8 cups
  • Castor oil – ½ tsp
  • Rock salt – 1 cup
  • Mustard seeds –1 tbsp
  • Red chilli – 15
  • Methi seeds-1 tsp
  • Turmeric whole (thin ones)-8 ( use 2 tbsp of turmeric powder if not)
  • Asafoetida – 1 tsp
Instructions
  1. Wash them thoroughly to get rid of dirt. I keep the stalk with it.
  2. Then dry them thoroughly my keeping it under the sun for few hours.Ensure no water , the else fungus will form.

  3. Put them in a clean dry bowl with rock salt and castor oil. Mix well and keep aside for a day or two. After two days it would have oozed out some water.
  4. Blend the red chilli, Methi seeds, mustard seeds, turmeric and add a little water to it and blend to a smooth paste. Important: Do not add any water, add just the oozed out water from the mango marination only.

  5. Add the blended paste to the tender mangoes. Keep this covered and put in a dry place fro a week. It will ooze out more pickled water in a week to 10 days’ time.
  6. Then store them in the refrigerator in a glass jar or ceramic jar! Enjoy for a year
  7. You can have them even a year in the refrigerator. If you keep them outside around 6 months if properly maintained.
Notes
1. Keeping it with stalk will help it last longer
2. Castor oil is to reduce heat caused by mangoes.
3. Every time use the dry spoon.
4. Take little amount of pickle in the small container for daily use so that the pickle will be good for a long time.
Wordpress Recipe Plugin by EasyRecipe
3.5.3208

Maavudu-2

Filed Under: HOMEMADE, RAITA/DIPS/CHUTNEY Tagged With: Indian quick pickle recipes, Iyenger maavadu recipe, Iyer maavadu, Iyer vadumango pickle, Maavadu / Vadu Mango Pickle - Mom’s Recipe, Maavadu Pickle, Maavadu Pickle recipe, Mango, Mango Pickle, mango recipes, pickle recipes, Pickles, Raw Mango, Raw mango recipes, south Indian famous recipes, Tambrahm mango pickles, Tambrahm vadu mango, Tender mango pickle, thayir sadham maavudu, vadu manga, Vadu Manga Pickle, Vadu Mango Pickle recipe, Vegetarian Baby Mangoes in Brine, vegetarian pickle recipes

Senai kizhangu/ Fennel Elephant yam/Suran dry roast

May 9, 2016 by Suki Leave a Comment

kizhanguroast-3

kizhanguroast-3
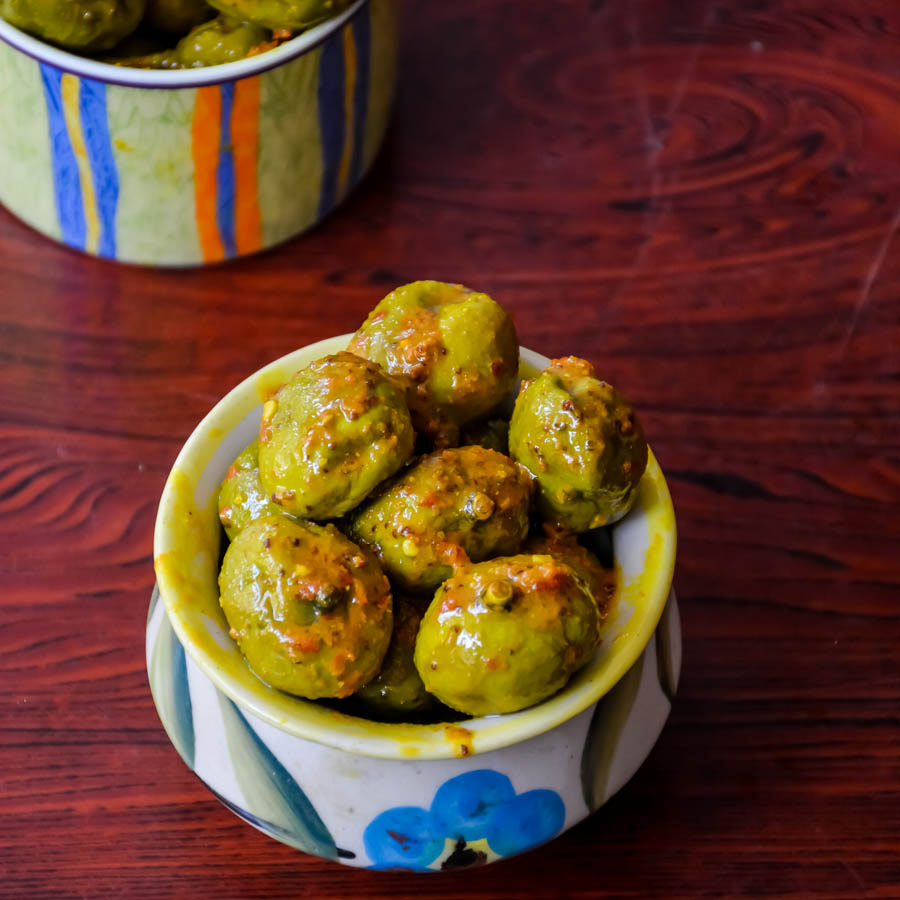
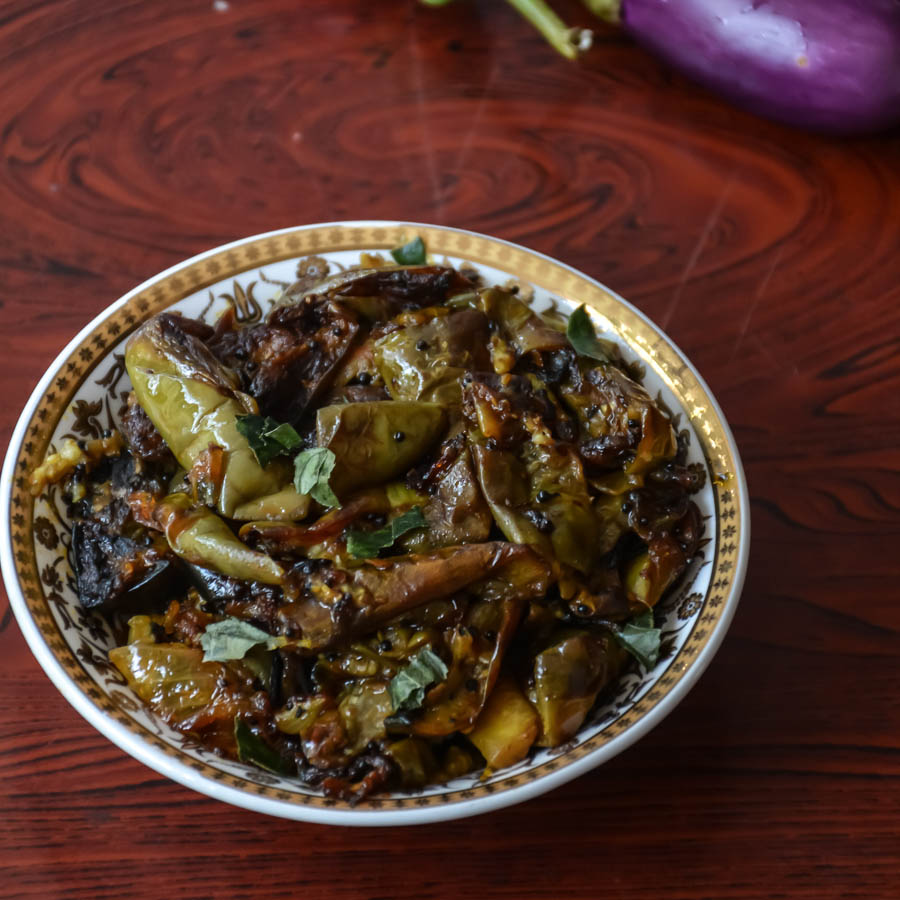
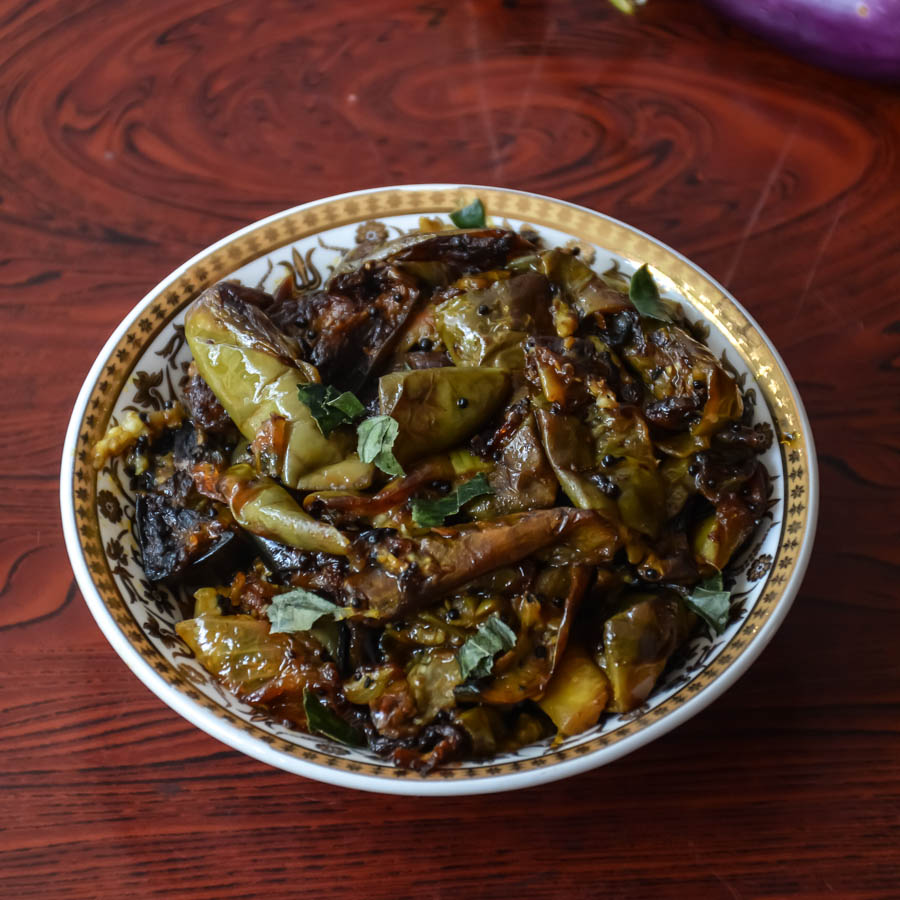
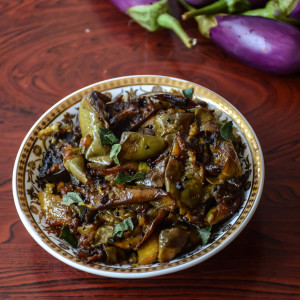
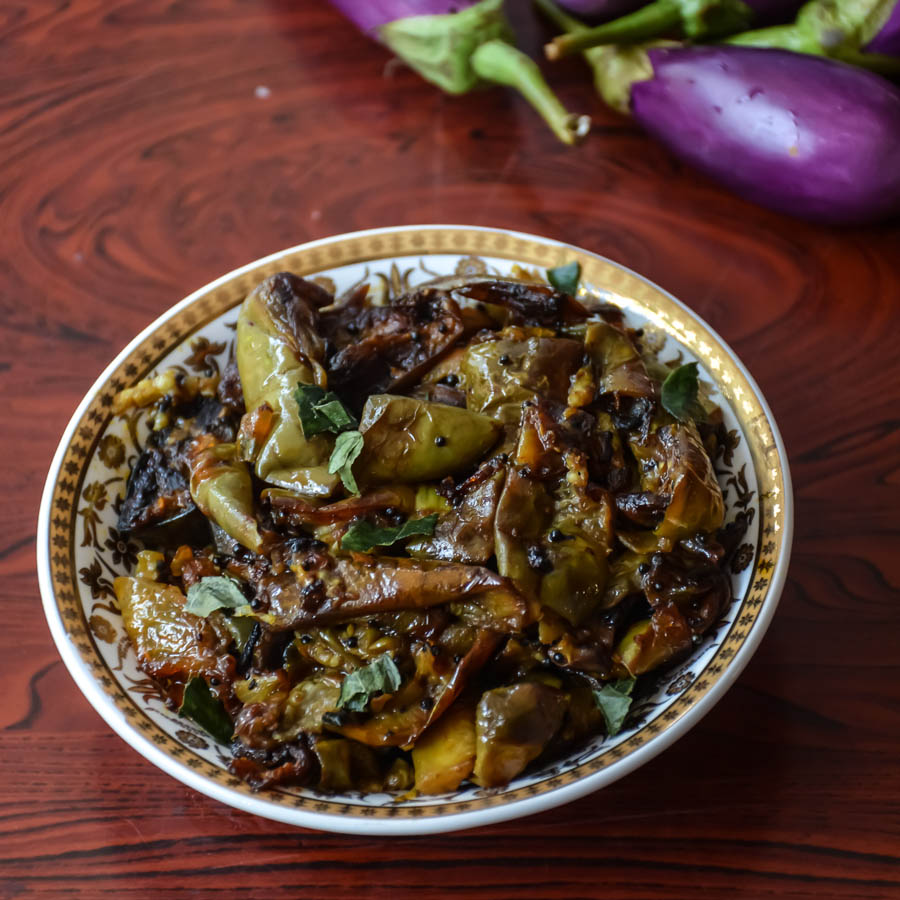
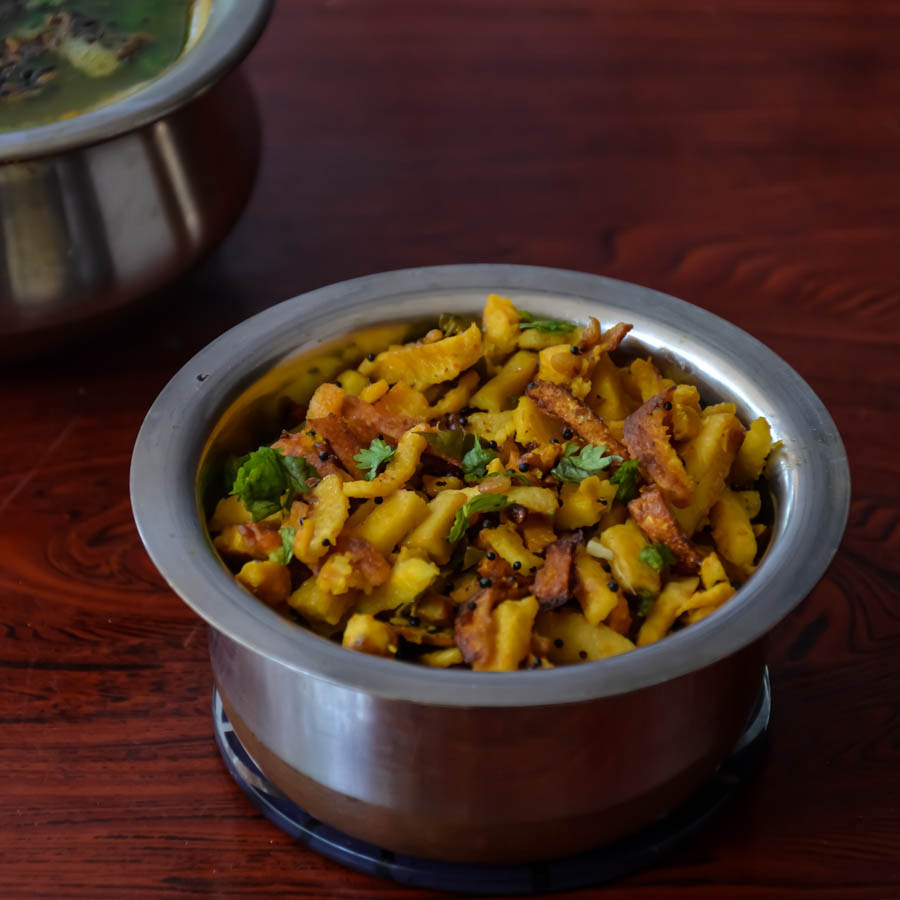
Marinated with Indian spices & Pan roasted to a golden color in south Indian style for a delightful side.

Elephant foot yam, the name looks different right?. It is called so because the larger tuber resembles an elephant foot. It is also called as suran and senai kizhangu in Hindi and Tamil. This vegetable is good for health as contains a large amount of carbs used for vital energy, lowers bad cholesterol, and lowers blood pressure. This is my mom’s recipe. My mom does this in a style by slice them finely, marinating with turmeric and sambar powder, and pan roast with oil. Sometimes she even slices them thinly, marinate, fry it deep. It is called Yam chips 😀  Obviously that takes a lot of oil ! I used to prepare them as elephant yam grill and make them with trevti dal, rasam and curd rice.

My other favorite dry side dishes: Carrot stir fry,Beans stir fry, baby potato stir fry, cauliflower stir fry, eggplant stir fry,Bitter gourd stir fry, okra/ladys finger stir fry, raw banana stir fry
kizhanguroast

Print
Senai kizhangu/ Fennel Elephant yam/Suran dry roast
Author: Suganya Hariharan
Recipe type: Main
Cuisine: Indian
Prep time:  10 mins
Cook time:  25 mins
Total time:  35 mins
Serves: 1.5 cups
 
Ingredients
  • • • • Elephant yam/ senaikizhangu – ½, peeled and sliced ~ 2 cups
  • • • • Oil - 2 tbsp
  • • • • Mustard seeds - ¾ tbsp
  • • • • Cumin seeds (Jeera) - 1 tsp
  • • • • Tamarind – 2 tsp ( 1 inch sized tamarind or pulp)
  • • • • Urad dal - 1 tbsp
  • • • • Curry leaves - 5
  • • • • Turmeric powder - 2 tsp
  • • • • Sambhar powder – 1 tbsp
  • • • • Chilli Powder – 1 tsp
  • • • • Sugar - 1 tsp
  • • • • Salt - to taste
Instructions
  1. • Wash Elephant yam and peel the outer layer totally. Slice them finely into small cubes.
  2. • Add turmeric powder, curry leaves, salt, sambar powder, chili powder, asafetida, tamarind and 1 tsp of oil. Marinate and keep aside for 10 mins.
  3. • Heat 1 tbsp of oil in a pan over medium heat, add mustard, after it crackles, add urad dal, and jeera.
  4. • Bring the heat to medium,now add the chopped raw elephant yam. Stir and sprinkle 1 tbsp of water, close the lid and cook for 5-7 minutes over medium heat.
  5. • Add 1 tsp of sugar and keep frying until the raw elephant yam gets roasted here and there in color. Change to low heat, it takes around 5-7 minutes. Switch off the flame.
Notes
1. Do not make the slice too thick then it won’t cook inside properly.
2. You can also deep fry them rather by doing them on the pan. But obviously, this is healthy.
3. Adding sugar makes retain the color and turns it crispy.
Wordpress Recipe Plugin by EasyRecipe
3.5.3208


Taste Great with Rice and Mor Buttermilk Rasam/ three lentil dal/ sambar/ curd rice

kizhanguroast-2

Filed Under: DRY CURRY SIDE DISH/ STIR-FRY Tagged With: best vegan recipes, best vegetarian Indian side dish recipes, elephant yam recipes, Fennel Elephant yam Roast, Healthy indian recipes, Indian vegan recipes, Meals recipes, no fry yam, quick yam recipes, Roast recipes, senai kizhangu curry, senai kizhangu kari, Senai kizhangu Roast, Senai kizhangu/ Fennel Elephant yam, sennai kizhangu recipes, Seppankilangu Roast, south Indian meal recipe, south Indian recipe, south Indian side dish recipes, south indian vegetarian recipe, Spicy Arbi Fry, Suran dry roast, Suran Roast, Taro root recipes, Vegan helathy recipes, Vegan Indian side dish recipes, vegan recipe, Vegetarian fry recipe, Vegetarian Indian side dish recipes, vegetarian recipes, veggie roast, yam recipes, yam roast, yam vegetarian recipes

Quick Spicy Brinjal Fry/ Kathirikkai Varuval

May 4, 2016 by Suki 21 Comments

BrinjalRoast-7

BrinjalRoast-7
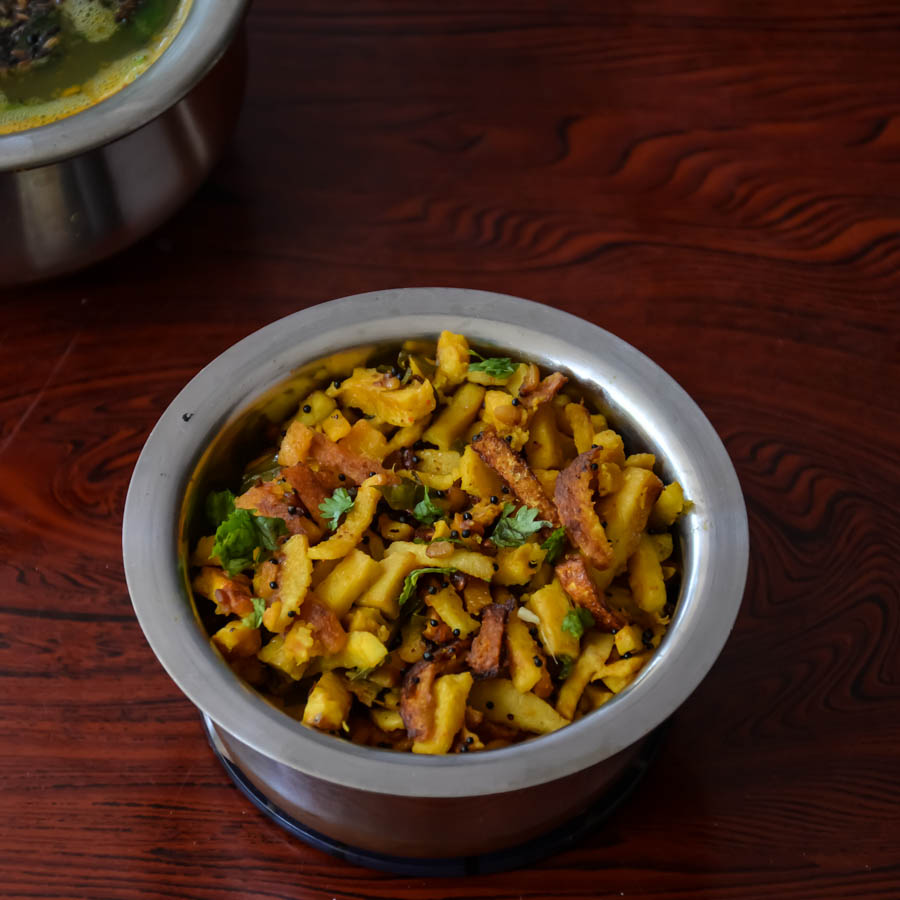
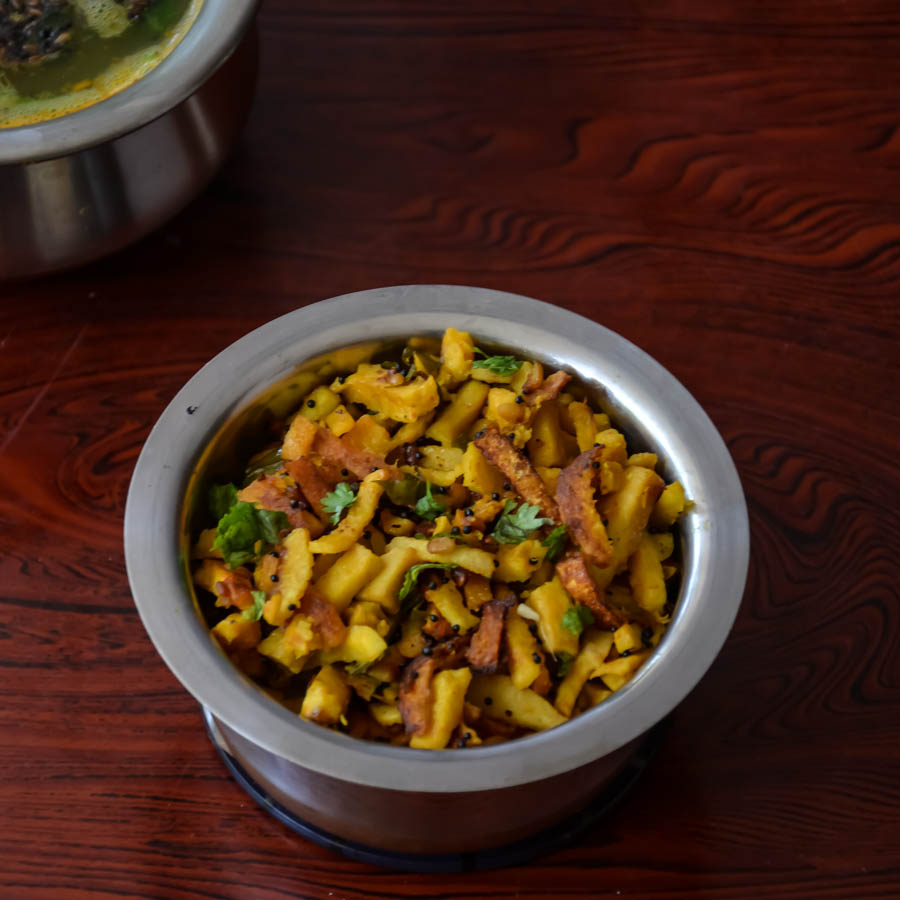
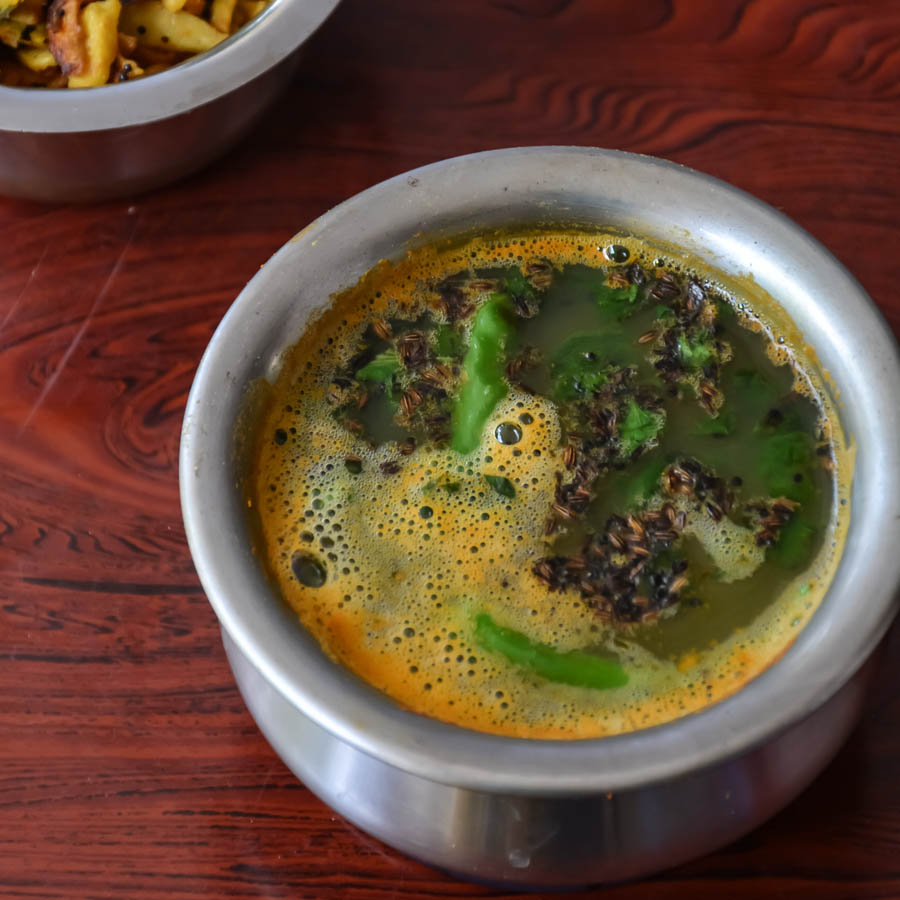
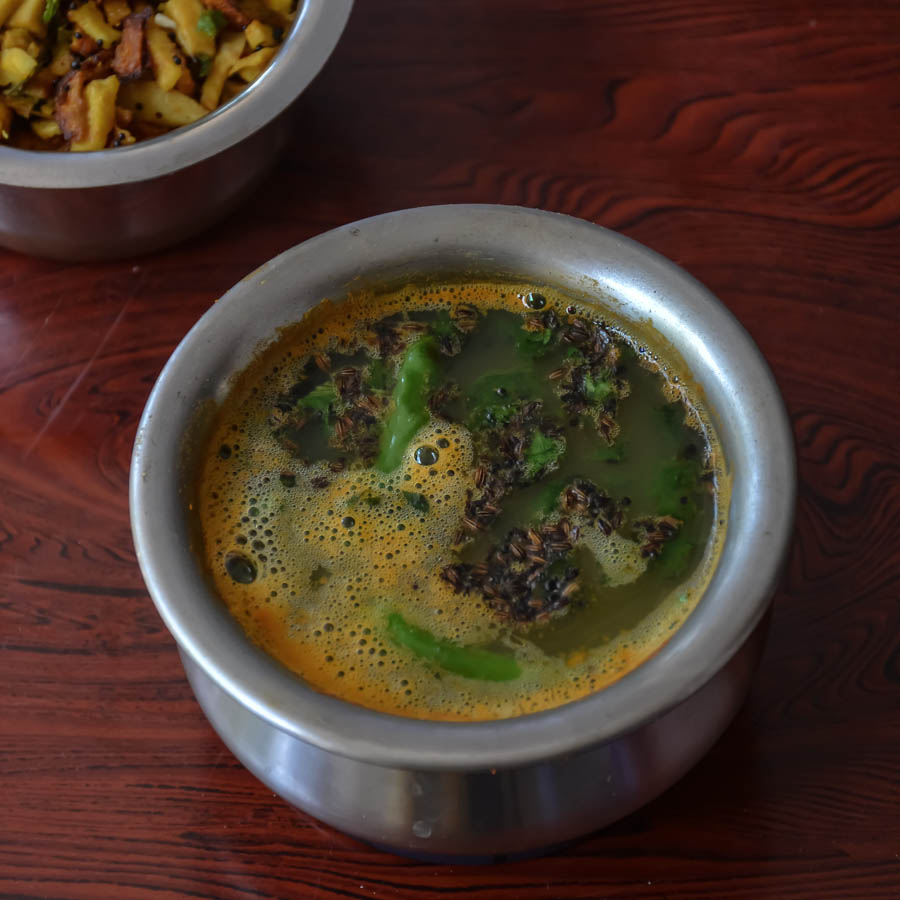
Quick, flavorful, light and perfect vegan accompaniment for rice or roti!

When I was a kid, I was never fond of brinjal like many of them. I had these weird thoughts that they look gross 😀 which is not true at all. I later realized it is one the versatile easy vegetables to cook with and also taste great! So, try to make this vegetable for your kids and try to implant into their minds that 😉 it is tasty, I say this because I still see people don’t like to have this vegetable for the same reason. Brinjal is rich in iron, fibre and vitamins.  Brinjal is one of the low calorie vegetable when it comes with antioxidants, magnesium but it takes a lot of oil.

My dad made this for me this time when I went to India. He made it one afternoon with some tomato rasam when my mom and I went to doctor and informed him that we will be late. And that night I had this 😀 and I totally loved it. So I asked him to make it again another day and I clicked the pictures the same day. My dad is a great cook 😉 just like my mom. In India, I have never seen Men cook as much as women. I know and agree the fact that there are lots of male chefs compared to women. But when it is compared to home cooking, it is so weird that men don’t cook much and I have seen and heard that most men don’t cook whole of their life. How weird is that? Just because they are born as male, doesn’t make them any better ;)! Back to topic, I am proud and happy that my dad is not one among the crowd J He always helps my mom in cooking and he is always there for everything!

BrinjalRoast-4

He used the small brinjals for this recipe and I would totally recommend that instead of eggplant for the recipe. But I have made this with eggplant also and it does taste good except that the taste of the vegetable is different. This is one of the quickest recipes to make on a weekend as a side for Indian breads like roti, paratha or for plain rice and or for garlic dal/ tomato rasam/Buttermilk rasam /sambar !

My Other favorite Brinjal recipes. Masala Stuffed Baby Eggplants/Ennai Kathirikkai,Roasted eggplant mozzarella pasta and Honey garlic EGgplant.


5.0 from 8 reviews
Print
Quick Spicy Brinjal Fry/ Kathirikkai Varuval
Author: Suganya Hariharan
Recipe type: Main
Cuisine: Indian
 
Ingredients
  • • • Small Eggplant/ Kathirikkai – 10
  • • • Mustard seeds – ¼ tsp
  • • • Urad dal /black gram – 2 tsp
  • • • Curry leaves – 1 sprig
  • • • Sugar – a pinch
  • • • Turmeric powder – ½ tsp
  • • • Onions – 1 medium, sliced
  • • • Salt – 1 tbsp
  • • • Oil – 2 tbsp
  • • • Red chilly Powder – 1 tsp
  • • • Sambar powder – 1 tbsp
Instructions
  1. Remove the ends of the eggplant and slice them and soak them in water till you cook.
  2. Heat a wide pan with oil and add mustard seeds. When it crackles, add the urad dal and when it gets lightly golden brown, add the curry leaves.
  3. Add sliced onions, pinch of sugar, little salt, sauté till they become nicely golden in colour.
  4. Now add the eggplants to it. Add the turmeric powder, chilli powdfer, sambar powder, required salt and add 2 tbsp of water. Mix it well and cover it for 7-8 minutes.
  5. After 7-8 minutes, open the pan, the water would have evaporated and now mix and turn brinjal so that all sides gets roasted. Cook it uncovered in medium heat till both sides get evenly roasted.
  6. Switch it off and serve with some hot rice and dal.
Notes
1. Use a wide pan as it helps to turn the eggplants.
2. Reduce the amount of spicyness if you want by avoiding the chilli powder.
Wordpress Recipe Plugin by EasyRecipe
3.5.3208

 This roast is perfect for rice and tomato rasam/Buttermilk rasam/dal/sambar !

BrinjalRoast-5

Filed Under: DRY CURRY SIDE DISH/ STIR-FRY Tagged With: 30 minute eggplant recipe, brinjal curry, Brinjal fry, Brinjal kari, Brinjal restaurant style, Brinjal roast recipe, Eggplant fry, Eggplant roast, healthy eggplant recipes, Indian best recipes, Indian eggplant recipes, Kathirikkai curry, Kathirikkai fry, kathirikkai hotel style, kathirikkai kari, kathirikkai lunch recipes, kathirikkai varuval, Quick brinjal fry recipe, quick brinjal roast, Quick brinjal roast recipe, quick eggplant recipe, quick eggplant recipes, Quick Indian eggplant recipes, quick kathirikkai recipes, Quick kids brinjal recipe, Quick vegan brinjal recipes, roasted eggplant, side dish for naan, Side dish for rasam, side dish for rice, small brinjal recipes, SPicy brinjal fry recipe, spicy brinjal recipe, Spicy eggplant fry, SPicy eggplant fry recipe, vegan brinjal recipes, Vegetarian eggplant fry recipe, Vegetarian eggplant recipe, Vegetarian quick recipes, vegetarian quick recpes, vegetarian sides

Lemon Tomato Rasam Soup/ Elumpichai thakkali rasam

May 1, 2016 by Suki 2 Comments

LemonTomatoRasam-2

LemonTomatoRasam-2

A spicy flavorful Indian style soup tempered with aromatic spices.

We make rasam mostly daily in India even if we have some other kuzhambu or curries because it is something which is very healthy and also too quick to make. It takes 30 minutes for me to prepare this rasam. But my mom makes in 20 minutes. 🙂 I guess she has way more experience in cooking than me 🙂

 If we have stomach problems or cold or if we want to have something light, the first thing that comes to my mind is rasam and then buttermilk. I make rasam so often that I never click pictures. But this one 😉 I took the picture as my mom made it 🙂 I loved that trip 😉 I never cooked anything. Just had to wake up, watch TV, see her cook sometimes 😉 and take pictures sometimes 😀 and that too if I feel 😀 wow! Vacation it is I say! Can’t imagine when I can have a similar trip again.

 LemonTomatoRasam-5

This rasam is with no tamarind, you can very well add tamarind, but it does add more tanginess. You can add rasam powder instead of sambar powder. My friend Vincy says rasam is best with omelette 😀 try it!

Other favorite rasam recipes: Tomato dal rasam, Buttermilk Mor rasam.

Print
Lemon Tomato Rasam Soup/ Elupichai thakkali rasam
Author: Suganya Hariharan
Recipe type: Main
Cuisine: Indian
Prep time:  10 mins
Cook time:  20 mins
Total time:  30 mins
Serves: 2 cups
 
Ingredients
  • Lentils/ Toor dal – 3 tbsp
  • Tomato – 2 small chopped finely (approx. ¾ cup)
  • Sambar powder – 1 tbsp
  • Turmeric powder – 1 tsp
  • Salt – to taste
  • Sugar – a pinch
  • Lemon – ½ , big, or 3 tbsp lemon juice
  • Coriander leaves – 2 tbsp, chopped finely to garnish

    To temper:
  • Oil – 1 tbsp
  • Mustard seeds – 1 tsp
  • Cumin seeds – 1 tsp
  • Curry leaves – 1 sprig
  • Asafoetida/Hing – 2 pinches
  • Ginger – 1 inch, chopped finely
  • Green chillies -2 sliced
Instructions
  1. Boil the toor dal in one cup of water for ten minutes on the stove in simmer. Or keep it in the cooker for 2 whistles. Mash it well and add a cup of water.

  2. Add the chopped tomatoes, sambar powder, turmeric powder and salt to it. Let it boil for 10 minutes in medium high flame. Add a pinch of sugar and switch off.

  3. Take a small pan with 1 tbsp of oil in medium flame for tempering, add the mustard seeds, and wait for it to crackle. Then add the cumin seeds, wait for it to change color to light brown. Add the ginger, ginger chilli, curry leaves and 2 pinches of asafetida, wait for it to get sauteed, switch off and add the tempering to the tomato rasam mixture.

  4. Squeeze some lemon into it. Usually, when the rasam is hot, do not squeeze lemon as it might give you sour taste. So, just wait for 5 -10 minutes and squeeze some lemon into it. Garnish with coriander leaves.

Notes
1. You can do this same recipe without dal as well. Just skip the second step and go to the third step.
2. Adding sugar will boast the flavors.
3. If you want it less spicy, reduce the sambhar powder,by half.
Wordpress Recipe Plugin by EasyRecipe
3.5.3208


It is best to have as a soup or with rice, beans stir fry or potato roast or other veggies dry stir fry or with the chicken dry roast.

 LemonTomatoRasam


Filed Under: SOUTH INDIAN GRAVIES/DAL/CURRY/KUZHAMBU Tagged With: Andhra style pappu charu, Elupichai thakkali rasam, Indian soup, Indian spicy soup, indian style flavorful soup, Indian style lentil soup., iyer style rasam recipes, Lemon Tomato Rasam Soup, no tamarind rasam, quick hotel style rasma recipes, quick rasam for cold recipes, quick rasma recipes, quick tomato vegan soup, quick vegan soup, quick vegetarian weeknight recipes, restaurant style rasam recipes, thakkali paruppu rasam, thakkali parupu rasam quick, Thakkali rasam, tomato rasam, tomato soup, vegetarian soup

  • Facebook
  • Google+
  • Instagram
  • Pinterest
  • Twitter

LOOKING FOR SOMETHING?

logo
Food Advertisements by
logo
Food Advertisements by

Categories

STAY CONNECTED

  • Facebook
  • Google+
  • Instagram
  • Pinterest
  • Twitter

SUBSCRIBE BY EMAIL

SEARCH RELISH THE BITE

logo
Food Advertisements by

Copyright © 2025 · Lifestyle Pro Theme on Genesis Framework · WordPress · Log in