• Home
  • Page Layouts
  • Page Templates
  • Theme Colors
    • Lifestyle Pro Blue
    • Lifestyle Pro Green
    • Lifestyle Pro Mustard
    • Lifestyle Pro Purple
    • Lifestyle Pro Red
    • Lifestyle Pro Teal

Relish The Bite

Taste of happiness

  • HOME
  • ABOUT
  • RECIPE INDEX
    • SNACKS & APPETIZERS
    • BREAKFAST
    • BAKED RECIPES
    • LUNCH & DINNER
      • RICE/BIRYANI VARIETIES
      • SIDES
        • DRY CURRY/STIR-FRY
        • SOUTH INDIAN CURRY/KUZHAMBU
        • NORTH INDIAN CURRY/DAL
        • RAITA/DIPS/CHUTNEY
        • Soups/Salads
      • PASTA PIZZA & TACOS
      • BREAD
      • CHINESE ASIAN INSPIRED
    • NON-VEG RECIPES
    • DESSERTS
    • BEVERAGES
  • SNACKS
  • BREAKFAST
  • NON-VEG RECIPES
  • RICE/BIRYANI VARIETIES
  • LAMB
  • SOUTH INDIAN CURRY/KUZHAMBU
  • VEGAN
  • NORTH INDIAN CURRY/DAL
  • DRY CURRY/STIR-FRY
  • PASTA & TACOS
  • CHINESE ASIAN INSPIRED
  • BAKED RECIPES
  • COLLECTIONS
  • BREAD
  • BEVERAGES
  • DESSERTS
  • FESTIVAL RECIPES
    • SNACKS & APPETIZERS
    • SWEETS/DESSERTS
  • RESOURCES
    • HOW TO START A BLOG
    • TITBITS
    • PRESS
  • CONTACT
You are here: Home / Archives for Indian

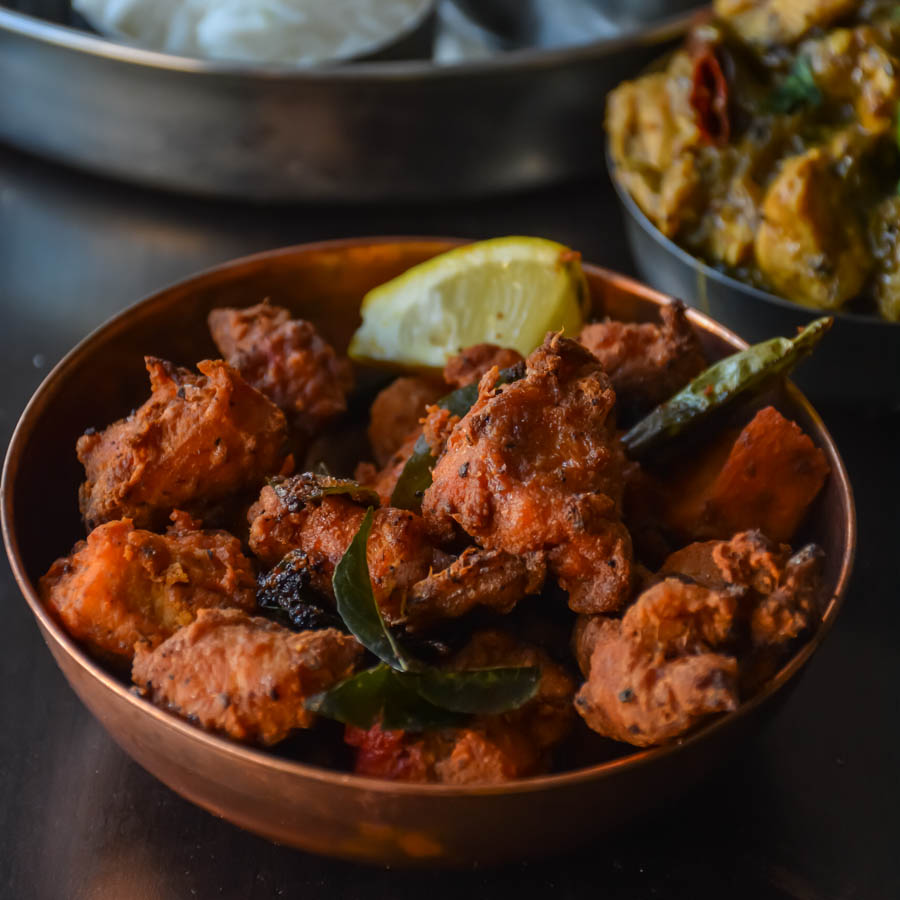
Chicken 65 – Restaurant Style

January 26, 2018 by Suki 11 Comments

Chicken65-4

Chicken65-4

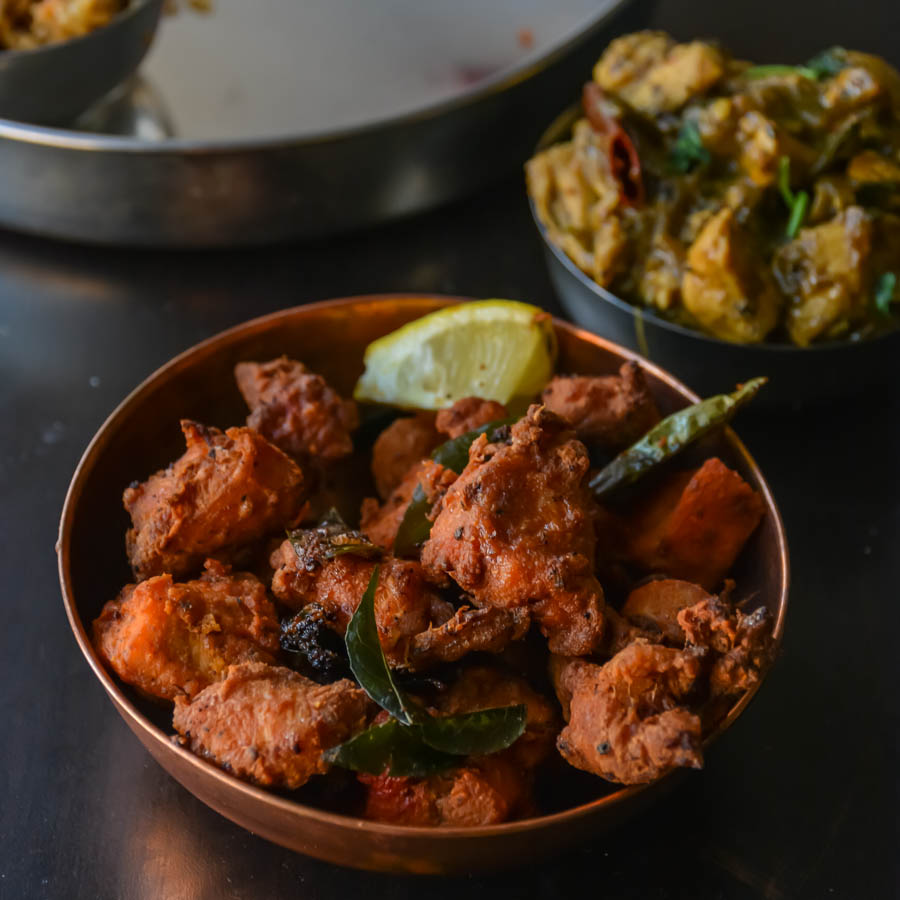
The famous deep-fried, south Indian appetizer 🙂 crispy outside and juicy inside!

Small pieces of chicken are marinated and then deep-fried till crisp.  This is one of the best things that you can do with chicken   I am sure there will be no one saying a no to this chicken recipe. This taste exactly like a restaurant one, I am sure you would love this recipe.

This is a recipe that I am updating the picture 🙂 from August 13, 2014! Omg! Time flies :D. It’s an old classic recipe I always use. I made this a week back with pepper chicken and biryani for my sweets. I bought a chicken breast used half for pepper chicken and used other half for chicken 65. Perfect for a single person J happy meal. I did not like my old picture 😉 much. Just trying to improve :). I had another recipe scheduled for this week 🙂 just inserted this into the schedule ;). I was so eager to post this.

Chicken 65 – I used to wonder where did this name come from and read some stories about this. There are many different stories for how the name came about but the most acceptable/logical theory seems to me is that it was introduced in 1965 by the famous Buhari hotel restaurant in Chennai. Many sources claim that “this dish originated in a military canteen in Chennai and as most of the soldiers, officers were from various parts of the country, to avoid language problems, they actually used a unique numbering system in the menu card/board and this particular dish was the 65th item on that menu. So it became chicken 65. But I used to wonder what happened to Dosa 16, lamb 36, omlette 01, why dint this dish survive. And I read one hilarious one, the chicken was cut on the 65th day! Hehe! Funny!

My other chicken favourite recipes:  Spicy chicken roast, pepper chicken curry, sweet and spicy garlic chicken drumsticks, spicy chicken egg fry noodles

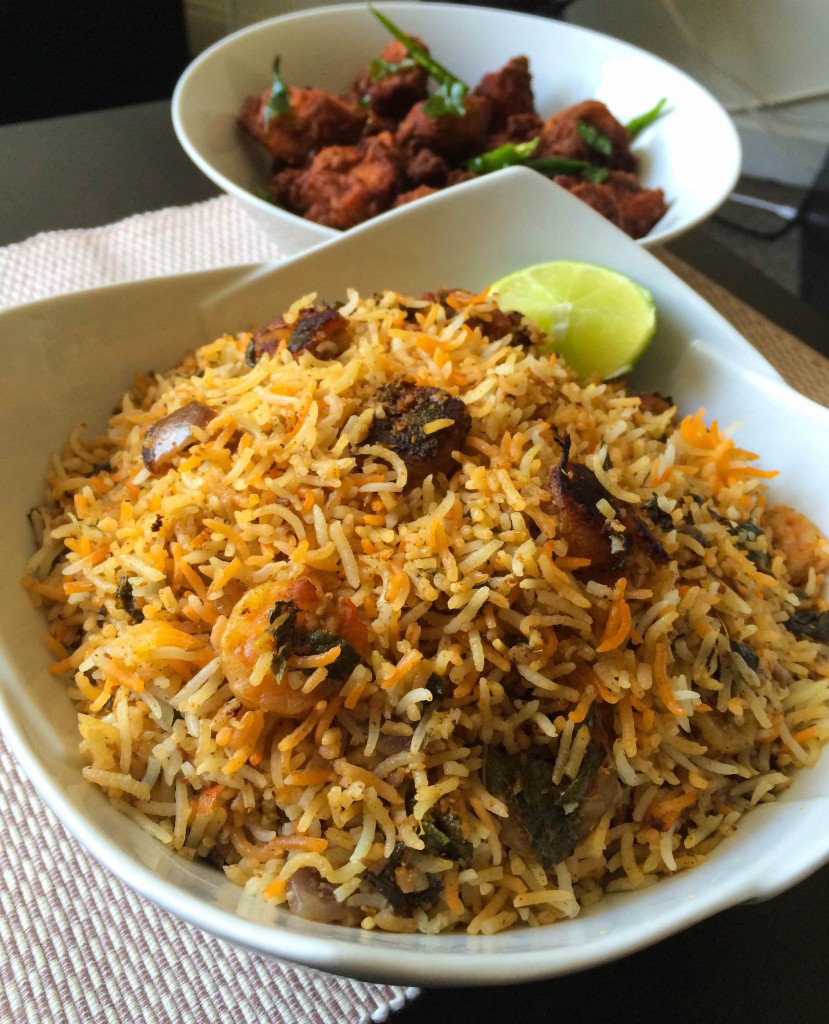
This taste great as an appetizer. Also taste great with lamb biryani, shrimp biryani, chicken biryani.
 

5.0 from 2 reviews
Print
Chicken 65
Author: Suganya Hariharan
Recipe type: Appetizer
Cuisine: Indian
 
Ingredients

  • For the Marinade:
  • Chicken – (try to use thigh meat) but I used two chicken breast.
  • Chillis – slit into slices
  • Turmeric powder – Just a pinch
  • Cumin powder – 1 tbsp
  • Chilli powder – 1 1⁄2 tbsp
  • Coriander powder – 1 tbs
  • Red colour – just a pinch
  • Ginger garlic paste – 1 tsp (I always blend fresh garlic and ginger)
  • Chilli garlic paste – 1 tbsp
  • Salt – 2 tblsp
  • Ajinomoto – 1 Tsp
  • Pepper powder – 1 Tsp
  • Corn flour – 3 tbsp
  • Egg – 1

  • Other ingredients:
  • Oil - for deep frying
  • Curry Leaves - few
  • Green Chilies - 2 halved
  • Lemon - ½ wedge just to season
Instructions
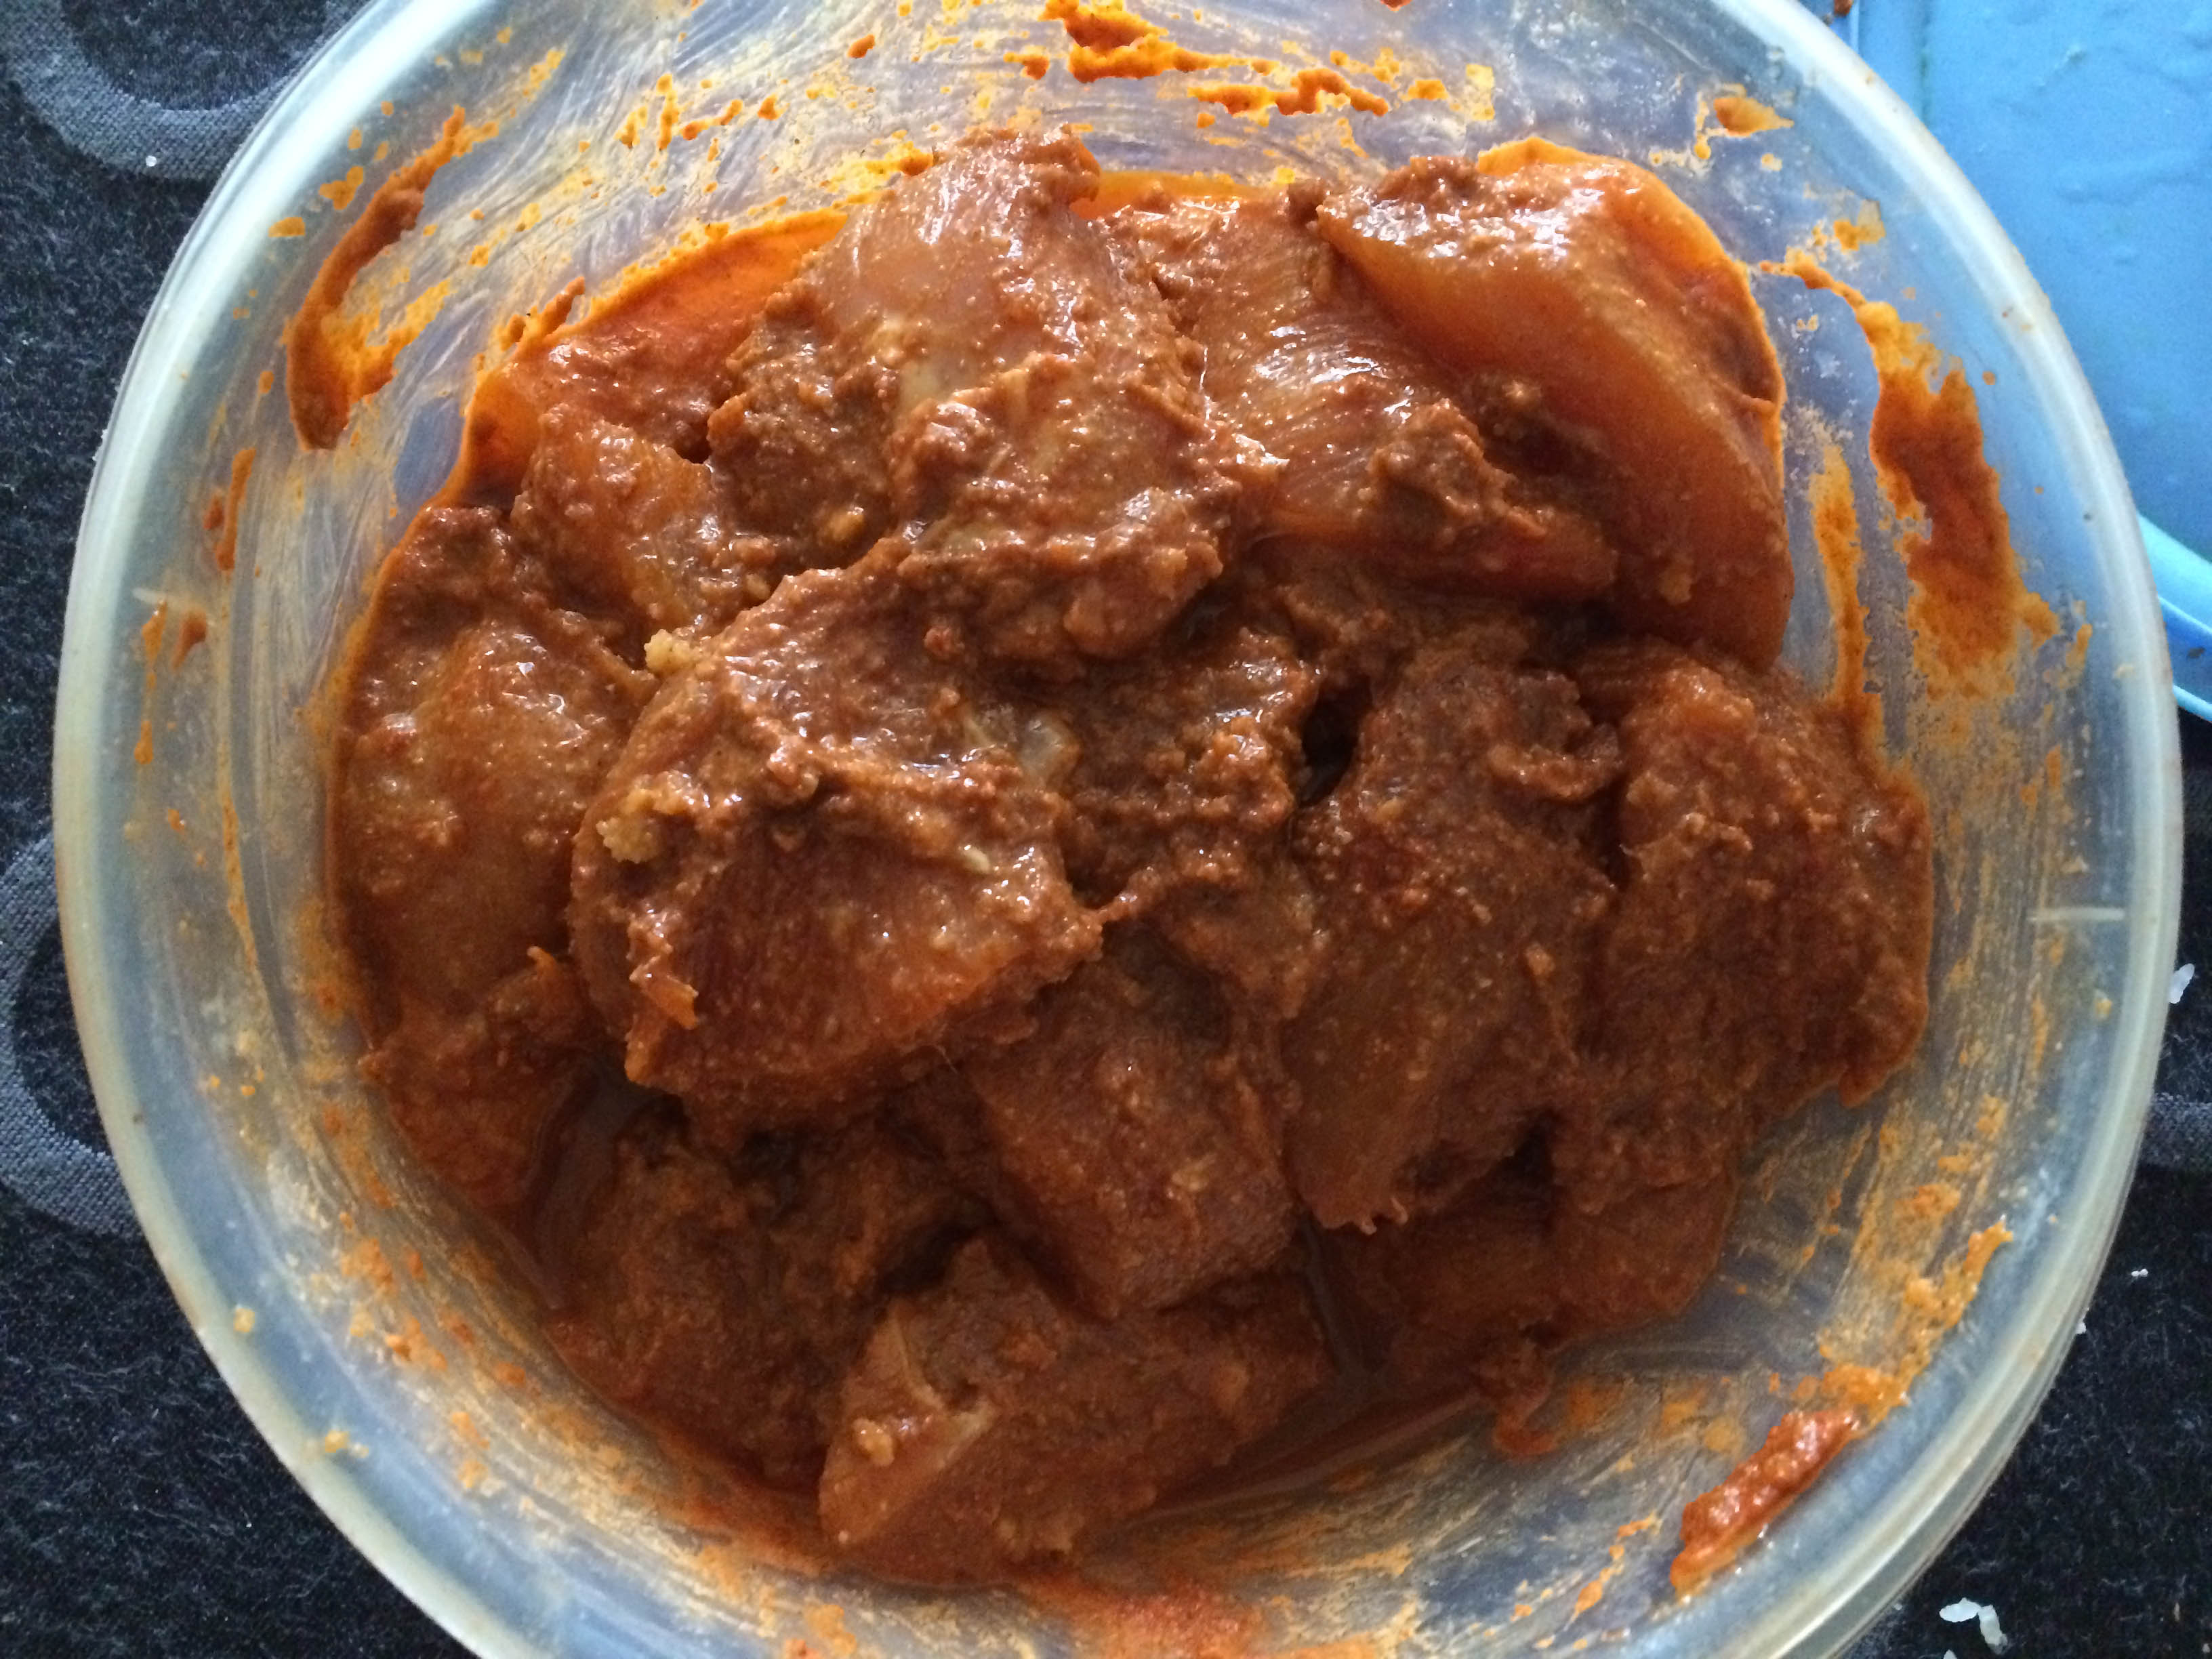
  1. Take a mixing bowl and mix all the ingredients under the “marinade” section. I usually rest it overnight. Allow it to rest at least for two-three hours.
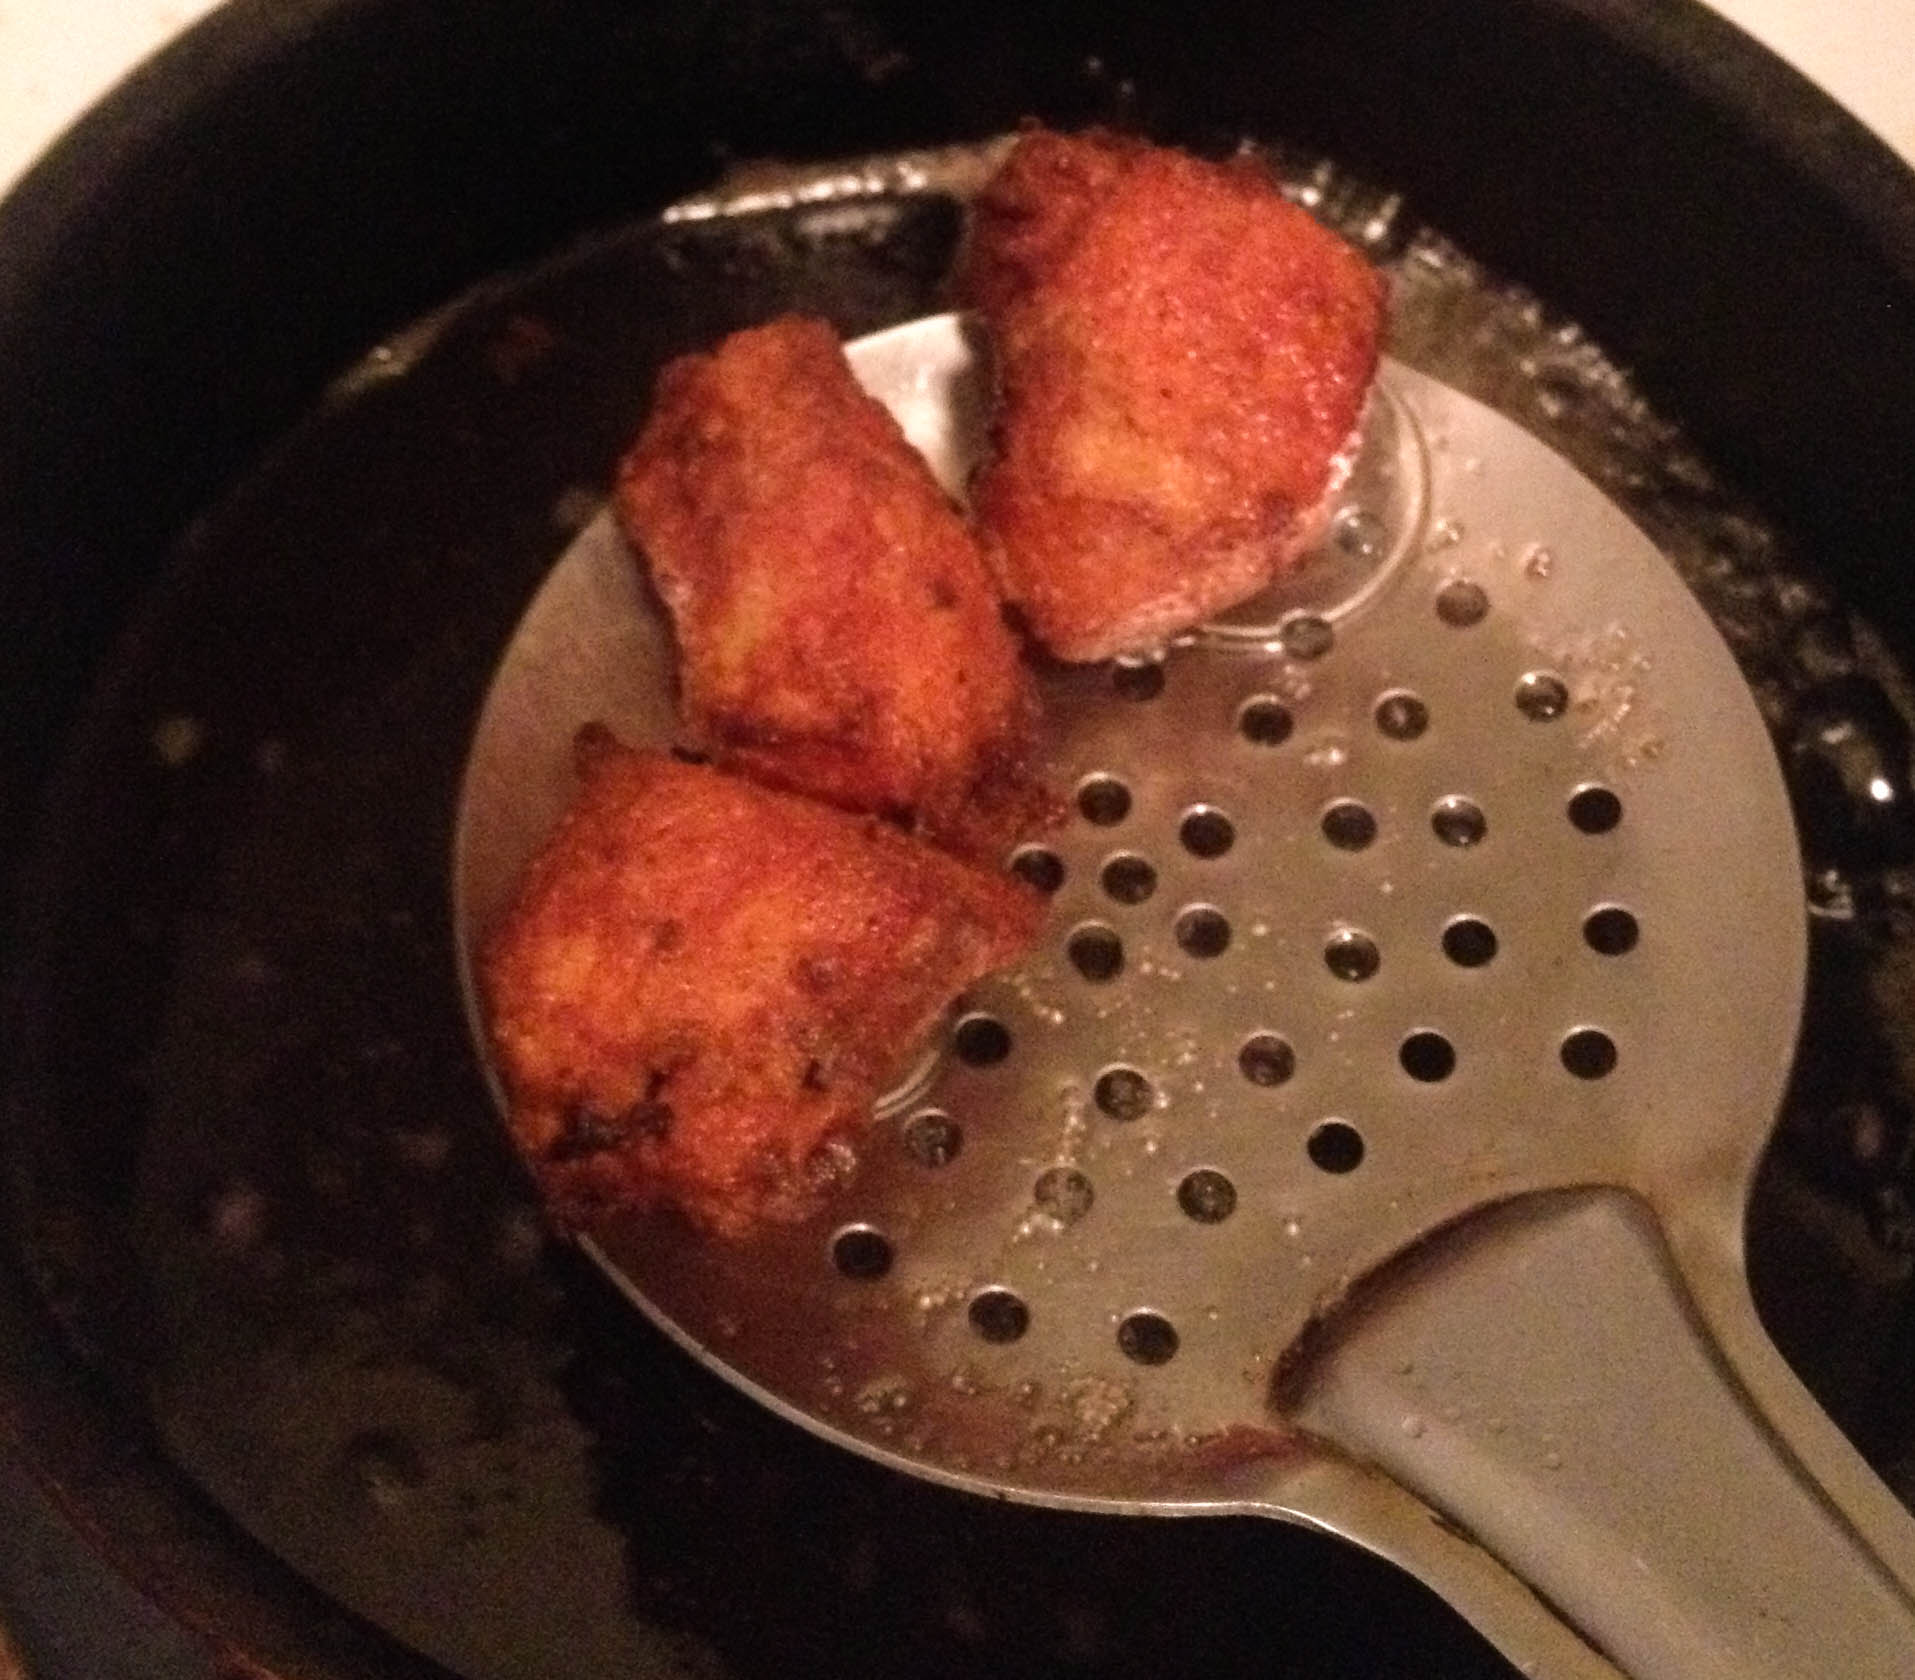
  2. Heat the oil to deep fry the chicken in medium flame. When oil becomes hot, add the chicken in batches and deep fry them till it becomes crispy and turns brown. Remove extra oil using by placing them on a kitchen tissue.
  3. In the same oil, just fry the slit green chillies and curry leaves. Place it on the top of the chicken, squeeze lemon to garnish.
Notes
1.When frying chicken,Egg makes a nice coating and seals the edges. Juices won't escape making the chicken tender.

2.The more resting time the softer the chicken 65 will be.

3.You can also temper with cumin seeds, chopped garlic,. Fry for 30 sec.

4.I used chicken breast because I did not get chicken thigh that day, try to use chicken thigh. It's juicier.

5.If you want to avoid red colour, you can use Kashmiri chilli paste and do with no colour. It tastes the same with no difference.

6.You can also onion to garnish.
Wordpress Recipe Plugin by EasyRecipe
3.2.1311

Filed Under: NON-VEG RECIPES, SNACKS & APPETIZERS Tagged With: appetizer, buhari style chicken 65, chicken, chicken 65 recipes, chicken fry 65 tikak recipes, chicken recipes, Indian, Indian chicken fry recipes, kids favorite chicken recipes, Non-vegetarian, restaurant style chicken 65, side dish, SIDES, snacks, starter

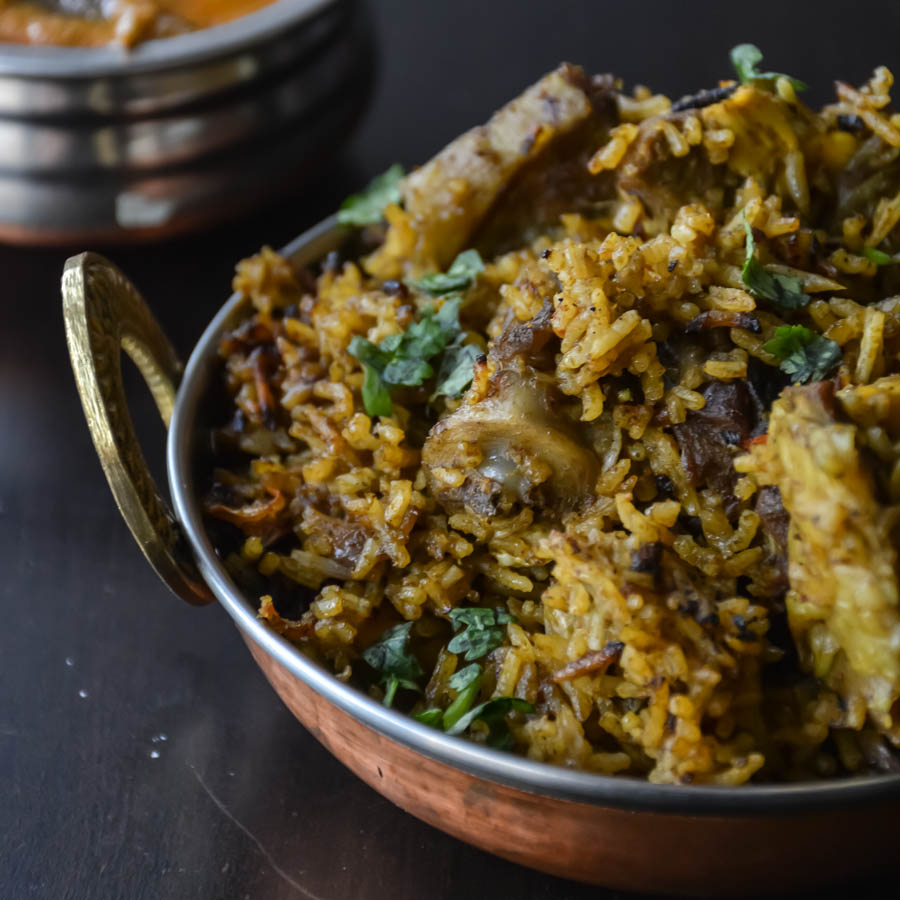
Homestyle Weekend Speciality Lamb Biryani

November 18, 2017 by Suki 3 Comments

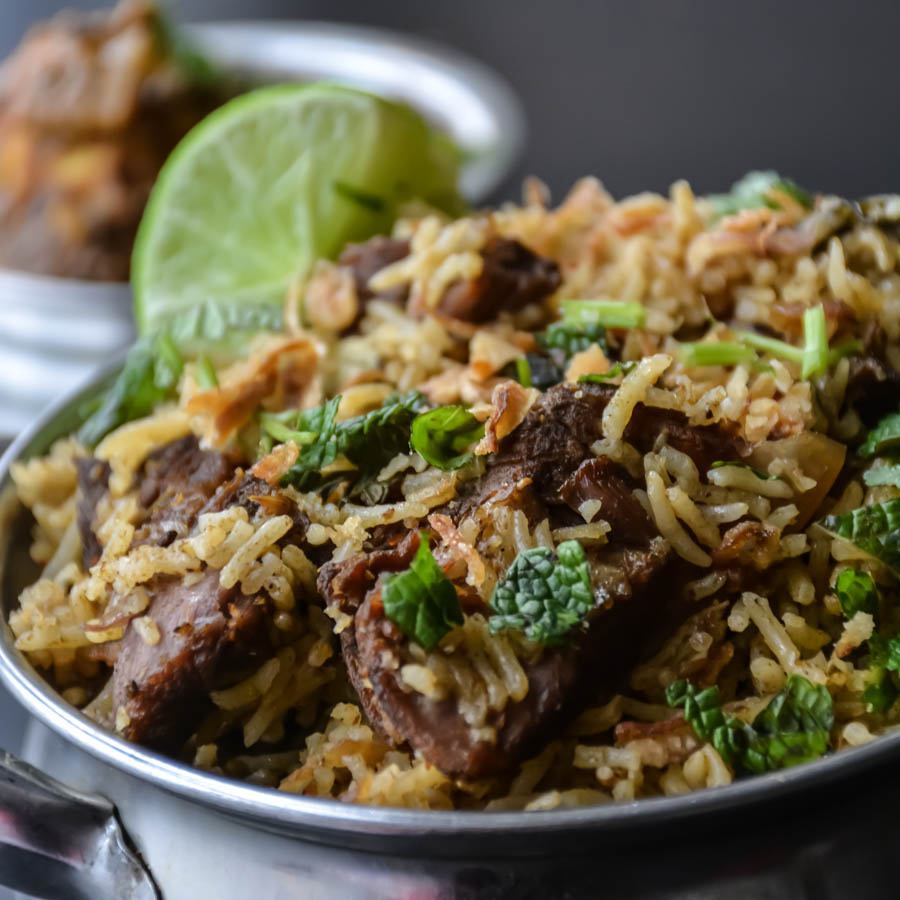
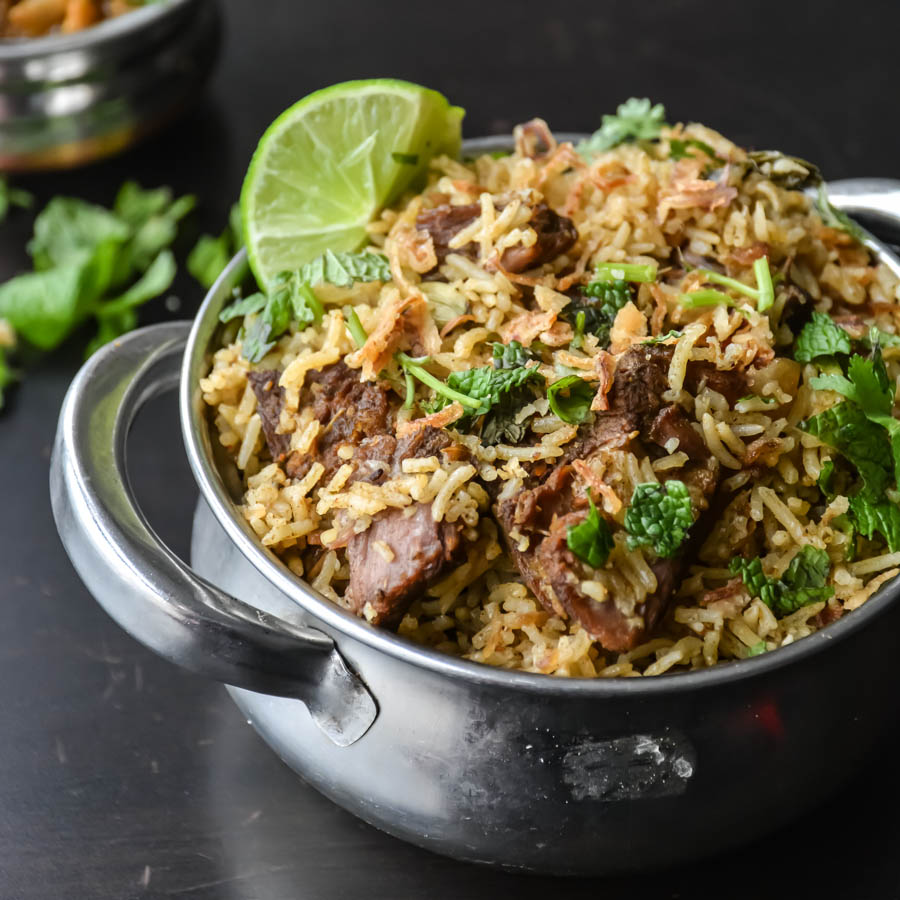
HomestyleMuttonBiryani_lamb

HomestyleMuttonBiryani_lamb

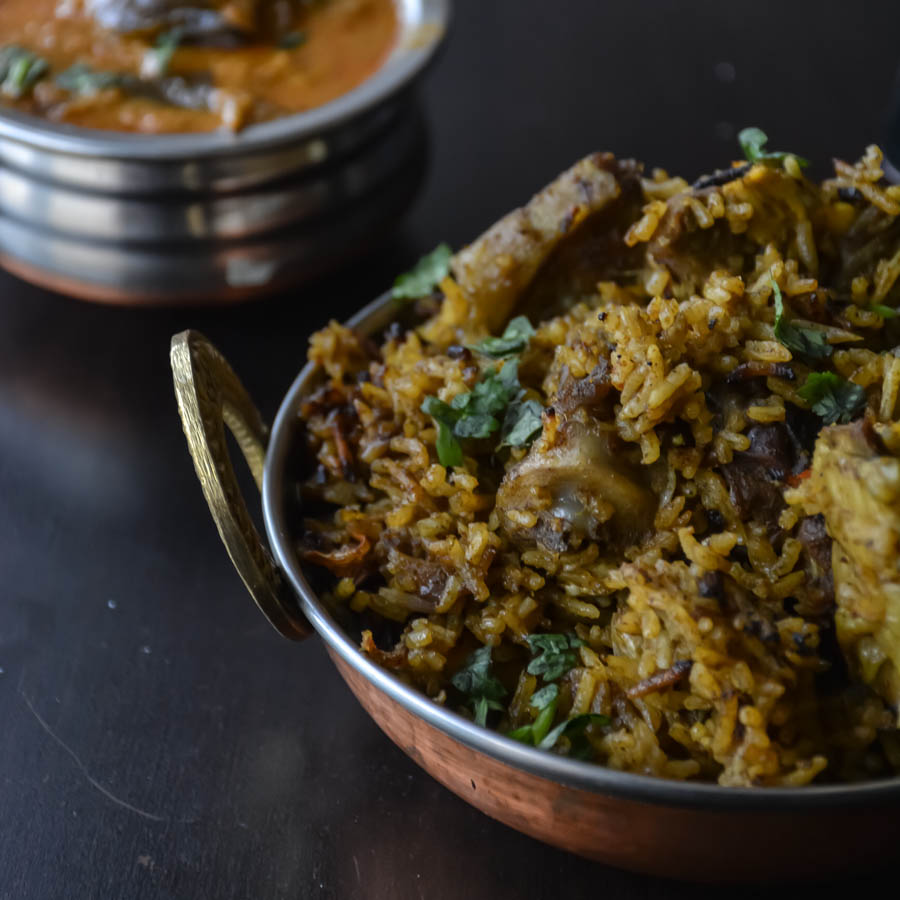
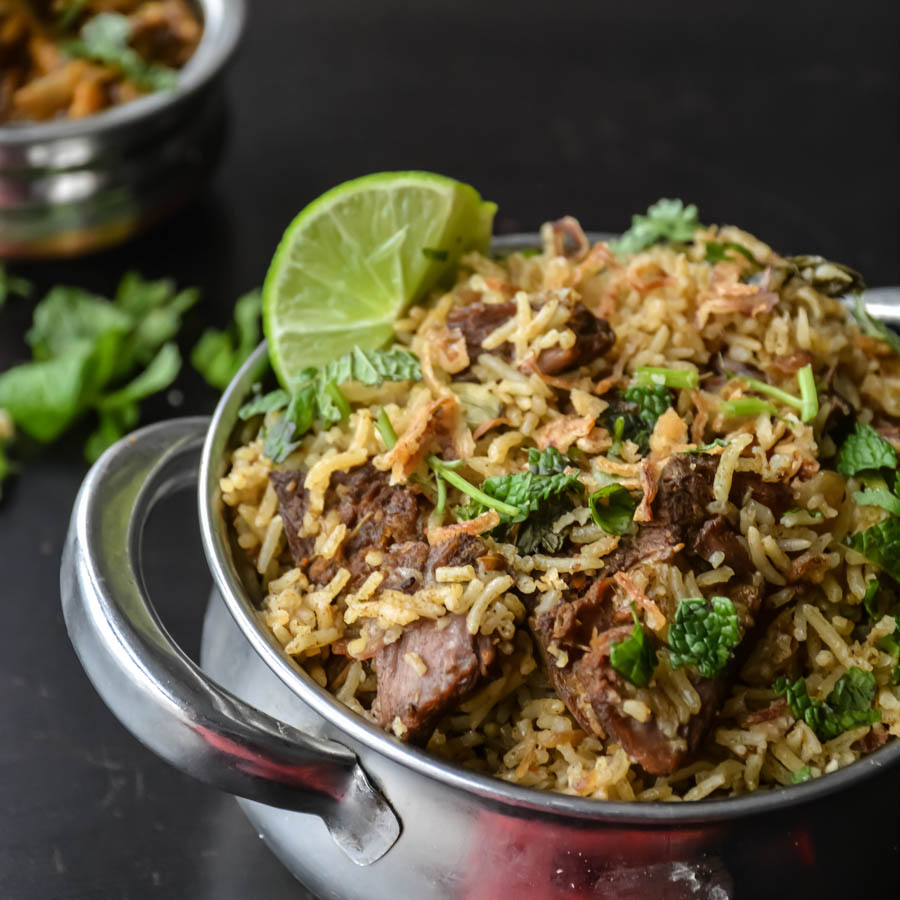
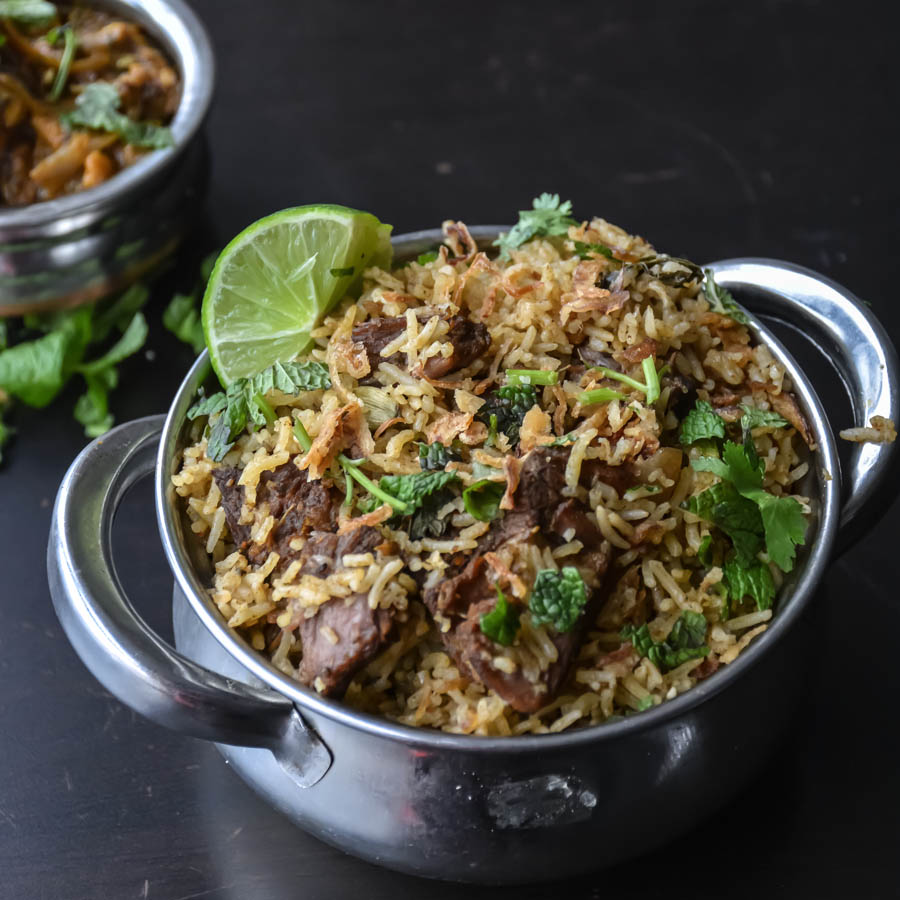
A plate full of hot, fragrant rice and lamb cooked with crispy onions and spiced mint coriander sauce. Taste best with chicken 65 or chicken curry 🙂 Weekend it is! 🙂 go for it! Comfort and happy feeling! 🙂

Biryani is one of the most popular dishes in India. The best thing about biryani is that it tastes great even the next day and the day after. It will save you from cooking for next three days and it will never be like you taste leftover food! Awesome right?

There will be no one saying NO to biryanis, let it be Tomato biryani, vegetable biryani, chicken biryani, shrimp biryani, palak biryani, chickpea briyani, potato biryani, paneer biryani, dum aloo biryani, cashew biryani, lamb biryani, egg biryani, mushroom biryani and so on! I have a biryani collection and it is one of the highest viewed pages.

Biryani is not strenuous at all to prepare like many of them believe. It’s just time-consuming and it need that little extra special care when we do it. Try to use all the ingredients listed, each ingredient has a special role in the biryani and compliments one with another. It is worth to do all this for the final taste. I have three lamb Biryani recipes – Ambur Lamb Biryani, Hyderabadi lamb biryani & Restaurant Style Lamb Biryani.

I made this long back, saved this picture and recipe in my draft and just forgot to post it. However I made this a week back for my love and it reminded me to post it. He said he loved it 🙂 Best feeling! Cooking always makes me happy and it makes me feel complete if I cook for him. “Happiness is cooking for him” – is surely my slogan. That’s the beauty of love I think :D. Biryani makes him happy, and it makes me love him more to see his smile :). I made this with chicken kurma as he said he wants that combo. I wasn’t actually sure about the combo, but he said it was good. Probably you guys should try 🙂 Usually he says biryani is good with chicken 65. 😉 enough of my love – here goes the recipe:


Print
Homestyle Weekend Speciality Lamb Biryani
Author: Suganya Hariharan
Recipe type: Main
Cuisine: Indian
Prep time:  10 mins
Cook time:  45 mins
Total time:  55 mins
Serves: 6 cups
 
Ingredients
  • • • Oil – 1tbsp
  • • • Bay leaf – ½
  • • • Cinnamon – 1 thin piece
  • • • Cloves – 3
  • • • Cardamom pods -2
  • • • Basmati Rice – 2.5 cups
  • • • Lamb – 400 gms (I used neck)
  • • • Biryani Masala – 1 tbsp
  • • • Garlic – 4, chopped
  • • • Green chilli – 2, slit into two
  • • • Red Onion – 2 medium sized, sliced
  • • • Tomato – ½, medium sized, sliced
  • •
  • for garnish:
  • • • Saffron – ½ tsp dissolved in ½ cup warm milk
  • • • Ghee – 2 tbsp (or oil)
  • • • Coriander leaves – 1 tbsp, chopped finely
  • • • Lemon juice – 1 tbsp
  • For fried onions: (comes to 2 tbsp)
  • • • Onions – 1 small onion, ½ cup, sliced thinly
  • • • Oil – to fry (3 - 4 tbsp)
  • For rice masala:
  • • • Khus khus (white poppy seeds) – ½ tbsp.
  • • • Cumin seeds/ jeera – ½ tbsp
  • • • Fennel seeds – 1 tbsp.
  • • • Garlic – 4 pods
  • • • Ginger – 2 inches
  • • • Green chilli – 7
  • • • Mint – ½ cup, chopped finely
  • • • Coriander leaves – ¼ cup, chopped finely.
Instructions


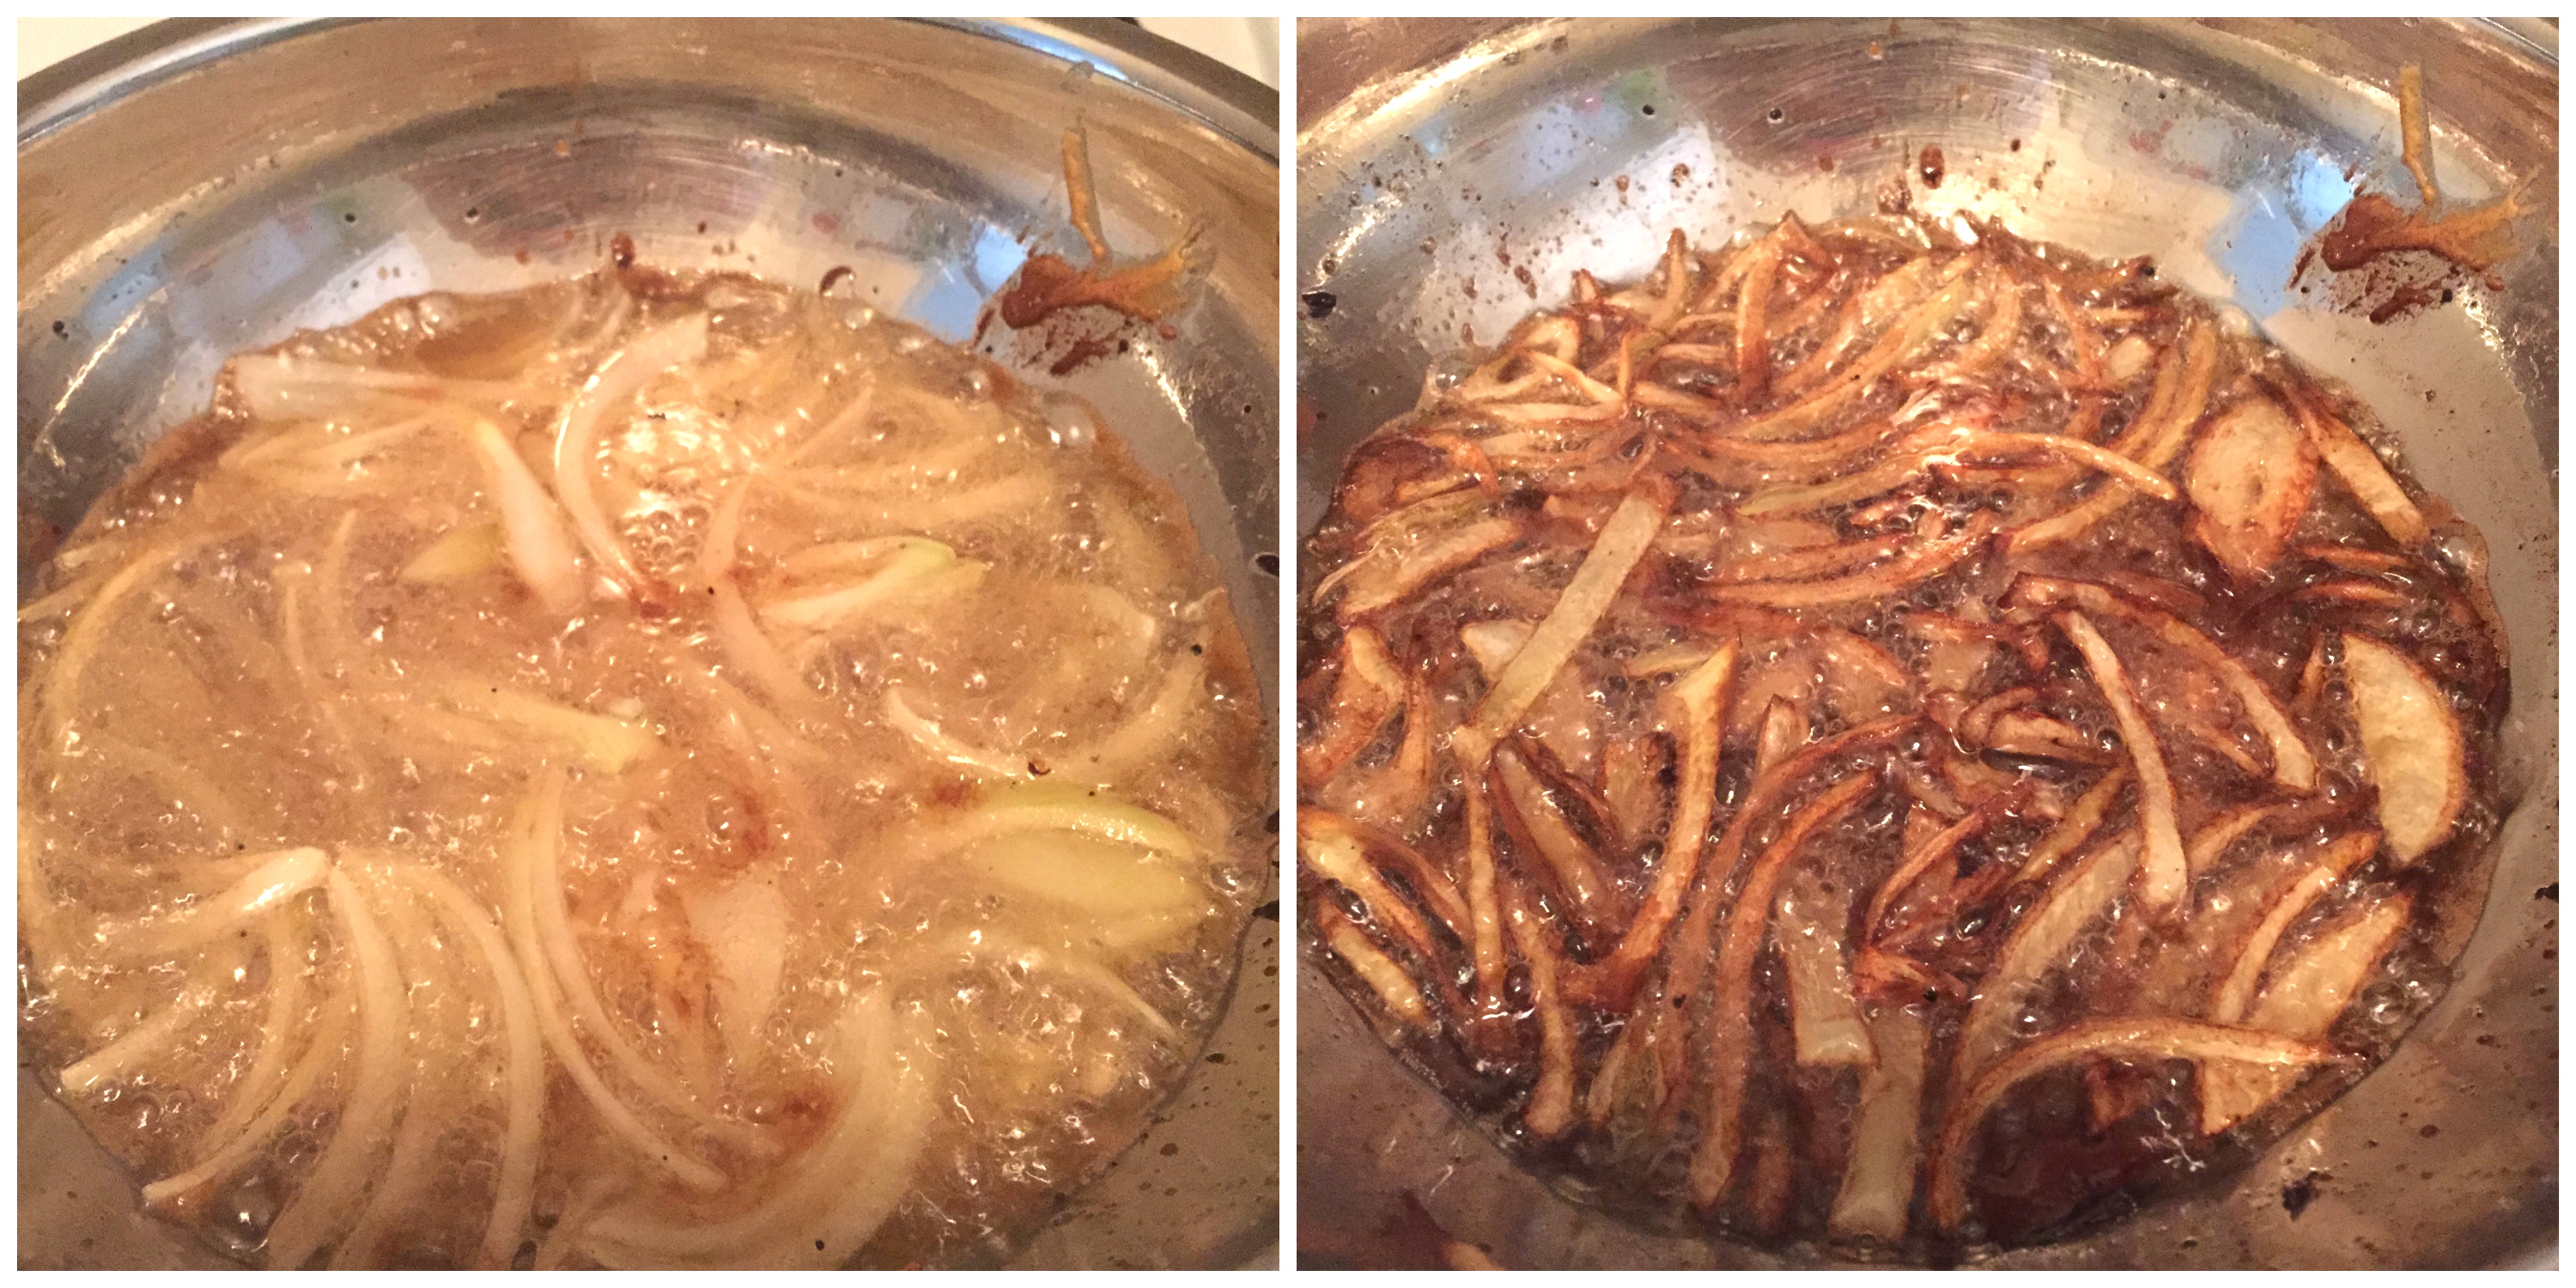
  1. For Fried onions: or you can use store brought ones:
  2. Heat a pan with oil, add the sliced onions and cook in medium heat till turn golden brown. Stir in the middle so that it does not stick to the bottom. Set aside.
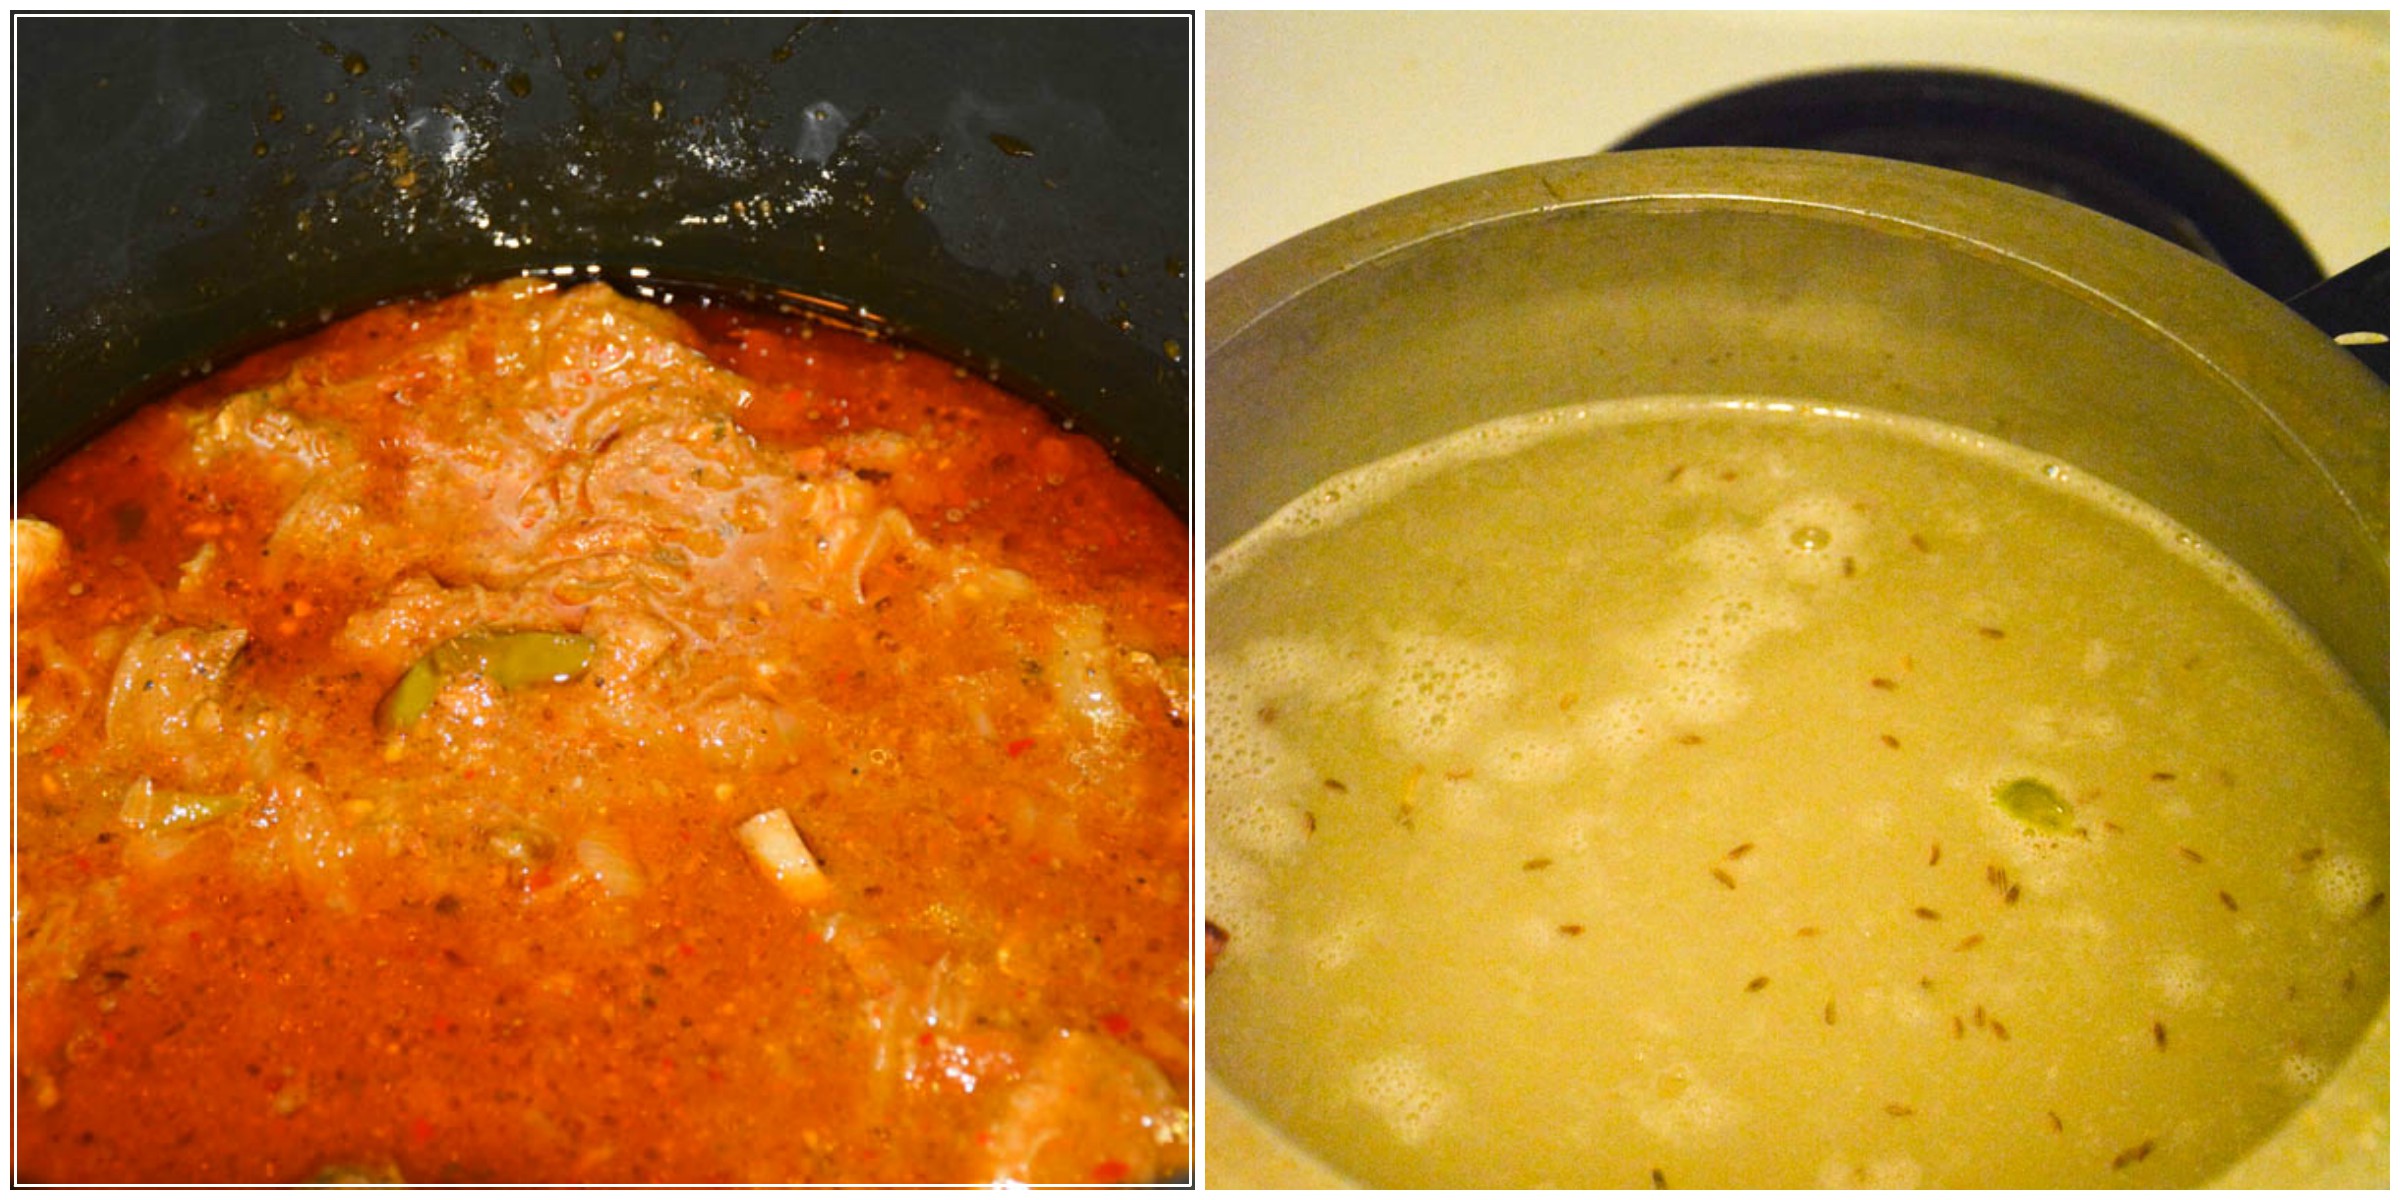
  3. For lamb: Add lamb, salt for lamb, then add water till it the lamb is correctly covered, not more or less. Cook for 1 hour and cook it covered in medium low heat or put it in a pressure cooker for 5 whistles. Water will not be evaporated totally, which is good. Store the water.
  4. For masala:
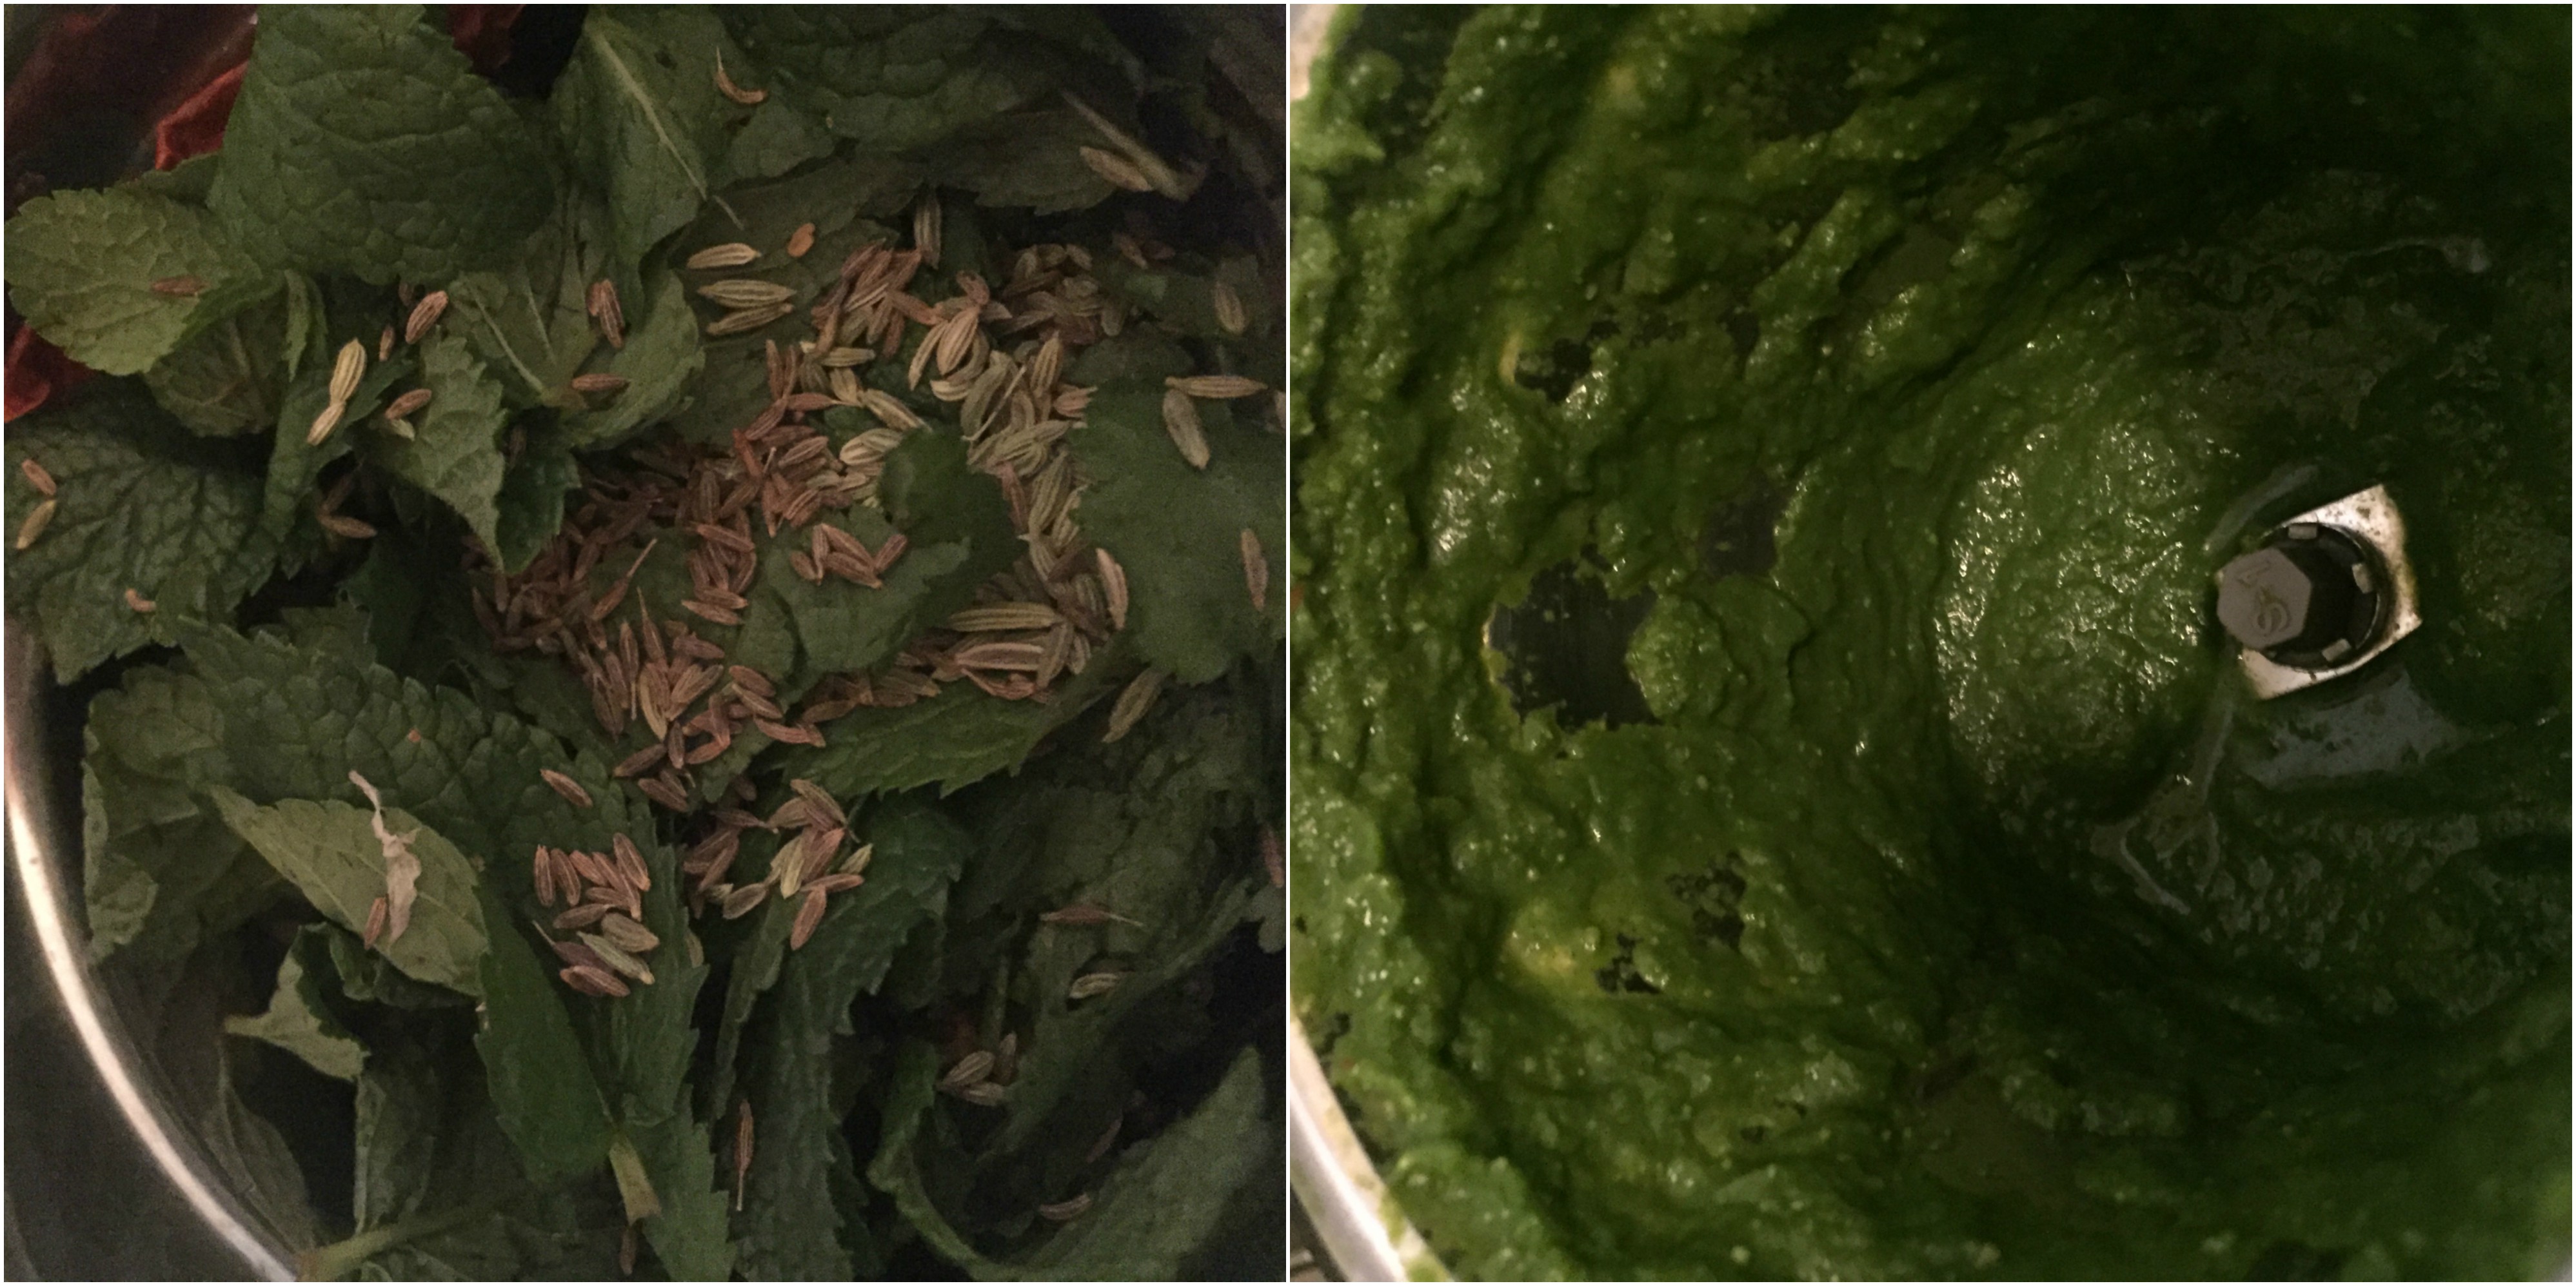
  5. Grind the garlic, ginger, mint, coriander, poppy seeds, fennel seeds, cumin seeds, chillis with two tbsp. of water into a smooth paste.

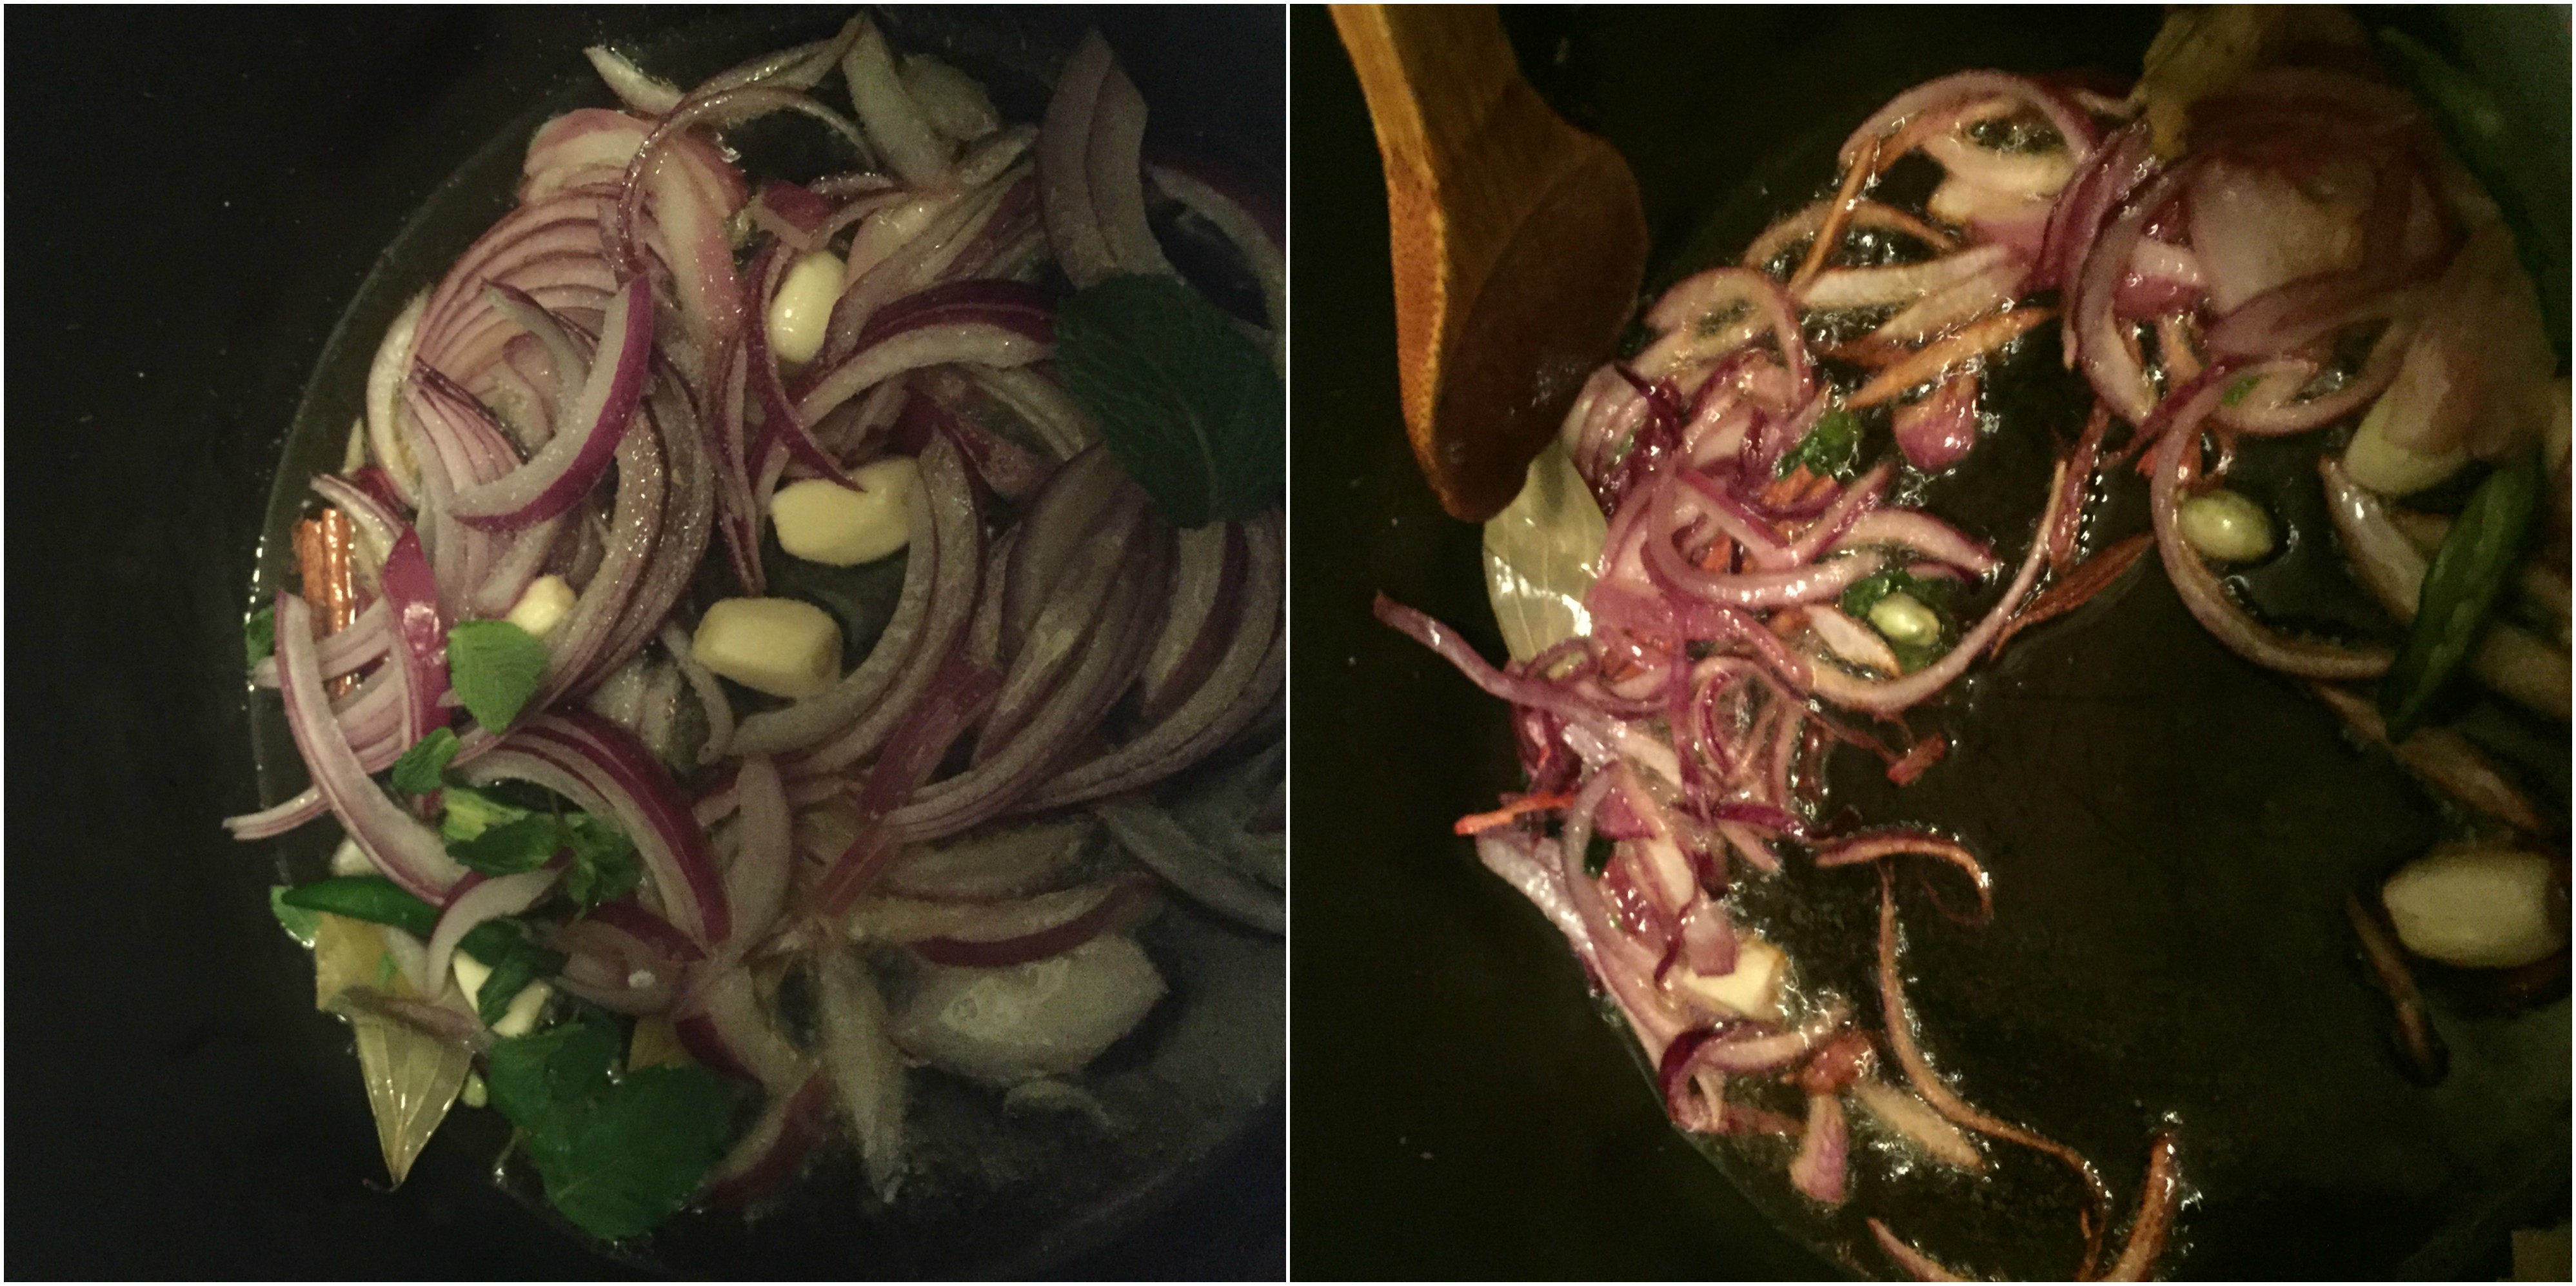
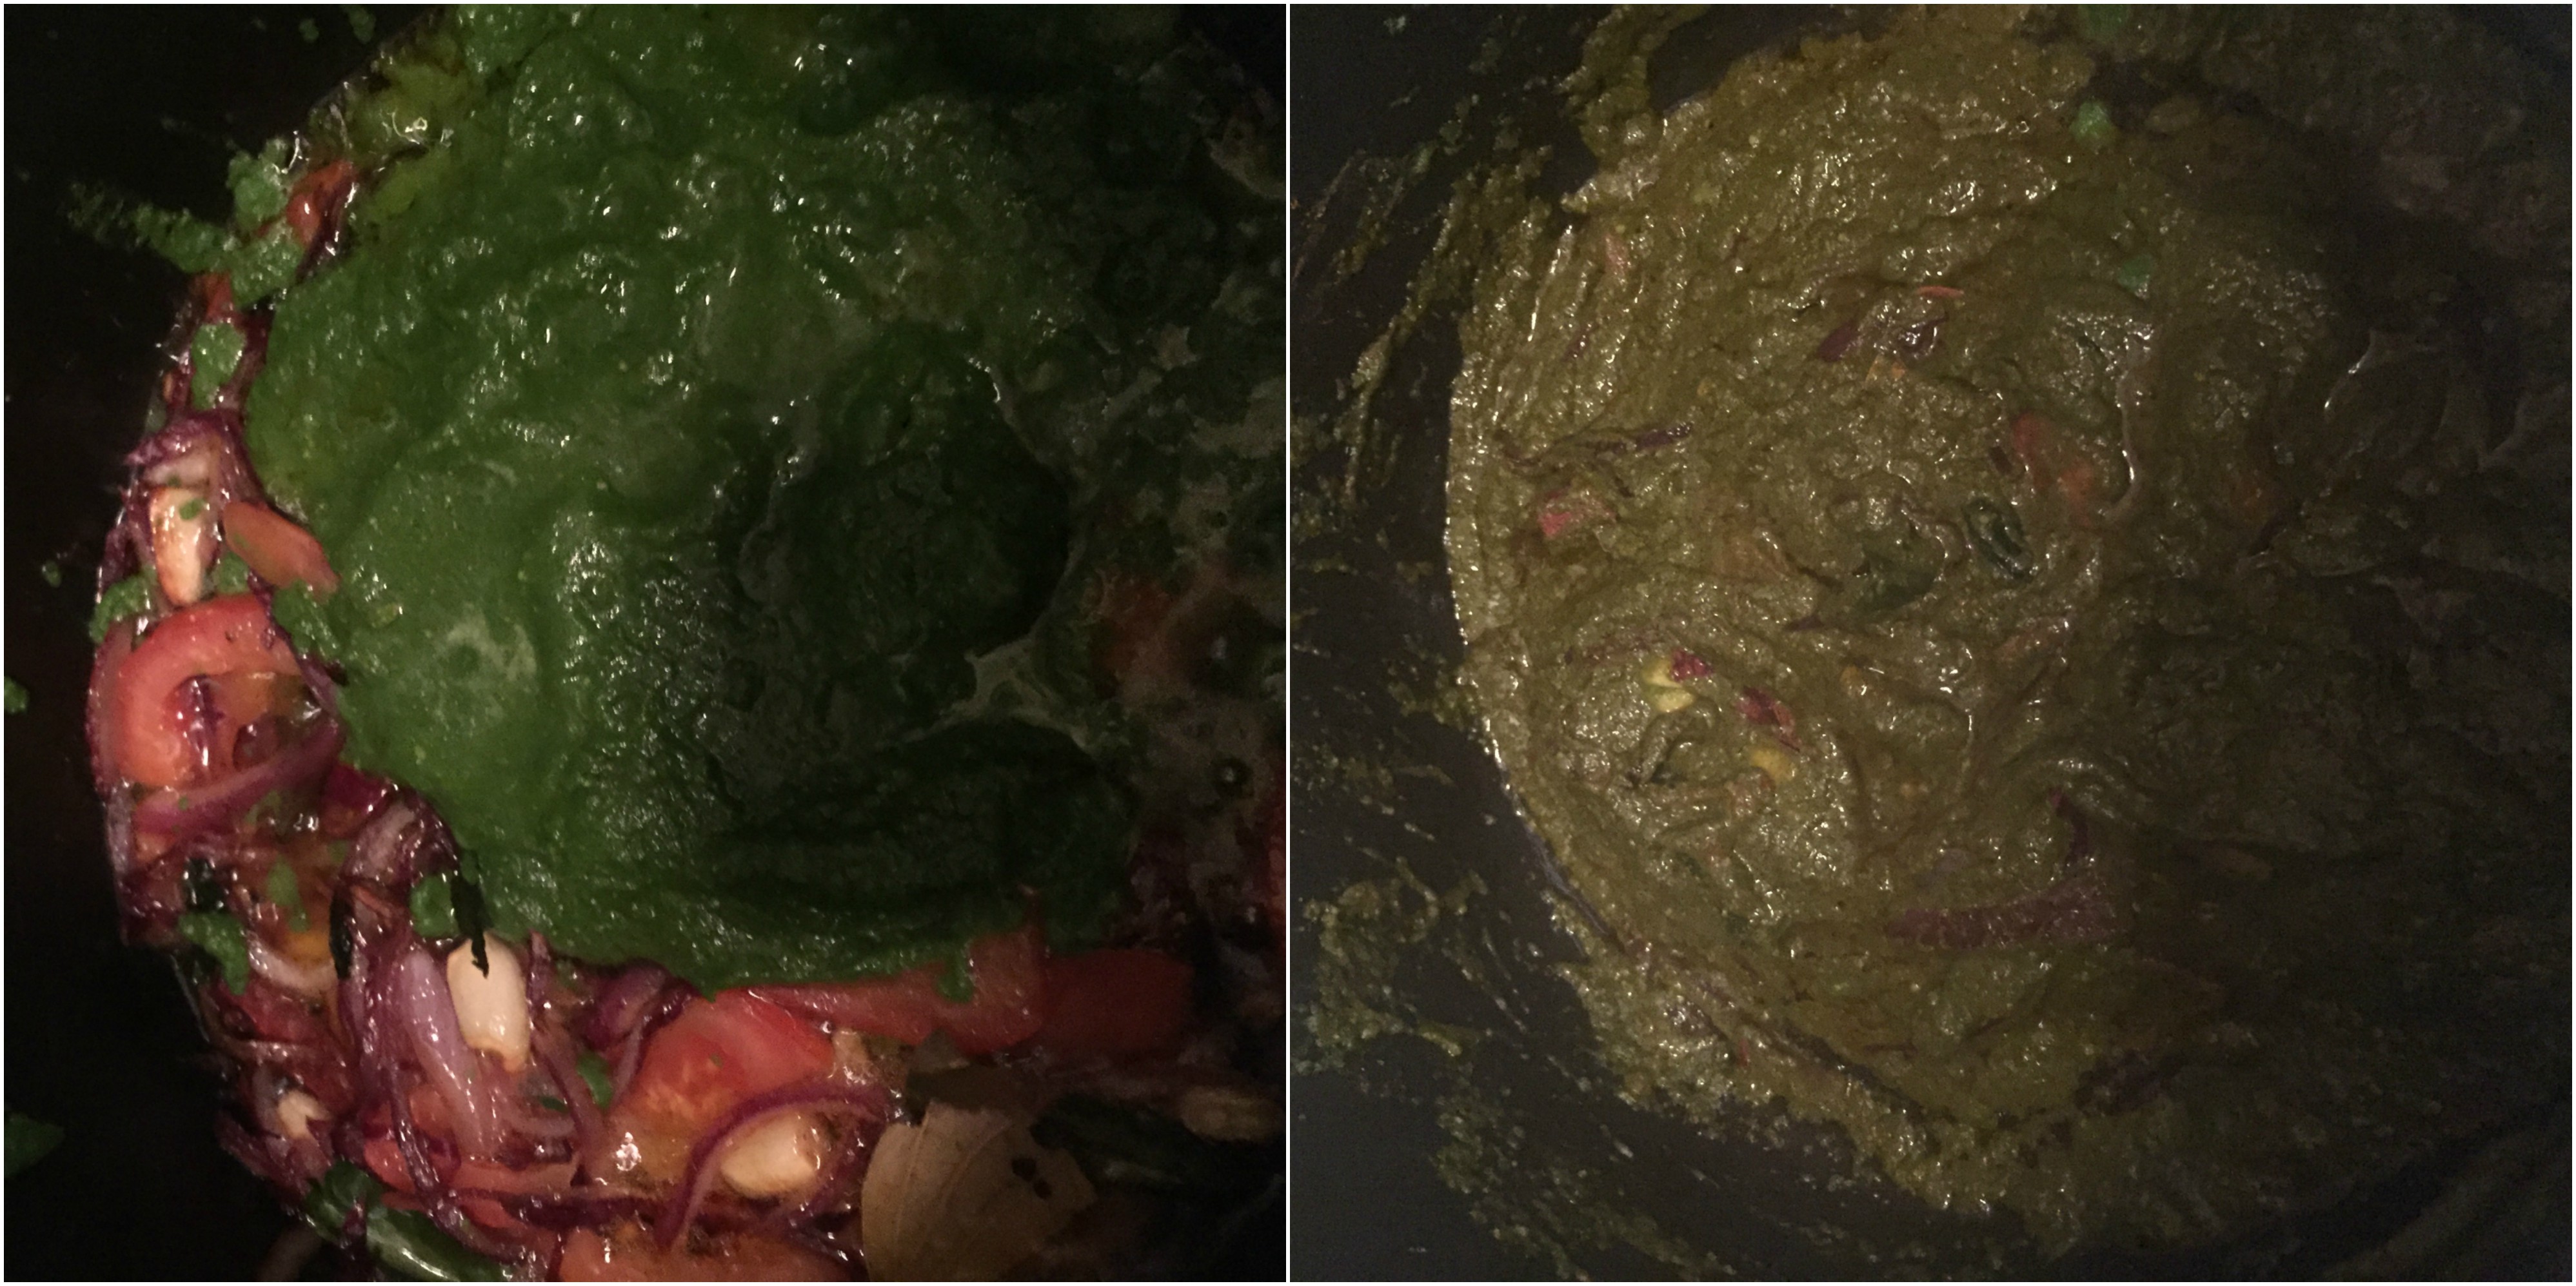
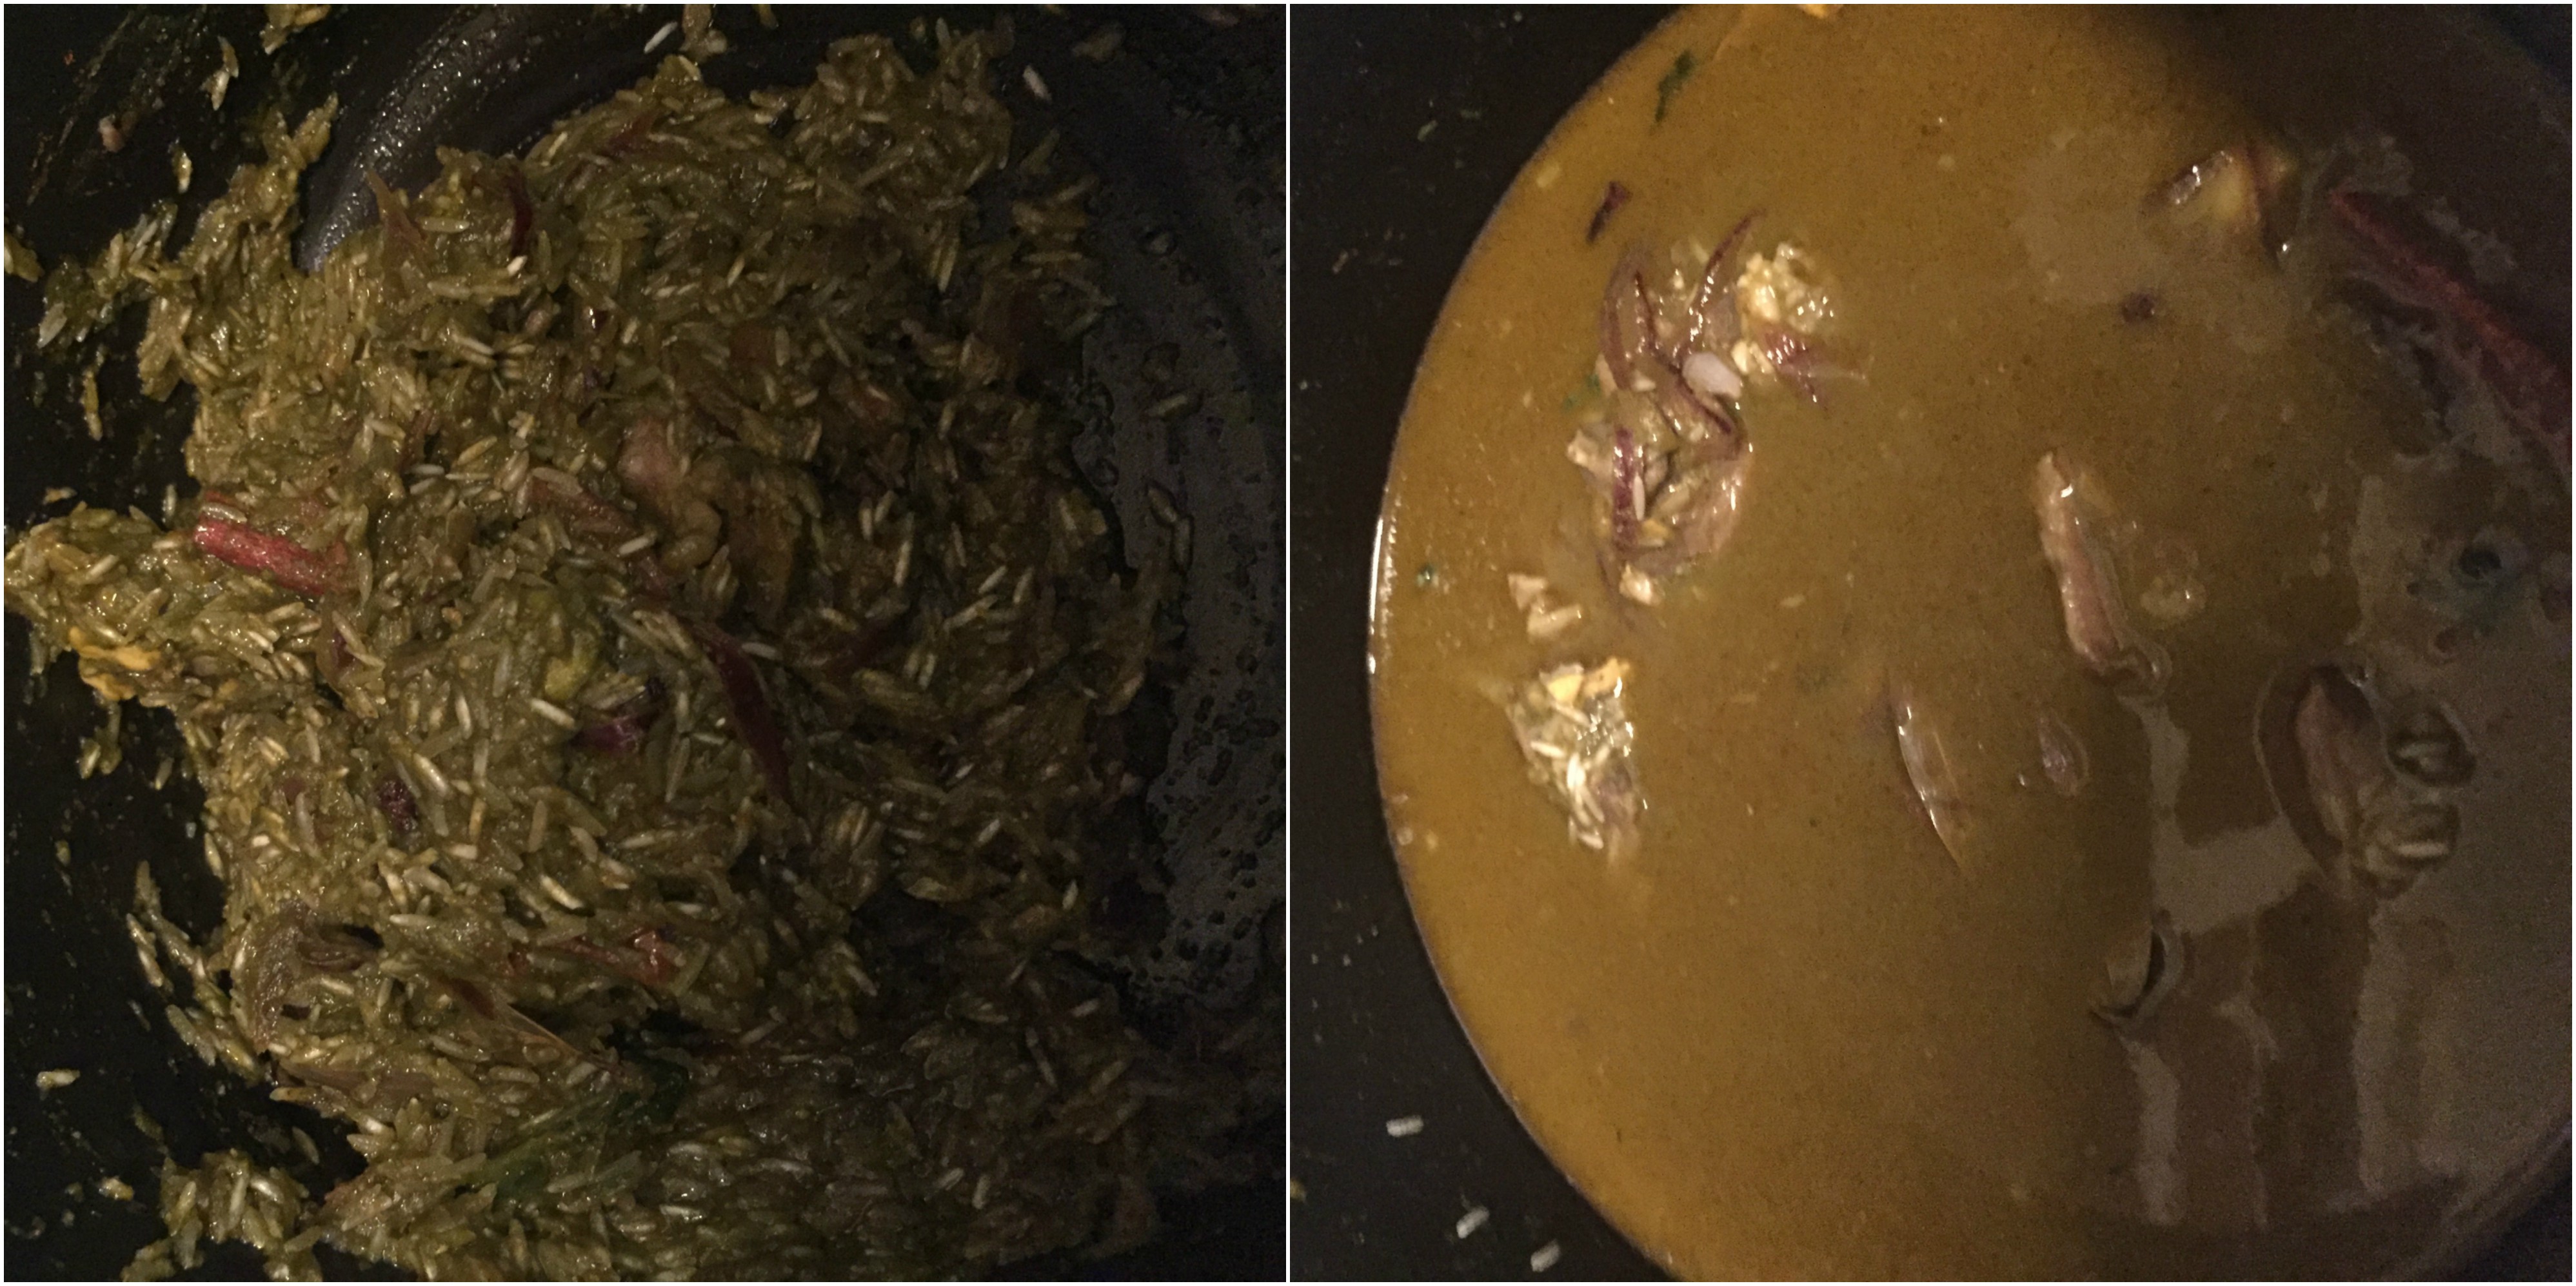
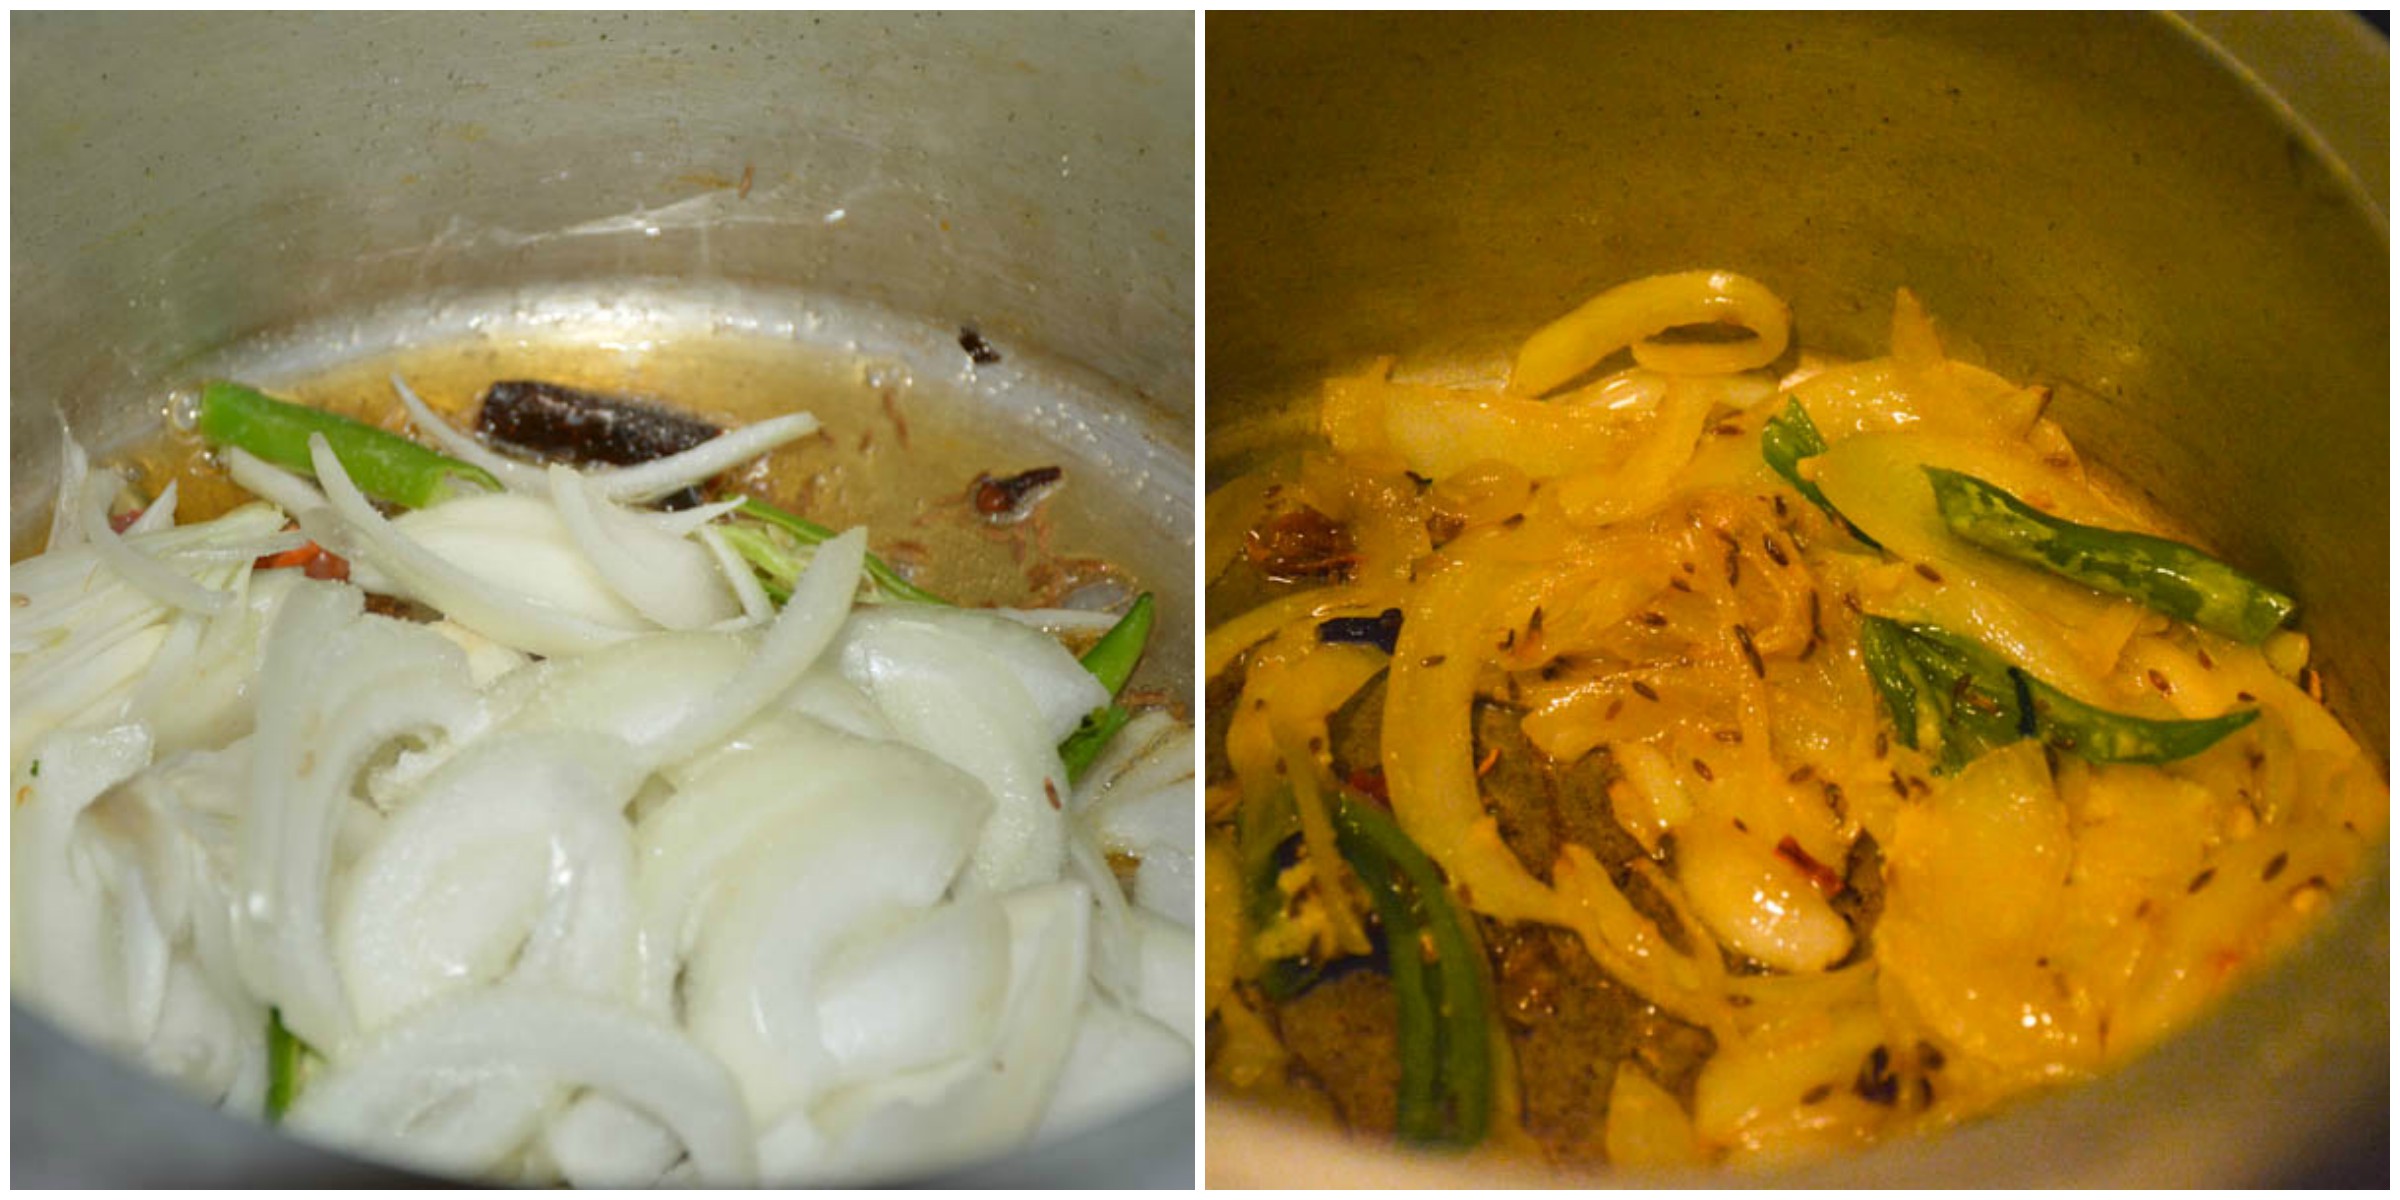
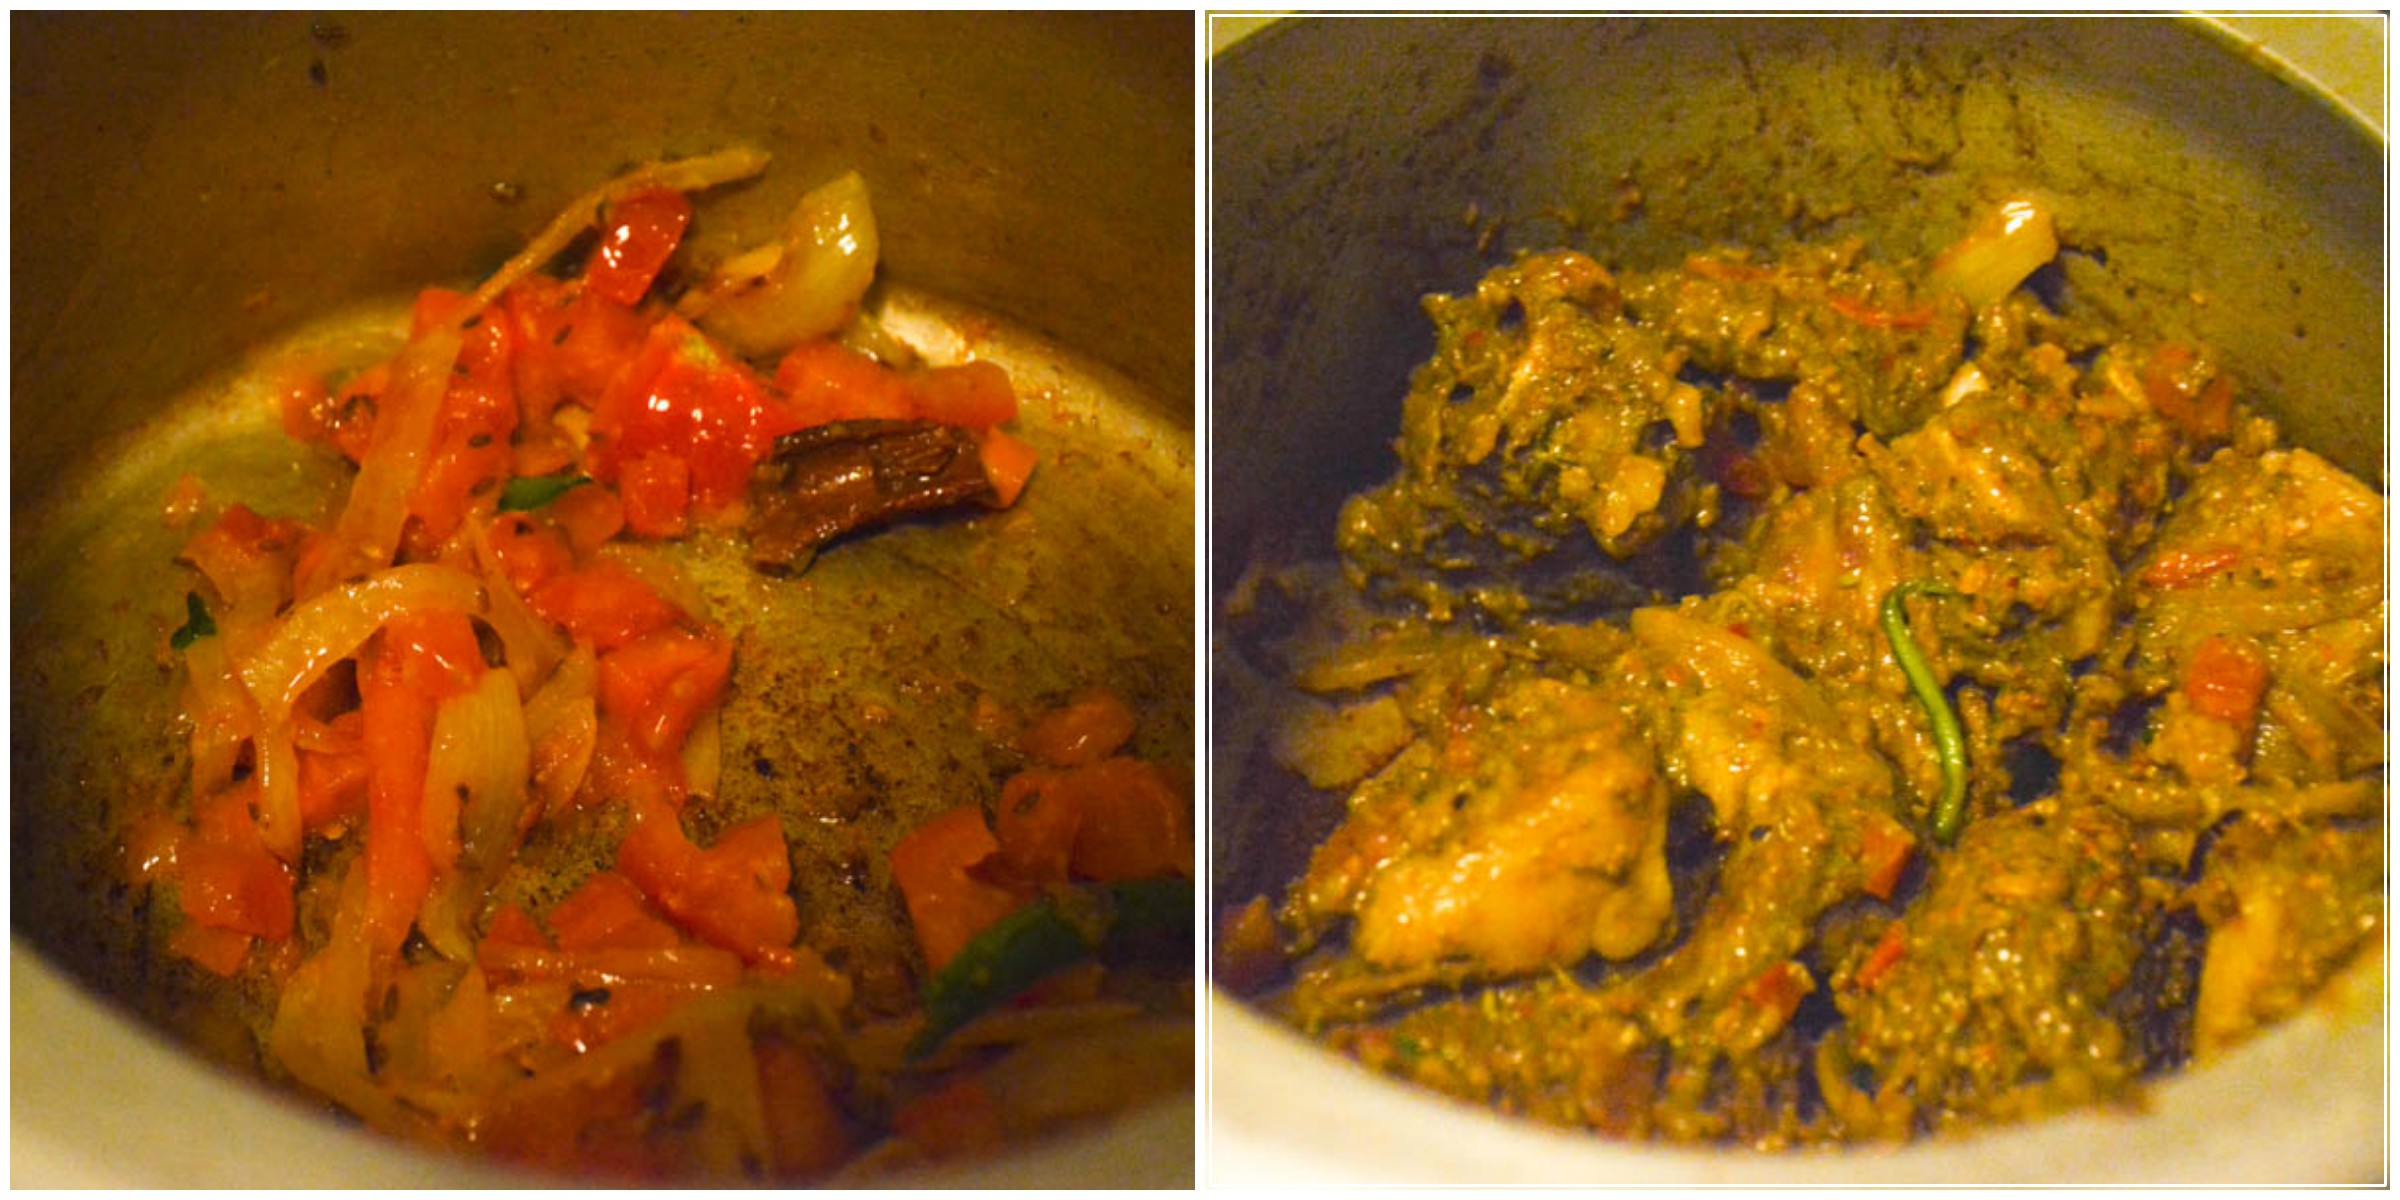
  6. Now take a big pan, add oil or ghee in medium heat, add the spices (cardamom, bay leaf, cinnamon, cloves), and add garlic , sliced onions, chillies and sautĂŠ for a minute till they get translucent. Now add the tomatoes, grinded paste, biryani powder and sautĂŠ them till the raw smell leaves and little oil oozes out, probably 2 minutes.

  7. Now add the rice, cooked lamb without water and mix well. SautĂŠ for a minute to allow the masala to get mixed.

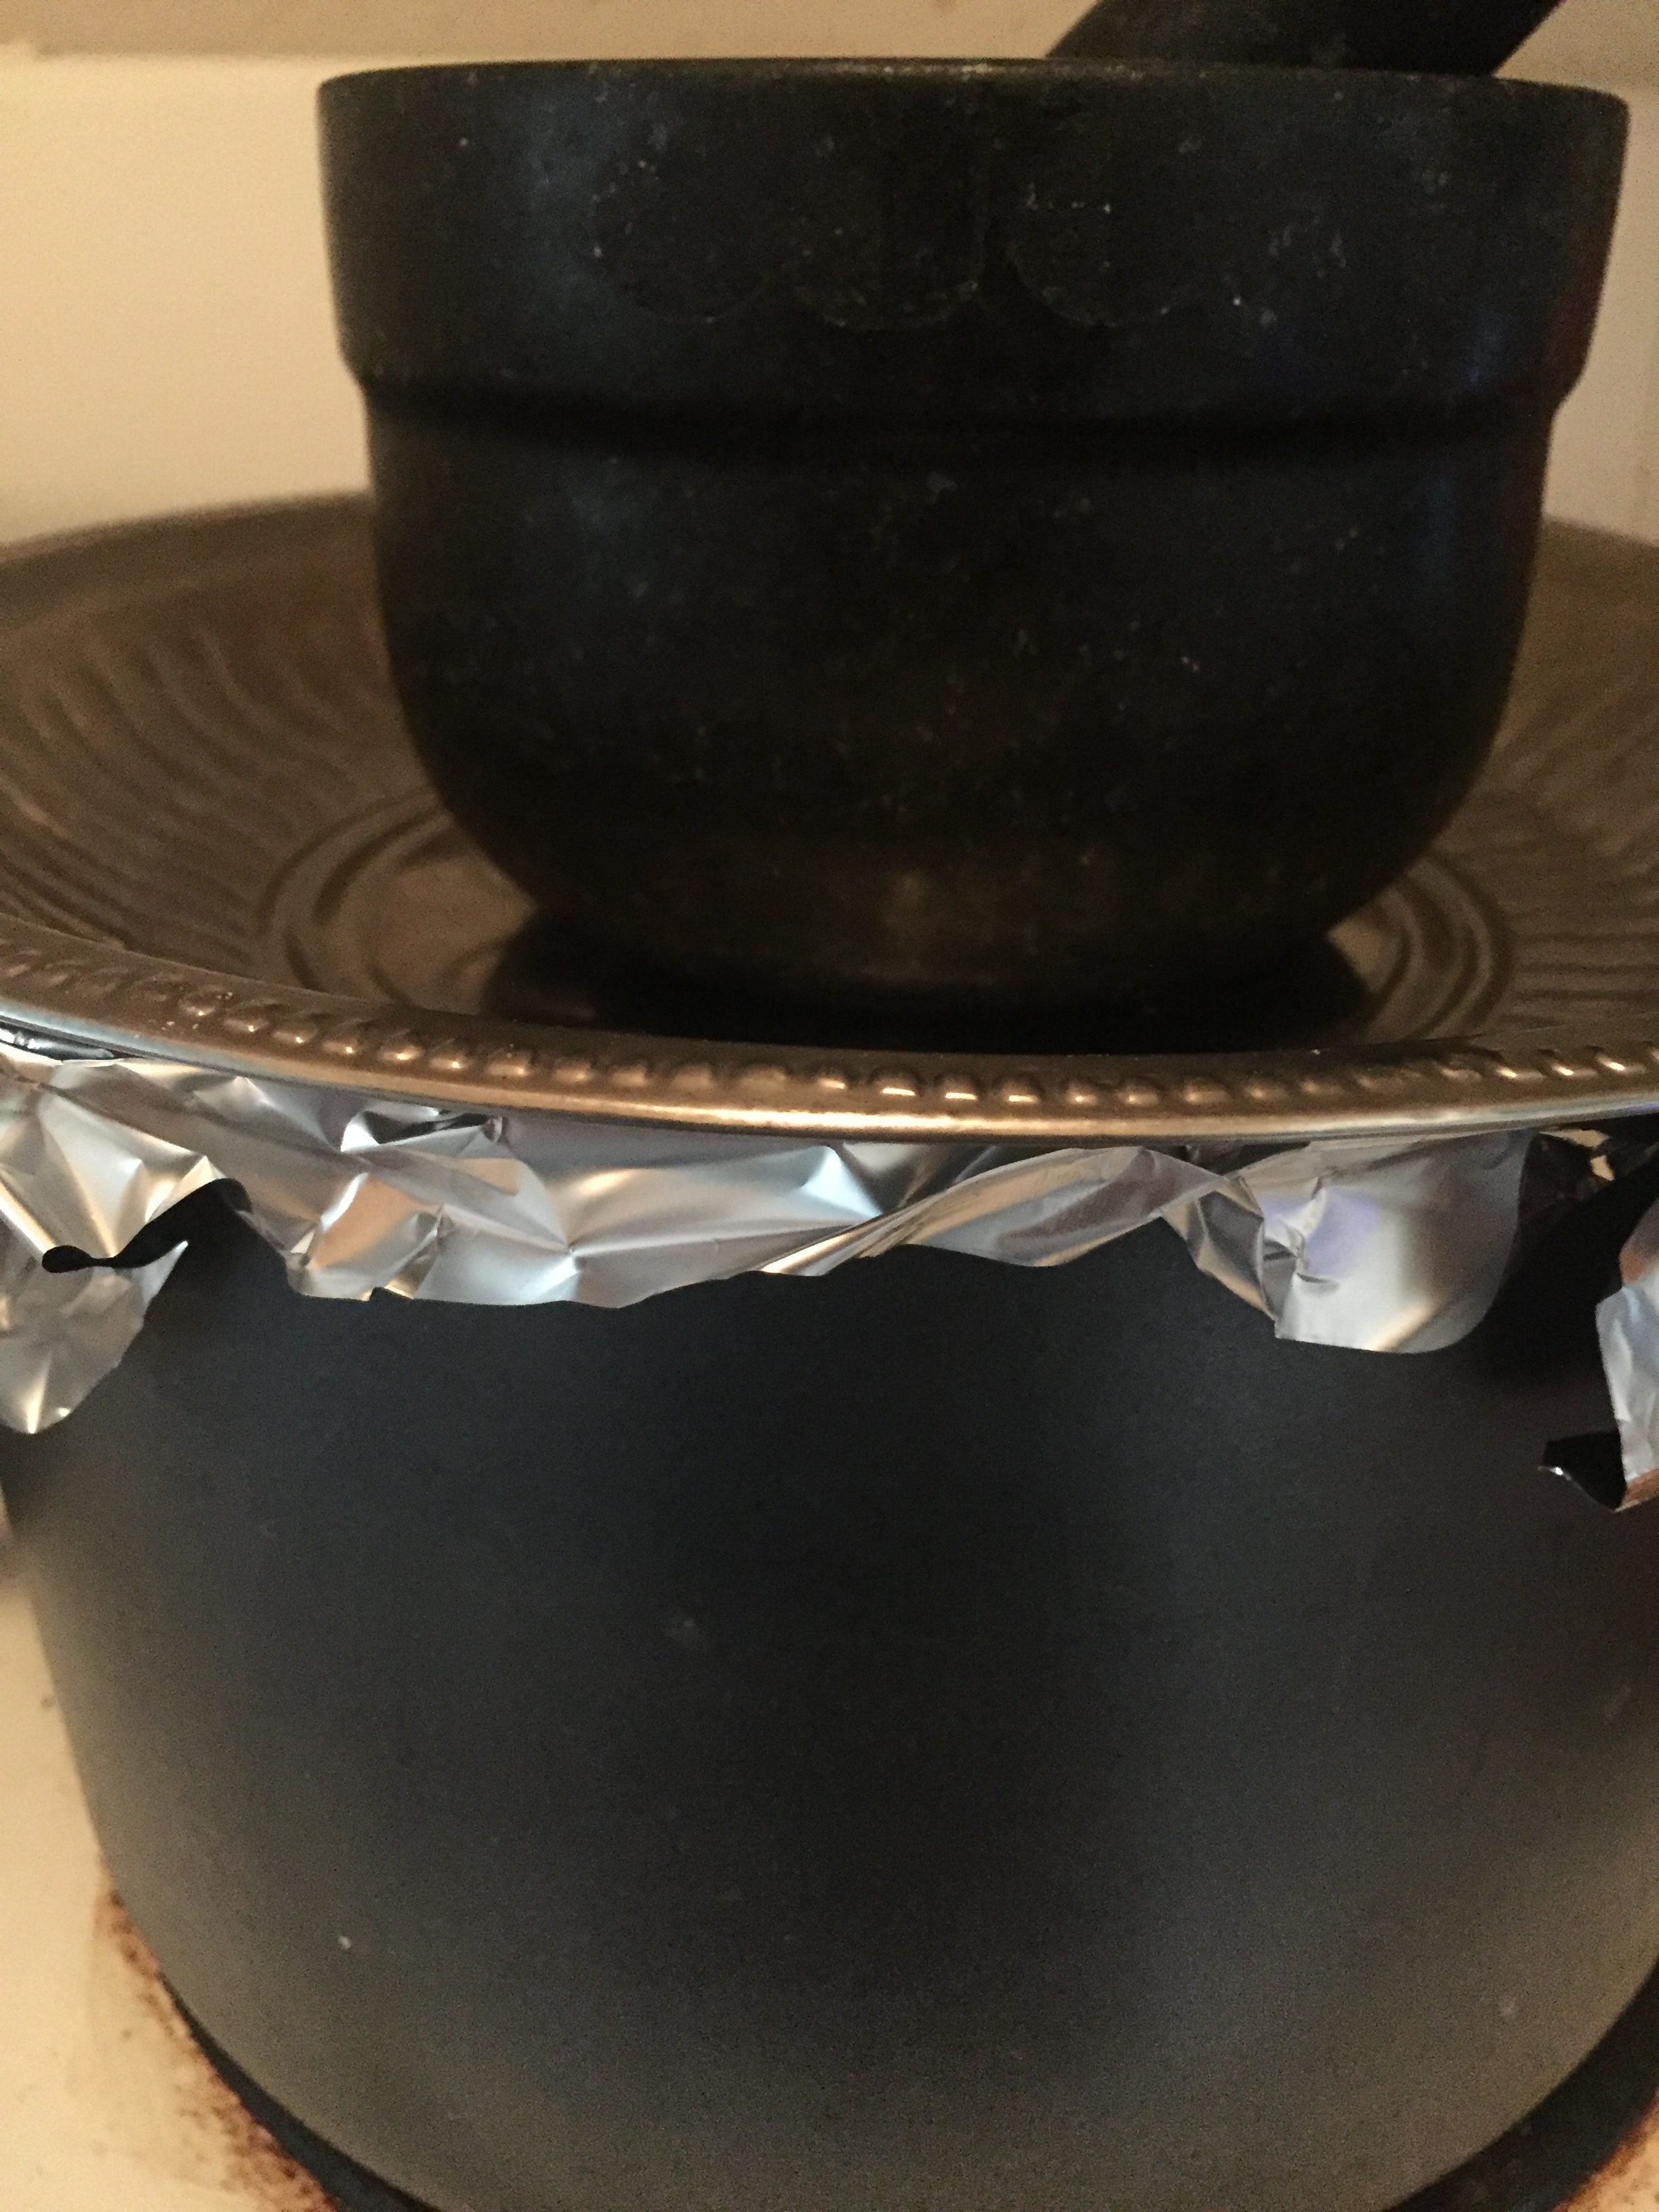
  8. Now add water from lamb and then normal water( Quantity of water to be added is for one cup of rice , it is 1.5 cups of water). Mix well and close the lid tight and keep it in medium heat for 10 minutes and keep it in low for 15 minutes.

  9. I always close my biryani pan with foil to make it sealed, then a plate and then something heavy (like mortar and pestle).

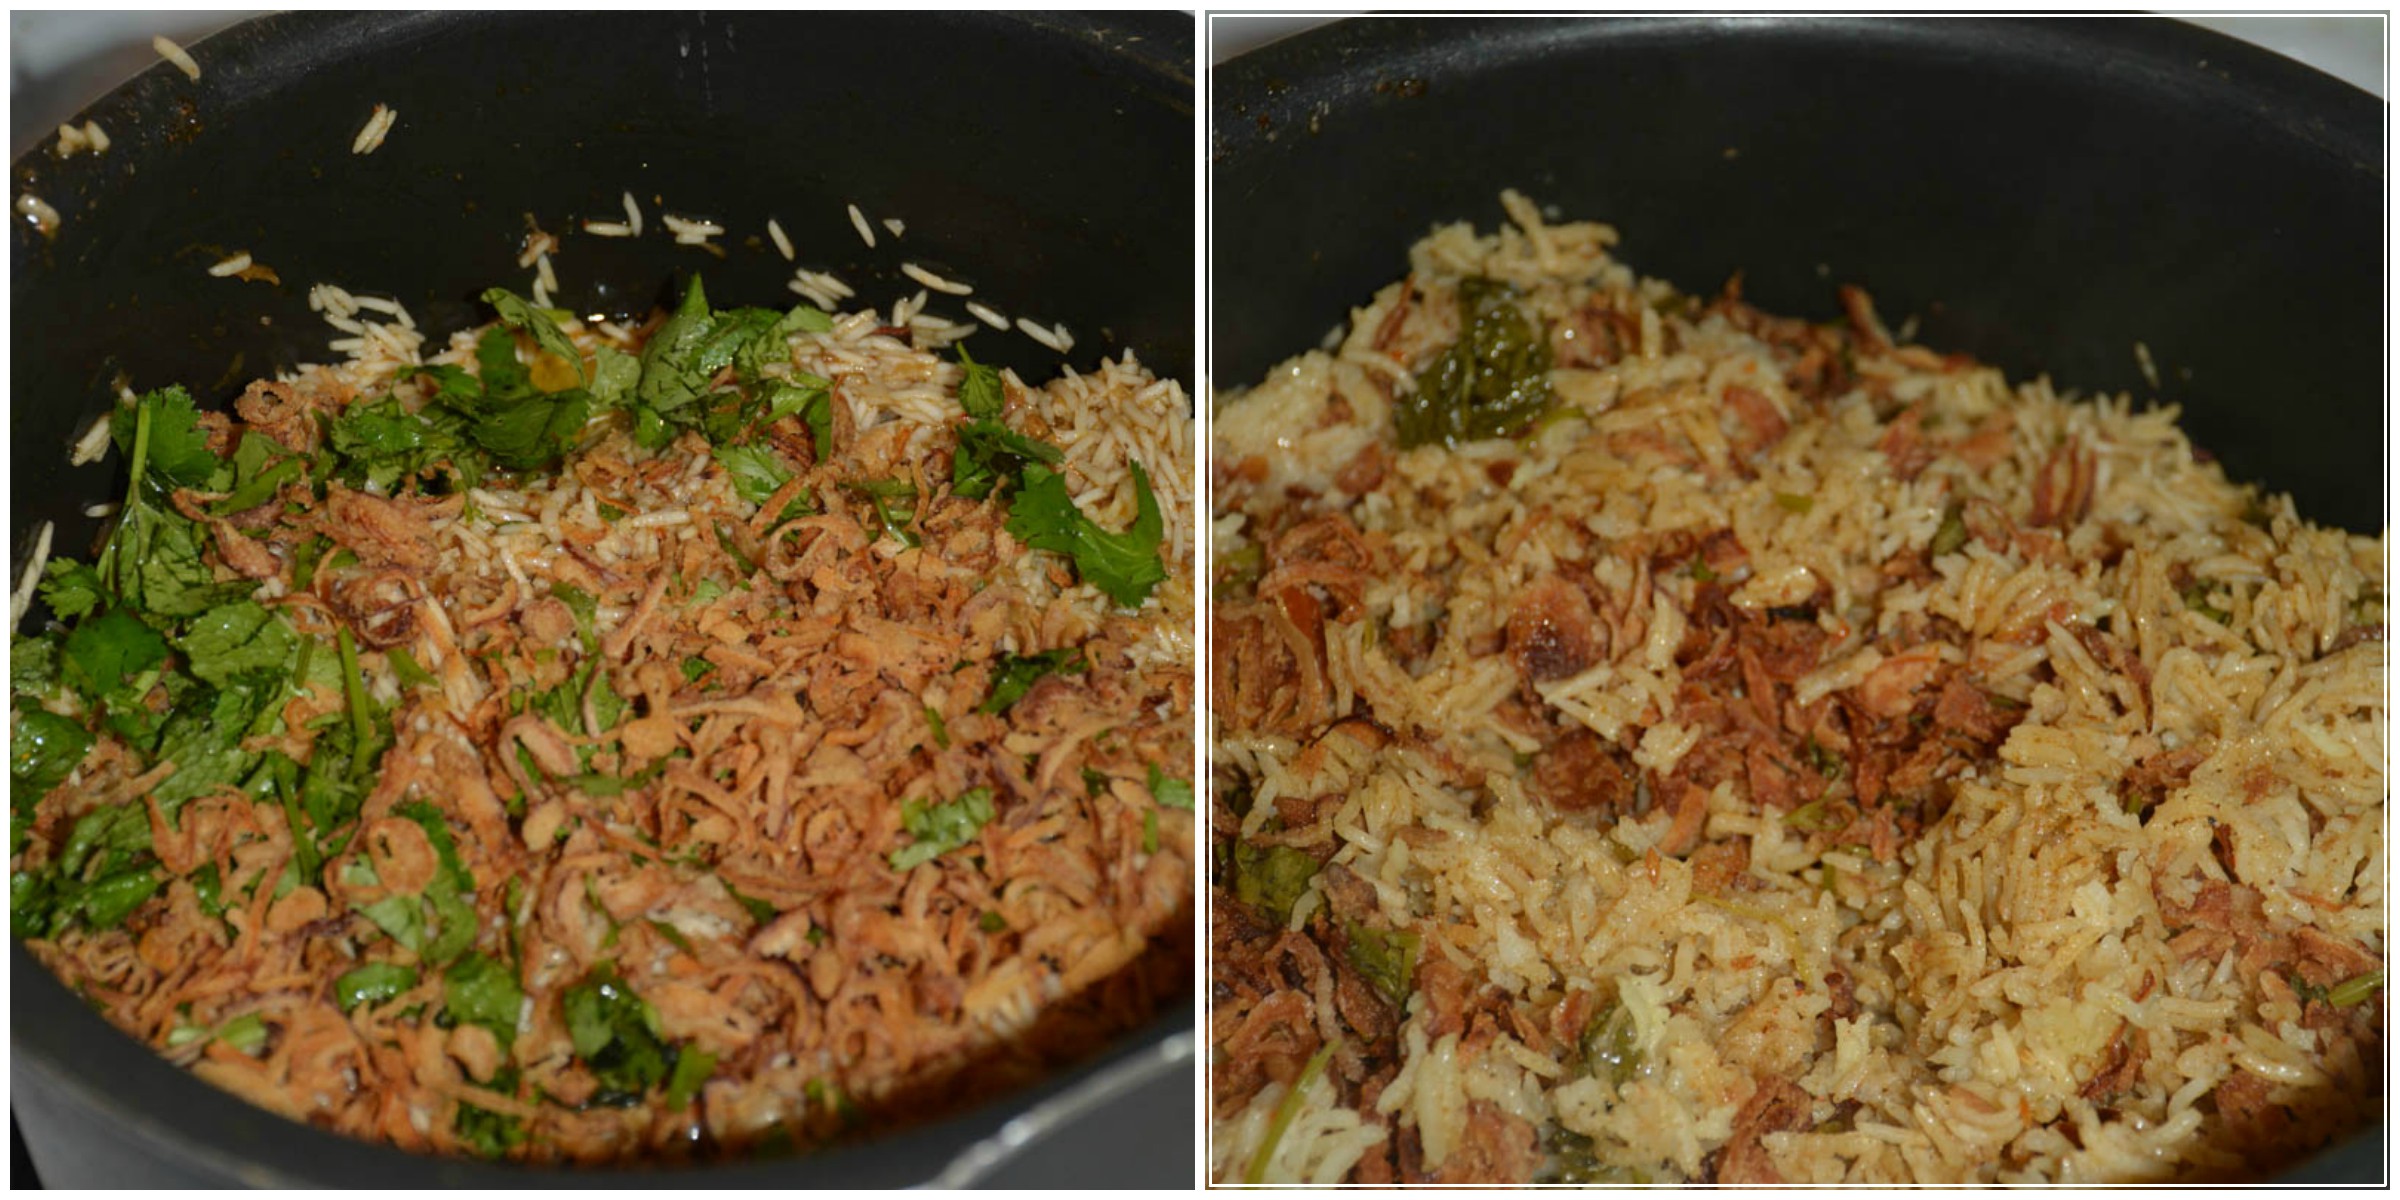
  10. Now add the marinated fried onions, chopped coriander, lemon juice for garnish and Drizzle the saffron milk over the rice. and Switch off, and keep it closed for another 5 minutes. They will help the rice to get the saffron flavors and vice versa.
Notes
1. You can skip biryani masala if you don’t have and add just garam masala (1 tsp and red chilli powder – 3 tsp instead of 1 tsp)
3. If it is spicy in the end, squeeze some lemon, it will reduce the heat and enhance the flavors also.
2. Adjust your salt level as per your taste.
Wordpress Recipe Plugin by EasyRecipe
3.5.3226


Filed Under: RICE/BIRYANI VARIETIES Tagged With: Basmati rice recipe, biryani masala recipe, Biryani recipe, biryani restaurant style recipes, Homestyle Weekend Speciality Lamb Biryani, hotel biryani recipes. Mutton biryani recipes, how to make biryani, how to make rice, hyderabadi mutton biryani recipes, hyderbadi biryani recipes, hyderbadi recipes, Indian, Indian food, indian lamb briyani recipe, jasmine rice, lamb biryani recipe, lamb recipes, mutton biryani recipe, non-veg biryani recipes, one pot meal, restaurant style biryani recipes, restaurant style lamb biryani recipe, restaurant style lamb recipe, rice varieties

Hyderabadi Lamb Biryani

December 10, 2015 by Suki 2 Comments

HyderabadiLambBiryani-12

HyderabadiLambBiryani-12A classic Indian dish prepared using spiced Marinated lamb, layered by basmati rice, fried onions, mint & cilantro leaves.

Biryani is one of the most popular dishes in India. There are varieties of biryani like Hyderabadi biryani, Mughal biryani, chettinadu biryani, Kashmiri biryani. It is a perfect Sunday lunch idea.  There will be no one saying  NO to biryanis, let it be vegetable biryani, chicken biryani, shrimp biryani, palak biryani, chickpea briyani, potato biryani, paneer biryani, duma loo biryani, cashew biryani, lamb biryani, egg biryani, mushroom biryani and so on! I have a biryani collection and it is one of the highest viewed pages. I have two lamb Biryani recipes – Ambur Lamb Biryani & Restaurant Style Lamb Biryani.


HyderabadiLambBiryani-19

Biryani is not strenuous at all to prepare like many of them believe. It’s just time-consuming and it need that little extra special care when we do it. Try to use all the ingredients listed, each ingredient has a special role in the biryani and compliments one with another. It is worth to do all this for the final taste 😉 Rich and delicious biryani made with lamb. It is surely a festive dish and this is perfect to cook when you have guests over or make it for dinner parties.

Other Favorite Lamb Recipes: Spicy Honey Rack Of Lamb, Lamb & spinach Curry,  dry Goat curry, Insanely Delicious Lamb & Chicken recipes.

Sides for Lamb Biryani: Garlic Tomato raita or any raitas, Mutton sukka, Mirchi Ka salan, chicken 65.

HyderabadiLambBiryani-13

Print
Hyderabadi Lamb Biryani
Author: Suganya Hariharan
Recipe type: Main
Cuisine: Indian
Prep time:  2 hours
Cook time:  1 hour 30 mins
Total time:  3 hours 30 mins
Serves: 6 servings
 
Ingredients
  • • Lamb – 1 lb

    Grind:
  • • Bay leaf – ½
  • • Cinnamon – 1 thin piece
  • • Lime juice - 1 tbsp
  • • Cloves – 3
  • • Cardamom pods -2
  • • Khus khus (white poppy seeds) – ½ tbsp.
  • • Cumin seeds/ jeera – ½ tbsp.
  • • Green chillies - 2
  • • Fennel seeds – ½ tbsp.
  • • Garlic – 4 pods
  • • Ginger – 1 inch
  • • Mint – ½ cup, chopped finely
  • • Coriander leaves – ½ cup, chopped finely.
  • • Pepper powder – 1 tsp
  • • Salt – 1 tbsp
  • • Biryani masala – 1 tbsp
  • • Red chilli powder – 1 tsp
  • • Yogurt – 2 tbsp
  • • Oil – 1 tbsp

    For garnish:
  • • Ghee – 2 tbsp
  • • Lime - small cube or 1 tsp
  • • Mint – 2 tbsp finely chopped
  • • Coriander leaves – 1 tbsp, chopped finely

    For mutton gravy:
  • • Oil – 1tbsp
  • • Bay leaf – ½
  • • Cinnamon – 1 thin piece
  • • Cloves – 3
  • • Cardamom pods -2
  • • Green chilli – 1, slit
  • • Onion – 1, medium, sliced
  • • Tomato - 1, small, chopped
  • • Turmeric powder – ½ tsp

    For rice:
  • • Basmati rice – 3 cups
  • • Salt – 2 tbsp
  • • Cumin Seeds/ Jeera – 1 tbsp

    For fried onions:
  • • Onions – 2 small onions, ½ cup, sliced thinly
  • • Oil – to fry (3 tbsp)
Instructions
  1. For Fried onions:
  2. Heat a pan with oil, add the sliced onions and cook in medium heat till turn golden brown. Stir in the middle so that it does not stick to the bottom. Set aside.


    For Marinating:
  3. Grind everything under “to grind” to a smooth paste.
  4. Wash lamb, add ½ of the fried onions to it, salt and blended paste. Mix everything together.
  5. Marinate it overnight or at least for 2 hours.

    For lamb masala:
  6. Add oil in medium heat, add the bayleaf, cinnamon, cloves, cardamom pods, sliced onions,the green chillies, and sautĂŠ till the onions are golden brown.

  7. Then add the tomatoes with ½ tsp of turmeric powder and sautÊ them well till they are cooked and not mushy.
  8. Add the marinated lamb and sautĂŠ for a minute.

  9. Then add water till it the lamb is correctly covered, not more or less. Cook for 1 hour and cook it covered in medium low heat or put it in a pressure cooker for 6 whistles. Water will not be evaporated totally which is good.

    For rice:
  10. Meanwhile Wash the rice and soak in water for twenty minutes.
  11. Take another big pan, add thrice the cup of rice you use, and boil it. When it is boiling high, add the rice, salt and jeera and mix well. After 5 minutes exact or when the rice is 50% done. Switch off and drain the rice.


    Layering:
  12. Now, the layering starts. Add the lamb with gravy to a big heavy bottom pan, pat and level it. Add the drained hot rice on the top of it. Mix everything together ( mix it with the gravy, not just layer it) well if you have lot of gravy. Garnish with fried onions, ghee, mint and coriander leaves.

  13. Cover the pan with a tight lid, keep it in medium flame for 10 minutes and then keep it in low flame. Keep an open pan (like a dosa or crepe pan, place the biryani pan on top of it and cook it for 40 minutes)
  14. Squeeze some lemon and switch off. Mix and serve hot!
Notes
1. You can skip biryani masala if you don’t have and add just garam masala (1 tsp and red chilli powder – 3 tsp instead of 1 tsp)
3. If it is spicy in the end, squeeze some lemon, it will reduce the heat and enhance the flavors also.
2. Adjust your salt level as per your taste.
Wordpress Recipe Plugin by EasyRecipe
3.5.3208

 HyderabadiLambBiryani-17

Filed Under: LAMB, NON-VEG RECIPES, RICE/BIRYANI VARIETIES Tagged With: Basmati rice recipe, biryani masala recipe, Biryani recipe, biryani restaurant style recipes, hotel biryani recipes. Mutton biryani recipes, how to make biryani, how to make rice, hyderabadi mutton biryani recipes, hyderbadi biryani recipes, hyderbadi recipes, Indian, Indian food, jasmine rice, lamb recipes, non-veg biryani recipes, one pot meal, restaurant style biryani recipes, restaurant style lamb biryani recipe

Malai Methi Paneer

May 31, 2015 by Suki 15 Comments

MatarPaneer-4

Malaimethipaneer1
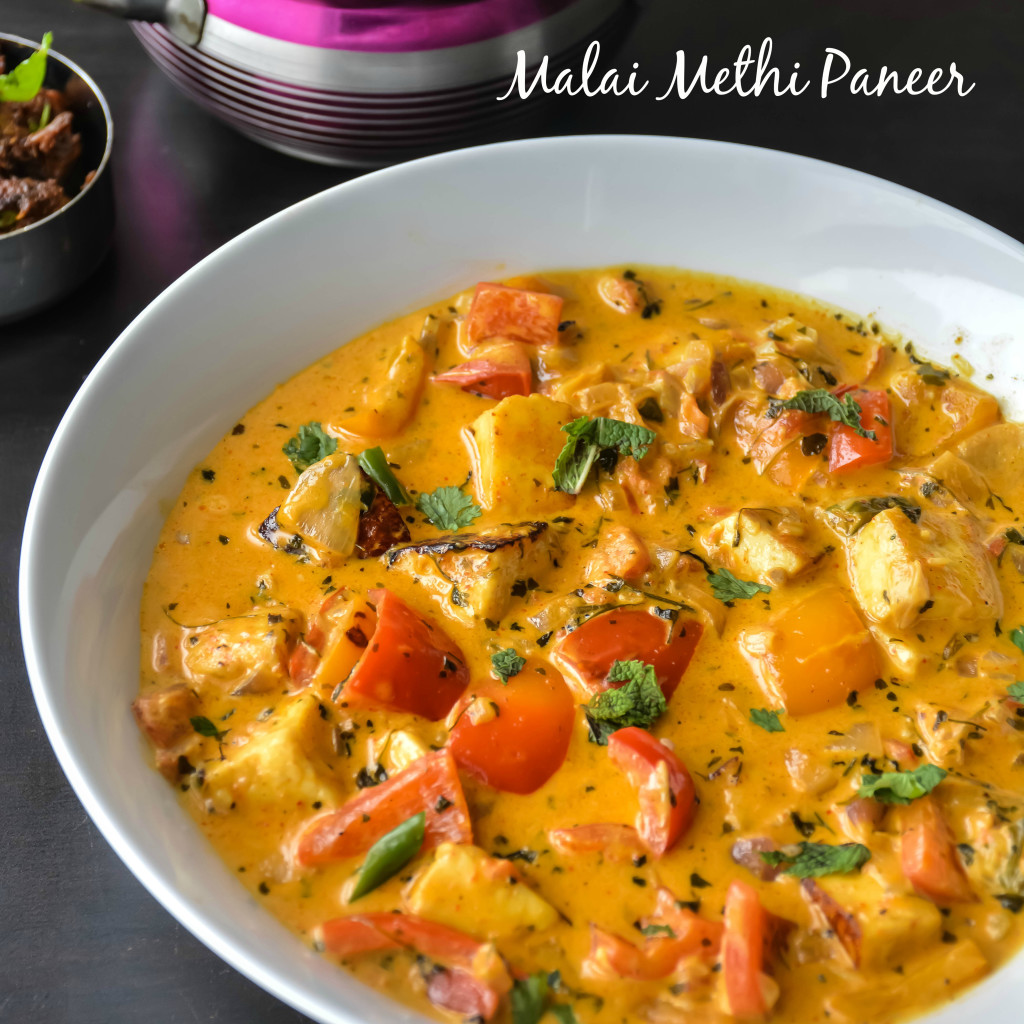
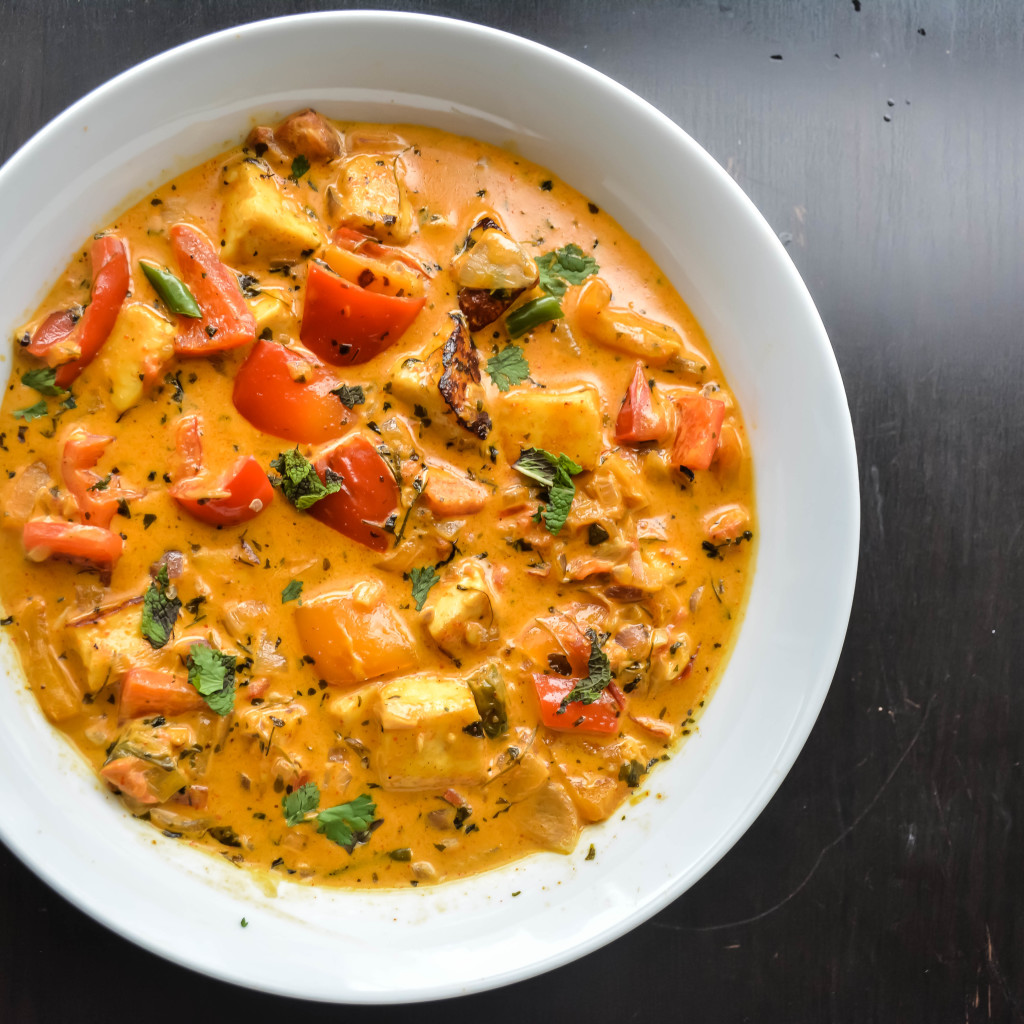
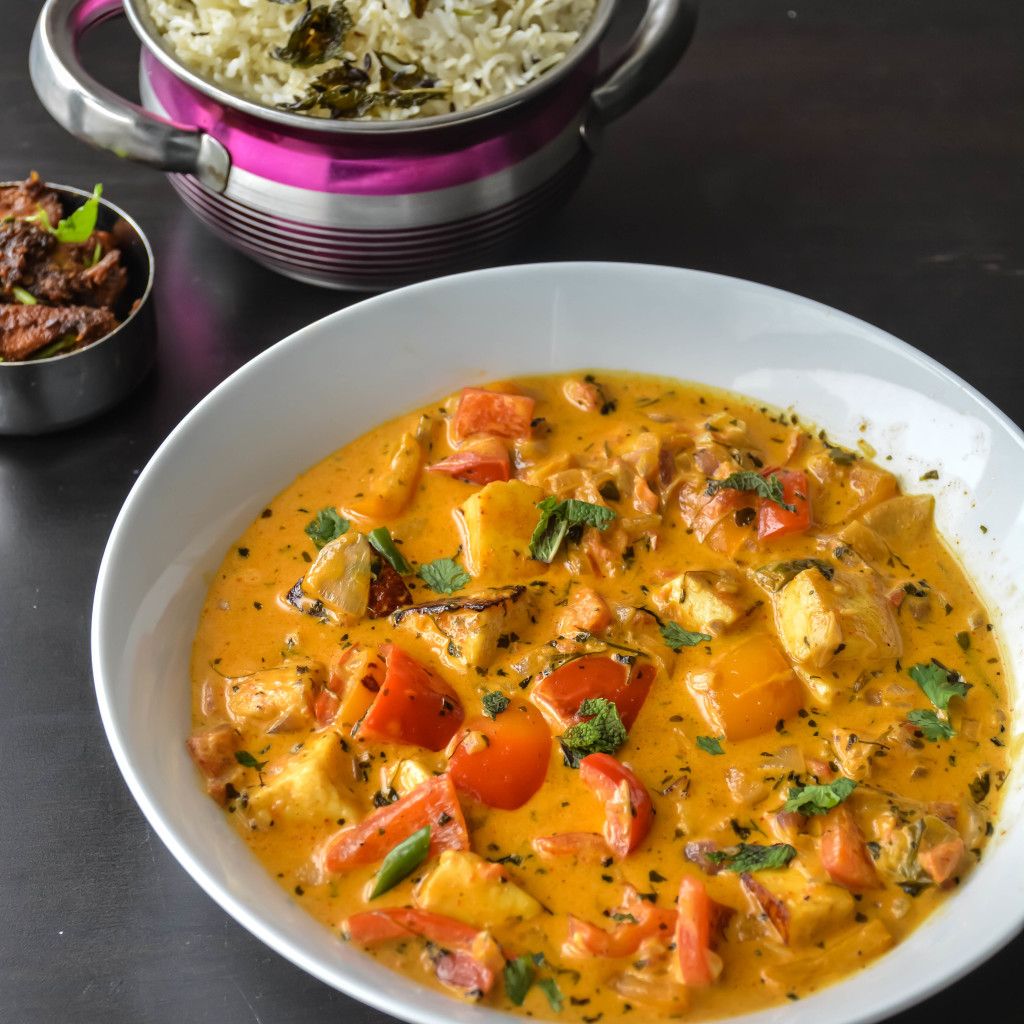
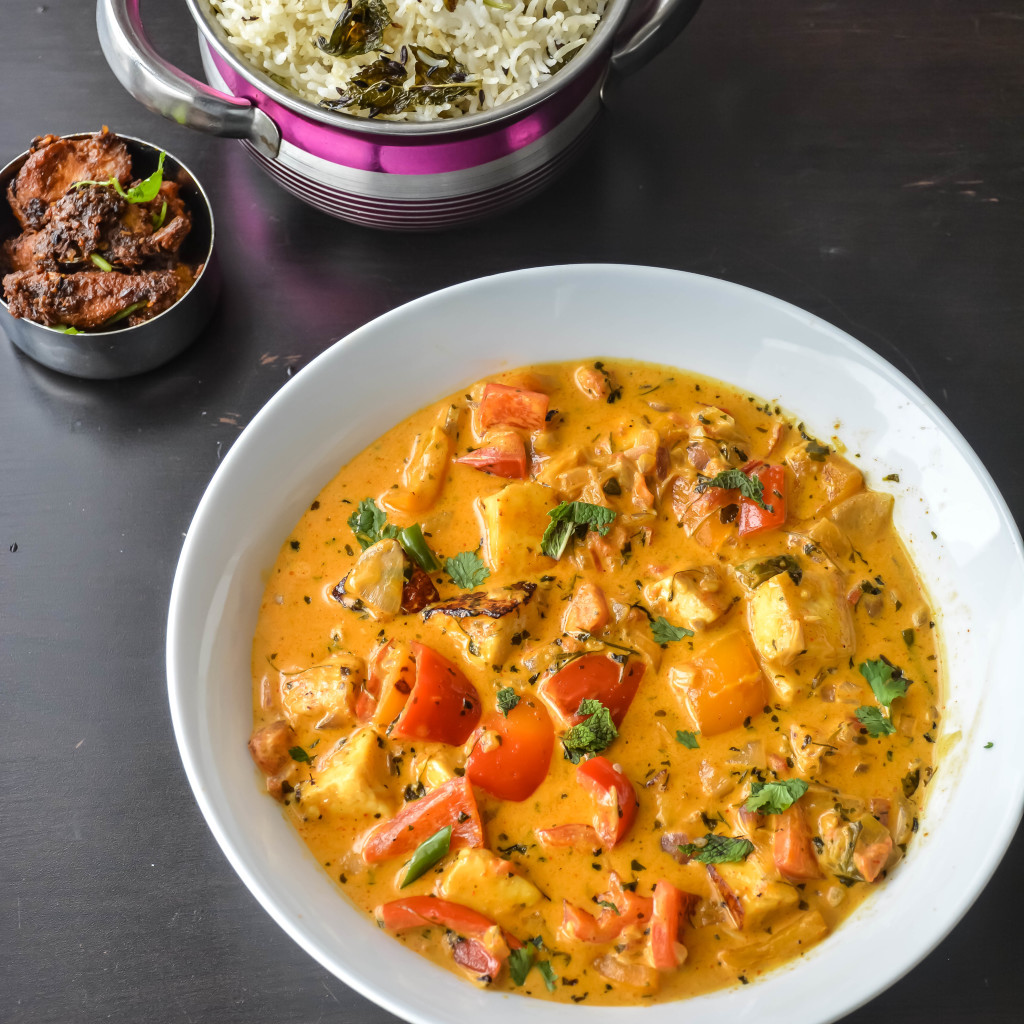
This dish is made of beautiful capsicums, methi leaves and of course paneer. For people who is not aware of paneer, it is fresh common cheese of India. Indian version of tofu . It’s very tasty. You get in many shops these days. It can be made at home as well. But it’s time consuming and also i think its same cost if we make it at home or buy at a shop.


MatarPaneer-5


Paneer 🙂 I don’t know who found this. But I love him/her for that. It is  one of my personal favourite. As I am a vegetarian (yes, i am 😉  ) whenever I wanted to eat something special in Indian food, first thing that comes to my mind is Paneer. I have really great Friends and we used to celebrate the birthday mornings by making something special for the birthday person when we all stayed together. OMG! That used to be real fun. Miss you girls !!!! They are all non vegetarians . So when they wanted to make something on my birthday, first thing that would knock their mind is Paneer 🙂 and I will be super happy !

This dish is a rich dish with Onion, tomato and colourful bell peppers. I wanted to make it more colourful. So I used these colours. You can very well use the normal ones 🙂


MatarPaneer-4

5.0 from 2 reviews
Print
MALAI METHI PANEER
Author: Suganya Hariharan
Recipe type: Dinner
Cuisine: Indian
Prep time:  10 mins
Cook time:  45 mins
Total time:  55 mins
Serves: 4
 
Ingredients
  • In the first pan:
    Oil - 1 tbsp
  • Cumin/Jeera - ½ tbsp
  • Onions - 2 ( minced them very small)
  • Chillies - 2 (cut them small)
  • Tomatoes - 2 (chop them very small)
  • ginger garlic paste - ½ tbsp
  • Turmeric powder - 1 tsp
  • Garam masala - 1 tsp
  • Cumin powder -1 tbsp
  • chilli powder - 1tbsp
  • salt - 1½ tbsp (or as per your taste/ or add it after the gravy is ready also)
  • coriander powder - ½tbsp
    Second pan:
  • Butter - 2 small cubes or 2tbsp
  • Green Bell pepper - 1
  • Red Bell Pepper - 1
  • Paneer cubes - 15 cubes
  • Dry Methi leaves (kasoori methi) - 3 tbsp
  • cooking cream - 1 cup
  • Coriander - to garnish
Instructions
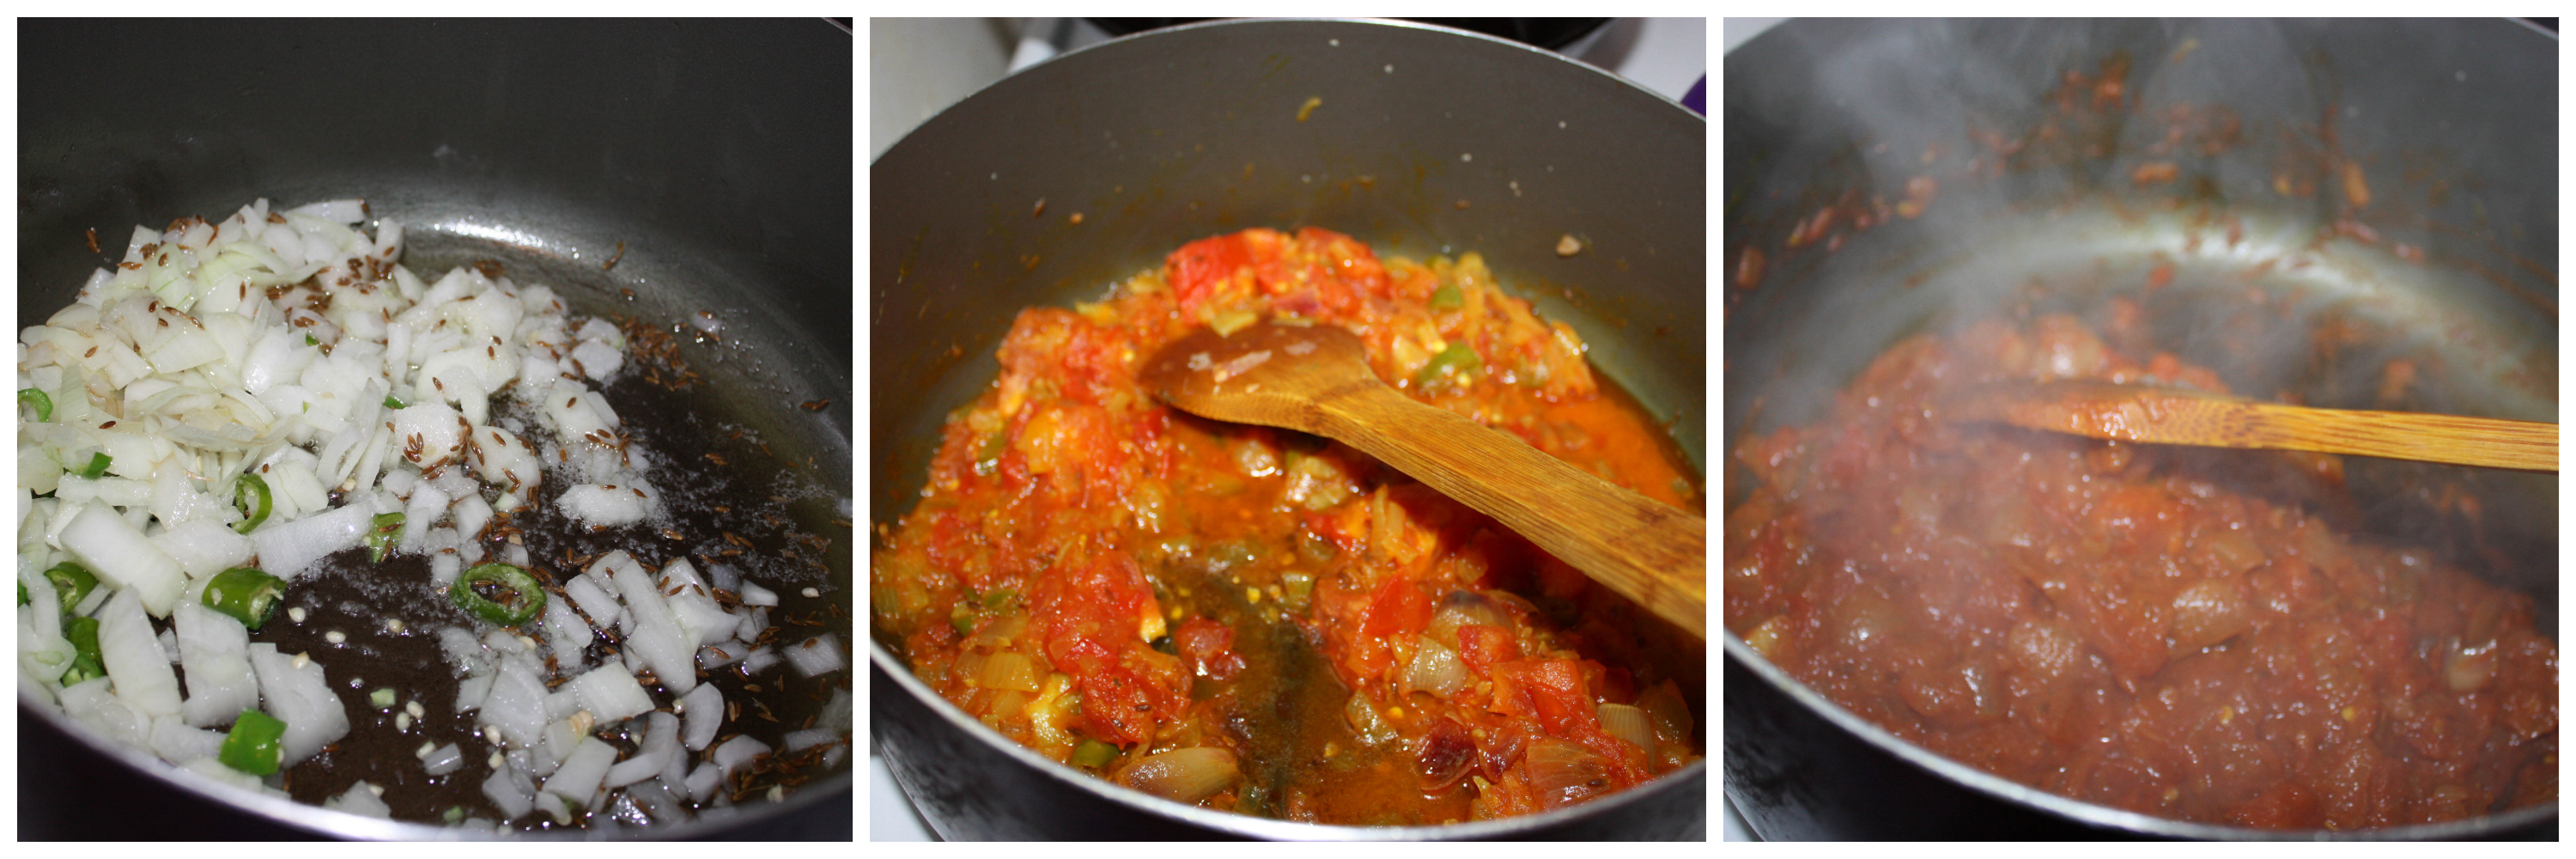
  1. Heat a pan in medium flame ,add some oil, cumin, onions, chillies and salt. Saute them till they are translucent.
  2. Add the ginger garlic paste, tomatoes and turmeric powder. Saute them for about 2-3 minutes in medium flame and then add the garam masala, cumin powder,coriander powder and ½ cup of water. saute them in medium flame till they ooze some oil out. You will surely oil oozing out from corners. switch it off when it happens so. usually it takes 5-6mins.
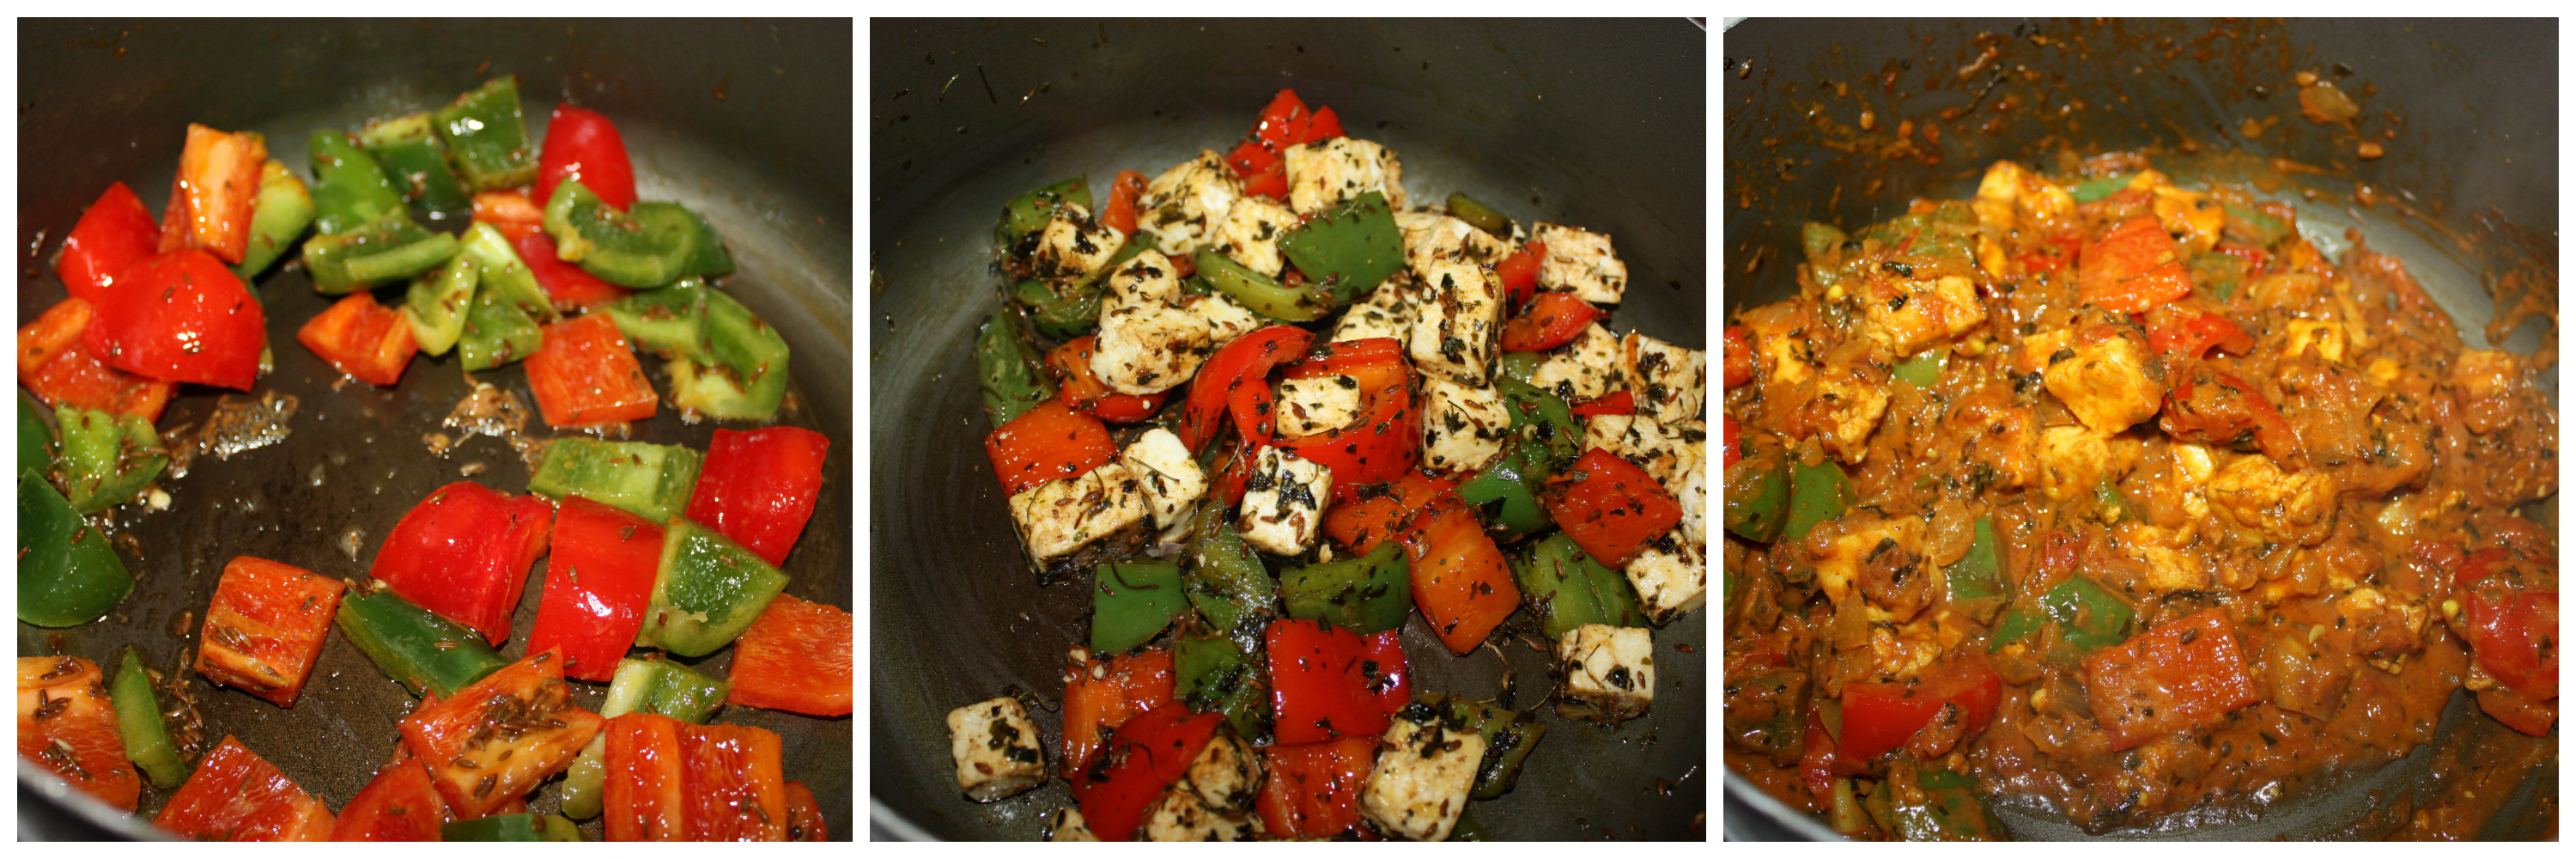
  3. Meanwhile, heat another pan in medium flame, add some butter, add the capsicums and paneer together. Crush the methi leaves and top it on this.Mix them carefully without breaking the paneer. Fry for three - five minutes.
  4. Add the onion tomato paste that we prepared before to this pan, add ½ cup of water. Make it boil for five minutes.
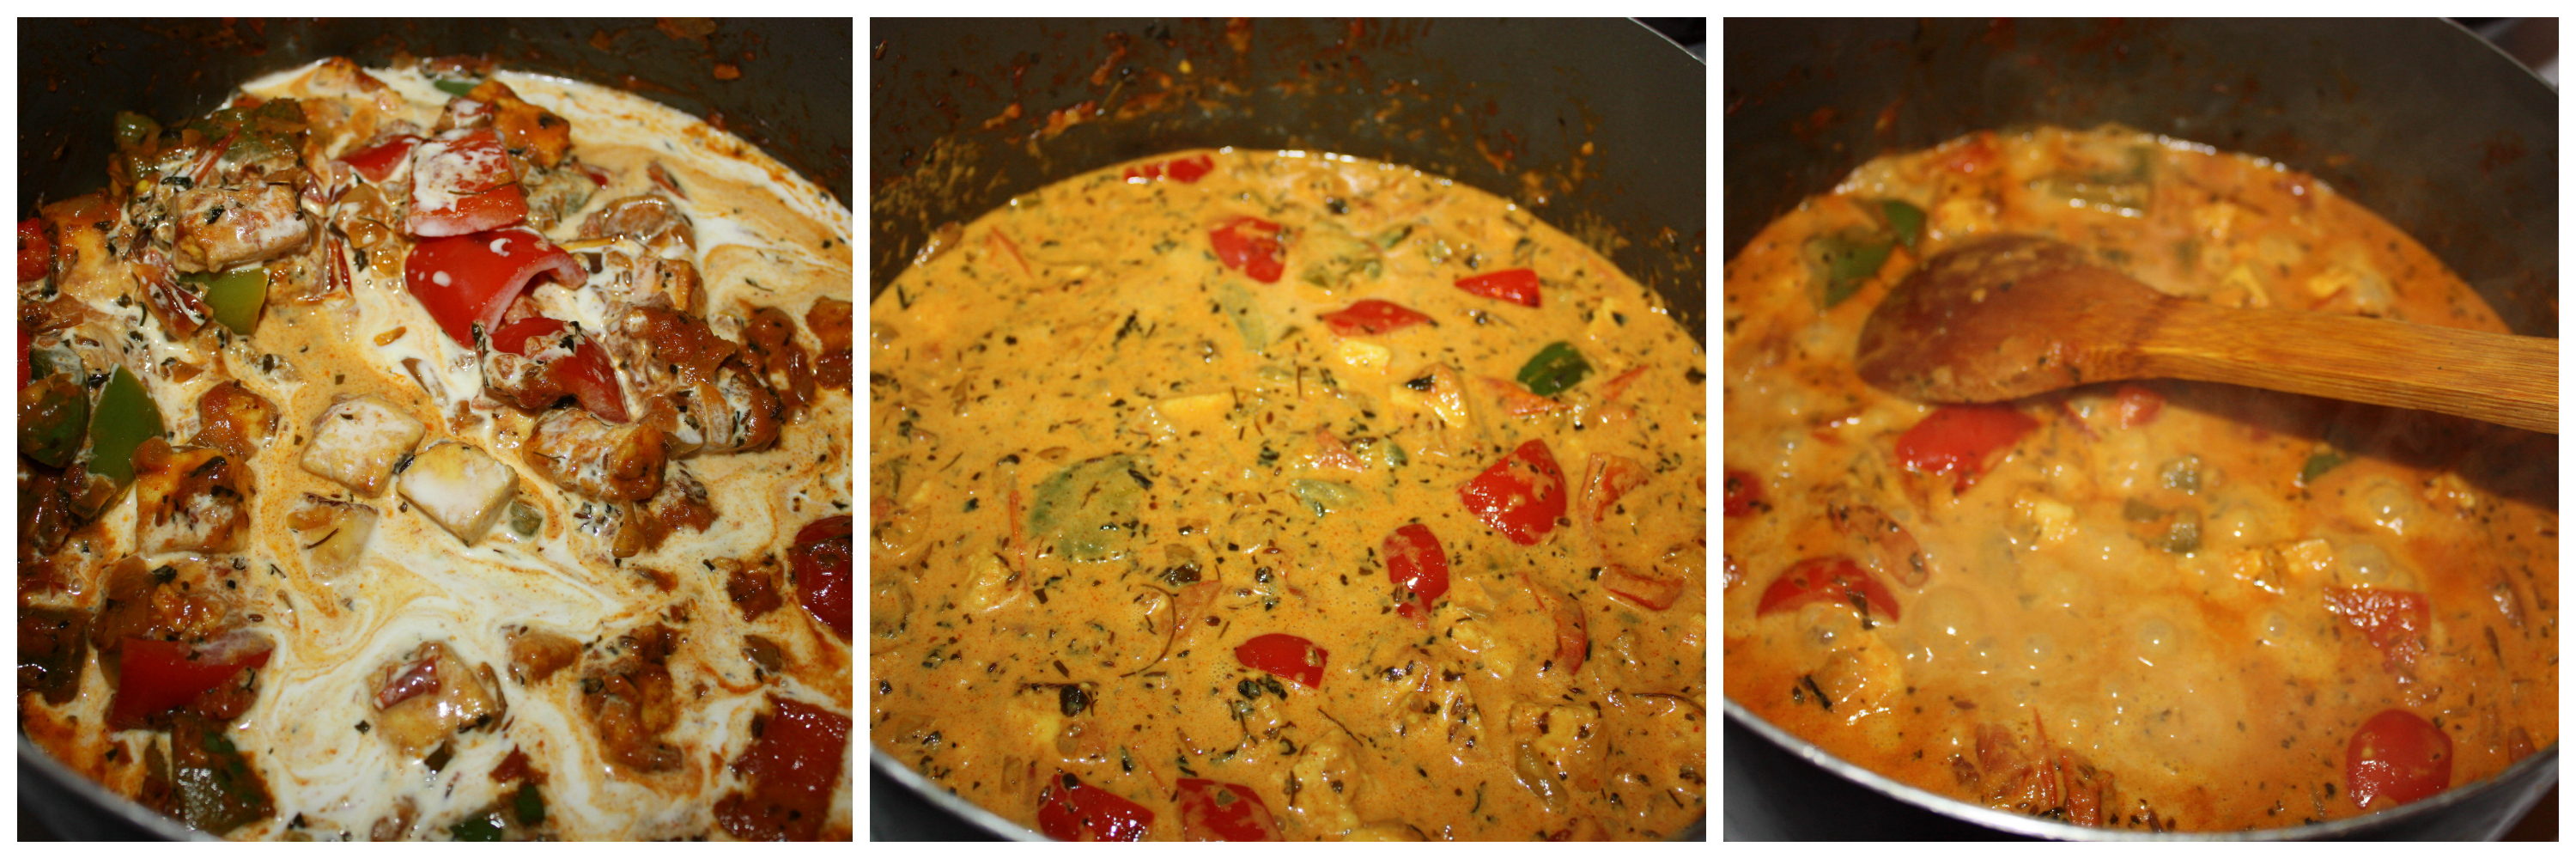
  5. Pour the cooking cream and mix gently. Let it boil. When you see oil oozing out on the top around 5-6 mintes later,switch off.
Notes
1. You don't have to fry paneer seperately for this recipe. When it gets sauted with bell peppers. The flavors of capsicum get into paneer nicely.
2. Cooking cream gives a rich flavor, so you should add it. DOn't skip it. You can use milk if you don't have cream
3. My salt level was perfect. But if you want more or less, you can adjust as per taste.
4. I wanted it to be colourful, so used green and red bell peppers. You can use any colours or just one.
5. I used dry methi leaves, i am not sure how it will taste with original ones.
Wordpress Recipe Plugin by EasyRecipe
3.2.2885

This will work with any bread / roti/ rice that you fancy 🙂

MatarPaneer-2

Filed Under: NORTH INDIAN GRAVIES/DAL/CURRY Tagged With: bell perpper, capsicum, cream, Indian, methi, milk, onion-tomato, PANEER, tasty

Restaurant Style Vegetable Biryani Recipe

January 26, 2015 by Suki 41 Comments

Vegbiryanititle

Vegbiryanititle

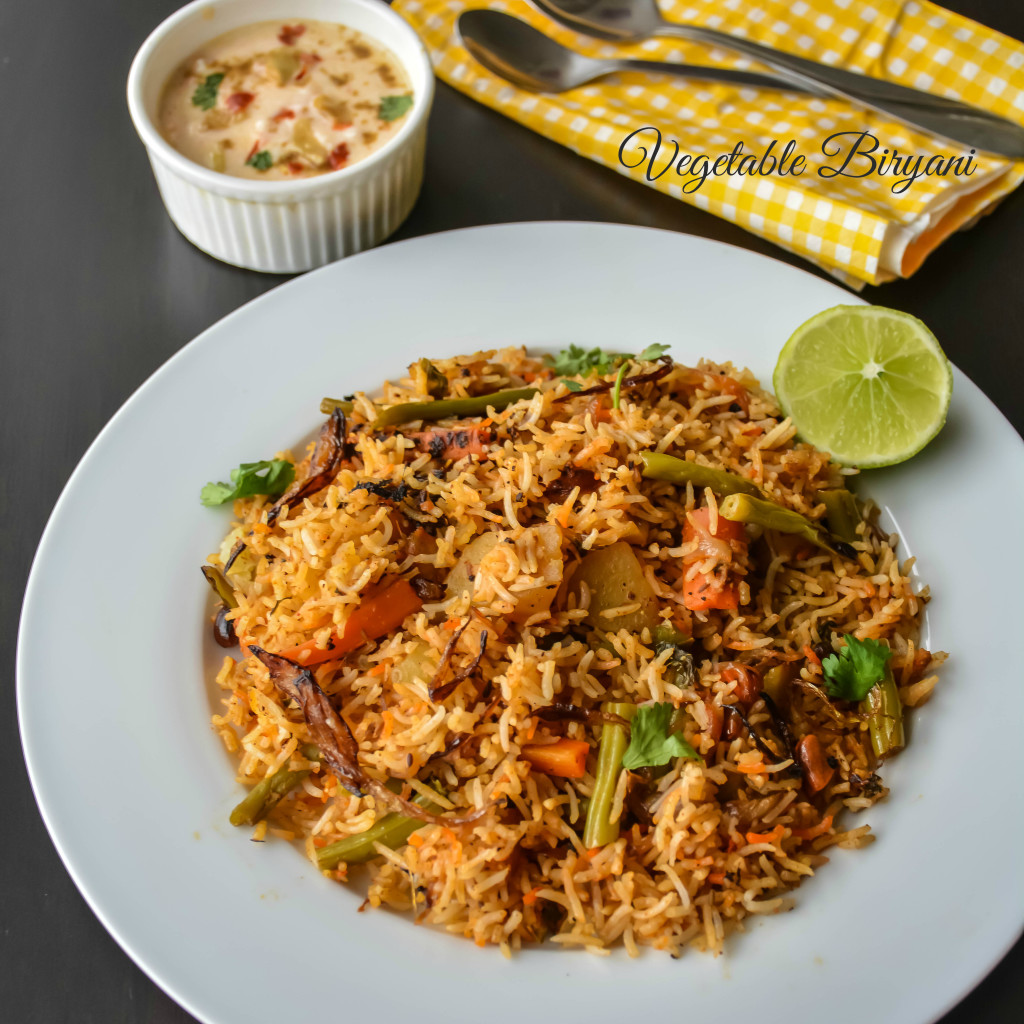
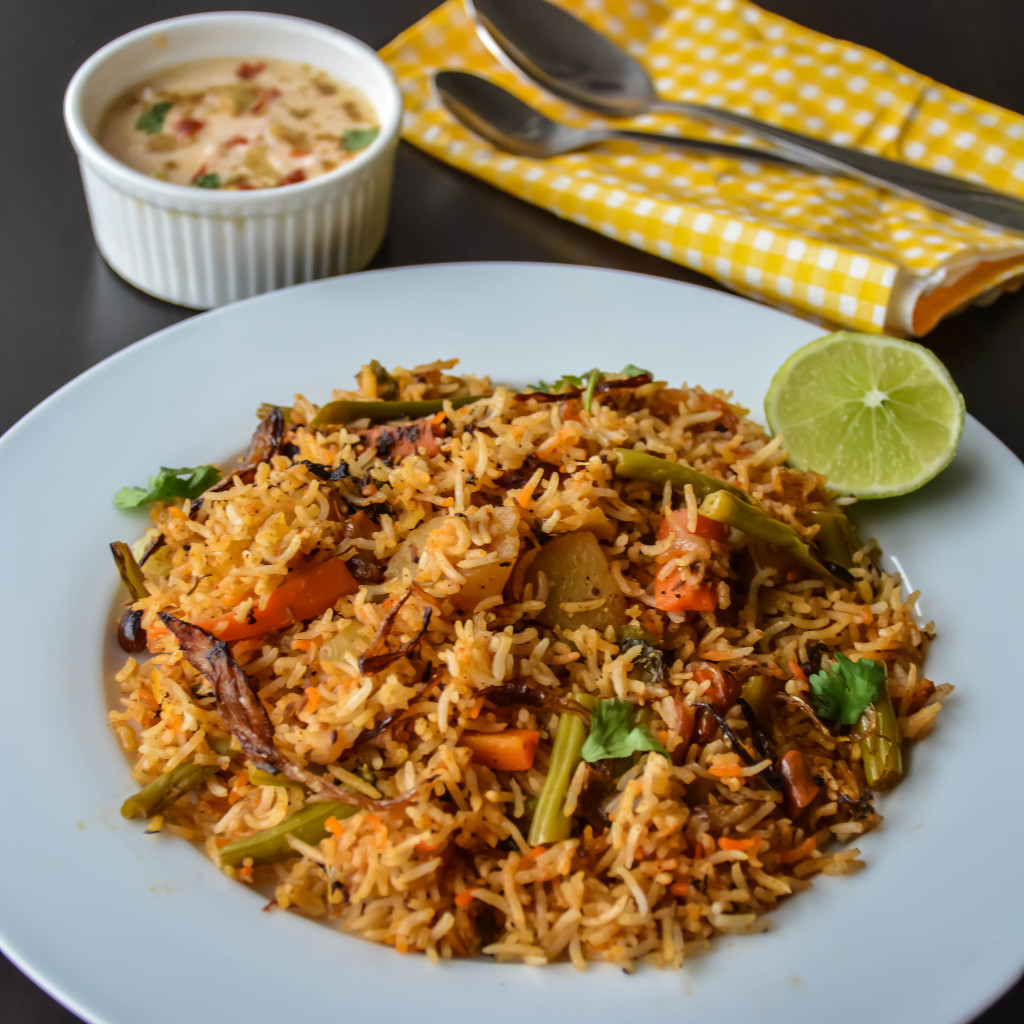
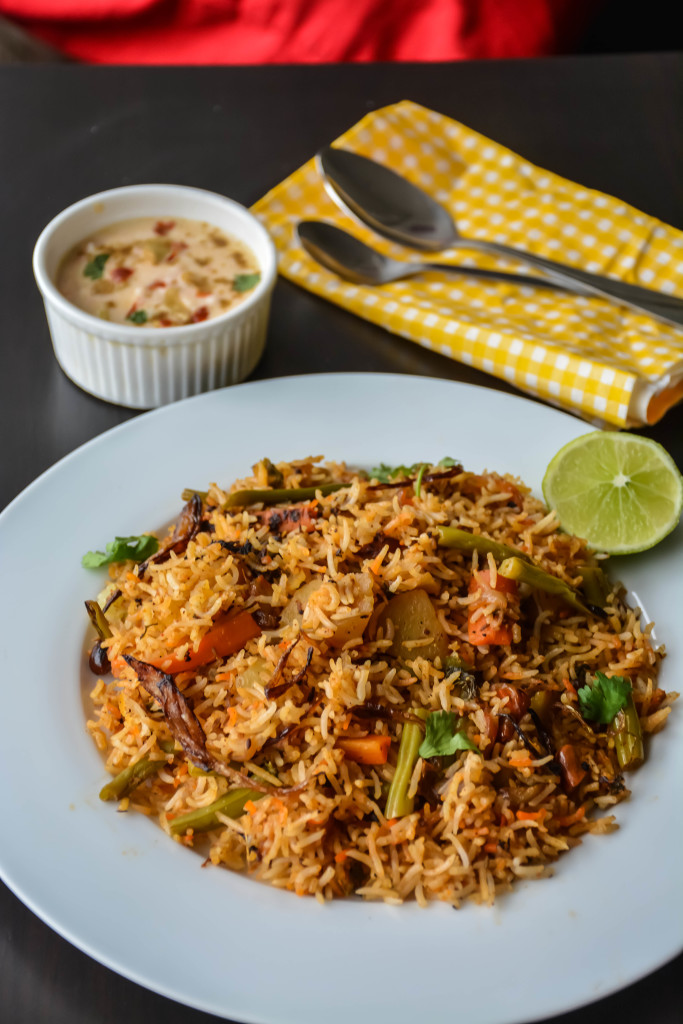
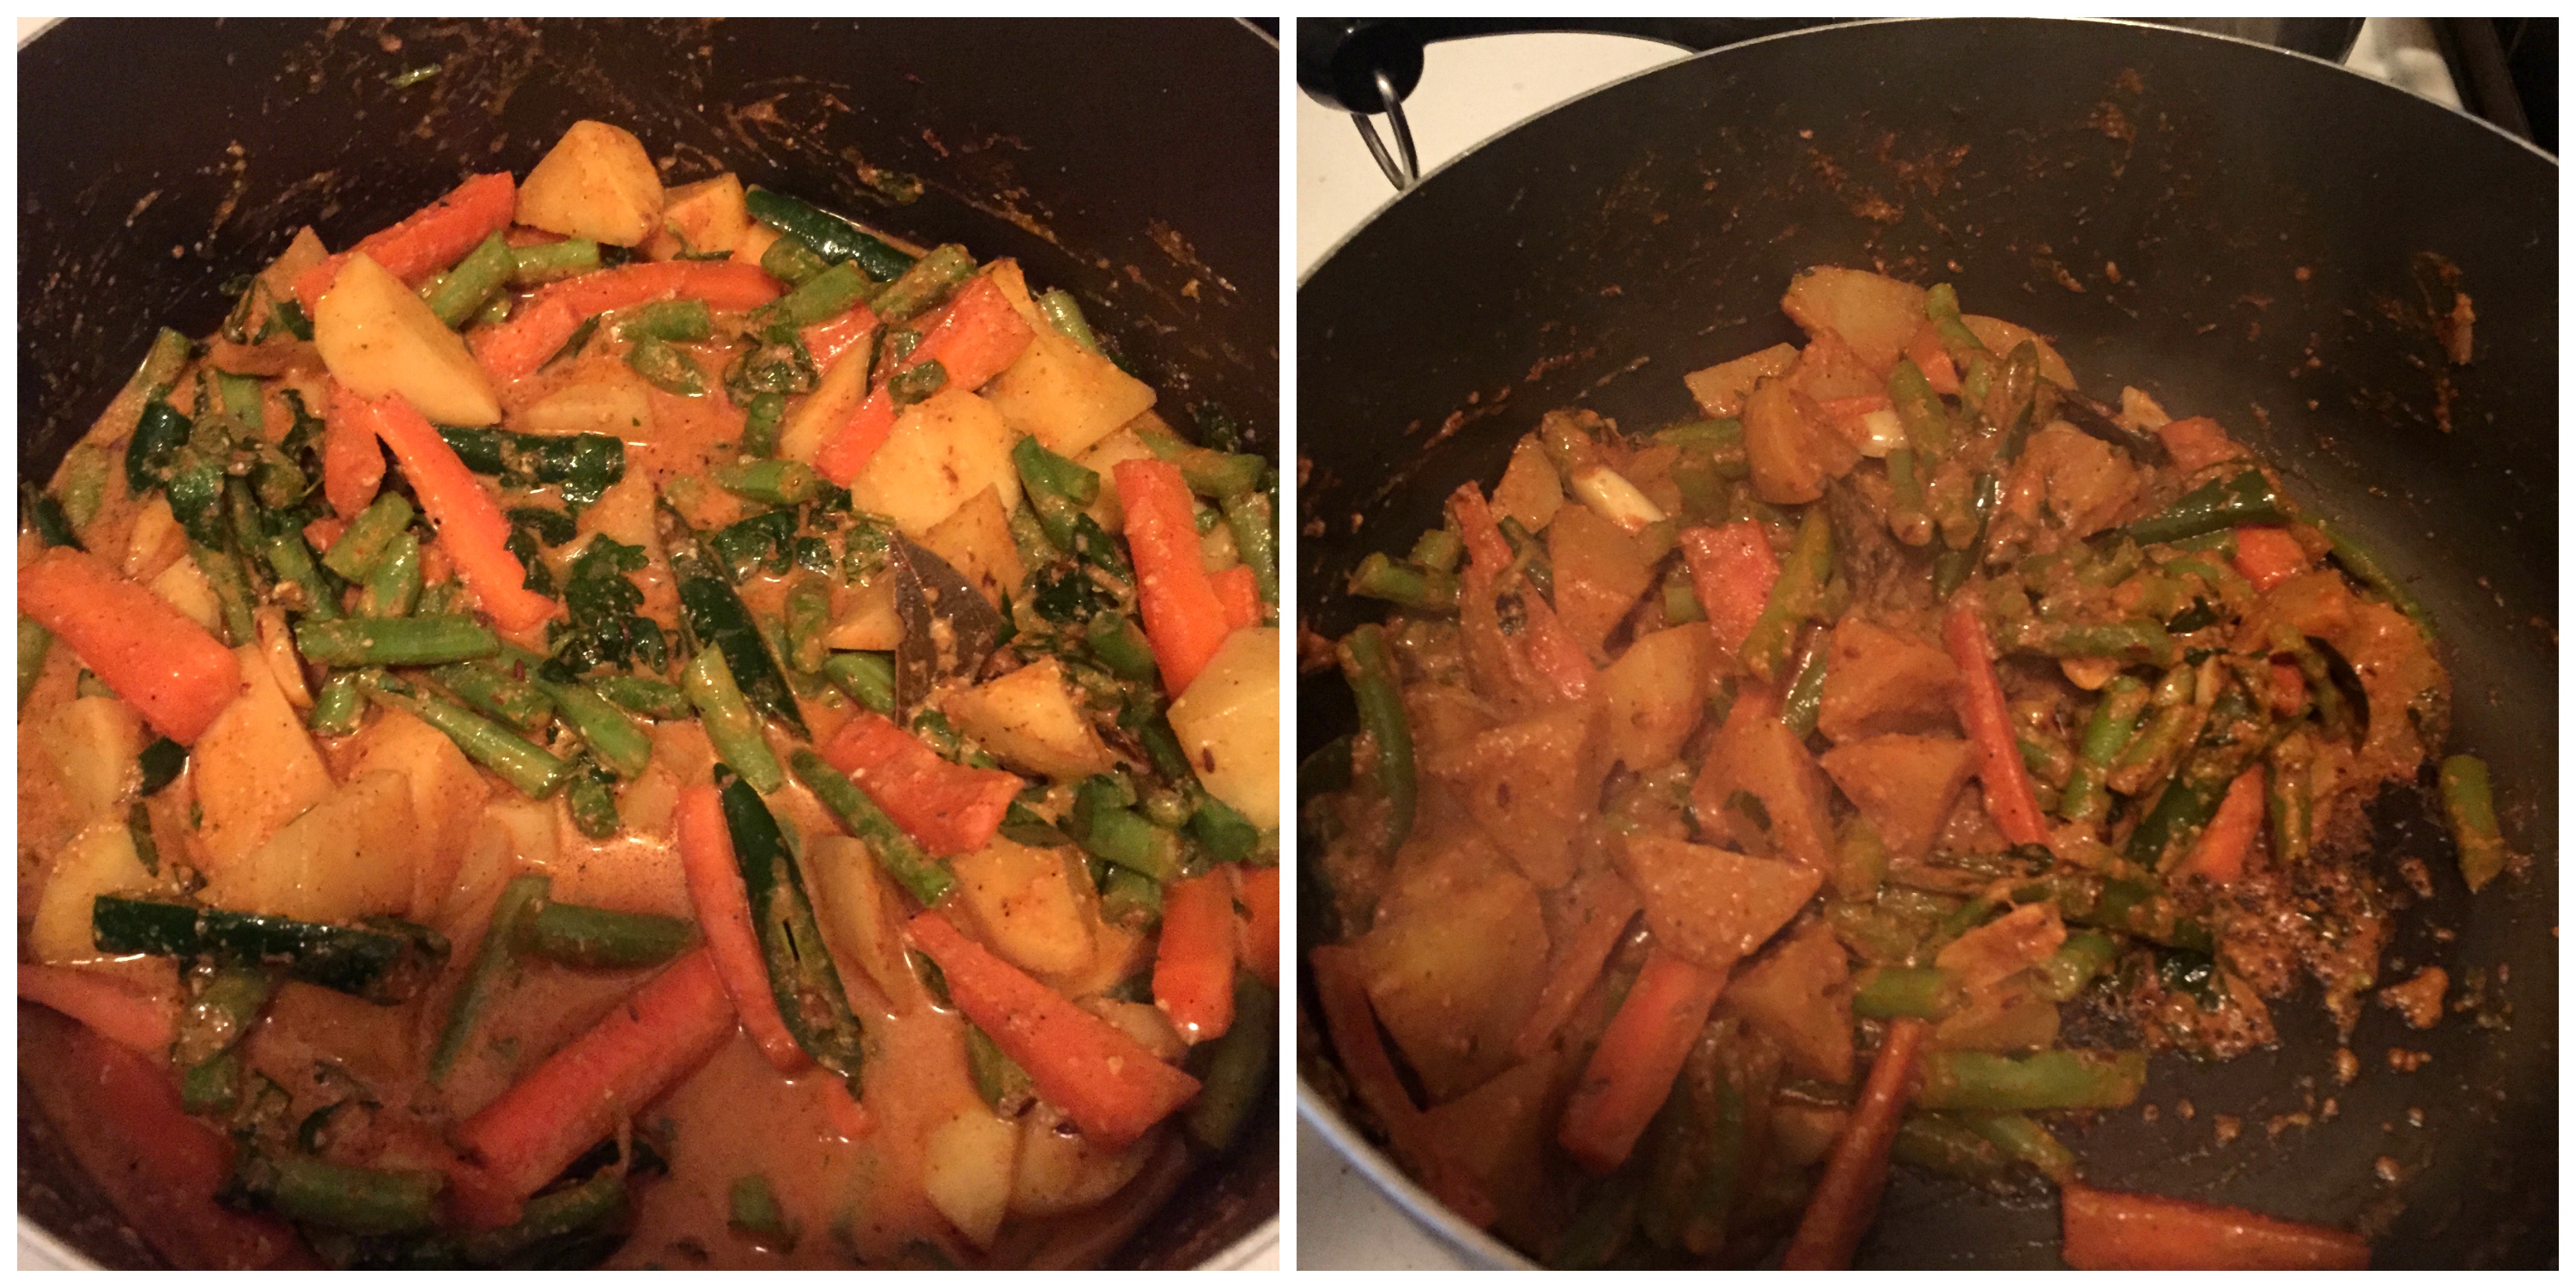
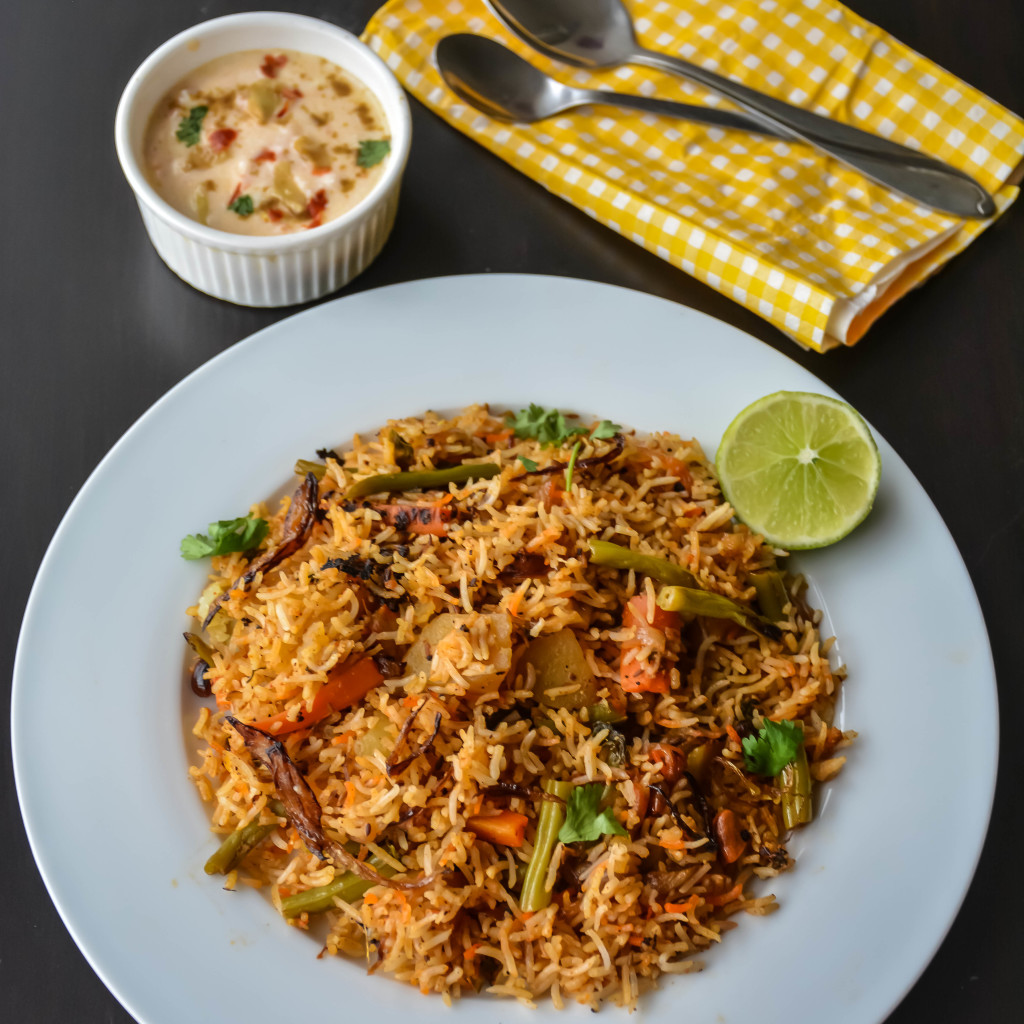
 This delicious layered biryani is fragrant, flavorful, and filling. Carrot, beans, peas and potatoes cooked in gravy of spicy yogurt and served with basmati rice topped with cashews and fried onions.

 If you think biryani is hard to make, I will surely say NO. It surely takes a bit of time. But all the hard work in the kitchen will be well worth the end result.  An authentic vegetable biryani is always slow cooked on “dum”. It is an ancient technique of cooking on dum as they believe it brings out its uniqueness and originality. This is done by cooking in steam by not allowing the steam to pass. The food gets cooked on its own steam and juices on slow fire and infuses the flavors and aroma of the herbs and spices in the food.

Vegbiryani.jpg3


It is a perfect Sunday lunch idea. I made this for the weekend and I just loved it. I usually like to make veg biryanis on a weekend for the time it takes and also 😉 it makes my weekend complete after having a meal like this 🙂 I made veg biryani, garlic tomato raita, curd rice and papad. I love to have biryanis with mirchi ka salan. It feels like you are in India if you have so :). The last time I had restaurant biryani was before three years in India. I am very choosy. If I don’t like it, I really don’t go to that place again. I loved the kailash parbat biryani 🙂 I am drooling as I type! :D! Actually I am drooling at my biryani 😉 picture and want to make it again 😉 even though I had it only yesterday 😀 There will be no one saying  No to biryanis, let it be vegetable biryani, chicken biryani, shrimp biryani, palak biryani ,chickpea briyani, potato biryani and so on!  My favorite is this :)!

Vegbiryani.jpg2


5.0 from 8 reviews
Print
Restaurant Style Vegetable Biryani Recipe
Author: Suganya Hariharan
Recipe type: Main
Cuisine: Indian
Prep time:  20 mins
Cook time:  20 mins
Total time:  40 mins
Serves: 5 or 6
 
Ingredients
  • For the masala:
  • Cashew nuts – 6
  • Khus khus (White poppy seeds) – ½ tbsp.
  • Cumin seeds/ Jeera – ½ tbsp.[


    For fried onions:
  • Onions – ½ cup, 2 small onions, sliced thinly
  • Cashewnuts - 6
  • Oil – to fry


    For layering:
  • Mint leaves – 1 tbsp, chopped
  • Coriander Leaves – 1 tbsp, chopped
  • Saffron – ½ tsp dissolved in ½ cup warm milk
  • Ghee – 2 tbsp


    For the rice:
  • Basmati rice – 2 cups
  • Salt – 2 tbsps
  • Cumin Seeds/ Jeera – 1 tbsp


    For the vegetables:
  • Oil – 1 tbsp
  • Bay leaf – ½
  • Cinnamon – 1 thin piece
  • Cloves – 3
  • Cardamom pods – 2
  • Ginger garlic paste – 2 tsp
  • Full fat yogurt – ½ cup
  • Garlic – 4 whole
  • Green chilli – 2, slit
  • Biryani masala – 1 tbsp
  • Red Chilli powder –1 tsp
  • Mint – ½ cup, chopped finely
  • Coriander leaves – ½ cup, chopped finely
  • Fresh beans – ½ cup, Chopped 1 inch thin
  • Carrot – 1 cup, chopped 1 inch thin
  • Peas – ½ cup
  • Potato – 2, chopped as cubes
Instructions
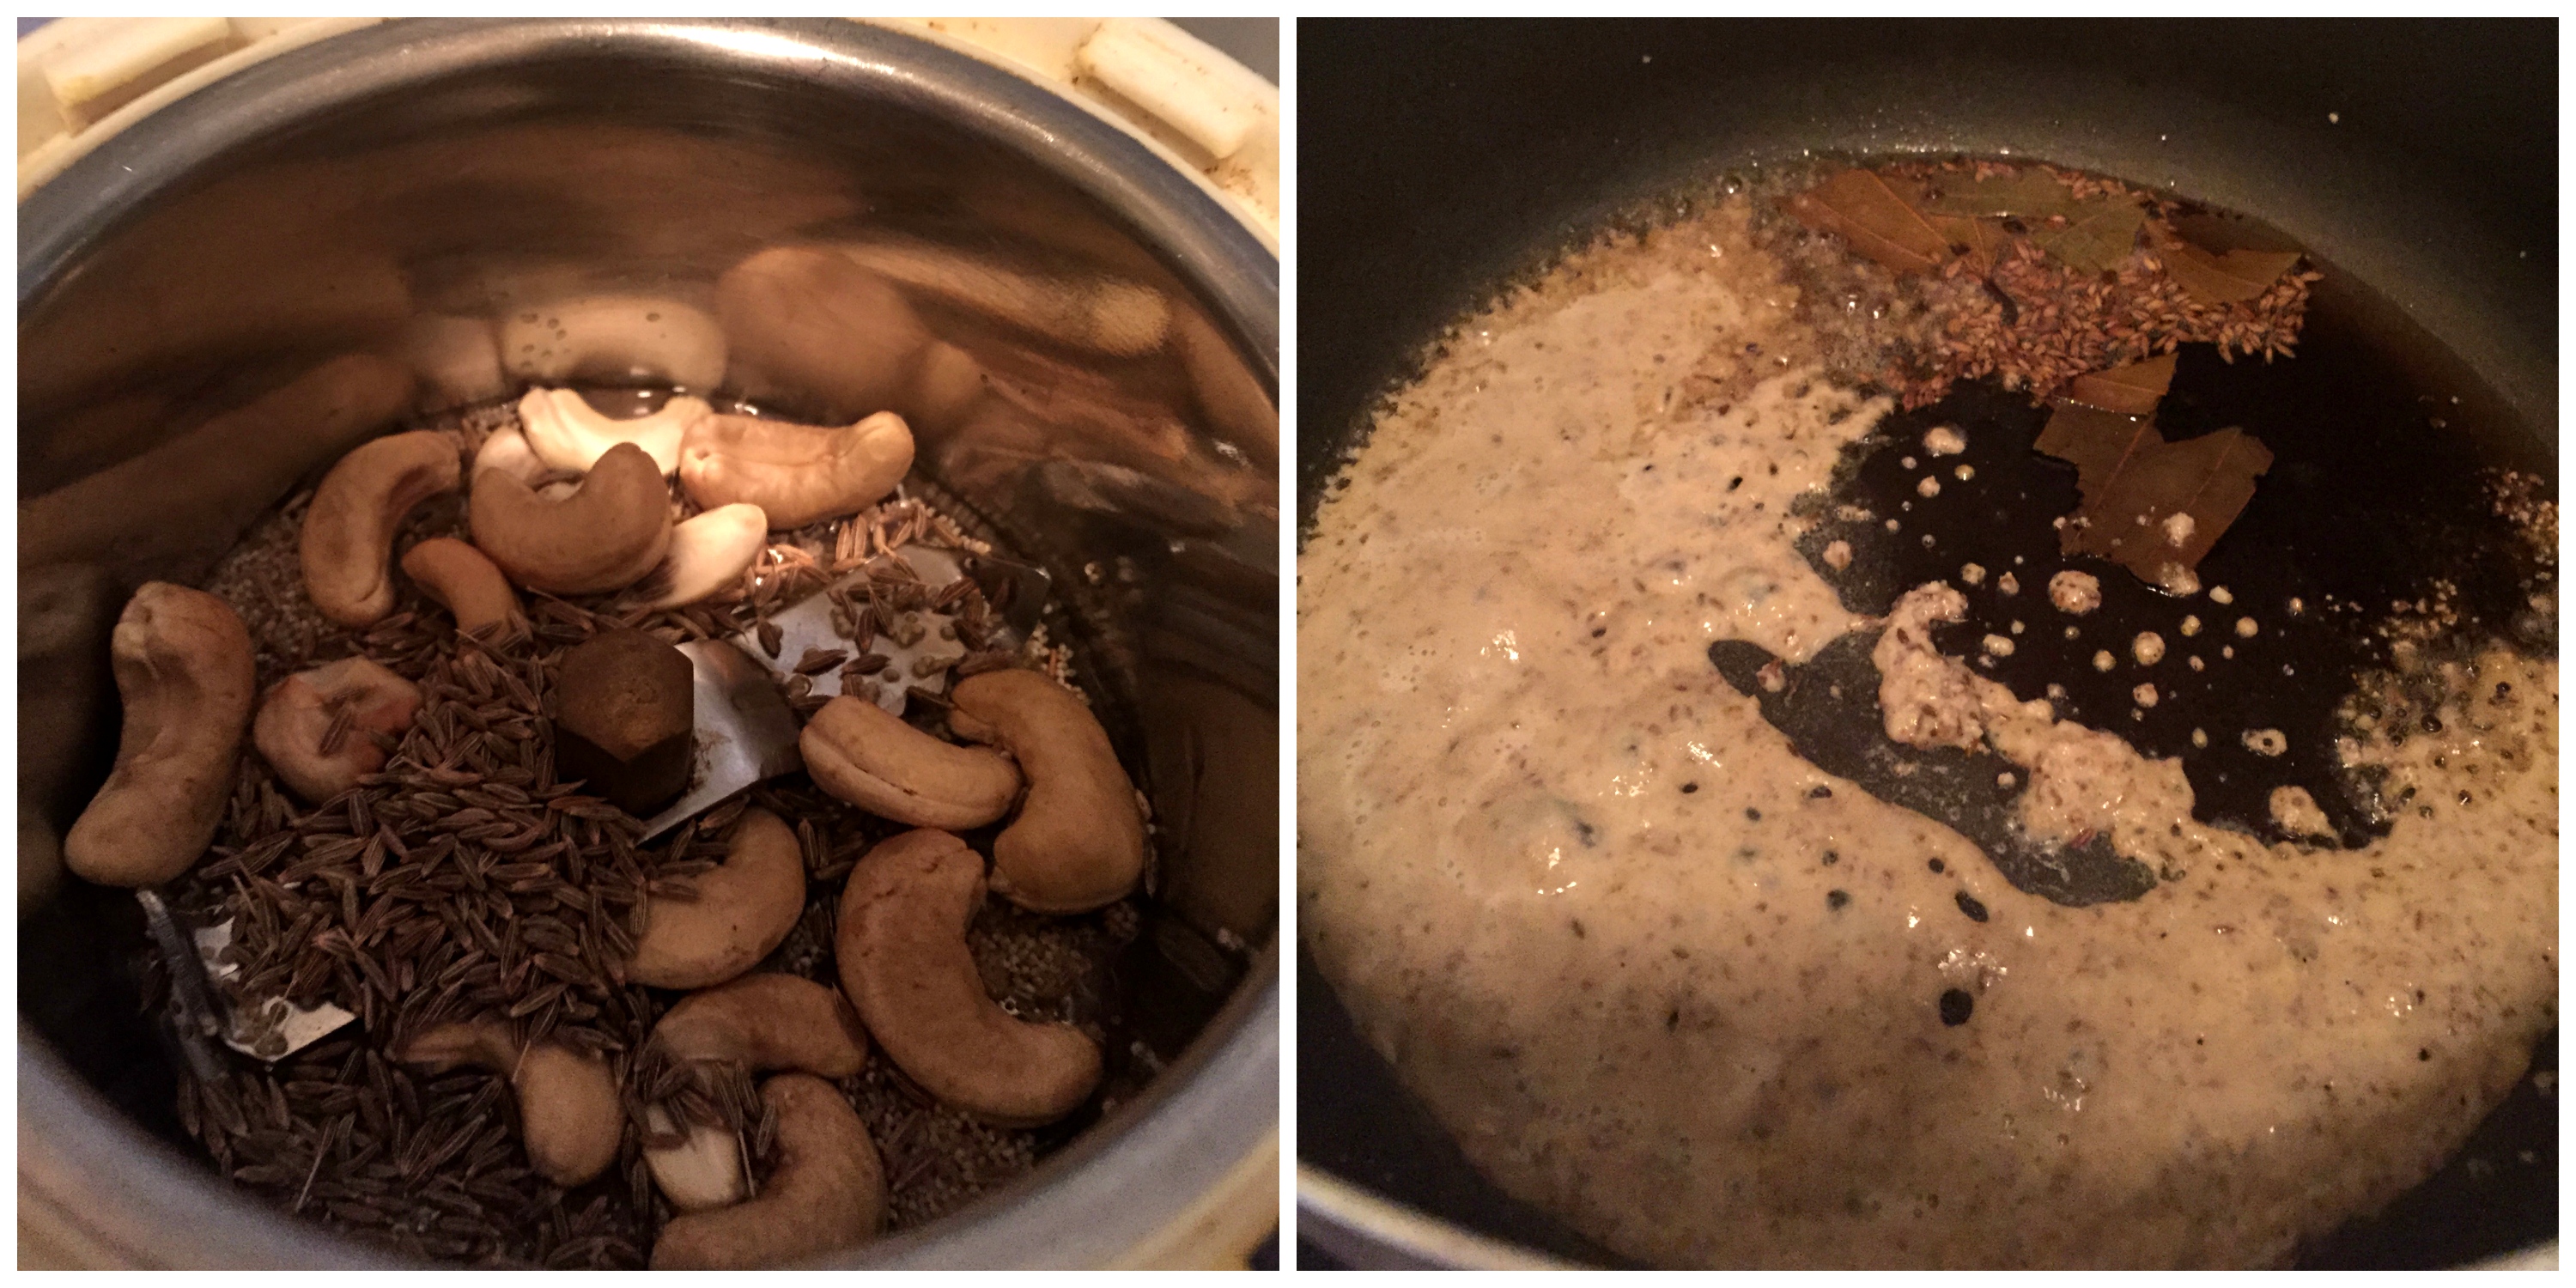
  1. Grind the cashew, poppy seeds and cumin seeds into a smooth paste, using as little water as possible. Set aside.
  2. Deep fry the sliced onions when it is hot. Don’t overcrowd the oil. When the onions turn light brown, remove from oil and drain on paper towel. The fried onion will crisp up as it drains. Also fry the cashewnuts till golden brown. Set aside.
  3. Wash the rice and soak in water for twenty minutes.
  4. Meanwhile, take a big wide pan, add oil in medium heat, add the spices like Bay leaf ,
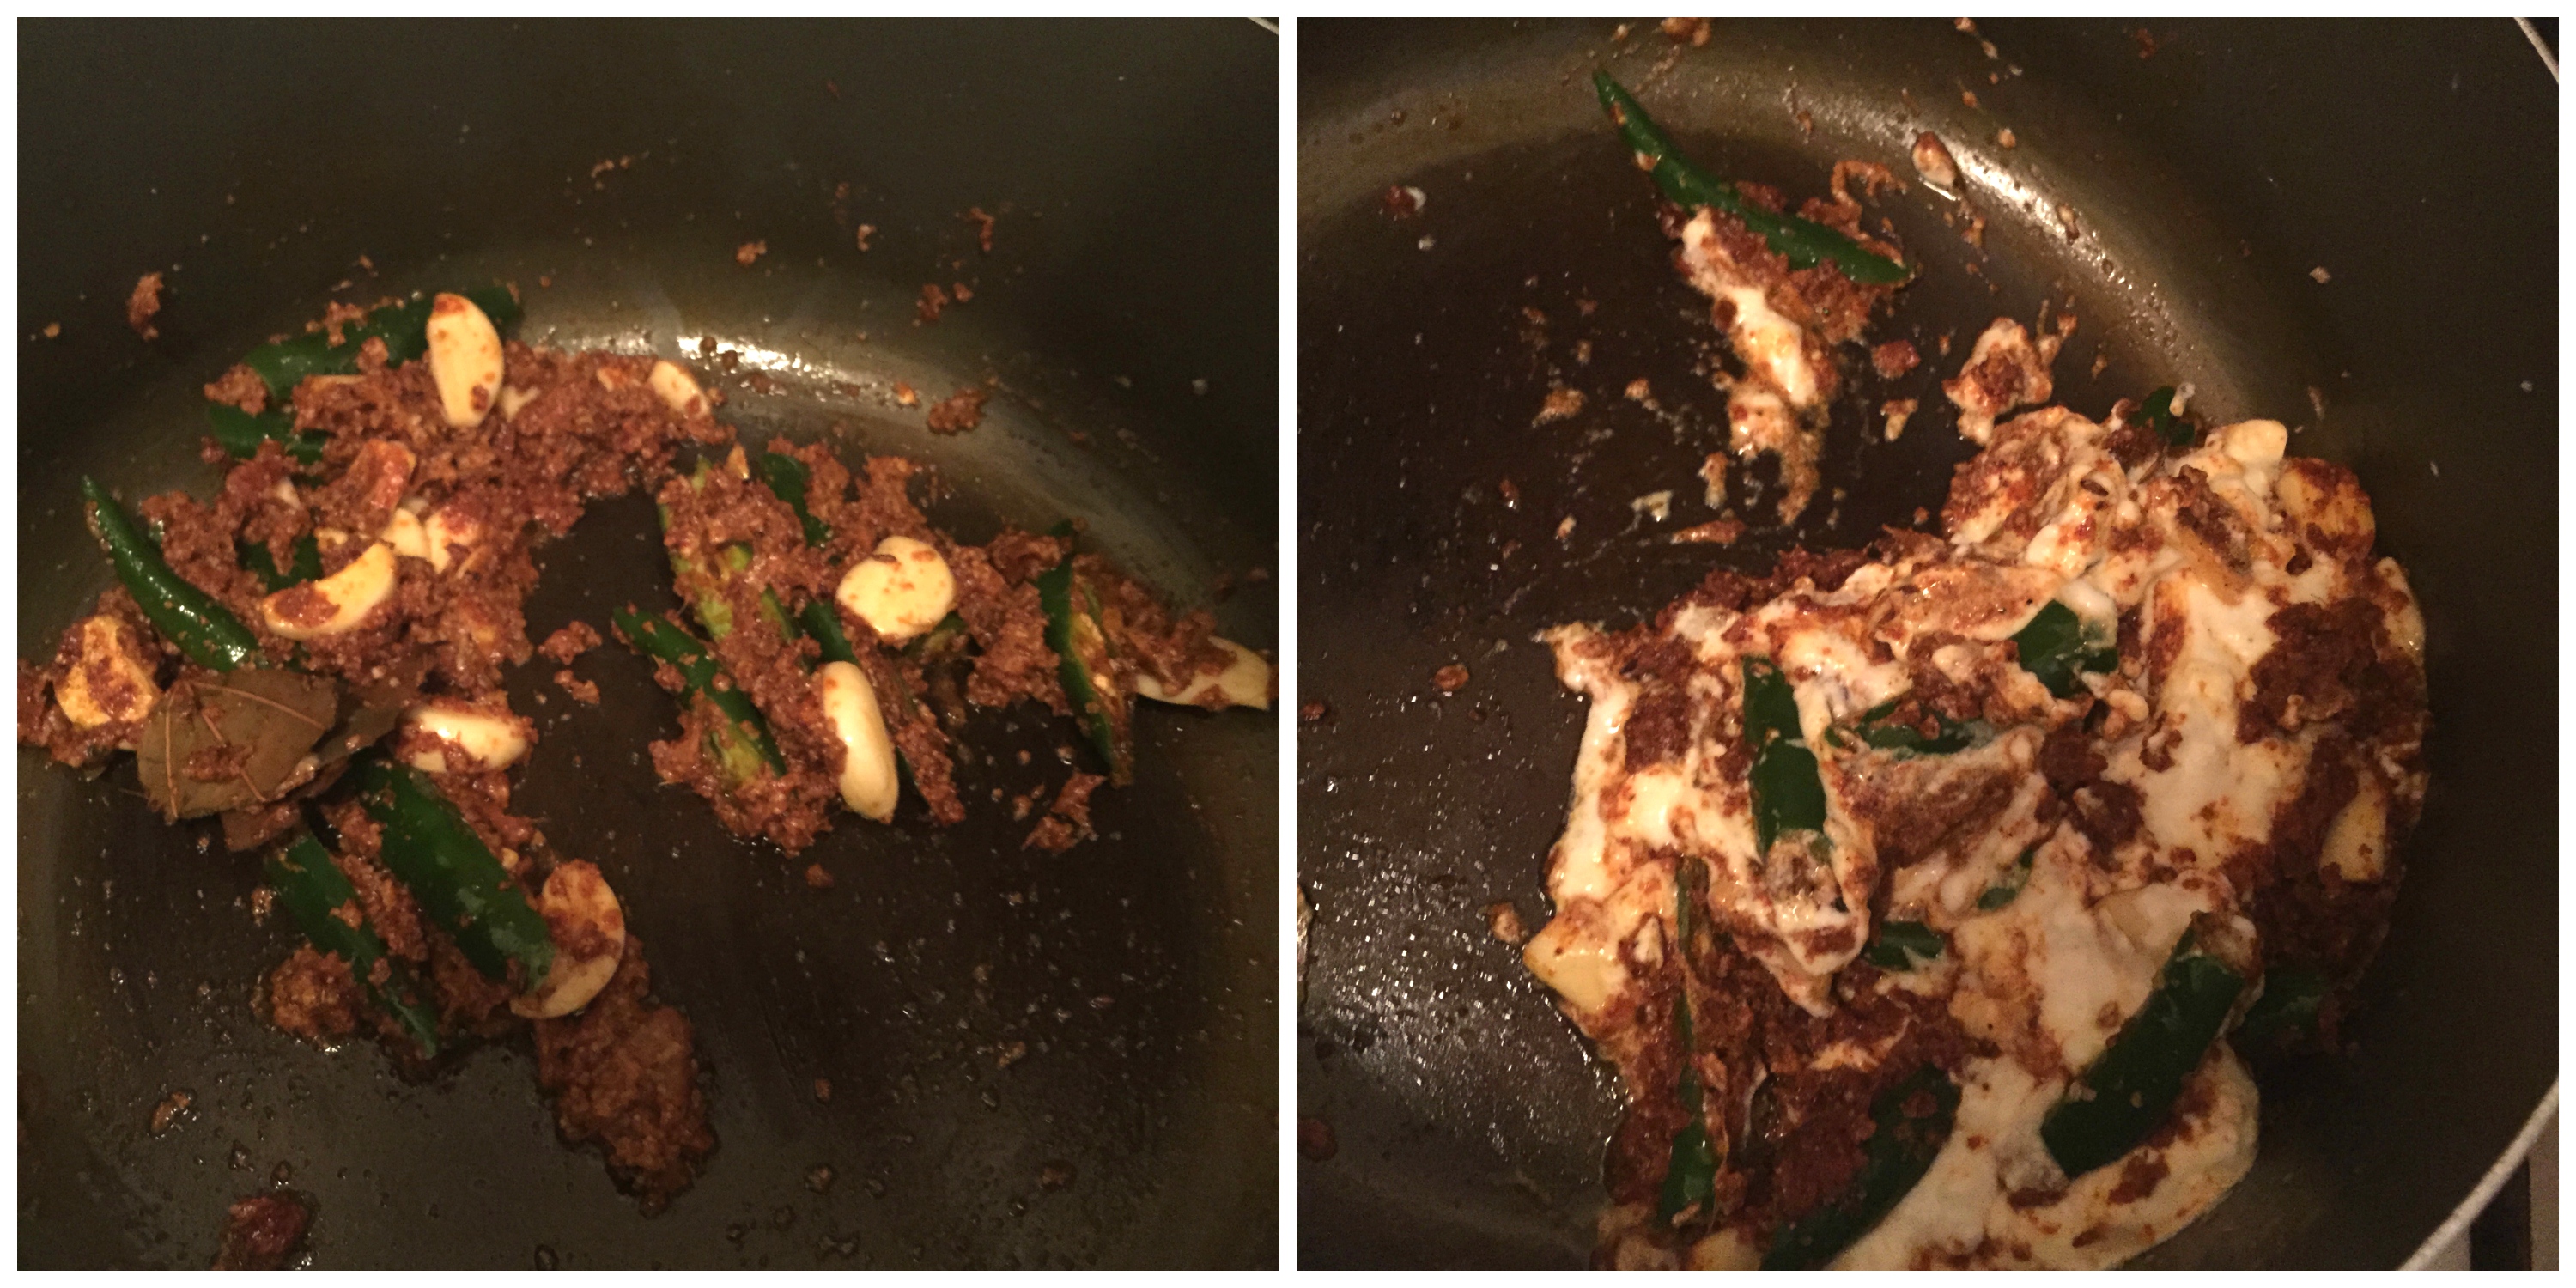
  5. Cinnamon,Cloves,Cardamom pods ,sautĂŠ for a minute.Add the blended paste, to it add the green chillies, ginger garlic paste and garlic and fry for a minute.
  6. Then to it add the red chilli powder, biryani powder, mint, coriander leaves and sautĂŠ them well.
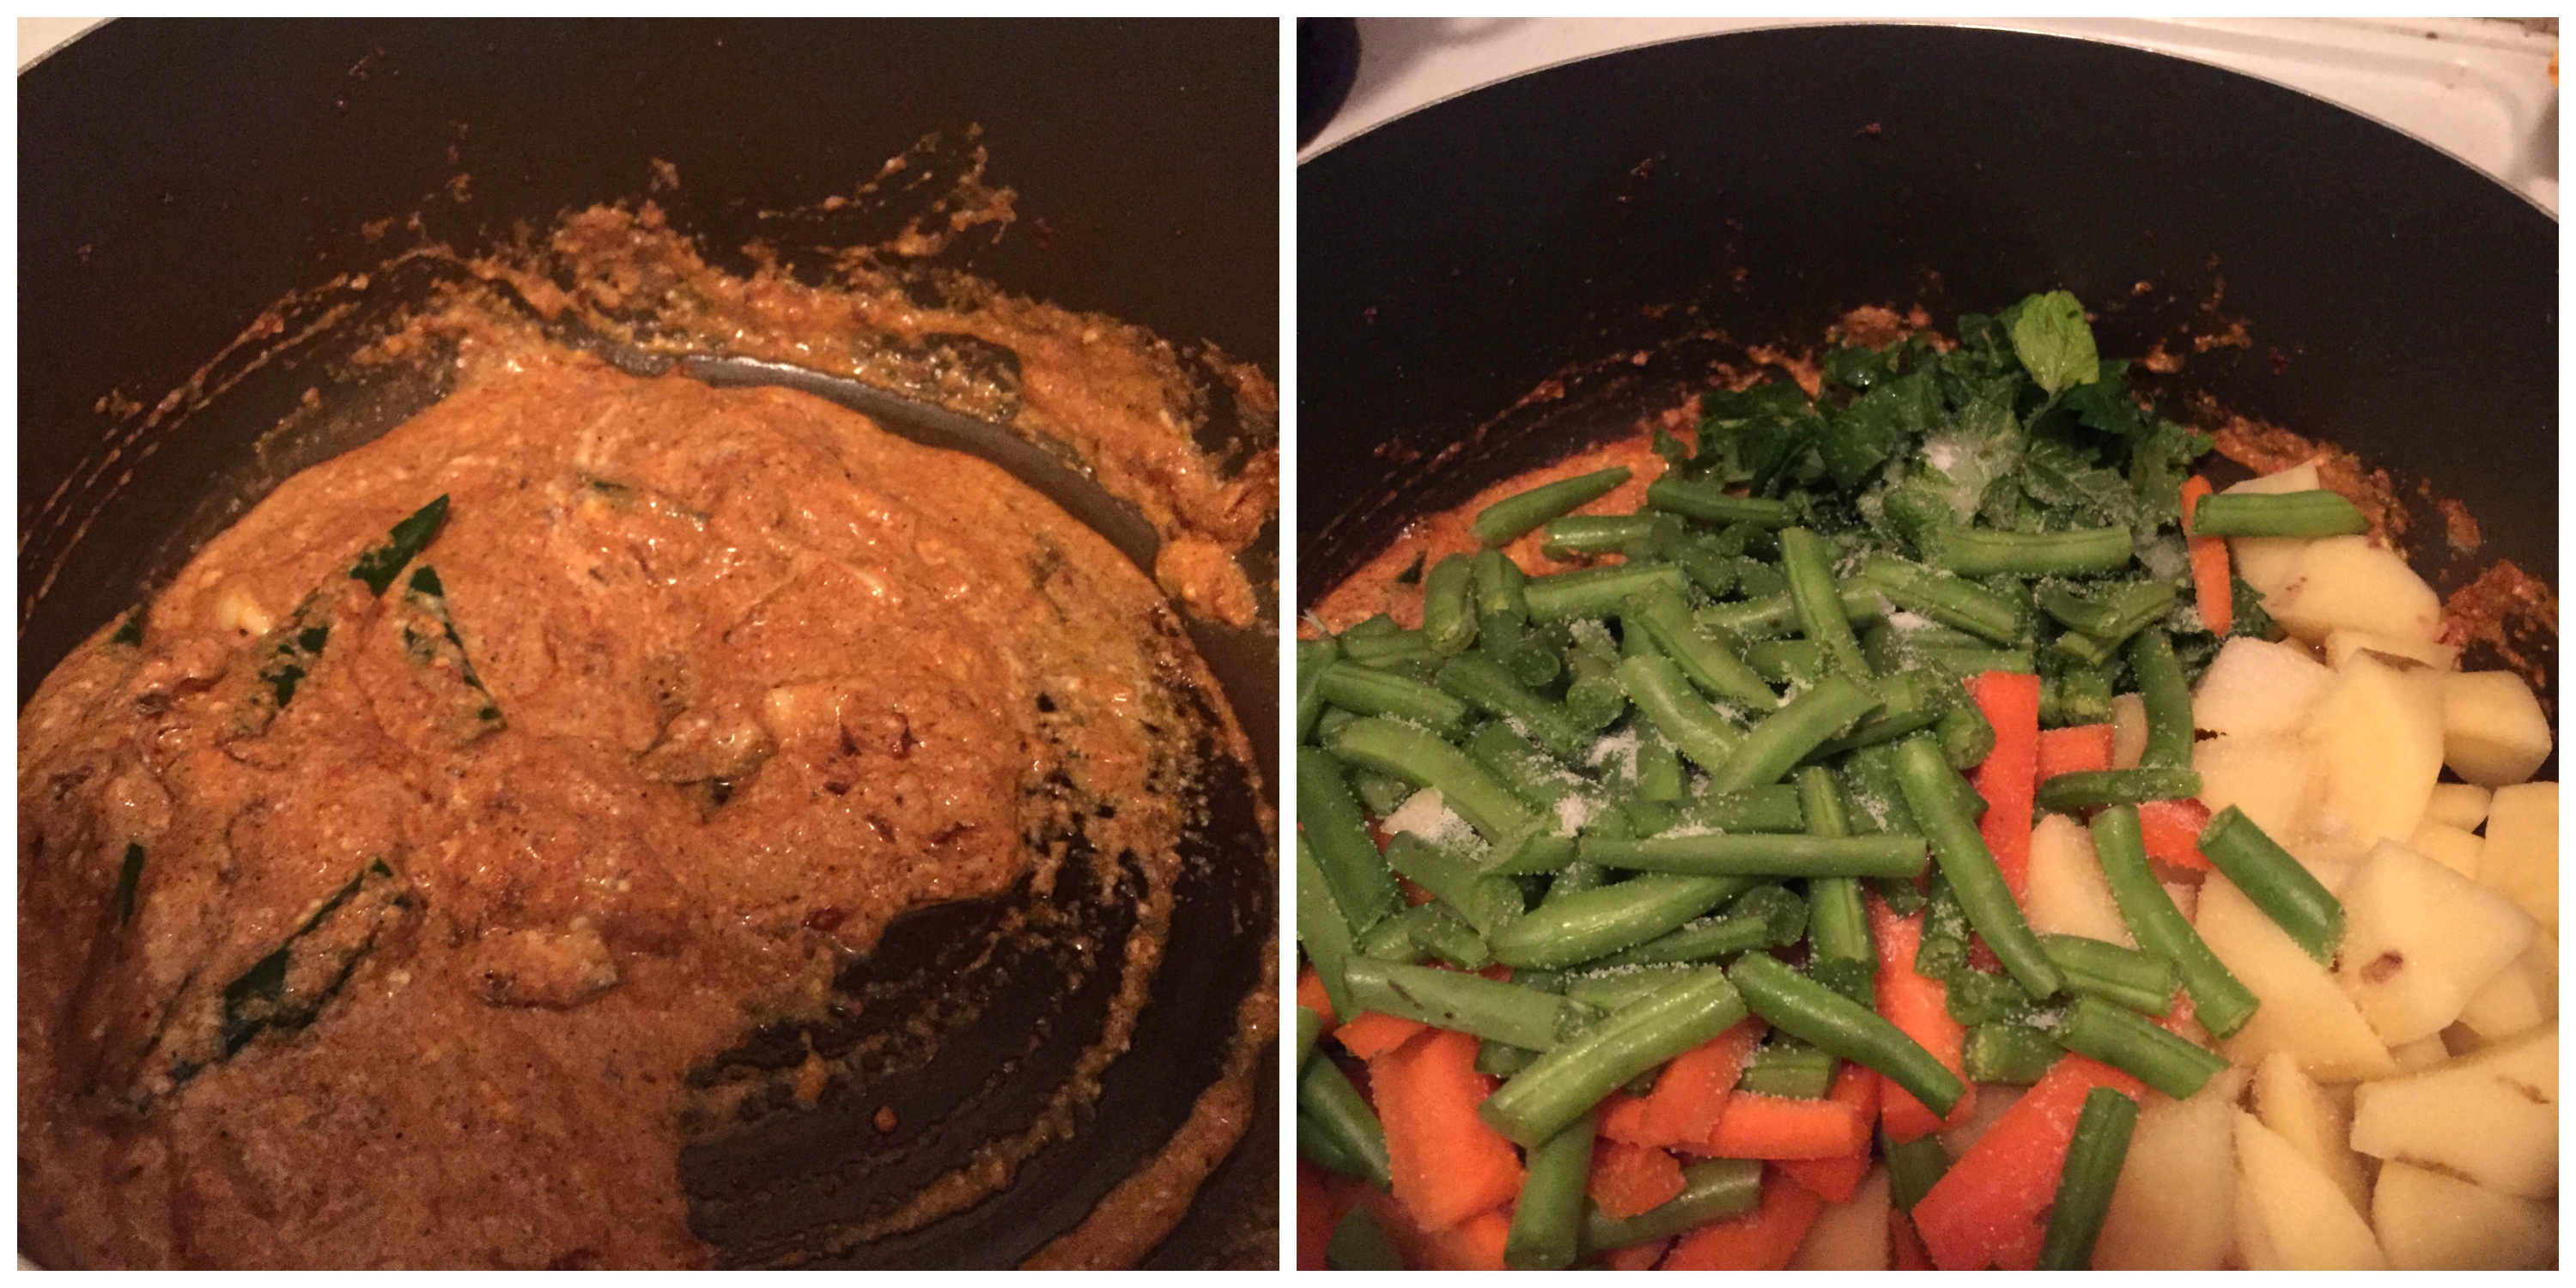
  7. Add the yogurt and mix well. I always move the skillet away from the heat when adding yogurt which prevents it from curdling.
  8. Now after returning the skillet back to the stove, add the vegetables and salt and ½ cup water and mix well. Cook for 10 minutes.
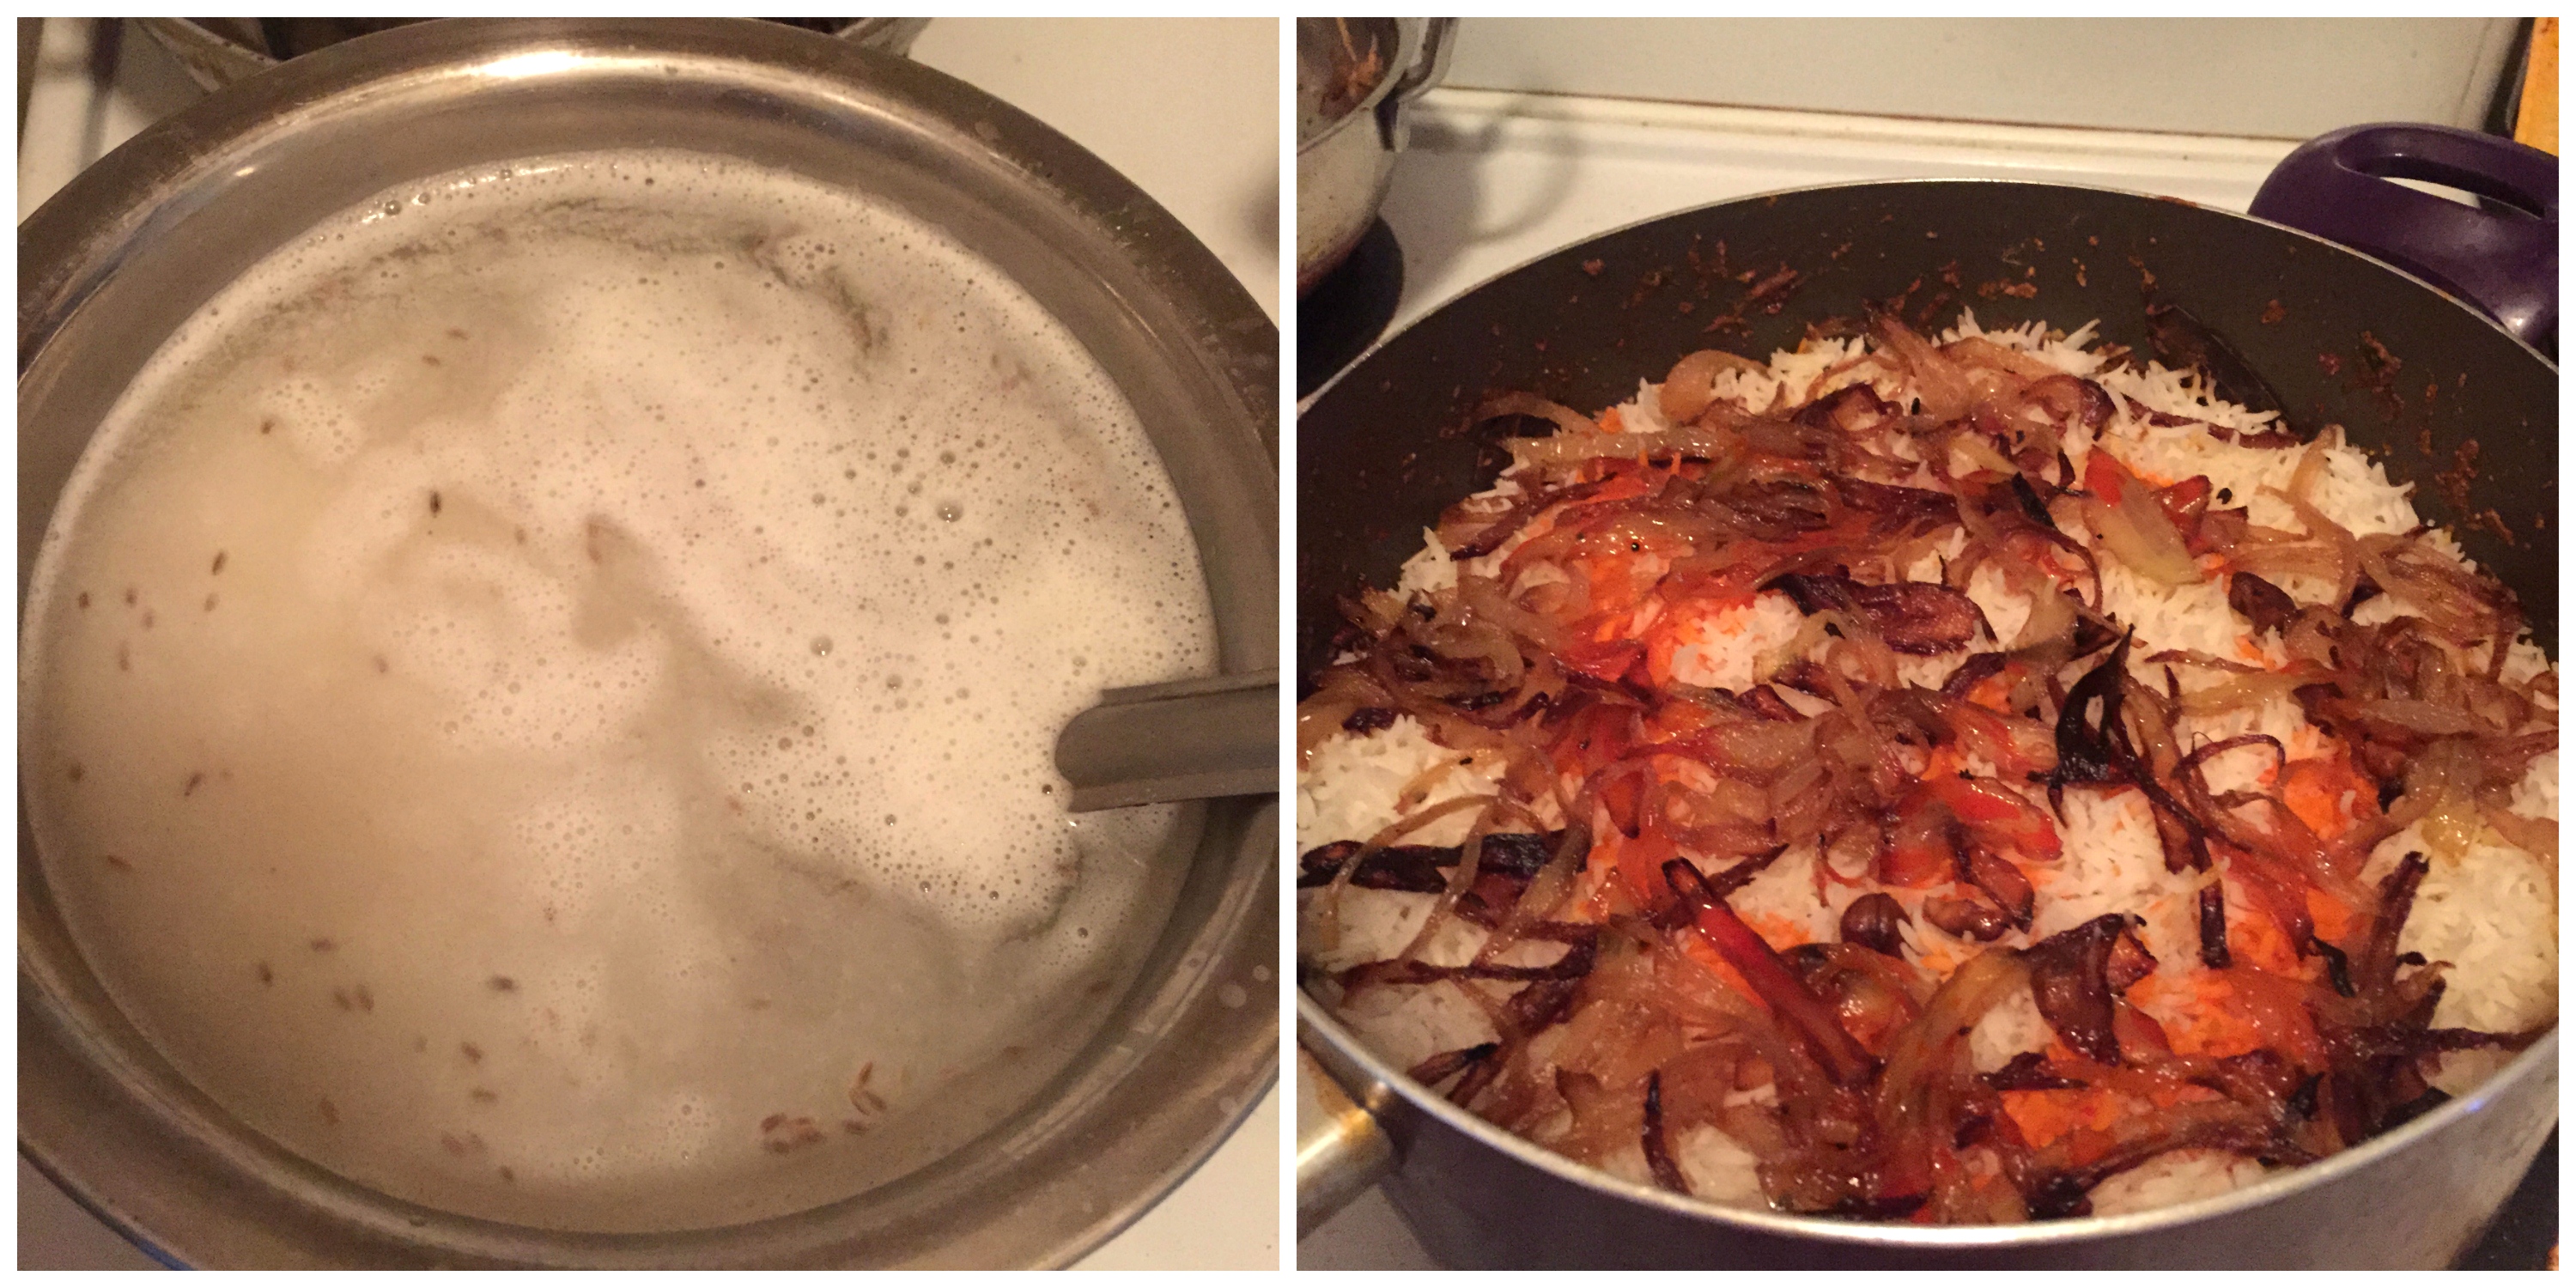
  9. When you do the seventh step, take another big pan, add thrice the cup of rice you use, and boil it. When it is boiling high, add the rice, salt and jeera and mix well. After 7 minutes exact or when the rice is 80% done. Switch off and drain the rice.
  10. The vegetables would have cooked by now and water would have drained.
  11. Now, the layering starts. To the vegetables, pat and level it. Add the drained hot rice on the top of it. Garnish with fried onions, ghee, mint, coriander leaves and saffron dissolved in milk.
  12. Cover the dish and bake in a 350f oven for 15 minutes or till the cooked but not mushy. Or cook in the stove medium heat for 12 minutes and lowest heat for 5 minutes. And switch off. Mix and serve hot!
Notes
1. If you are cooking in oven, do make sure to cook in a big oven safe pan and cover it tight and then keep in oven for the final step.
2. You can skip biryani masala if you don’t have and add just garam masala (1 tsp and red chilli powder – 3 tsp instead of 1 tsp)
3. If it is spicy in the end, squeeze some lemon, it will reduce the heat and enhance the flavors also.
4. Vegans can leave the ghee and replace yogurt with coconut milk
Wordpress Recipe Plugin by EasyRecipe
3.5.3226

Taste perfect with raita or mirchi ka salan. Even having it plain is delicious.

 Vegbiryani.jpg1

Filed Under: RICE/BIRYANI VARIETIES Tagged With: Basmati rice recipe, biryani masala recipe, Biryani recipe, how to make biryani, how to make rice, Indian, Indian food, jasmine rice, one pot meal, restaurant style vegetable biryani recipe, vegan recipe, vegetable recipes, vegetarian recipe

Paneer Makhanwala

August 31, 2014 by Suki 6 Comments

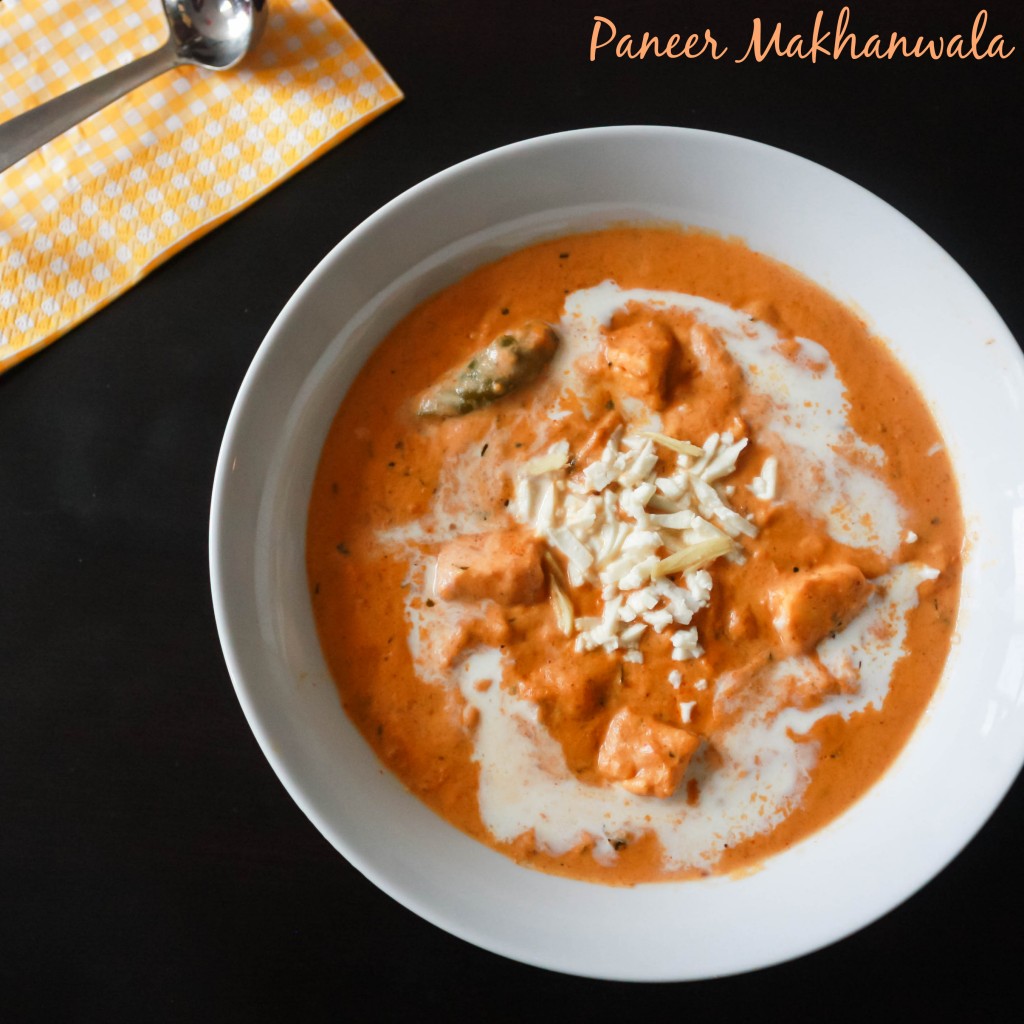
Paneer_Makhanwala_Relishthebite_name1

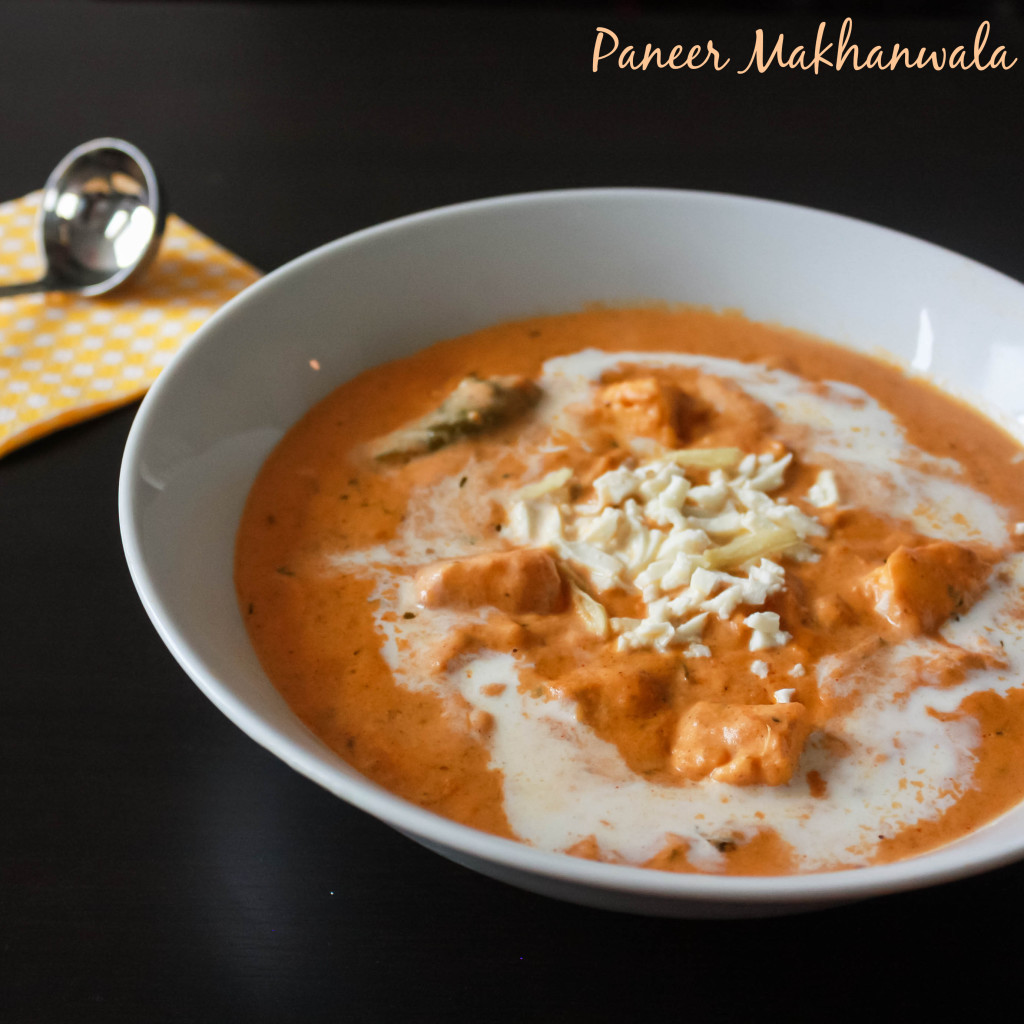
Paneer_Makhanwala_Relishthebite_name2Paneer cubes in a buttery nutty creamy tangy flavor. It is a rich dish with really tasty ingredients. Paneer dishes are always a real treat for vegetarians. I have heard people say that Paneer makhani,paneer butter masala and paneer makhanwala are same and its just the name which differs. But I personally feel paneer butter masala and paneer makhanwala is different in the method of preparation and also its taste. I will soon post the recipe of paneer butter masala and you will know the difference. I am not sure what is the originality of each dish. ;)Whats there in the name, its the taste which matters a lot 😉 Right?
My friends came over from Ottawa for the weekend, so did this for them. I made it with roti. And they really loved it clap. Happy ME ! 😀 When there is guest over and I wanted to do vegetarian dishes, I will make it a point to do atleast one paneer dish ;). It goes well with any kind of pulav, jeera rice, naan,roti or any kind of bread you fancy.

You can always skip the ingredients a bit if you don’t have that specific ingredient at home. You can do this recipe with tofu,chicken,potato instead of paneer. Never be afraid to try new flavors in your cookingthumbsup. I always believe in that. 🙂

It taste great with peas pulao, veg fried rice Indian or parotta.

I have a collection of paneer recipes to look and my other favorite paneer recipes: Butter paneer curry, paneer sandwich, and paneer dumplings

5.0 from 1 reviews
Print
PANEER MAKHANWALA
Author: Suganya Hariharan
Recipe type: Indian
Cuisine: Indian
Prep time:  5 mins
Cook time:  30 mins
Total time:  35 mins
Serves: 4
 
Ingredients
  • For the gravy:
  • Onion - 1 Chopped
  • Tomato - 2 Chopped
  • Garlic - 5 Chopped
  • Ginger - ½ inch Chopped
  • Cinnamon - 1
  • Cardomon - 2 whole
  • Cashews - 7 whole
  • Almond - 7 whole
  • Jeera - 1 Tbsp
  • Salt - As needed
  • Water - 2 cups
    [other]
  • Unsalted Butter - 2 Tbsp
  • Paneer - 250gms
  • Chilli Powder - 1 Tbsp
  • Green Chilli - 1 Slit
  • Kasturi Methi - 1 tbsp
  • Garam Masala Powder - 1 tsp
  • Sugar - ½ tsp
  • Water - 1½ cups
    [Garnish]
  • Paneer - 1 Tbsp Grated
  • Ginger - ½ inch, Juilenne
  • Cream - 1 Tbsp
  • Salt - As needed
Instructions
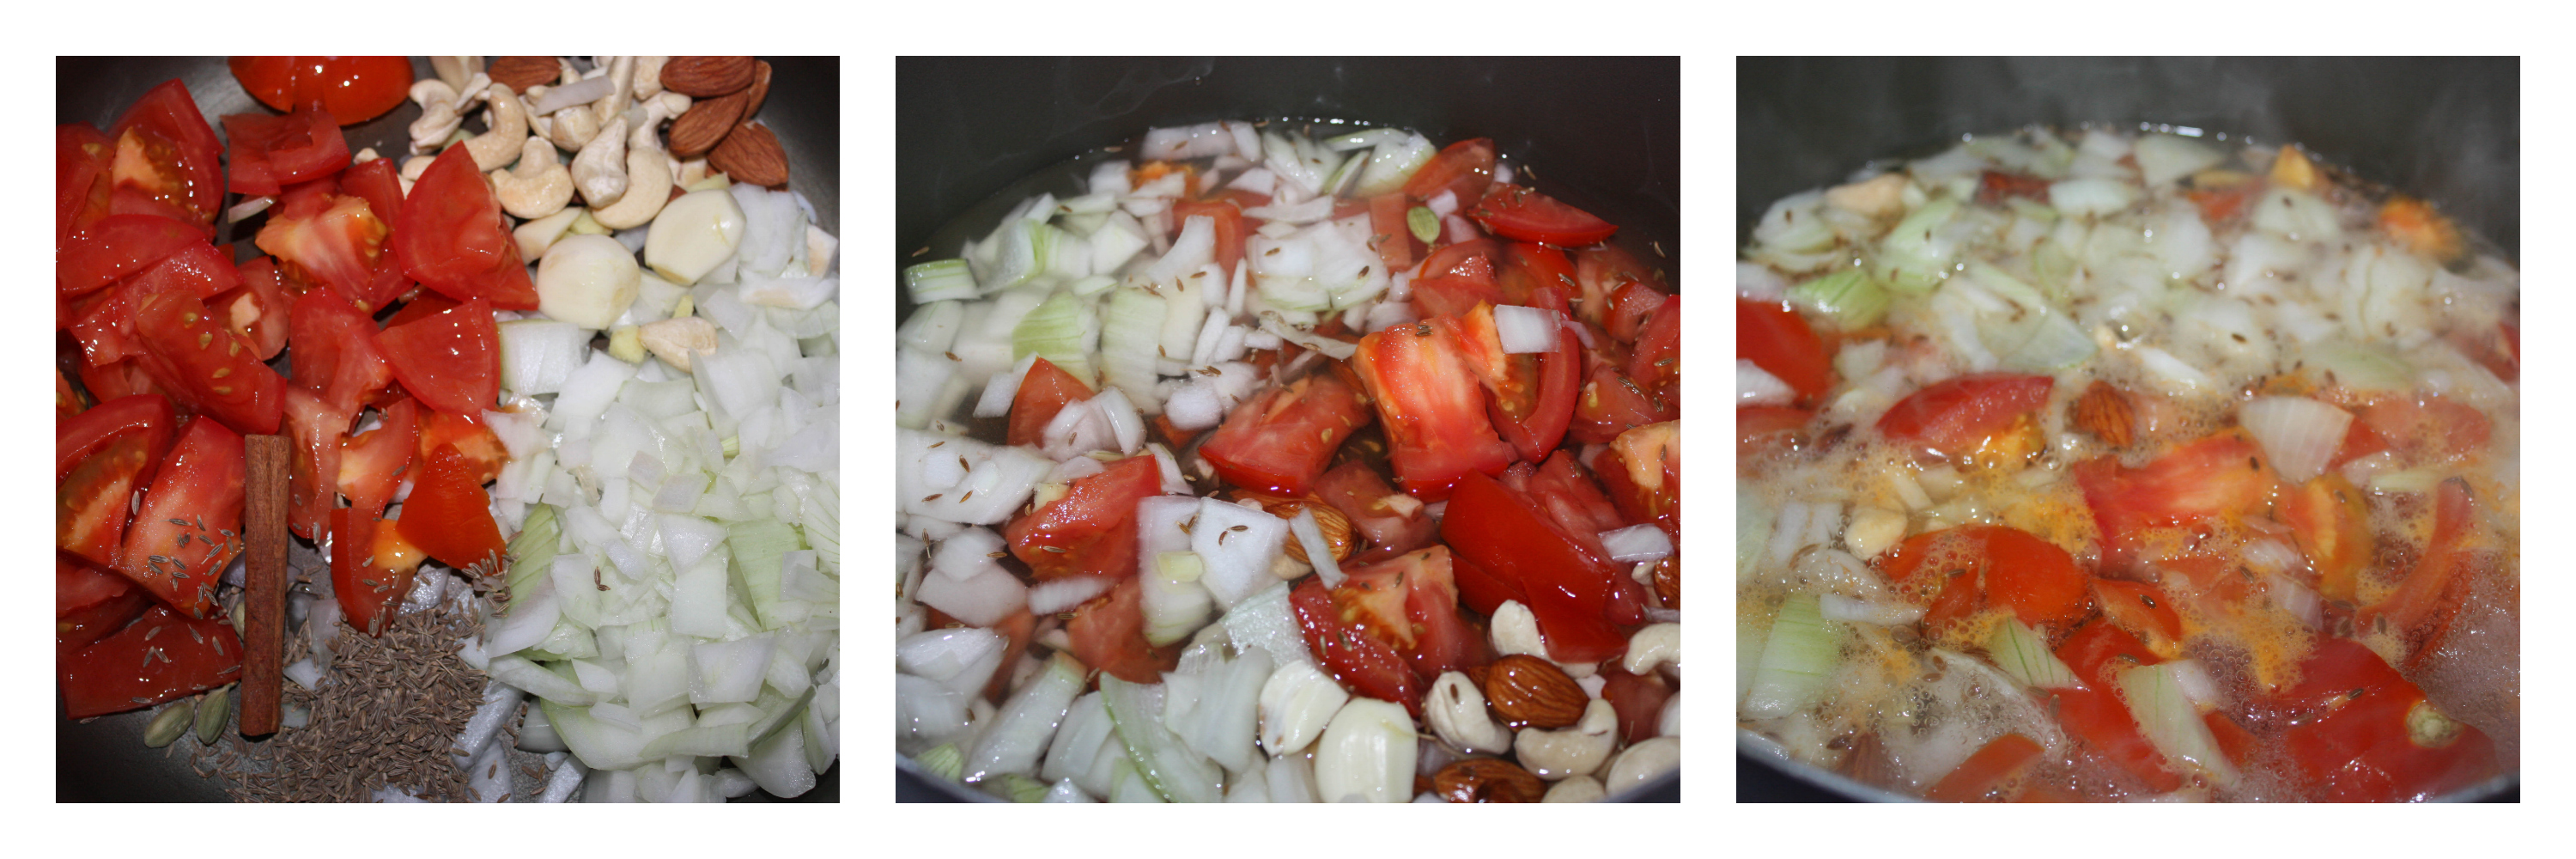
  1. Mix the chopped onions, tomatoes, cashews, almonds, garlic, ginger, cinnamon, cardomon, jeera, salt and water in a pan.
  2. Cook for about 15- 20 minutes on a medium flame till everything gets cooked. Allow this to cool.
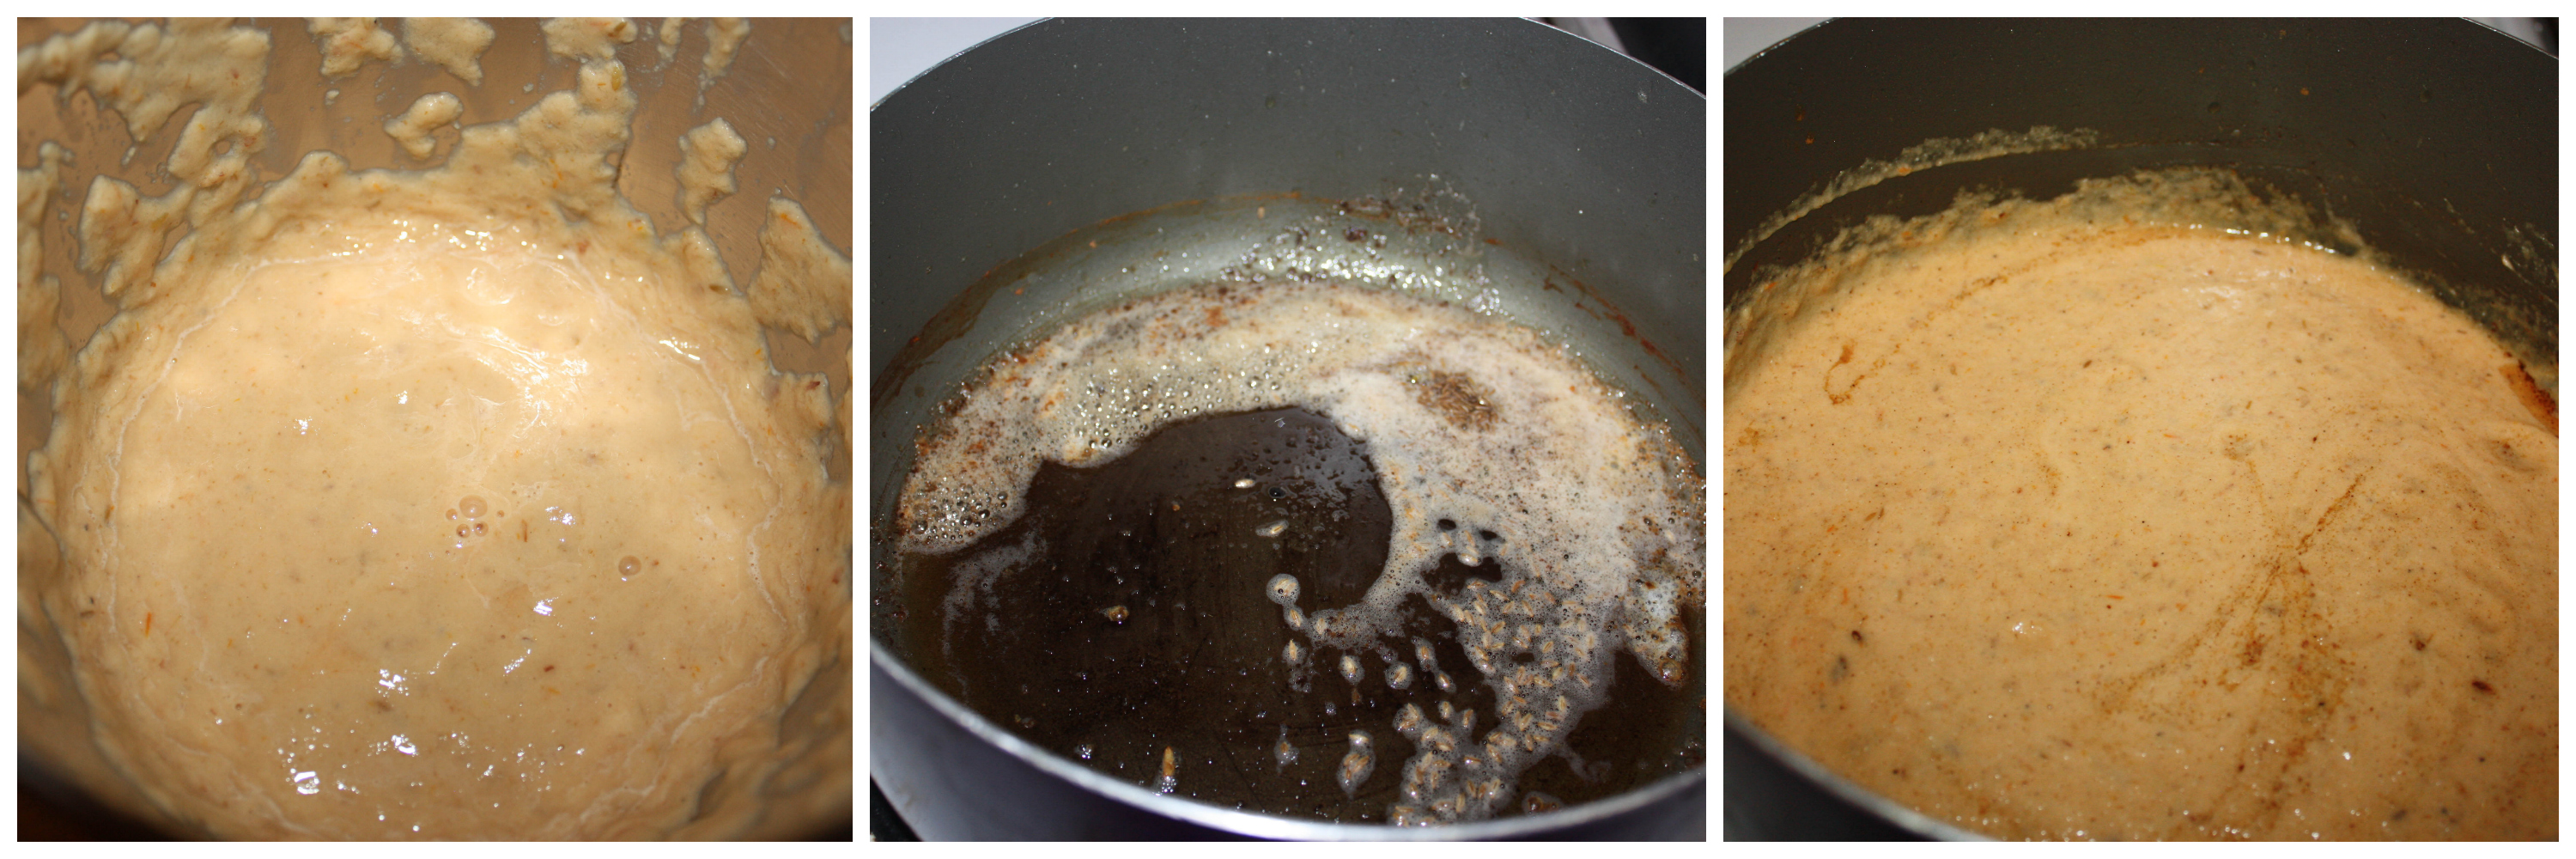
  3. Then add everything in a blender. Blend them into a smooth paste with not even small pieces of cashews on it.
  4. Heat butter in the same pan.
  5. Add the jeera, blended makhani paste and stir well.
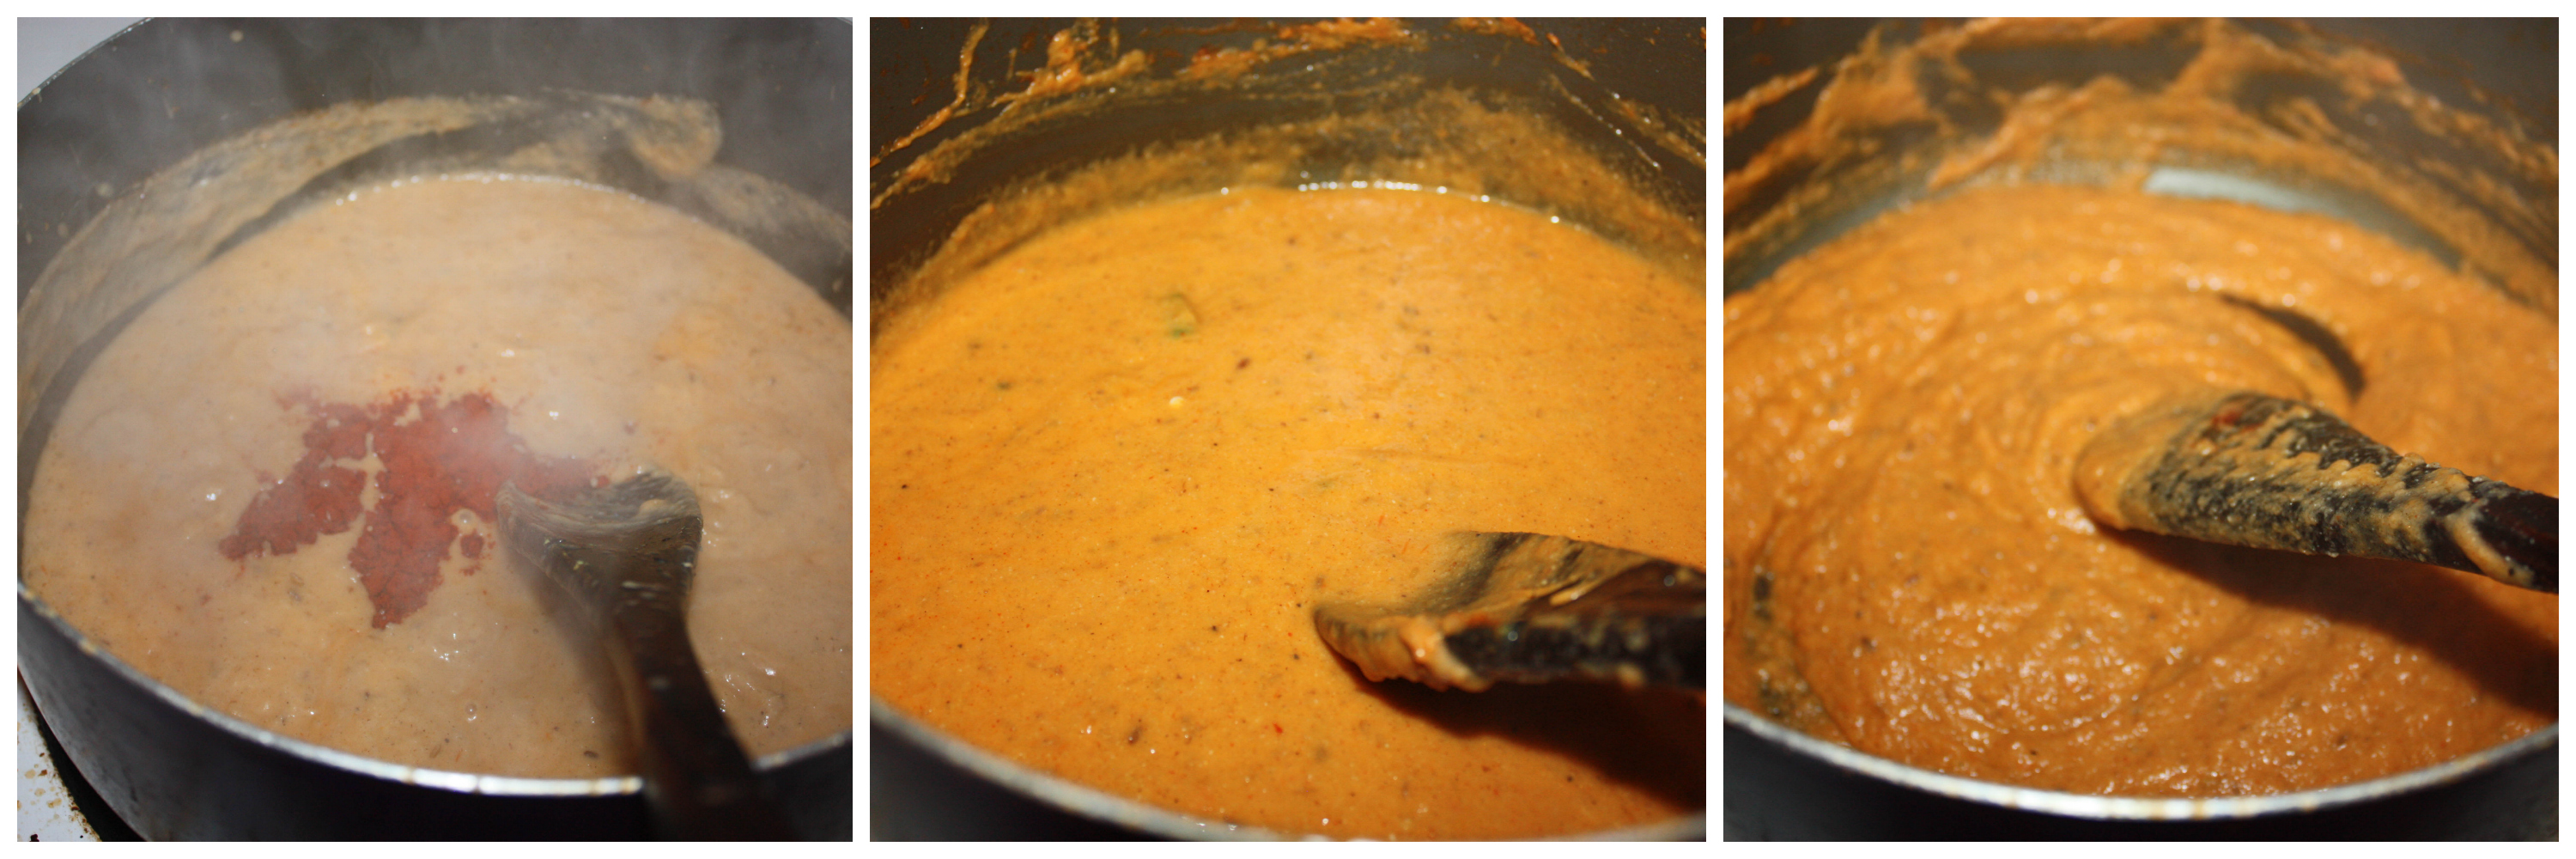
  6. Add chilli powder. (If you want rich color, you can add kashmiri chilli powder. I used normal one)
  7. Stir well &sautĂŠ the masala on a medium flame till the butter ooze out. It has to be sauted really well till butter ooze out.
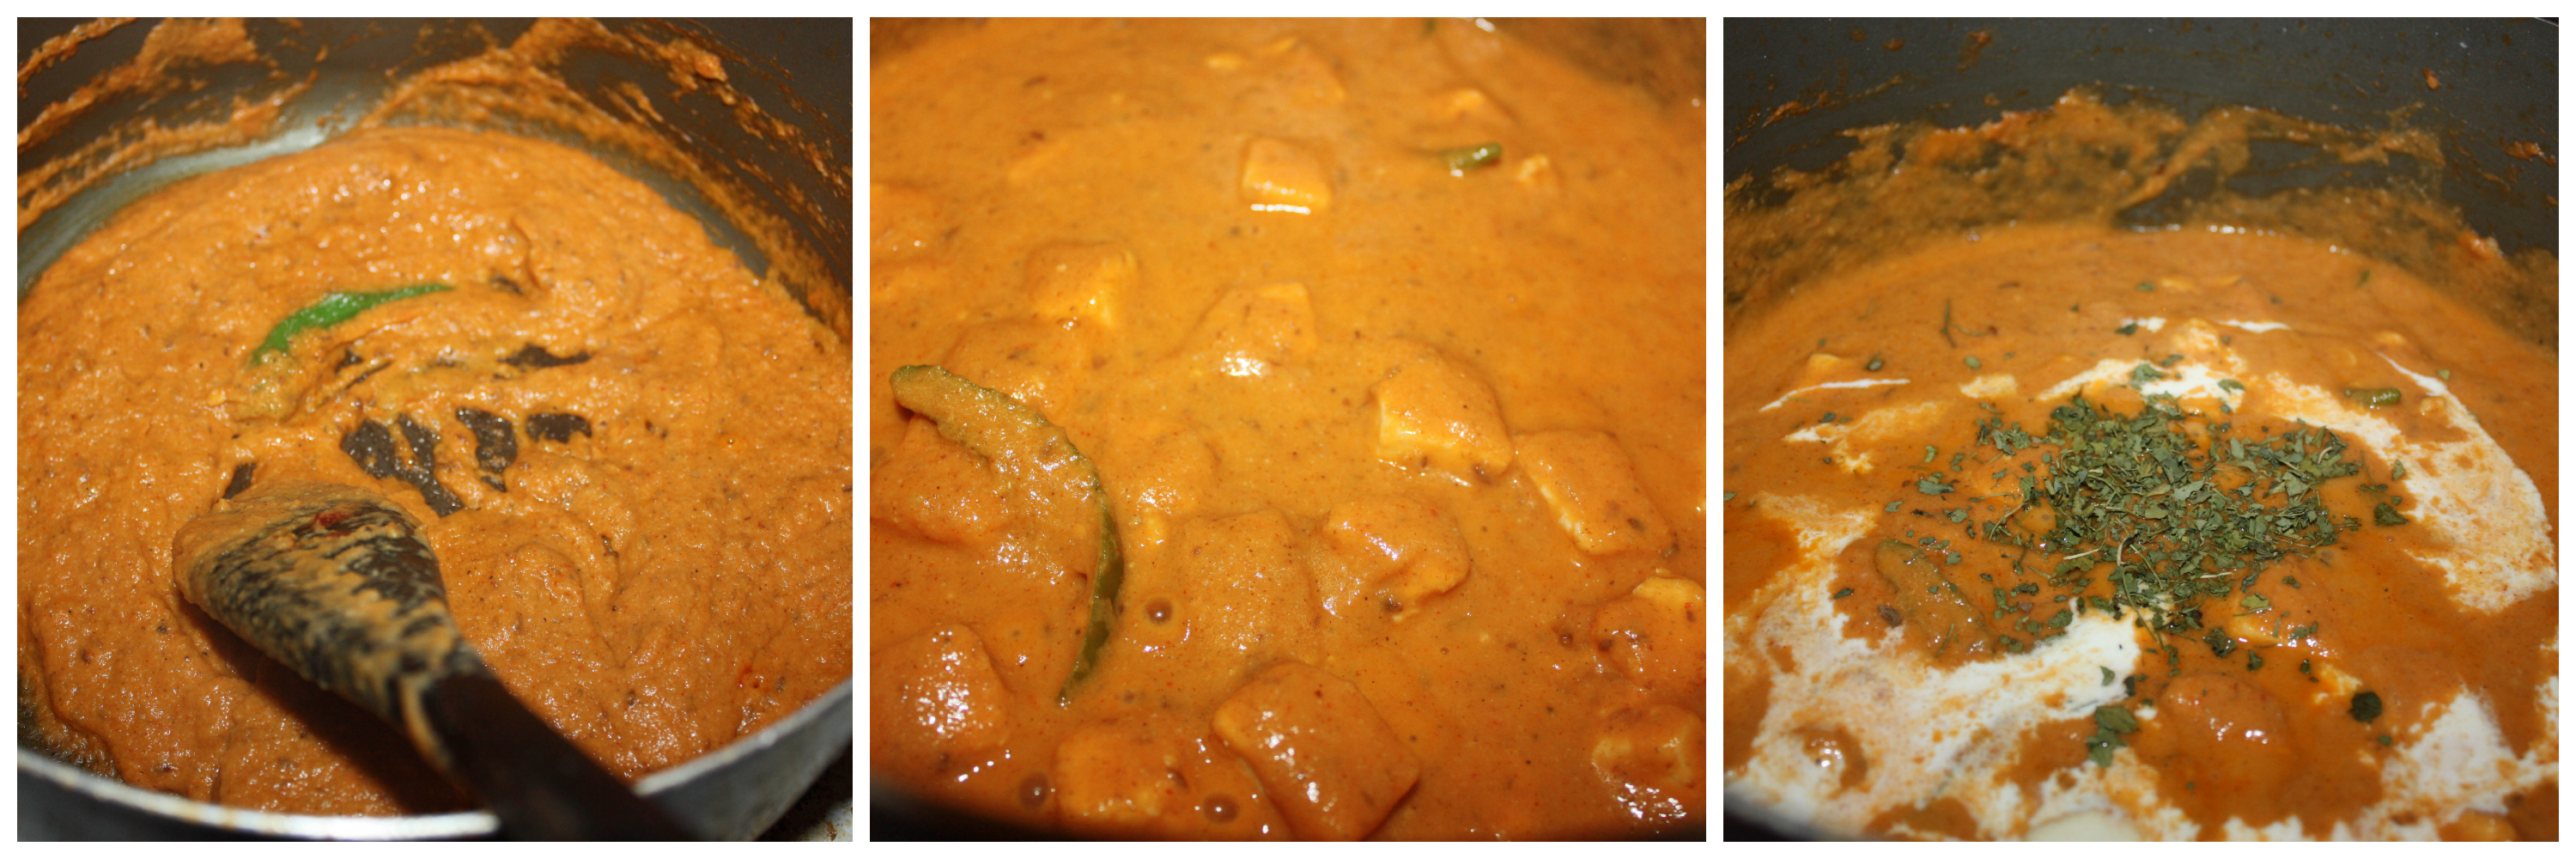
  8. Add paneer, methi leaves, chilli powder,cream,water and boil for ten minutes.
  9. Switch off the flame. Garnish with paneer, ginger and cream.
Notes
1. You can use coriander to garnish as well.
2. Close the lid when you add paneer and water at the end as it will splash out some gravy outside as it boils.
3. You can also fry paneer in butter/oil before you add them.
Wordpress Recipe Plugin by EasyRecipe
3.2.1311


It taste great with peas pulao, veg fried rice Indian or parotta.or any kind of bread you fancy.


Paneer_Makhanwala_Relishthebite_name1

Filed Under: NORTH INDIAN GRAVIES/DAL/CURRY, SIDES Tagged With: Almonds, best paneer recipes, butter, cashews, cream, Gravies, Homemade, Indian, Nuts, PANEER, paneer best indian recipes, paneer butter masala recipes, Paneer Dishes, paneer north indian recipes, paneer recipes restaurant style, paneer recipews, RichCreamyDish, tasty, vegetarian paneer indian recipes, vegetarian party recipes

Coconut Rice/ Thengai sadham

August 22, 2014 by Suki 4 Comments

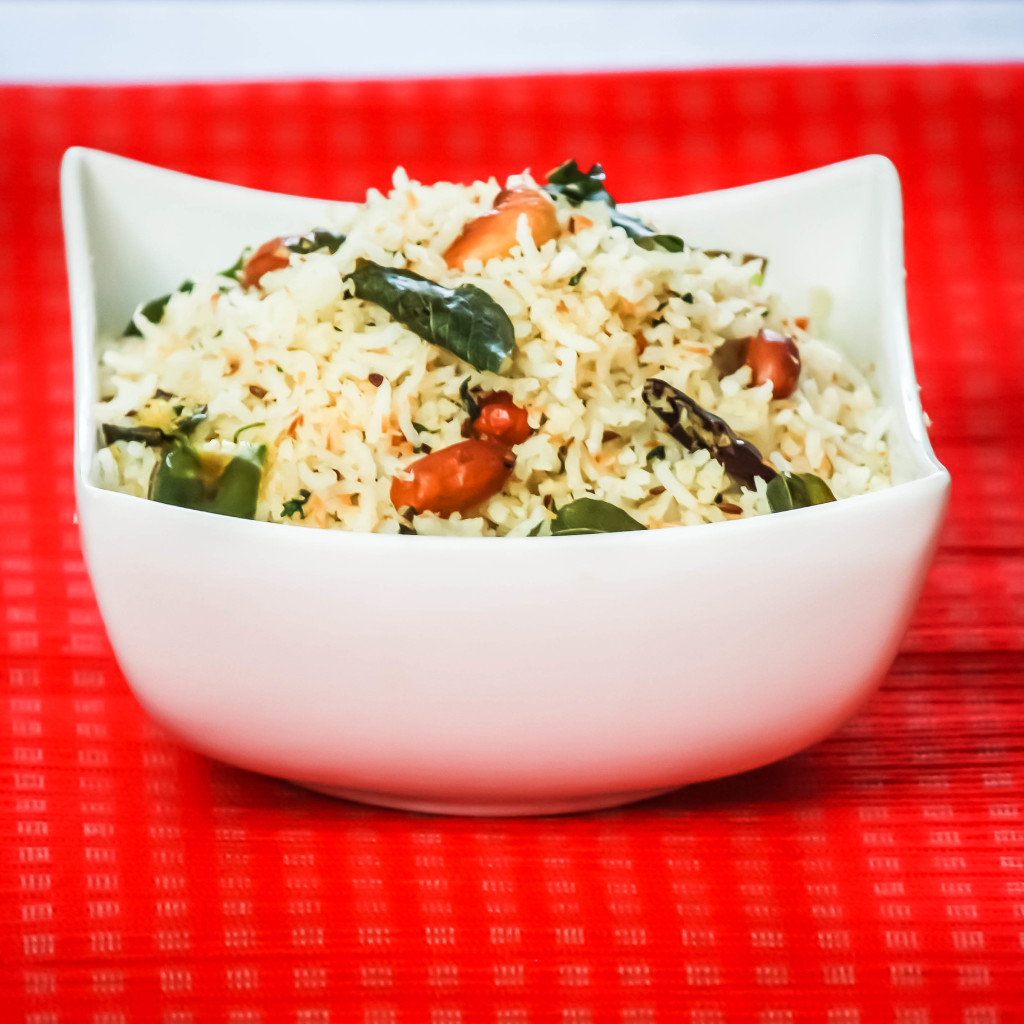
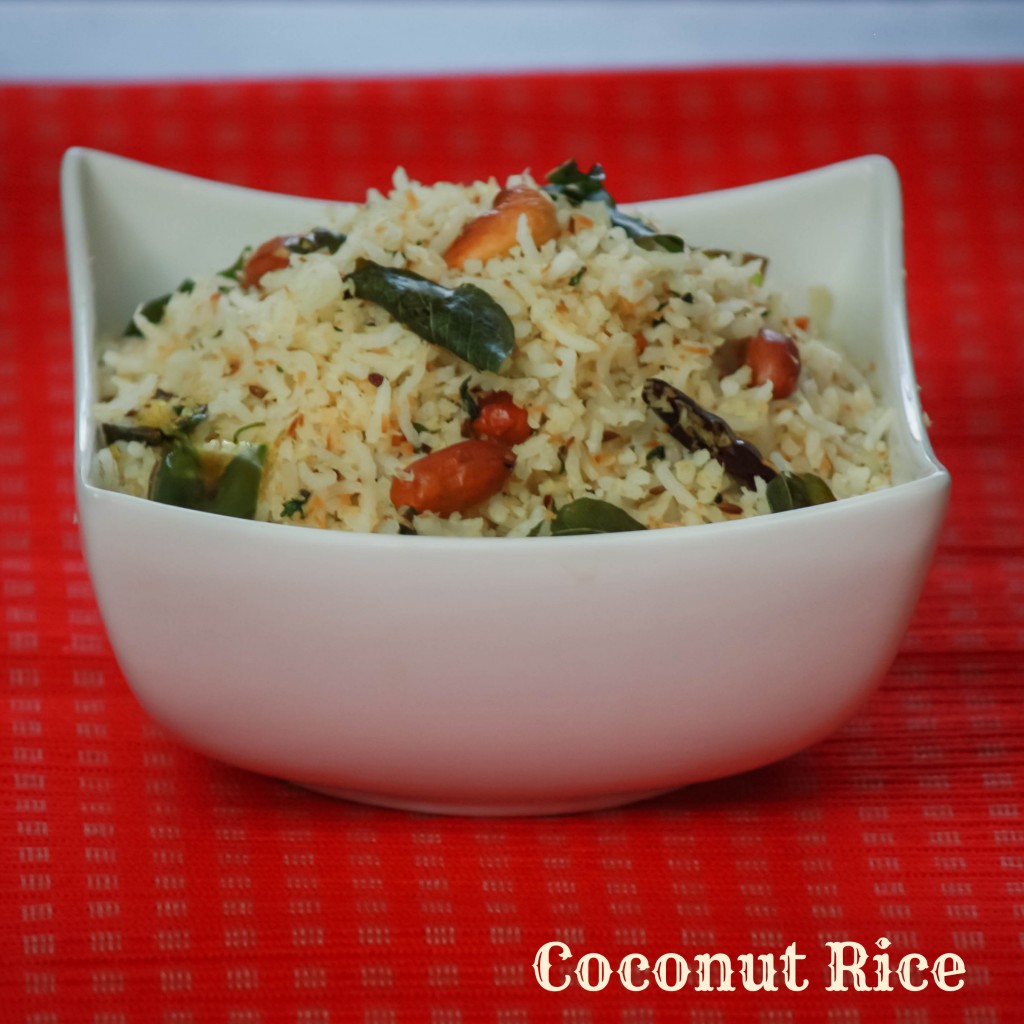
Coconut_Rice_Relishthebite-edit

coconut_rice_Relishthebite

It’s an  authentic rice variety from south India. When i get busy on week days, they are my life saviours.There are lot of variety dishes like lemon rice, capsicum rice, tamarind rice , tomato rice, potato rice… and so on! I don’t have them often because I like to have them once in a while 🙂 only. I need variety in my rice ;). And kids love these rice variety and surely a lunch box idea. I am not sure why they love them may be because of the colours I guess. My sis was telling me that my nephew loves these colourful dishes. My mom used to cook these for lunch-box when I was doing my schooling. They are easy to prepare and sooper quick. The coconut oil, sesame oil and coconut blend the flavours so well.. It has very few ingredients and those ingredients are always at home. Will update other varieties in future post soon.. soon :)!


5.0 from 1 reviews
Print
COCONUT RICE / THENGAI SADHAM
Author: Suganya Hariharan
Prep time:  10 mins
Cook time:  20 mins
Total time:  30 mins
Serves: 5
 
Ingredients
  • Sesame oil -1 tbsp
  • Coconut Oil - 1 tbsp
  • Asafoetida - 2 tsp
  • Mustard seeds - tsp
  • Urad dal - 2tsp
  • Peanuts - Handful
  • Cashew nuts - less than one handful
  • Green chillies - 2 (adjust according to spice level)
  • Dried Red chilly - 1 (adjust according to spice level)
  • Fresh scraped coconut/ Frozen Coconut - 1.5 cup, (packed tightly)
  • Cooked Rice - 3 cup
  • salt to taste -
Instructions
  1. Heat a Kadai with oil, add the mustard seeds, and once it splutters add the urad dal, peanuts, asafoetida and dried red chilly. Fry till the dals turns golden and the peanuts are fried.
  2. Add the green chillies and curry leaves and then add the scraped coconut and sautĂŠ for few minutes on low heat, until the coconut turns light brown. Now add some salt to it according to your taste, sautĂŠ for few seconds.
  3. Add the cooked rice now ,stir gently. You don't want to mash the rice,
Notes
1. Try to use both coconut oil and sesame oil. If not, atleast any one of them. Don' use the normal oil.
2. Both original coconut and frozen coconut are good for this. I have tried both.
3. Arrange the ingredients in a plate to make life even more easy.
4. I like it little spicy, so used lot of chillies, you can use just two. And my chillies here i cant depend, each time their spice level differs a lot. I have very very few Indian grocery shops here. Cant complain.
5. Use channa dal if you have them. It really gives great taste to this dish. I did not have it this time. Use it along with urad dal at the start
6. I used basmathi rice as it gives extra flavor. You can use any rice. I like thefragrance of basmathi rice with coconut. It makes the dish even more rich,
Wordpress Recipe Plugin by EasyRecipe
3.2.1311

Serve hot with papad, potato roast or some curries.


Coconut_Rice_Relishthebite-edit

Filed Under: FESTIVAL RECIPES, RICE/BIRYANI VARIETIES, VEGAN Tagged With: cashew, chilli, coconut, curry leaves, dinner, Indian, lunch, Lunch-box, peanut, quick, rice

Shrimp Biryani

August 16, 2014 by Suki 2 Comments

Shrimp_Biryani_Relishthebite

Shrimp_Biryani_Relishthebite


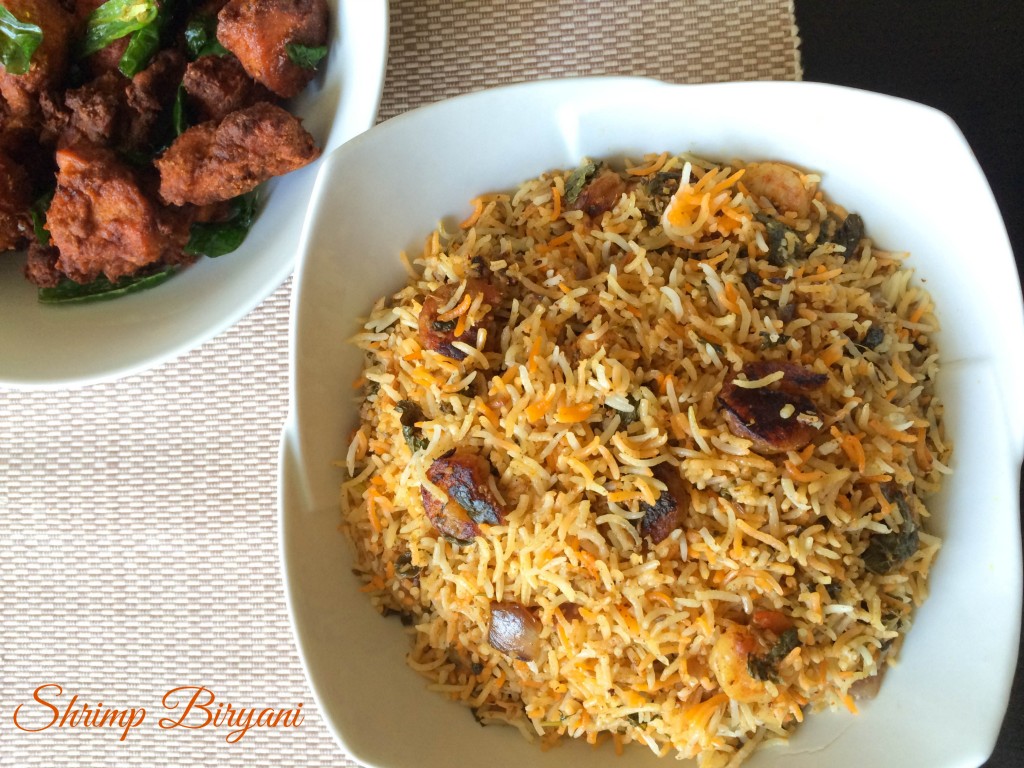
Who does not love the exotic fragrant biryani? 😀 Just the name “biryani” will make many drool. Biryani is one of the most popular dishes in India. Biryani is one of the foods for sure that gives that comfort feeling. Shrimp biryani is extraordinary for seafood lovers and biryani lovers. Shrimp in biryani induce nice flavors to rice. 

The one I have prepared is a home-style biryani. Closing the vessel with the lid when cooking and sealing the edges with wheat dough is the authentic style. Cook on high flame for 2 minutes. Then remove the vessel from the stove and place an iron tawa. Place back the biryani vessel on iron tawa and cook biryani for 20minutes.

Biryani is not strenuous at all to prepare like many believe. Its just little time consuming and it need that little extra special care when we do it. Try to use all the ingredients listed, each ingredient has a special role in the biryani and compliments one with another.

There are many different types and versions of regional biryani recipes. The style that I am cooking today is dum biryani, shrimp gets the direct heat from the flame and the rice is cooked with steam generated by the airtight method of cooking. This way the rice is cooked in the flavors of the shrimp and gets the aroma of the shrimp. I have cooked this recipe couple of times and it has never failed me.For the biryani masala ,I will post my biryani powder soon. But store bought ones are good too. I use aachi biryani powder most of the times.

 It is for all the seafood spicy flavourful food lovers 🙂

My other favorite biryani recipes: Lamb Biryani, ambur biryani, chicken biryani, mushroom biryani, cauliflower biryani

5.0 from 1 reviews
Print
Shrimp Biryani
Author: Suganya Hariharan
Recipe type: Dinner, Lunch
Cuisine: Indian
Prep time:  60 mins
Cook time:  30 mins
Total time:  1 hour 30 mins
Serves: 4 or 5
 
Ingredients
  • Marinate:
  • Ginger garlic paste - 1 ½ tbsp (I grind fresh garlic and ginger)
  • Biryani powder - 2½ tbsp
  • Red chilli powder - 2 ½ tsp
  • Coriander pwder - 1 tsp
  • Cinnamon - 1
  • Cardomon - 2
  • Fennel seeds - 1 tsp
  • Jeera - 1 tbsp
  • Green chilli - 5 (cut them roughly)
  • Mint - 1 /2 cup(chopped)
  • Coriander- ½ cup minced
  • Grated coconut - 3 tbsp finely grated
  • Curd - 1 cup
  • Oil - 3tbsp
  • Prawn - 600 grams ( shrimp, peeled, raw, de-shelled & de-veined

    Rice:
  • Basmati rice - 3 cup (soaked for twenty minutes)
  • Jeera - 2 tsp
  • Salt - 2 ½ tbsp. (according to taste)

    Others:
  • Oil - ½ cup
  • Onions - 2 (sliced beautifully)
  • Ghee - 2 tbsp
  • Garam masala powder - 1 tsp
  • Salt - 1 tbsp
  • Orange food colour mixed with 2tsp of water or saffron in warm water
  • Lime juice
  • coriander – to garnish
Instructions
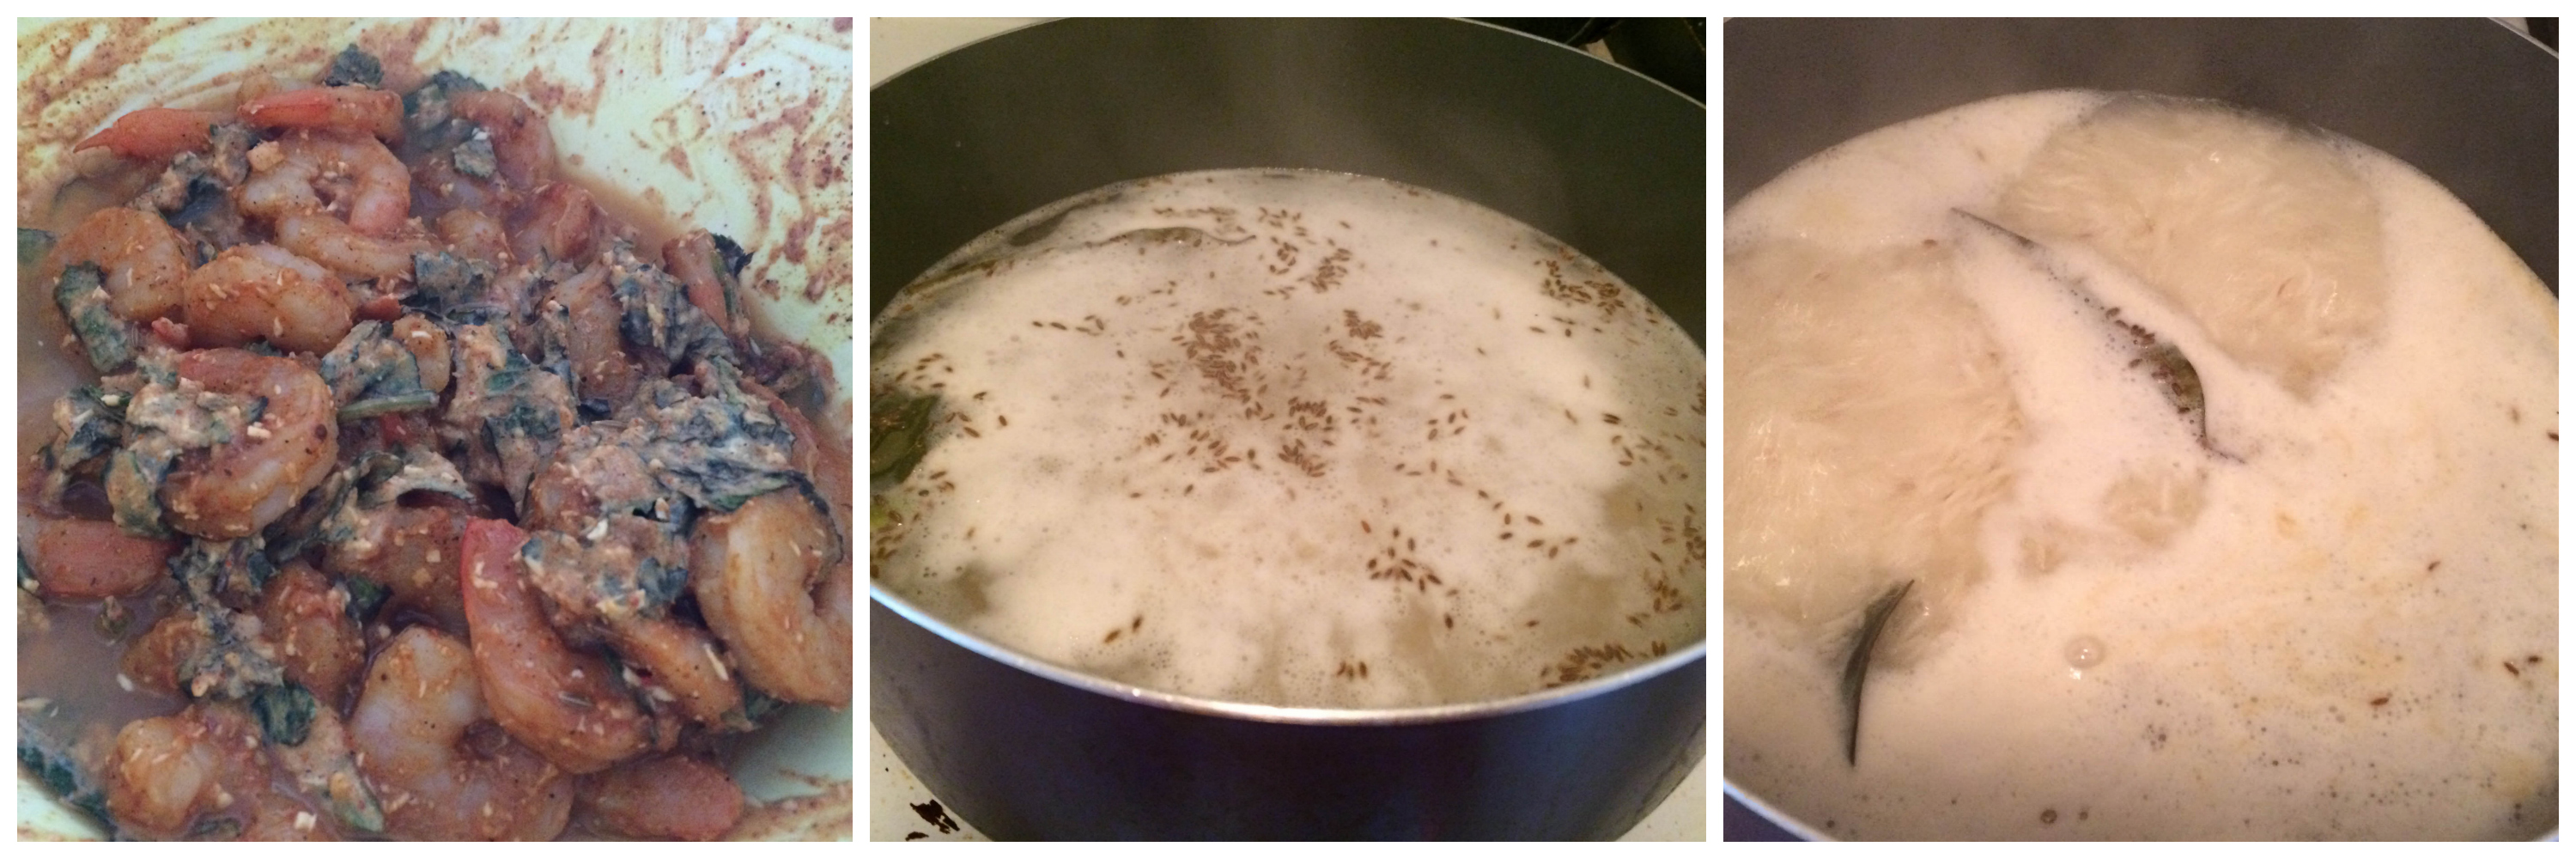
  1. Marinate everything listed under “marinate” section for at least an hour.
  2. Boil 8 cups of water in high heat. When it boils vigorously, add the soaked rice, jeera and salt. Cook till its 80% done. Usually I put them for 5 minutes after adding rice. That is usually 80% done.
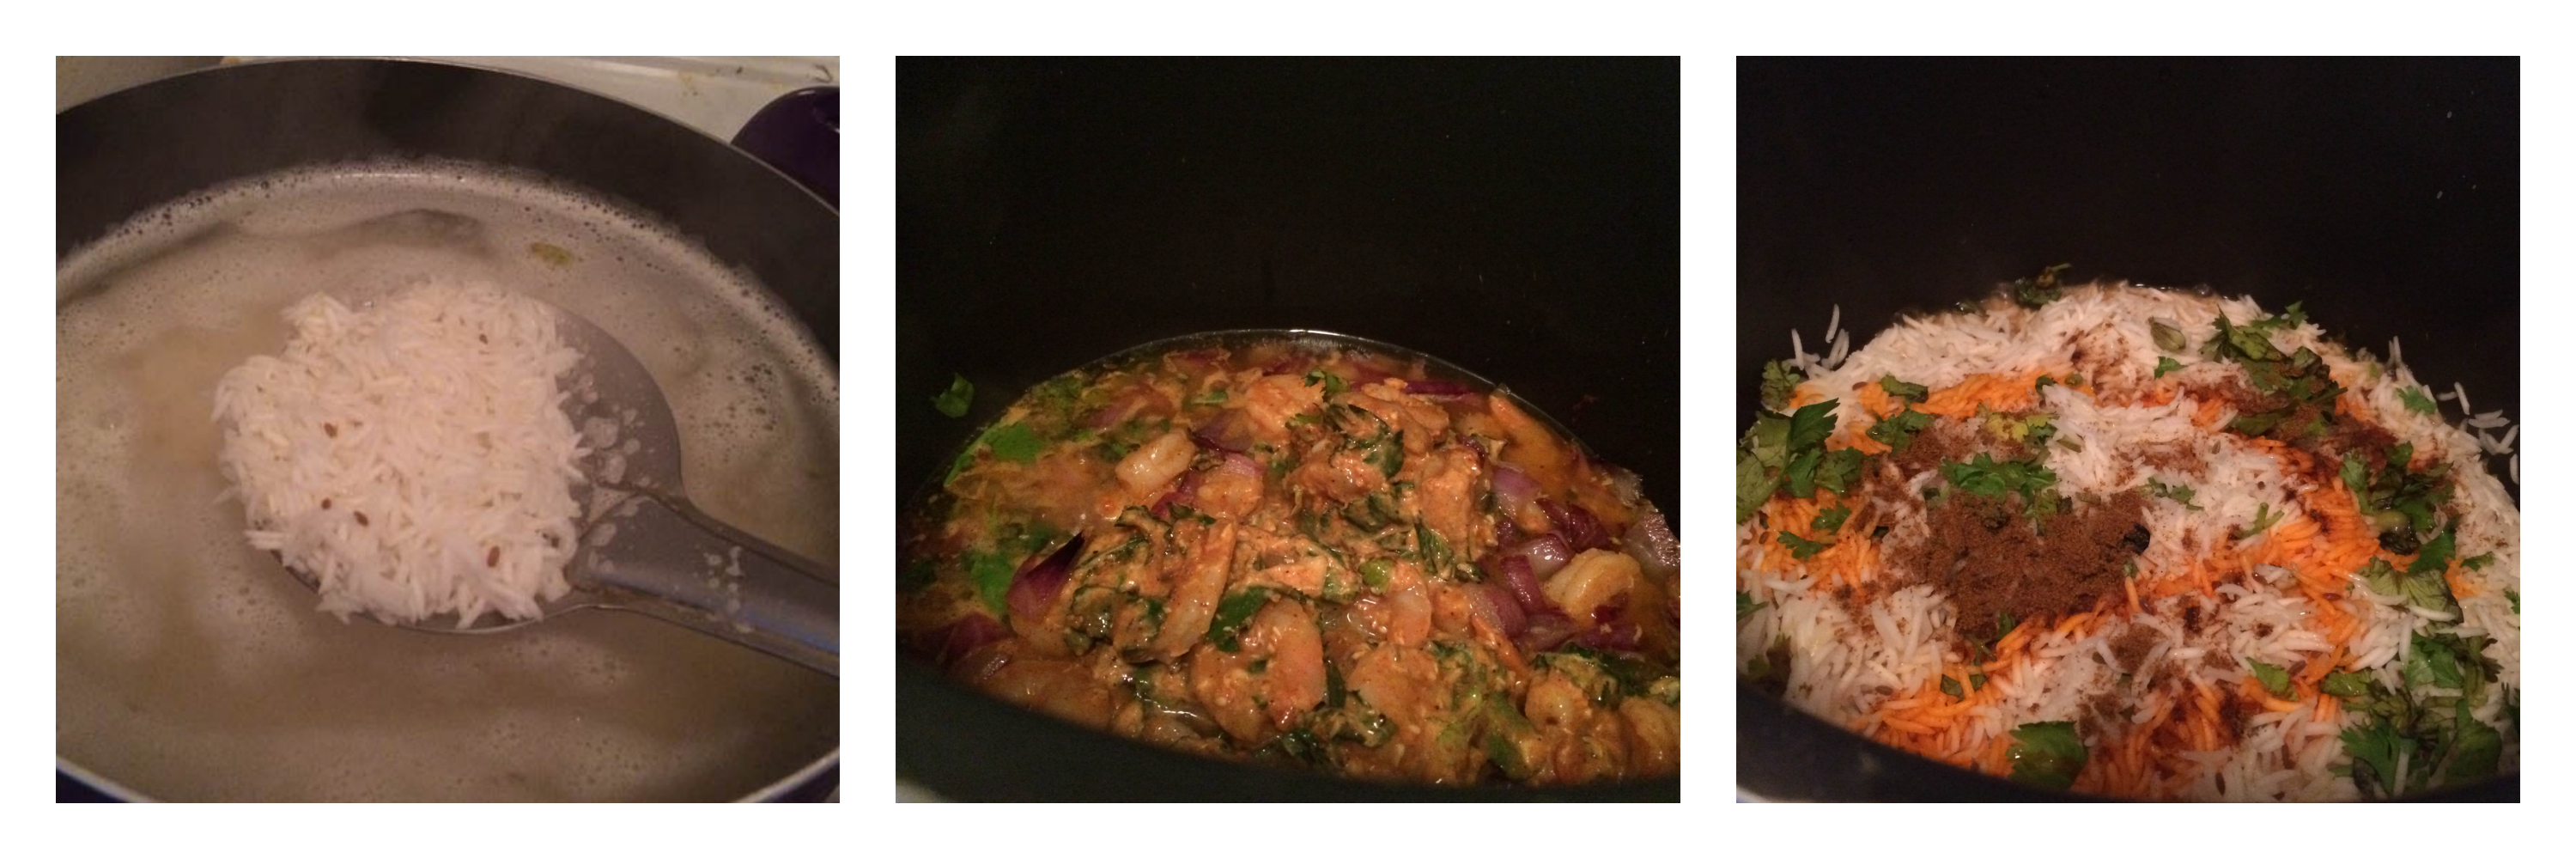
  3. Meanwhile on the other side, heat a heavy bottom pan with oil. Add the onions and salt. SautĂŠ them till they become crispy. Add the marinated shrimp to it and sautĂŠ for 3-4 minutes. Stir in between. (I am using cooked shrimp that we get on market, its hard to get raw shrimps around here. If you are cooking with raw shrimps, add the shrimp and cook for 5minutes till it is done.)
  4. Top the shrimp with the cooked rice, add the ghee, garam masala powder. Shrimp and rice will cook perfectly in that heat.
  5. Close it with tight lid, if possible Place lid and over the lid place a heavy weight (like cooker) keep it in medium for 10 minutes and switch it off.
  6. Top it with the food color mixture,coriander and mix after a minute. After 5 minutes, gently mix the rice and gravy. squeeze the lemon and serve.
  7. Biryani ready!
Notes
1.Don’t over soak the rice, and then it will not give you that biryani texture in the rice.
2.Gently mix the rice at the end, don’t break the rice.
3.Don’t compromise on the quality of the rice. Use basmathi rice and not long grained rice.
4. The red colour is not healthy. But sometimes I use it. You can add the saffron soaked in warm milk instead.
5. I am using cooked shrimp that we get on market; it’s hard to get raw shrimps around here. If you are cooking with raw shrimps, add the shrimp and cook for another 5minutes till it is done.
Wordpress Recipe Plugin by EasyRecipe
3.2.1311


Serve with raita, Chicken curry or any curry, boiled eggs or chicken 65. 

ShrimpBiryani_relishthebite

Filed Under: NON-VEG RECIPES, RICE/BIRYANI VARIETIES Tagged With: biryani, biryani reci indian recipes, dinner, flavourful, Indian, Indian Recipes, lunch, marinate, Non-vegetarian, prawn biryani, prawn indian recipes, restaurant style prawn biryani, rice, rice indian recipes, seafood recipes, Shrimp, shrimp biryani, shrimp Indian recipes, spices

  • Facebook
  • Google+
  • Instagram
  • Pinterest
  • Twitter

LOOKING FOR SOMETHING?

logo
Food Advertisements by
logo
Food Advertisements by

Categories

STAY CONNECTED

  • Facebook
  • Google+
  • Instagram
  • Pinterest
  • Twitter

SUBSCRIBE BY EMAIL

SEARCH RELISH THE BITE

logo
Food Advertisements by

Copyright © 2025 ¡ Lifestyle Pro Theme on Genesis Framework ¡ WordPress ¡ Log in