• Home
  • Page Layouts
  • Page Templates
  • Theme Colors
    • Lifestyle Pro Blue
    • Lifestyle Pro Green
    • Lifestyle Pro Mustard
    • Lifestyle Pro Purple
    • Lifestyle Pro Red
    • Lifestyle Pro Teal

Relish The Bite

Taste of happiness

  • HOME
  • ABOUT
  • RECIPE INDEX
    • SNACKS & APPETIZERS
    • BREAKFAST
    • BAKED RECIPES
    • LUNCH & DINNER
      • RICE/BIRYANI VARIETIES
      • SIDES
        • DRY CURRY/STIR-FRY
        • SOUTH INDIAN CURRY/KUZHAMBU
        • NORTH INDIAN CURRY/DAL
        • RAITA/DIPS/CHUTNEY
        • Soups/Salads
      • PASTA PIZZA & TACOS
      • BREAD
      • CHINESE ASIAN INSPIRED
    • NON-VEG RECIPES
    • DESSERTS
    • BEVERAGES
  • SNACKS
  • BREAKFAST
  • NON-VEG RECIPES
  • RICE/BIRYANI VARIETIES
  • LAMB
  • SOUTH INDIAN CURRY/KUZHAMBU
  • VEGAN
  • NORTH INDIAN CURRY/DAL
  • DRY CURRY/STIR-FRY
  • PASTA & TACOS
  • CHINESE ASIAN INSPIRED
  • BAKED RECIPES
  • COLLECTIONS
  • BREAD
  • BEVERAGES
  • DESSERTS
  • FESTIVAL RECIPES
    • SNACKS & APPETIZERS
    • SWEETS/DESSERTS
  • RESOURCES
    • HOW TO START A BLOG
    • TITBITS
    • PRESS
  • CONTACT
You are here: Home / 2014 / Archives for August 2014

Archives for August 2014

Paneer Makhanwala

August 31, 2014 by Suki 6 Comments

Paneer_Makhanwala_Relishthebite_name1

Paneer_Makhanwala_Relishthebite_name2
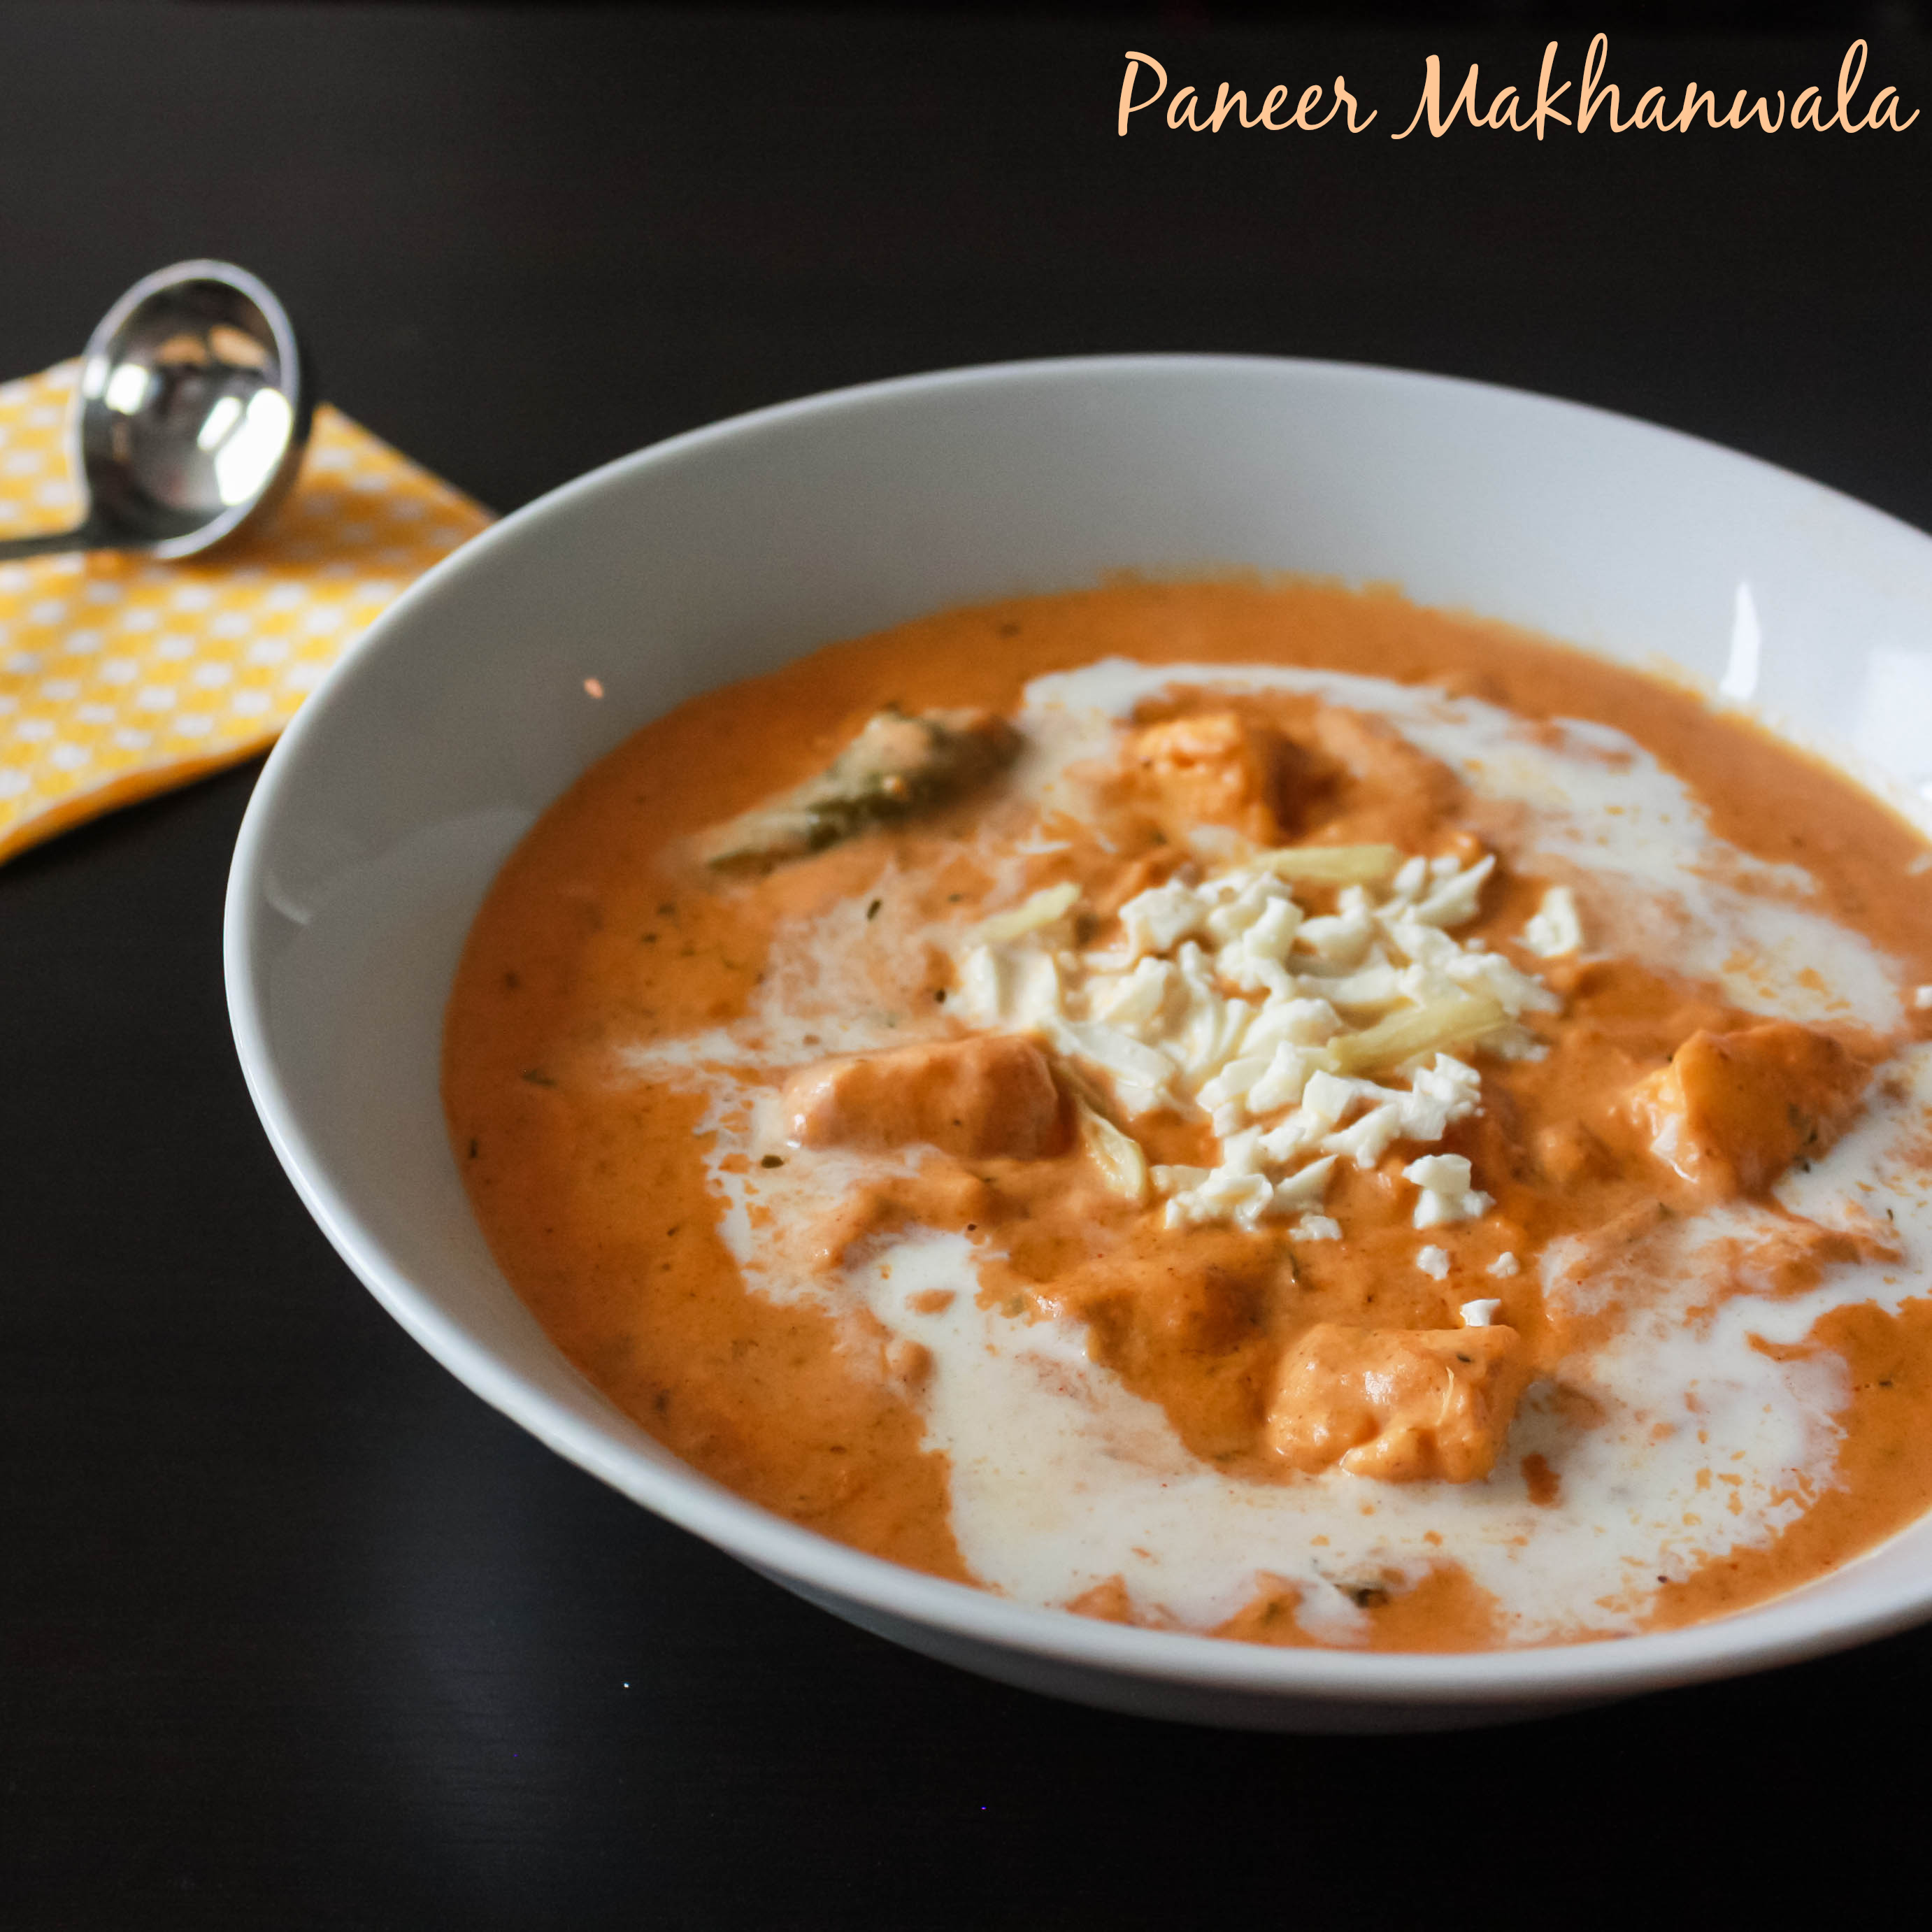
Paneer cubes in a buttery nutty creamy tangy flavor. It is a rich dish with really tasty ingredients. Paneer dishes are always a real treat for vegetarians. I have heard people say that Paneer makhani,paneer butter masala and paneer makhanwala are same and its just the name which differs. But I personally feel paneer butter masala and paneer makhanwala is different in the method of preparation and also its taste. I will soon post the recipe of paneer butter masala and you will know the difference. I am not sure what is the originality of each dish. ;)Whats there in the name, its the taste which matters a lot 😉 Right?

My friends came over from Ottawa for the weekend, so did this for them. I made it with roti. And they really loved it clap. Happy ME ! 😀 When there is guest over and I wanted to do vegetarian dishes, I will make it a point to do atleast one paneer dish ;). It goes well with any kind of pulav, jeera rice, naan,roti or any kind of bread you fancy.

You can always skip the ingredients a bit if you don’t have that specific ingredient at home. You can do this recipe with tofu,chicken,potato instead of paneer. Never be afraid to try new flavors in your cookingthumbsup. I always believe in that. 🙂

It taste great with peas pulao, veg fried rice Indian or parotta.

I have a collection of paneer recipes to look and my other favorite paneer recipes: Butter paneer curry, paneer sandwich, and paneer dumplings

5.0 from 1 reviews
Print
PANEER MAKHANWALA
Author: Suganya Hariharan
Recipe type: Indian
Cuisine: Indian
Prep time:  5 mins
Cook time:  30 mins
Total time:  35 mins
Serves: 4
 
Ingredients
  • For the gravy:
  • Onion - 1 Chopped
  • Tomato - 2 Chopped
  • Garlic - 5 Chopped
  • Ginger - ½ inch Chopped
  • Cinnamon - 1
  • Cardomon - 2 whole
  • Cashews - 7 whole
  • Almond - 7 whole
  • Jeera - 1 Tbsp
  • Salt - As needed
  • Water - 2 cups
    [other]
  • Unsalted Butter - 2 Tbsp
  • Paneer - 250gms
  • Chilli Powder - 1 Tbsp
  • Green Chilli - 1 Slit
  • Kasturi Methi - 1 tbsp
  • Garam Masala Powder - 1 tsp
  • Sugar - ½ tsp
  • Water - 1½ cups
    [Garnish]
  • Paneer - 1 Tbsp Grated
  • Ginger - ½ inch, Juilenne
  • Cream - 1 Tbsp
  • Salt - As needed
Instructions
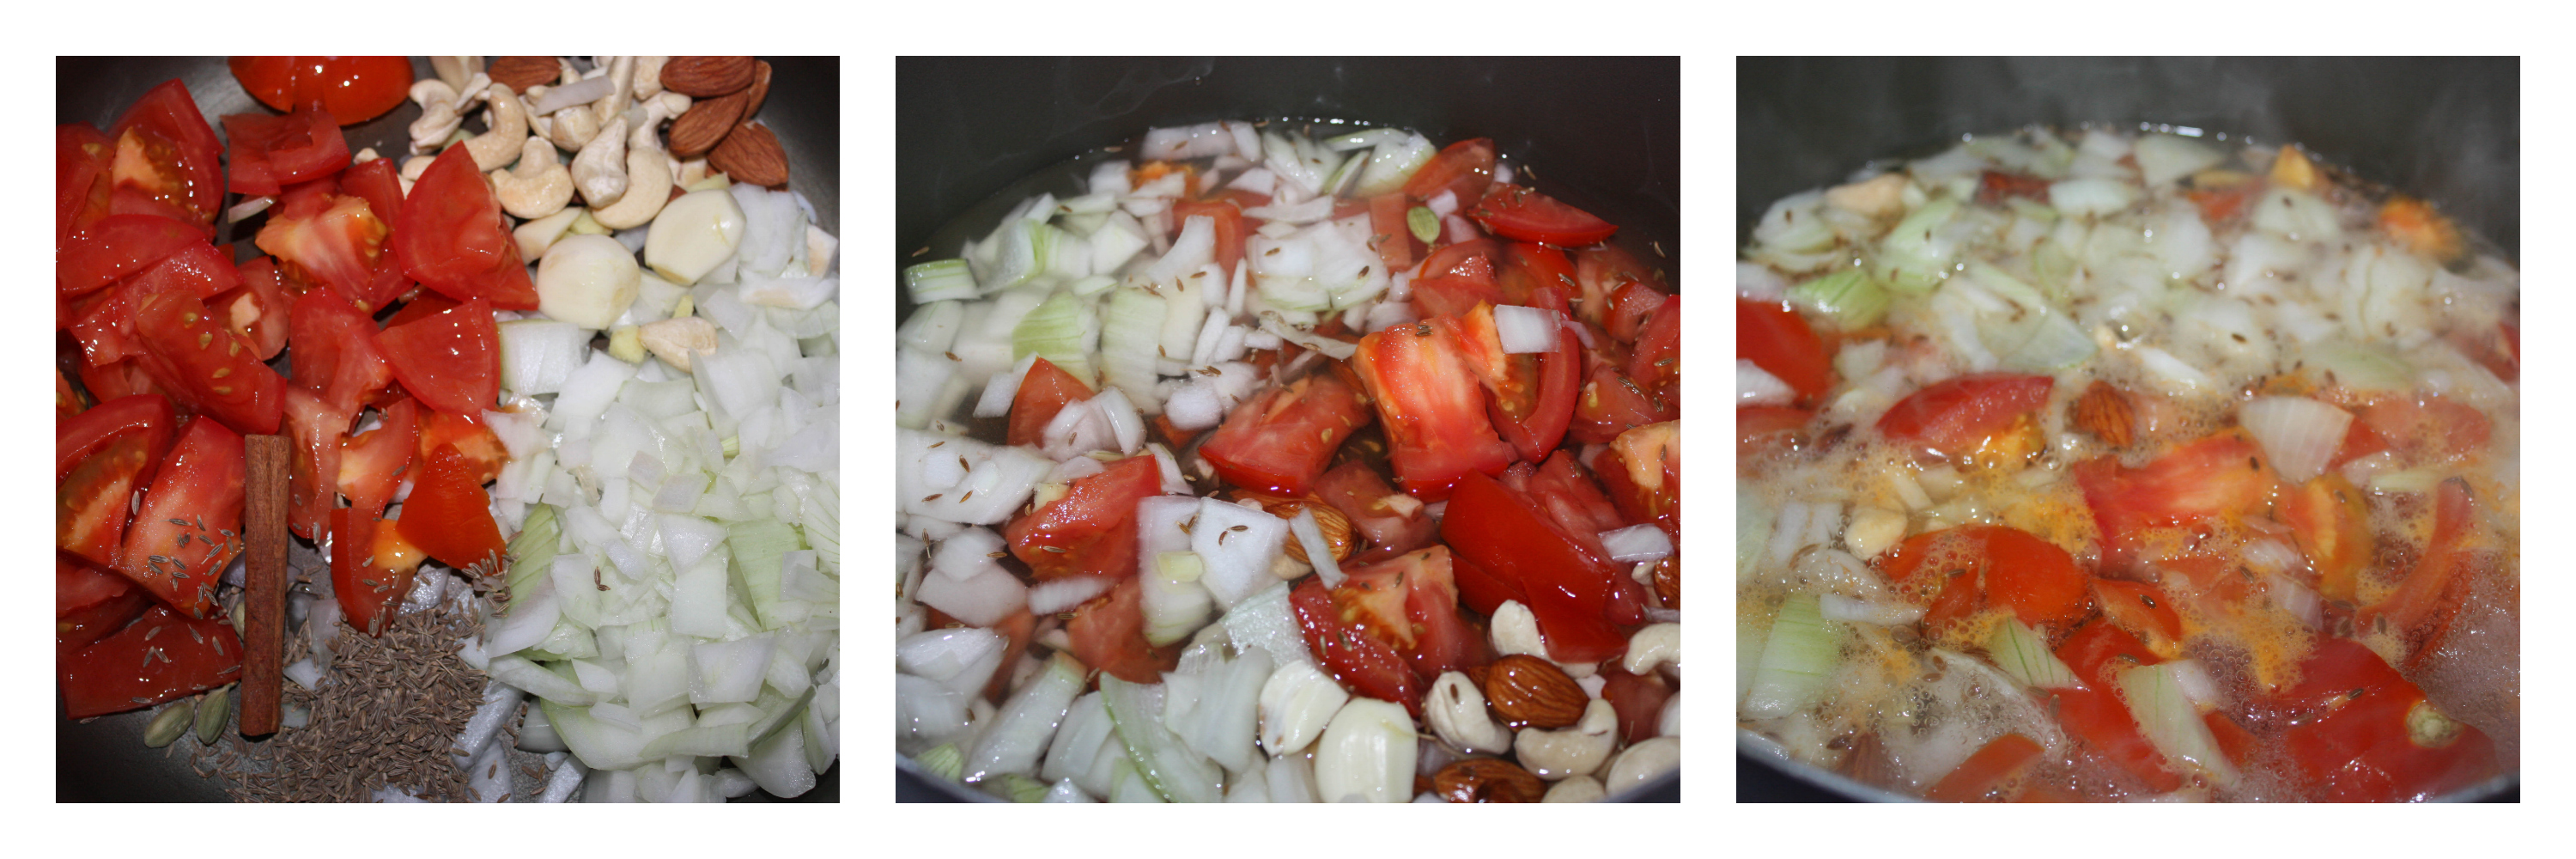
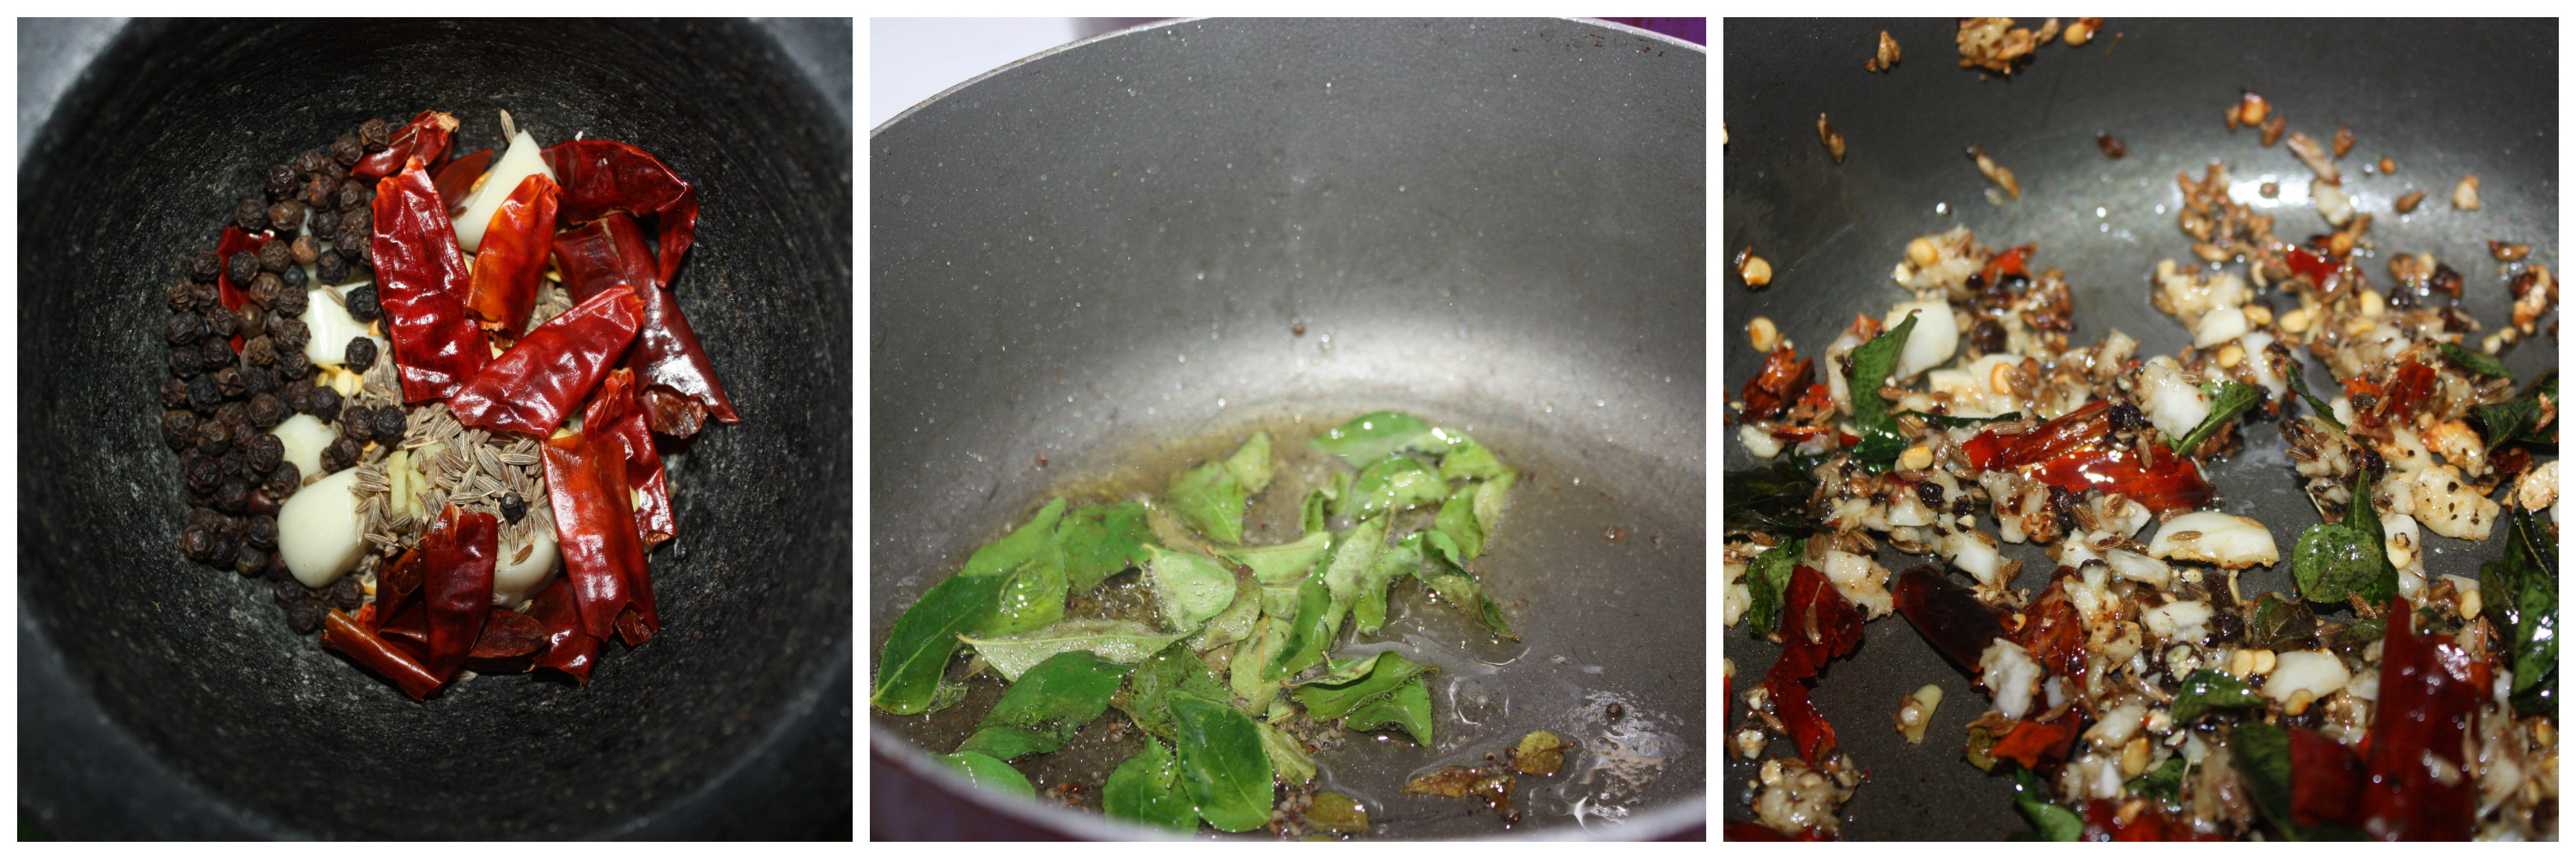
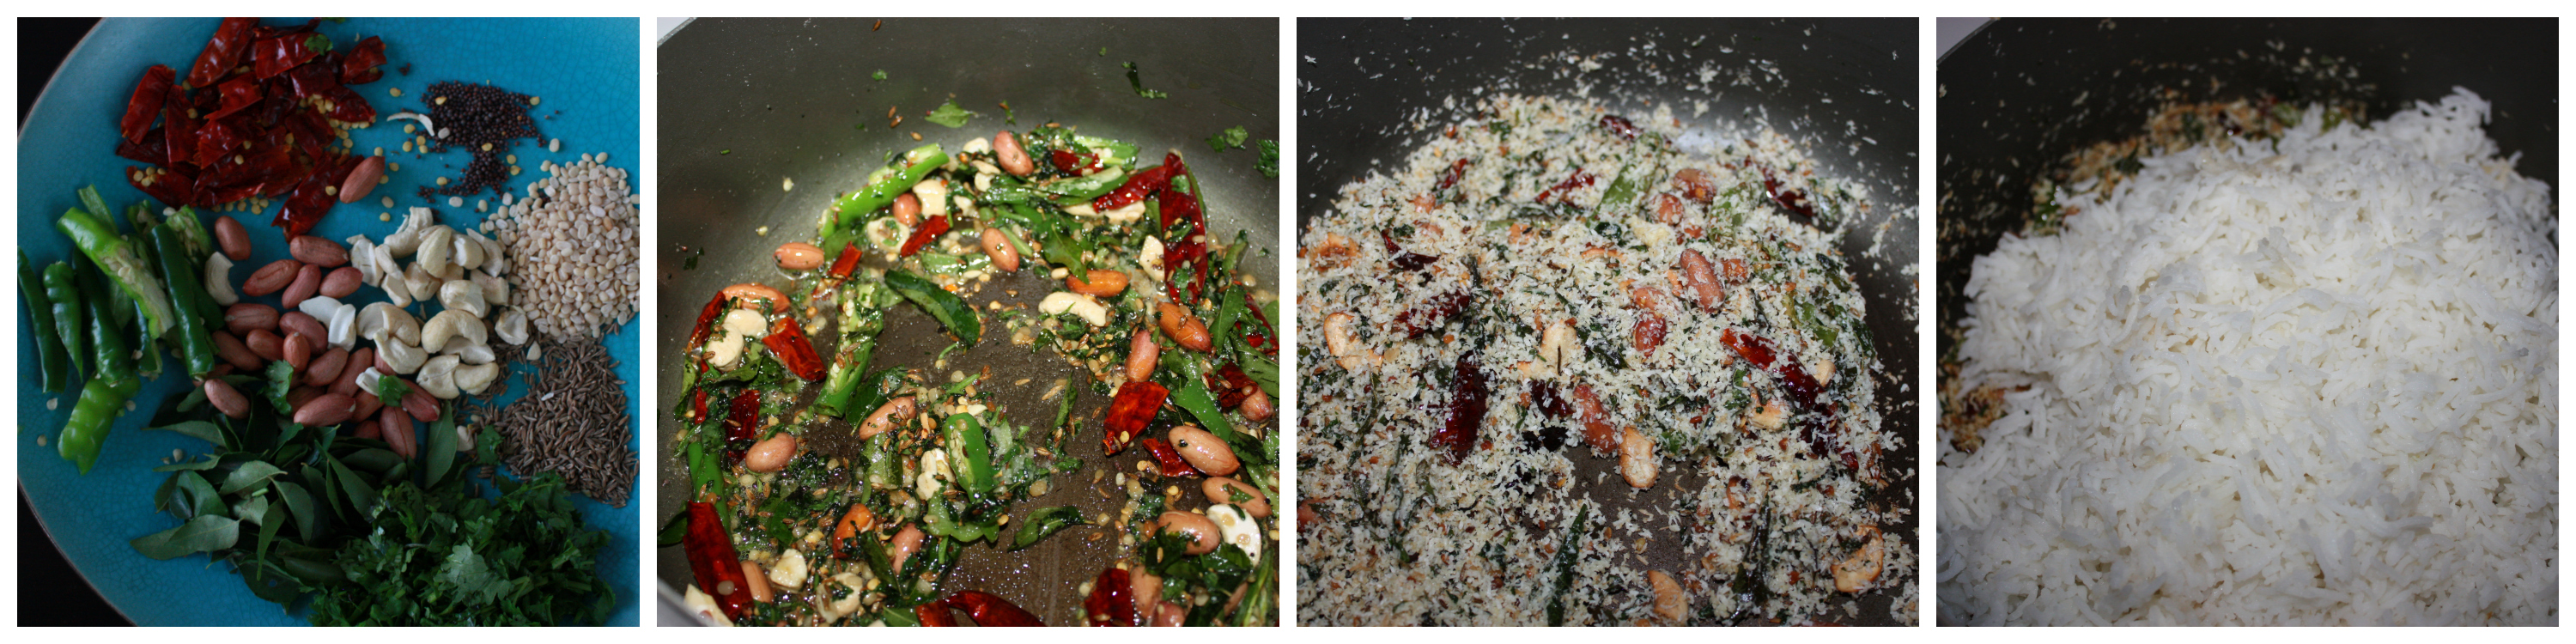
  1. Mix the chopped onions, tomatoes, cashews, almonds, garlic, ginger, cinnamon, cardomon, jeera, salt and water in a pan.
  2. Cook for about 15- 20 minutes on a medium flame till everything gets cooked. Allow this to cool.
  3. Then add everything in a blender. Blend them into a smooth paste with not even small pieces of cashews on it.
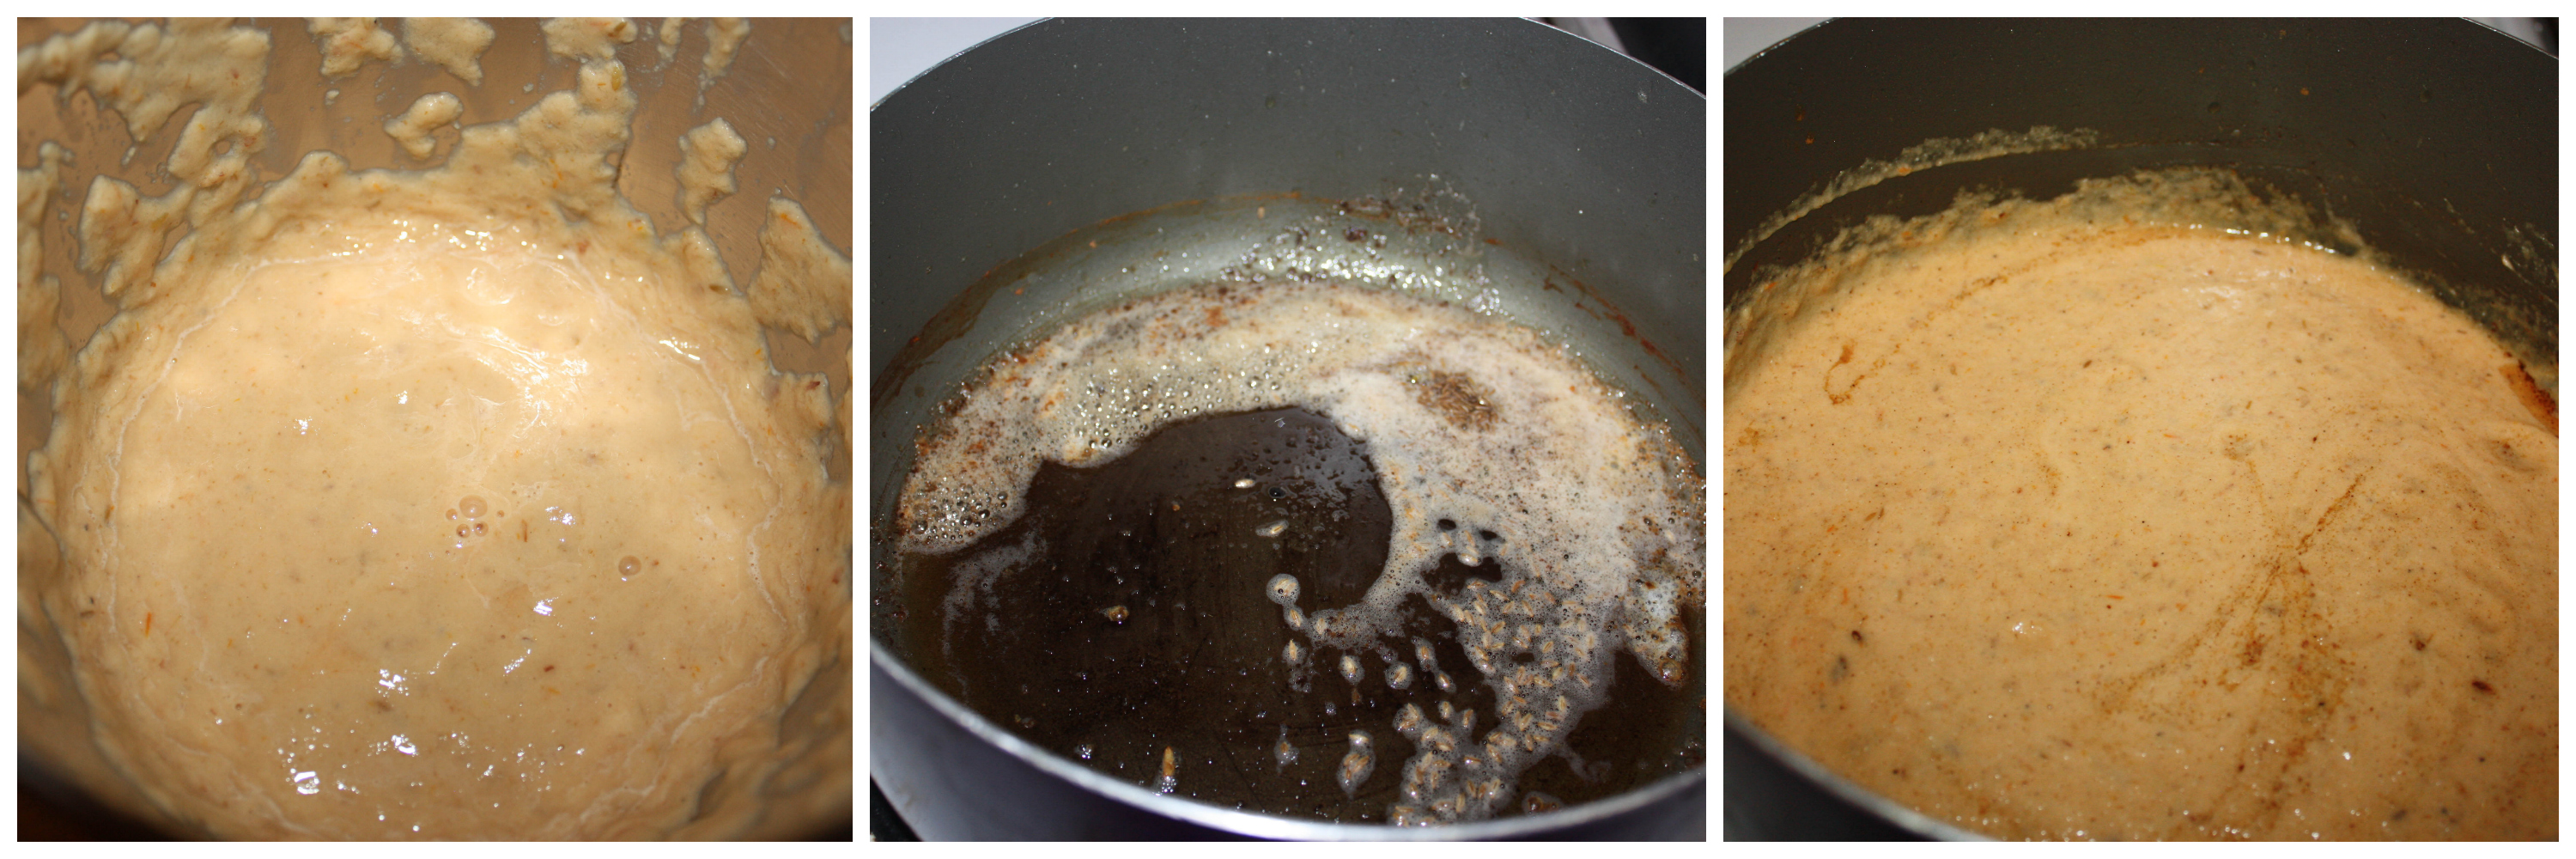
  4. Heat butter in the same pan.
  5. Add the jeera, blended makhani paste and stir well.
  6. Add chilli powder. (If you want rich color, you can add kashmiri chilli powder. I used normal one)
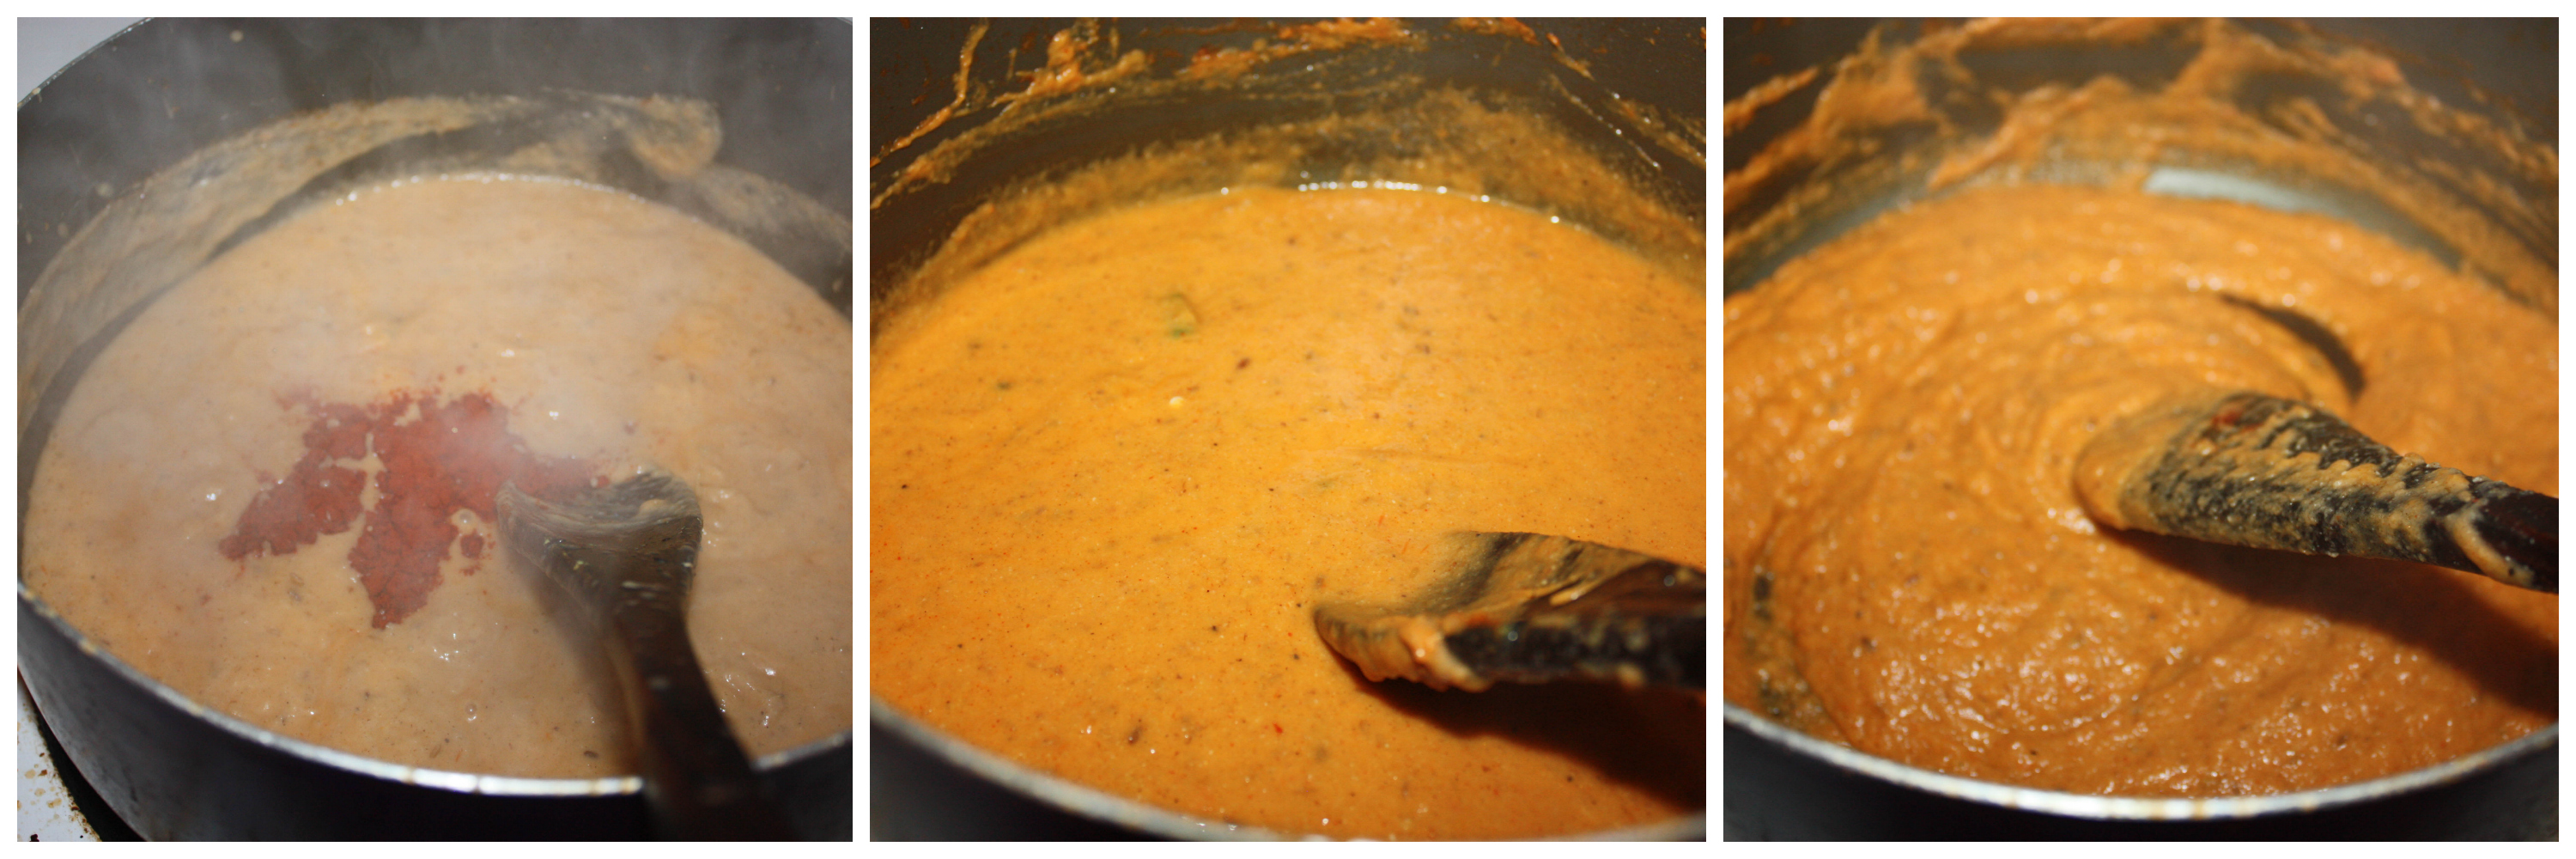
  7. Stir well &sauté the masala on a medium flame till the butter ooze out. It has to be sauted really well till butter ooze out.
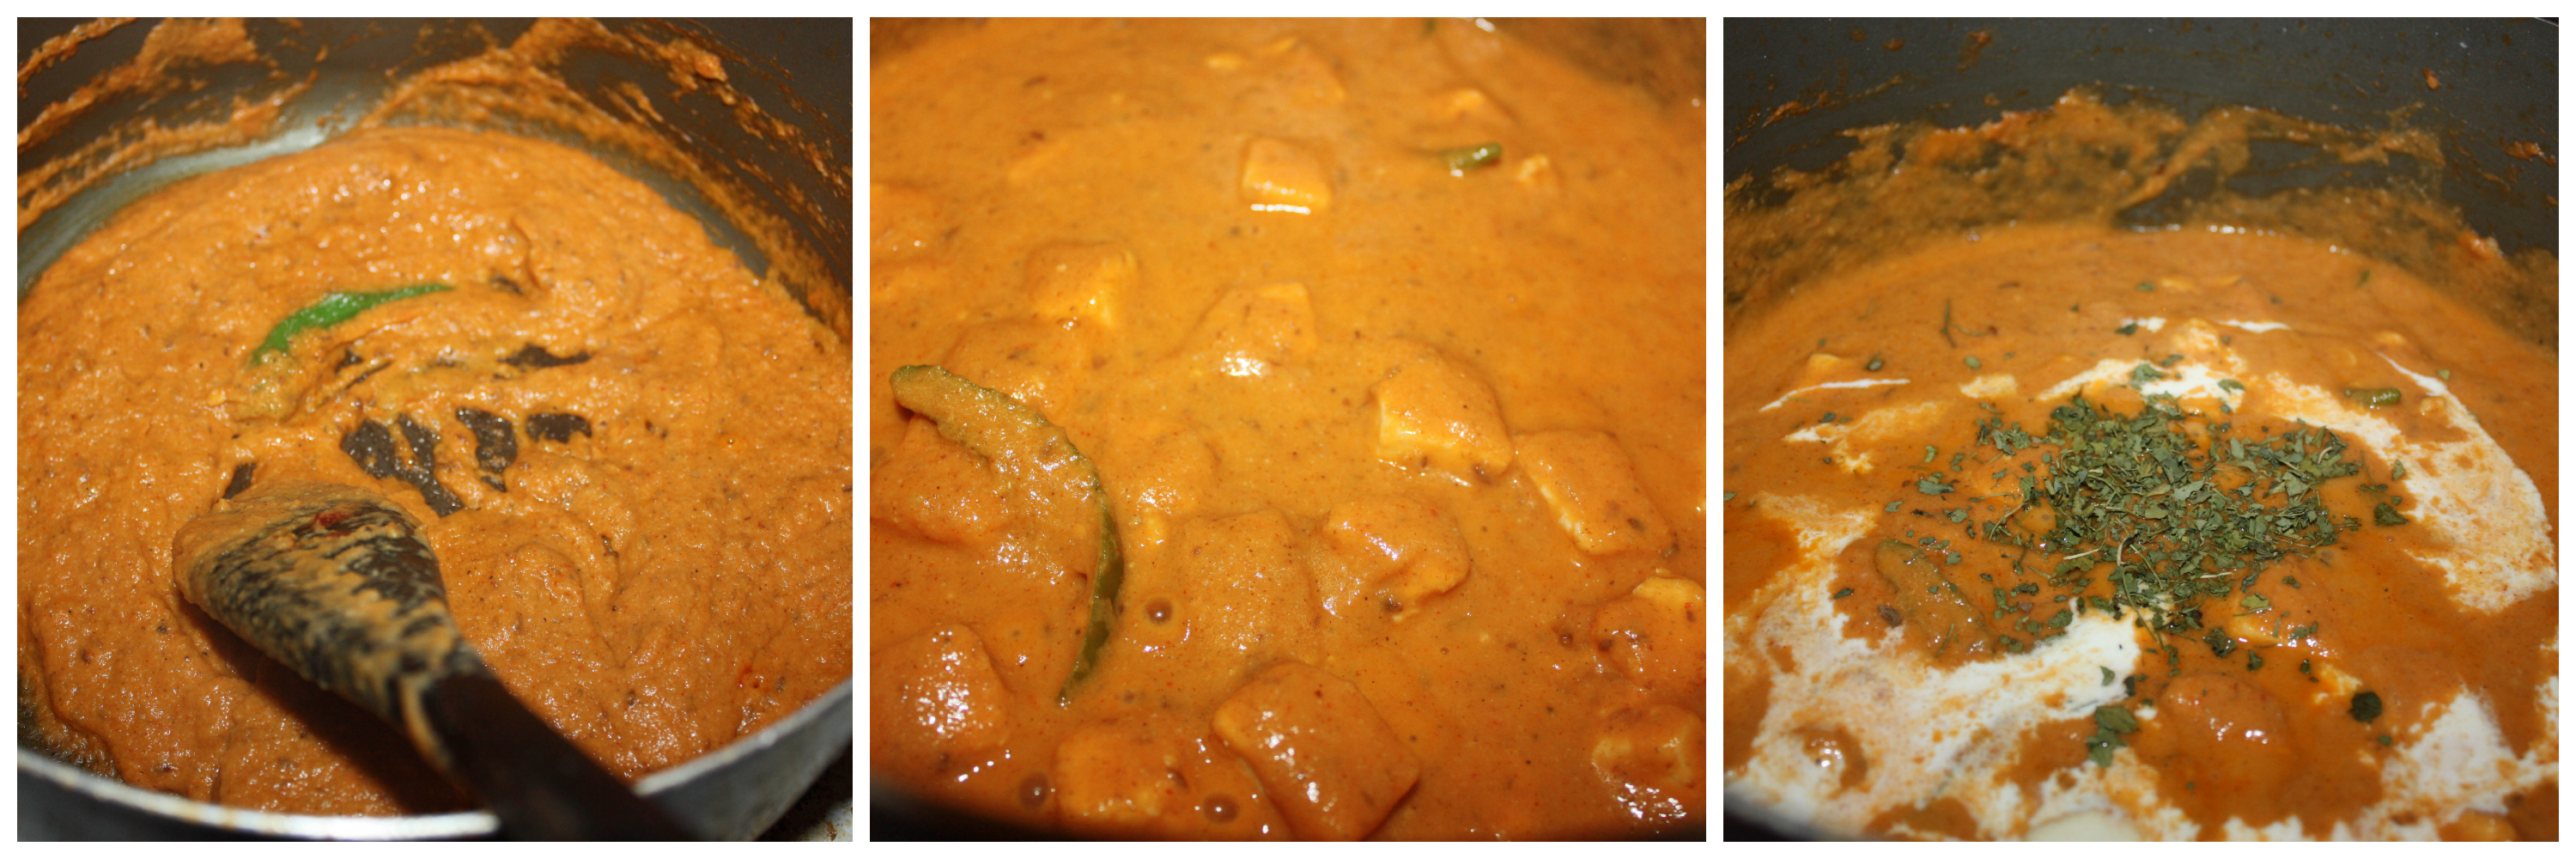
  8. Add paneer, methi leaves, chilli powder,cream,water and boil for ten minutes.
  9. Switch off the flame. Garnish with paneer, ginger and cream.
Notes
1. You can use coriander to garnish as well.
2. Close the lid when you add paneer and water at the end as it will splash out some gravy outside as it boils.
3. You can also fry paneer in butter/oil before you add them.
Wordpress Recipe Plugin by EasyRecipe
3.2.1311


It taste great with peas pulao, veg fried rice Indian or parotta.or any kind of bread you fancy.


Paneer_Makhanwala_Relishthebite_name1

Filed Under: NORTH INDIAN GRAVIES/DAL/CURRY, SIDES Tagged With: Almonds, best paneer recipes, butter, cashews, cream, Gravies, Homemade, Indian, Nuts, PANEER, paneer best indian recipes, paneer butter masala recipes, Paneer Dishes, paneer north indian recipes, paneer recipes restaurant style, paneer recipews, RichCreamyDish, tasty, vegetarian paneer indian recipes, vegetarian party recipes

Tomato Dal Rasam/ Tomato Soup

August 29, 2014 by Suki 6 Comments

Tomato_Rasam_name_relishthebite

Tomato_Rasam_name_relishthebiteIt’s been five days since I posted a recipe 🙁 I went for a vacation to Florida 🙂 🙂victory
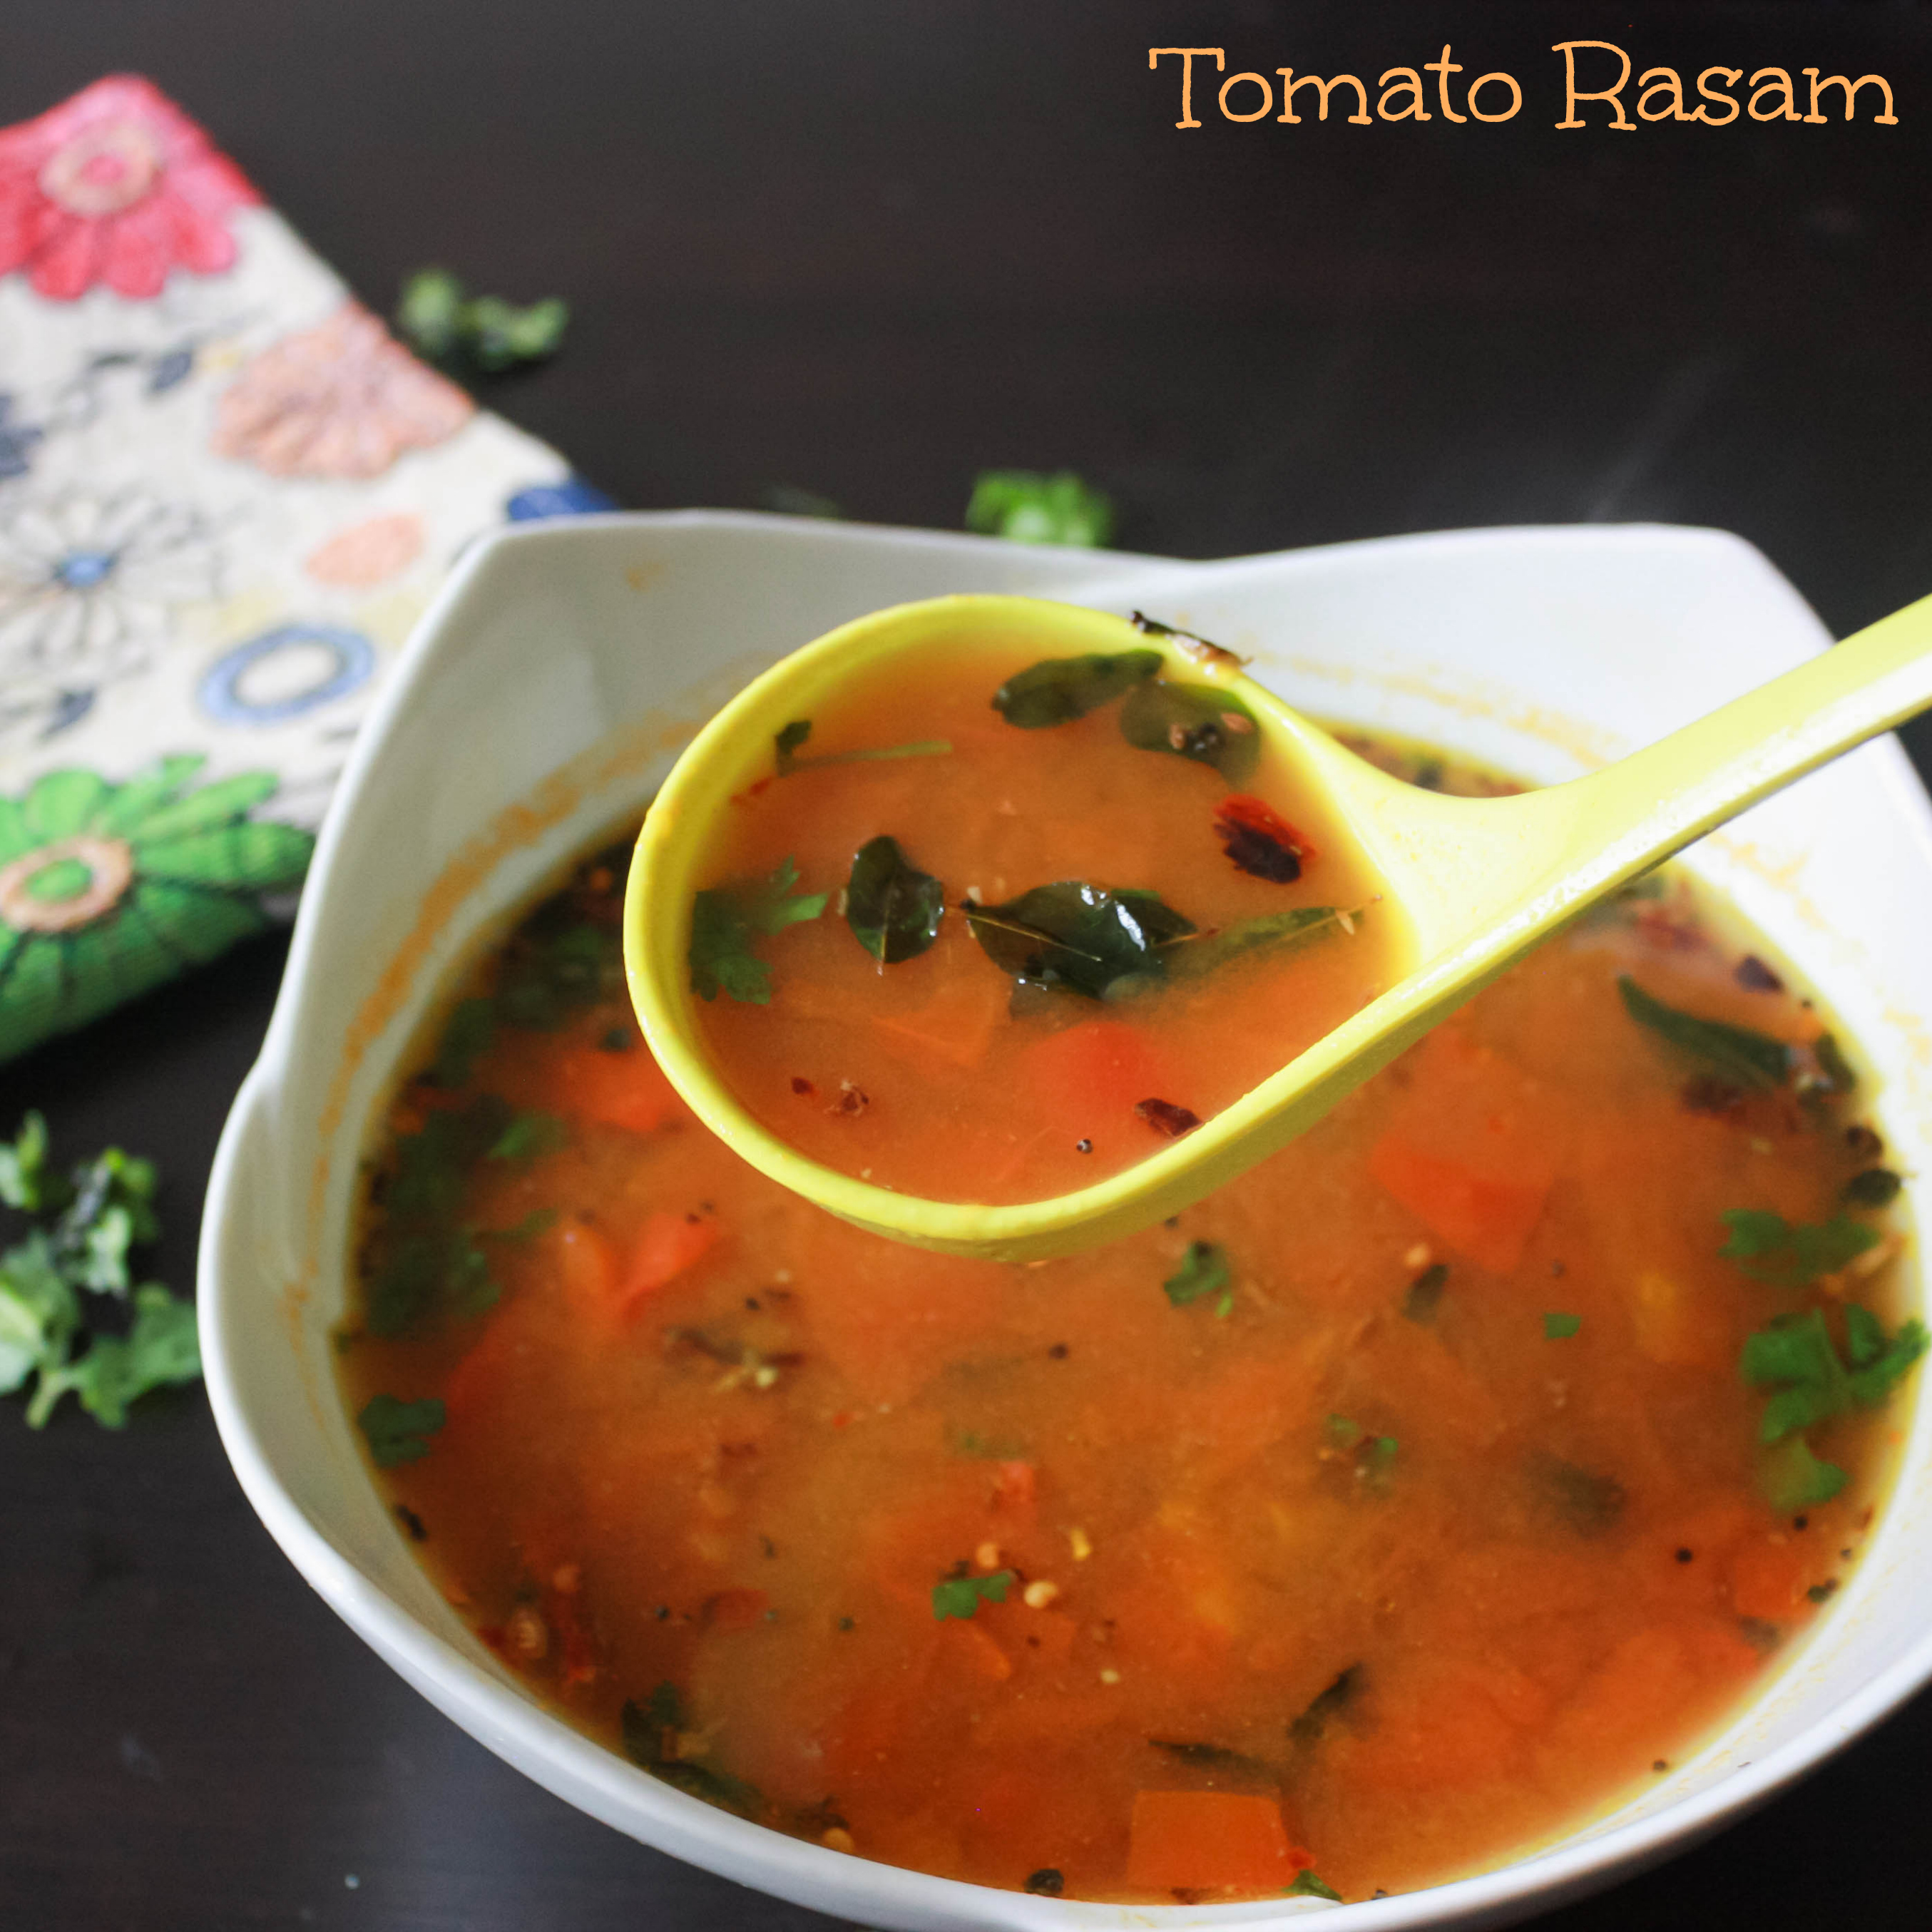
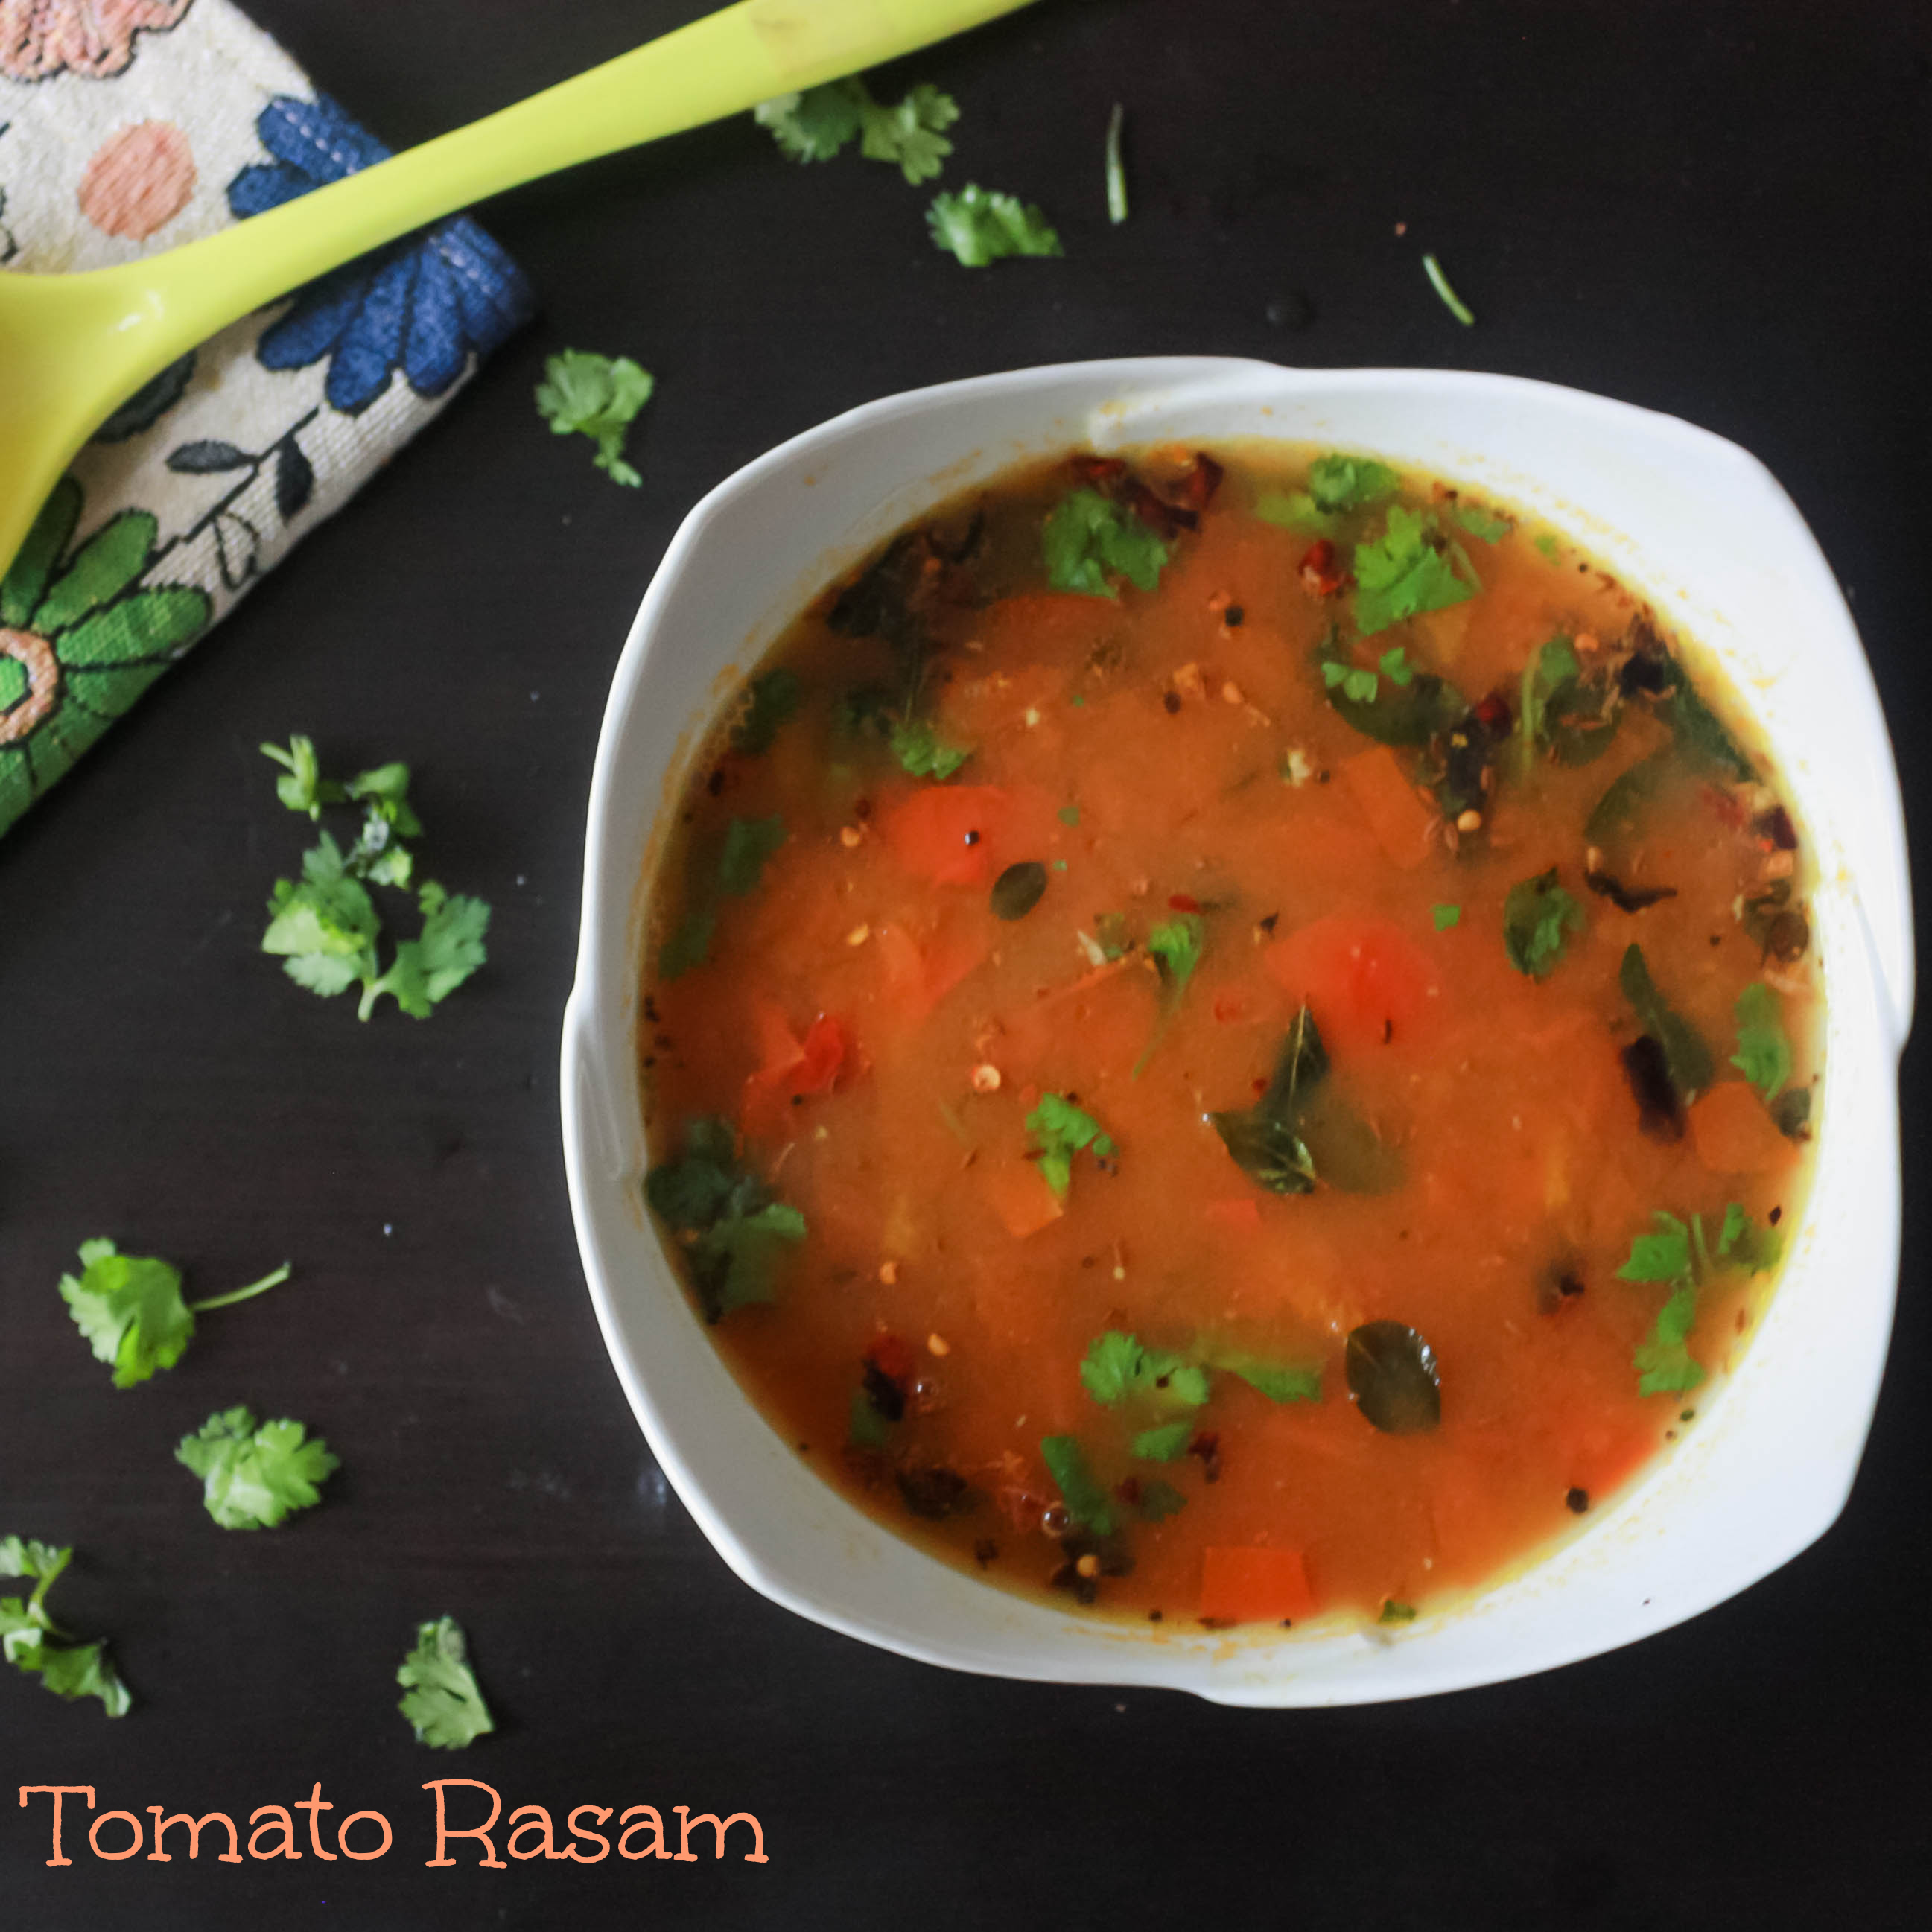
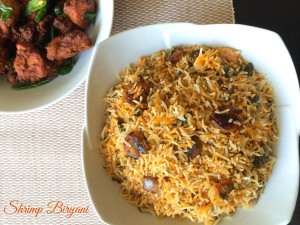
. And my vacation is the reason for doing this simple and tasty rasam recipe. Rasam is such a comfort food. The whole five days of vacation I just had the same old pizza and burgers. My tongue almost died out of taste. I couldn’t wait to have home food on the last day. I personally feel hotel and outside foods are good to have once in a while only 😀 Home food is the best food. Don’t you agree 😉 ?

There are lots of ways to do this rasam. And there are varieties of rasam like tomato rasam, lemon rasam, tamarind rasam, rasam with dal, without dal, mysore rasam and so on. Today I will show one of my own rasam recipe. We have more easy ones but I like this one personally so made this today. Try it 🙂 its really tasty and very good for cold because of the pepper we use.

Vegan note: use oil and not ghee! 🙂

it taste perfect with rice and baby potato roast, beans stir fry, cauliflower peas masala,kovakkai/tindora masala, bittergourd/pavakkai stir fry

Print
TOMATO DAL RASAM
Author: Suganya Hariharan
Recipe type: Main
Cuisine: Indian
Prep time:  5 mins
Cook time:  25 mins
Total time:  30 mins
Serves: 5
 
Ingredients
  • Toor dal – 2 tbsp
  • Tomatoes – 2 chopped finely
  • Green chillis – 2 sliced
  • Turmeric Powder – ½ tsp
  • Sambhar Powder – 1 Tbsp
  • Rasam Powder – 1 tbsp
  • Tamarind –lemon sized
  • sugar -1tsp
  • salt – 2 tbsp ( as needed)
    To blend:
  • 1 inch ginger
  • Pepper balls – 10
  • Red chillis – 3, broken
  • Garlic – 7
  • Jeera – ½ tbsp
    To Temper:
  • Oil/ Ghee/ Butter – 1 tbsp
  • Mustard seeds – 1tsp
  • Curry leaves – 10
  • Asafetida/Hing – a Pinch
  • Coriander Leaves – ½ cup
Instructions
  1. Soak the tamarind in water for five minutes and remove the juice from it Boil the toor dal in one cup of water for ten minutes on the stove in simmer.
  2. Now drop the chopped tomatoes,salt and green chillies on that and boil it for five mins.
  3. Now drop the turmeric powder, sambhar powder, rasam powder and tamarind paste. Boil this for ten mins in medium heat.
  4. There will be bubbles formed now around this time. Just drop the sugar and switch off.
  5. Blend the mixture that is listed as “to blend” coarsely. Do not grind them soft. You can either use blender or use a pestle and mortar to grind them.
  6. Now take a small pan, pour the ghee/oil, drop the mustard seeds, and wait till it crackles. And now add the blended mixture and sauté for a minute and switch off. Drop this on top of the rasam and garnish with coriander leaves.
Notes
1. You can do this same recipe without dal as well. Just skip the second step and go to the third step.
2. If you do not have rasam powder, skip it.
3. When you gring the mixture under “to blend” , grind them coarsely. You want to taste those spices in your mouth.
4. Adding sugar will boast the flavors.
5. If you want it less spicy, reduce the sambhar powder, rasam poswer and peppers by half.
Wordpress Recipe Plugin by EasyRecipe
3.2.1311


It goes really well with any curries or papad. Or even you can have it as soup.

Rasam_name2_Relishthebite

Filed Under: SOUTH INDIAN GRAVIES/DAL/CURRY/KUZHAMBU Tagged With: clear tomato soup recipes, comfort south indian rasam recipe, dal, dinner, lemon quick rasam recipes, lunch, pepper, perfect soup for cold recipes, quick iyerstyle tomato rasam, rasam, rasam quick recipes, rice, soup, spicy, tamarind, tomato, tomato quick rasam recipes, tomato rasam recipes

Aval payasam with Jaggery

August 29, 2014 by Suki 2 Comments

Aval_Payasam_1_name

Aval_Payasam_1_nameAval payasam is one of the easiest payasam recipes. I would say easiest sweet recipes I know. It can be done in a minute. I did this for Krishna jayanthi but had no time to post. For people who do not know what is krishna jayanthi, i have detailed a bit in pepper vada. So, just wanted to post it now 🙂

Aval is one of the fine ingredient which gives great taste and boils easily so its quick to make. I prefer to use jaggery instead of sugar as it is rich in iron and also healthier option than sugar.


Print
Aval Payasam with jaggery
Author: Suganya Hariharan
Recipe type: Dessert
Cuisine: Indian
Prep time:  5 mins
Cook time:  15 mins
Total time:  20 mins
Serves: 3
 
Ingredients
  • Aval/Poha/Rice Flakes – 1 cup
  • Jaggery – ½ cup broken nicely ( Adjust as per your sweet taste level)
  • Milk – 1½ cup
  • Cardamon powder – 1 pinch
  • Ghee – ½ tbsp
  • Cashews, raisins – 10 ( as per your taste)
Instructions
  1. Heat a pan with ½ tbsp of ghee, fry the cashews till it is golden brown. Remove it and keep it separate.
  2. Fry the aval in the same pan and keep it separate.
  3. In the sam pan, boil milk. When it is boiling nicely, add the fried aval and cardoman powder. Cook it in medium flame till it is done.
  4. Add the jaggery to it. And mix well. Don’t boil them more than a minute or two as there are chances to curdle them.
  5. Top the payasam with the fried cashews ☺ Payasam is ready.
Notes
1. Jaggery amount is approximate, you can adjust as per your taste.
2. I did not have cashews, so just used raisins. You can us raisins with cashews when you fry them.
3. Do not boil the mixture after jaggery for more than two minutes, as there are chances to curdle them.
4. You can also grind the aval/poha before dropping them in hot milk.
Wordpress Recipe Plugin by EasyRecipe
3.2.1311

Aval_Payasam_relishthebite_name2

Filed Under: DESSERTS, SWEETS/DESSERTS Tagged With: aval, cashews, dessert, festival, jaggery, krishnajayanthi, milk, payasam, poha, sweet

Green Peas Sundal/Pachai Pattani Sundal

August 28, 2014 by Suki Leave a Comment

Green_Peas_Sundal_Relishthebite_name1

Green_Peas_Sundal_Relishthebite_name1
I wanted to make some Sundal recipe for Ganesh Chaturthi special. I have already made a sweet, coconut ladoo and posted it. I have explained about ganesh chaturthi on that :)If someone wants to read,:) you can ;). The most common sundal recipes for festival are chenna sundal. But they do this also for festivals. 🙂 This is a basic sundal version that we make for navarathri. Navrathri is near by too.

If you are using fresh gresh peas, soak them overnight. You can use it next day. I used the frozen peas 😉 so it was even easier. You can use this recipe to make any variety of sundal recipes. Just replace with those lentils/beans.

Print
GREEN PEAS SUNDAL/ PACHAI PATTANI SUNDAL
Author: Suganya Hariharan
Recipe type: Appetizer
Cuisine: Indian
Prep time:  5 mins
Cook time:  10 mins
Total time:  15 mins
Serves: 1
 
Ingredients
  • Fresh Frozen peas - ½ cup
  • Salt - To taste
    To blend to a coarse paste:
  • Grated coconut - 2tbsp
  • Green chillies -2 small
  • Coriander - 1 tbsp
  • Ginger- small piece. Very small.
  • Jeera - ½ tsp
    Temper:
  • Oil - 2tsp
  • Mustard seeds - 2tsp
  • Curry leaves - 6
  • Red chilli - 1
  • Hing - a pinch
Instructions
  1. If you are using fresh dried variety of peas, then soak them overnight or atleast for 4 hrs. Pour enough water,salt and pressure cook for 3 whistles.The skin might come out, just discard them.
  2. I am using frozen green peas, so i just wash them. Set aside.
  3. Transfer the ingredients listed under "to blend to a coarse paste" into a blender and blend them to a coarse paste. set aside.
  4. Heat a pan with the oil, add the list under "temper" in that pan.
  5. Add the green peas and salt, toss them for two minutes. Add the blended mixture on top of it. Saute them for two - three minutes until the raw smell of green chillies leaves. Switch off.
Notes
1. Adjust green chillies according to your spice level.
2. You can use this recipe to make any variety of sundal recipe. Just replace with that lentils/beans.
3. If you are using fresh dried variety of peas, then soak them overnight or at least for 4 hrs. Pour enough water and pressure cook for 3 whistles.The skin might come out, just discard them.
4. If you are soaking peas overnight then 2 whistles is enough. If you are soaking just for three hours, then 3-4 whistles.
5. use salt according to taste. Put them when you are boiling.
Wordpress Recipe Plugin by EasyRecipe
3.2.1311

Serve hot/warm as a snack Goes well with any rasam.

Green_Peas_Sundal_Relishthebite-name2

Filed Under: DRY CURRY SIDE DISH/ STIR-FRY, SNACKS & APPETIZERS FESTIVAL, VEGAN Tagged With: appetizer, coconut, GaneshChaturthi, green peas, lentils, navrathri, snack, sundal

Coconut ladoo/Coconut sweet balls

August 28, 2014 by Suki Leave a Comment

Coconut_ladoo_2_With_name

Coconut_Ladoo_with_name

Coconut Ladoos made with just only five ingredients and it melts in the mouth. They are specially made for festivals like diwali,ganesh chaturthi. You can make them even if there is no festival, no harm 🙂 . Kids love coconut a lot. Even the elder ones in our family will love it 🙂 Everyone has a kid inside us sleeping 😉 They can be made both by fresh coconut or desiccated coconut.

I made them with desiccated coconut. This time i am making for ganesh chaturthi. I made these beautiful ladoos to be offered as naivediyam or bhog to lord ganesha. Ladoos are one of the favorite food of lord ganesha. Apart from these ladoos, there are motichoor ladoos, rava ladoo and boondi ladoo.

Ganesh chaturthi, i have witnessed this festival from my young age. It is the hindu festival celebrated in the name of god Ganesha. He is the elephant-headed god and known to be a god as the remover of obstacles and the god of beginnings and wisdom. This festival involves installing clay idols of lord ganesha which are worshipped for ten days with herbals leaves,plants and immersed in a lake the idol and the herbal leaves. This tradition was introduced because after adding herbal and medicated leaves in lakes, the water in the lake becomes hygenic. In early days, people use to drink lake water and to protect people from infections and diseases , this tradition was introduced.

This festival is celebrated in many states of India. The recipes prepared for this festival differs from state to state. Some of them make sundals, some make modak or kozhukattai. Many people don’t use onions, garlic, spices for this festival. Check with your elders before doing so if you are preparing this for god. I always do the mothak or kozhukattai. So this time i wanted to try something different. That is the reason for these coconut ladoos. It takes only twenty minutes to come together, so its perfect for those looking for quick and easy sweet recipes for any festival.They are perfect for gifting too. You can play around the ingredients and proportions a bit depending on how much you like them.

My other favorite Indian sweets: Basundi, carrot ladoo,Gulab jamun, kala jamun, rice kheer, thaen mittai, rasgulla,coconut ladoo, coconut burfi, beetroot halwa aval payasam,rava ladoo, semiya kesari

My other favorite Indian snacks : Spicy curry leaves seedai,cashew pakoda, karasev/ chickpea snacks, ribbon pakoda,Spicy curry leaves murukku, Ribbon pakoda, Uppu seedai

Print
Coconut ladoos
Author: Suganya Hariharan
Recipe type: Dessert
Cuisine: Indian
Prep time:  5 mins
Cook time:  20 mins
Total time:  25 mins
Serves: 10 ladoos
 
Ingredients
  • 1 cup of sweetened condensed milk
  • 1 cup of desiccated coconut
  • ½ cup of desiccated coconut for rolling
  • 1 tsp of butter or ghee
  • 7 raw almonds,chopped
  • 2 cardamon crushed
Instructions
  1. Heat the ghee and toast the almonds till it turns golden. Drain and keep it aside.
  2. To the same pan, add the 1 cup of desiccated coconut. Toast for a minute.
  3. To the same pan, pour the condensed milk on it. Mix well and cook on low flame.
  4. Cook it until the mixture quite thick and starts to roll like a ball. It will take around 7-10 mins.
  5. Add the roasted almonds, cool the mixture but not make it really cold. Cool it little so that you cna handle by hand.
  6. Just apply ghee in your hand, make round balls by taking that mixture in your hand.
  7. Roll this balls in the ½ cup of desiccated coconut. And keep it aside.
  8. You can store them in airtight container upto four days. I refrigerate them as it is coconut based dish.
Notes
1. If you have doubt to when you can switch off the heat, it is when the spatula will refuse to get stir any more and mixture will almost stick to your spatula.
2. you can also use fresh coconut but you cant store it for long time. So i prefer to use dessicated coconut. And also you have to cook the fresh coconut for a longer time since fresh coconut can be more moist.
Wordpress Recipe Plugin by EasyRecipe
3.2.1311

Coconut_ladoo_2_With_name

Filed Under: DESSERTS, SWEETS/DESSERTS Tagged With: Almonds, coconut, Coconut ladoo, Coconut vegetarian dessert recipesq, dessert, GaneshChaturthi, Indian coconut recipes, Indianrecipes, Indiansweets, Ladoo, milk, quick indian festival sweet recipes, quick Indians weet recipes, sweet, uick sweet recipes

Coconut Rice/ Thengai sadham

August 22, 2014 by Suki 4 Comments

Coconut_Rice_Relishthebite-edit

coconut_rice_Relishthebite

It’s an  authentic rice variety from south India. When i get busy on week days, they are my life saviours.There are lot of variety dishes like lemon rice, capsicum rice, tamarind rice , tomato rice, potato rice… and so on! I don’t have them often because I like to have them once in a while 🙂 only. I need variety in my rice ;). And kids love these rice variety and surely a lunch box idea. I am not sure why they love them may be because of the colours I guess. My sis was telling me that my nephew loves these colourful dishes. My mom used to cook these for lunch-box when I was doing my schooling. They are easy to prepare and sooper quick. The coconut oil, sesame oil and coconut blend the flavours so well.. It has very few ingredients and those ingredients are always at home. Will update other varieties in future post soon.. soon :)!


5.0 from 1 reviews
Print
COCONUT RICE / THENGAI SADHAM
Author: Suganya Hariharan
Prep time:  10 mins
Cook time:  20 mins
Total time:  30 mins
Serves: 5
 
Ingredients
  • Sesame oil -1 tbsp
  • Coconut Oil - 1 tbsp
  • Asafoetida - 2 tsp
  • Mustard seeds - tsp
  • Urad dal - 2tsp
  • Peanuts - Handful
  • Cashew nuts - less than one handful
  • Green chillies - 2 (adjust according to spice level)
  • Dried Red chilly - 1 (adjust according to spice level)
  • Fresh scraped coconut/ Frozen Coconut - 1.5 cup, (packed tightly)
  • Cooked Rice - 3 cup
  • salt to taste -
Instructions
  1. Heat a Kadai with oil, add the mustard seeds, and once it splutters add the urad dal, peanuts, asafoetida and dried red chilly. Fry till the dals turns golden and the peanuts are fried.
  2. Add the green chillies and curry leaves and then add the scraped coconut and sauté for few minutes on low heat, until the coconut turns light brown. Now add some salt to it according to your taste, sauté for few seconds.
  3. Add the cooked rice now ,stir gently. You don't want to mash the rice,
Notes
1. Try to use both coconut oil and sesame oil. If not, atleast any one of them. Don' use the normal oil.
2. Both original coconut and frozen coconut are good for this. I have tried both.
3. Arrange the ingredients in a plate to make life even more easy.
4. I like it little spicy, so used lot of chillies, you can use just two. And my chillies here i cant depend, each time their spice level differs a lot. I have very very few Indian grocery shops here. Cant complain.
5. Use channa dal if you have them. It really gives great taste to this dish. I did not have it this time. Use it along with urad dal at the start
6. I used basmathi rice as it gives extra flavor. You can use any rice. I like thefragrance of basmathi rice with coconut. It makes the dish even more rich,
Wordpress Recipe Plugin by EasyRecipe
3.2.1311

Serve hot with papad, potato roast or some curries.


Coconut_Rice_Relishthebite-edit

Filed Under: FESTIVAL RECIPES, RICE/BIRYANI VARIETIES, VEGAN Tagged With: cashew, chilli, coconut, curry leaves, dinner, Indian, lunch, Lunch-box, peanut, quick, rice

Orange Coconut Smoothie

August 21, 2014 by Suki 2 Comments

Orange Coconut_Smoothie_1pic_Relishthebite-2-2

Orange Coconut_Smoothie_1pic_Relishthebite-2-2

This is a great source of vitamin C, and help in increasing your immune system. And top of it, if you have cold & flu, it helps to reduce it. It has Orange, Coconut milk, ginger, vanilla and honey. As a whole it has amazing benefits. Ginger has been a treatment for cold for thousand of years. It’s a five-ingredient smoothie, which does wonders to us. If we have one smoothie similar to this for a day once, it’s really good for healththumbsup.

I am not really good at saying all this health related stuffs. But out of experience, I recommend oranges always. And I personally know that oranges are good for skin, hair and health. I have read that it’s good for skin and prevents aging faster nice.

I used the leftover oranges as I used the orange peel for Orangettes. I kept them in refrigerator covered for thirty minutes so that I can avoid ice much. And I used coconut milk, which was kept in refrigerator too.

You can even use the store bought orange juice and try this recipe instead of fresh oranges. It taste equally good. But fresh oranges/clementines has more nutritional value as we all know. If you wanted to get over the bottle of orange juice somehow as the expiry date is near by, then this is the best handy recipe.

I did this recipe with honey. If you don’t want honey on this recipe, use sugar.

5.0 from 1 reviews
Print
ORANGE COCONUT SMOOTHIE
Author: Suganya Hariharan
Recipe type: Dessert
Prep time:  5 mins
Cook time:  5 mins
Total time:  10 mins
Serves: 2 large glass
 
Ingredients
  • Oranges – 4 peeled and cut roughly.
  • Ginger – 2 tsp crushed.
  • Coconut milk – 1 ½ cups
  • Shredded coconut – for garnishing
  • Honey – 2 tbsp (or sugar – 2tbsp)
  • Ice cubes –3-4
Instructions
  1. Blend the oranges, coconut milk, honey/sugar, ice cubes and ginger zest together in a blender for 2 minutes.
  2. Filter them if you don’t like the pulpy flavor.
  3. Garnish with shredded coconut.
Notes
1. I did this recipe with honey. If you don’t want honey on this recipe, use sugar.
2. You can even use the store bought orange juice and try this recipe instead of fresh oranges. I have tried it.
3. Filter them after blending if you don’t like the pulpy flavor.
Wordpress Recipe Plugin by EasyRecipe
3.2.1311

Orange Caoconut_Smoothie_pic2Relishthebite-

Filed Under: DRINKS & BEVERAGES Tagged With: coconut, coconut milk, ginger, healthy, honey, milk, Milkshake, Orange, smoothie

Orangettes

August 20, 2014 by Suki Leave a Comment

Orangettes_relishthebite-4

Who will say NO to chocolates?

Orangettes are the ideal candy for those who love the orange and chocolate flavor combo. They are very simple, made of nothing but orange peel, chocolate and sugar.The prime point here is that you don’t have to fling the peels aside and we have something to do with that. If you want you can store the orange peels for this purpose in the freezer and use them later.

Orangettes_relishthebite-7-2

They are easy to make at home, and have a long shelf life. They are perfect gifts for friends and family J you can freeze them and gift it whenever you need. To keep the chocolate firm, I store them in the refrigerator or freezer. I have had orangettes in candy shops, but never thought to make them myself.

Orangettes_relishthebite-5

I love citrus flavors. Those flavors excite me. I have made candied orange peel long back.I thought of doing that to start with, then chocolate “called “ me 😀 😀 :D. And I wanted to try a new recipe. So here it goes.These taste really good. That flavor comination is out of the world. Try to use dark chocolate as the normal chocolate does not taste that good for me. i used mostly dark chocolate but added few chunks of milk chocolate to it.

Print
Orangettes
Author: Suganya Hariharan
Recipe type: Dessert
Prep time:  5 mins
Cook time:  75 mins
Total time:  1 hour 20 mins
Serves: 6
 
Ingredients
  • 2-3 oranges
  • 3 cups sugar
  • 3 cups water
  • Few bars of dark chocolate
  • oil – ½ tsp
Instructions
  1. Scrub the oranges and Slick off the top and the bottom.
  2. Using a sharp knife, slice the peel away from the orange in long, flat strips. Slice the peel into thin ¼th inch strips and set aside.
  3. Take a saucepan; add some water and the peel. Boil the water for 10 minutes in low heat. Remove the peels, rinse in cold water and dry. Blanch them few times if you can to remove the bitterness. I did this step thrice.
  4. Now take another pan, add the sugar and water, simmer it in a medium heat. Add sliced peels and cook for 45 minutes. You can turn it off when the liquid turns syrupy. And also peels should become soft and translucent. Remove the peels; place them in a wire rack to cook and dry off a bit.
  5. Chop the chocolate little and melt it in a double broiler, stir them frequently. Procedure for double broiler is by boiling water in a pan and Keeping another pot on top of it with chocolate. The chocolate will melt from this heat. I used ½ tsp oil togive that silky texture.
  6. Place a parchment paper in a clean place. U can cover the whole slice or cover only half. When they are dipped, place them immediately on the paper.
  7. They have to be set in refrigerator for 30minutes.
  8. Pull them put when you want to eat them.
Notes
1. I have used only three oranges. If you want prepare loads and store in inventory, you can do by increasing it proportionately. Let me know if you have some questions on that.
2. Do the boiling/blanching of orange in hot water at least twice to remove bitterness.
Wordpress Recipe Plugin by EasyRecipe
3.2.1311

Orangettes_Relishthebite

Filed Under: DESSERTS, SWEETS/DESSERTS Tagged With: chocolate, citrus, dessert, Dip, Orange, Orange Recipe, Orangettes, sugar, sweet, syrup, tasty

Uppu Seedai/ Crunchy Lentil Nuggets

August 18, 2014 by Suki 4 Comments

UppuSeedai_relishthebite

UppuSeedai_relishthebiteHello all hi
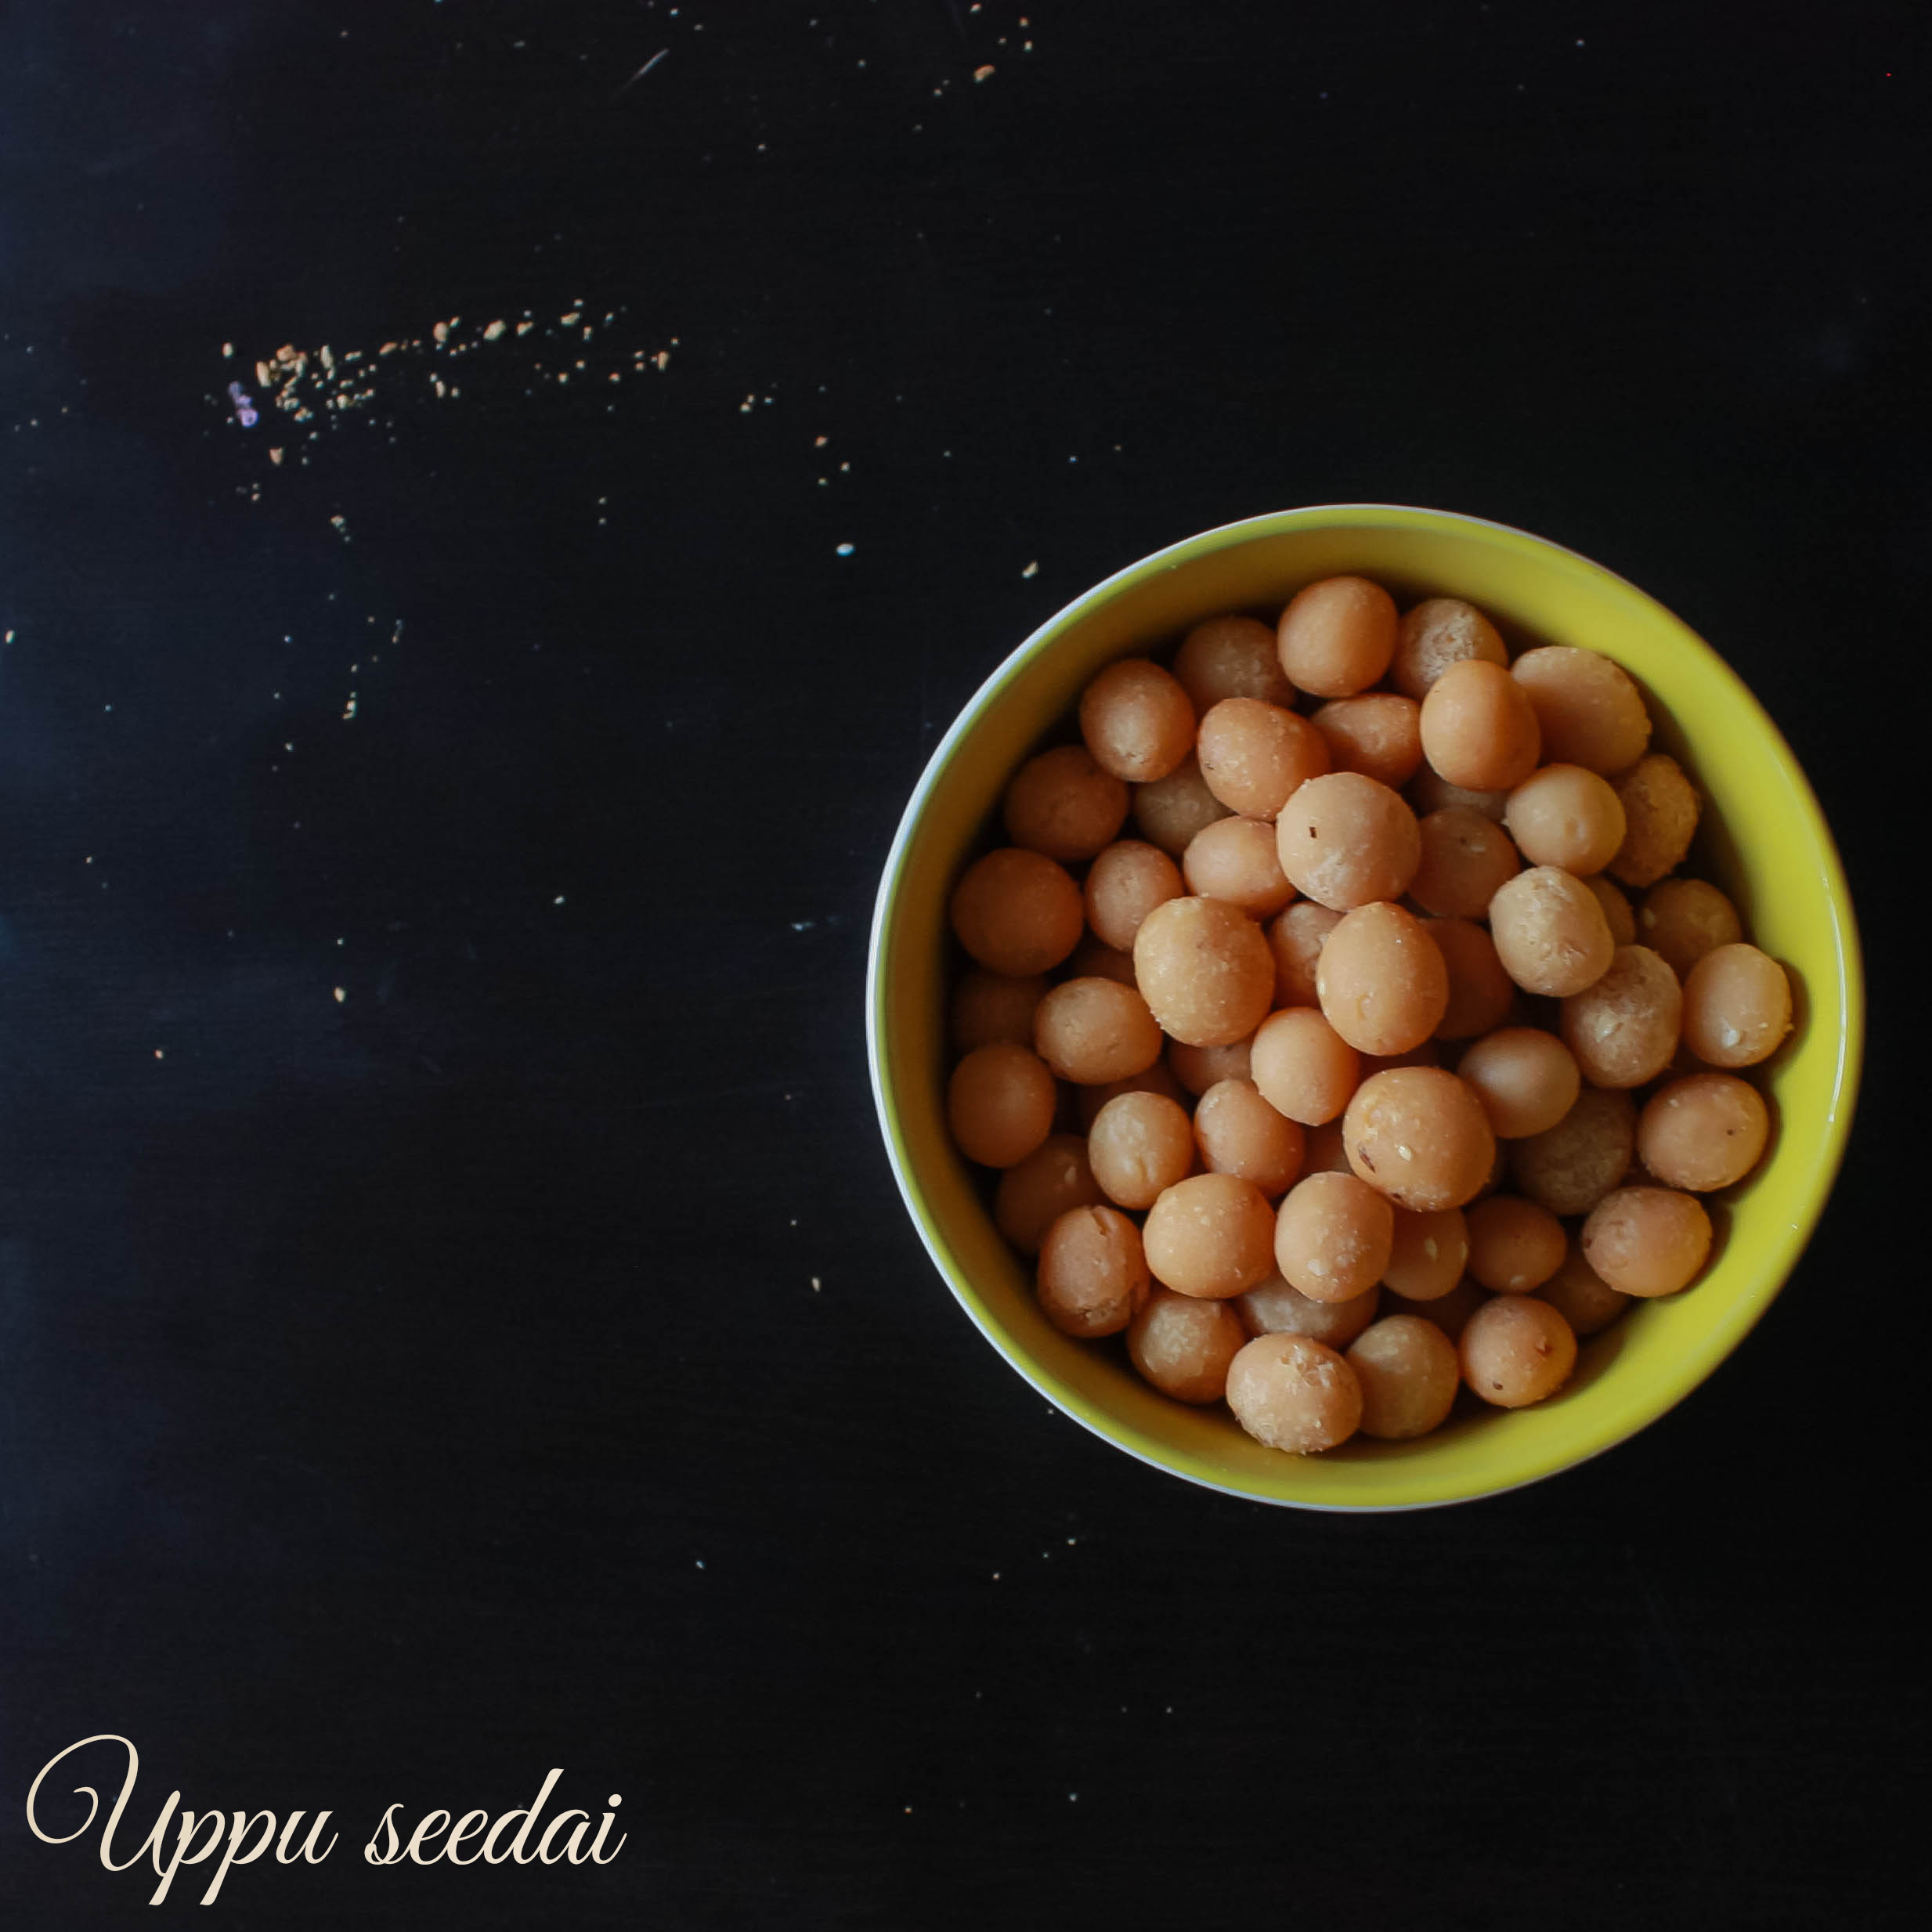
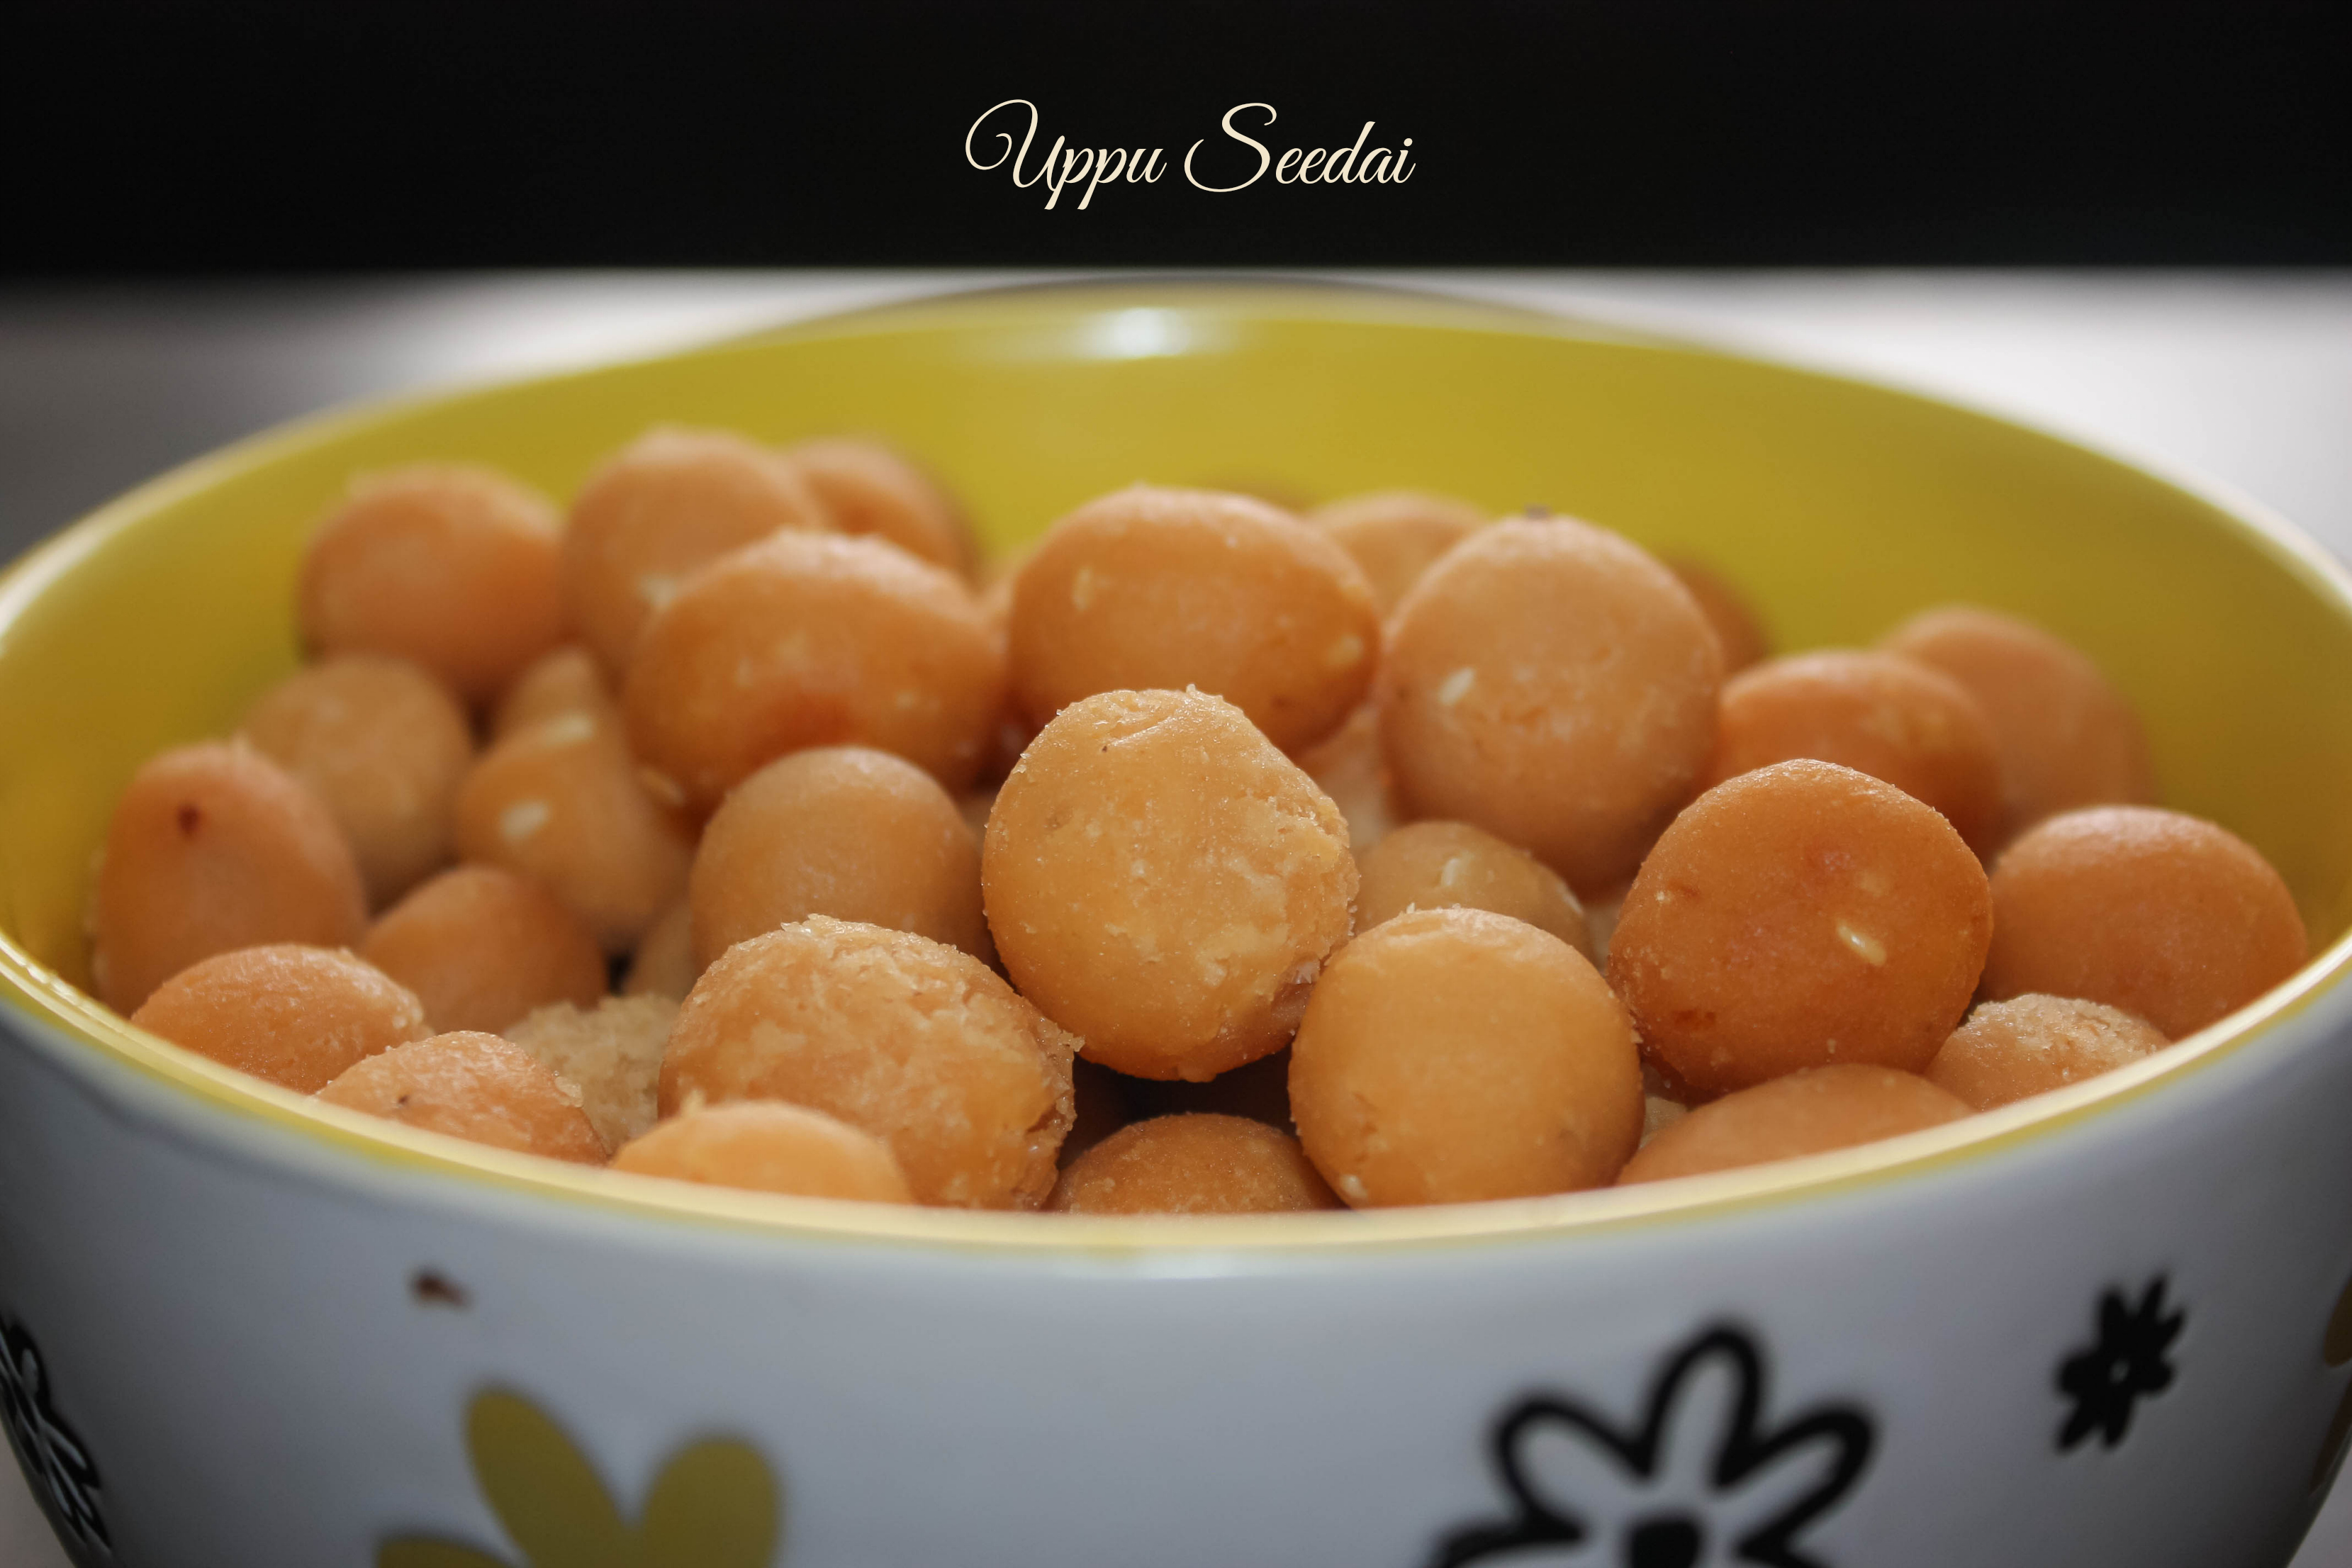
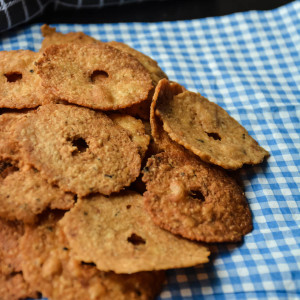
, It’s Janmashtami/ Krishna Jayanthi today. It’s the birthday of the Lord Krishna. I posted a recipe for “pepper vadai/ milagu vadai” yesterday for this occasion. But the main savory we do for this festival is the “Uppu seedai/sweet seedai”. I am going to uncover the “uppu seedai” recipe today here. I like savory more than sweet after coming to Canada. Wherever I go here, I see ample of sweet based dishes and get very few savory ones. So my choice was this and I did aval payasam as a sweet which was very easy to make. It took me very few minutes. Will post it sometime soon.

I was wondering why this recipe is being the main savory for this god. There should be a reason. Let me know if somebody gets to know it.notsure

Uppuseedai_Relishthebite

I always wanted to make seedai, but my mom used to warn me that it would burst easily. So I was staying away from it always. This time, may be I thought I was old enough to try it. When I told my mom today about making this recipe, my mom was watching me in facetime when I was doing it, and she was waiting for me till i shout “success!” after taking the first batch from the stove. She is so protective whatever age I am in. “MOM’s” are always the best. heart
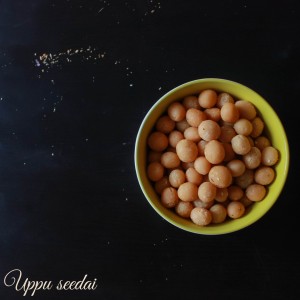
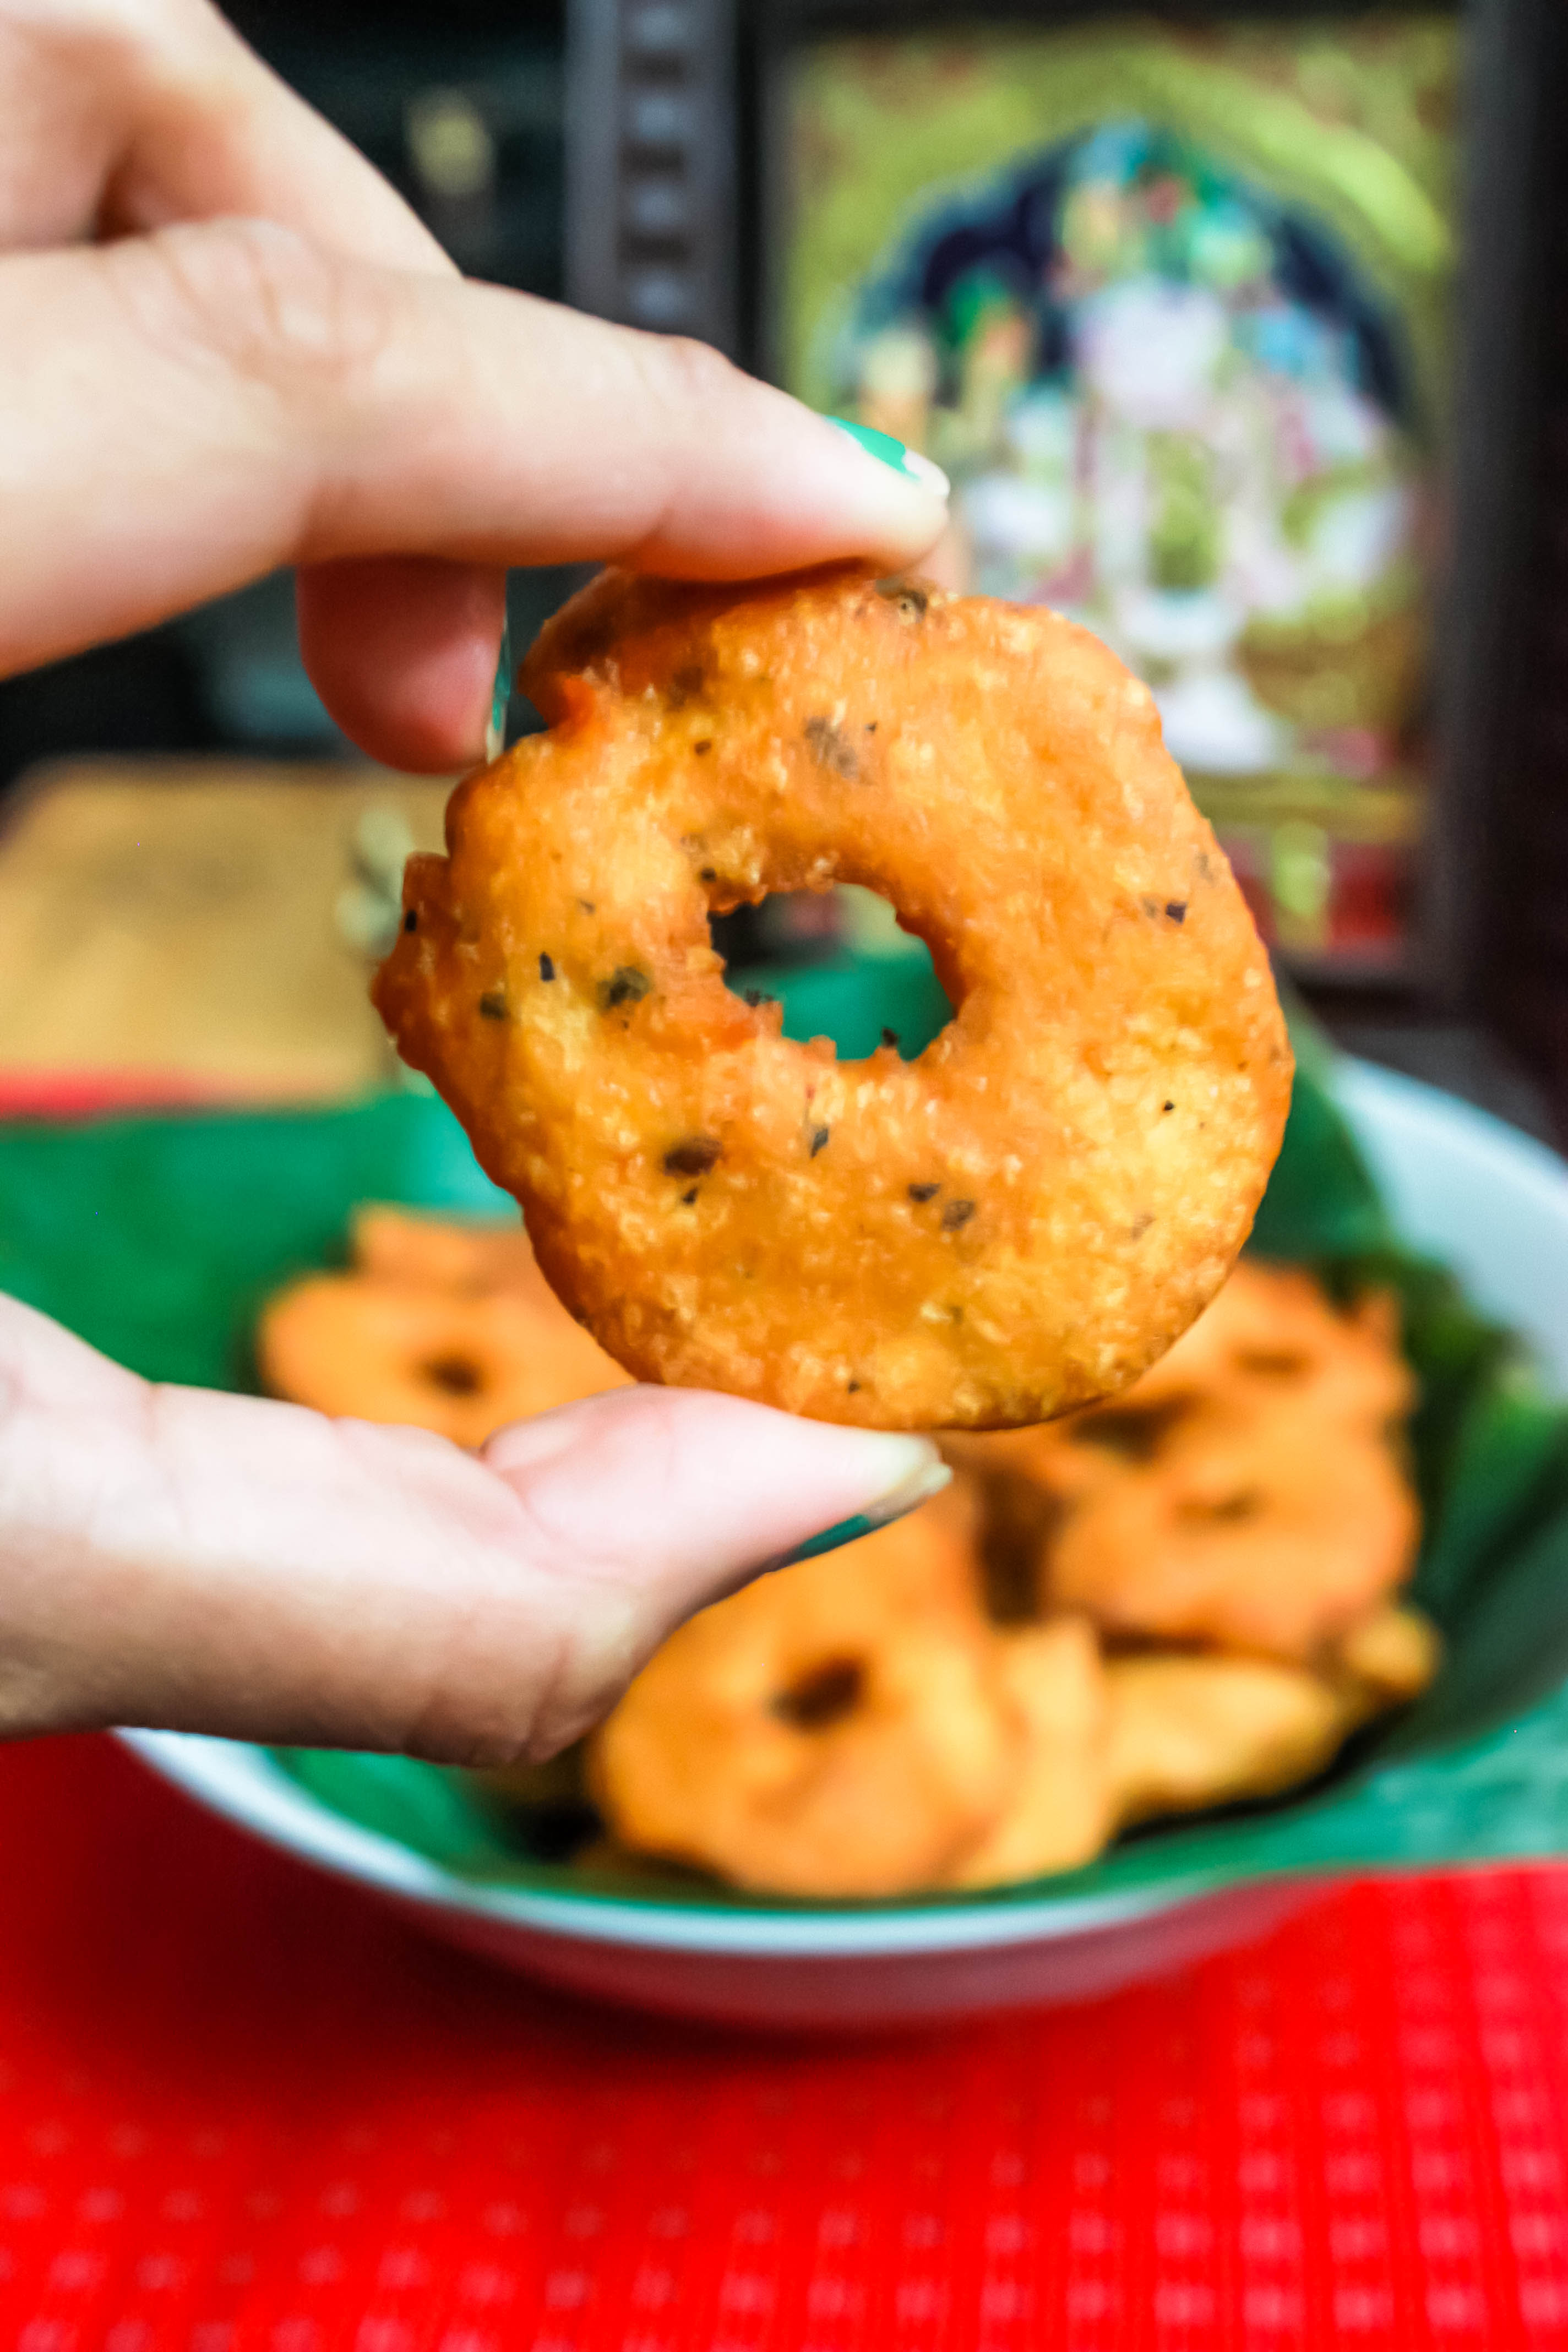
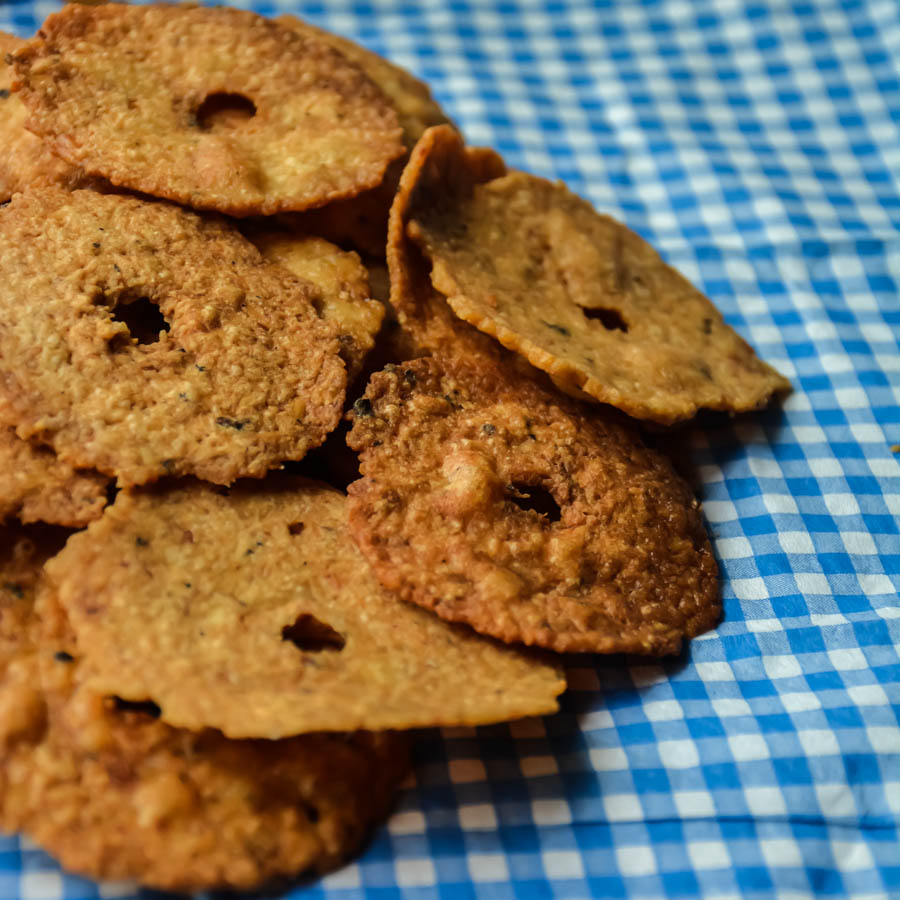
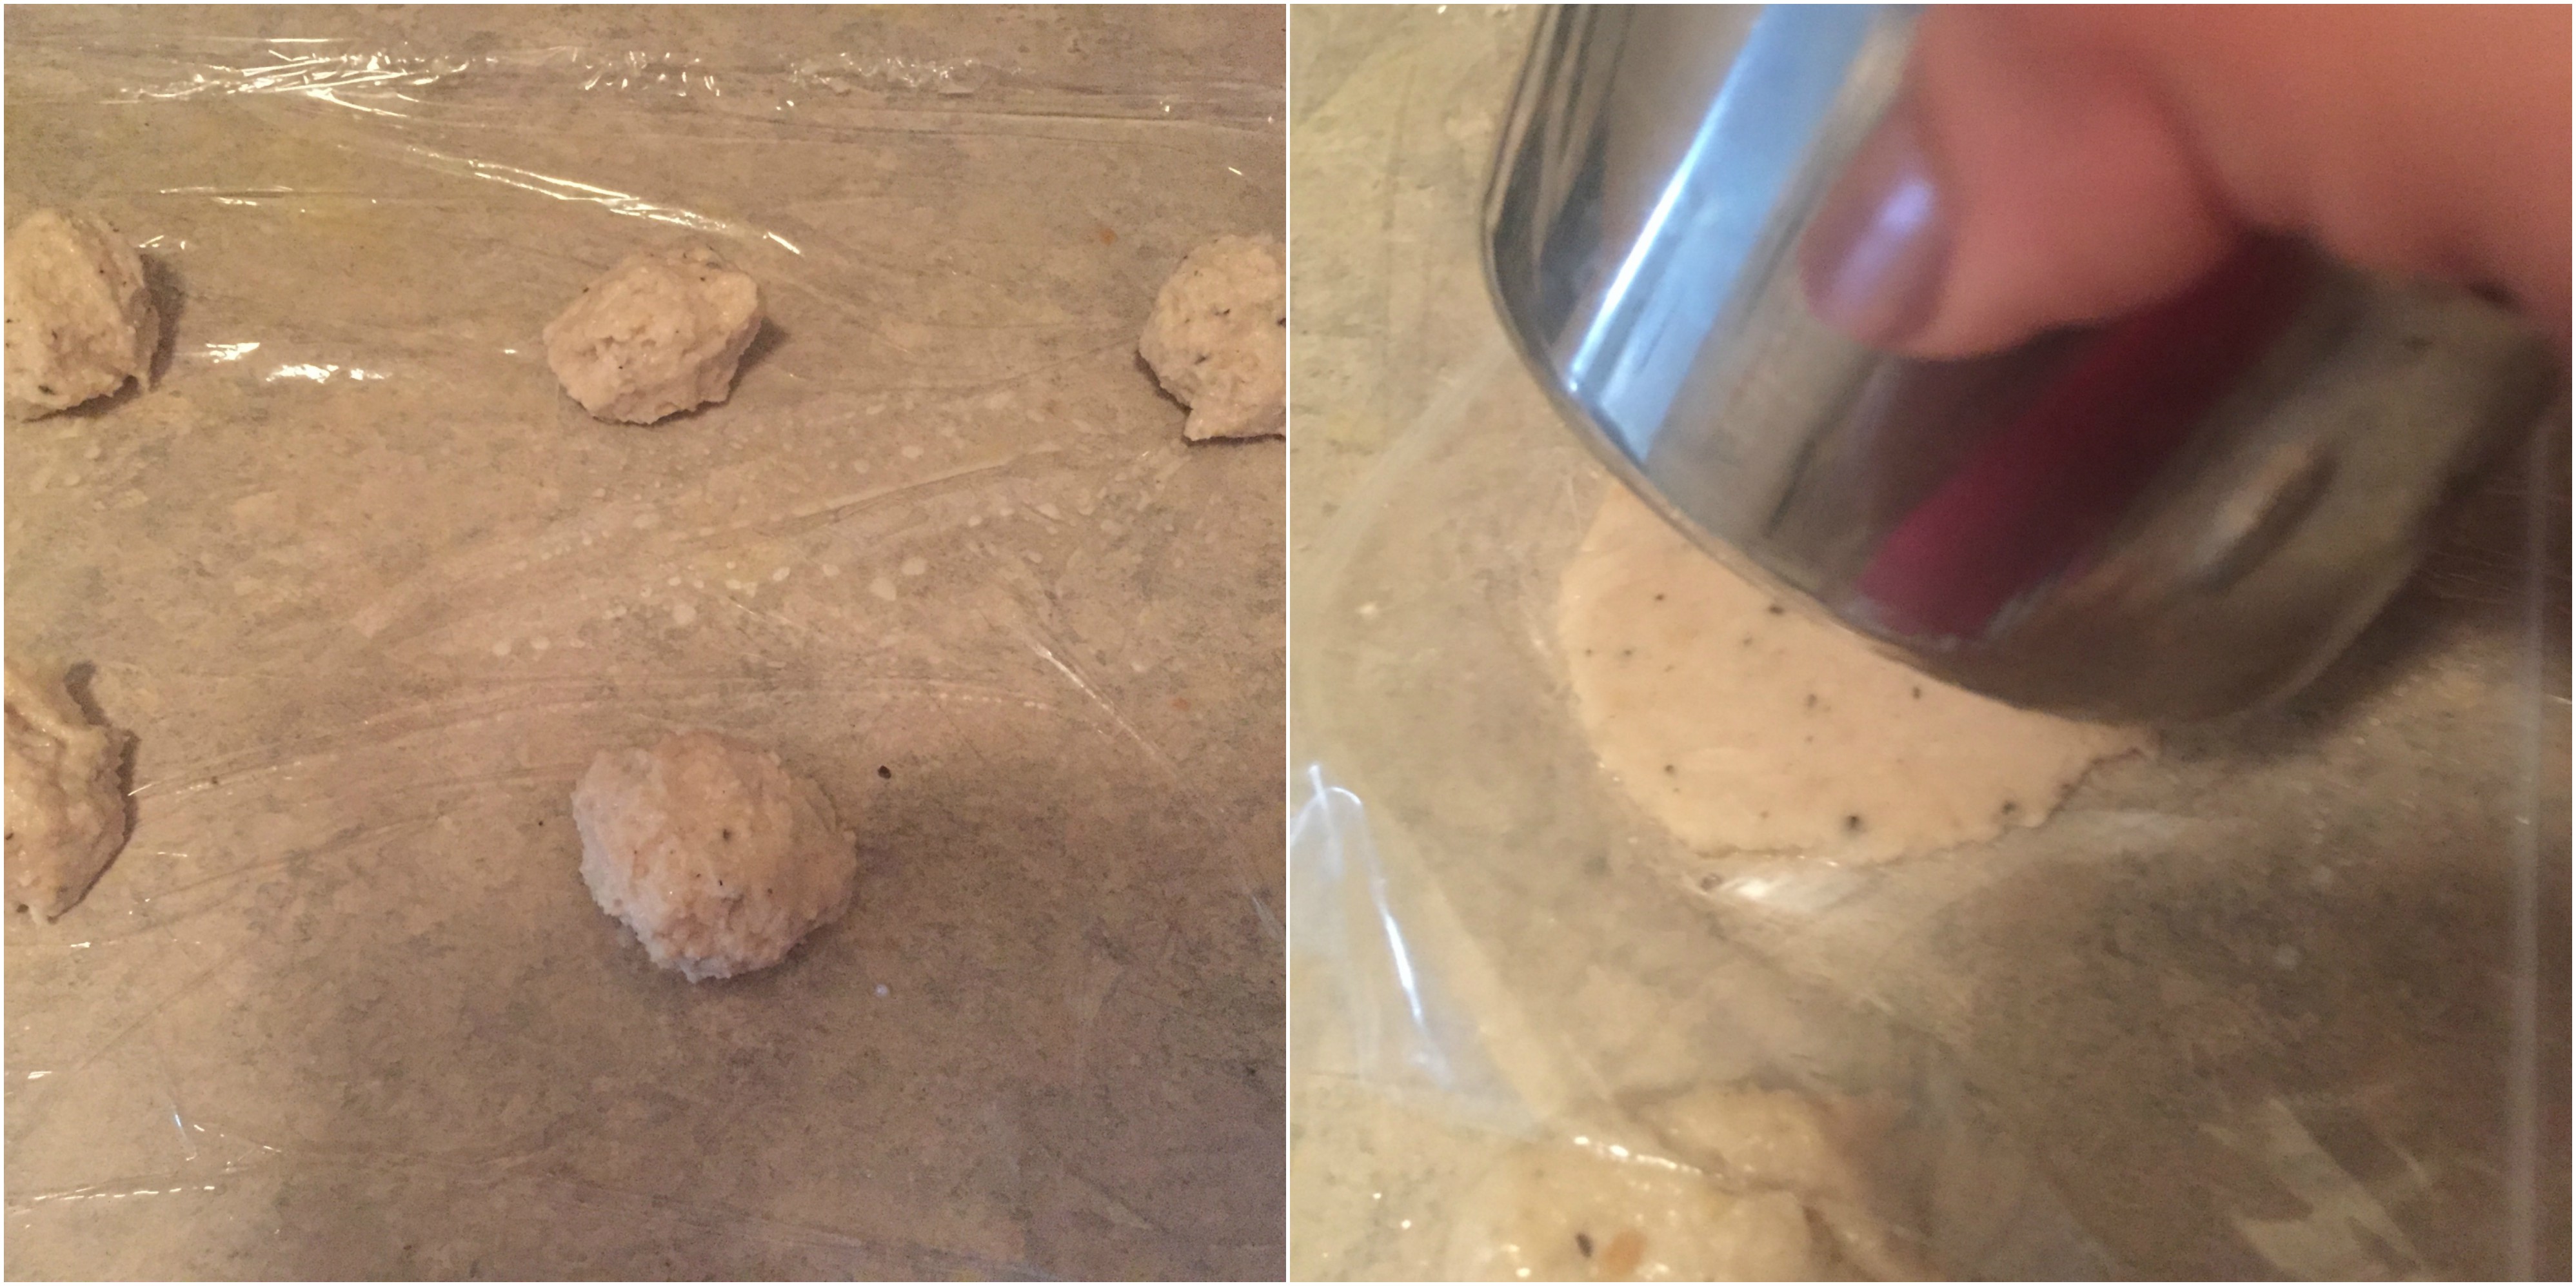
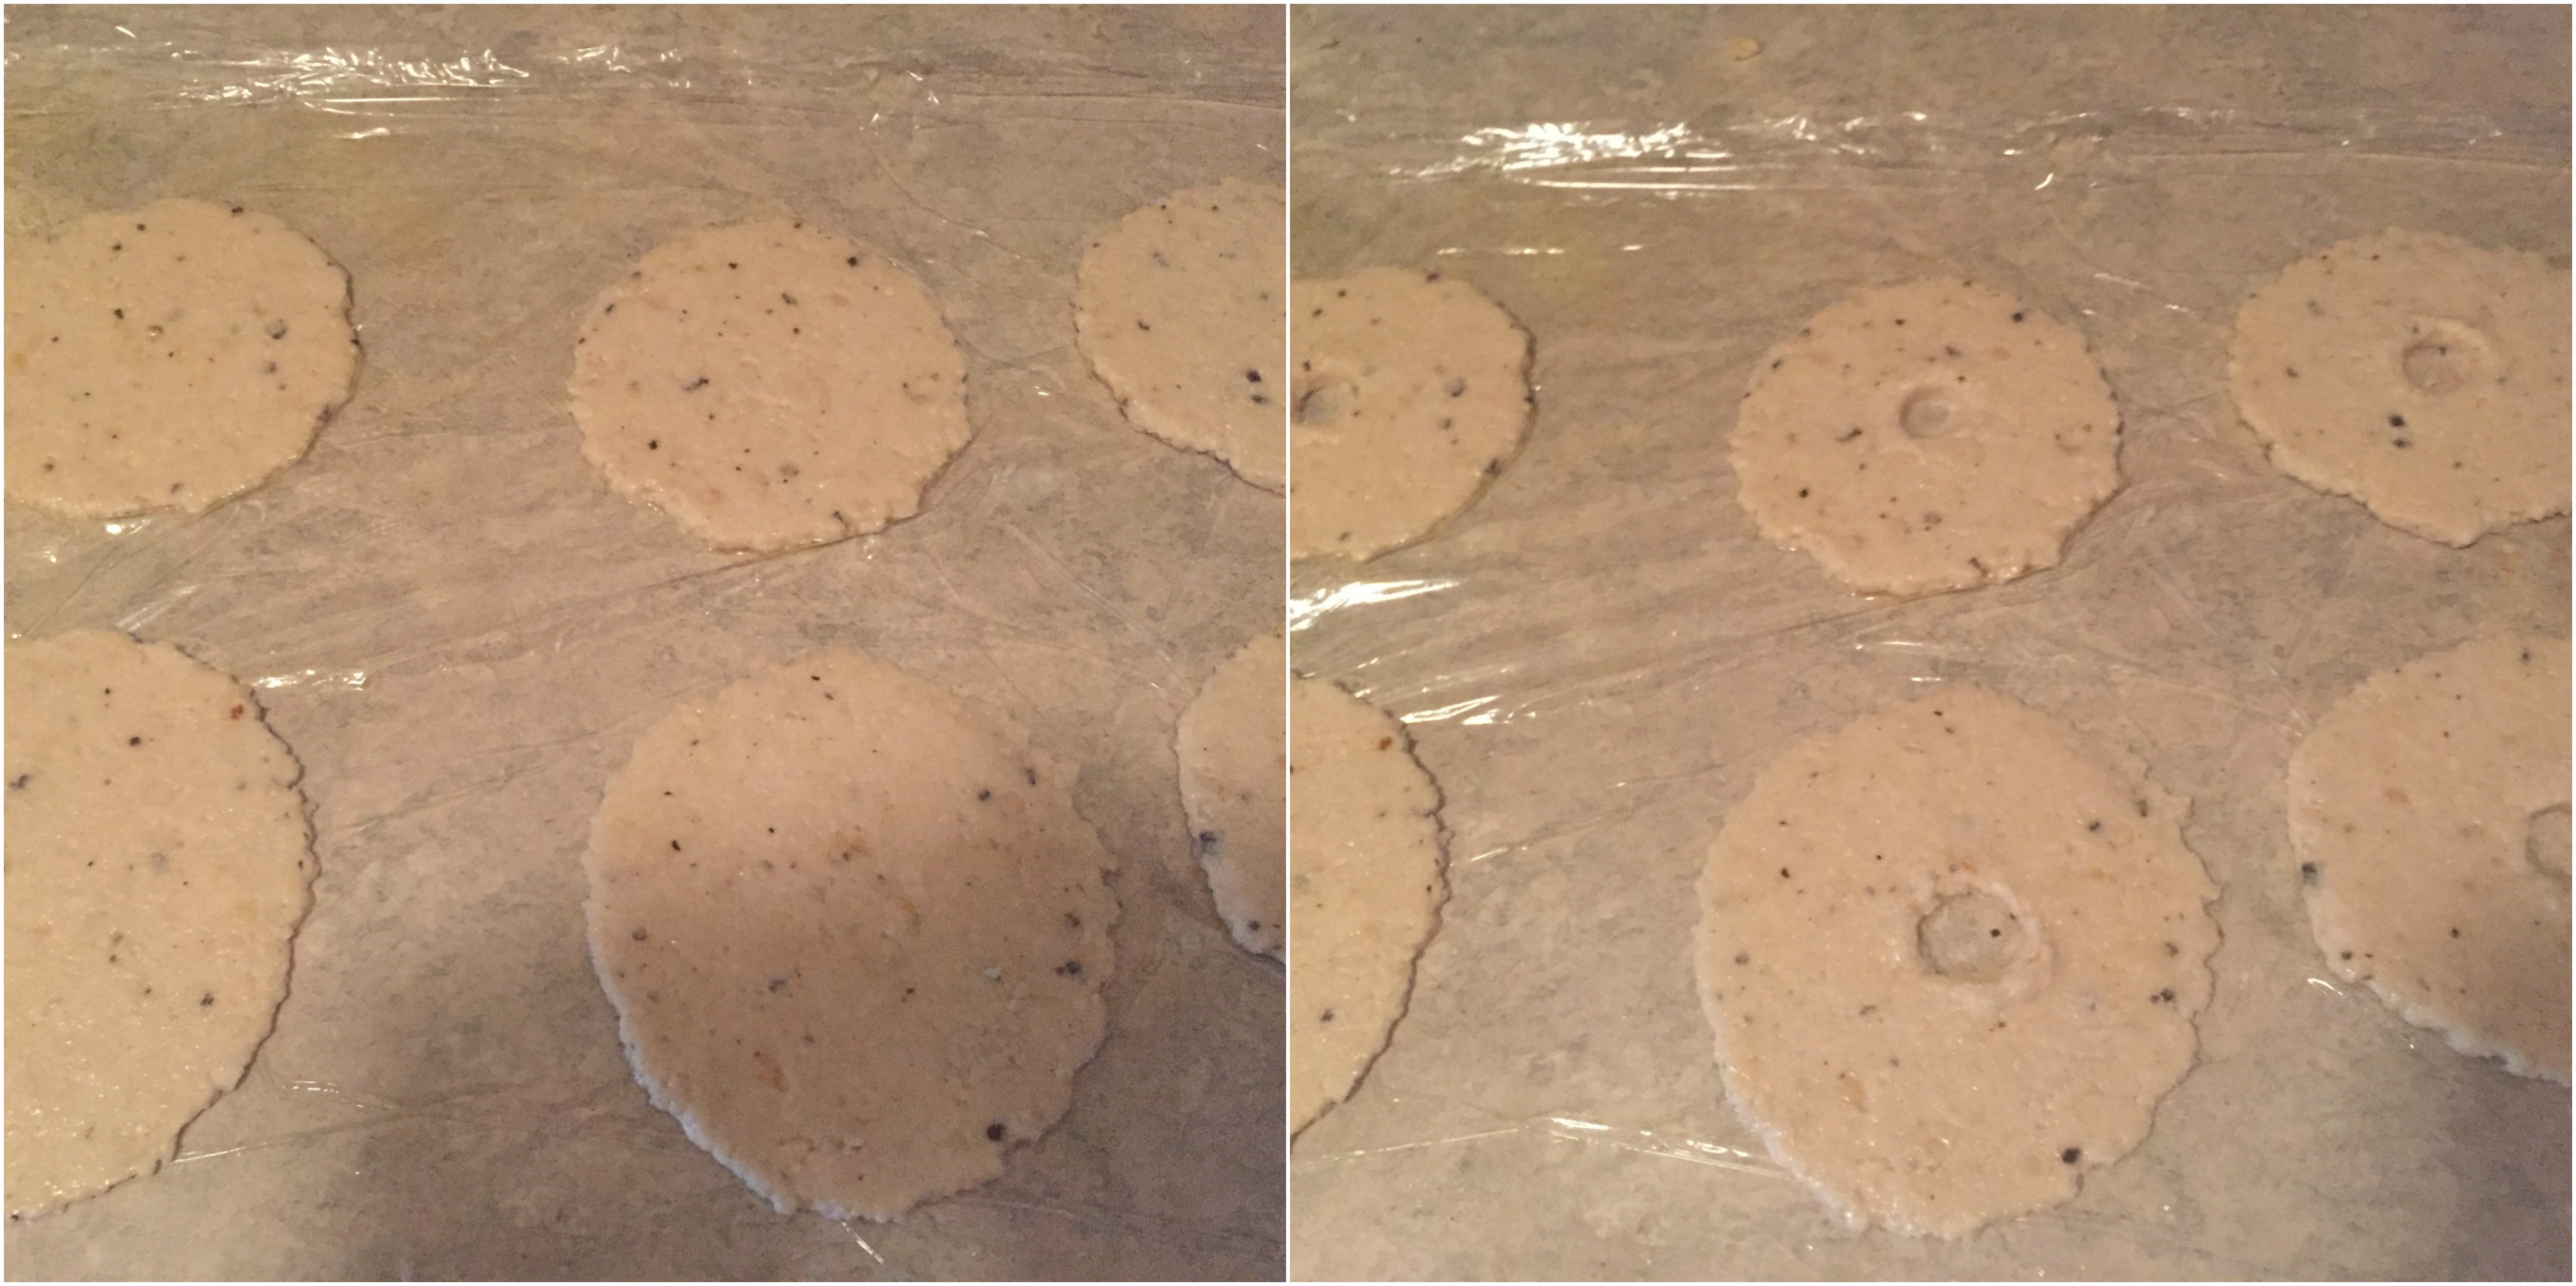
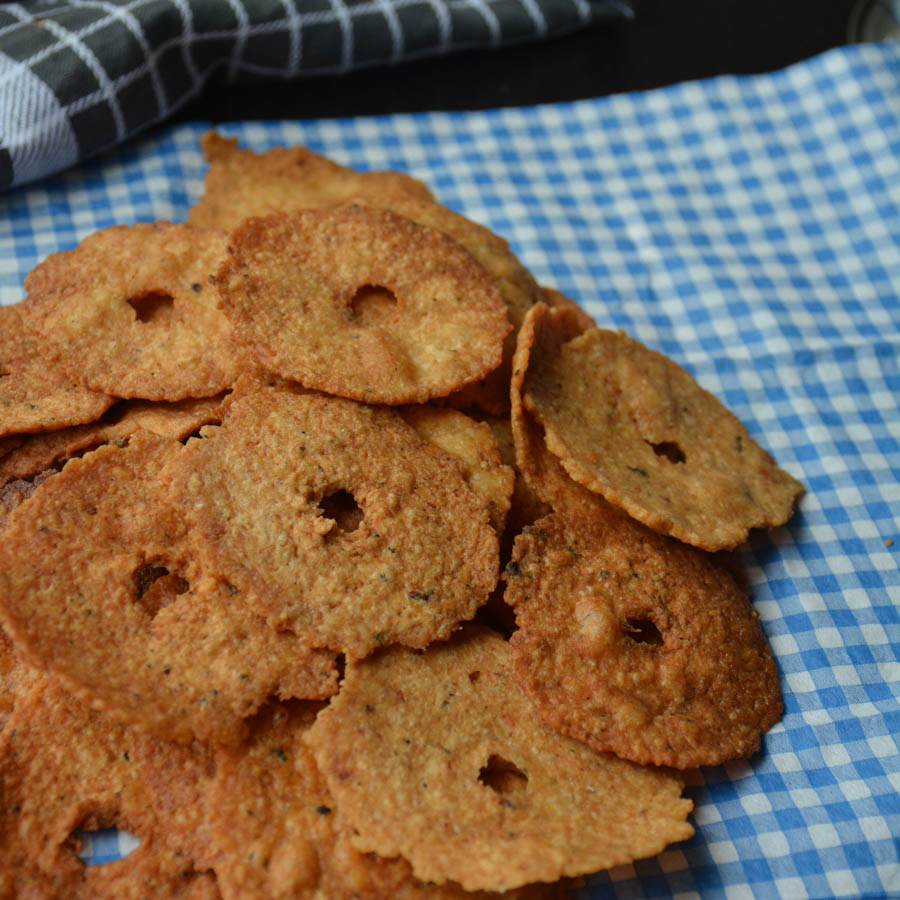
I have seen my dad and close one’s throw this “Seedai” on the air and catch them with their mouth to make it more interesting. When I put the first batch in the oil, I stayed away from the kitchen just to make sure that it does not burst and was peeping into the kitchen peek
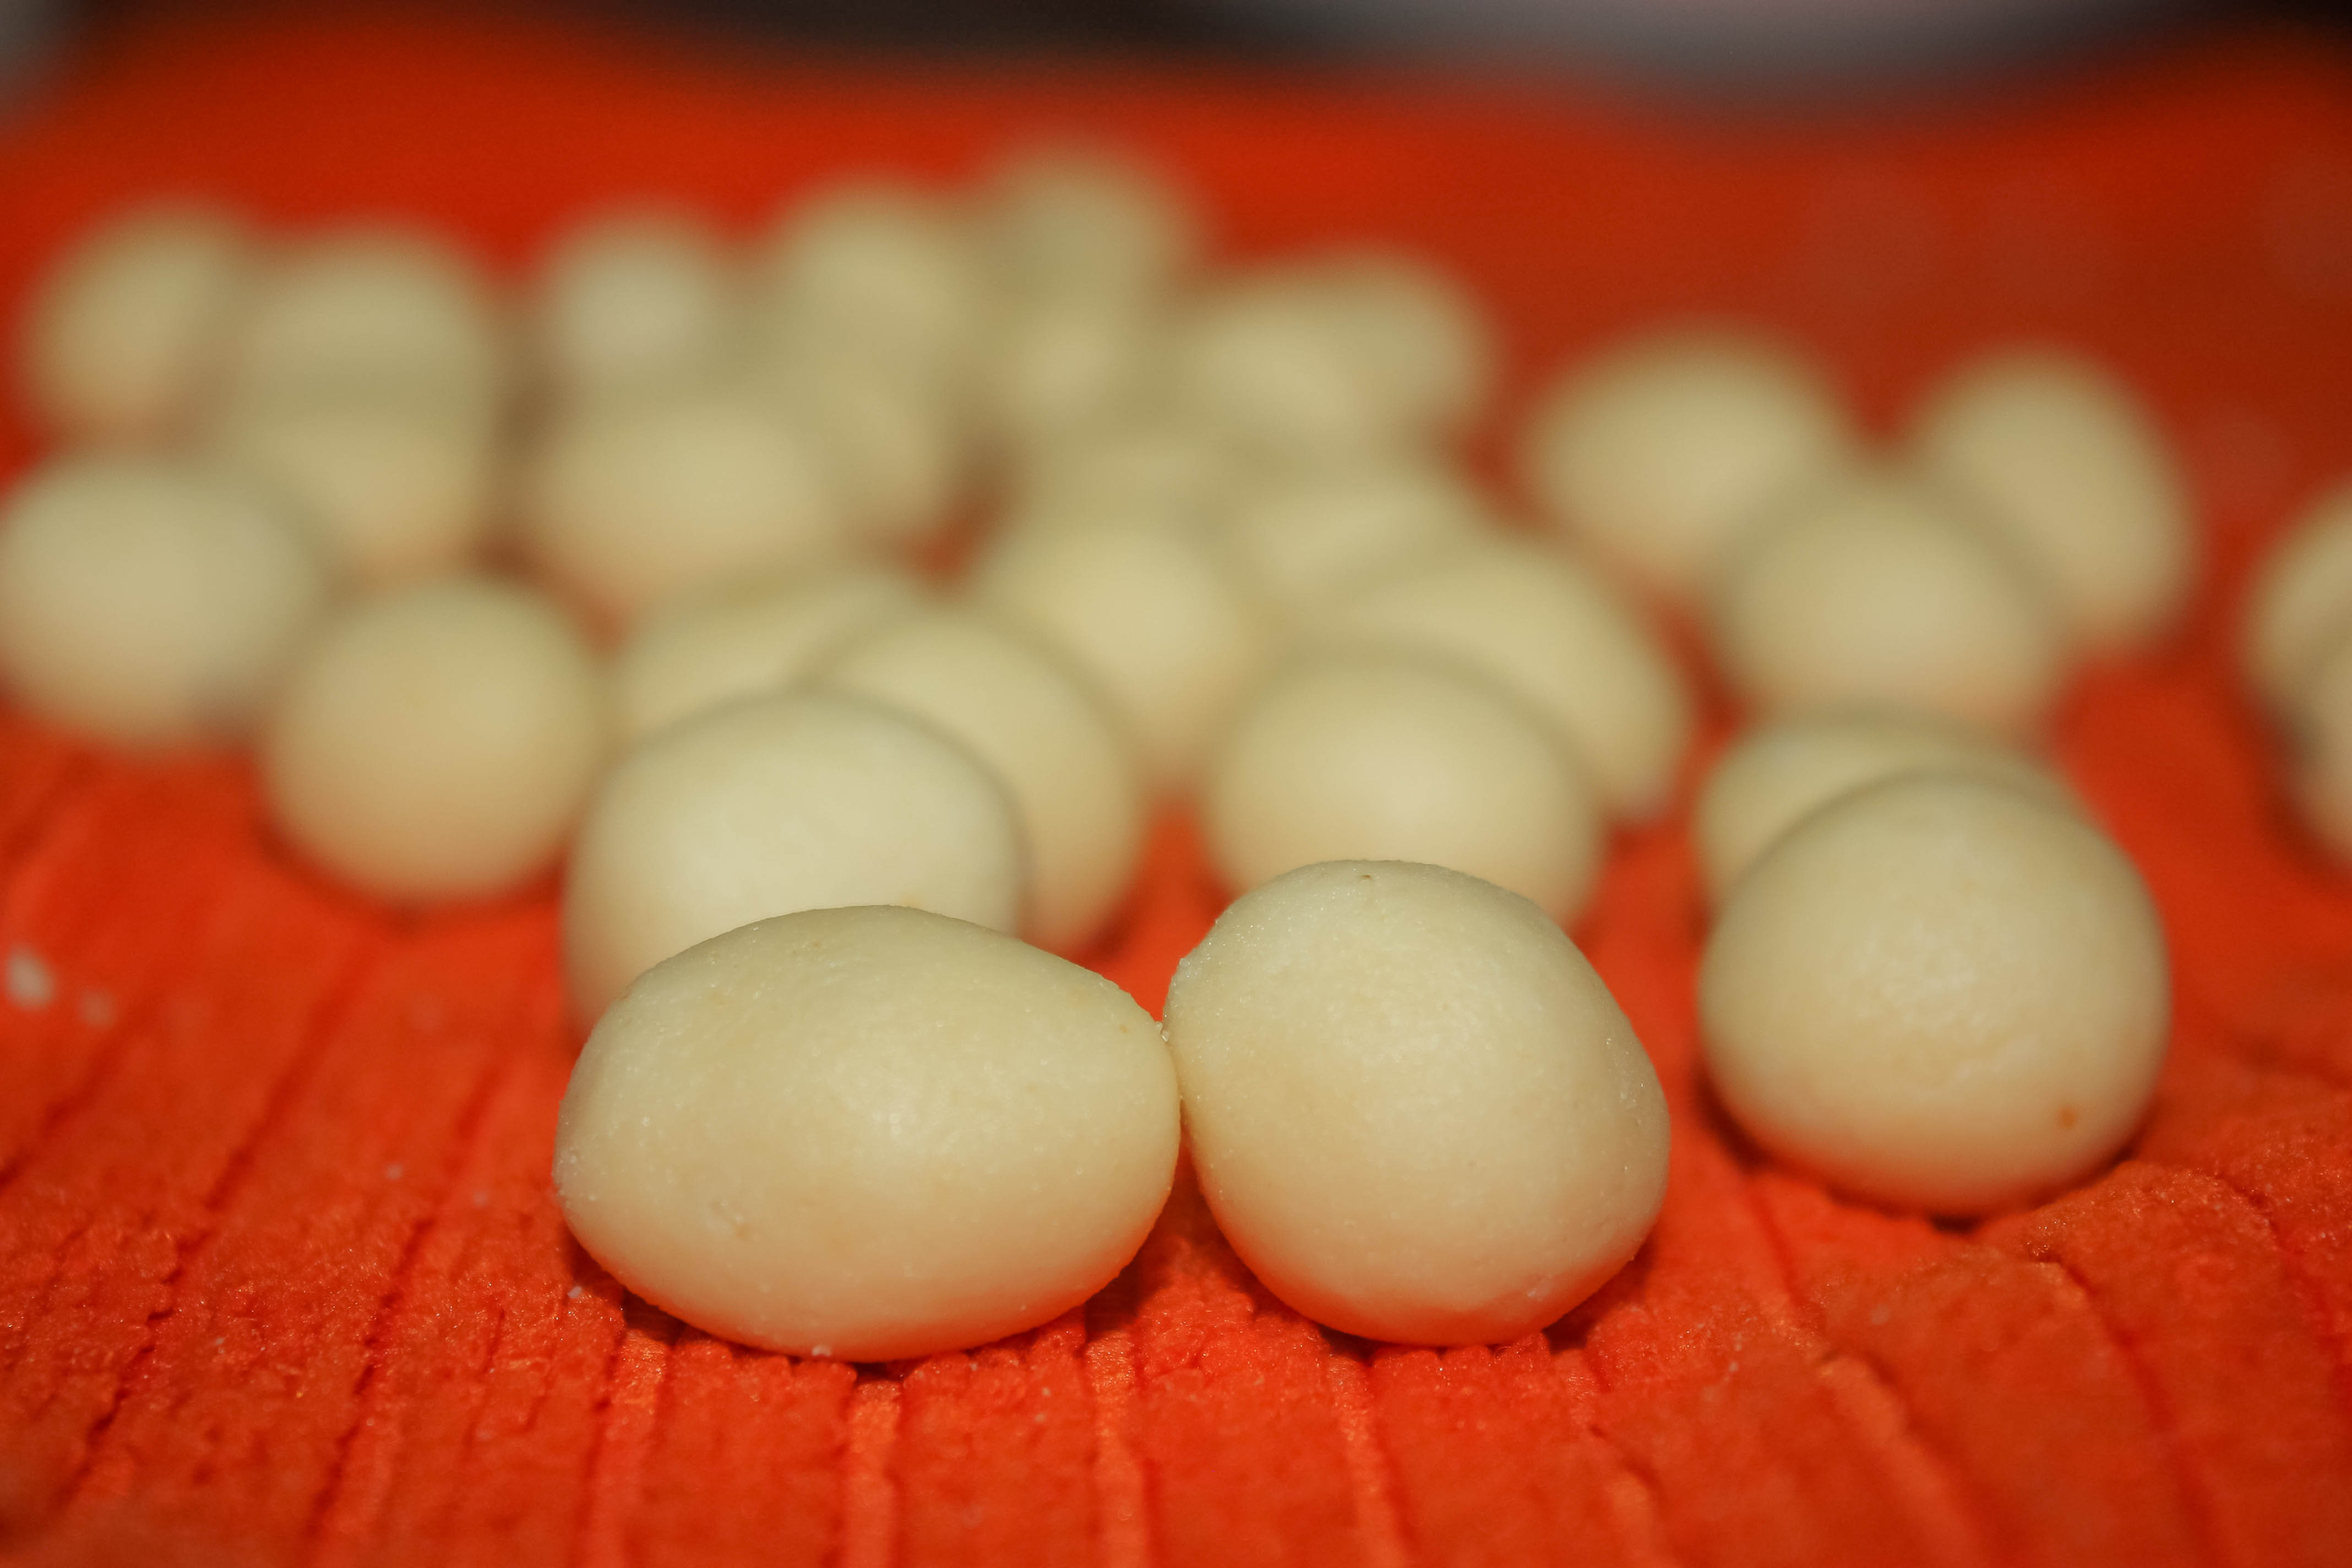
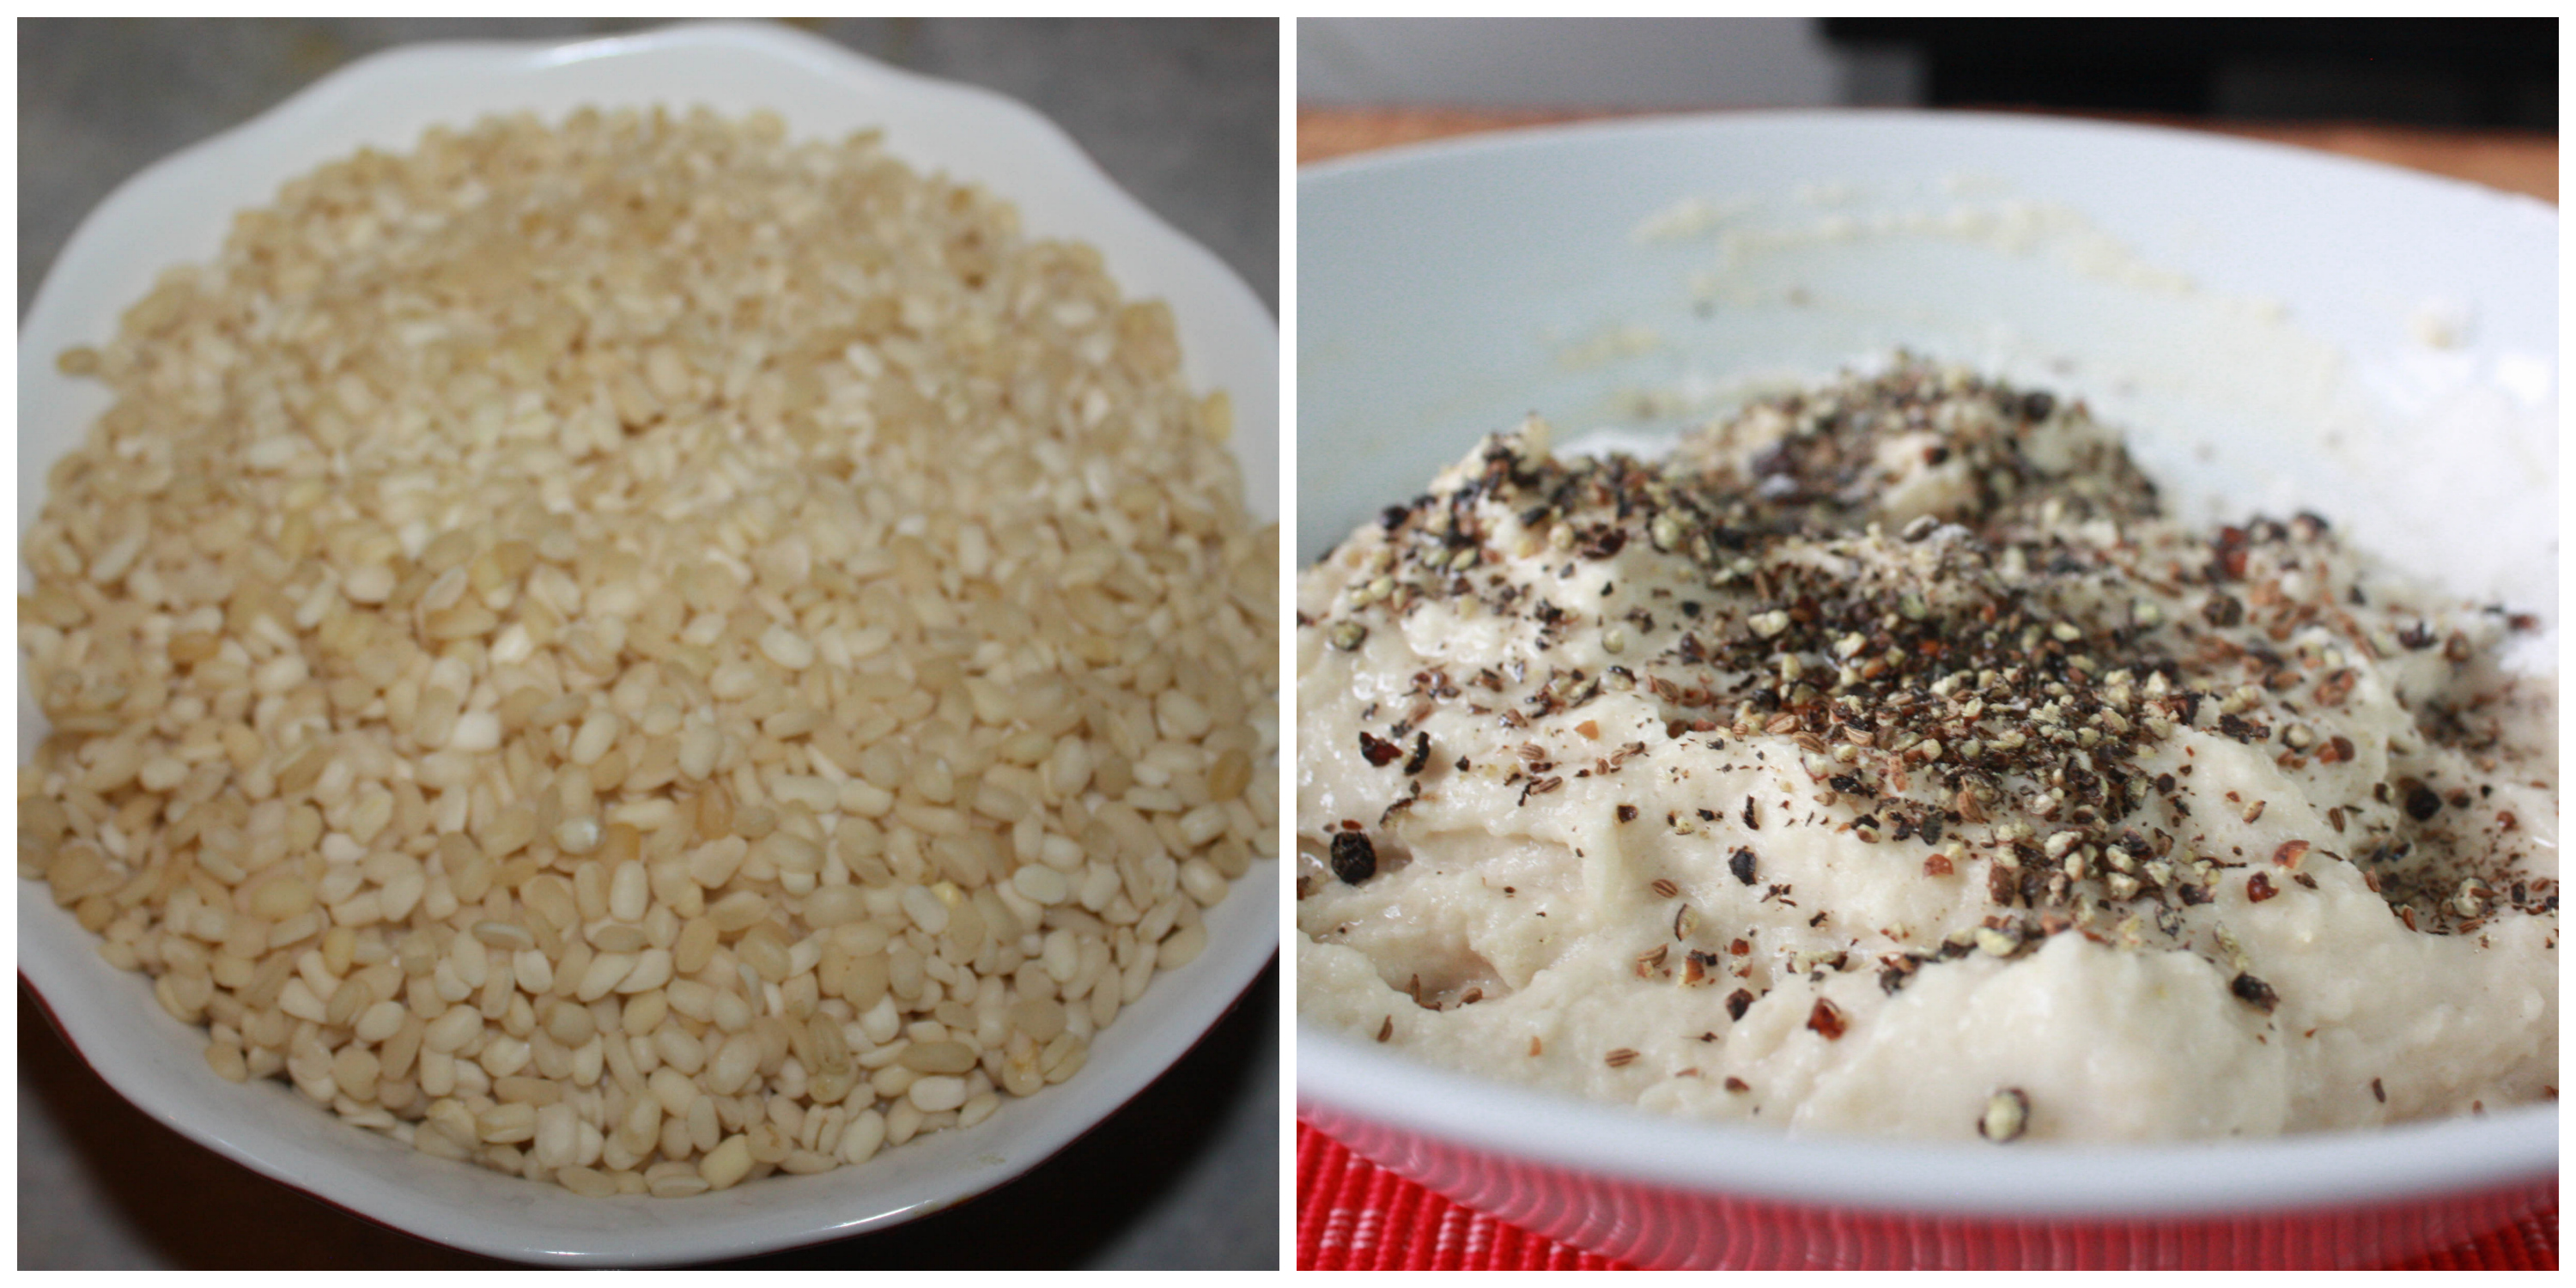
. But it came out so good :). I was so happy! I am not trying to scare you by saying all this, but be careful when you do this. May be in older days they used to have lot of stones in the rice which made it burst. These days its loads better and also if you sieve it well, it should be very fine 🙂

The correct way to do this recipe is to soak one cup of raw rice in water for two hours, dry them completely by placing on a cloth/paper and grind them. I used the ready-made rice flour instead. It was equally good. I have no complaints. 🙂 Let me know someone if you get to know the reason why we need to do the former method.

5.0 from 1 reviews
Print
UPPU SEEDAI / CRUNCHY LENTIL NUGGETS
Author: Suganya Hariharan
Recipe type: Appetizer
Cuisine: Indian
Prep time:  60 mins
Cook time:  30 mins
Total time:  1 hour 30 mins
Serves: 2 cups seedai
 
Ingredients
  • Rice flour – 1 cup
  • Urad dal – ¼ cup
  • Sesame seeds – 1tbsp
  • Ajwain – 1 tsp
  • Coconut Grated - 2 tbsp
  • Jeera/Cumin – 1tsp
  • Salt – as needed.( I used 1 tbsp)
  • Ghee – 1 tbsp
  • Oil – to fry.
Instructions
  1. Fry the urad dal for 2 – 3 mins.Grind the urad dal very finely. Mix rice flour and urad dal powder together, Seive them twice.
  2. Mix the ajwain, coconut,jeera,ghee and salt to the mixture.
  3. Add water little by little to form a soft dough but do not make it watery/sticky.
  4. Now comes the major step, hold a little dough part on your left hand on the fingers side like shown below. Take a tiny dough part, press them and release them by making anticlockwise directions on the right hand. And the first seedai dough is ready. It should not be hard or very soft. It should be in perfect texture.
  5. Make them all like the above step.
  6. Fry them in hot oil and take them out when its in golden color.
Notes
1. Be careful when you put them in oil, it might easily burst. So, sieve it properly to avoid stones.
2. When you make the balls, make sure its not very hard or very soft. It will either break or it will be too hard.
3. Use unsalted butter instead of ghee. Or if you using ghee adjust your salt accordingly as ghee would have salt.
4. If you think the dough is too hard, add little ghee and water. Very little.
5. Oil should be very hot, or else it will break.
6. Roast the urad dal just for few minutes, which should do the job.
7. Try to use whole urad dal for this recipe. I used the broken one’s, as I did not have the whole urad dal handy.
Wordpress Recipe Plugin by EasyRecipe
3.3.3077

Uppuseedai_Relishthebite

Filed Under: SNACKS & APPETIZERS, SNACKS & APPETIZERS FESTIVAL Tagged With: appetizer, crispy, crunchy, festival, fry, lentil, nuggets, snacks, vegeterian

Milagu Vadai/ Pepper fritters

August 17, 2014 by Suki 1 Comment

Milaguvadai-5

Milaguvadai-5

Crispy  and spicy crackers made with peppercorns and urad dal.

I made this again this week 🙂 the very first version I made before two years 😀 I totally had this guilt that it was not perfect so tried again and it came out crispy perfect. I found the reason for it, I soaked for an hour which did not make it crispy I believe and this time I soaked for just 15 minutes.

Today is Krishna Jayanthi 🙂 Happy Birthday, Lord Krishna. For people who do not know what is Krishna Jayanthi, it’s an annual celebration of the birth of the Hindu deity Krishna. Images of Krishna’s infancy are placed in swings and cradles in temples and homes. His devotees celebrate his birthday by today sweets and savory by his name. This pepper vadai/ milagu vadai is usually done for another god “Hanuman”. But it’s a good savory to do for all gods. These vadai’s are usually connected through a thread and garlanded to the Lord. The below picture was my older version. I totally felt it was not that crispy so made it again 🙂 This time it was crispy crispy perfect!

Milagu_vadai_Relishthebite

This is the first time for me to make these. And I guess it turned out good. They used to give this in temple. And I always loved them. But never felt like trying them at home. But today is the day for me to try this. Soak the urad dal only for one hour. It will not have that texture otherwise. I soaked more than that this time 😉 so make sure.

Milaguvadai-4

Print
Milagu Vadai/ Pepper Vadai
Author: Suganya Hariharan
Recipe type: Appetizer
Cuisine: Indian
Prep time:  60 mins
Cook time:  30 mins
Total time:  1 hour 30 mins
Serves: 6
 
Ingredients
  • Urad dal - 1 cup
  • Rice flour – 1 tbsp
  • Pepper corns – 2 tsp (grounded)
  • Ajwain - ½ tsp
  • salt – ½ tbsp
  • Oil – To fry
Instructions
  1. Wash and soak the urad dal for 15 minutes and not more than that.Drain it nicely. If there is water, it can spoil the whole procedure. Grind it in the blender without adding water. The mixture should be little coarse not a paste.
  2. Ground the pepper again roughly. Just a single pulse would do.
  3. Take a bowl, mix the ground urad dal, hing, rice flour,ajwain and broken pepper.
  4. Heat oil in a kadai/pan, add one tbsp of oil to the vadai mixture.
  5. Take a banana leaf/Ziploc cover grease with oil. Grease your hands with oil to tap them thinly using hand or flat shaped cup. Take small lemon sized balls and pat it to make it a circle and thin vadai. Flatten it as thin as you can.Mark a hole in the center.


  6. Remove the vadai from the banana leaf and put them in the hot oil.
  7. Cook the vadai on both sides and till its crispier brown color on both sides.
Notes
1. Try to use whole urad dal. As it gives a nice texture. If not, use the broken ones.
2. When you drain the mixture, drain them completely. If there is water, the vadai’s wont be formed perfectly.
3. If the vadai batter is sticky and with more water, add more rice flour. Continue doing still it is in the perfect consistency.
4. Adding 1 tbsp hot oil to the batter will make the vadai crispier.
5. If you want crispier vadai, after frying them, try to refry them again. It will give nice colour and more crispiness. But mine was fine with the first time.
6. If you don’t have banana leaf, use Ziploc or polythene cover.
7. Marking a hole in the center will cook the vadai faster.
8. Ensure that vadais are patted thin, or else it’s going to be hard.
Wordpress Recipe Plugin by EasyRecipe
3.5.3208

Milaguvadai-2

Filed Under: SNACKS & APPETIZERS, SNACKS & APPETIZERS FESTIVAL Tagged With: anjaneyar vada recipe, appetizer, festival, hanuman vada recipes, Indian fritters, INDIAN RECIPE, Indian snacks recipes, pepper, pepper fritters, pepper lentil fritters, PEPPER RECIPE, quick, savory, snacks, spicy, tasty, Vadai, VADAI RECIPE, yummy

Shrimp Biryani

August 16, 2014 by Suki 2 Comments

Shrimp_Biryani_Relishthebite

Shrimp_Biryani_Relishthebite


Who does not love the exotic fragrant biryani? 😀 Just the name “biryani” will make many drool. Biryani is one of the most popular dishes in India. Biryani is one of the foods for sure that gives that comfort feeling. Shrimp biryani is extraordinary for seafood lovers and biryani lovers. Shrimp in biryani induce nice flavors to rice. 

The one I have prepared is a home-style biryani. Closing the vessel with the lid when cooking and sealing the edges with wheat dough is the authentic style. Cook on high flame for 2 minutes. Then remove the vessel from the stove and place an iron tawa. Place back the biryani vessel on iron tawa and cook biryani for 20minutes.

Biryani is not strenuous at all to prepare like many believe. Its just little time consuming and it need that little extra special care when we do it. Try to use all the ingredients listed, each ingredient has a special role in the biryani and compliments one with another.

There are many different types and versions of regional biryani recipes. The style that I am cooking today is dum biryani, shrimp gets the direct heat from the flame and the rice is cooked with steam generated by the airtight method of cooking. This way the rice is cooked in the flavors of the shrimp and gets the aroma of the shrimp. I have cooked this recipe couple of times and it has never failed me.For the biryani masala ,I will post my biryani powder soon. But store bought ones are good too. I use aachi biryani powder most of the times.

 It is for all the seafood spicy flavourful food lovers 🙂

My other favorite biryani recipes: Lamb Biryani, ambur biryani, chicken biryani, mushroom biryani, cauliflower biryani

5.0 from 1 reviews
Print
Shrimp Biryani
Author: Suganya Hariharan
Recipe type: Dinner, Lunch
Cuisine: Indian
Prep time:  60 mins
Cook time:  30 mins
Total time:  1 hour 30 mins
Serves: 4 or 5
 
Ingredients
  • Marinate:
  • Ginger garlic paste - 1 ½ tbsp (I grind fresh garlic and ginger)
  • Biryani powder - 2½ tbsp
  • Red chilli powder - 2 ½ tsp
  • Coriander pwder - 1 tsp
  • Cinnamon - 1
  • Cardomon - 2
  • Fennel seeds - 1 tsp
  • Jeera - 1 tbsp
  • Green chilli - 5 (cut them roughly)
  • Mint - 1 /2 cup(chopped)
  • Coriander- ½ cup minced
  • Grated coconut - 3 tbsp finely grated
  • Curd - 1 cup
  • Oil - 3tbsp
  • Prawn - 600 grams ( shrimp, peeled, raw, de-shelled & de-veined

    Rice:
  • Basmati rice - 3 cup (soaked for twenty minutes)
  • Jeera - 2 tsp
  • Salt - 2 ½ tbsp. (according to taste)

    Others:
  • Oil - ½ cup
  • Onions - 2 (sliced beautifully)
  • Ghee - 2 tbsp
  • Garam masala powder - 1 tsp
  • Salt - 1 tbsp
  • Orange food colour mixed with 2tsp of water or saffron in warm water
  • Lime juice
  • coriander – to garnish
Instructions
  1. Marinate everything listed under “marinate” section for at least an hour.
  2. Boil 8 cups of water in high heat. When it boils vigorously, add the soaked rice, jeera and salt. Cook till its 80% done. Usually I put them for 5 minutes after adding rice. That is usually 80% done.
  3. Meanwhile on the other side, heat a heavy bottom pan with oil. Add the onions and salt. Sauté them till they become crispy. Add the marinated shrimp to it and sauté for 3-4 minutes. Stir in between. (I am using cooked shrimp that we get on market, its hard to get raw shrimps around here. If you are cooking with raw shrimps, add the shrimp and cook for 5minutes till it is done.)
  4. Top the shrimp with the cooked rice, add the ghee, garam masala powder. Shrimp and rice will cook perfectly in that heat.
  5. Close it with tight lid, if possible Place lid and over the lid place a heavy weight (like cooker) keep it in medium for 10 minutes and switch it off.
  6. Top it with the food color mixture,coriander and mix after a minute. After 5 minutes, gently mix the rice and gravy. squeeze the lemon and serve.
  7. Biryani ready!
Notes
1.Don’t over soak the rice, and then it will not give you that biryani texture in the rice.
2.Gently mix the rice at the end, don’t break the rice.
3.Don’t compromise on the quality of the rice. Use basmathi rice and not long grained rice.
4. The red colour is not healthy. But sometimes I use it. You can add the saffron soaked in warm milk instead.
5. I am using cooked shrimp that we get on market; it’s hard to get raw shrimps around here. If you are cooking with raw shrimps, add the shrimp and cook for another 5minutes till it is done.
Wordpress Recipe Plugin by EasyRecipe
3.2.1311


Serve with raita, Chicken curry or any curry, boiled eggs or chicken 65. 

ShrimpBiryani_relishthebite

Filed Under: NON-VEG RECIPES, RICE/BIRYANI VARIETIES Tagged With: biryani, biryani reci indian recipes, dinner, flavourful, Indian, Indian Recipes, lunch, marinate, Non-vegetarian, prawn biryani, prawn indian recipes, restaurant style prawn biryani, rice, rice indian recipes, seafood recipes, Shrimp, shrimp biryani, shrimp Indian recipes, spices

Balsamic Peach Spinach Salad

August 15, 2014 by Suki 10 Comments

Balsamic Peach Spinach salad

Spinach_peach_feta_walnut_Relishthebite

This is my favourite dish if I wanted it to eat healthy. To be frank with you, I am not a salad person at all. But once in a while, I would have that craving for salads. I guess I should stress on the “WHILE” part 😀 strongly. And when I have them, I want them with all the taste and health factors on the plate.

I like the part that salads are simple enough to put together for a light weeknight meal, and really fancy enough to serve as a starter at your night or summer party’s.

Balsamic peach spinach salad nuts toast

It’s a refreshing summer salad. The dressing used is jam packed with all sorts of ingredients that just come alive when you eat it. The combo with sweetness of peach and balsamic glaze, crunchy walnuts, mustard flavor, freshness of spinach, and that crumbled cheese is really worth it. When you look at the combo, its kind of weird. But try it 🙂 you would surely know what I am trying to say, Fresh, crunchy, salty and sweet! That explains it all.

You can also grill the peach and use. It gives an excellent smoky taste. Do it with some olive oil, balsamic, pinch of salt and use it instead of plain peach. But if you want grill your peaches, be very careful. They have a tendency to pick up the flavors of what you previously grilled on that grill. You may want to clean your grill well before grilling them.

Print
Balsamic Peach Spinach Salad
Author: Suganya Hariharan
Recipe type: Dinner
Prep time:  5 mins
Cook time:  20 mins
Total time:  25 mins
Serves: 2
 
Ingredients
  • Peaches - 2 firm yet ripe.
  • 4cups baby spinach
  • ¼ cup crushed walnuts and pecans together
  • ½-cup blue cheese crumbles or feta cheese
  • ½-cup balsamic vinegar

    Dressing:
  • Dijon Mustard – 2tbsp
  • Honey -1/2tsp
  • Olive oil
  • Salt
  • Pepper
  • Lemon
Instructions
  1. Pour the balsamic vinegar into a small saucepan and bring to a boil. Heat it in simmer for 15-20 minutes until the balsamic vinegar is syrupy and reduced very well.
  2. Meanwhile, Slice the peaches into 5 or 6 segments per peach.
  3. In a small bowl, stir together a drizzle of olive oil, a squeeze of lemon, salt and pepper. Whisk together all the dressing components and taste. If you like it more mustard flavor, add more mustard, if it’s too tart, add a bit more honey. Chill until ready to use.
  4. Dry roast walnuts and pecans. Keep it aside.
  5. Toss spinach with a little of olive oil. Place it in the salad bowls. Top the layer the spinach with salad dressing, balsamic vinegar, peach, nuts and crumbled cheese. Top it with balsamic if needed.
Wordpress Recipe Plugin by EasyRecipe
3.2.1311

Spinach_peach_feta_walnut_Relishthebite-2

Filed Under: SALAD Tagged With: balsamic, fruit. nut. cheese, healthy, peach, salad, spinach

Page 1 of 2
1 2 Next »
  1. Pages:
  2. 1
  3. 2
  4. »
  • 1
  • 2
  • Next Page »
  • Facebook
  • Google+
  • Instagram
  • Pinterest
  • Twitter

LOOKING FOR SOMETHING?

logo
Food Advertisements by
logo
Food Advertisements by

Categories

STAY CONNECTED

  • Facebook
  • Google+
  • Instagram
  • Pinterest
  • Twitter

SUBSCRIBE BY EMAIL

SEARCH RELISH THE BITE

logo
Food Advertisements by

Copyright © 2025 · Lifestyle Pro Theme on Genesis Framework · WordPress · Log in