• Home
  • Page Layouts
  • Page Templates
  • Theme Colors
    • Lifestyle Pro Blue
    • Lifestyle Pro Green
    • Lifestyle Pro Mustard
    • Lifestyle Pro Purple
    • Lifestyle Pro Red
    • Lifestyle Pro Teal

Relish The Bite

Taste of happiness

  • HOME
  • ABOUT
  • RECIPE INDEX
    • SNACKS & APPETIZERS
    • BREAKFAST
    • BAKED RECIPES
    • LUNCH & DINNER
      • RICE/BIRYANI VARIETIES
      • SIDES
        • DRY CURRY/STIR-FRY
        • SOUTH INDIAN CURRY/KUZHAMBU
        • NORTH INDIAN CURRY/DAL
        • RAITA/DIPS/CHUTNEY
        • Soups/Salads
      • PASTA PIZZA & TACOS
      • BREAD
      • CHINESE ASIAN INSPIRED
    • NON-VEG RECIPES
    • DESSERTS
    • BEVERAGES
  • SNACKS
  • BREAKFAST
  • NON-VEG RECIPES
  • RICE/BIRYANI VARIETIES
  • LAMB
  • SOUTH INDIAN CURRY/KUZHAMBU
  • VEGAN
  • NORTH INDIAN CURRY/DAL
  • DRY CURRY/STIR-FRY
  • PASTA & TACOS
  • CHINESE ASIAN INSPIRED
  • BAKED RECIPES
  • COLLECTIONS
  • BREAD
  • BEVERAGES
  • DESSERTS
  • FESTIVAL RECIPES
    • SNACKS & APPETIZERS
    • SWEETS/DESSERTS
  • RESOURCES
    • HOW TO START A BLOG
    • TITBITS
    • PRESS
  • CONTACT
You are here: Home / 2014 / Archives for October 2014

Archives for October 2014

Sweet and Spicy Garlic chicken Drumsticks

October 30, 2014 by Suki 2 Comments

Sweetandspicychicken-13

Sweetandspicychicken-13
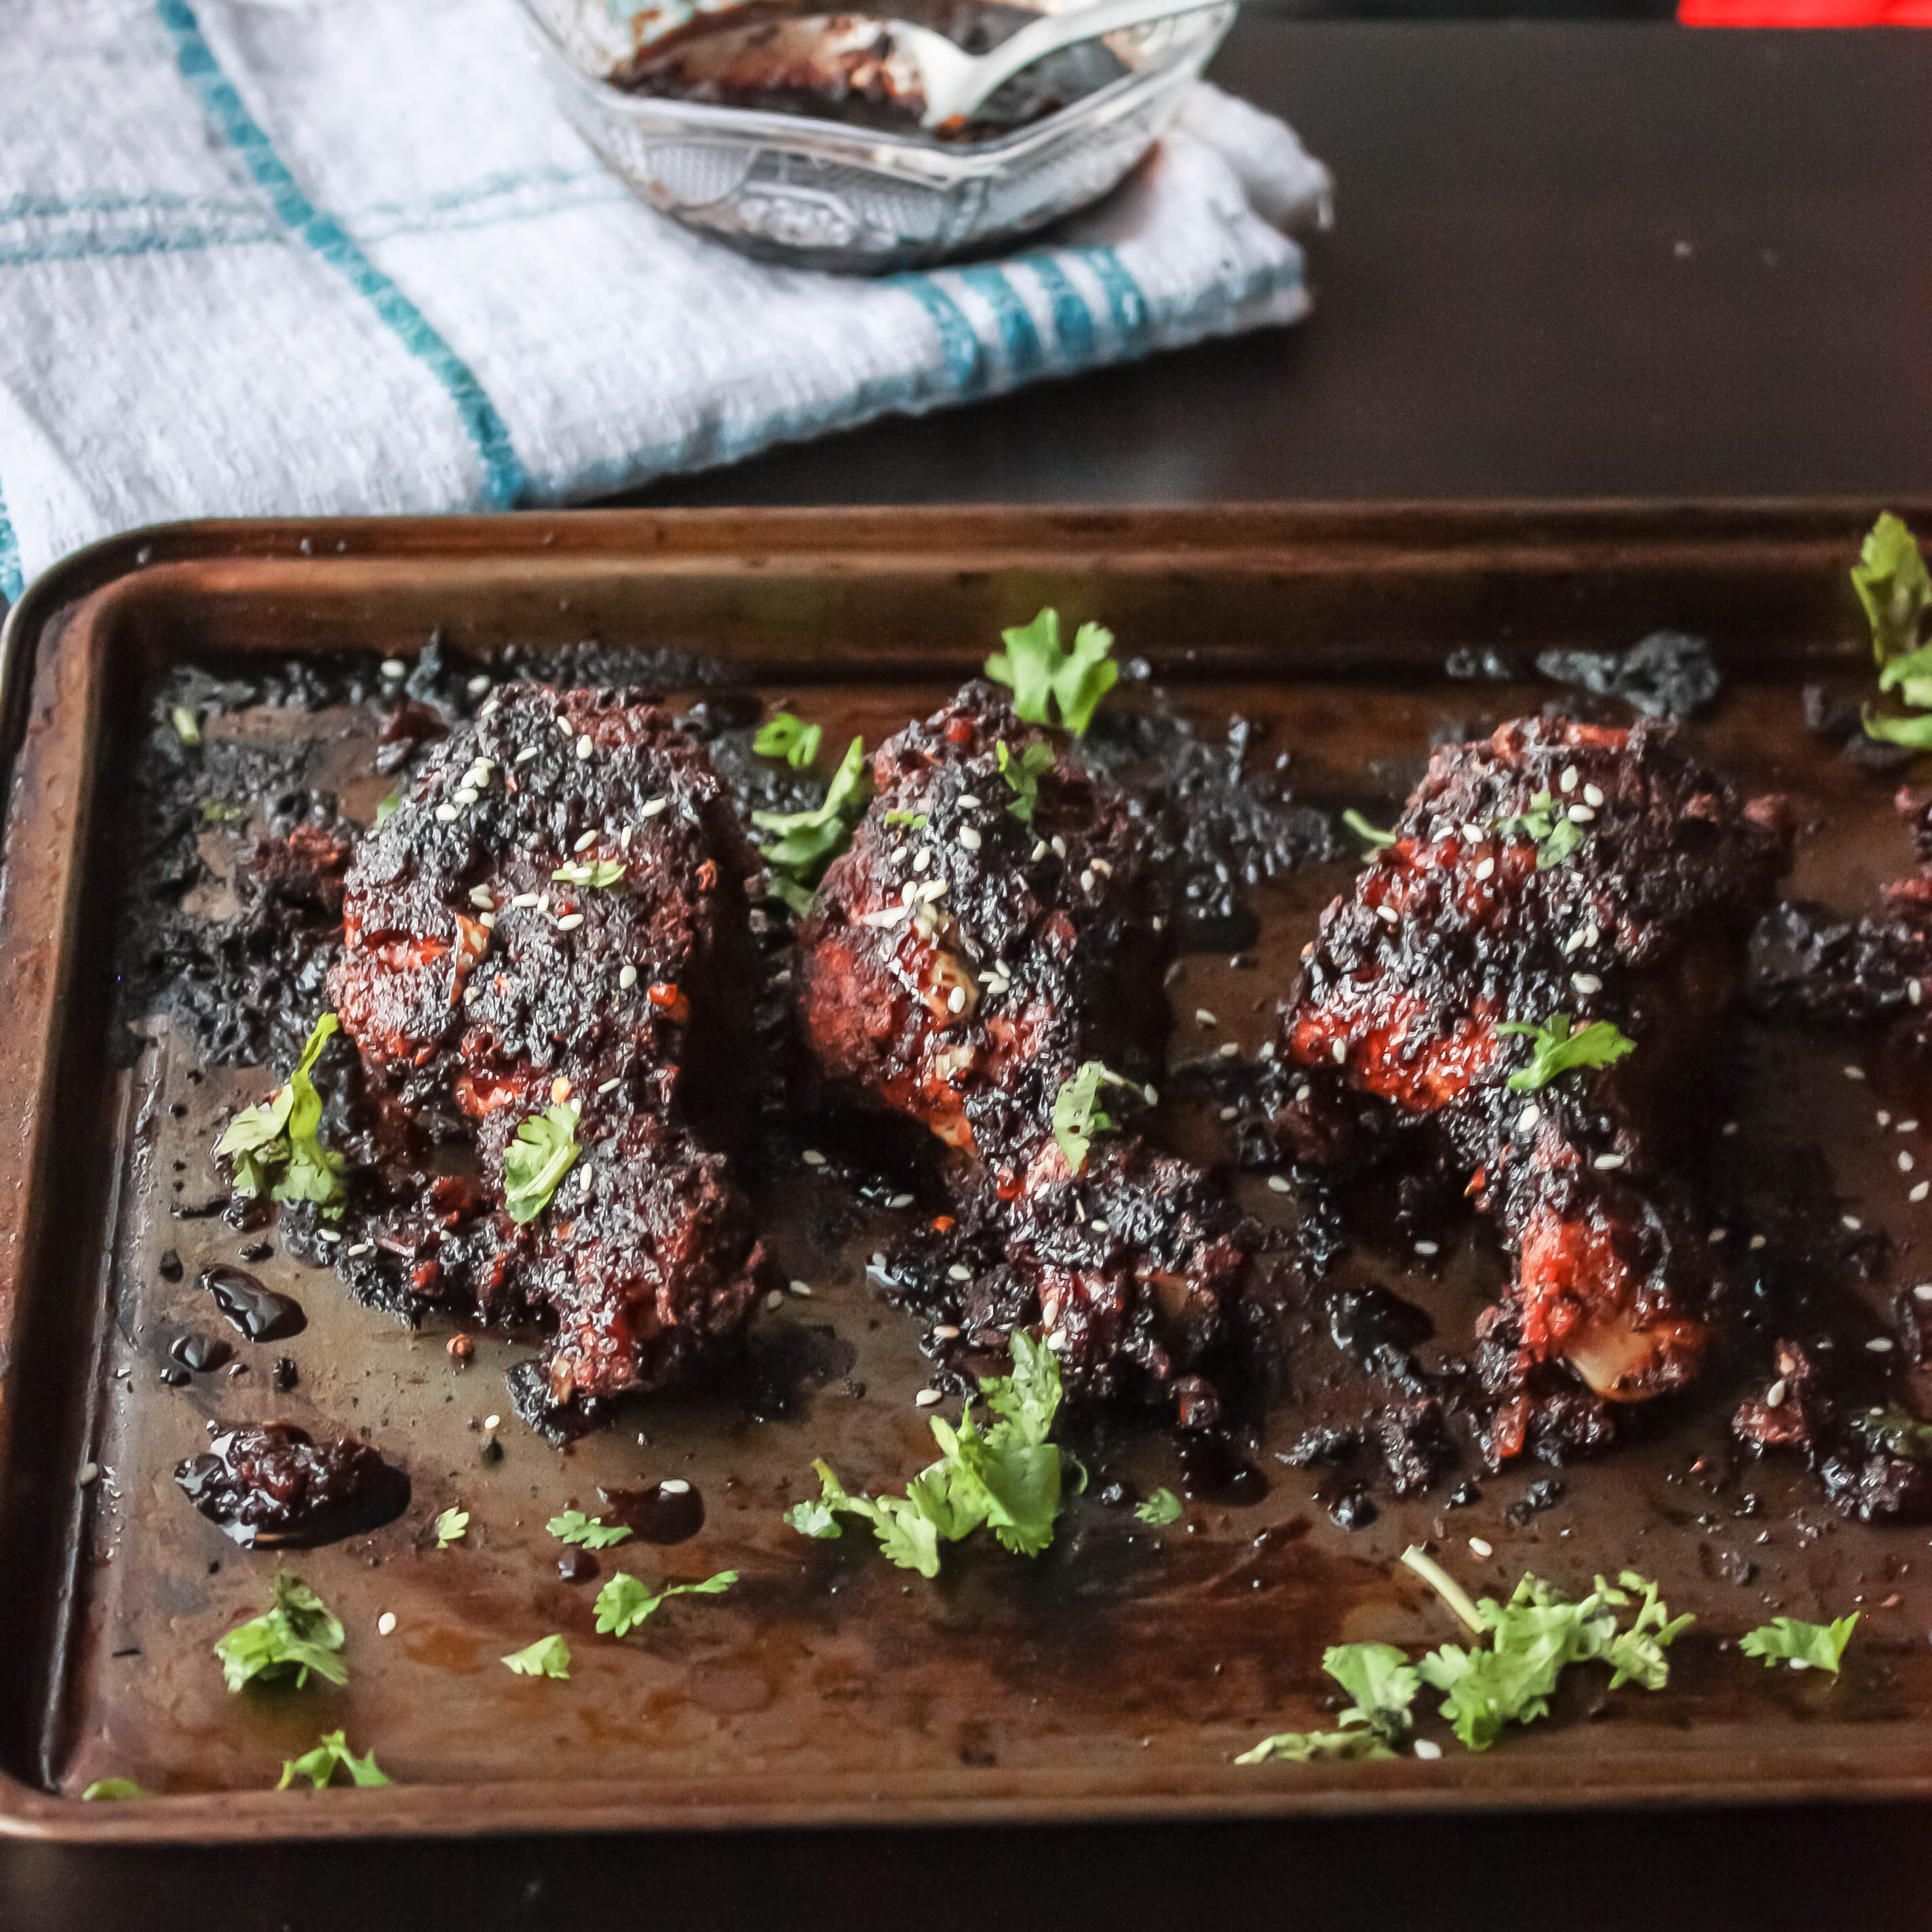
It is a great addition to our Halloween table or even for a game day. It’s loaded with garlic, sweet and heat. Spicy, crispy, sweet with ginger and garlic flavor.

Tomorrow is Halloween day and I wanted to do something dark, bloody and scary. I can imagine that you already started to plan menu for the party. But wait a minute, I can do it 😉 but I don’t think I will eat them. So I wanted to do something nice and change the name of it rather than the boring name! For instance devilishly hot chicken, bloody bad chicken, spooky spicy chicken, toasted witch skin 😉 and so on!

Sweetandspicychicken-12

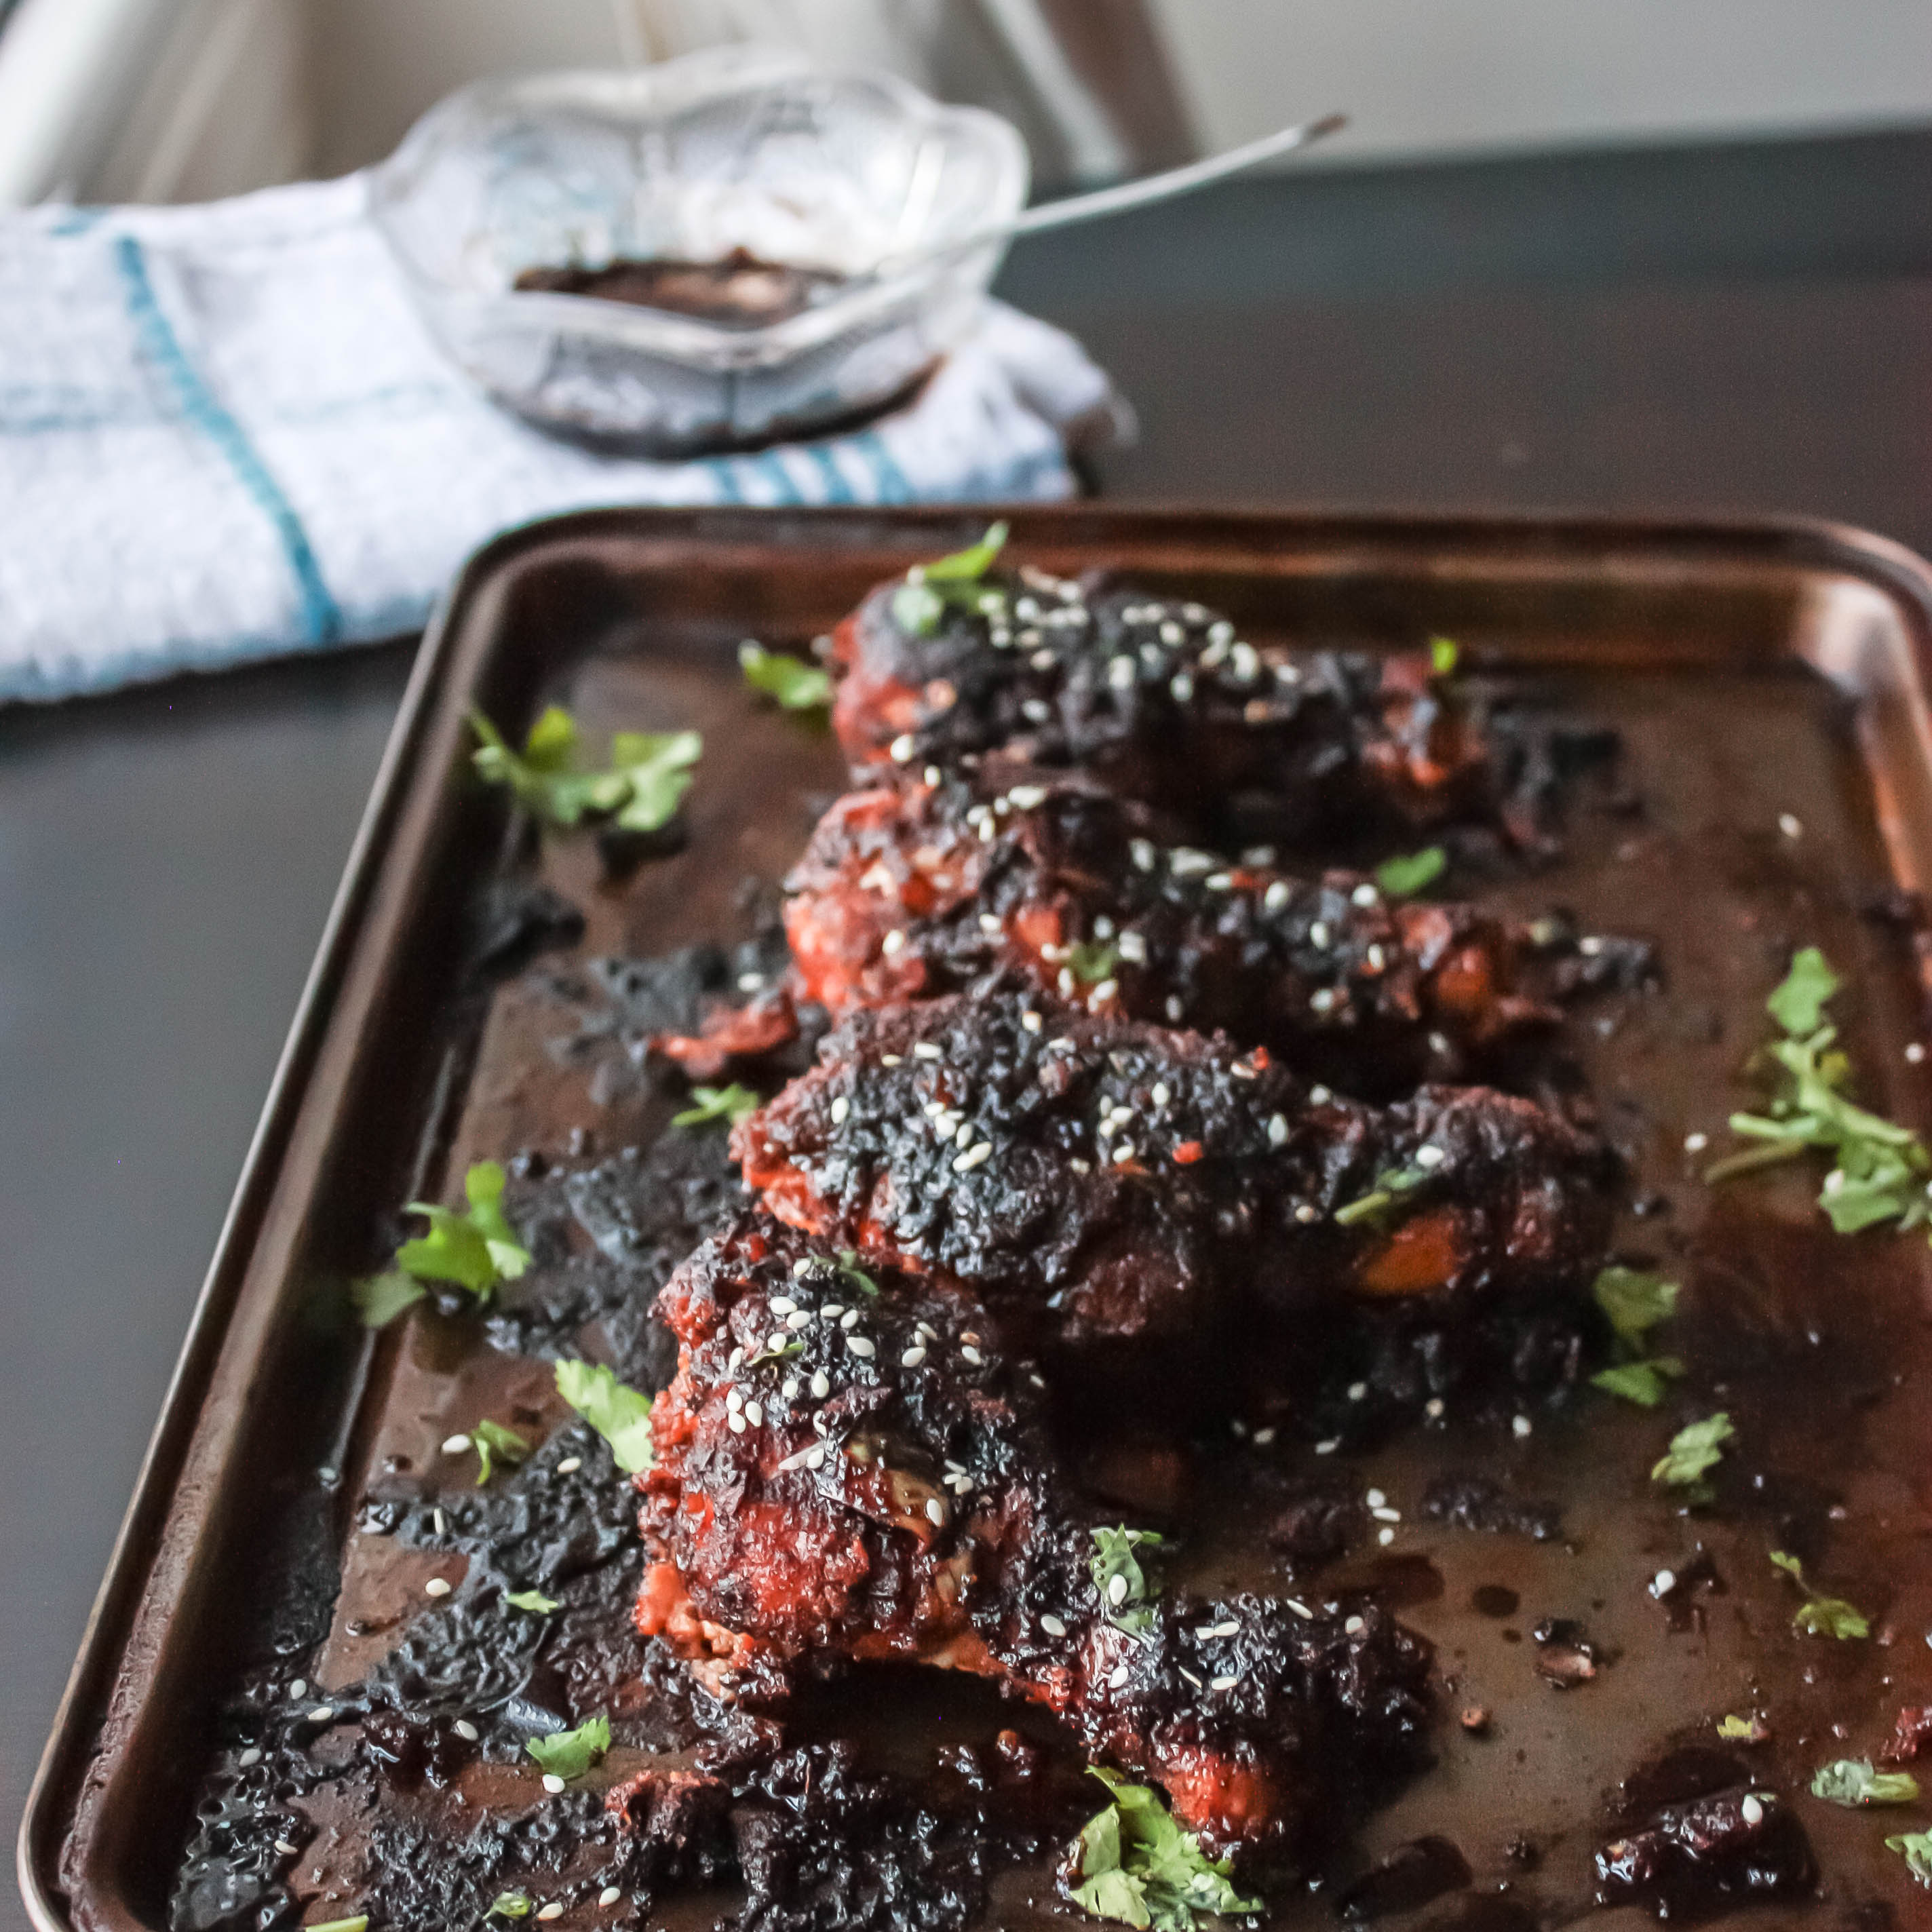
This taste loads better than it looks. This one is so easy to prepare and you can prepare in bunches and they are so inexpensive to buy. There are so many recipes with chicken drumsticks. You can make sticky lime chicken drumsticks, orange chicken drumsticks, tandoori chicken and so on…Na na! Not on a Halloween day. So, I planned to do this.

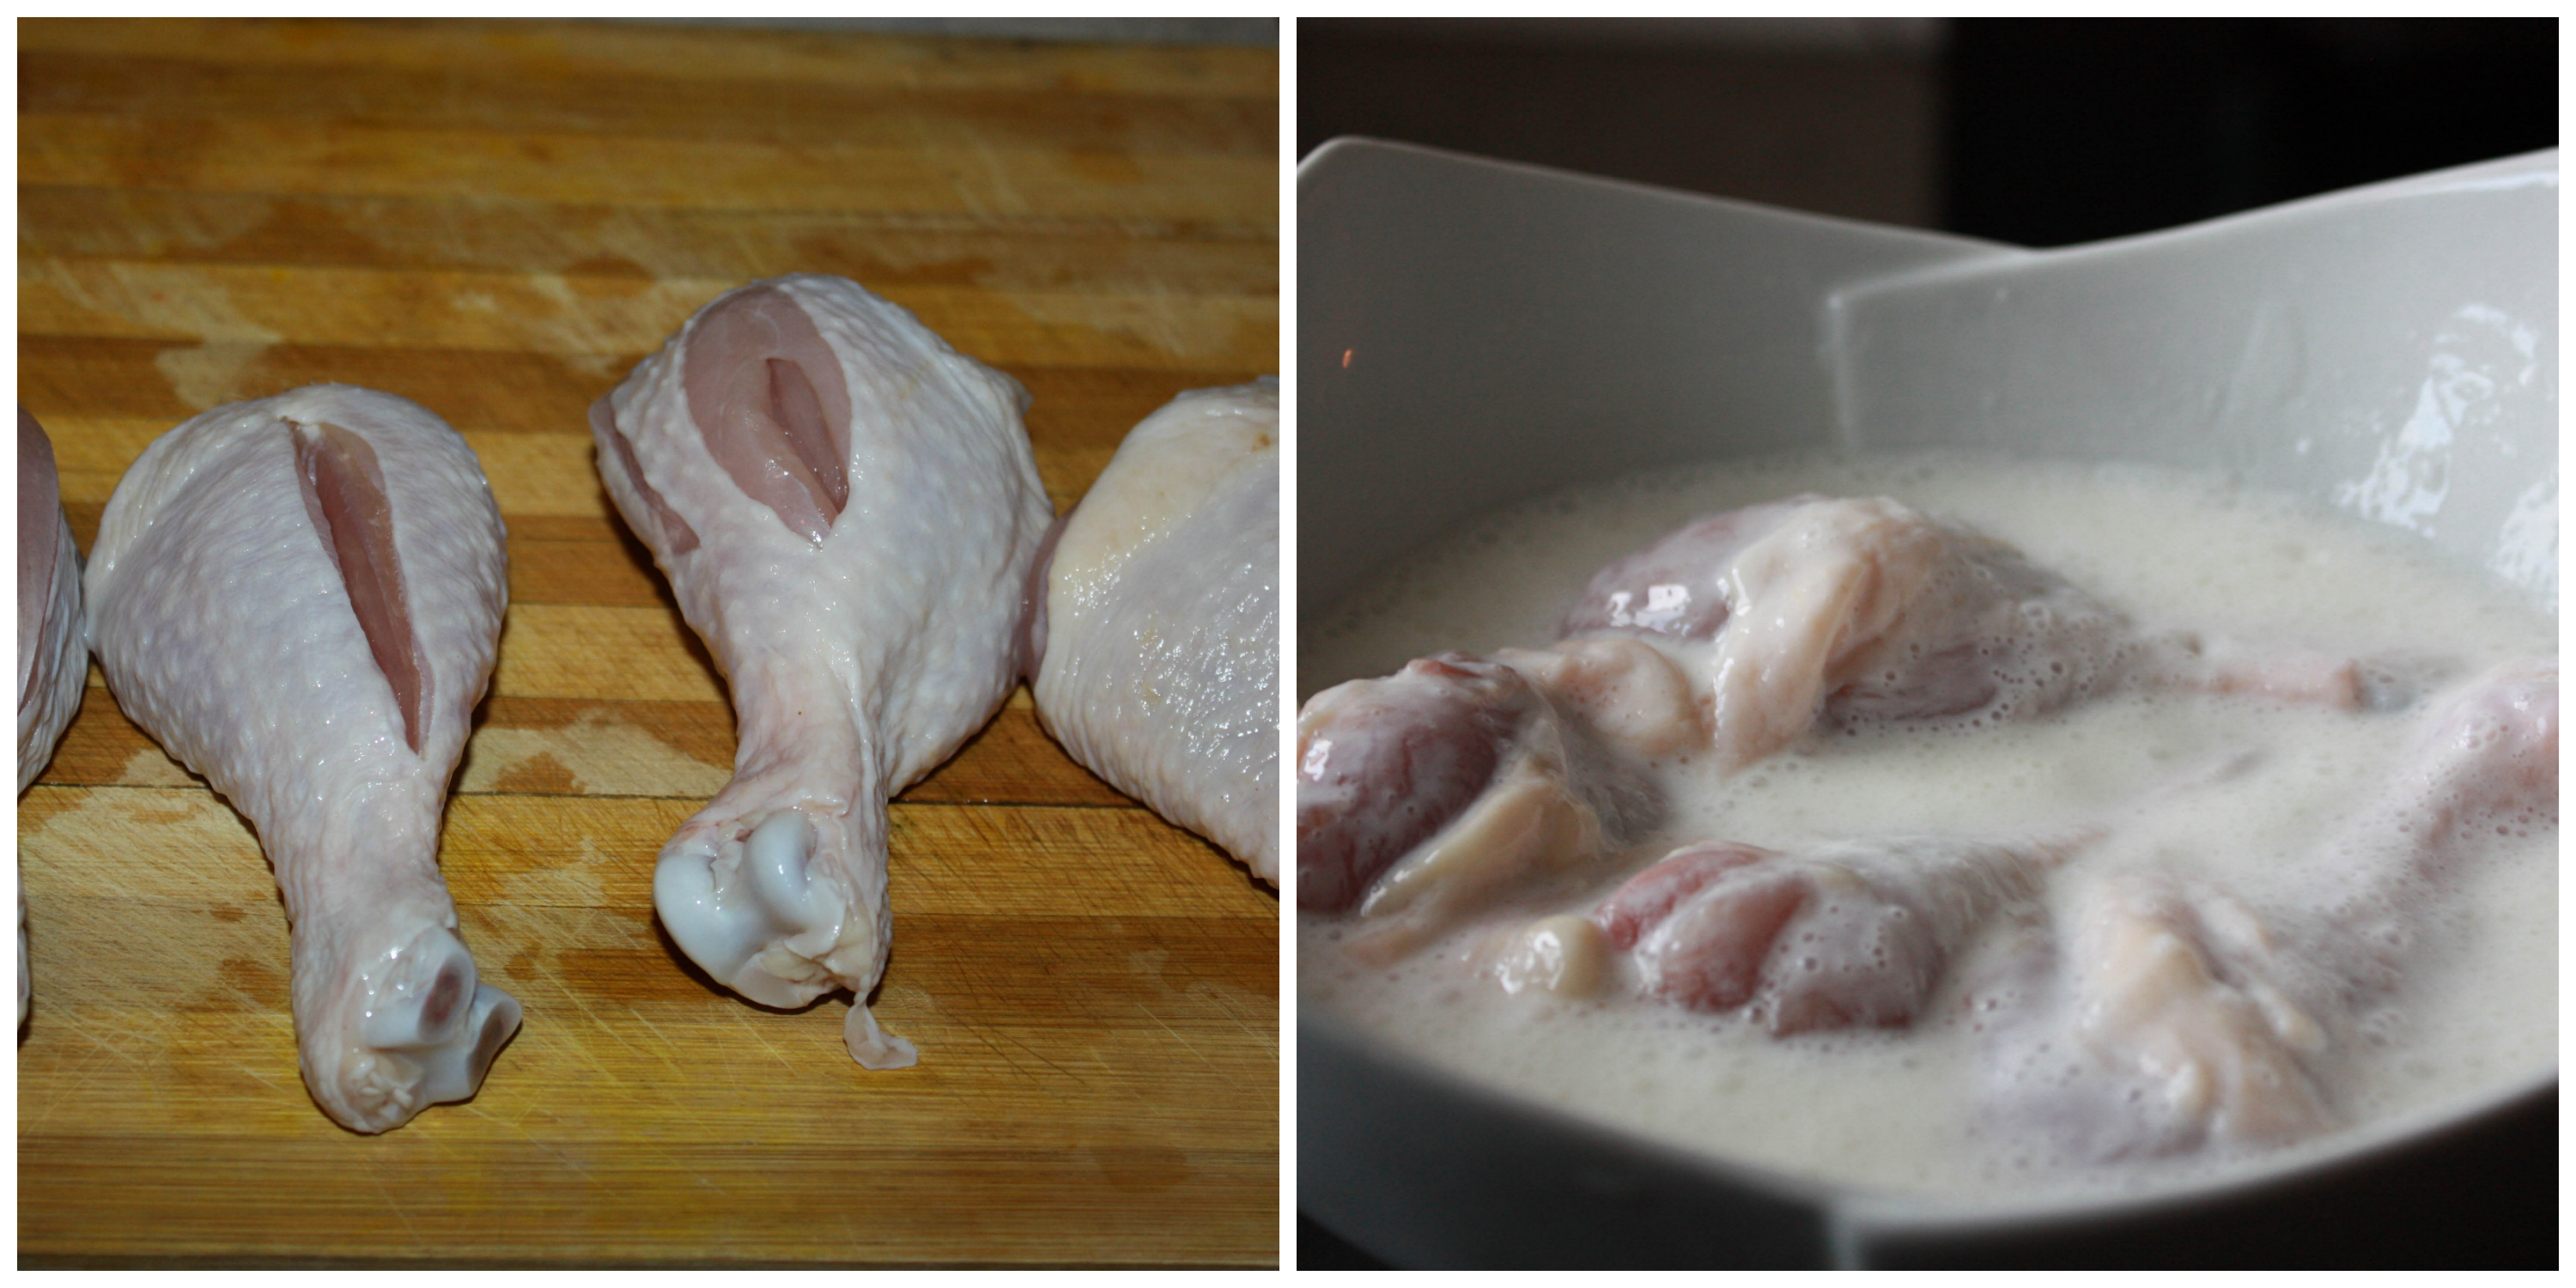
The secret to super moist and tasty tender chicken is to brine the meat first with buttermilk and I have heard even whey is a very good option.  I did not brine this time, and still it is good.  Truly finger licking chicken, and also one of those dishes that don’t require too much standing nor spending time in the kitchen.

5.0 from 1 reviews
Print
Sweet and Spicy Garlic chicken Drumsticks
Author: Suganya Hariharan
Recipe type: Appetizer
Prep time:  5 mins
Cook time:  35 mins
Total time:  40 mins
Serves: 4 drumsticks
 
Ingredients
  • Chicken Drumsticks – 4
  • Buttermilk – ½ cup
  • Breadcrumbs – ½ cup
  • Cornmeal – 2 tsp
  • Olive oil – 2 tsp
  • Flour – ¼ cup
  • Dried oregano – 1 tbsp
  • Salt – 1tbsp
  • Black pepper – 1 tsp
  • Paprika – 1 tsp
    Sauce:
  • Garlic cloves – 2, crushed
  • Ginger – 1 inch, crushed
  • Soy sauce – ½ cup
  • Lemon juice – 2 tbsp
  • Lemon zest – 1 tsp
  • Brown sugar – 1 tbsp
  • Honey – 2 tbsp
  • salt - 1 tsp
  • Chilli sauce – 2 tbsp
  • Chilli flakes - 2 tsp
  • Coriander leaves to garnish
Instructions
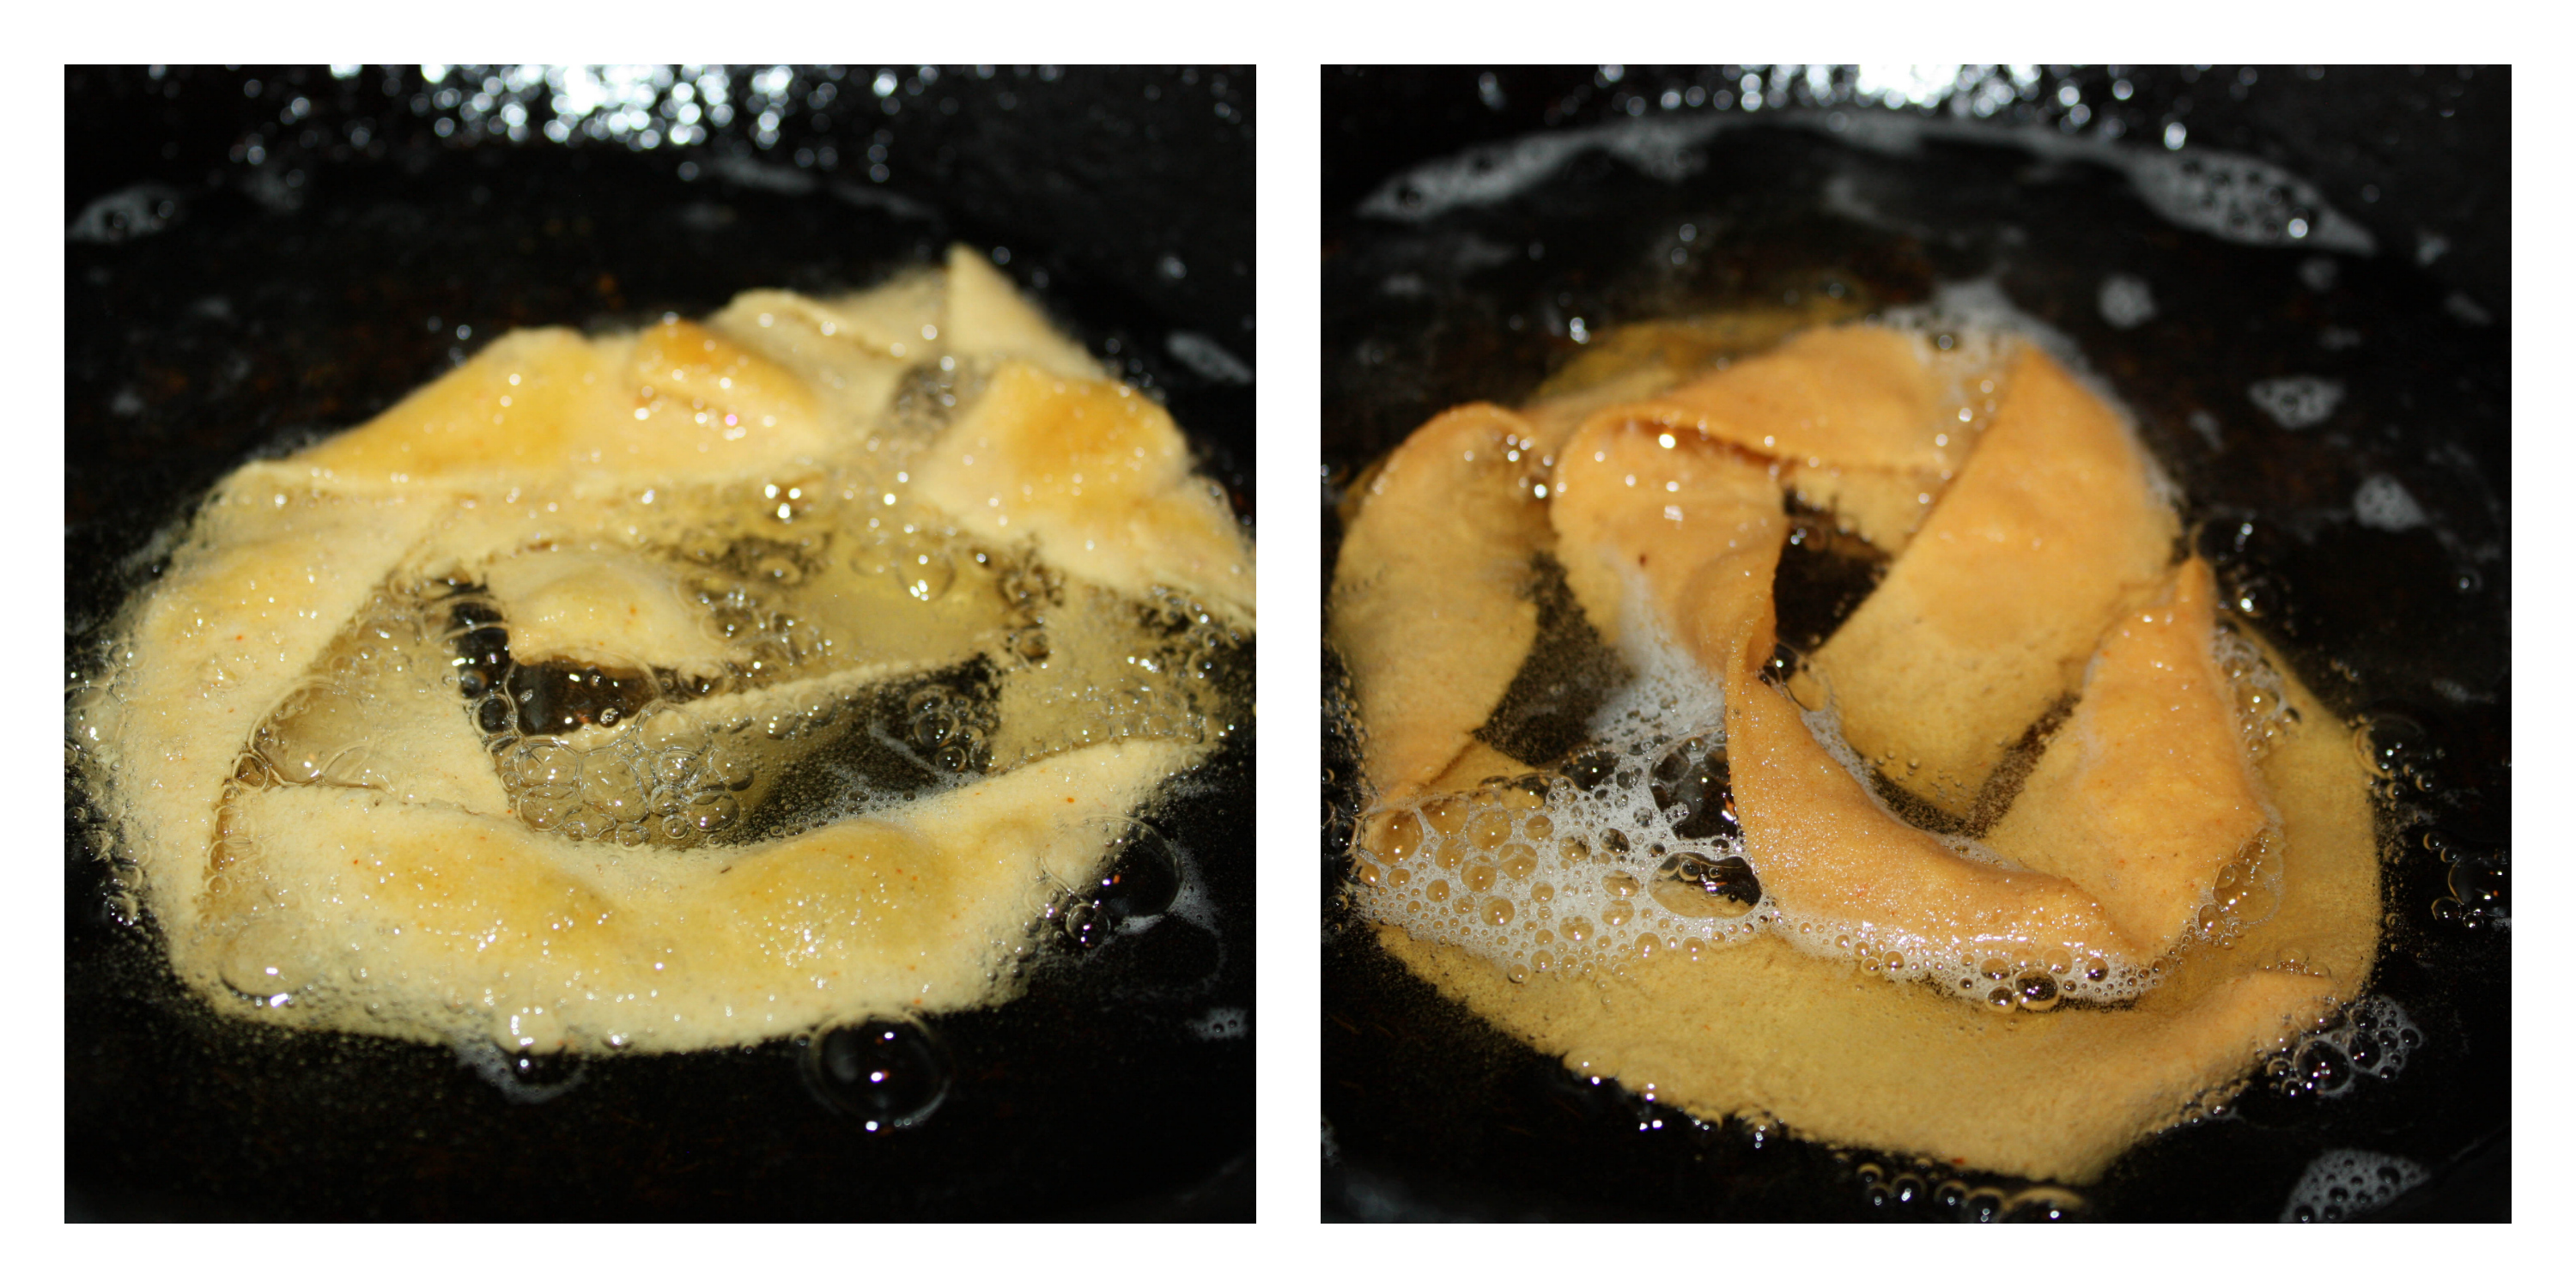
  1. Preheat the oven to 450 degrees. Line a baking sheet with foil and place a metal cooling rack on top if you have one, it can work without, too.
  2. Take a drumstick and make few deep cuts in each drumstick.Keep buttermilk in one bowl. Soak the chicken in the buttermilk.
  3. Take another bowl and mix the breadcrumbs, cornmeal, olive oil, paprika, oregano, salt and pepper. Remove the chicken one piece at a time, let the buttermilk drip off and gently press into this breadcrumb mixture.
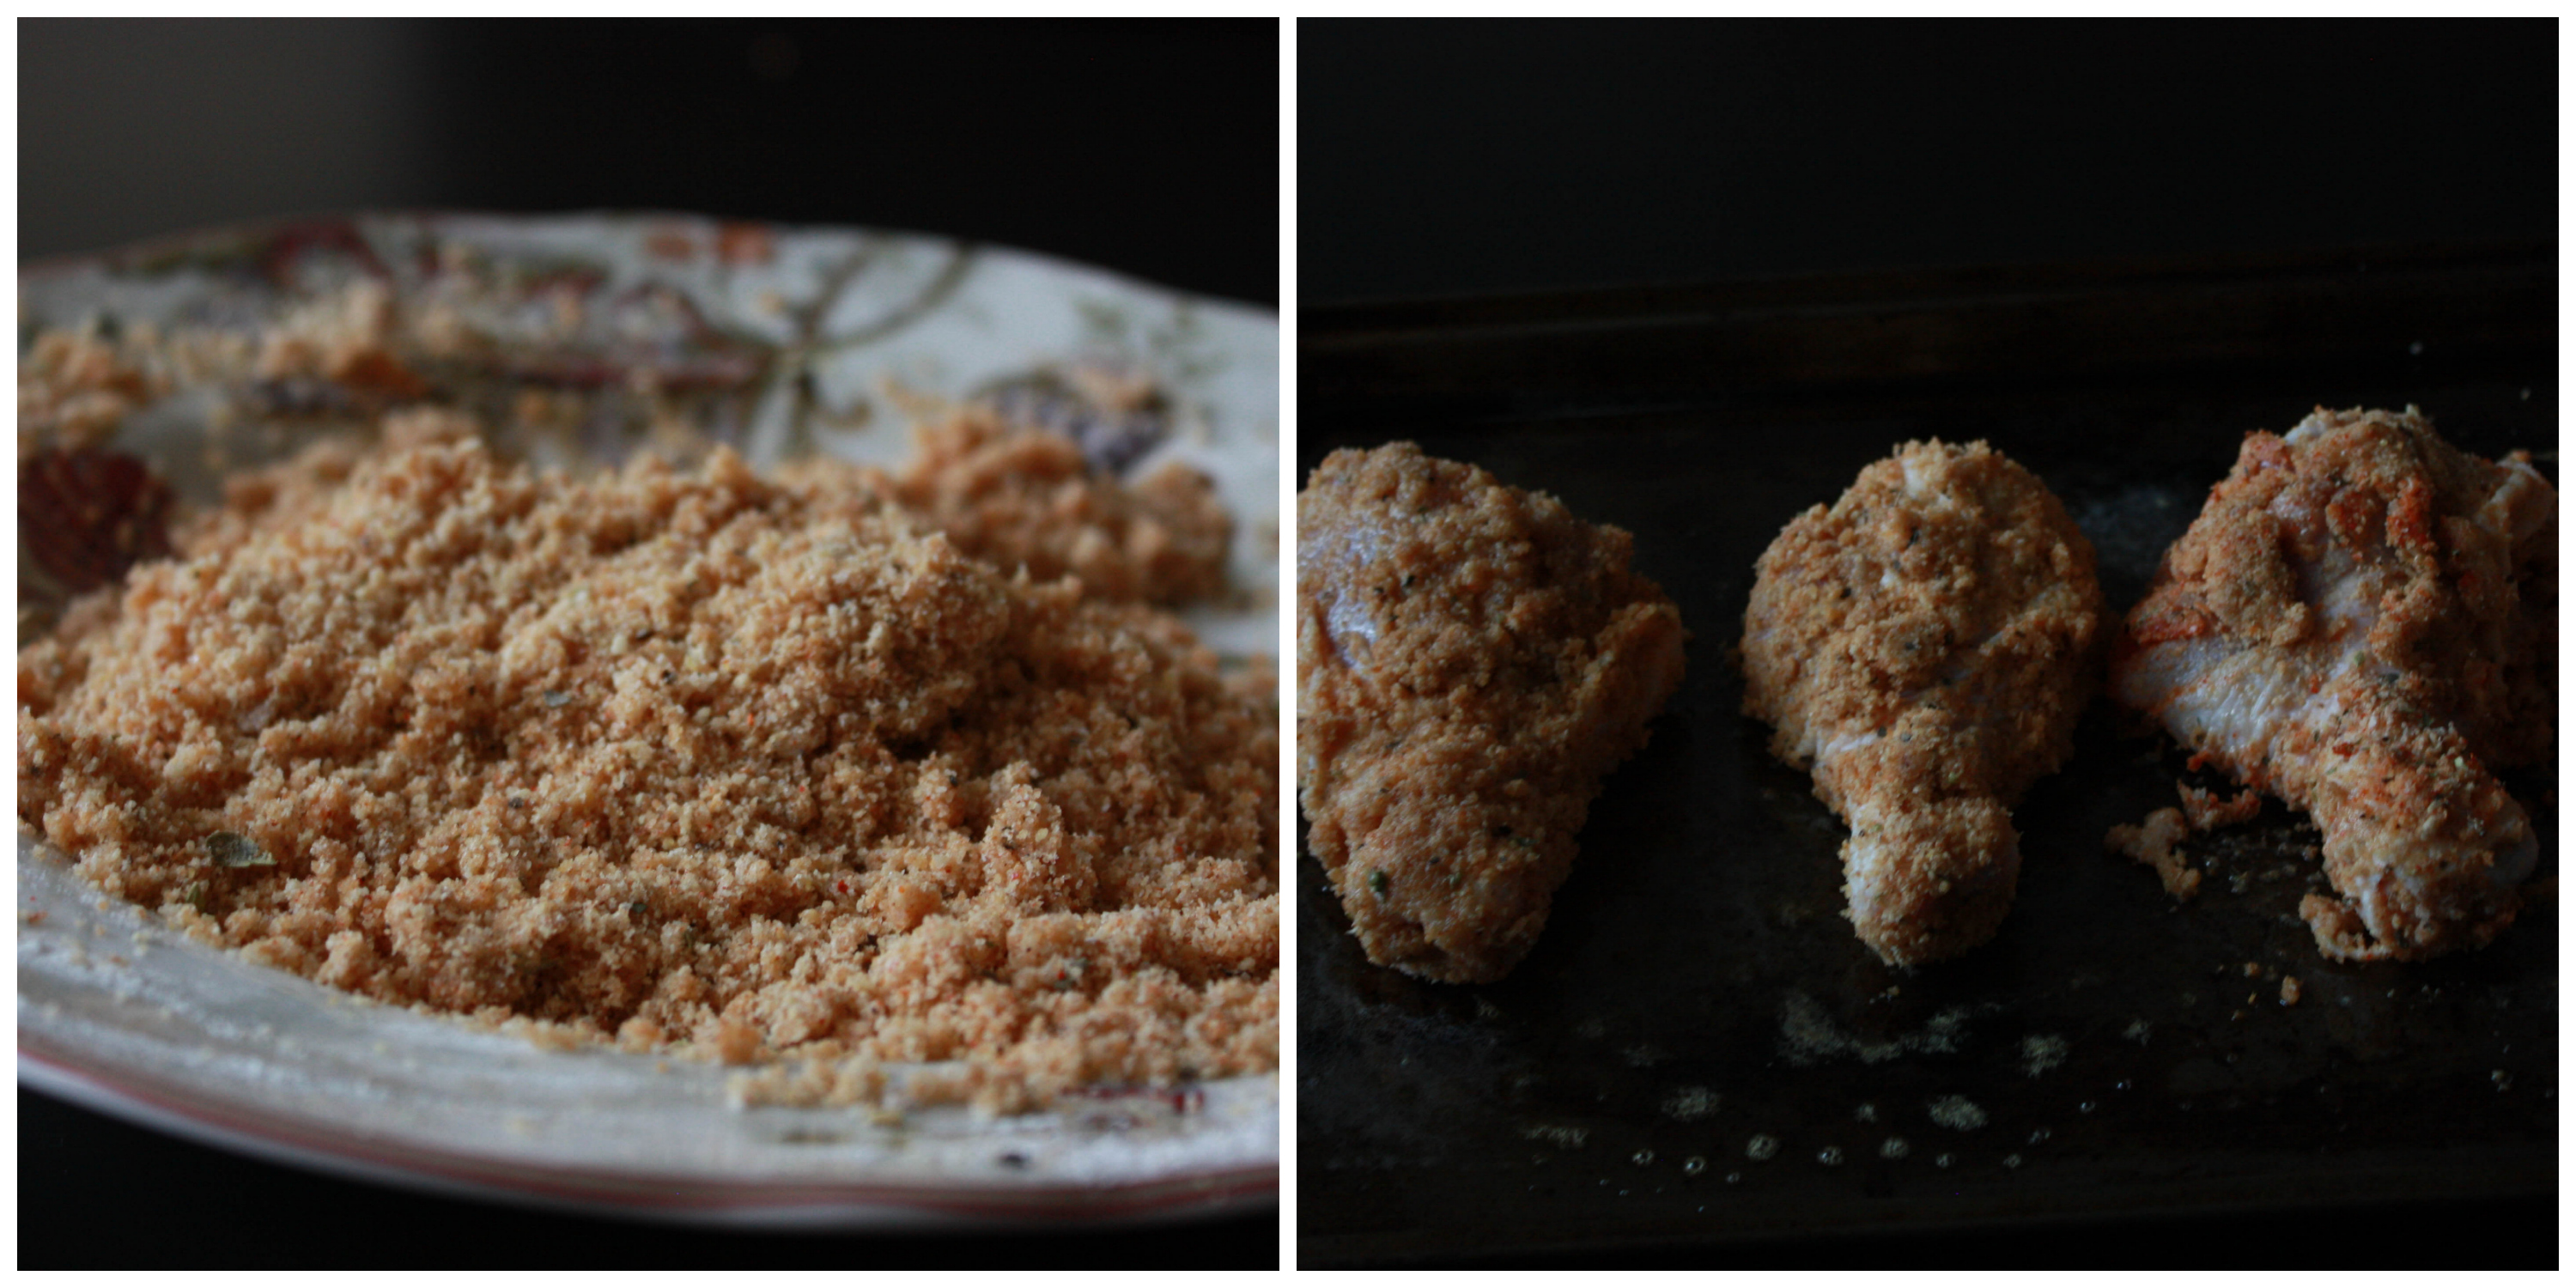
  4. Place the chicken on the baking sheet and bake for ten minutes. After ten minutes, flip it to the other side and bake for 10 minutes.
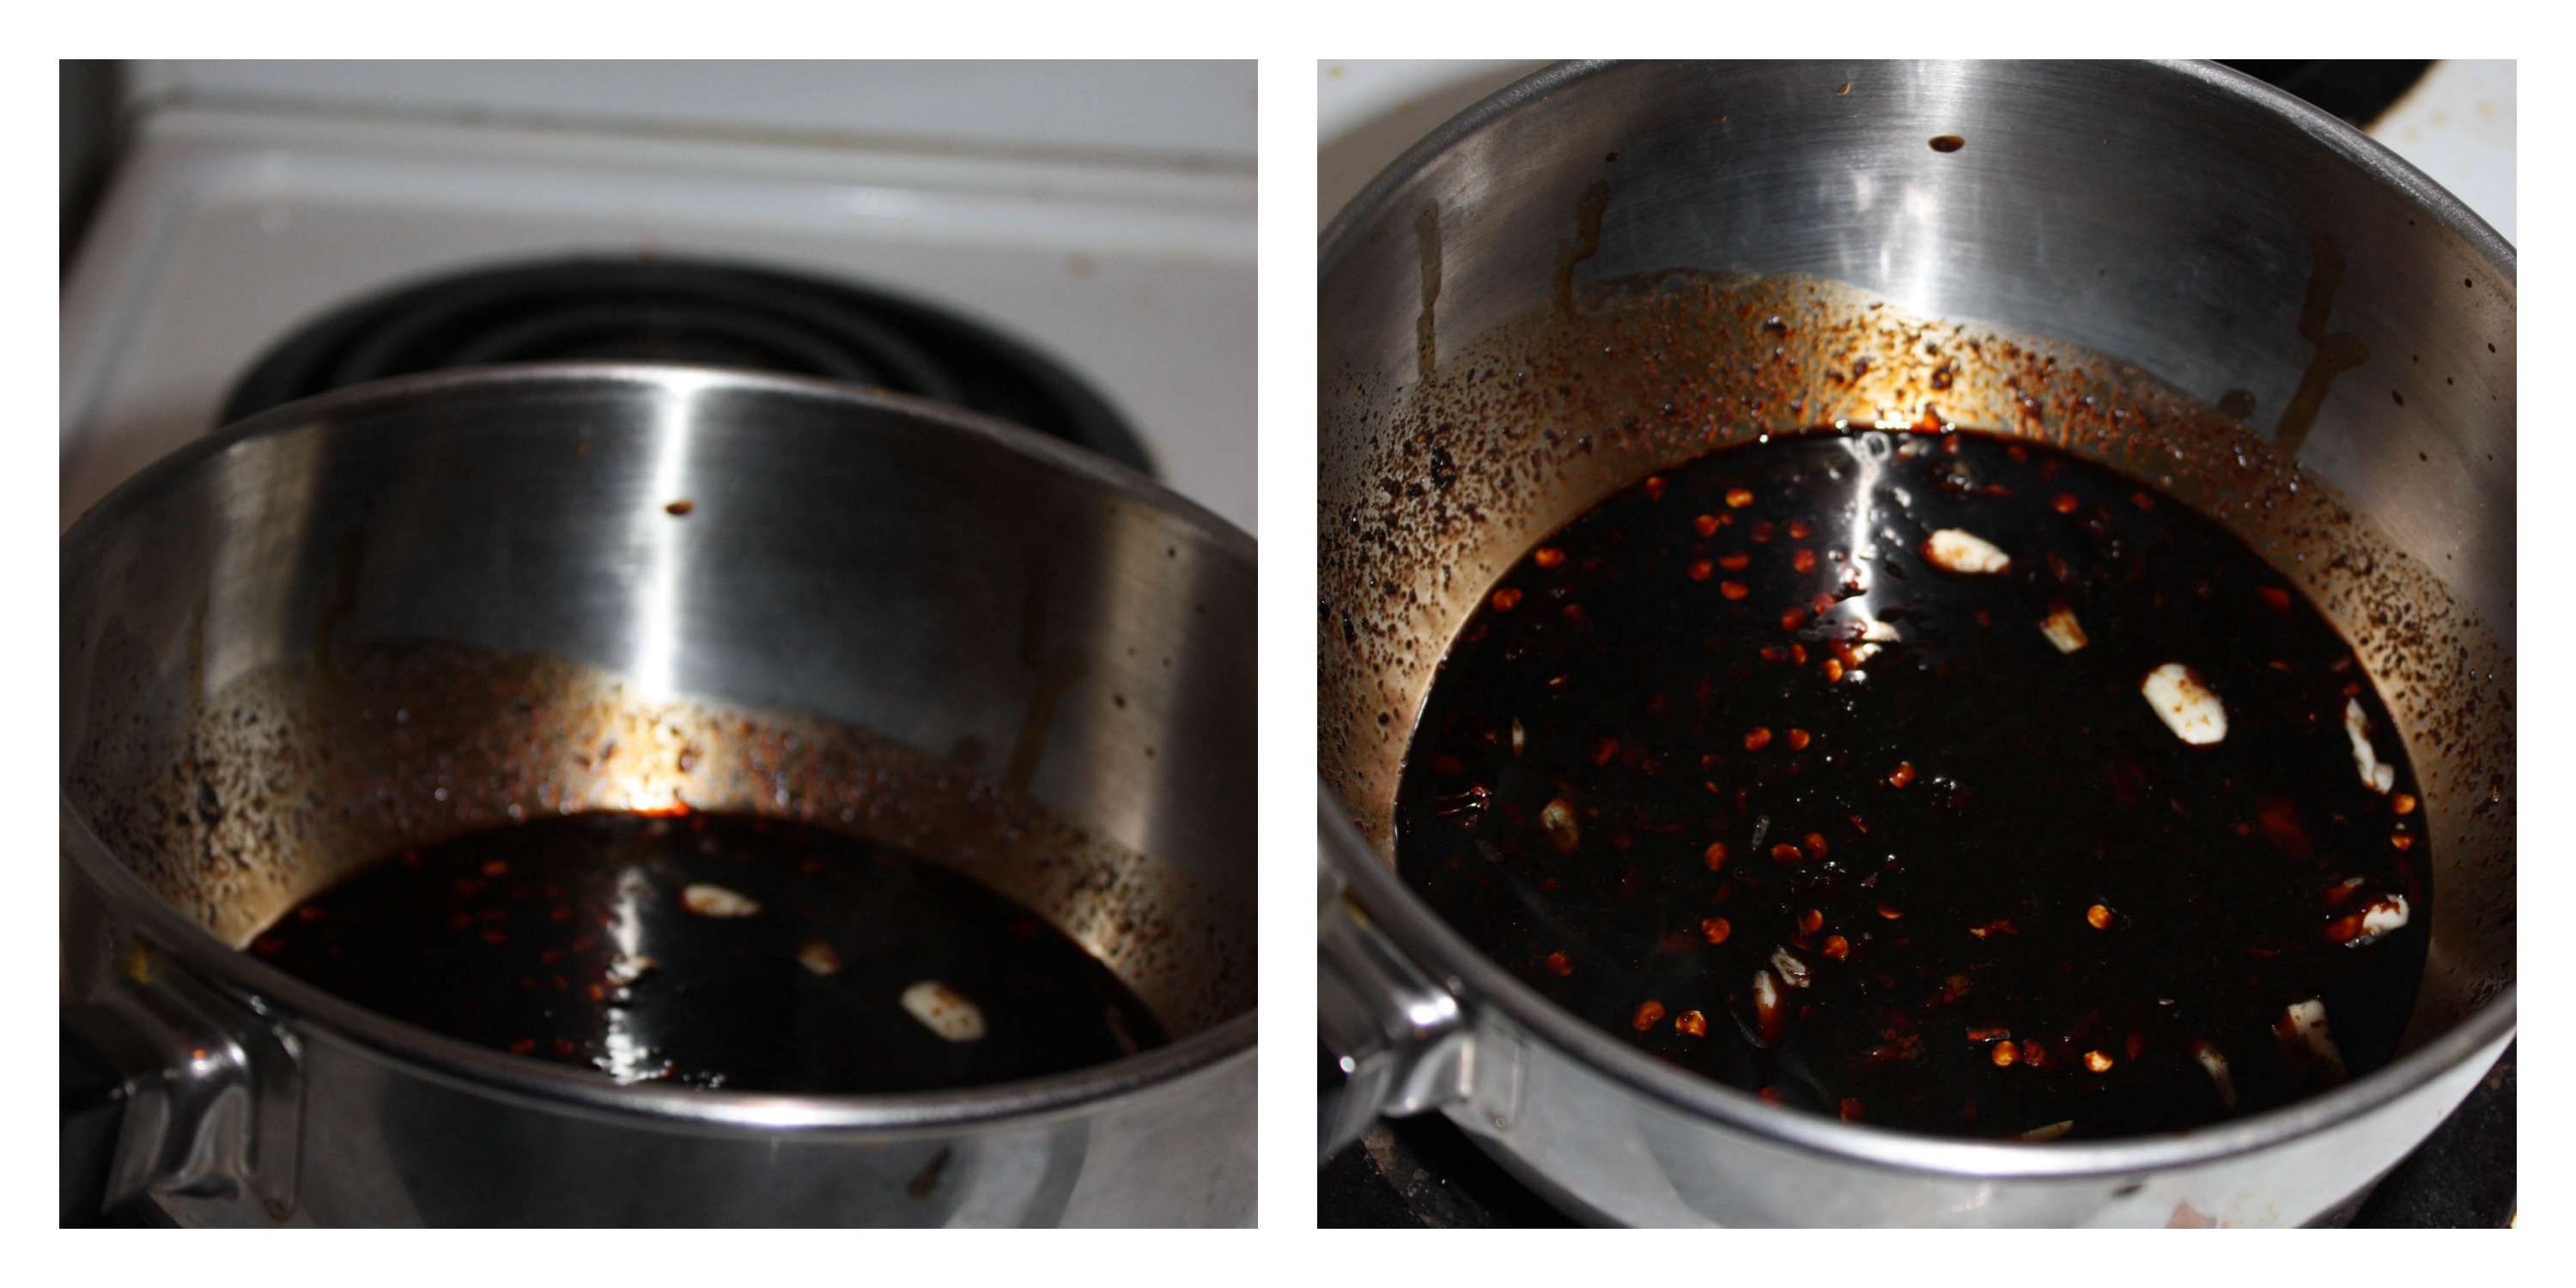
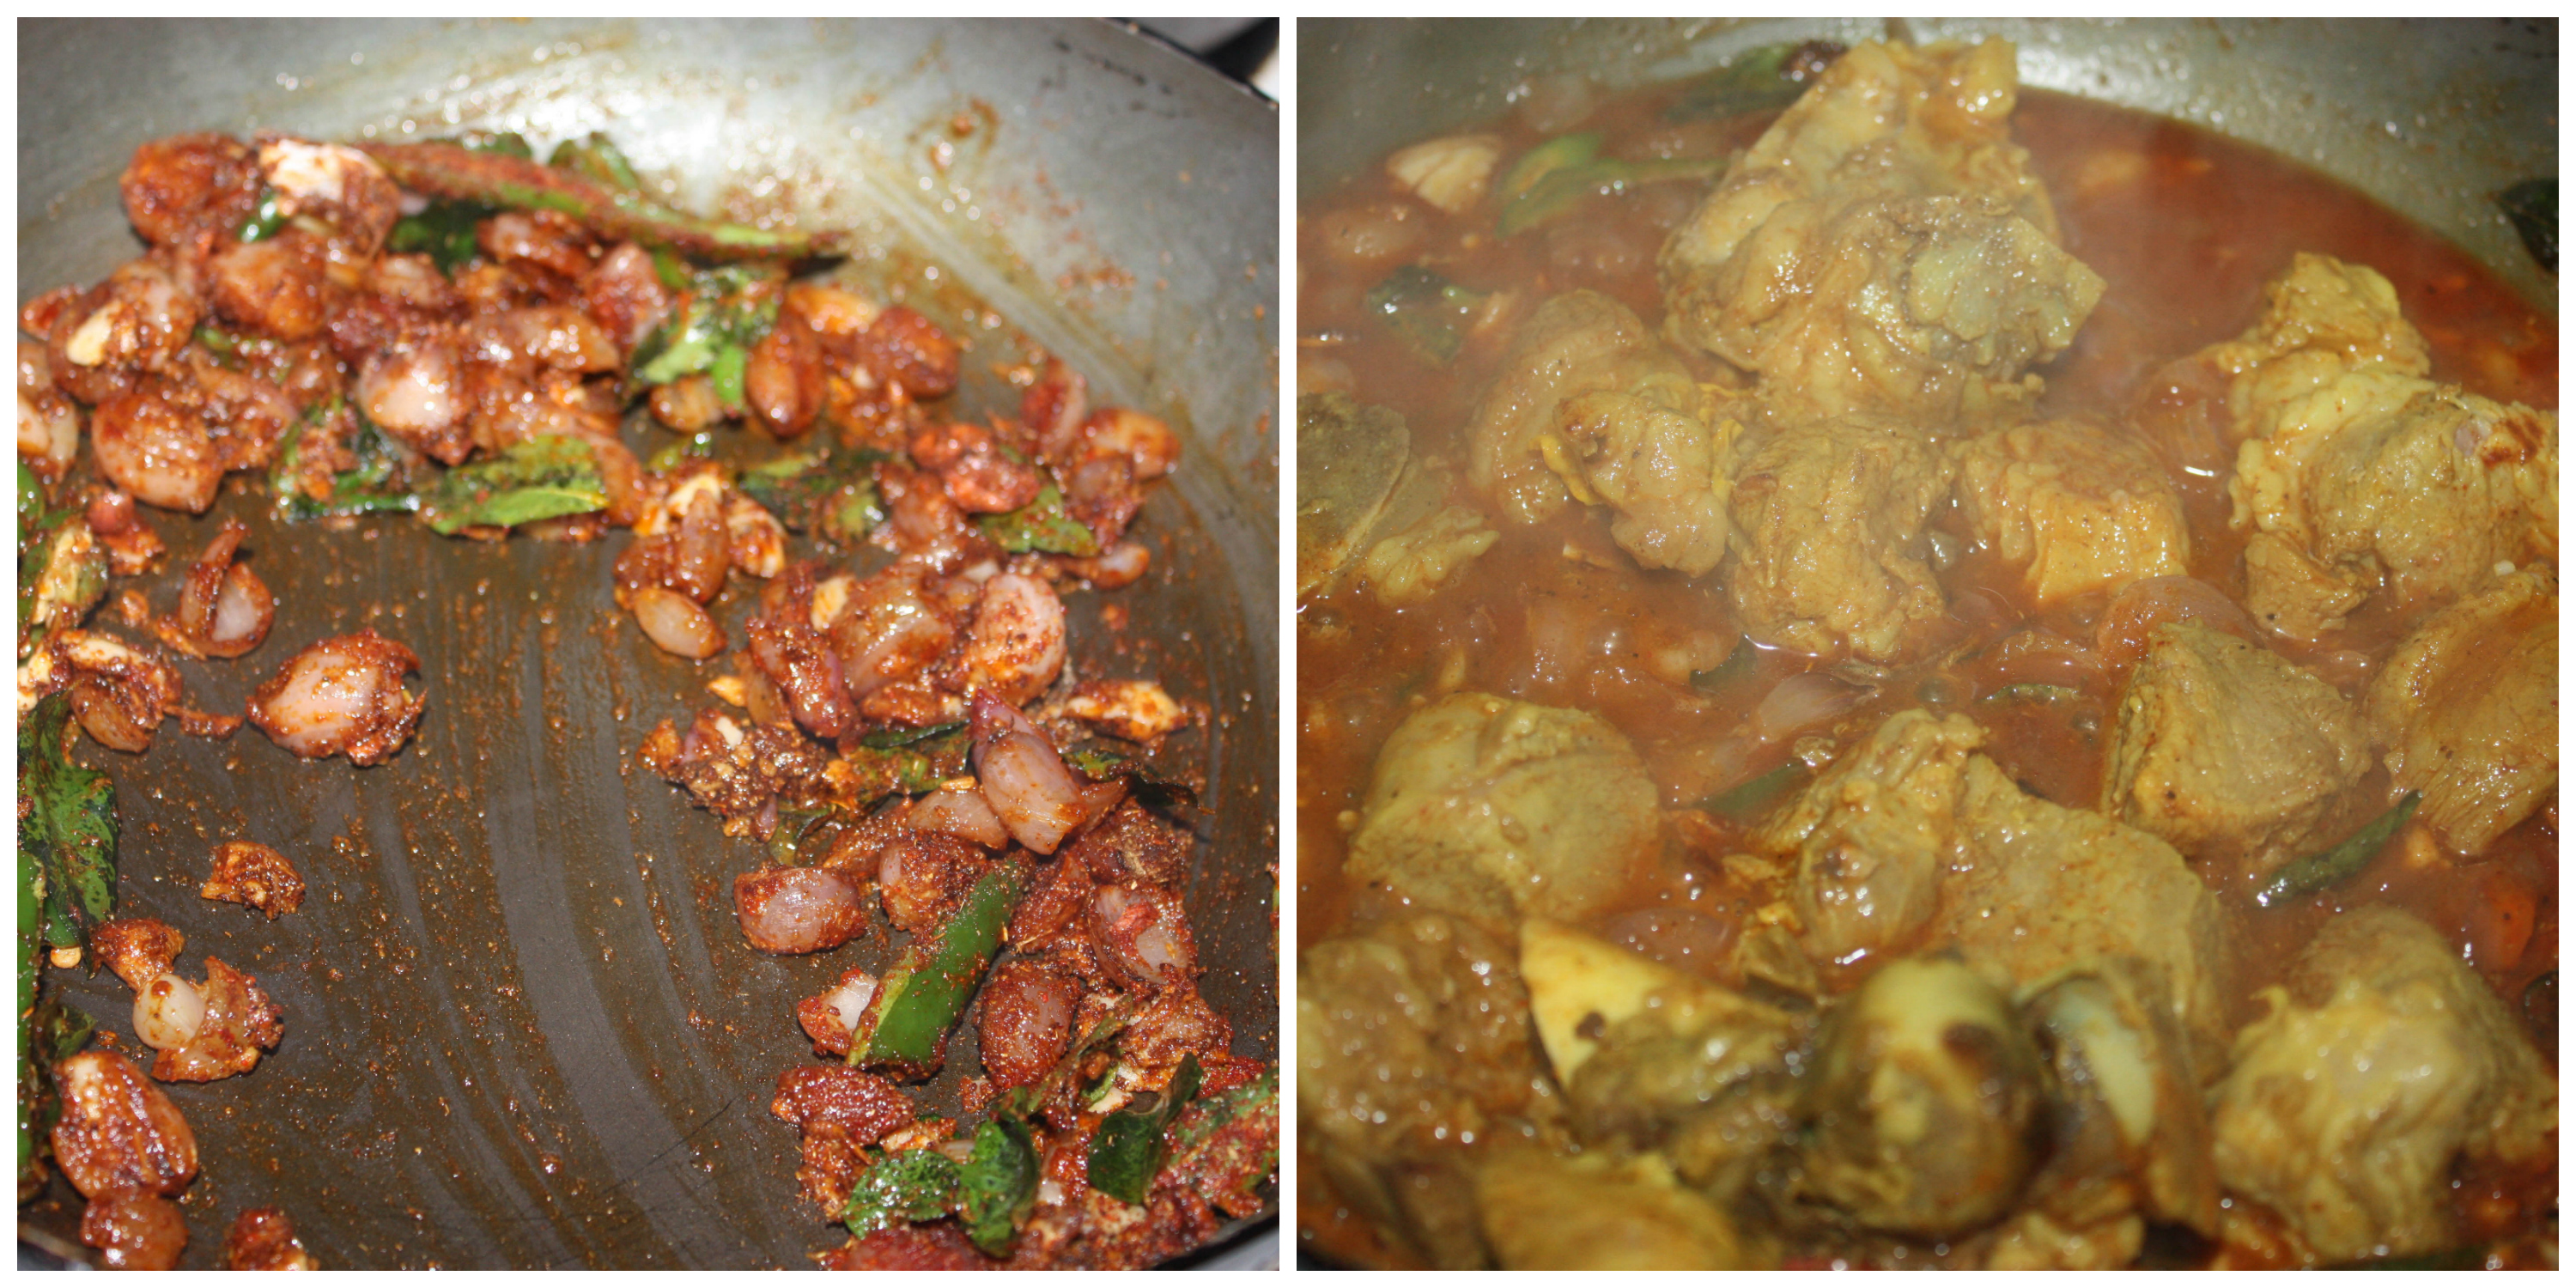
  5. Meanwhile when the chicken bakes, mix all the ingredients nicely. Put the sauce in a skillet over medium low heat and let it simmer for a while.
  6. When the chicken is done, dip each piece in the sauce and return to the baking sheet. And bake for 5 minutes.
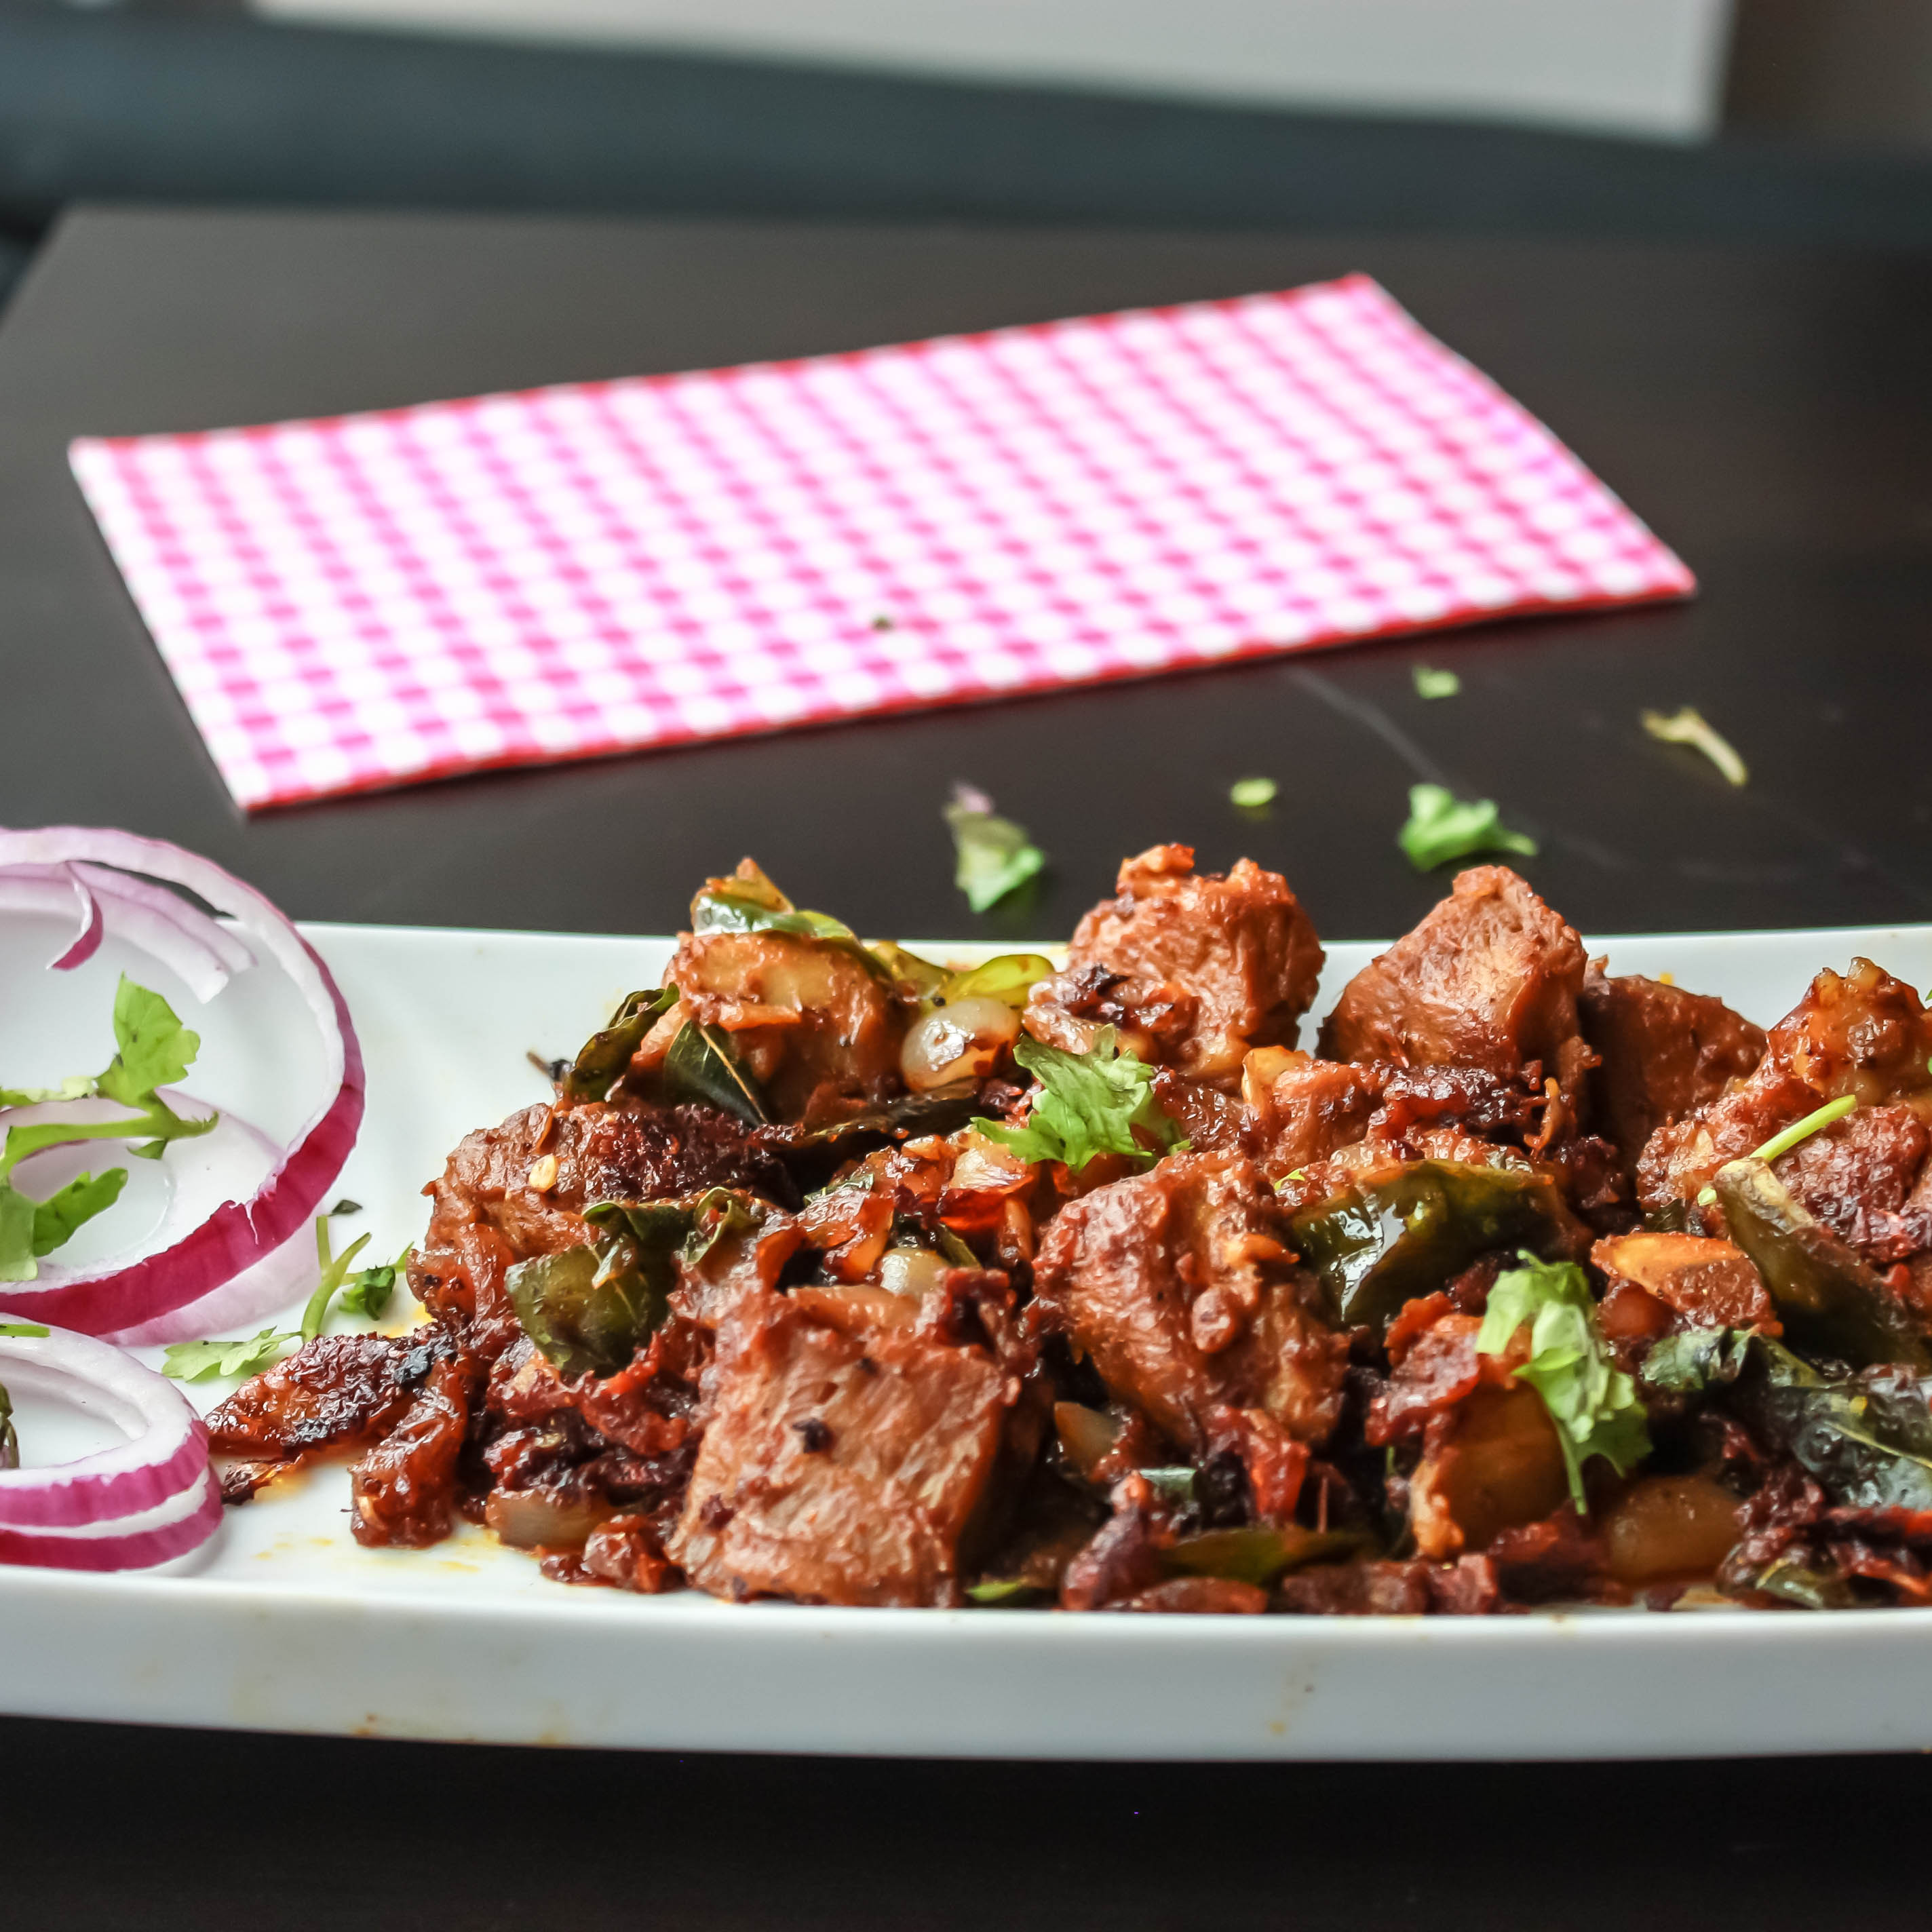
  7. Finally re-dip in that sauce and rest for two minutes and serve straight away with the garnish.
Notes
If you do not have buttermilk, you can use milk with spoonful of vinegar
Wordpress Recipe Plugin by EasyRecipe
3.2.1311

Sweetandspicychicken-10

Filed Under: BAKED RECIPES, NON-VEG RECIPES Tagged With: best chicken drumstick recipe, chicken drumstick recipe, chicken recipes, garlic chicken drumstick recipe, halloween 2014 recipe, halloween chicken recipe, halloween recipes, halloween tasty recipe, oven baked chicken drumstick recipe, oven roasted chicken drumstick recipe, sweet and spicy garlic chicken drumstick

Saag Aloo Capsicum / Spinach Potato Pepper

October 28, 2014 by Suki 10 Comments

SaagCapsicumAloo-3-2


Indian spiced potatoes with spinach and capsicum — a perfect side dish.

There are many ways of making aloo palak or potato spinach recipe and here is my favourite version from my kitchen. This is a dry version and this curry ought not be too soupy, as you want the potatoes to absorb all the flavors in the dish. The potatoes should be juicy from the spinach flavors but not mushy. Saag means spinach and aloo means potato. Saag is a term also used to describe other greens, such as mustard leaves. Capsicum is optional here and I just wanted to add it for more flavors.

SaagCapsicumAloo-2-2

This will take some time but you don’t have any job in the kitchen, just simmer the spinach to the point where there is moisture left in the pan for the consistency that you find is signature to this dish. The thought of cooking curry from scratch probably scares many of us, but it’s really easy when you know the flavor combinations of the different spices. For instance, spinach goes really well with potato. And potato goes great with bell pepper. Saag aloo isn’t tricky to make at the best of times. You just need one pan and one spoon to make this and you may as well have cooked the whole meal on your one stovetop. This recipe is for those days where you literally want to dump everything on the pot and return to your dent in the sofa.

vegan Note: replace Milk with coconut milk.

4.7 from 3 reviews
Print
Saag Aloo Capsicum / Spinach Potato Pepper
Author: Suganya Hariharan
Recipe type: Main
Cuisine: Indian
Prep time:  5 mins
Cook time:  25 mins
Total time:  30 mins
Serves: 4
 
Ingredients
  • Potato – 3
  • Cumin seeds (jeera) – 2 tsp
  • Garlic – 3, chopped finely
  • Onion – 1, chopped finely
  • Green chilli – 1, chopped finely
  • Capsicum/ Pepper – 1 chopped into cubes
  • Spinach – 1 cup, chopped or whole
  • Chilli powder – 1 tbsp
  • Coriander powder – 1 tbsp
  • Cumin powder – 1 tbsp
  • Milk – 2 tbsp
  • Oil – 2 tbsp
  • Salt – as needed
  • Lime- for garnishing
  • Corainder leaves – For garnish
Instructions
  1. Remove the skin from the potatoes and cut into small wedges,
  2. Heat oil in a large heavy bottomed non-stick skillet over medium heat, add jeera, garlic and add the onions and chillies and fry until they are golden brown.
  3. Now add the potatoes, capsicum. Salt and turmeric and fry until golden brown.
  4. Now add the chilli powder, coriander powder and cumin powder. Add 2 tbsp of water and simmer it for few minutes.
  5. Now stir in the chopped spinach to this, and add two tbsp. of milk and close it.
  6. Stir in the mixture a few handfuls at a time, until each potato is coated with the spinach.
  7. The potatoes should be little roasted and coated with spinach and have the flavors of capsicum in it.
  8. Garnish with coriander leaves and squeeze in some lime.
Notes
1. Don’t add more water, it may make the potatoes mushy.
Wordpress Recipe Plugin by EasyRecipe
3.2.1311

Perfect side dish for with rasam and rice or roti or plain rice.

SaagCapsicumAloo-4

Filed Under: NORTH INDIAN GRAVIES/DAL/CURRY Tagged With: best side dish for roti, famous indian food recipe, Healthy indian recipes, healthy recipes, how to make aloo palak, kids recipes, potato indian recipes, saag aloo recipe, spinach aloo capsicum recipe, spinach recipes

Matar Paneer/ Paneer Peas Masala

October 27, 2014 by Suki 6 Comments

PaneerMatarMasalafinal1

PaneerMatarMasalafinal1

Pan fried paneer with peas and spices in rich cashewnut gravy.

This healthy and delicious vegetarian curry can be on your plate in less than half an hour. Popular recipe amongst the north Indian recipes prepared with paneer and peas. Anything with paneer is a definite win. The texture of paneer is similar to greek feta which is prepared in a similar manner. I used the frozen peas instead of boiling some. I have seen that it’s a part of most restaurants menu. Goes well with steamed rice, Pulao, naan or roti. Paneer can be replaced with tofu also. Don’t add lots of cashews to make it rich, it will spoil the originality of the taste. I cut my paneer in this manner, but you can always cut in the way you fancy.

paneerMatarMasala2Final

I am getting busy these days at work, so when I am back home, I am so tired that I just cook something quick and I could not click any pictures. And also I have to tell you, its getting dark so I don’t feel like clicking pictures without natural light. So, this whole week it was more like quick cooking after diwali. I just made simple very comforting home food.

Yesterday the weekend started and I finally got some chance to click pictures with natural light. So, here it is. I made matar paneer and butter naan. I will post the recipe of butter naan soon. I have similar paneer recipes like malai methi paneer and paneer makhanwala.

Print
Matar Paneer/ Paneer Peas Masala
Author: Suganya hariharan
Recipe type: Main
Cuisine: Indian
Cook time:  30 mins
Total time:  30 mins
Serves: 4
 
Ingredients
  • For the gravy:
  • Onion – 1 cup, Chopped
  • Tomato – 1 cup, Chopped
  • Green Chilli – 1 , chopped finely
  • Ginger Garlic Paste – 1 tbsp
  • Cashews - 7 whole
  • Turmeric – 1 tsp
  • Oil – 1tbsp
  • Salt - As needed
    [other]
  • Unsalted Butter - 2 Tbsp
  • Paneer - 250gms
  • Chilli Powder - 1 Tbsp
  • Coriander powder – 1 tbsp
  • Cumin Powder – 1 tbsp
  • Kasturi Methi - 1 tbsp
  • Sugar - ½ tsp
  • Water – ½ cup
  • Cream - 2 Tbsp

  • [Garnish]
  • Coriander – 1 tbsp, chopped finely
Instructions
  1. Take 1 tbsp of butter in a pan, place the paneer cubes and fry for a minute in each side till they become crispy golden. Keep it aside. (Optional step)
  2. Take 1 tbsp of oil in a pan, add the cashews and fry till it is golden brown. Add the chopped onions and green chillies and sauté till they become transculent. Now add the tomatoes, garlic ginger paste and salt.
  3. Cook for about 10 minutes on a medium flame till everything gets cooked. Allow this to cool.
  4. Then add everything in a blender. Blend them into a smooth paste with not even small pieces of cashews on it.
  5. Heat butter in the same pan. Add the jeera, blended paste and stir well.
  6. Add chilli powder, coriander powder and cumin powder. (If you want rich color, you can add kashmiri chilli powder. I used normal one)
  7. Stir well &sauté the masala on a medium flame till and add the water and mix well. It has to be sauted really well till butter ooze out.
  8. Add washed boiled peas, dry methi leaves, cream,sugar, water and boil for five minutes and switch off.
  9. Garnish with chopped coriander or paneer, ginger or cream.
Notes
1. Frying the paneer is an optional step.
2. Its better to close the vessel with a lid when we add the blended gravy as it may spilt up some outside as it boils
Wordpress Recipe Plugin by EasyRecipe
3.2.1311

PaneerMatarMasalaFinal3

Filed Under: NORTH INDIAN GRAVIES/DAL/CURRY Tagged With: best side dish for chapathi naan, Matar paneer recipes, paneer recipes, peas masala recipe, peas paneer recipe, peas recipe, quick side dish for roti, side dish for rice

Mutton Sukka / Goat Curry

October 24, 2014 by Suki 14 Comments

MuttonSukkaRelishthebiteName

MuttonSukkaRelishthebiteNameIt is a lip smacking mutton recipe with a palatable flavor of fresh peppercorns and garlic in every piece.

I am sure all meat lovers would love this recipe.  It’s been a while since I posted a non-veg recipe. There were a lot of festivals going on, so whenever I go to kitchen, I tend to make some festival snacks or sweets. I finally got some time to make some yesterday. Mutton is rich in fat and carbohydrates and is a great source of protein. I made this with chicken curry and it took me just an hour to make both. It’s that easy to make. You can even serve it as starter or even as sides. Unlike chicken and prawn, mutton or beef must be cooked first and then fried or pan fried. I always like to cook anything with pepper. It makes the whole home with the pepper aroma. It is so good. When I made them and saw it in the plate, I just complimented myself saying “Beautiful”! 😀


MuttonSukkaFinal2

I made this and chicken curry after coming home from work yesterday. It was already late. It just took an hour as I have made this many times. But it is fall here, so it was dark when I thought I can click some pictures. So I just clicked three pictures exactly. And here it is. I am really learning each day on how to click picture and I should say I am very amateur in photography. I should take up a course :D!


4.7 from 3 reviews
Print
Mutton Sukka / Dry Goat Curry
Author: Suganya Hariharan
Recipe type: Appetizer, Dinner
Cuisine: Indian
Prep time:  5 mins
Cook time:  30 mins
Total time:  35 mins
Serves: 3
 
Ingredients
  • Mutton – 200 gms
  • Turmeric powder – ½ tsp
  • Salt – to taste
    To crush:
  • Garlic – 5 pearls
  • Pepper – 5
  • Fennel seeds – ½ tsp
    To temper
  • Small onion – ¼ cup, chopped roughly
  • Curry leaves - Few
  • Green chilli – 4, slit
  • Chilli powder – 1 tsp
  • Coriander powder – 1 tsp
  • Cumin powder – 1 tsp
  • Salt – little
  • Oil – 2 tsp
  • Lime juice & coriander – to Garnish
Instructions
  1. In a pressure cooker add the mutton pieces with turmeric powder, salt and water to a line below it covers the mutton. More water can make it boil more. Cook for 5 to 6 whistles in medium low flame. You can also boil it without pressure cooker for 20-30 minutes.
  2. Once mutton is cooked, keep it aside with the water.
  3. Meanwhile crush the ingredients under “to crush” using mortar and pestle or a blender. Keep it aside.
  4. In a pan, add the onions, green chillies and curry leaves. Sauté for few seconds. Then the crushed pepper garlic, red chilli powder, coriander powder and cumin powder. Sauté well.
  5. Now add the mutton pieces with water and let it get cooked till it gets dried.
  6. Drizzle some lime juice and garnish with coriander leaves. Serve with onion slices.
Notes
1. If it starts getting thicker, it will stick so stir it well or add little more at this stage.
2. Do not add more water when you boil the mutton. It may spoil the whole dish.
Wordpress Recipe Plugin by EasyRecipe
3.5.3226

Serve it as an appetizer or with rice or any kind of bread you fancy!

MuttonSukkaFinal3

Filed Under: LAMB, NON-VEG RECIPES Tagged With: Dry goat recipe, Goat Curry recipe, lamb dry recipe, lamb recipes, mutton fry recipes, Mutton indian recipes, mutton raost recipe, Mutton sukka curry recipe, Mutton sukka recipe, pepper mutton recipe

Milagu Kuzhambu / Pepper Curry

October 22, 2014 by Suki 5 Comments

MilaguKuzhambuRelishthebite

MilaguKuzhambuRelishthebiteTraditional south Indian kuzhambu – A blend of black pepper corns with other spices and ingredients.

Pepper has lots of medicinal values, its helps us when we have cold and cough. It helps in getting rid of congestion, and also helps in digestion. Curry leaves is also rich in iron. So, this curry is very healthy and tasty. After all the festival snacks and sweets, wanted some healthy and comfort food from home. Easy pepper kuzhambu, traditional spicy and flavorful kuzhambu with just whole pepper corns. It is very good for cold and is comforting to have during winter days. This just took 20 minutes for me to make. It’s good to eat with rice or idli or dosa. I had a bad cold last week, and I got bored having pepper rasam or soup. So, that is when I wanted to try this after a long tiem as it had pepper. Really, it helped me a lot to treat me from cold. I felt lots better. You will feel itt when you start having two spoons. You would feel the nose blocked to release. Great? Right!?

It has a consistency of chutney but when u mix it with rice it taste perfect. Sometimes you get bored of the usual kuzhambu, rasam and sambhar, and then you need to try this! Freshly ground pepper will enhance the flavor the any dishes. My mom used to make this for me. Those days I do not love this much. But now when I made this, I really loved it. Even when it was all finished, I took some rice and added it to the pan, tossed it and had it! Beautiful!

5.0 from 1 reviews
Print
Milagu Kuzhambu / Pepper Curry
Author: Suganya Hariharan
Recipe type: Dinner
Cuisine: Indian
Prep time:  5 mins
Cook time:  15 mins
Total time:  20 mins
Serves: 4
 
Ingredients
  • Mustard seeds – 1 tsp
  • Curry leaves – 1 sprig
  • Small onions (shallots) – 10
  • Tomato - ¼ cup (chopped)
  • Garlic cloves - 5
  • Asafetida (hing)_ - 2 pinches
  • Turmeric powder – 1 /2 tsp
  • Jaggery, powdered – ½ tsp
  • Salt – to taste
  • Sesame oil – 3 tbsp
  • Tamarind – 1 small lemon size
    To roast & Grind:
  • Black Whole Pepper Corns (milagu) – 1 tbsp
  • Garlic cloves – 5
  • Urad dal – 1 tsp
  • Coriander seeds – 3 tsp
  • Cumin seeds – 1 tsp
  • Channa dal – 1tsp
  • Whole dry red chillies – 4
  • Curry leaves - 5
Instructions
  1. Soak tamarind in 1 cup of water
  2. Heat a pan and add black pepper corn, dry red chillies, urad dal, coriander seeds, channa dal, cumin seeds and sauté over very low flame to a golden brown color.
  3. Turn off the stove and add curry leaves and mix well. Let it cool completely and transfer the contents to a blender jar and blend it smooth paste.
  4. Heat the same pan with the remaining oil. Add mustard seeds, when they splutter and add asafetida.
  5. Add onions, curry leaves, garlic and Keep sautéing them for two minutes. Then add tomato and turmeric powder and and saute for 2 minutes. Transfer the ground paste and salt. Sauté them for a minute and now add the tamarind water plus extra water, the gravy should be on thicker side, so don’t add more water. Allow to boil.
  6. Once it starts boiling and the raw small leaves, add powdered jaggery and mix well. Garnish with some chopped coriander and switch off the flame.
Notes
1. If you would like have it in watery consistency, add more water.
2. If you would want it more thicker version, let it boil for few more minutes.
Wordpress Recipe Plugin by EasyRecipe
3.2.1311

Serve this with rice and papads, carrot stir fry

Or

With idli, dosai , paniyaram

MilaguKuzhambuRelishthebite2

Filed Under: SOUTH INDIAN GRAVIES/DAL/CURRY/KUZHAMBU, VEGAN Tagged With: indian curry recipes, Indian kuzhambu spicy recipe, Indian pepper gravies, indian side dish recipes, Kuzhambu recipes, Milagu kuzhambu recipe, Pepper kuzhambu recipe, Perfect home treatment for cold and cough.

Kara Sev / Pepper Chickpea Snack

October 21, 2014 by Suki 2 Comments

KarasevRelishthebite

KarasevRelishthebiteA popular Indian festive snack made with gram flour, rice flour and a slight hint of crushed pepper. It is very easy to prepare and perfect for teatime snack. It is spicy and crunch and made with simple ingredients, just mix all ingredients, press it using murukku press and fry it. Simple, right? If you use more rice flour, Kara sev would be in a lighter side.  So, if you want a lighter shade, you can use more rice flour. Traditionally this kara sev made using kara sev ladle but I used murukku press for making this kara sev with the wide holes achu/plate.

Tomorrow is Diwali and I still did not get into the mood of Diwali. It is no fun when you are outside of India. And when people wish me “Happy Diwali”, I will be like…”Where is happiness for Diwali when you get to stay outside India and In India , they get holidays  🙂 and I get to go to work. :(. No excitement! I say”.  True? Right! I tried making it an happening event by making some sweets and snacks, but it could not even stand near to India’s fun! 😀  I am planning to just go to work and later go for Dinner. Sometimes you need some rest from kitchen as well 😉 even though you love to cook 😉

Print
Kara Sev
Author: Suganya Hariharan
Recipe type: Snacks
Cuisine: Indian
Prep time:  5 mins
Cook time:  25 mins
Total time:  30 mins
Serves: 2-3 cups
 
Ingredients
  • Rice flour – 1 cups
  • Besan (Benjal Gram Flour) – 2 cup
  • Red Chilli Powder - 2tsp
  • Pepper powder – 1 tbsp (coarsely grounded/ crushed)
  • Asafetida – 2 pinches
  • Ajwain – 1 tsp
  • Melted Butter – 2 tbsp
  • Hot oil – 2 tbsp
  • Salt – To taste
  • Oil – For Deep Frying
Instructions
  1. Heat oil for deep-frying in a pan.
  2. In a wide bowl, add all the ingredients. Add water little by little to form soft stiff dough.
    ]
  3. Fix the Kara sev achu (mould) into the murukku press. Add a portion of dough in the murukku press and close it.
  4. When the oil is hot, in medium high heat, make a round layer in hot oil. Do not add more layers to form even cooking.{br]
  5. When it turns into crispy golden brown color on one side and cook till the bubble ceases. Drain it in tissue paper, cool down completely and store in airtight container.
Notes
Make sure you fry them in hot oil. If you make it in low flame, the pakodas will drink up lot of oil.
Wordpress Recipe Plugin by EasyRecipe
3.2.1311

KarasevRelishthebite2

Filed Under: SNACKS & APPETIZERS, SNACKS & APPETIZERS FESTIVAL Tagged With: crunchy snack recipe, festival quick snacks recipe, Kara sev recipe, pepper chickpea snack, quick diwali snacks recipe, south indian snacks recipe

Rava Ladoo / Semolina Sweet

October 20, 2014 by Suki 3 Comments

ravaladoo-8name

ravaladoo-8nameSimple exotic dessert made with semolina and cashew nuts. Great five-ingredient recipe for last minute preparation.

The entire process of making rava ladoo took me no longer than 20 minutes. These rava ladoos are a traditional sweet that is also made during many festivals like Diwali, ganesh Chaturthi, weddings or small pujas at home. It makes an excellent gift during festival season or a light dessert. It is a delicious soft and sweet balls. This can be prepared without any difficulties. There are various versions followed to prepare this ladoo. Some like to add milk and some like to add ghee/clarified butter. Only thing is if you add milk, it reduces its shell life. Some like to add coconut but I like it with no coconut. Its not that I don’t like coconut, I love coconut 😀 I have two desserts with just coconut. But I mad ethis for Diwali, so we start celebrating Diwali atleast a week before. So, I made them in the weekend and can have till Diwali. 😀 what a plan 😀 To know more about Diwali, you can visit my “Spicy murukku” post.

5.0 from 1 reviews
Print
Rava Ladoo / Semolina Sweet
Author: Suganya Hariharan
Recipe type: Dessert
Cuisine: Indian
Cook time:  20 mins
Total time:  20 mins
Serves: 13
 
Ingredients
  • Rava – 1 cup
  • Sugar – ¾ cup
  • Meted ghee – ¼ cup
  • Cashew nuts – 8-9
  • Cardamom powder – a pinch
  • Milk - 1 tbsp
Instructions
  1. In a pan, add 1 tsp of ghee and roast the cashews and keep it aside.
  2. In the same pan, roast the rava in medium flame for 5 to 10 minutes. Do not get it burnt or change it colour. Don’t move away .
  3. My rava was very soft, so I did not grind. But grind them if not after cooling it down.
  4. Take a wide bowl, Add sugar and cardamom powder to the mixture. Add the melted ghee and cashews to rava sugar mixture.[br
  5. Mix well and start making round balls. Sprinkle milk as u make it, if you find it hard to form balls.
Notes
1. Do not roast rava on high flame as it will get burnt easily.

2. If you want to make it with less ghee, ad dhalf of ghe and half of milk.

3. You can fry raisins with cashews and add them
Wordpress Recipe Plugin by EasyRecipe
3.2.1311

Store in an airtight container for 4-5 days in room temperature.

ravaladoo-7name

Filed Under: DESSERTS, SWEETS/DESSERTS Tagged With: diwali sweet recipe, festival sweet recipes, indian sweet recipes, last minute sweet recipe, quick sweet recipe, Rava ladoo recipe, semolina recipe

Privacy Policy

October 20, 2014 by Suki Leave a Comment

This privacy policy sets out how Relishthebite uses and protects any information that you give while using www.relishthebite.com

Should we ask you to provide certain information by which you can be identified when using this website, then you can be assured that it will only be used in accordance with this privacy statement.

Relishthebite may change this policy from time to time by updating this page. You should check this page from time to time to ensure that you are happy with any changes. This policy is effective from 20-OCT-2014.

What we collect

We may collect the following information:

  • contact information including email address
  • demographic information such as postcode, preferences and interests
  • other information relevant to customer surveys and/or offers

What we do with the information we gather

We require this information to understand your needs and provide you with a better service, and in particular for the following reasons:

  • We may use the information to improve our products and services.
  • We may periodically send promotional emailsabout new products, special offers or other information which we think you may find interesting using the email address which you have provided.
  • From time to time, we may also use your information to contact you for market research purposes. We may contact you by email, phone, fax or mail. We may use the information to customise the website according to your interests.

Security

We are committed to ensuring that your information is secure. In order to prevent unauthorised access or disclosure,we have put in place suitable physical, electronic and managerial procedures to safeguard and secure the information we collect online.

How we use cookies

A cookie is a small file which asks permission to be placed on your computer’s hard drive. Once you agree, the file is added and the cookie helps analyse web traffic or lets you know when you visit a particular site. Cookies allow web applications to respond to you as an individual. The web application can tailor its operations to your needs, likes and dislikes by gathering and remembering information about your preferences.

We use traffic log cookies to identify which pages are being used. This helps us analyse data about web page traffic and improve our website in order to tailor it to customer needs. We only use this information for statistical analysis purposes and then the data is removed from the system.

Overall, cookies help us provide you with a better website, by enabling us to monitor which pages you find useful and which you do not. A cookie in no way gives us access to your computer or any information about you, other than the data you choose to share with us.

You can choose to accept or decline cookies. Most web browsers automatically accept cookies, but you can usually modify your browser setting to decline cookies if you prefer. This may prevent you from taking full advantage of the website.

Advertising

Some of our advertisers occasionally serve you cookies as well. We do not have control over cookies placed by advertisers. We may use advertising service vendors to help present advertisements on the website, one of which is http://www.gourmetads.com. These vendors may use cookies, web beacons, or similar technologies to serve you advertisements tailored to interests you have shown by browsing on this and other sites you have visited, to determine whether you have seen a particular advertisement before and to avoid sending you duplicate advertisements. In doing so, these vendors may collect non-personal data such as your browser type, your operating system, Web pages visited, time of visits, content viewed, ads viewed, and other clickstream data. The use of cookies, web beacons, or similar technologies by these advertising service vendors is subject to their own privacy policies, not ours, and Service Provider disclaims all liability in connection therewith.

Links to other websites

Our website may contain links to other websites of interest. However, once you have used these links to leave our site, you should note that we do not have any control over that other website. Therefore, we cannot be responsible for the protection and privacy of any information which you provide whilst visiting such sites and such sites are not governed by this privacy statement. You should exercise caution and look at the privacy statement applicable to the website in question.

Controlling your personal information

You may choose to restrict the collection or use of your personal information in the following ways:

  • whenever you are asked to fill in a form on the website, look for the box that you can click to indicate that you do not want the information to be used by anybody for direct marketing purposes
  • if you have previously agreed to us using your personal information for direct marketing purposes, you may change your mind at any time by contacting us.

We will not sell, distribute or lease your personal information to third parties unless we have your permission or are required by law to do so. We may use your personal information to send you promotional information about third parties which we think you may find interesting if you tell us that you wish this to happen.

Opt Out

For information about opting out of Gourmet Ads and ad serving partners please visit http://www.gourmetads.com/about/privacy-policy

If you believe that any information we are holding on you is incorrect or incomplete, please contact us.

Filed Under: Uncategorized

Spicy Curry Leaves Murukku

October 19, 2014 by Suki 4 Comments

MurukkuName

MurukkuNameCrispy curry leaves flavoured murukku/chakli – A perfect snack to have while sipping a cup of hot chai.

A crispy, crunchy, mouth melting murukku made with chickpea flour and spices. Of all the murukku recipes that I make, this spicy curry leaves murukku is the most loved by all when I make them for Deepavali. I already have a murukku press, but it was not that good 🙂 and one of my friend gave me new one last week 🙂 I was so eager to make it with that 😀

Murukku-3-2

I miss India more when I think about diwali or any festival for that matter. I used to enjoy the whole month when I was a kid 🙂 I don’t burst much crackers 😀 I was scared :D, but my mom used to make sweets and snacks the whole month. I used to help her a lot 😀 by eating them. ;). I used to give true comments of what she makes, so she used to give it to me first always 😉 and I always love snacks. 😀 My mom would take me and my sister to shopping J for diwali J. She used to get us special dresses, matching ornaments and we finish the day by going to dinner and coming back home. I loved it! Those days that dresses means a lot to us. Now, I buy my dress whenever I want. It’s no more special even on my birthday. That was the real fun birthdays or any occasions. Diwali night we used to clean home and some renovate homes too. We used to exchange gifts 😉 that’s the best part I say 😀

5.0 from 1 reviews
Print
Spicy Curry Leaves Murukku
Author: Suganya Hariharan
Recipe type: Snacks
Cuisine: Indian
Prep time:  5 mins
Cook time:  20 mins
Total time:  25 mins
Serves: 25
 
Ingredients
  • Rice flour – 2 cups
  • Besan (Benjal Gram Flour) - 1cup
  • Red Chilli Powder - 2tsp
  • Pepper powder – ½ tsp
  • Asafetida – 2 pinches
  • Sesame seeds – 1 tsp
  • Melted Butter – 2 tbsp
  • Hot oil – 2 tbsp
  • Salt – To taste
  • Oil – For Deep Frying
    To grind:
  • Curry Leaves - 15
  • Red chilli - 4
  • Garlic - 3
  • Ginger - 1 inch
Instructions
  1. Blend everything under to grind. And keep aside.
  2. Heat oil for deep-frying in a pan.
  3. In a wide bowl, add all the ingredients and add the blended mixture. Add water little by little to form soft stiff dough.
  4. Fix the murukku achu (mould) into the murukku press. Add a portion of dough in the murukku press and close it. Press it and make a circular shape. I always grease some laddles and make murukku first in that then drop them in oil. This will help to make nice shaped ones.
  5. When the oil is hot, in medium high heat, drop the shaped murukku. Do not crowd the pan, it will make the oil temperature go down.
  6. When it turns into crispy golden brown color on one side and also when bubbles ceases, flip this carefully using the ladle to other side and cook till the bubble ceases. Drain it in tissue paper, cool down completely and store in airtight container.
Notes
1. Make sure you fry them in hot oil. If you make it in low flame, the murukkus will drink up lot of oil.
2. Always grease some laddles and make murukku first in that then drop them in oil. This will help to make nice shaped ones.
Wordpress Recipe Plugin by EasyRecipe
3.2.1311

MurukkuName2

Filed Under: SNACKS & APPETIZERS, SNACKS & APPETIZERS FESTIVAL Tagged With: Diwali snack recipes, hotc hai snack, indian festival snacks, indian snack recipes, spicy murukku recipe, spicy snack recipe, tea time snack

Ribbon Pakoda (Nada Thenkuzhal)

October 18, 2014 by Suki 2 Comments

Ribbonpakoda-8nameChickpea flour spirals for non-stop munching.

It is an easy, addictive spicy and flavorful snack. Diwali is round the corner and I wanted to start making some snacks and sweets. I had a big list to make. Thought of making the savories on one day and sweets on another. I am not sure how many I am going to post here. But wanted to start posting with this one as I got some request for this. And one of my personal favorite. These are made especially during diwali days. It is also a perfect teatime snack. Many add garlic in this recipe but this time I made it with no garlic 😉 and I like it this way.

Diwali or deepavali is known as festival of lights 🙂 and is usually around autumn every year. The festival preparations usually extend over more than 5 days. And the main diwali night coincides with the darkest new moon light, karthiga. It is believed that on this day Rama returned to his people after 14 years of exile during which he fought and won a battle against the demons and the demon king, Ravana. People celebrate this day by lighting candles for his victory over evil (darkness). Some link it with the celebration of Lakshmi, the goddess of wealth and prosperity. The five day festival begins on the day lakhmi was born during the war between the forces of good and forces of evil. That’s a lot of information 😀 lets go to the fun part! Recipe time :)!

Print
Ribbon Pakoda (Nada Thenkuzhal)
Author: Suganya Hariharan
Recipe type: Snacks
Cuisine: Indian
Prep time:  5 mins
Cook time:  25 mins
Total time:  30 mins
Serves: 2-3 cups
 
Ingredients
  • Rice flour – 2 cups
  • Besan (Benjal Gram Flour) - 1cup
  • Red Chilli Powder - 2tsp
  • Pepper powder – ½ tsp
  • Asafetida – 2 pinches
  • Sesame seeds – 1 tsp
  • Melted Butter – 2 tbsp
  • Hot oil – 2 tbsp
  • Salt – To taste
  • Oil – For Deep Frying
Instructions
  1. Heat oil for deep-frying in a pan.
  2. In a wide bowl, add all the ingredients. Add water little by little to form soft stiff dough.
  3. Fix the ribbon pakoda achu (mould) into the murukku press. Add a portion of dough in the murukku press and close it.

  4. When the oil is hot, in medium high heat, make a round layer in hot oil. Do not add more layers to form even cooking.br]
  5. When it turns into crispy golden brown color on one side and also when bubbles ceases, flip this carefully using the ladle to other side and cook till the bubble ceases. Drain it in tissue paper, cool down completely and store in airtight container.
Notes
Make sure you fry them in hot oil. If you make it in low flame, the pakodas will drink up lot of oil.
Wordpress Recipe Plugin by EasyRecipe
3.2.1311

Store in an airtight container and use for two weeks. 

Ribbonpakoda-9

Filed Under: SNACKS & APPETIZERS, SNACKS & APPETIZERS FESTIVAL Tagged With: Diwali snacks, diwali snacks recipes, festival snacks, nada thenkuzhal recipe, ribbpn pakoda recipe

Malai Pepper Mushroom

October 15, 2014 by Suki 5 Comments

Malai Capsicum Mushroom-14

Malai Capsicum Mushroom-name


Roasted peppers and mushroom pieces simmered in rich and creamy gravy, with a subdued amount of spice.

I have never had a glimpse of this recipe nor tasted it anywhere. I just made this yesterday in my kitchen with whatever I had but it came out so well that I wanted to share it with you right away. I made this with simple rotis for dinner and I am sure it tastes great with even rice. I always like to experiment with gravies when I am having it with rotis, because I know that I can have anything with rotis 😉 mostly. But rice.. Na na na..NO. Everything does not taste the best with rice. I will have it if I have no choice. Food is always FOOD. I am learning and making sure I don’t waste food. I guess I am growing..Getting my sense.. 😀 Getting matured! 😀 Ok don’t imagine me to be too bad, I don’t havoc loads of food before but once in a while, I get up from the table without finishing the plate. Now NO 🙂 isn’t that a good habit? 😉

Replace the butter with oil

& replace cream& milk with coconut milk to make the recipe vegan!

Malai Capsicum Mushroom-15

 We had a really nice weather yesterday. In October around 29°C in Montreal is just rare, luckily we got one, it’s usually cold around this time. So came from work, I made this 40 minutes. It was quick and easy to make, clicked pictures and went for walk to the beautiful Mount Royal and relaxed myself. And when I entered back home, the whole house had this beautiful aroma from capsicum and I loved it.

Malai Capsicum Mushroom

I usually have a soft spot for spicy foods, actually it’s hard for me to devour if the food is even little bland. But this one is not spicy at all and also tasty. Due to the presence of cream, onions and cashews, it is not spicy. You could see a tint of brown shade because of the onion I used. You can use yellow onion if you have one and also I need to say the different color peppers made the gravy even more appetizing.

Print
Malai Pepper Mushroom
Author: Suganya Hariharan
Recipe type: Side dish
Cuisine: Indian
Prep time:  5 mins
Cook time:  35 mins
Total time:  40 mins
Serves: 4
 
Ingredients
  • Bell Pepper – 5 small , 2 cups, diced
  • Mushroom – ½ cup, chopped
  • Cream – ¼ cup
  • Milk – ½ cup
  • Garam Masala – ½ tsp
  • Butter – 1 tbsp
  • Kasoori methi (dry methi leaves) – 2 pinches
  • Sugar – 1 tsp
  • Salt – 1tsp


    To sauté & grind:

  • Onion – 1
  • Cashews – 8
  • Green Chilli – 5
  • Ginger – 1 small piece
  • Cardamom – 1
  • Garlic – 4
  • Poppy seeds – 1tsp
Instructions
  1. Soak 1 tsp of poppy seeds in a tablespoon of water. Keep it aside.
  2. In a kadai, heat butter, add cardamom, onion, green chili, ginger and garlic, Fry until onions are transparent. Cool down and add cashews.

  3. Blend it with the soaked poppy seeds (with water) and make a smooth paste. Do not add more water.
    ["https://www.relishthebite.com/wp-content/uploads/2014/10/malaicapsicum2.jpg"]
  4. Heat butter in a pan or kadai. Add the diced capsicum, mushroom and dry methi leaves. Keep sautéing for two minutes, till it becomes little soft.
  5. Now add the blended paste to it. Keep frying the masalas for a minute or two till the raw smell goes off without changing color.
  6. Then add 1 cup of milk, salt needed and ½ cup of water. Simmer for 5 minutes till it gets thick.
  7. Add the cream and simmer for some more minutes.
  8. Add 1 tsp of sugar and simmer for a minute and switch off.
  9. Garnish with coriander leaves.
Notes
1. After adding cream or milk, never put the flame to high.
2. Do not skip the cashews, it’s a binding agent.
Wordpress Recipe Plugin by EasyRecipe
3.2.1311

Malai Capsicum Mushroom-14

Filed Under: NORTH INDIAN GRAVIES/DAL/CURRY Tagged With: colorful curry, colorful subzi, malai capsicum maslaa, malai capsicum mushroom curry, malai masala, malai recipe, rice and pulao, sidedish for totti

Carrot Stir Fry / Carrot Poriyal

October 14, 2014 by Suki 4 Comments

carrot poriyal-2-2Name

carrot poriyal-2-2NameSteamed carrots is seasoned with mustard seeds, urad dal and curry leaves and finally garnished with fresh coconut in this classic south Indian stir fry.

Today I wanted to post a comfort food from my home. You can make this in few minutes. This stir fry is healthy and goes well with plain rice or any gravy. I always prefer individual veggies stir fry than the combination of few veggies.  I love carrots and this stir-fry is my favorite, I even like to eat this with plain rice or sometimes add plain rice it and enjoy as carrot rice. You can very well combine with beans and make it as carrot beans stir fry. I do that when I have only few portions of each veggie in the refrigerator. I mix all the veggies like beans, carrot and peas and make a stir fry using everything.

I have been thinking of posting this recipe for a long time, then thought it’s too simple to post. But now I thought it can surely help beginners or bachelors. You can substitute this with any veggie you fancy and make this same stir-fry. You can even use frozen veggies, then you have to just 1 tbsp. of water, add the coconut and switch off. There is no need of boiling and the whole recipe just takes 5 minutes to do. It tastes best with rasam, dal or sambhar. You can also have this with roti or just with plain rice.

Print
Carrot Stir Fry / Carrot Poriyal
Author: Suganya Hariharan
Recipe type: Side dish
Cuisine: Indian
Prep time:  5 mins
Cook time:  15 mins
Total time:  20 mins
Serves: 4
 
Ingredients
  • Mustard seeds – ½ tsp.
  • Urad dal – 1 tsp
  • Asafetida – ¼ tsp
  • Onions – 1 small / ½ cup, chopped
  • Green chilli – 1, chopped
  • Curry leaves – 1 spring
  • Carrots – 2 cups, chopped
  • Turmeric powder – ¼ tsp
  • Sambhar powder – ½ tbsp
  • Salt – to taste
  • Fresh coconut – 1 tbsp
  • Coriander – 1tbsp, chopped
  • Oil - ½ tbsp
  • Coconut oil – 1 tsp
Instructions
  1. Heat oil in a pan, add mustard seeds, urad dal and let it splutter. Add curry leaves and fry for a min. Now add chopped onions and green chillies and salt and sauté well till onions gets slightly browned.
  2. Now add the chopped carrots, sauté for a minute. Add the turmeric powder and sambhar powder. Mix it well. Add water till it is almost covered. Close the lid and let it turn soft and raw smell leaves.
  3. Once all the water gets evaporated, add dry coconut and chopped coriander and give a quick stir fry. Finish off by adding 1 tsp of coconut oil and switch off.
Notes
1. You can mix few more veggies to the same recipe and use it.
2. You can substitute this with any veggie you fancy and make this same stir-fry.
3. You can use 1 tsp of coconut oil to garnish. It gives extra flavor.
4. You can use frozen veggies also, then you have to just 1 tbsp of water, add the coconut and switch off.
Wordpress Recipe Plugin by EasyRecipe
3.2.1311

Filed Under: DRY CURRY SIDE DISH/ STIR-FRY, VEGAN Tagged With: carrot coconut recipe, Carrot Poriyal, carrot recipes, carrot stir fry, healthy carrot recipe, vegetarian carrot stir fry recipe, vegetarian stor fry recipe

Page 1 of 2
1 2 Next »
  1. Pages:
  2. 1
  3. 2
  4. »
  • 1
  • 2
  • Next Page »
  • Facebook
  • Google+
  • Instagram
  • Pinterest
  • Twitter

LOOKING FOR SOMETHING?

logo
Food Advertisements by
logo
Food Advertisements by

Categories

STAY CONNECTED

  • Facebook
  • Google+
  • Instagram
  • Pinterest
  • Twitter

SUBSCRIBE BY EMAIL

SEARCH RELISH THE BITE

logo
Food Advertisements by

Copyright © 2025 · Lifestyle Pro Theme on Genesis Framework · WordPress · Log in