 I’ve always loved Mexican food as I mentioned in my taco recipe. 🙂 But there is just something nice about a golden brown cheesy quesadilla! It always makes me go cRaZyyyyy! I am not sure if there is an authentic quesadilla recipe 😉 I guess just the taste matters to us.;)
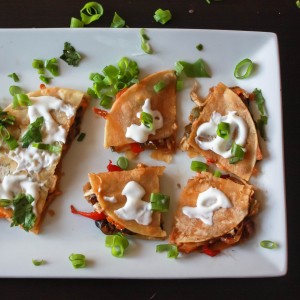
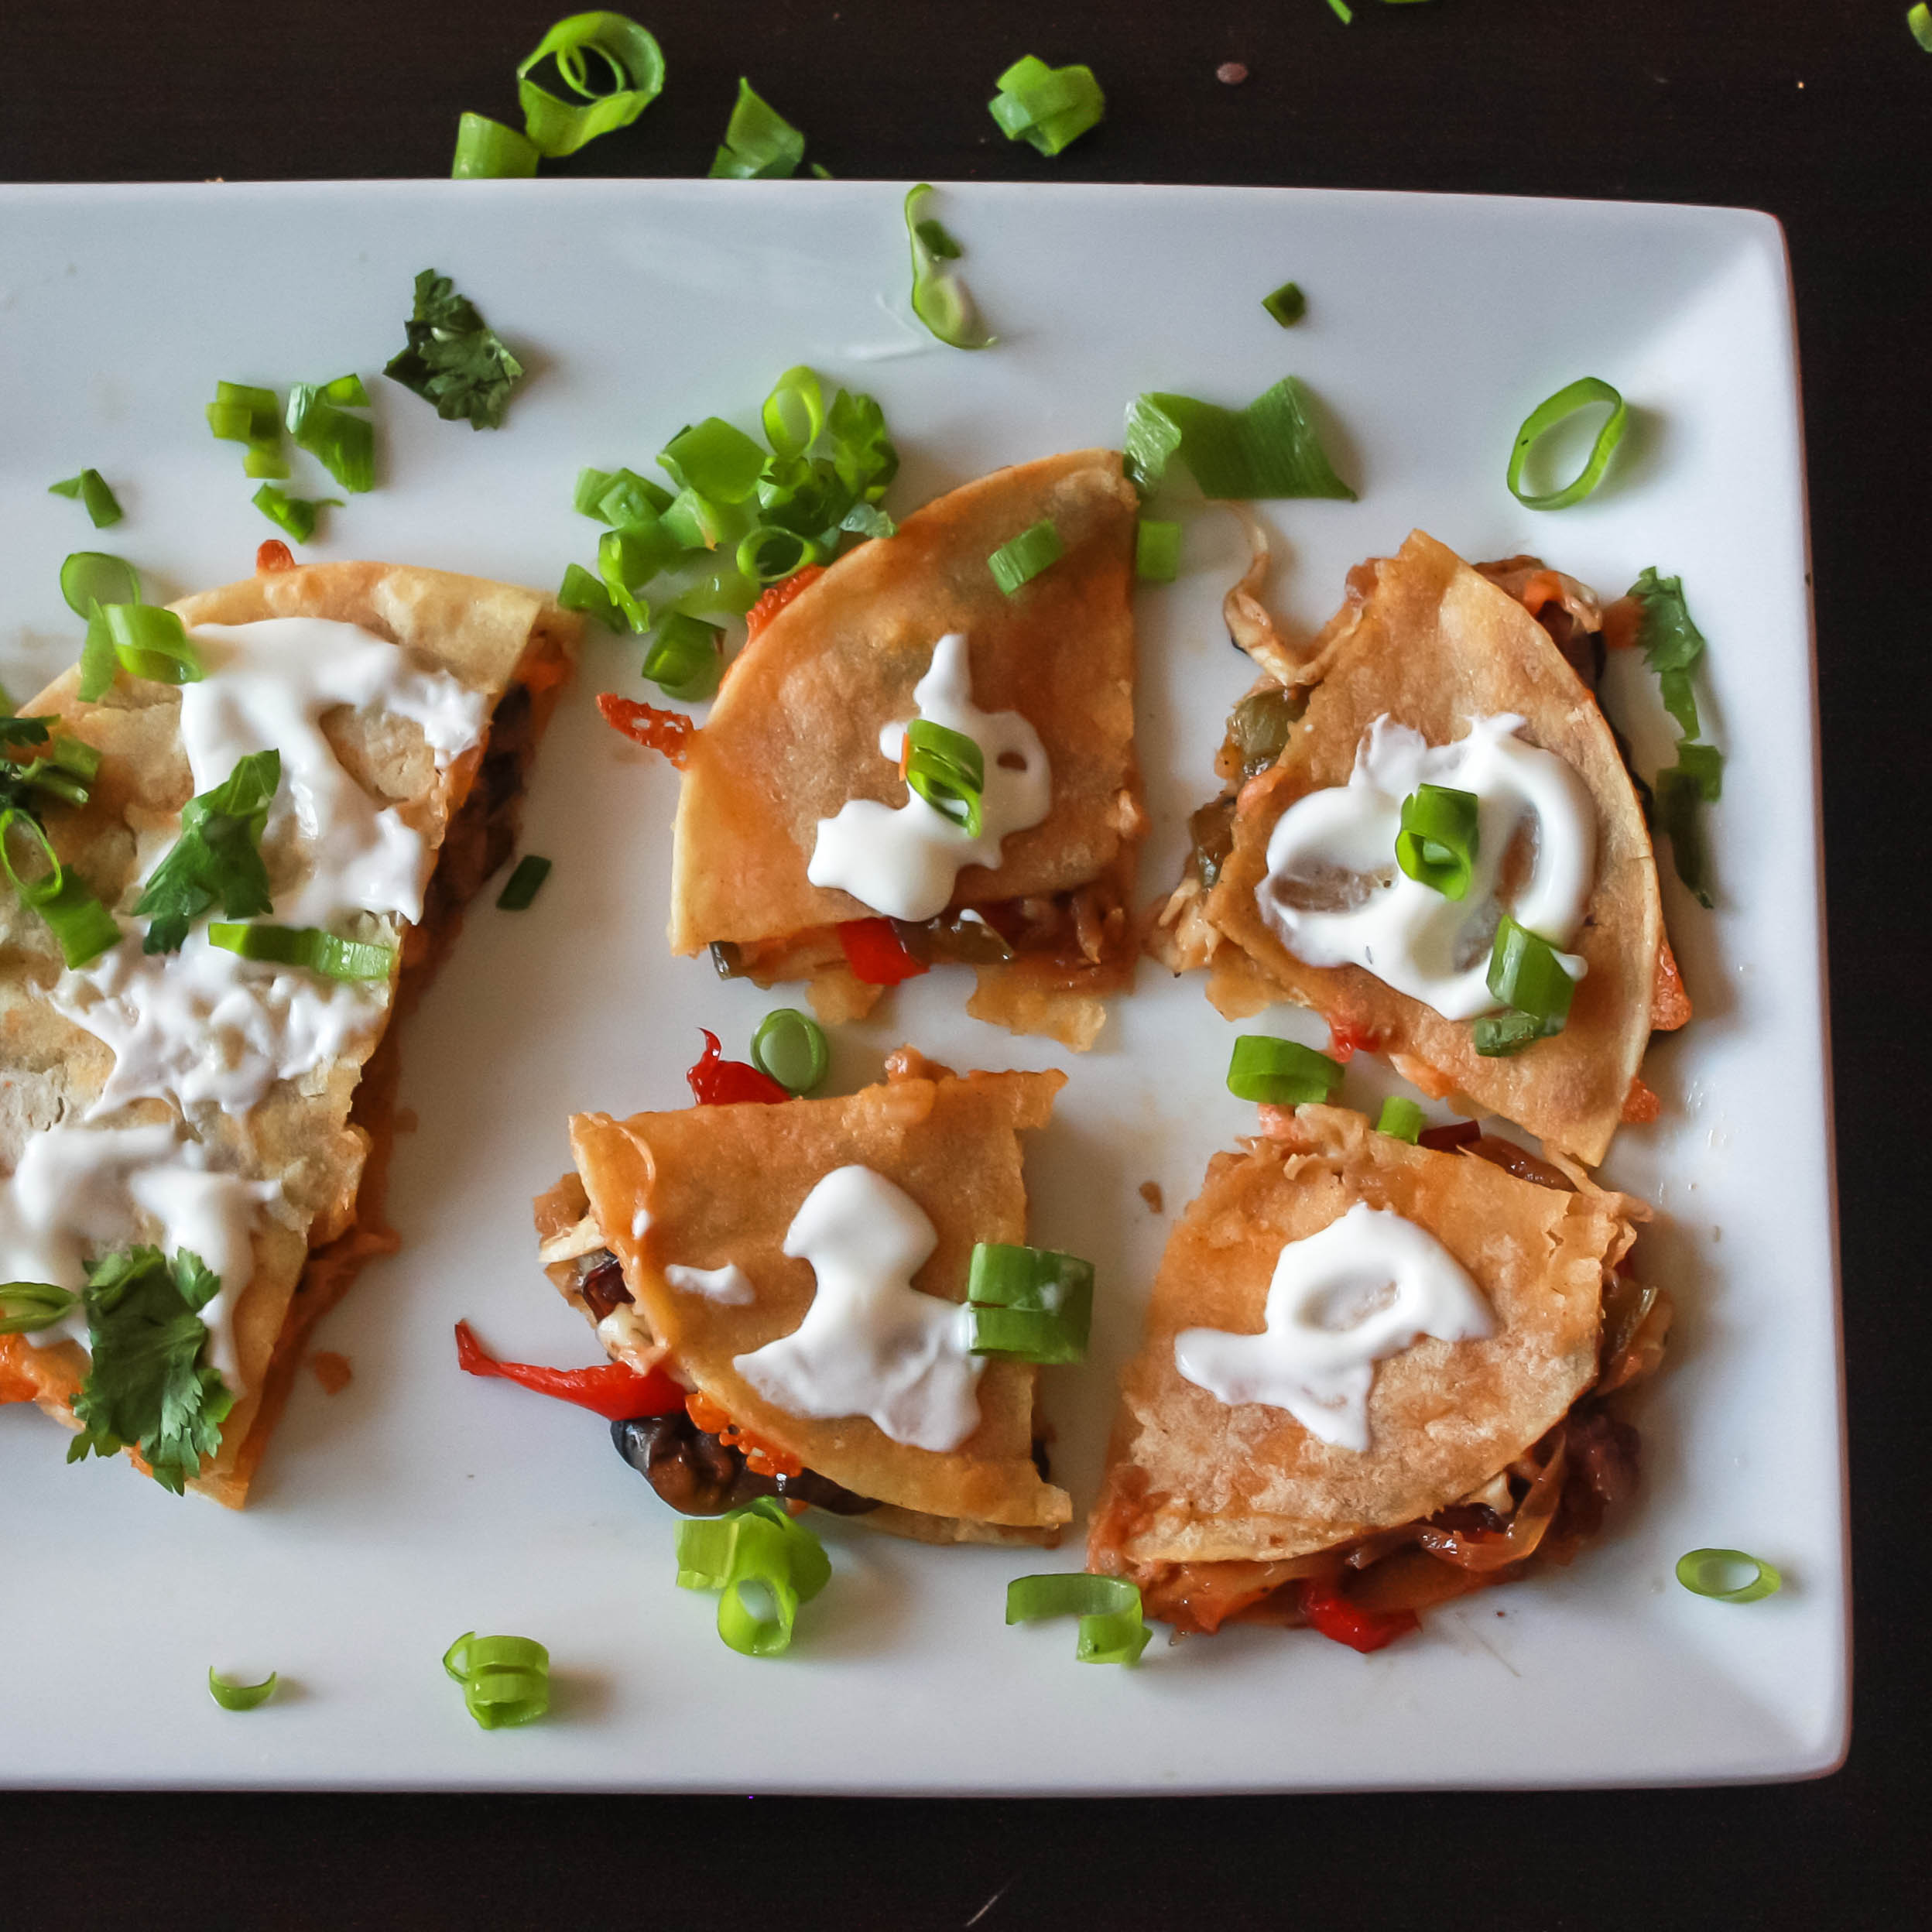
This recipe contains sauted mushrooms+ onions +peppers +tortilla +CHEESE + toppings 🙂 I have tried many fillings and this is my personal favourite 🙂 If your quesadillas or for that matter any cheese sandwiches, when they leak cheese out of the edge and that that cheese is fried against tortilla.. sooper crispy.. That is heaven to me 😀 ! If you are a cheesy favorite person you will understand what I am trying to convey here 😀
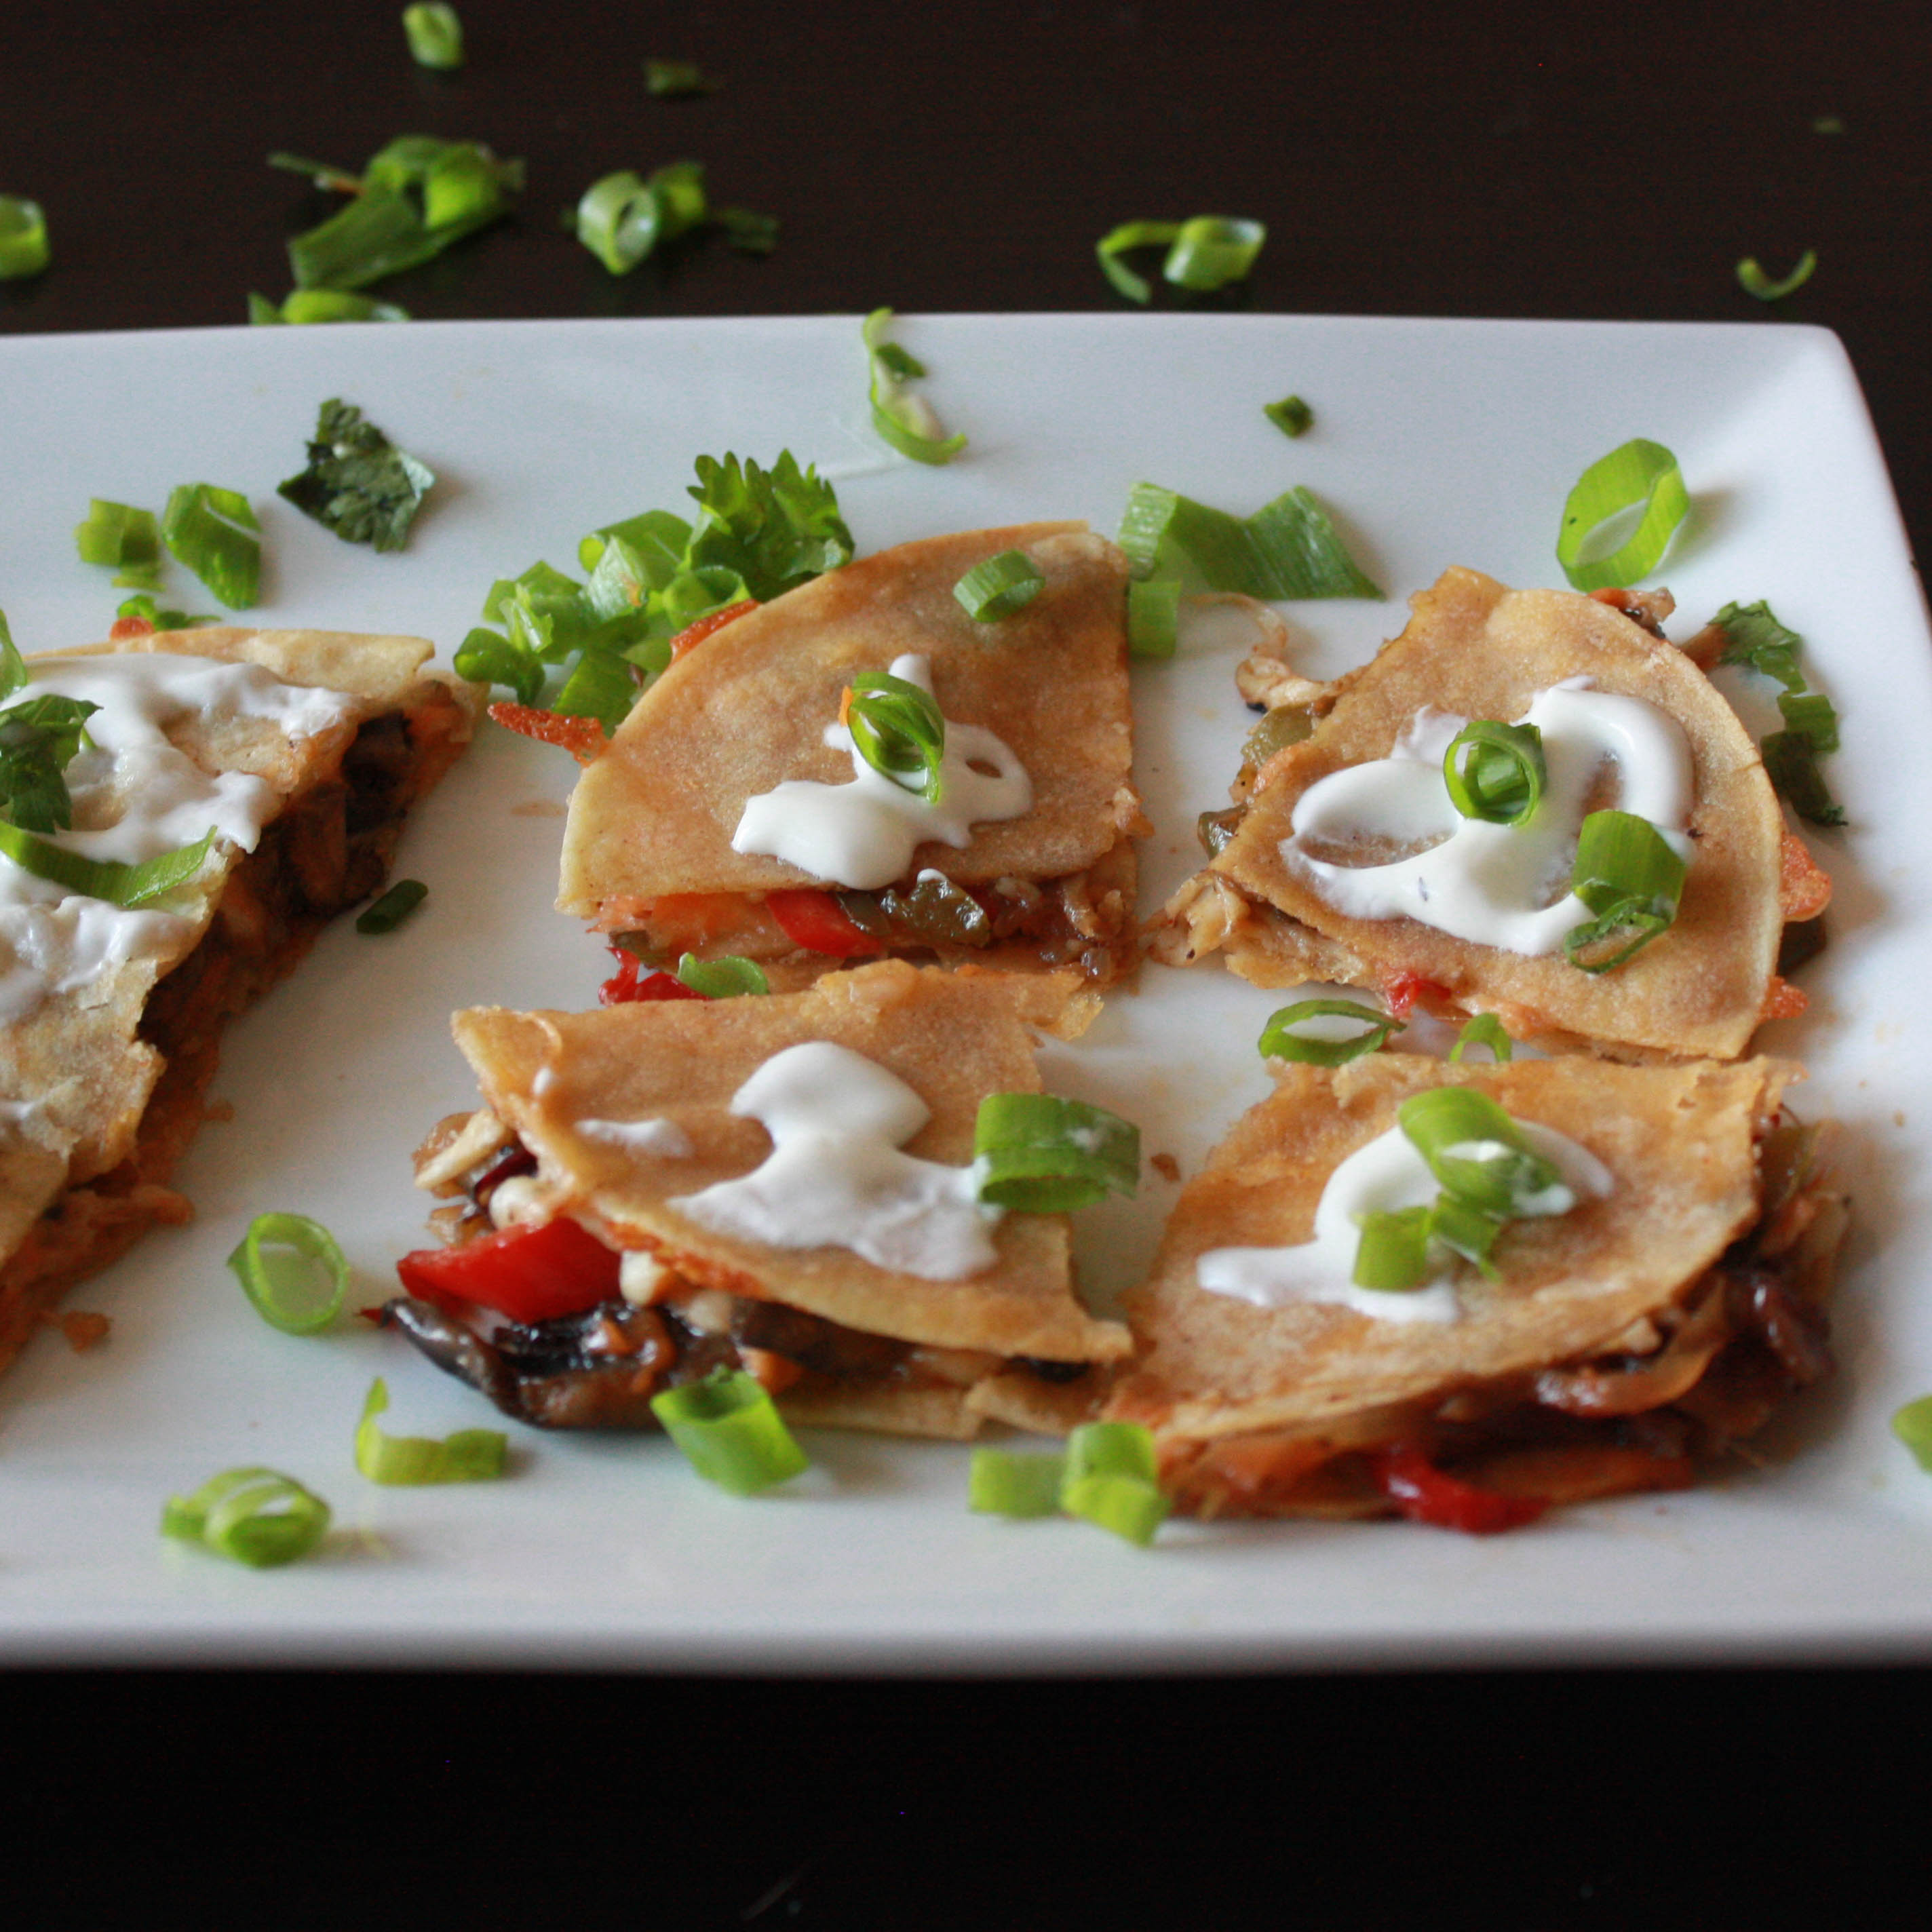 Quesadillas at their base are two tortillas filled with cheese and other veggies and they are toasted until the tortillas are nice and golden brown and the cheese has melted. I usually do quesadillas with wheat flour tortilla. But today I did with corn tortilla. Those are the tortillas that were left in the freezer after my tacos I did before few days. You can very well use the same recipe with wheat flour tortillas.
So with these corn tortillas I did a mini quesadilla. 🙂
No more delay, I am going to the recipe straight 😀
- Yellow onion – 1 cup
- Bell peppers – 1 cup (used both yellow and red)
- Mushrooms – 2 cups ( sliced)
- Butter – 3 tbsp
- Olive oil – 1 tbsp
- Tortillas – 10 corn tortillas
- Cheese –1 ½ cup (shredded)
- Chilli powder – 1 ½ tsp
- crushed pepper – ½ tablespoon
- Sour cream - to garnish
- Spring onions - to garnish
- Cilantro - to garnish
- salt - as needed
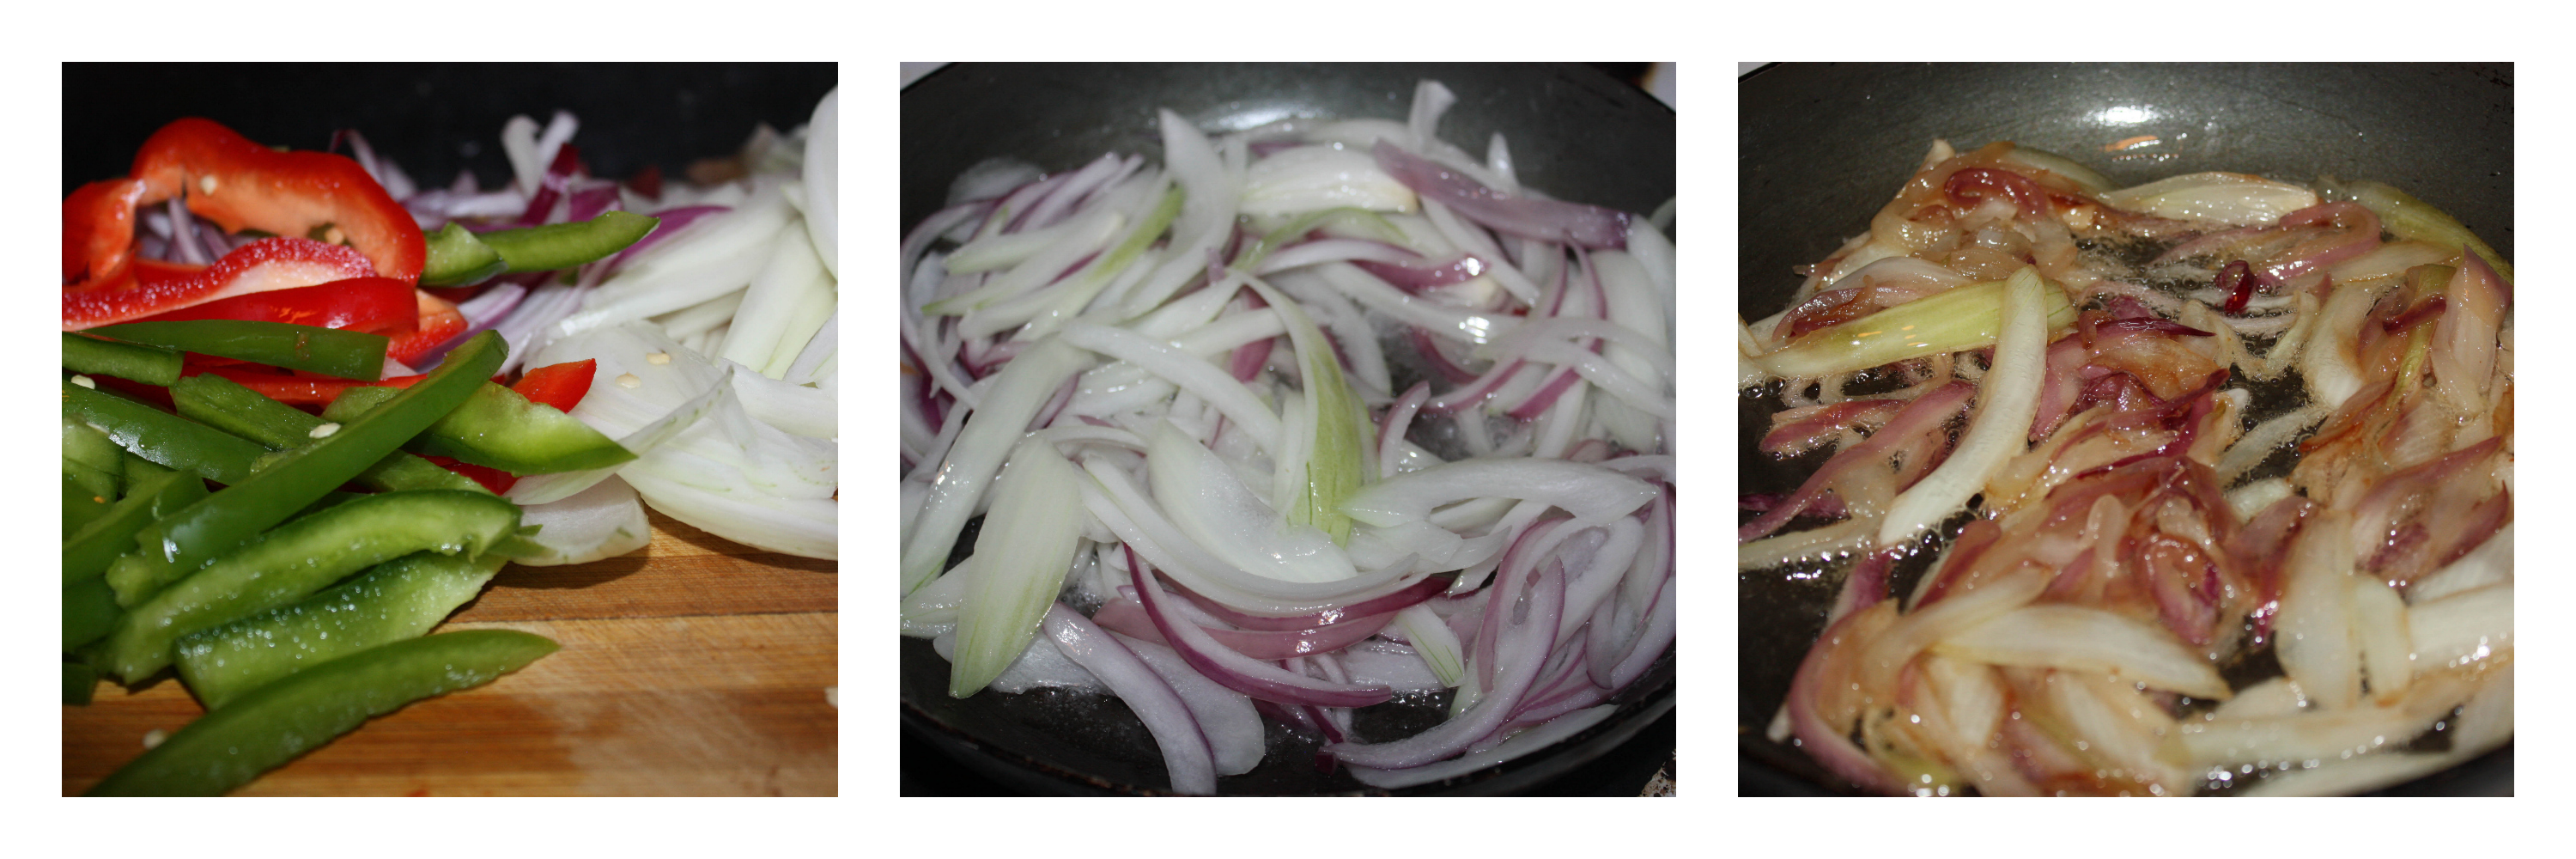
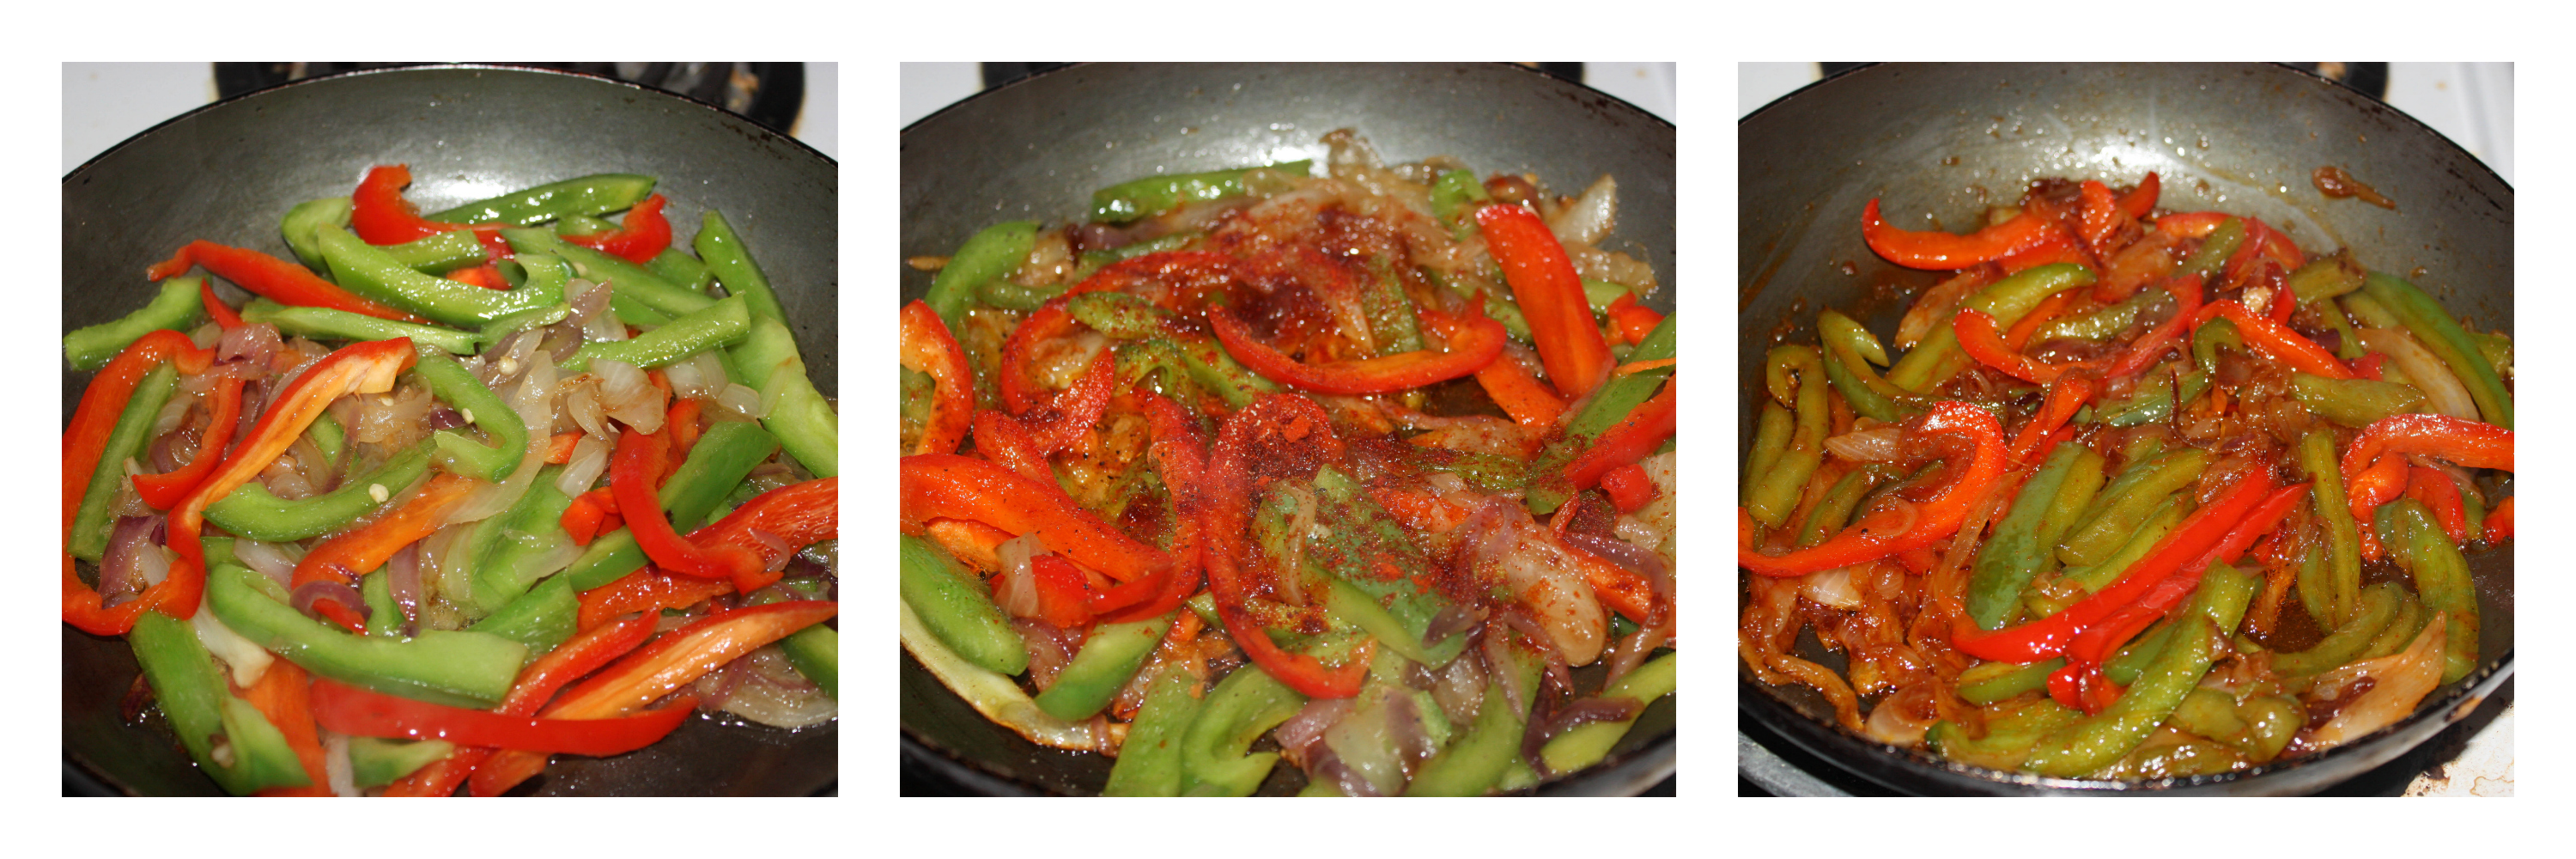
- Onion-Pepper preparation: Slice the onion and pepper into thin strips. Heat the olive oil in a wide pan, add the onions and a dash of salt and sauté them for 4-5 minutes over medium heat or until it gets soft. Then add the peppers and sauté them for 5 minutes until it becomes kind of roasted outside and soft. Add the chili powder and crushed pepper. Cook for five minutes. Switch off and Keep it aside.
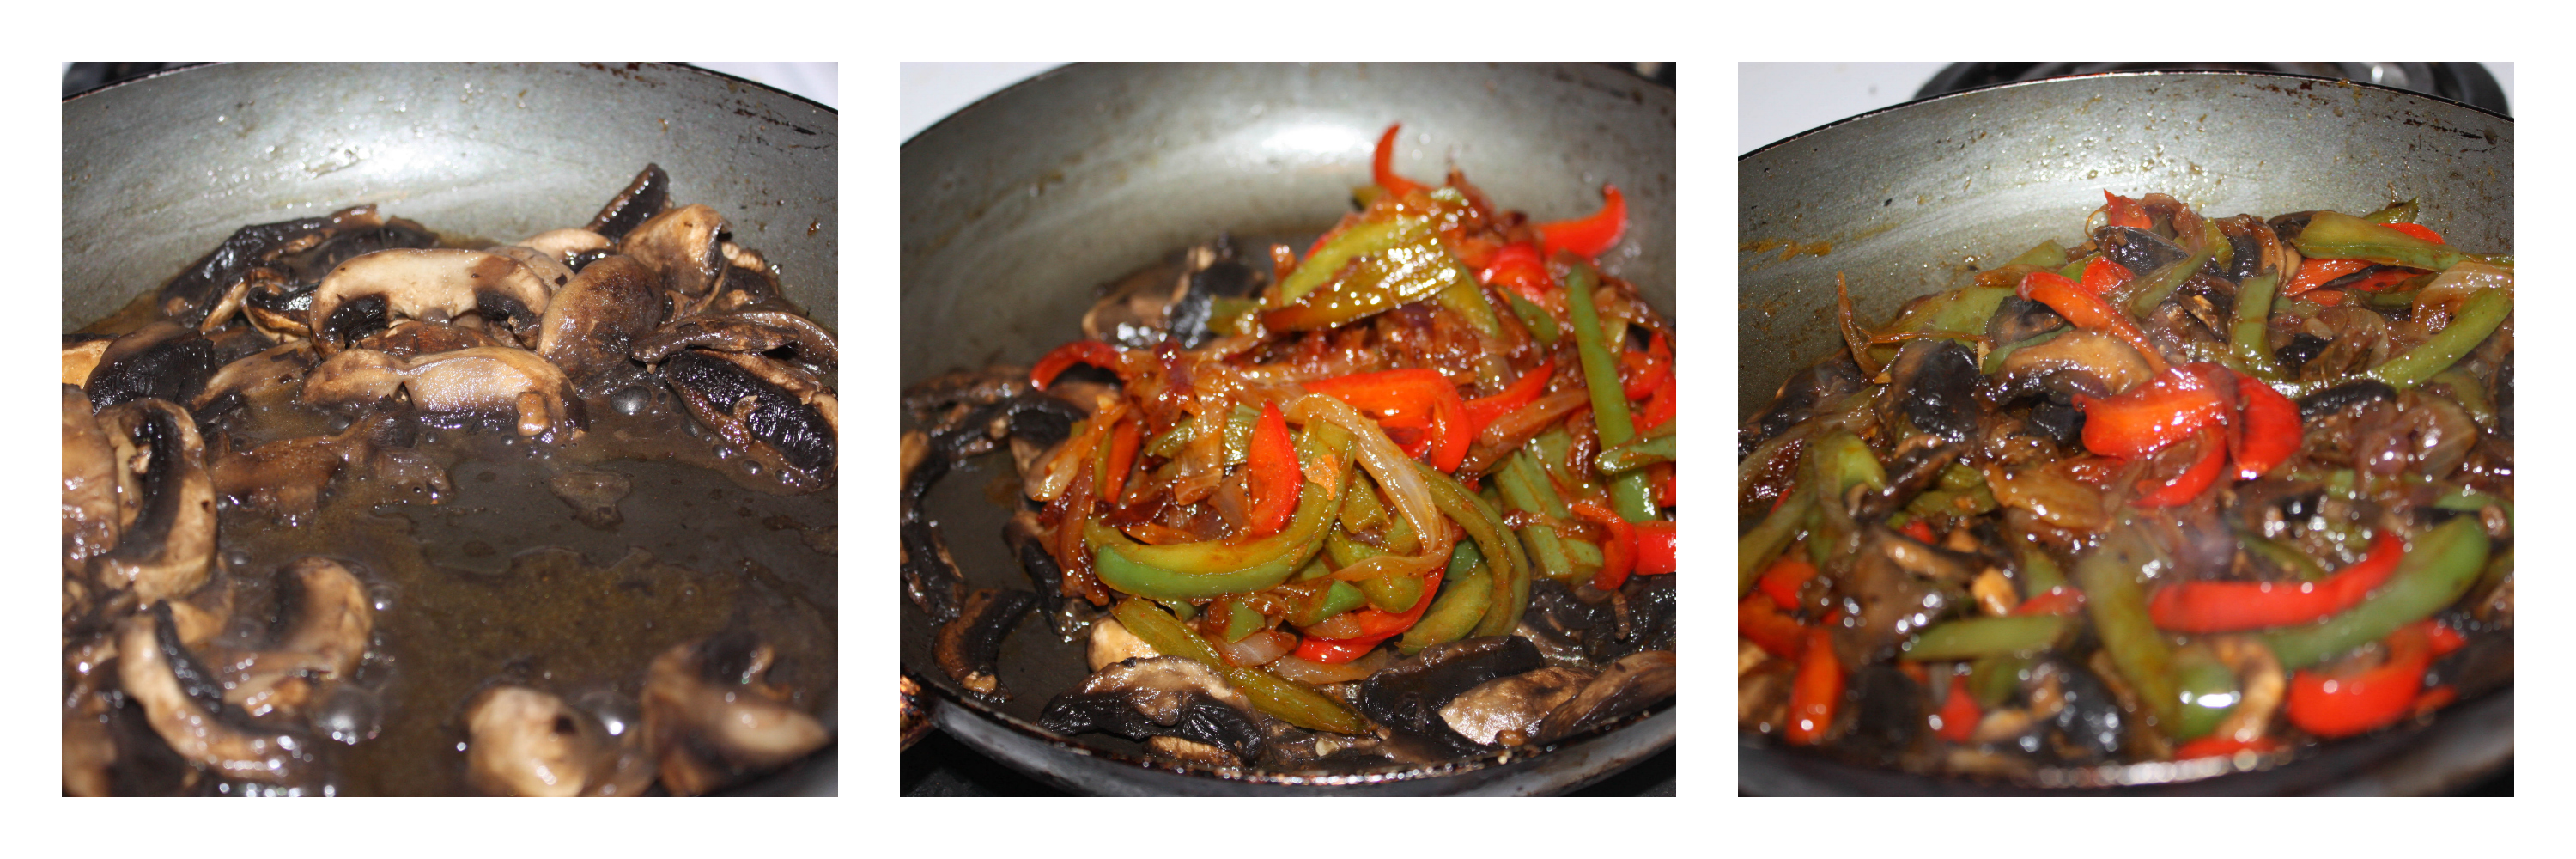
- Mushroom preparation: Clean the same pan by wiping with a paper towel. Add one tablespoon of butter and add the mushrooms. Sauté them until it become soft. Keep it aside. Add the onion pepper that we kept aside on top of it. Give a stir and switch off.
- Tortilla plating preparation: Place one tortilla; keep some cheese on top of it, then some mushroom onion pepper. Then place some cheese on top of that and another tortilla on top of it. Arrange them all and keep aside.
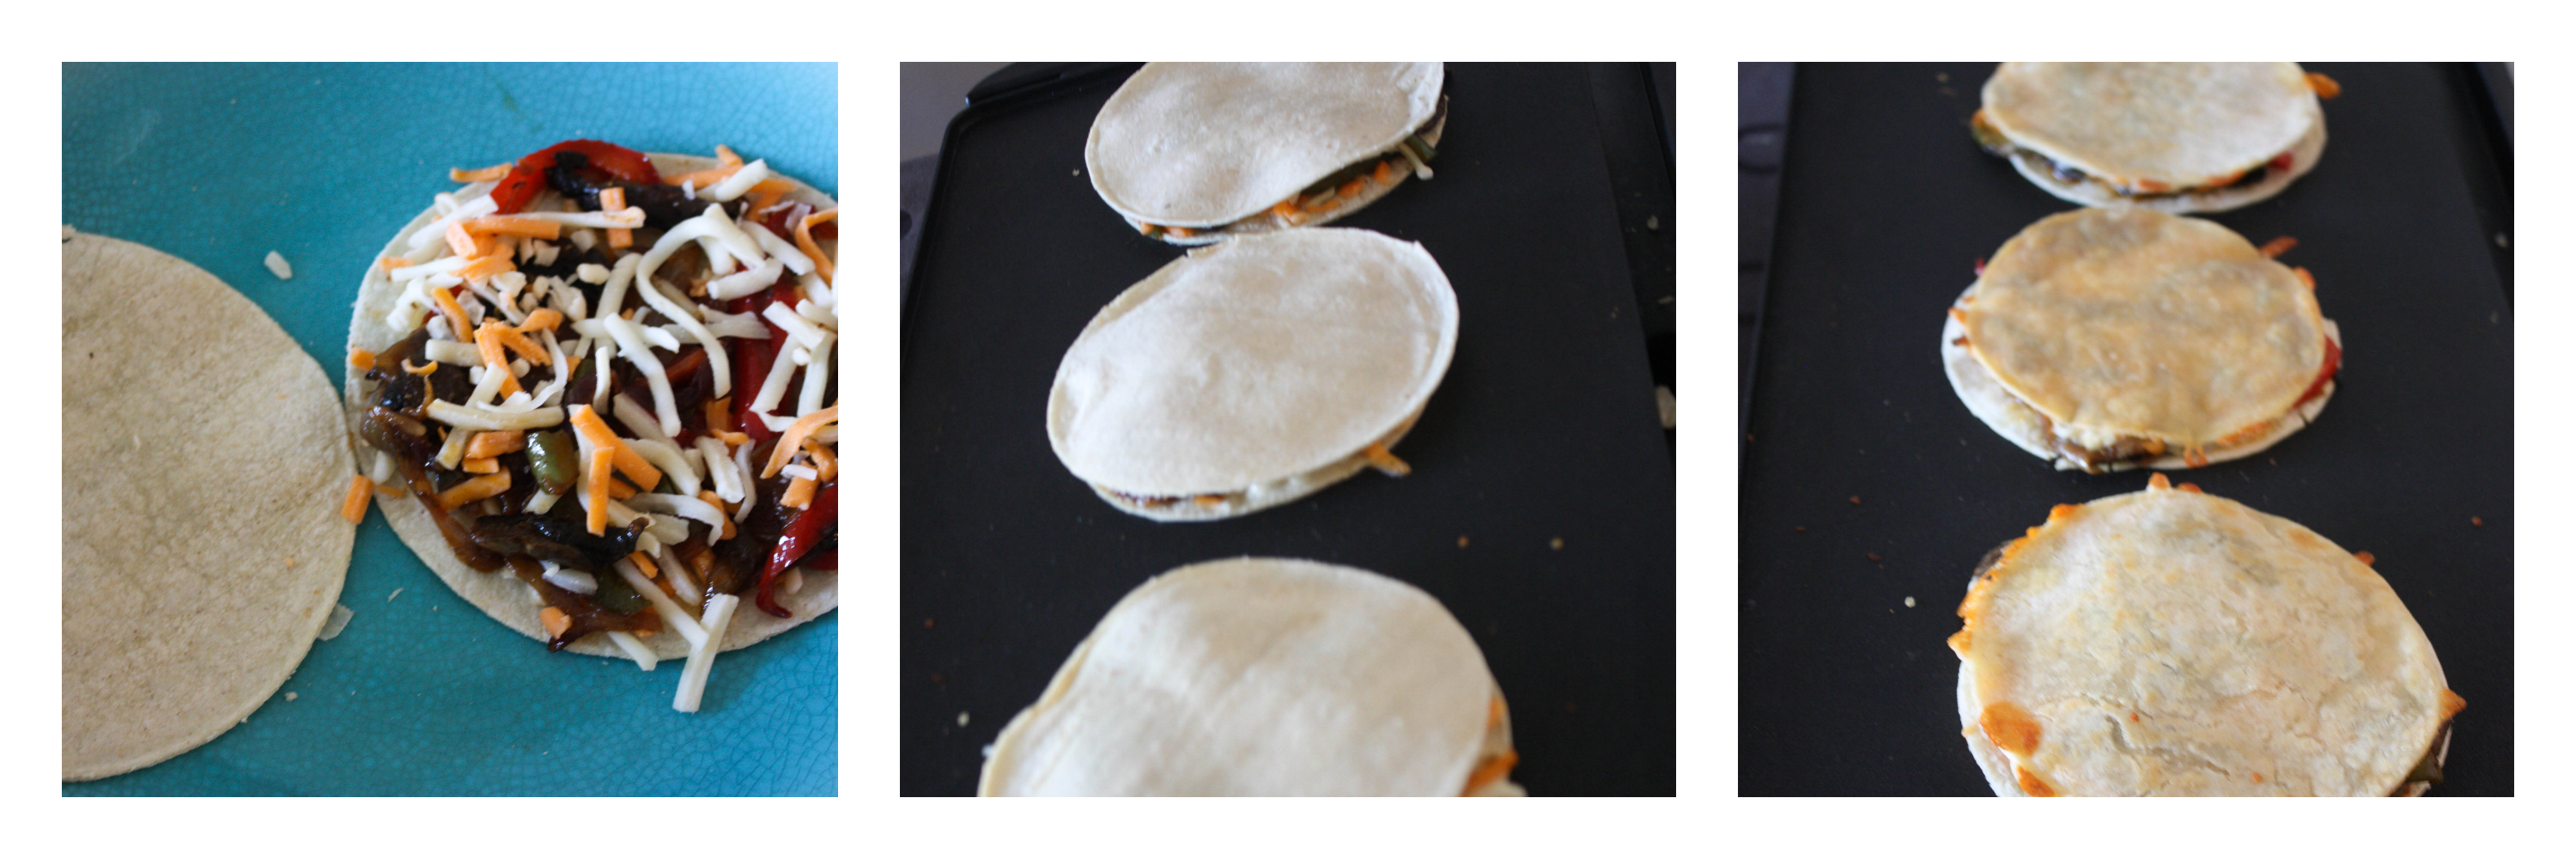
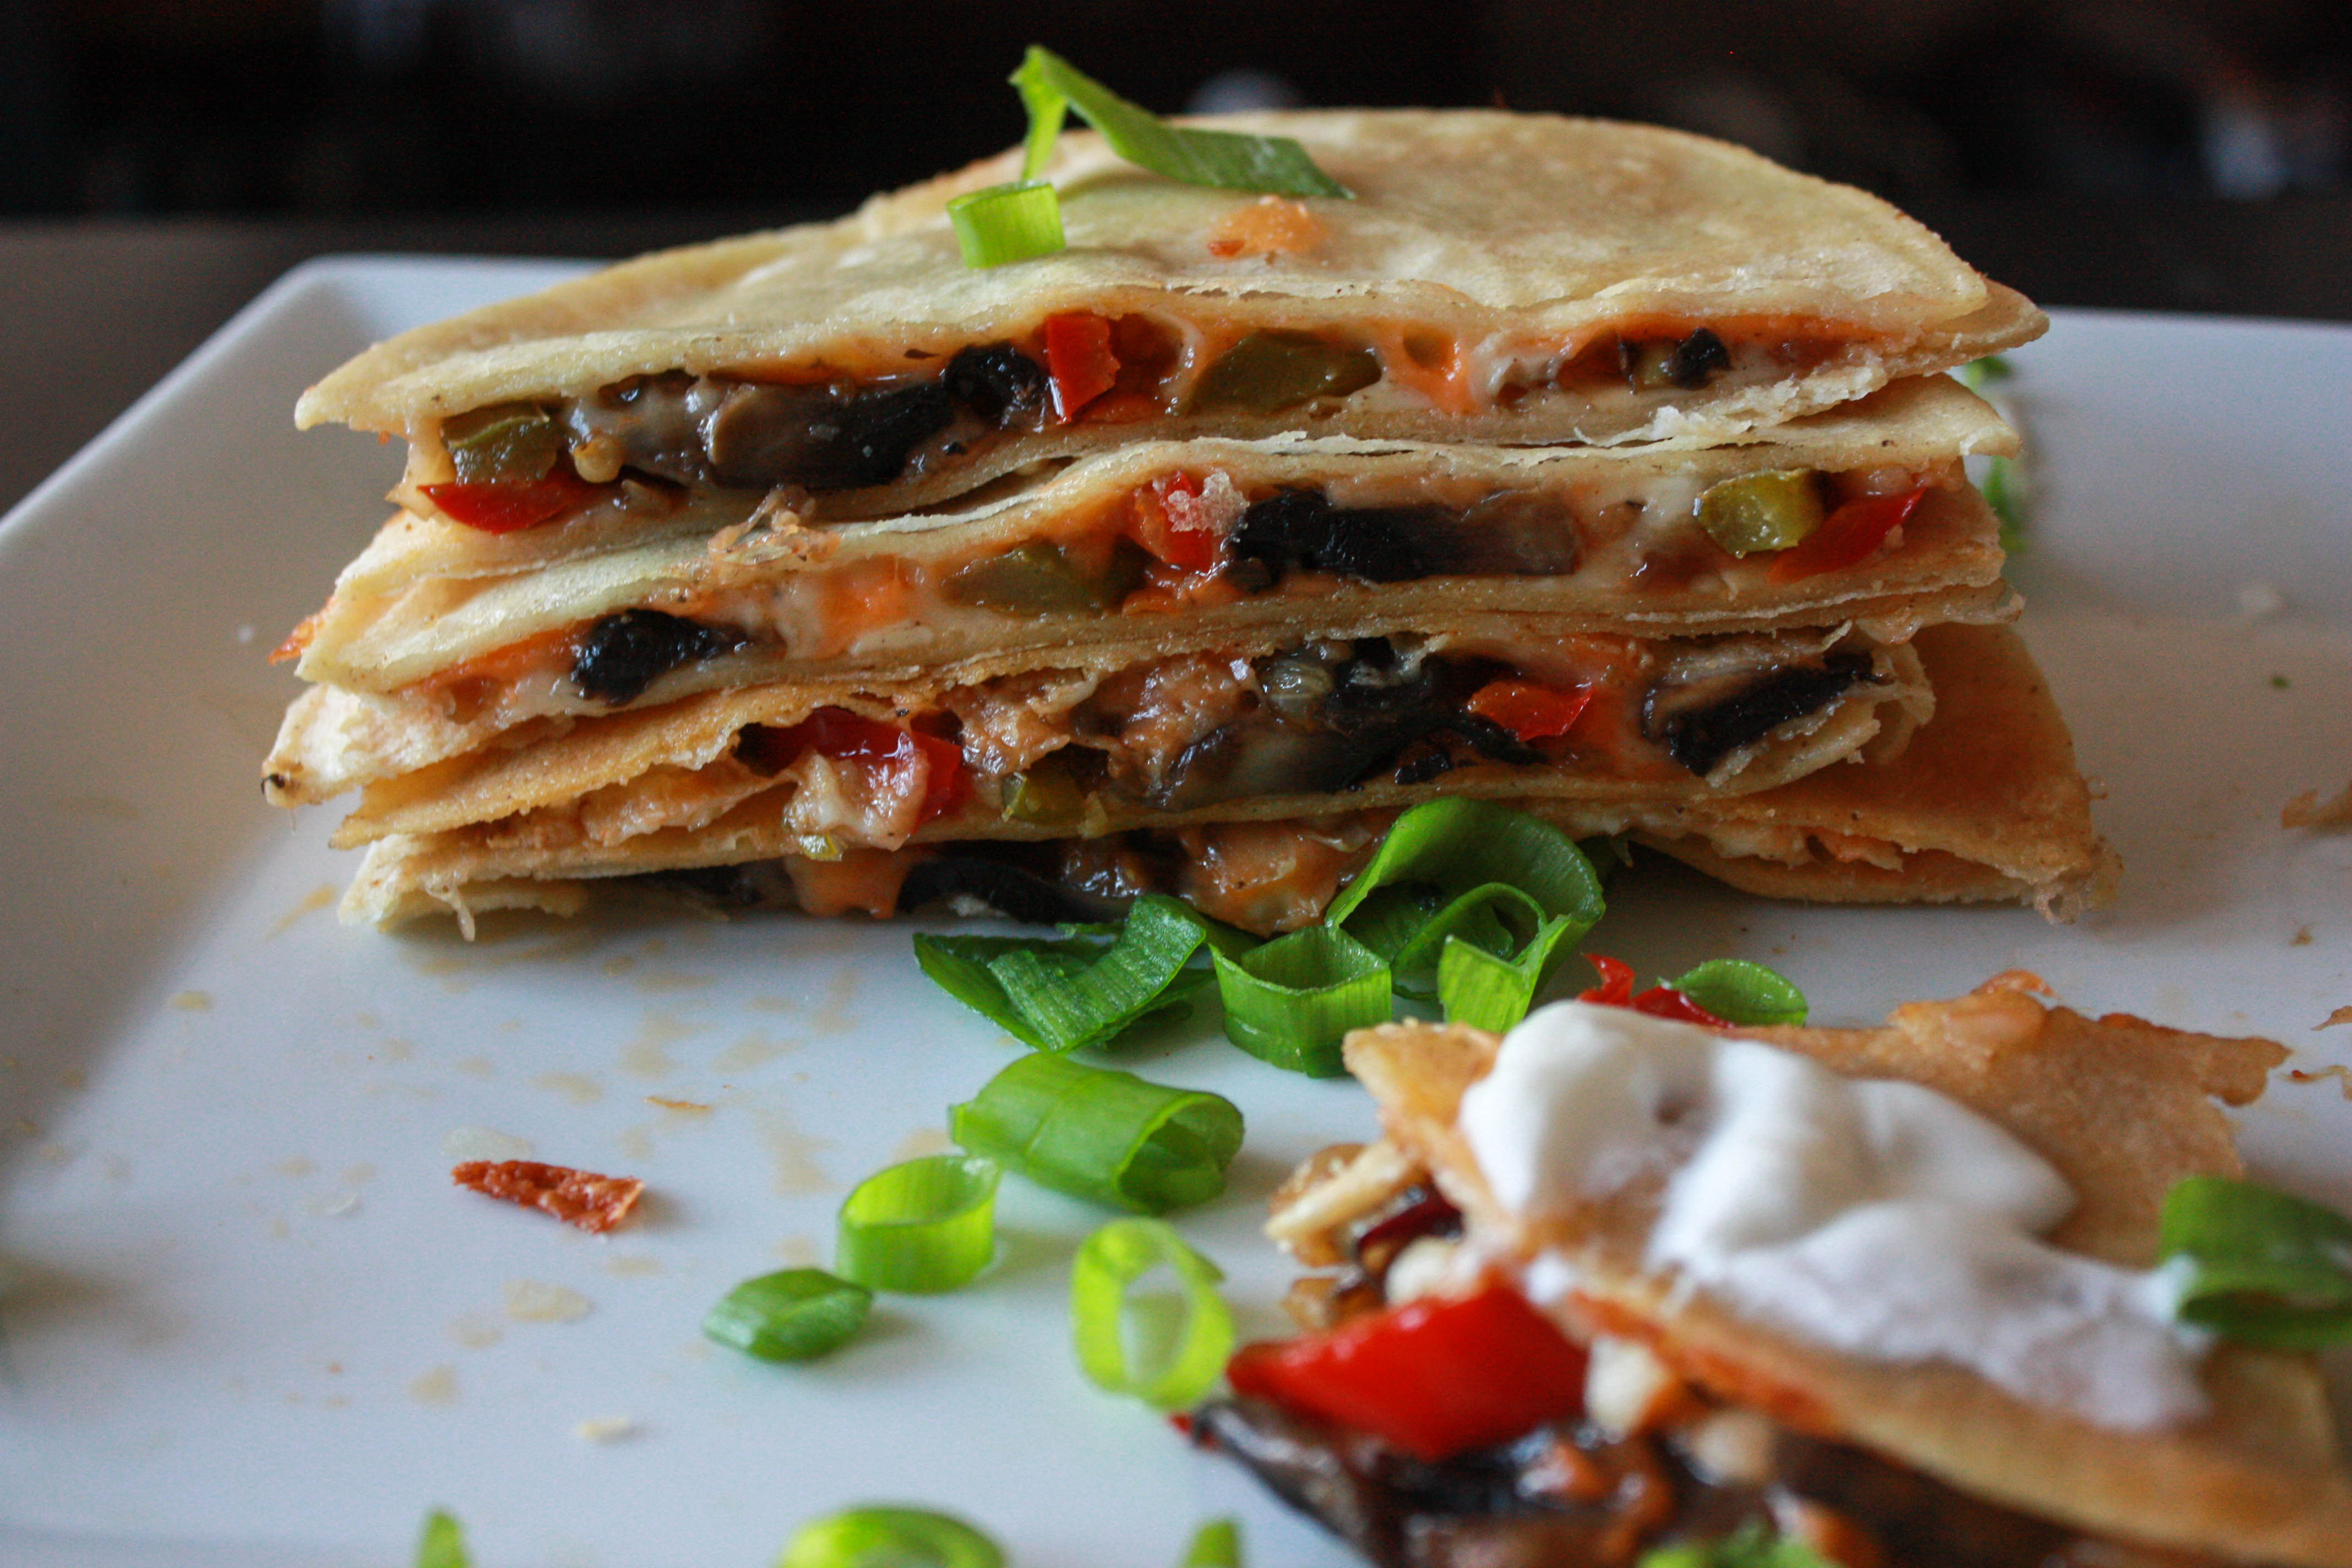
- Final step: Heat a medium skillet on the stove over medium heat. Place one quesadilla preparation into the pan. If you have bigger one like this, you can cook like this. So, cook them for few minutes, and then flip carefully with a spatula. Cook for two minutes and switch off. Let the quesadillas cool on a cutting board for a few minutes, and then slice each quesadilla into four slices using a pizza cutter or a very sharp knife. Garnish with sour cream, spring onions and coriander.
2. For mini quesadillas, you have to use corn tortillas or use wheat tortillas and cut many pieces.
3. You can use wheat flour tortillas or corn tortillas.
4. You need to put cheese on the bottom and top of the onion-pepper-mushroom preparation for it to stick between tortillas.
5. Be careful when you flip the tortillas. It may slip easily.


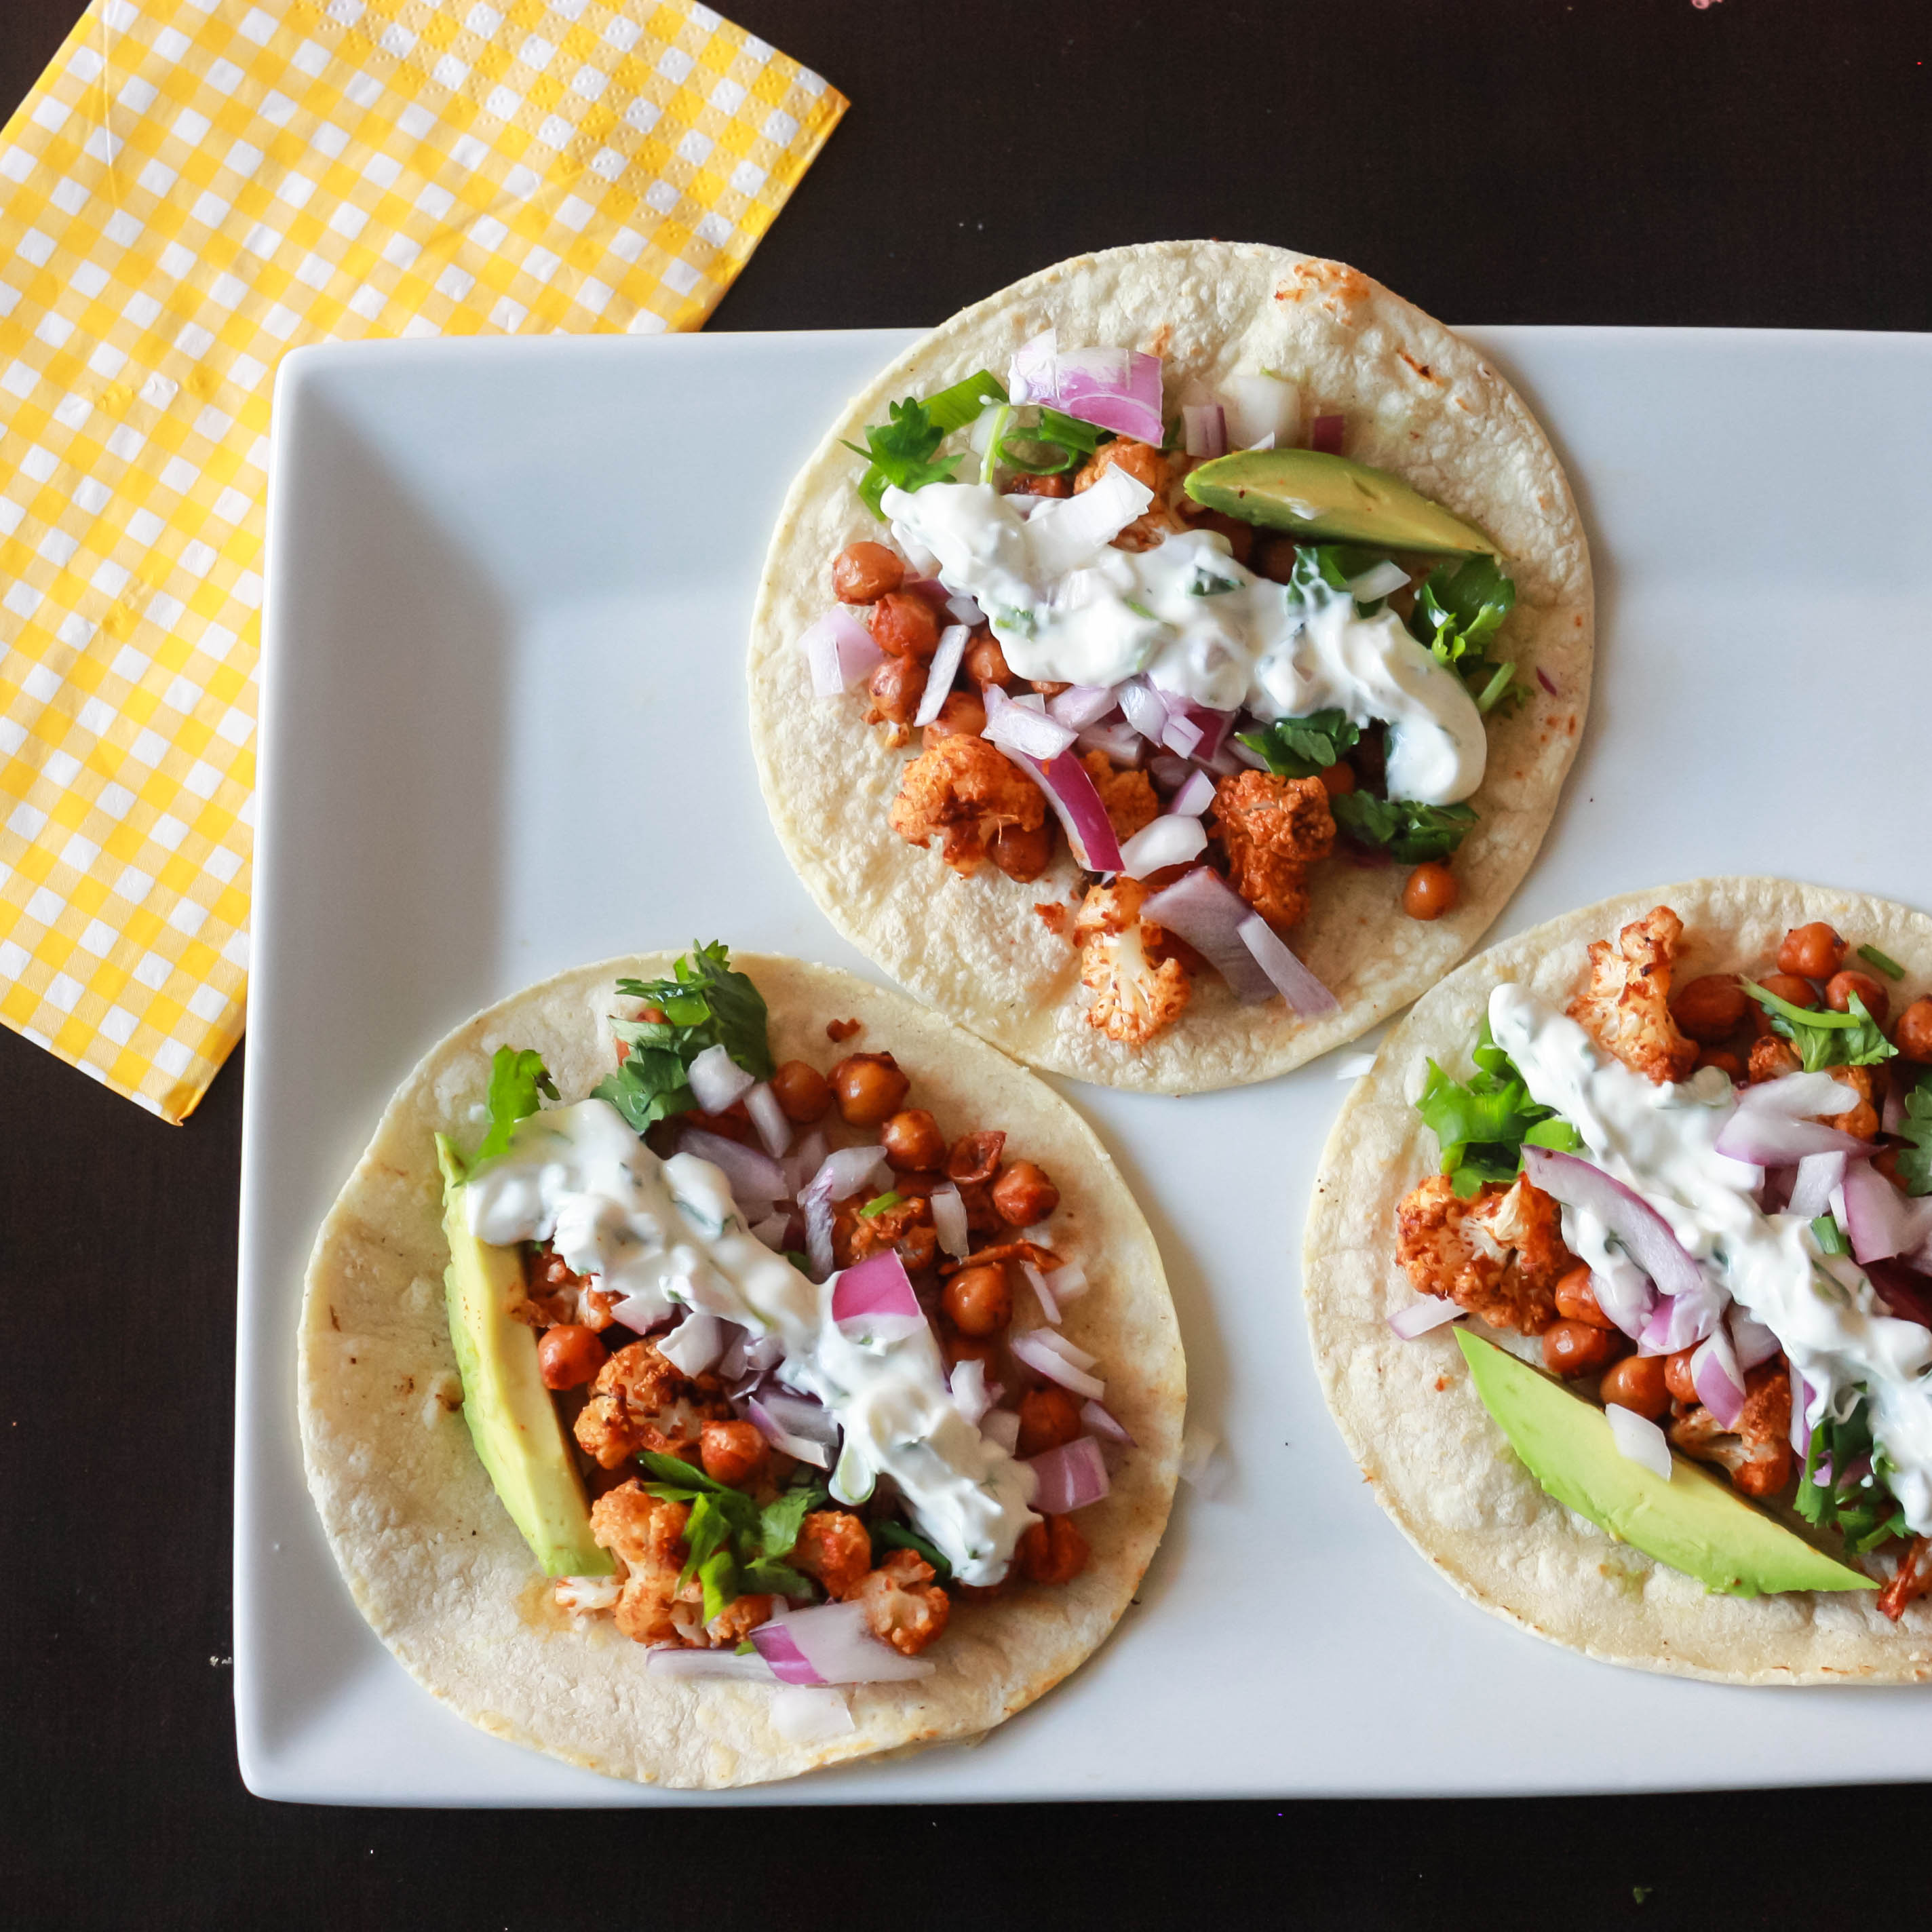
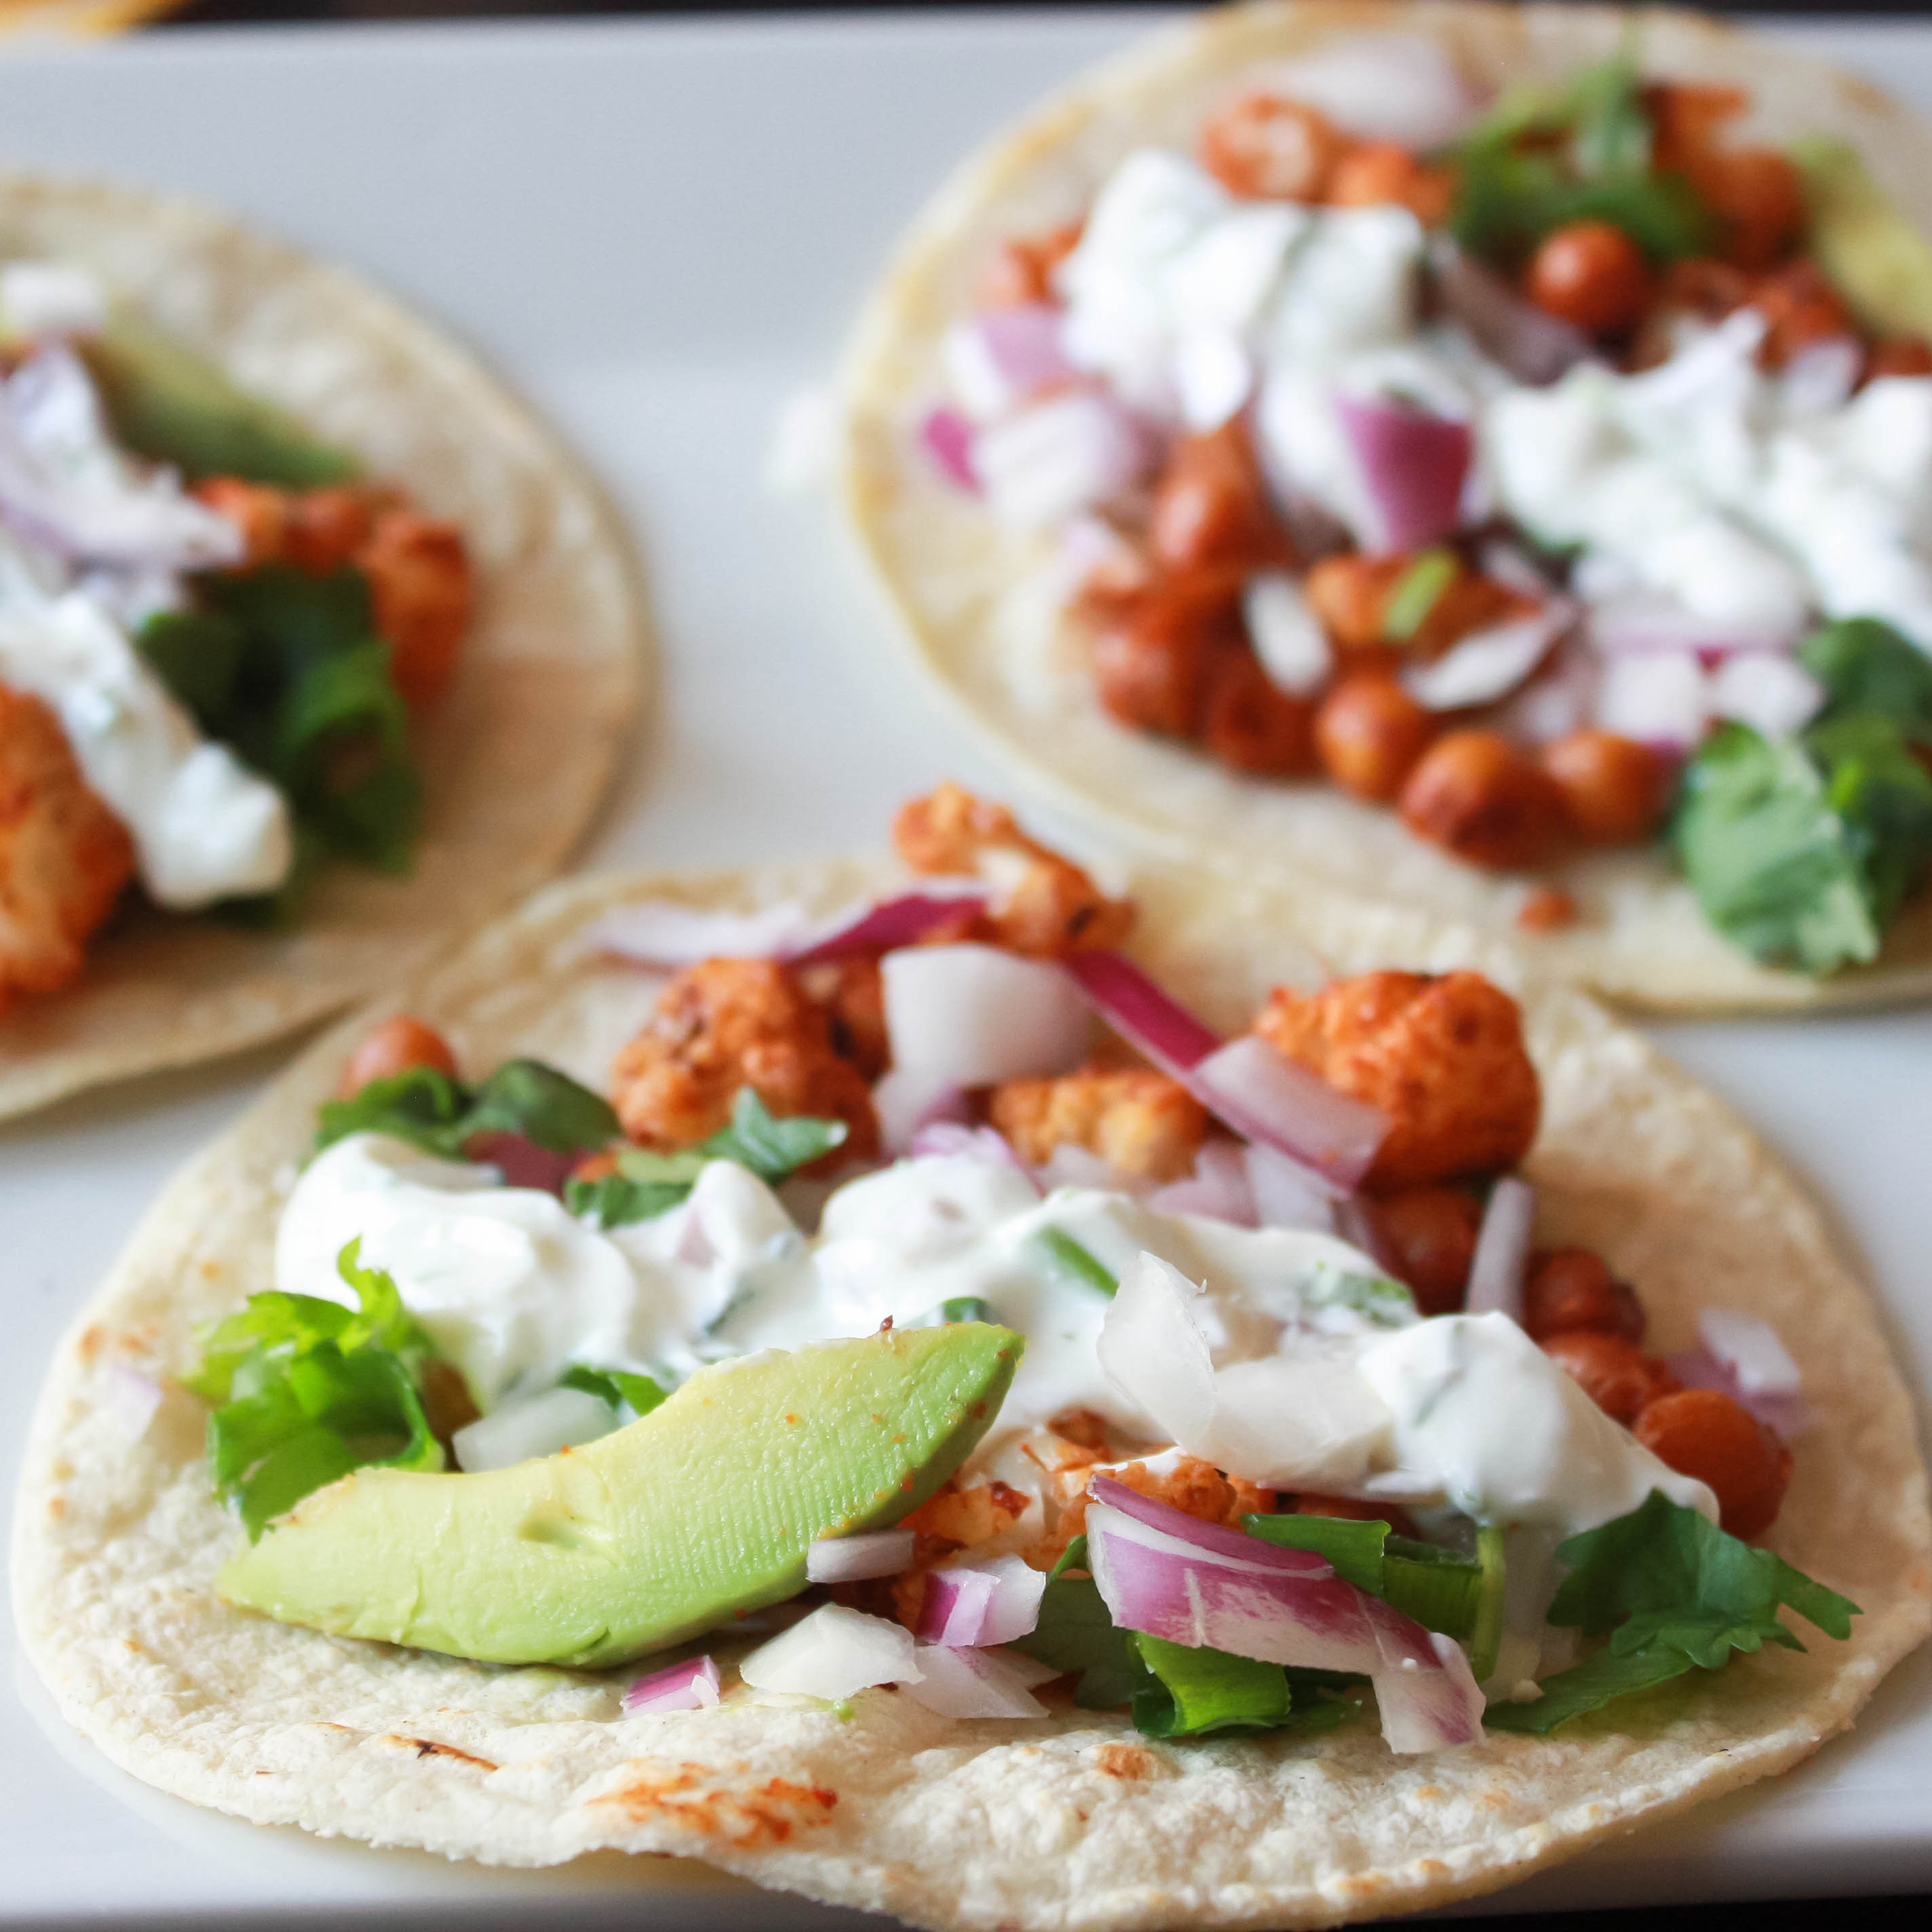
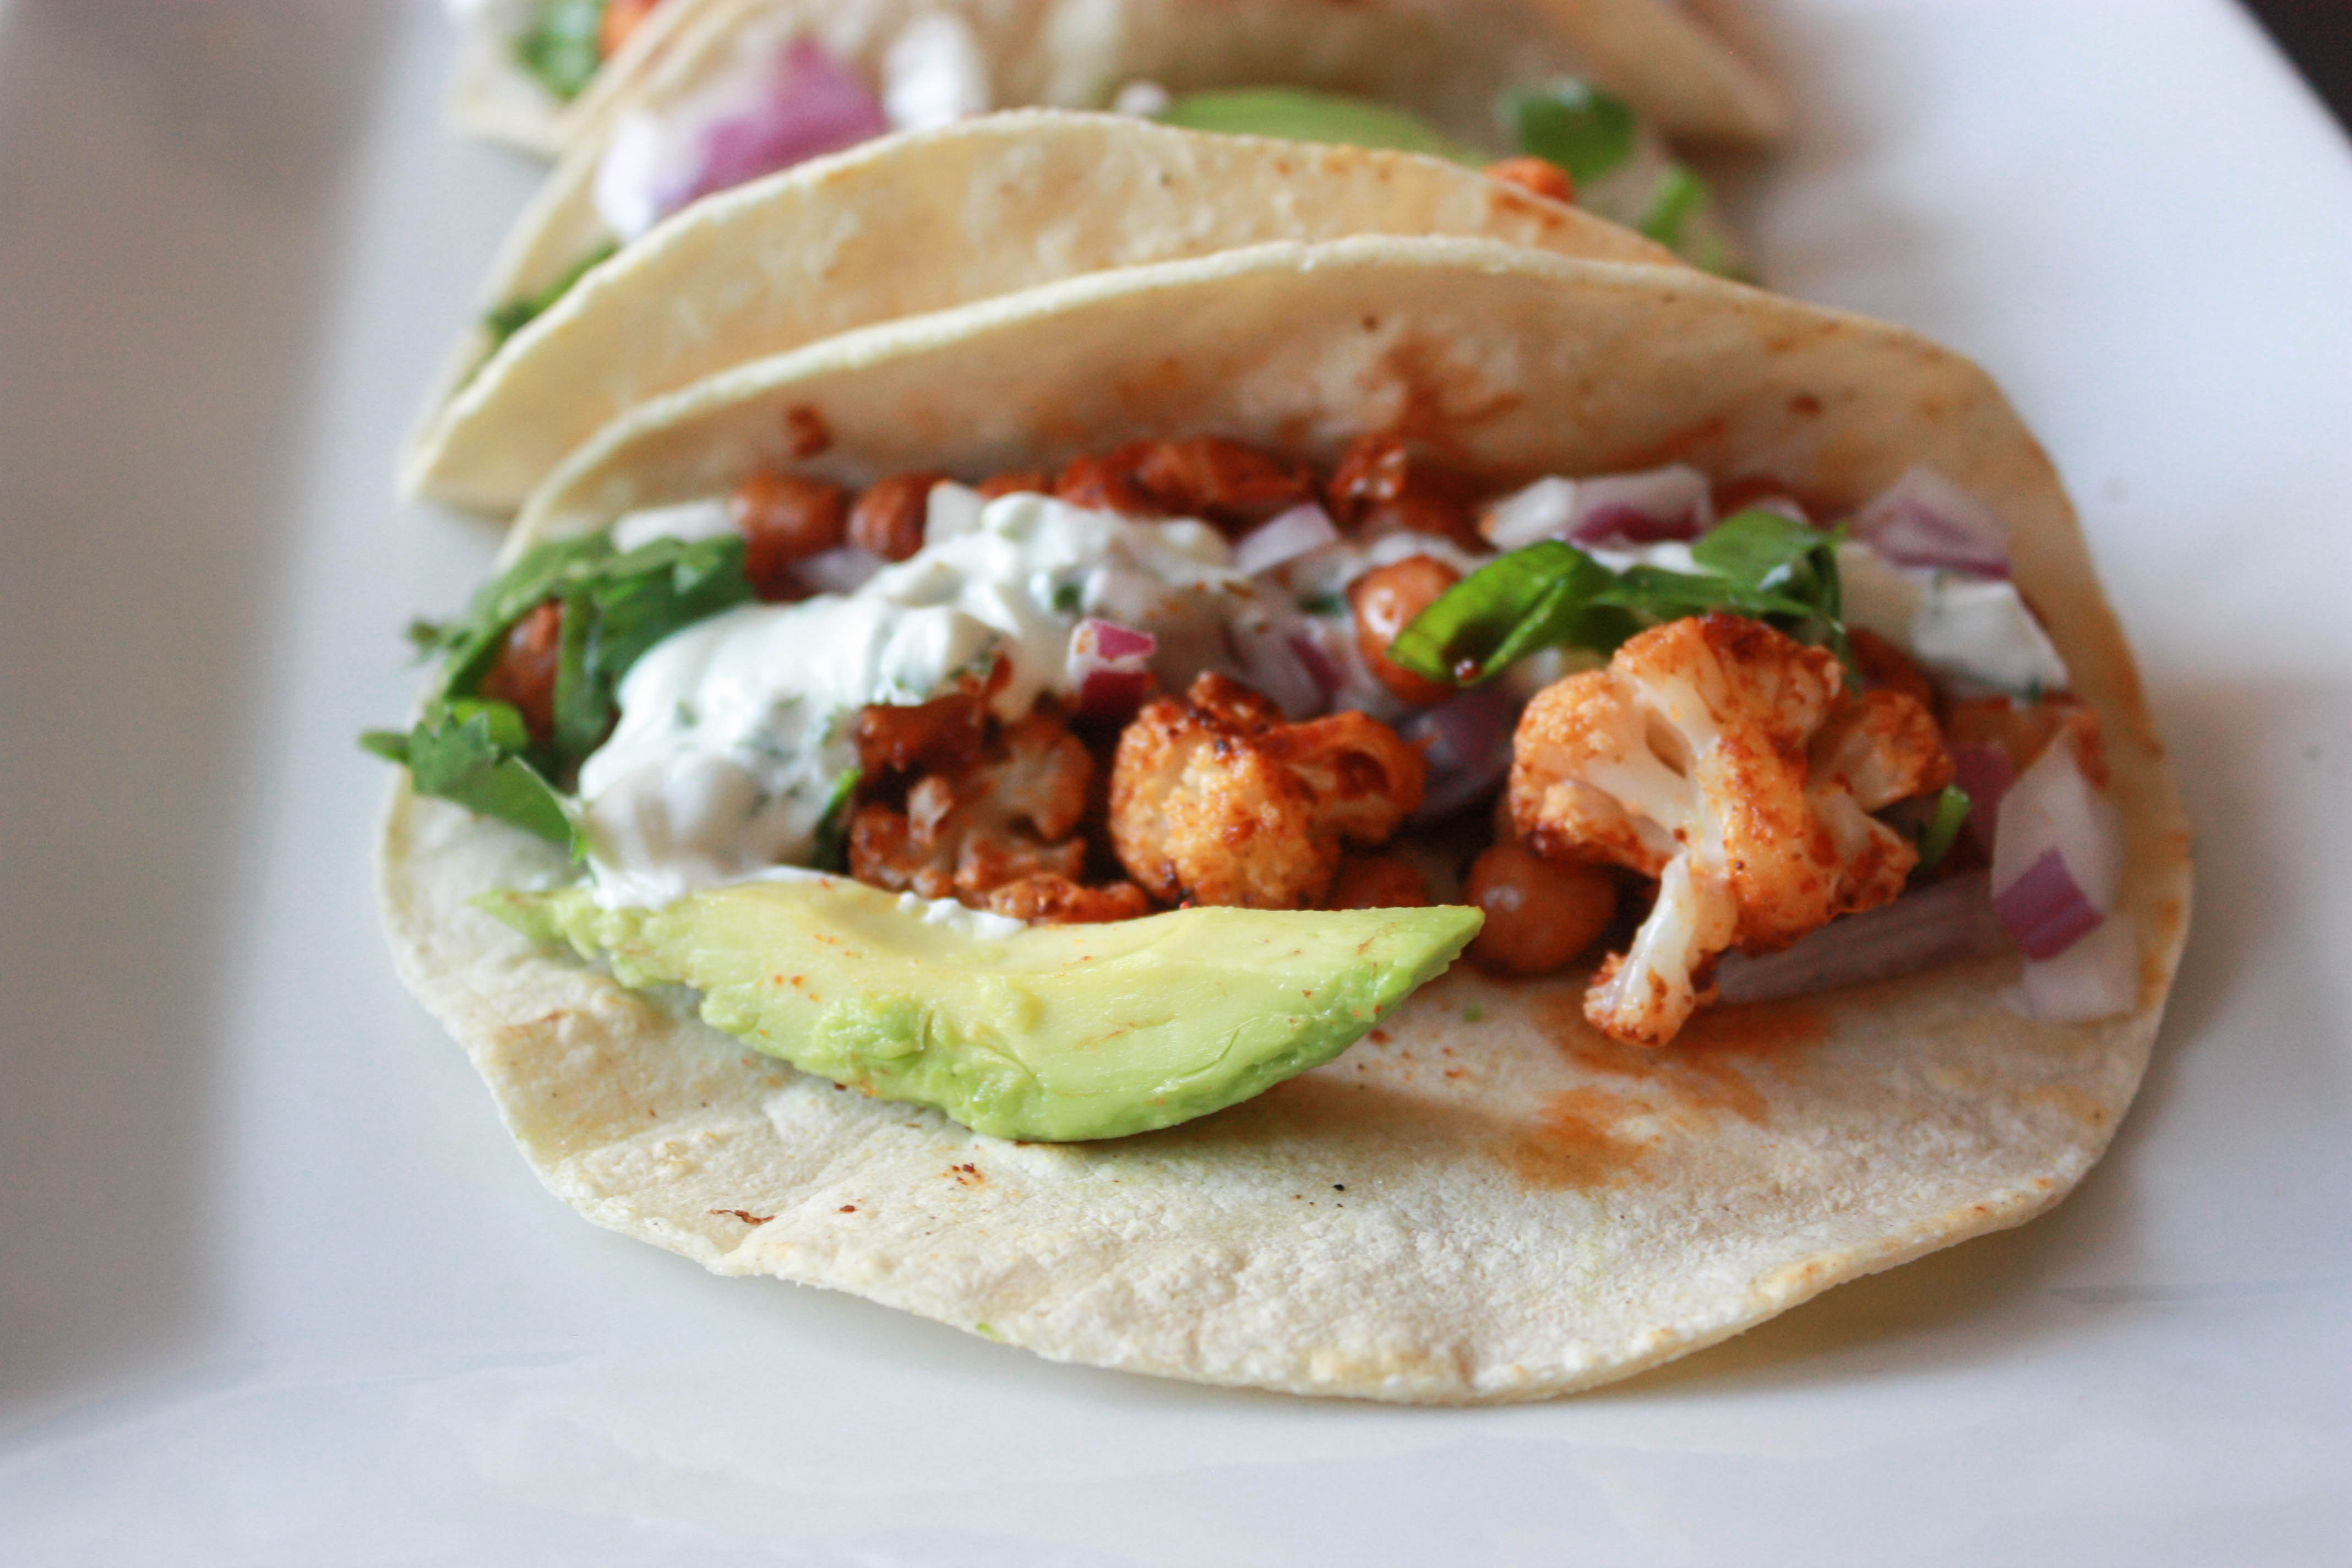
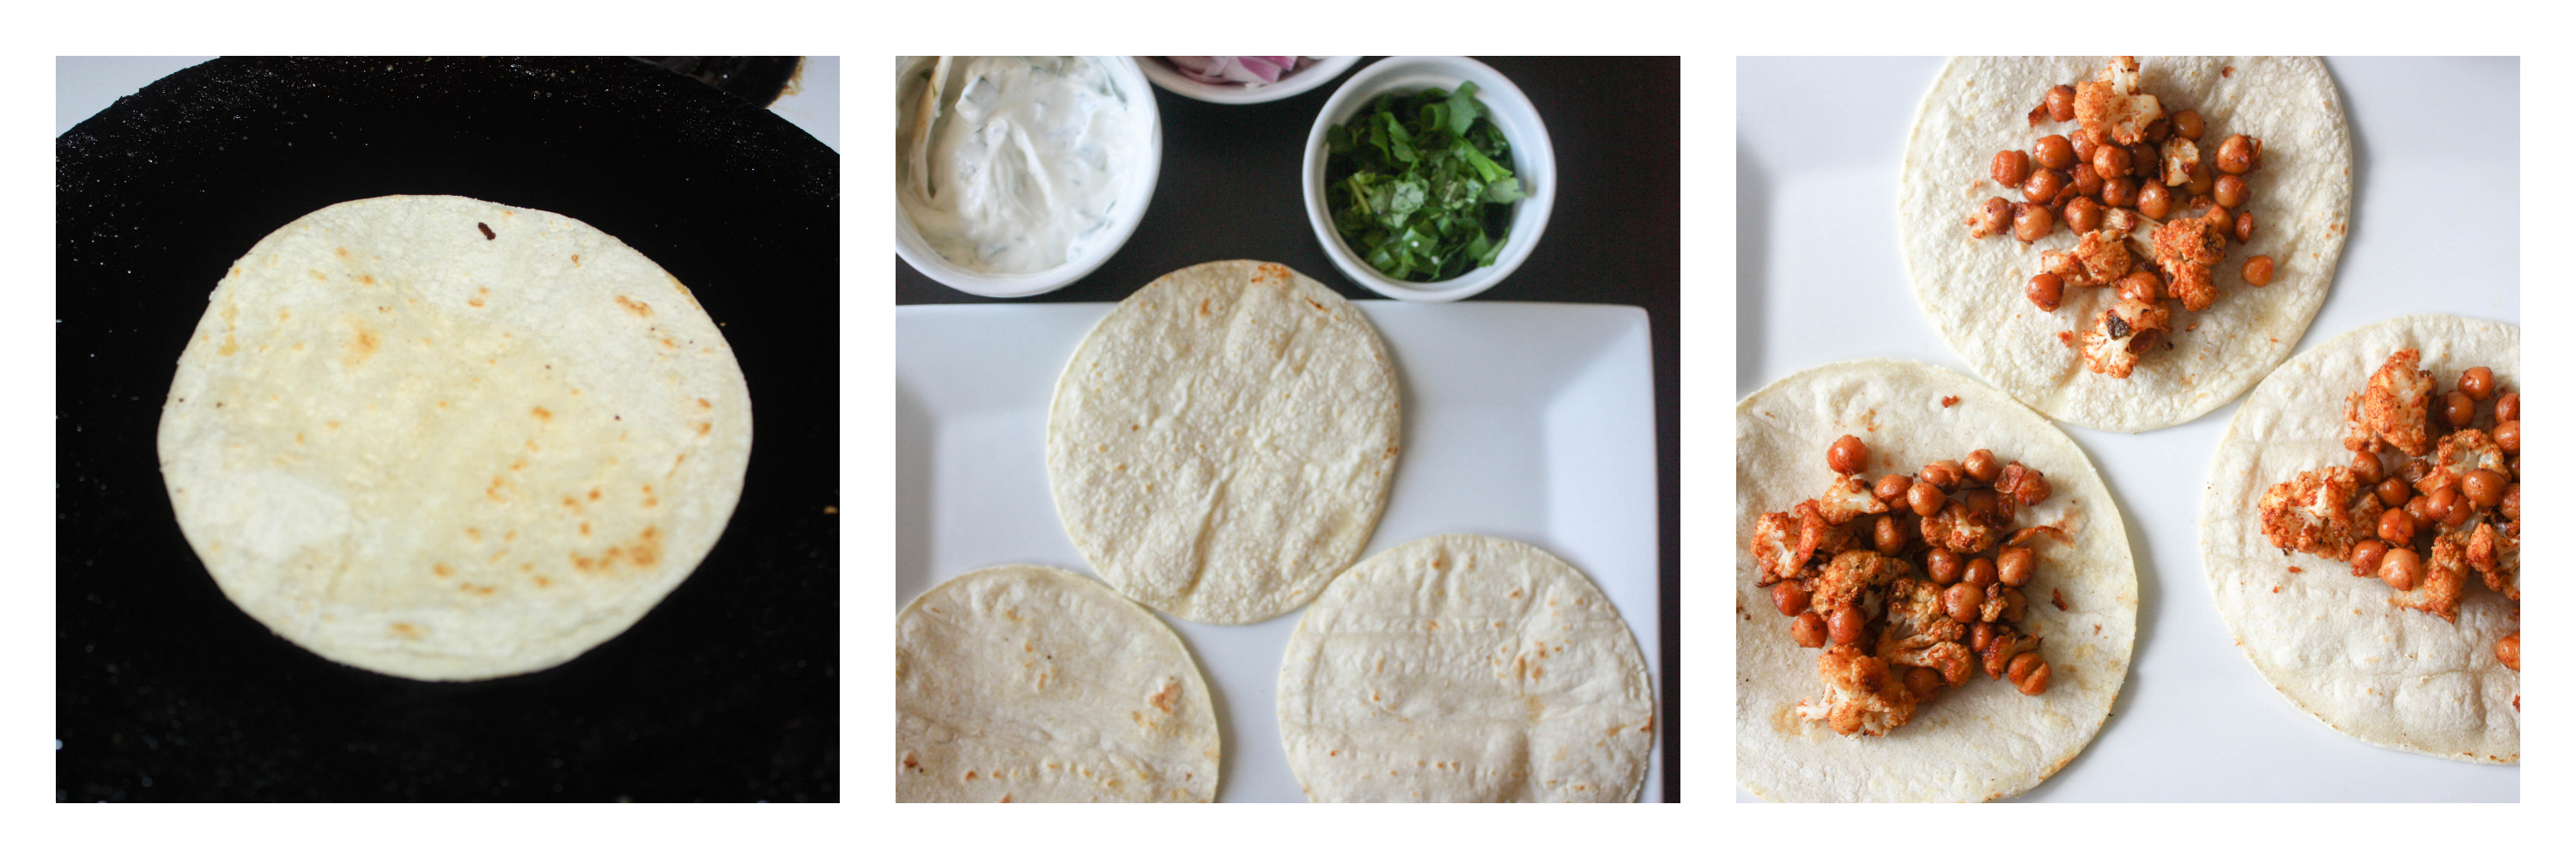
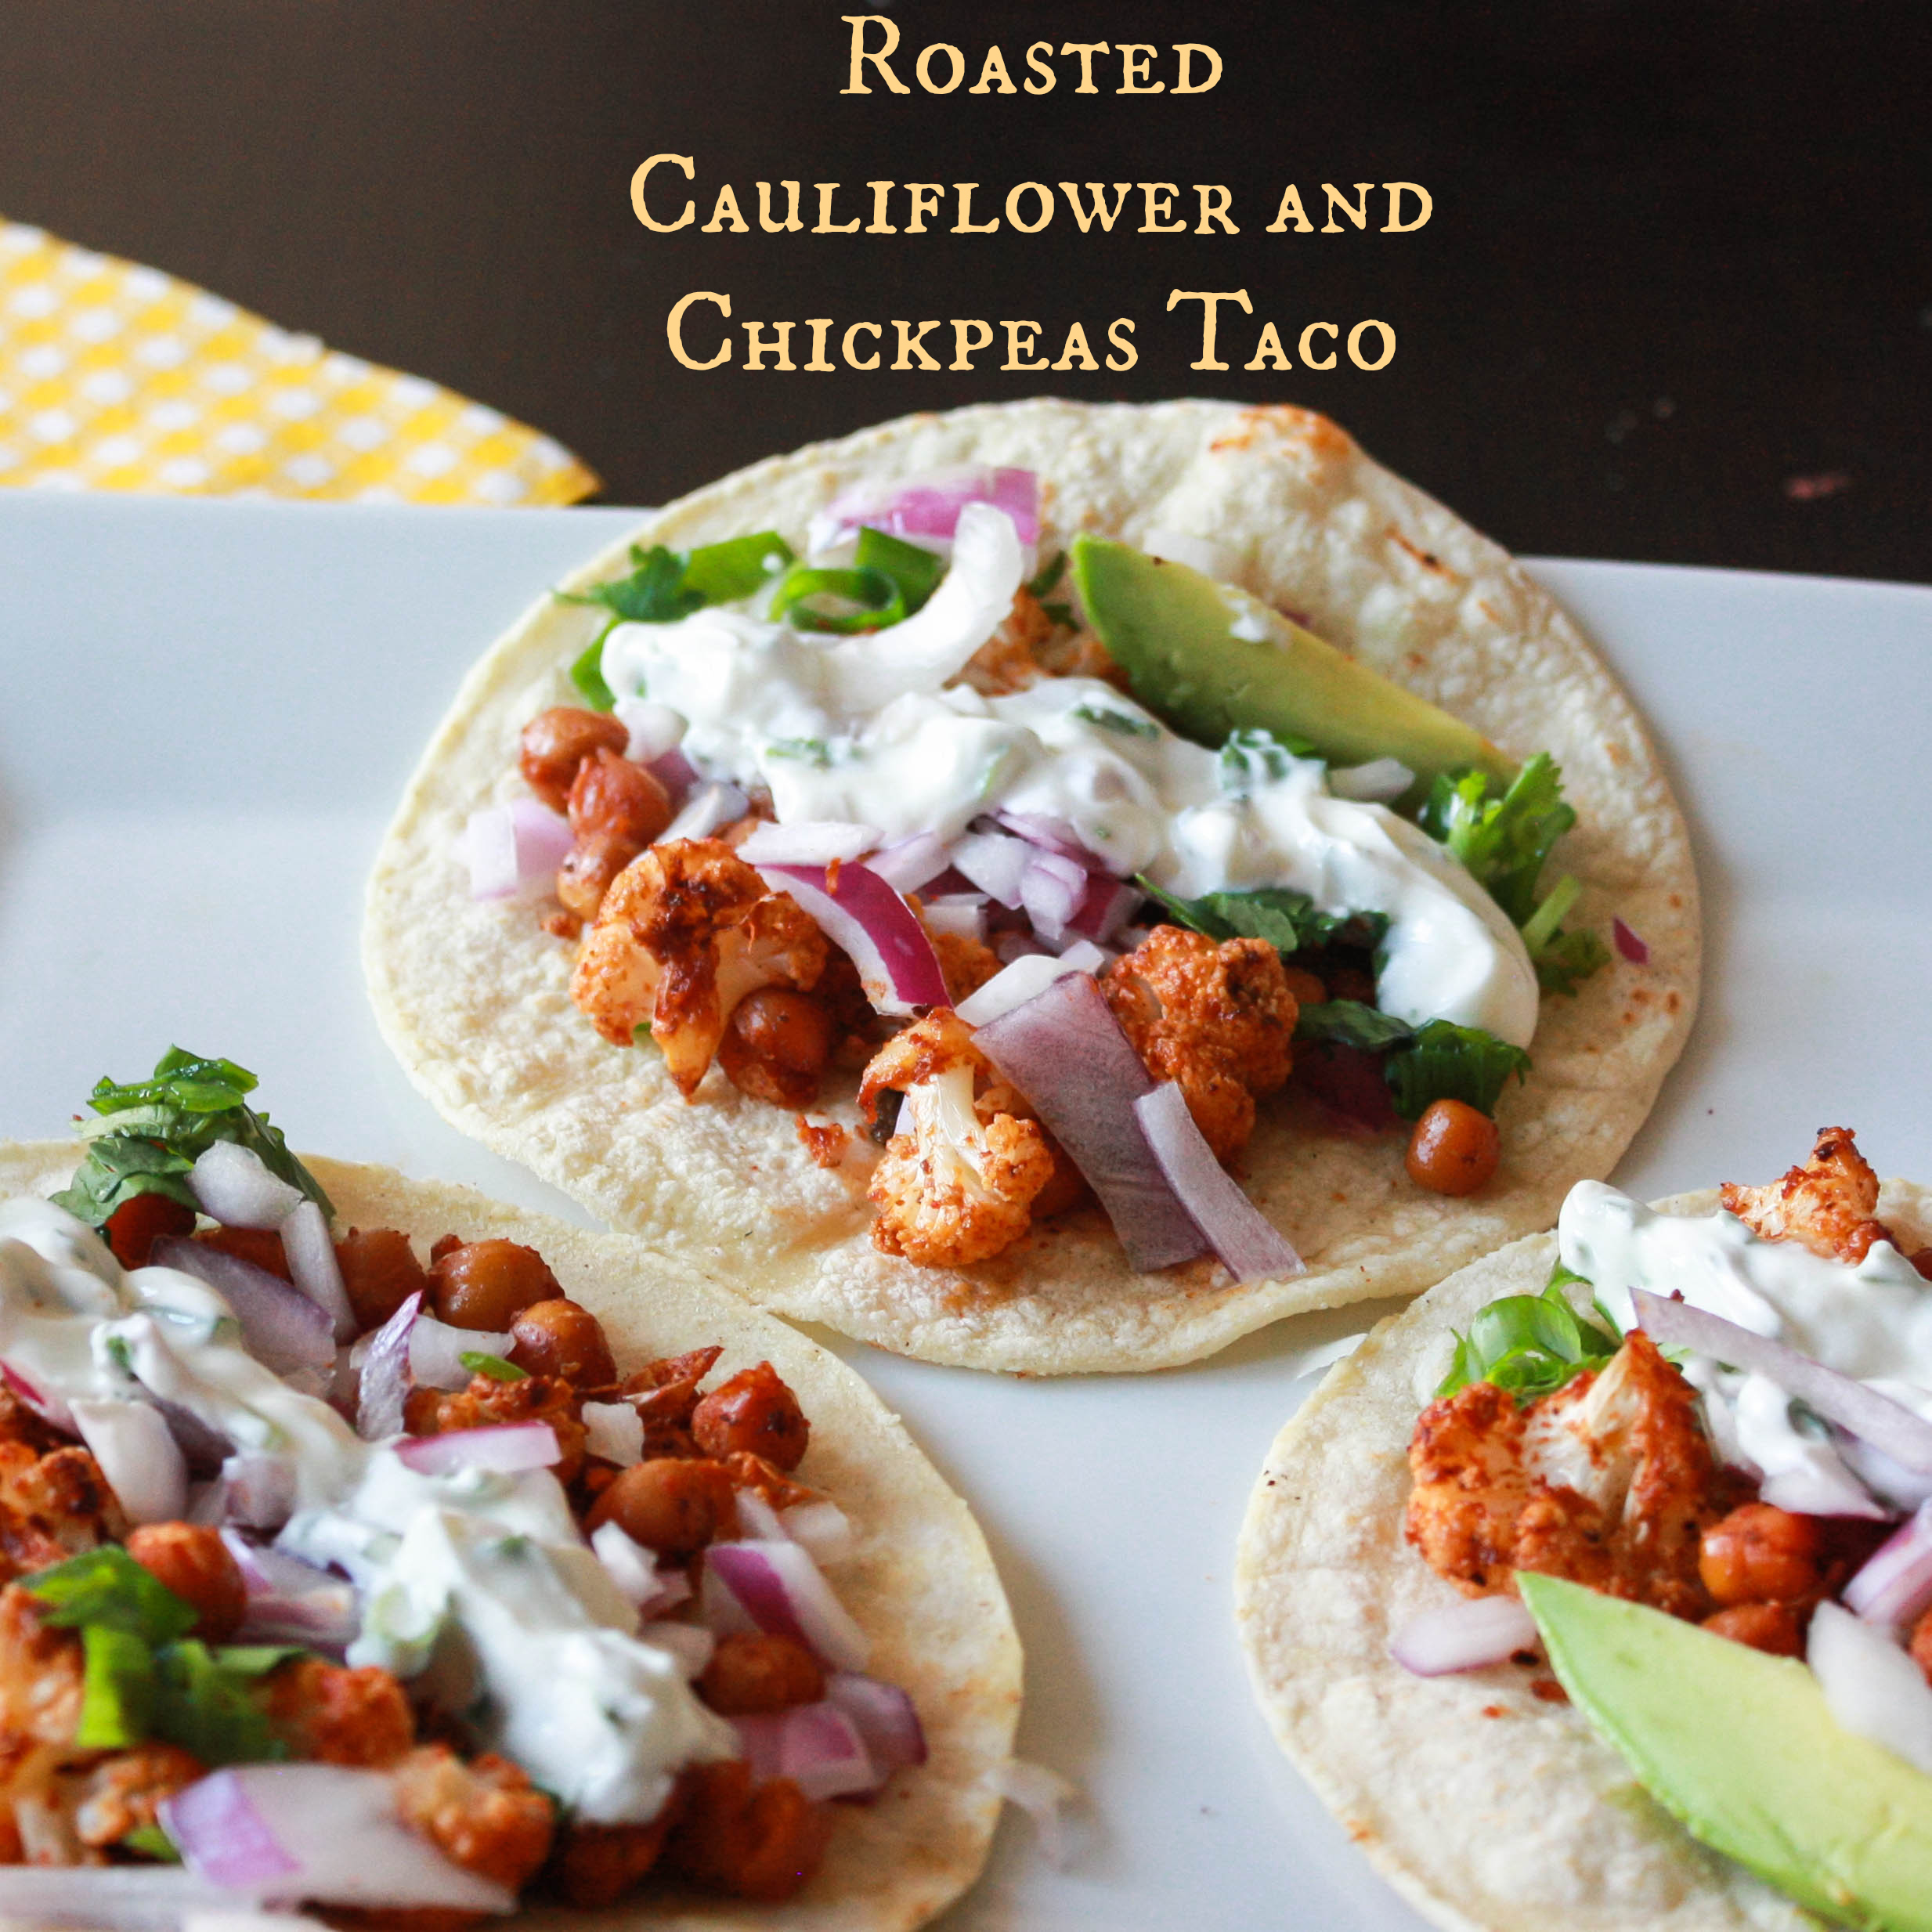
 I used store bought corn tortillas. Will make my corn tortilla sometime 🙂 and post the recipe soon 🙂 To make the cilantro lime crema vegan, you can use vegan sour cream or yogurt.
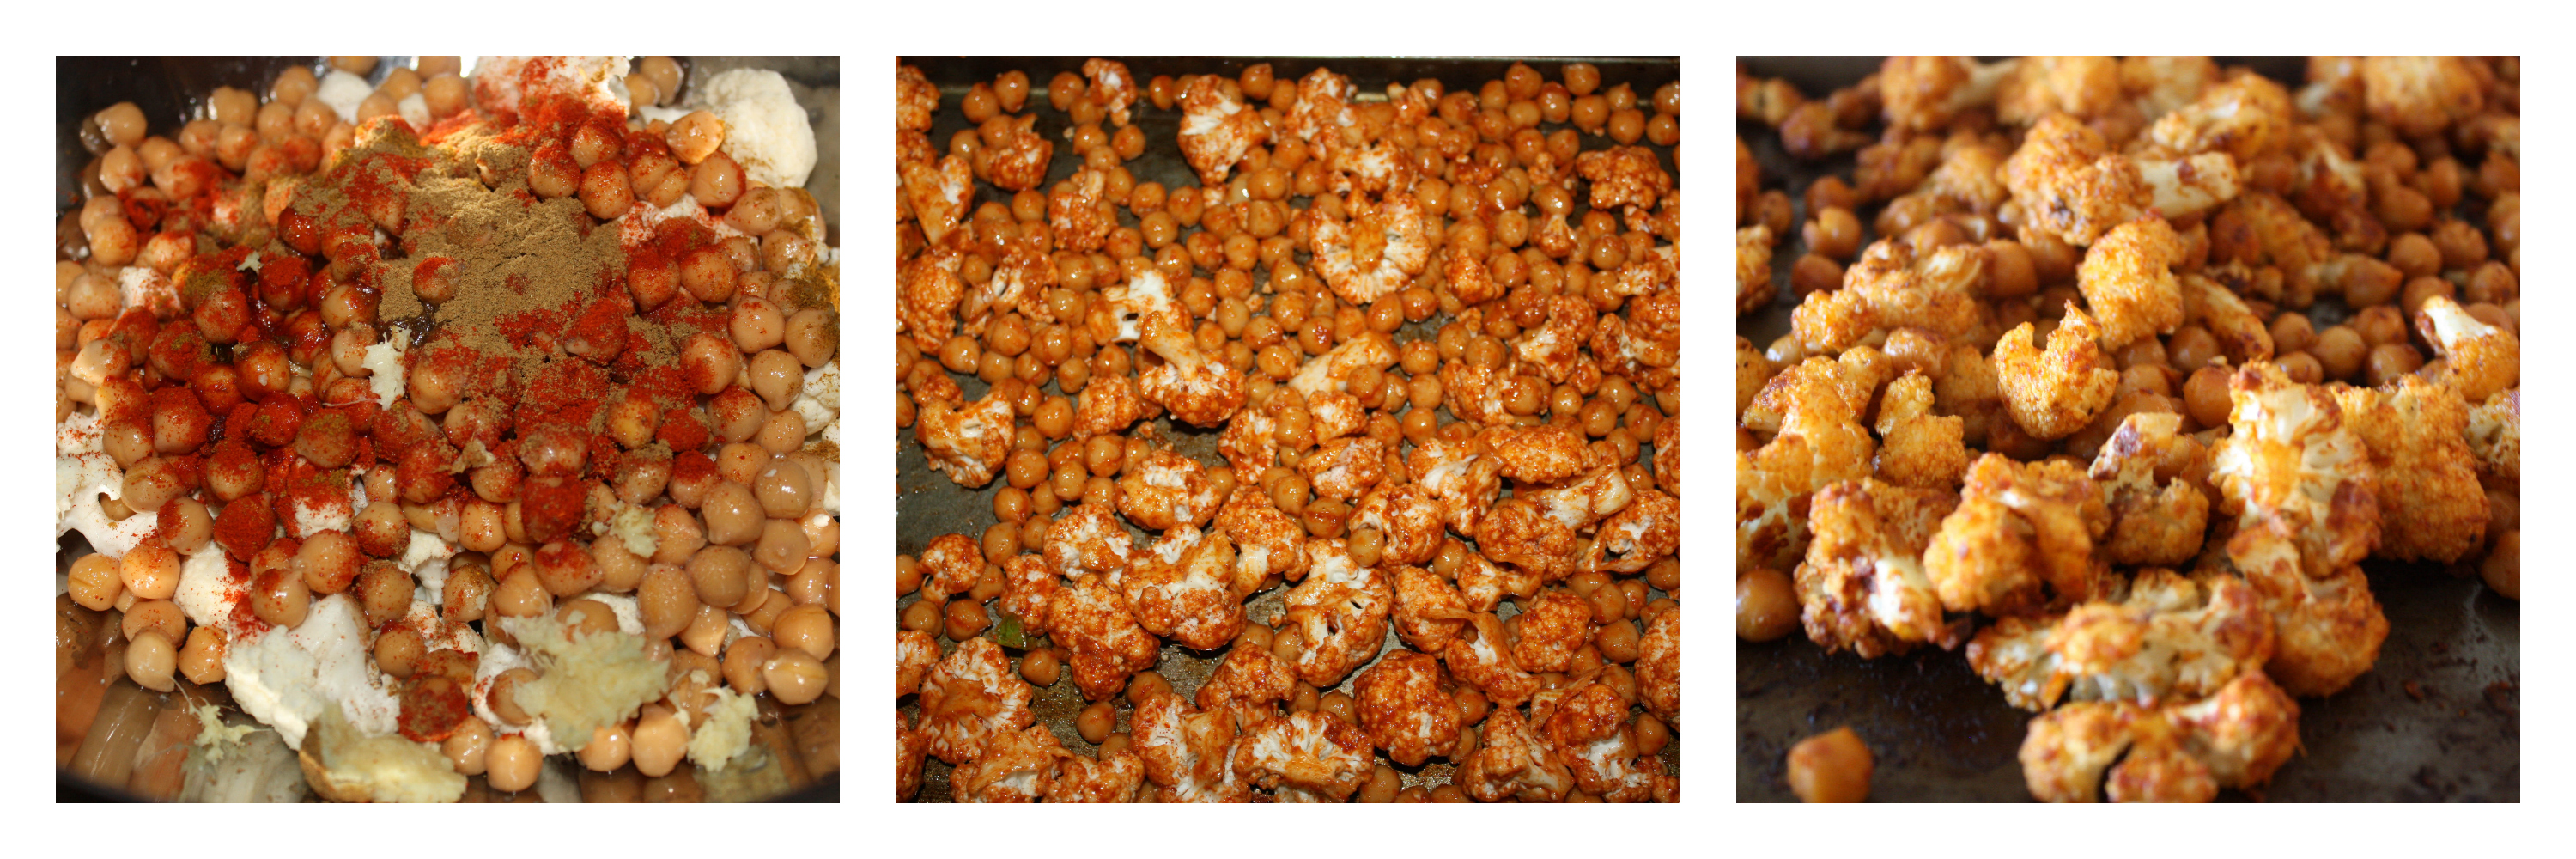


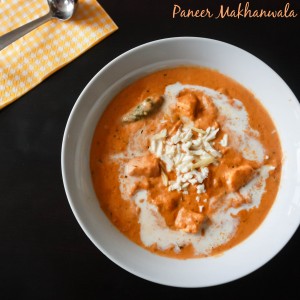
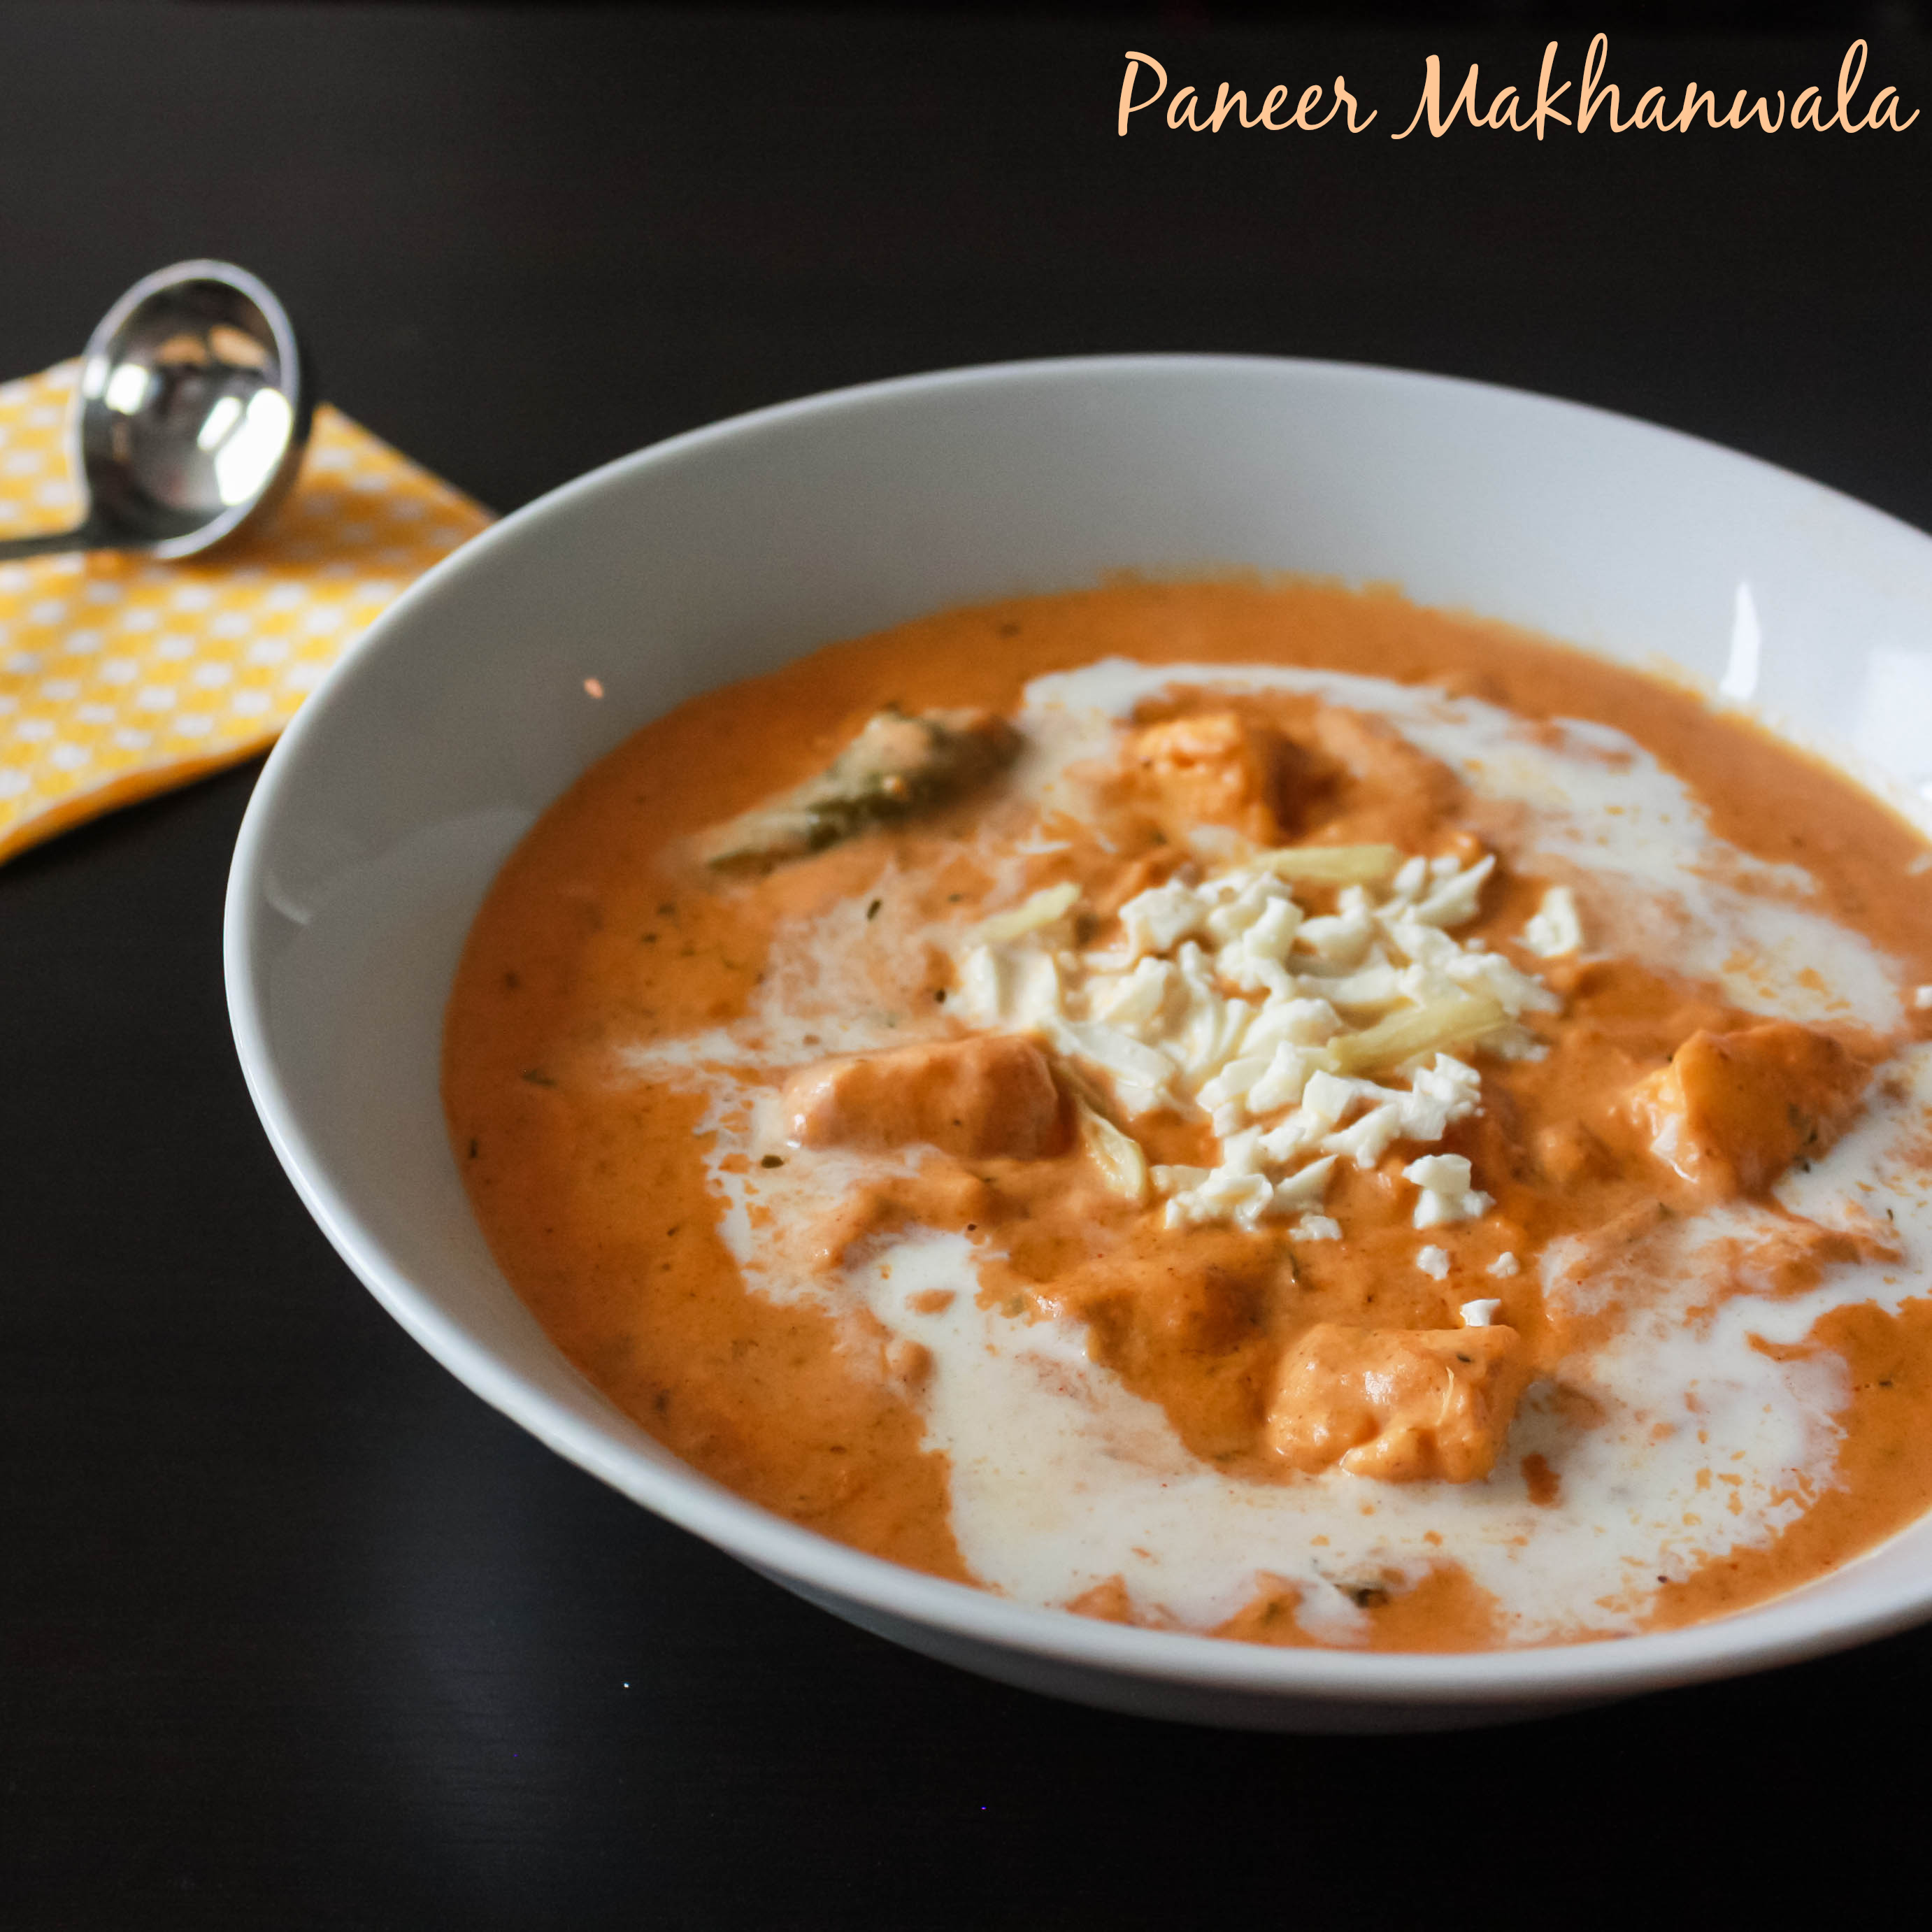
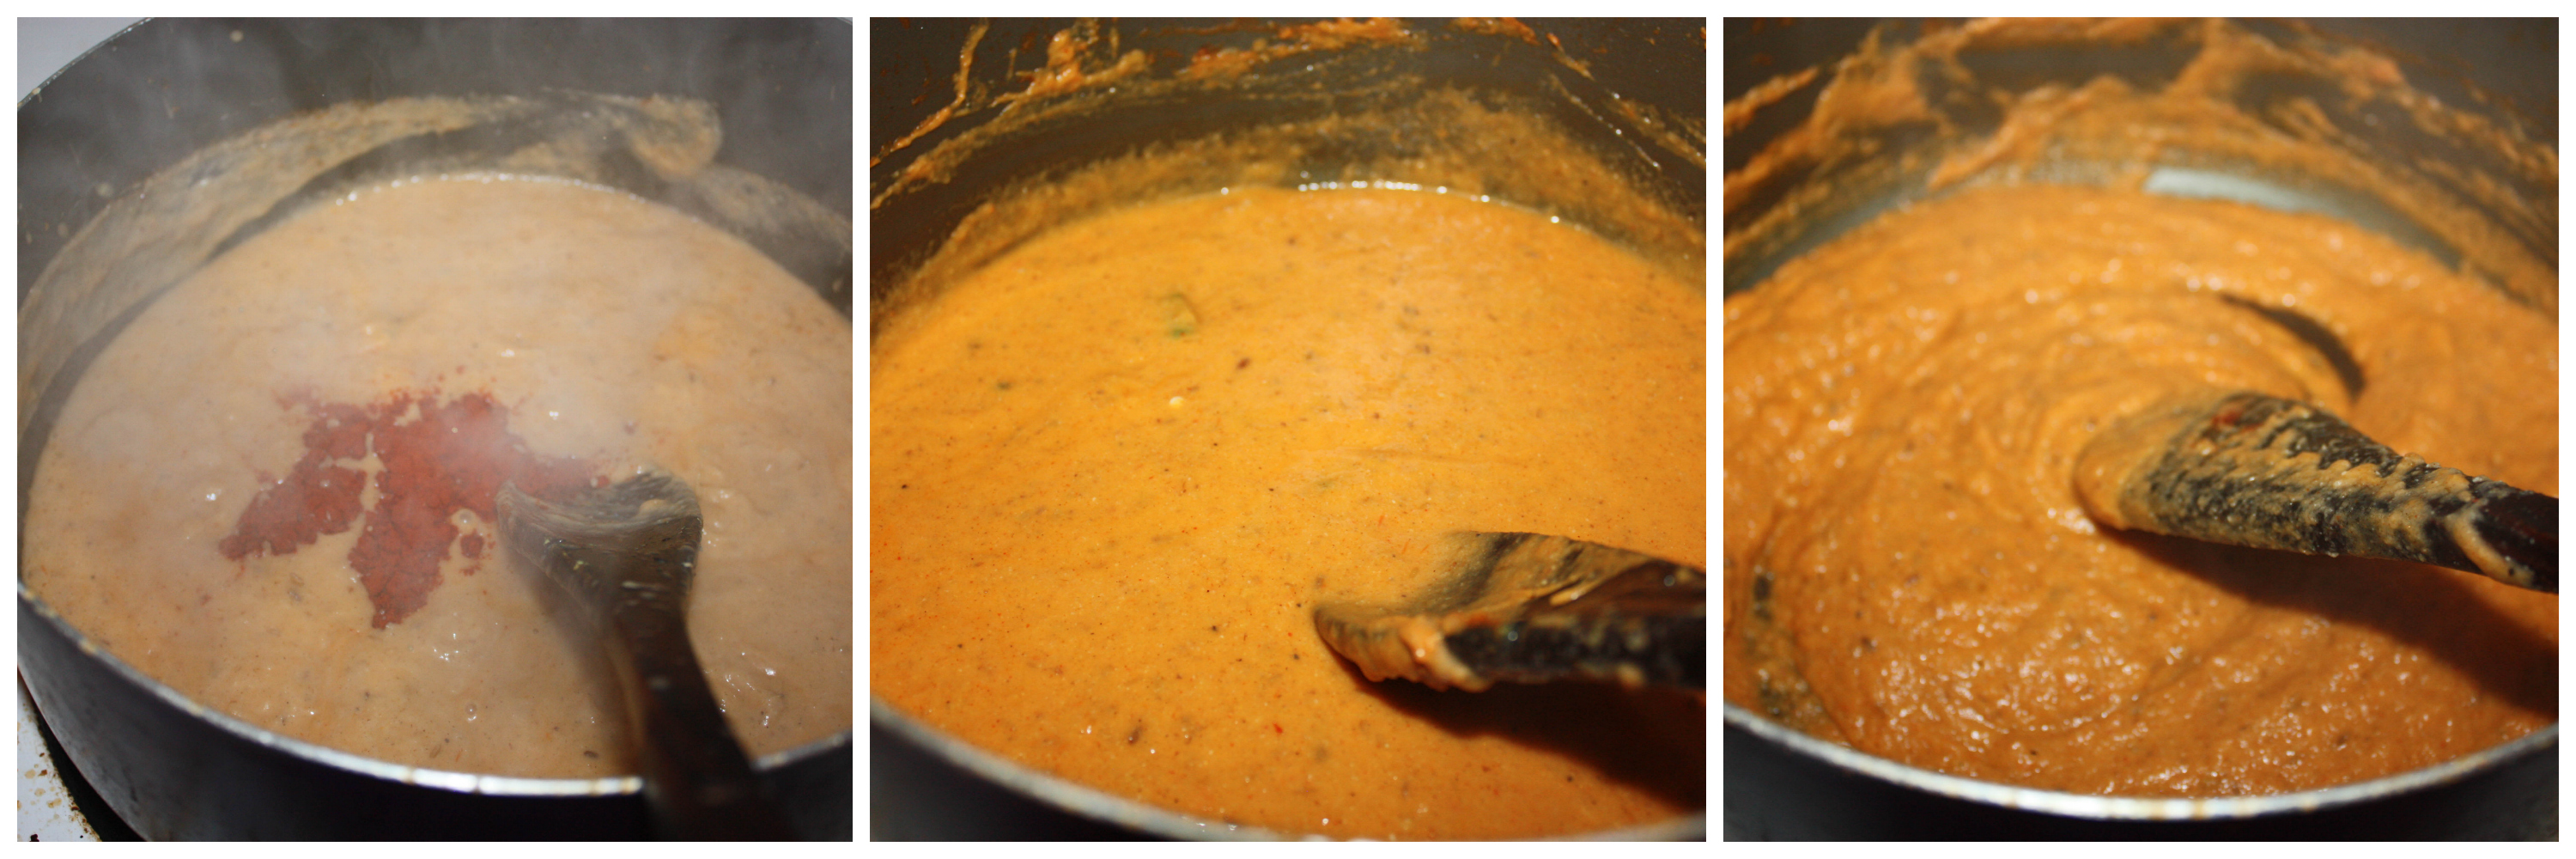
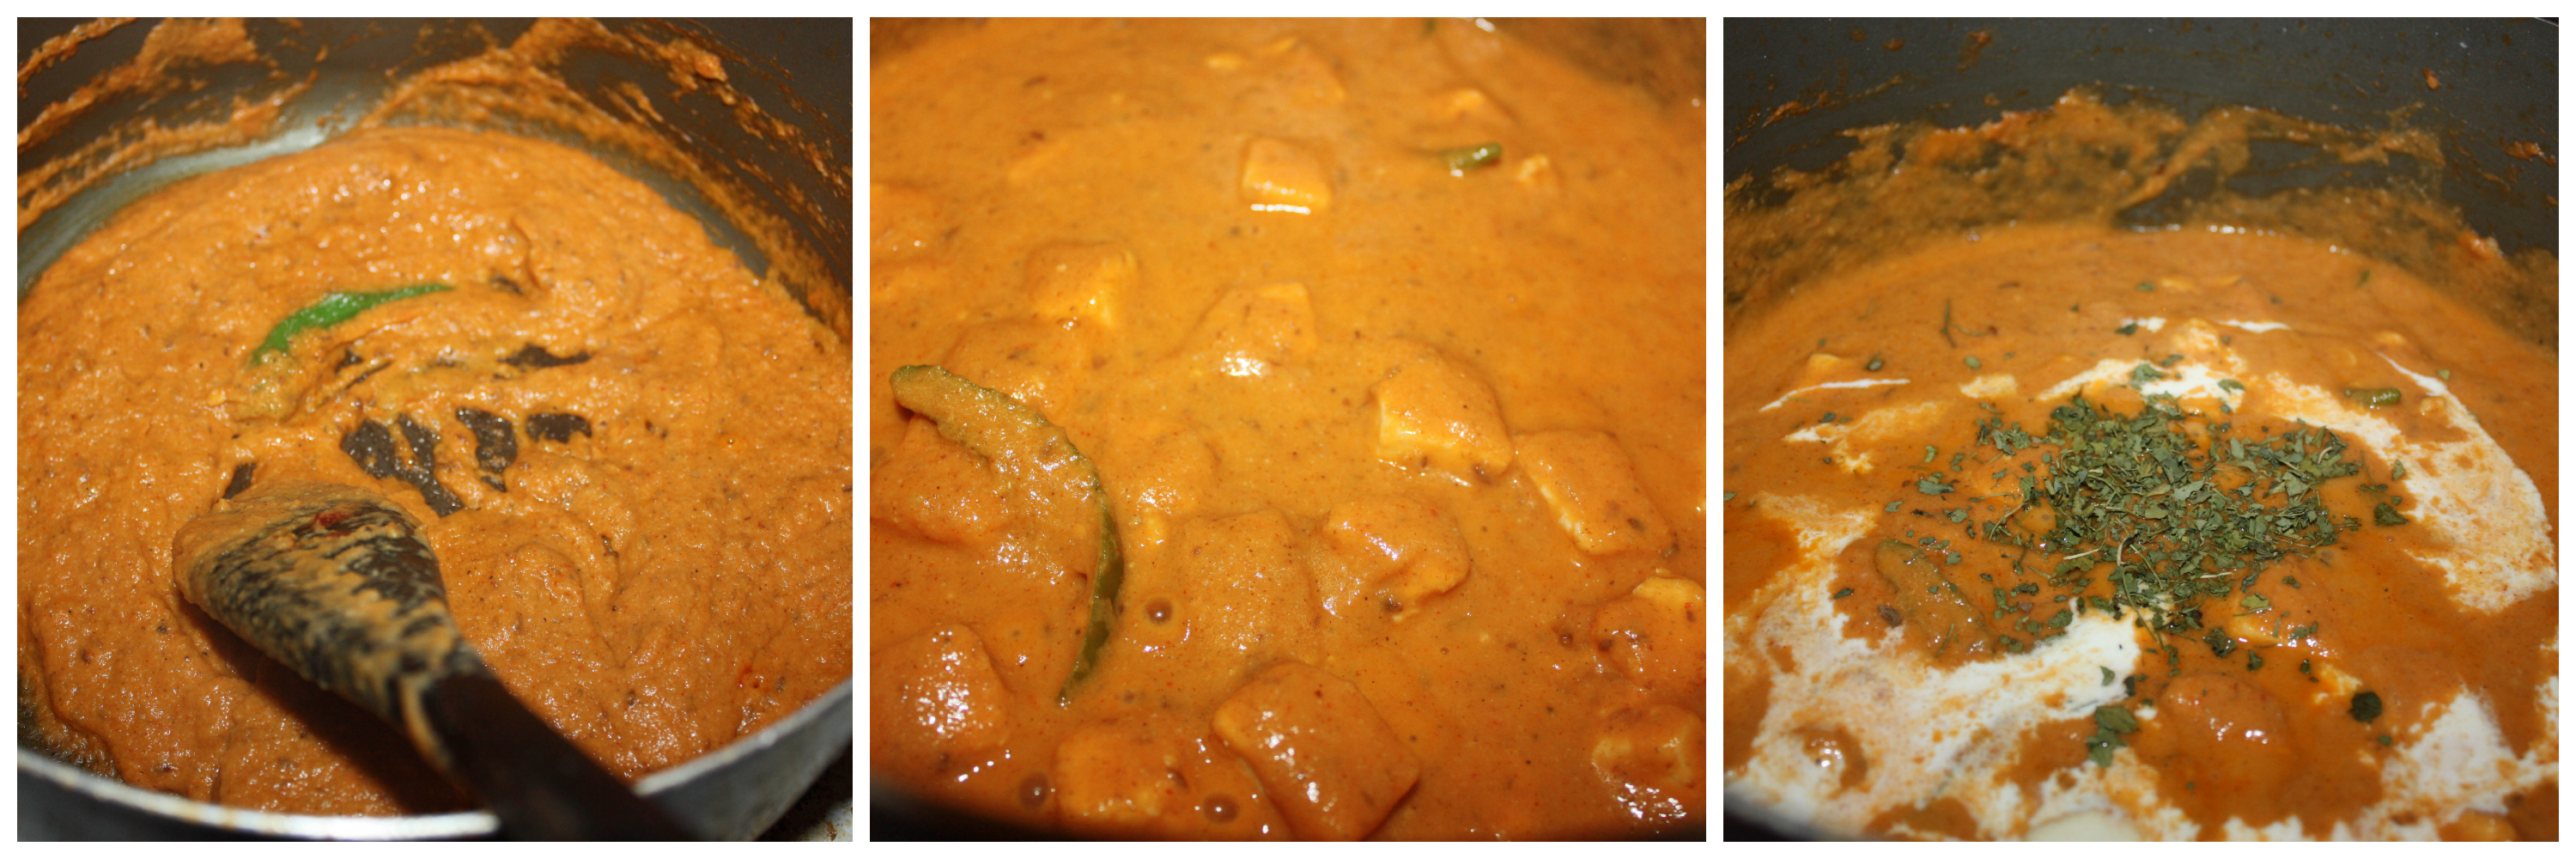
 . Happy ME ! 😀 When there is guest over and I wanted to do vegetarian dishes, I will make it a point to do atleast one paneer dish ;). It goes well with any kind of pulav, jeera rice, naan,roti or any kind of bread you fancy.


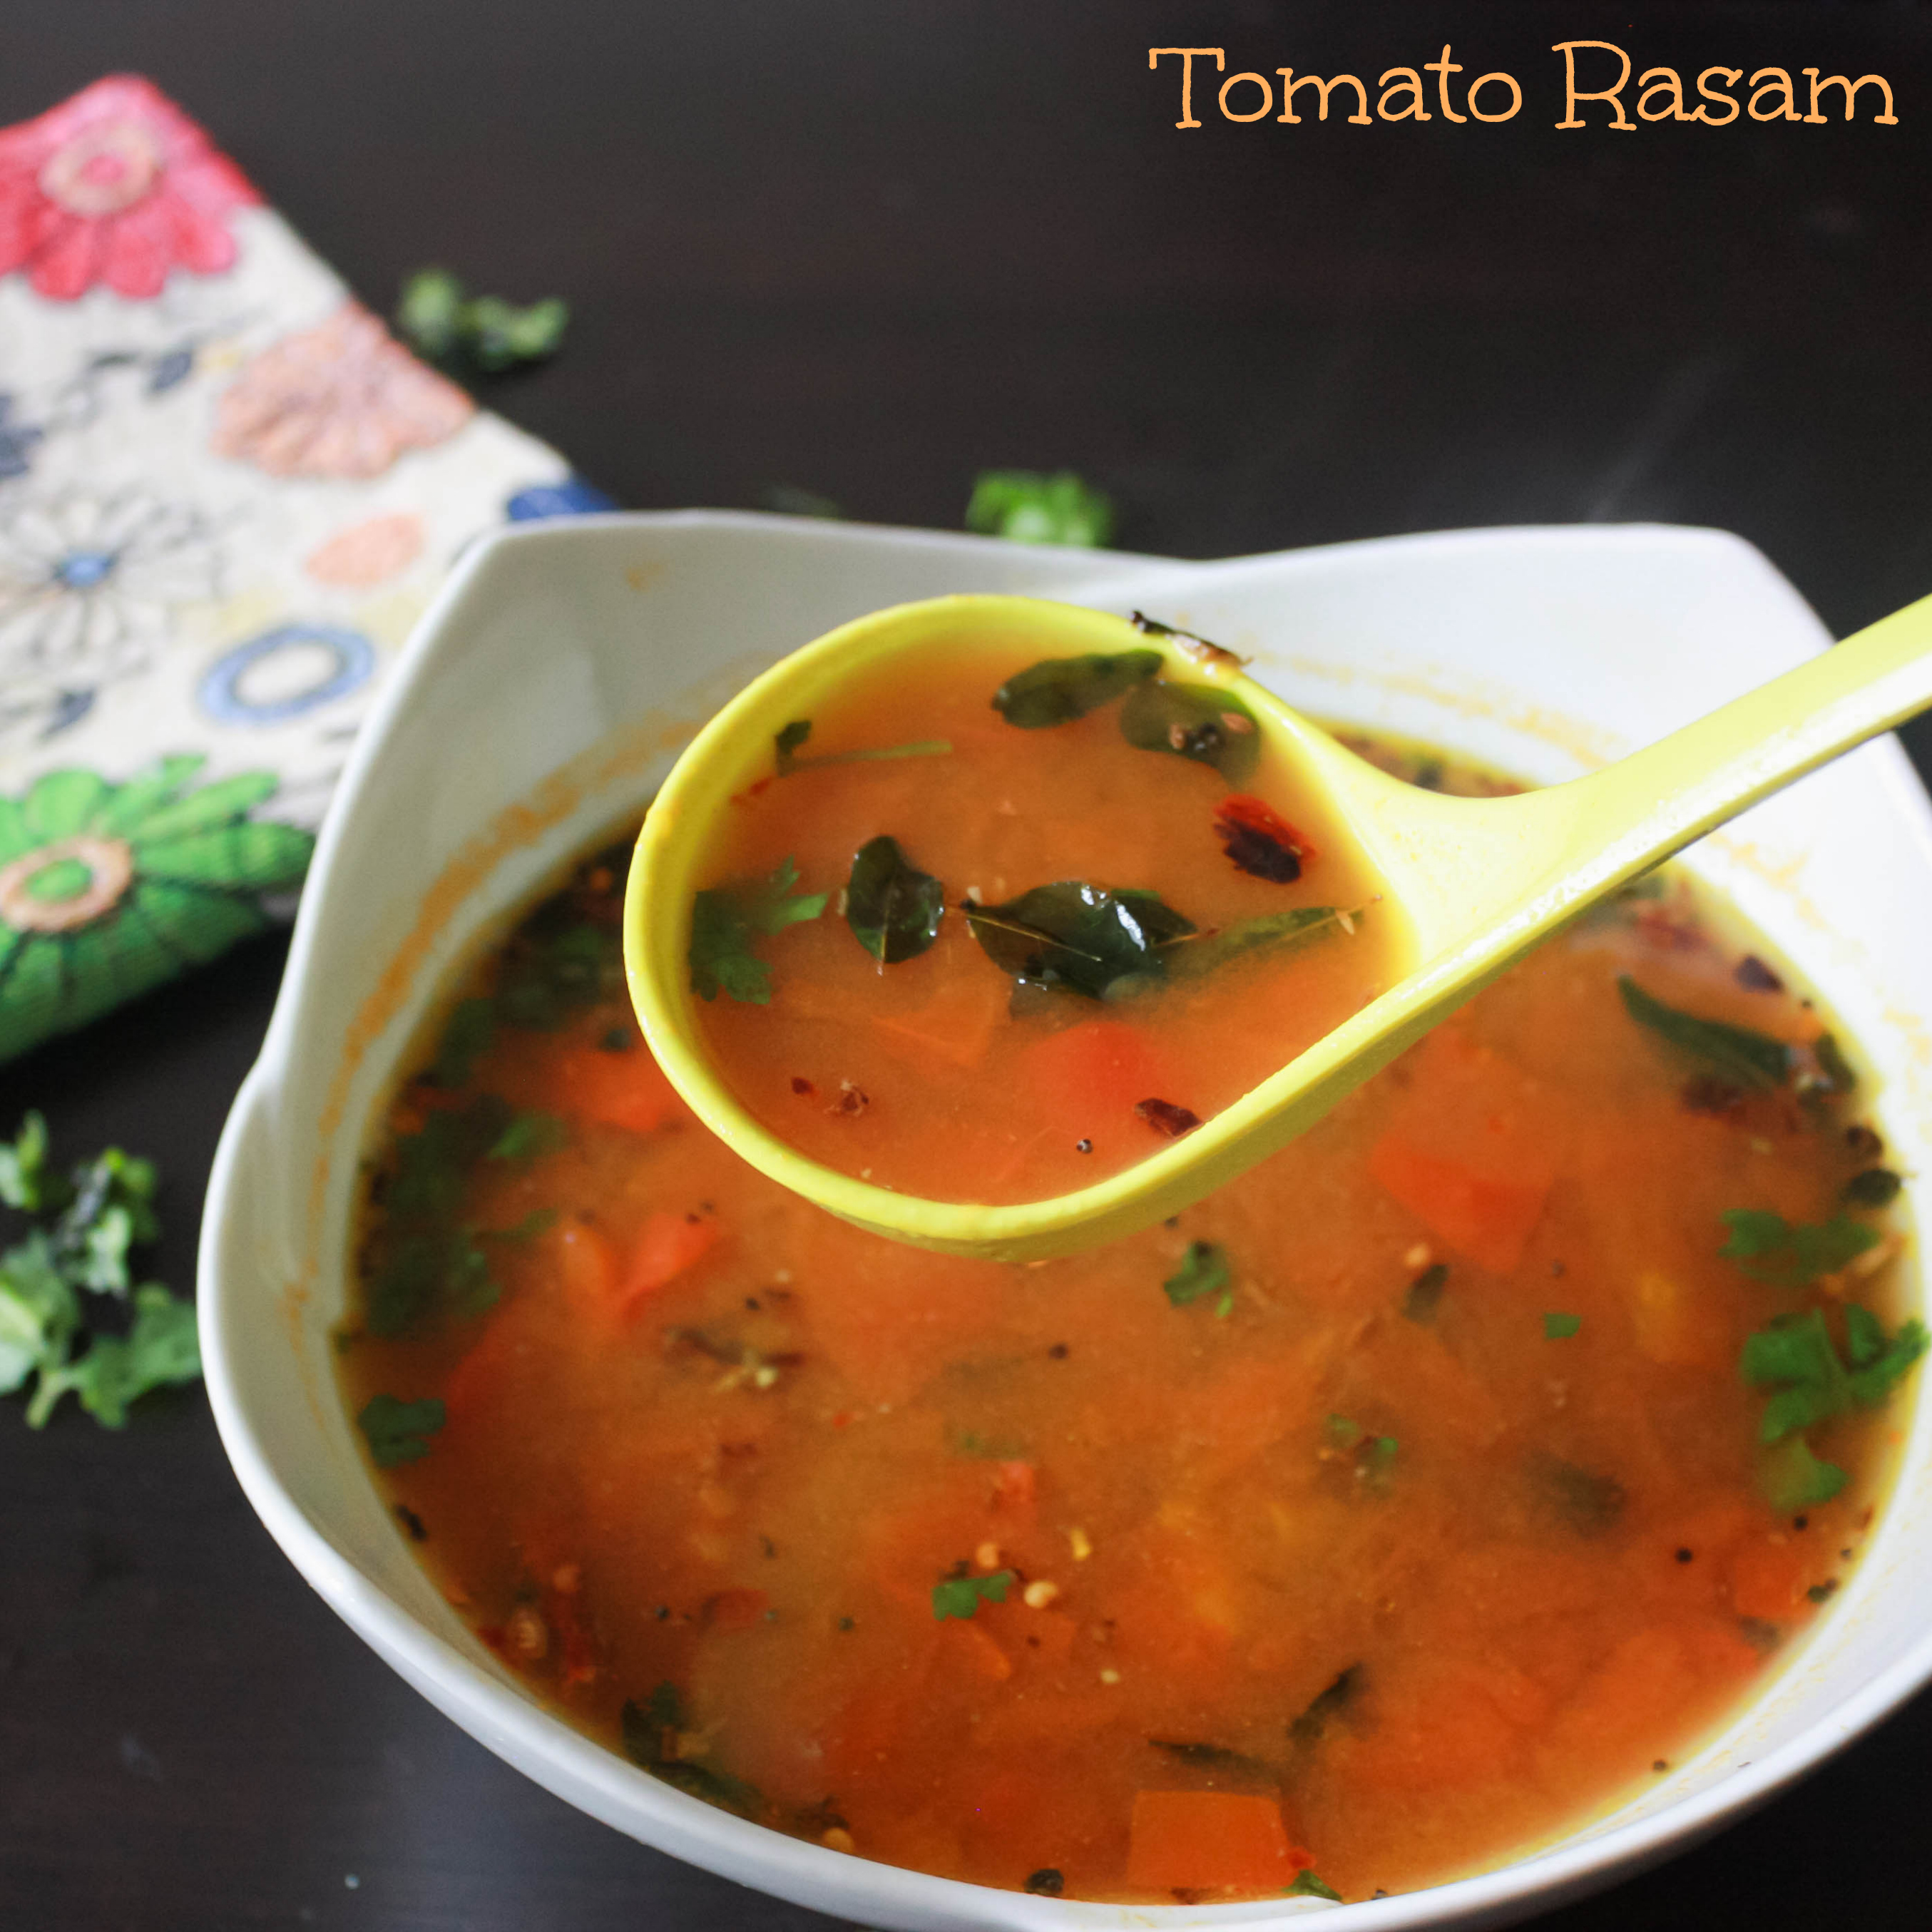
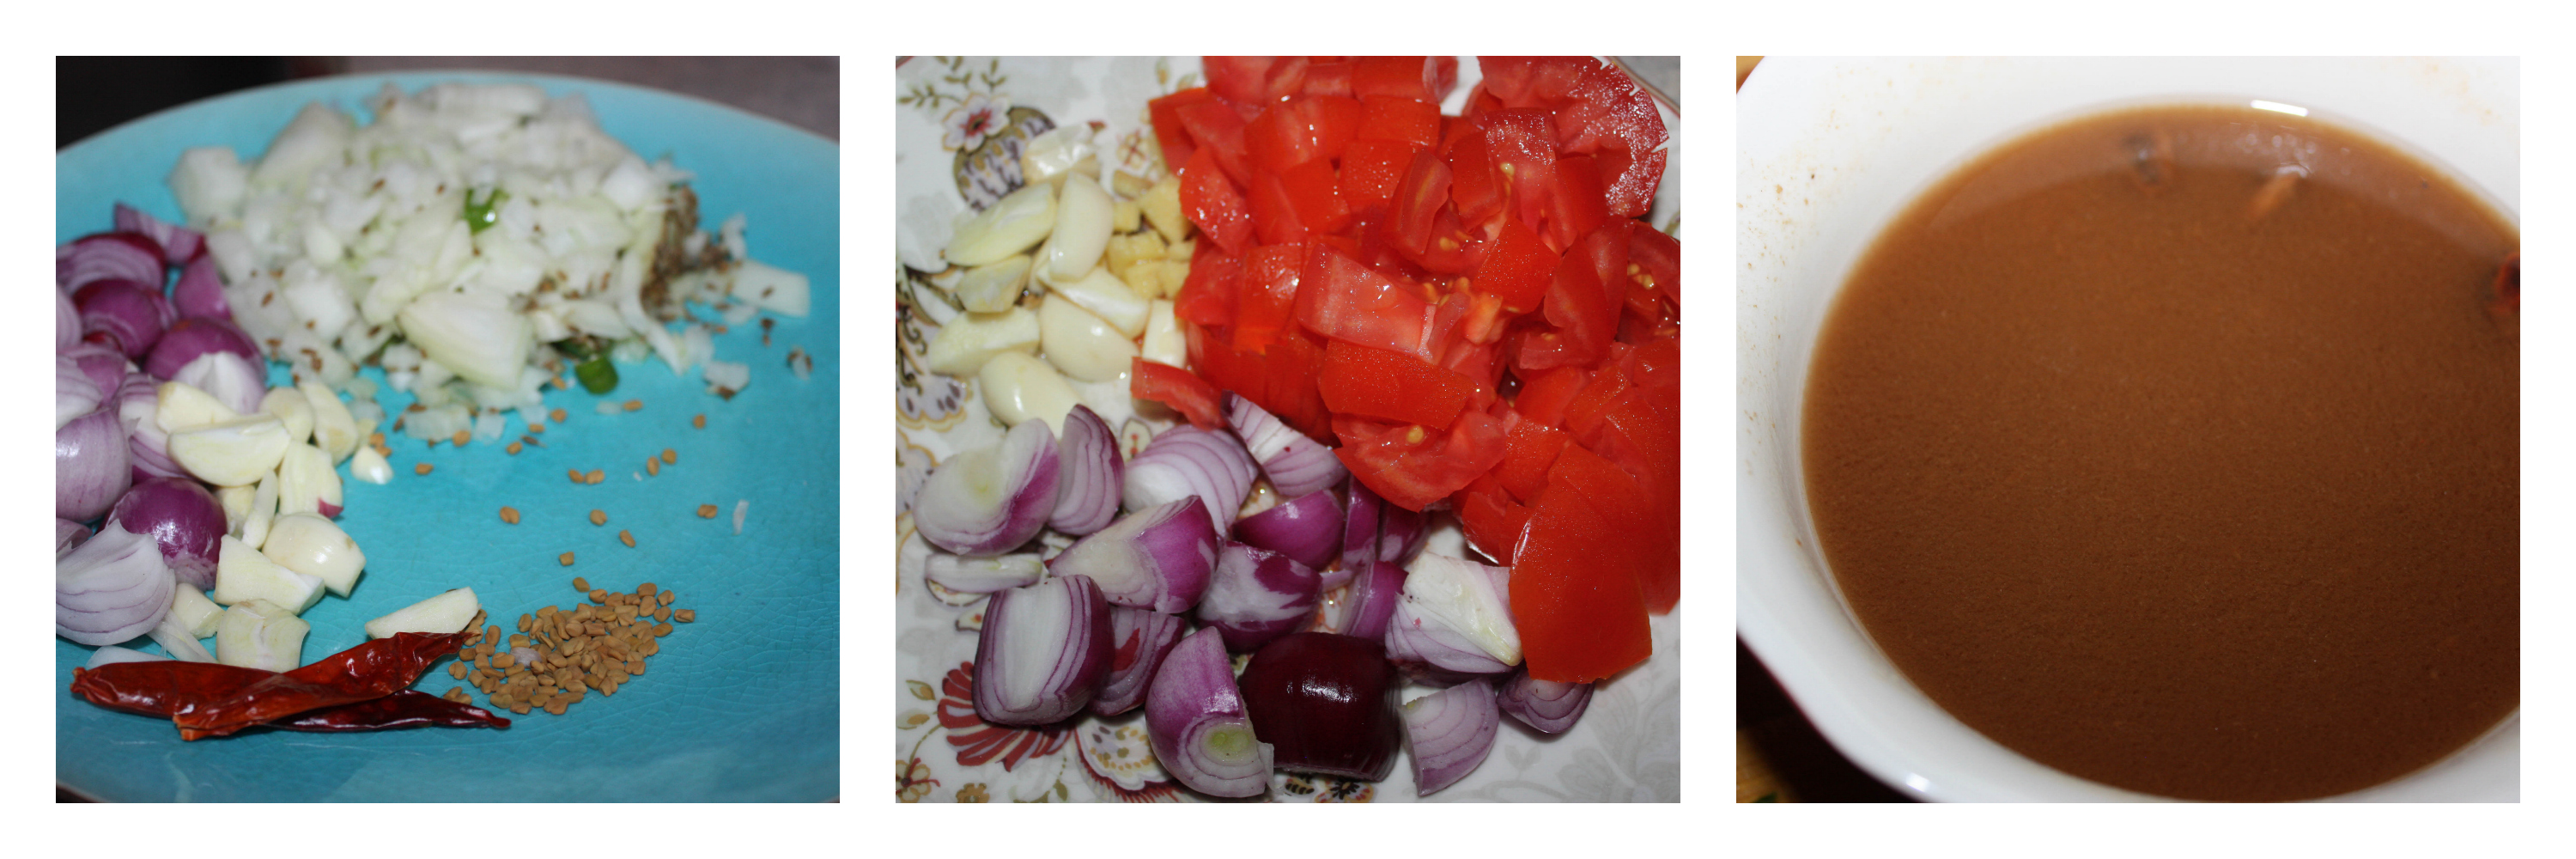
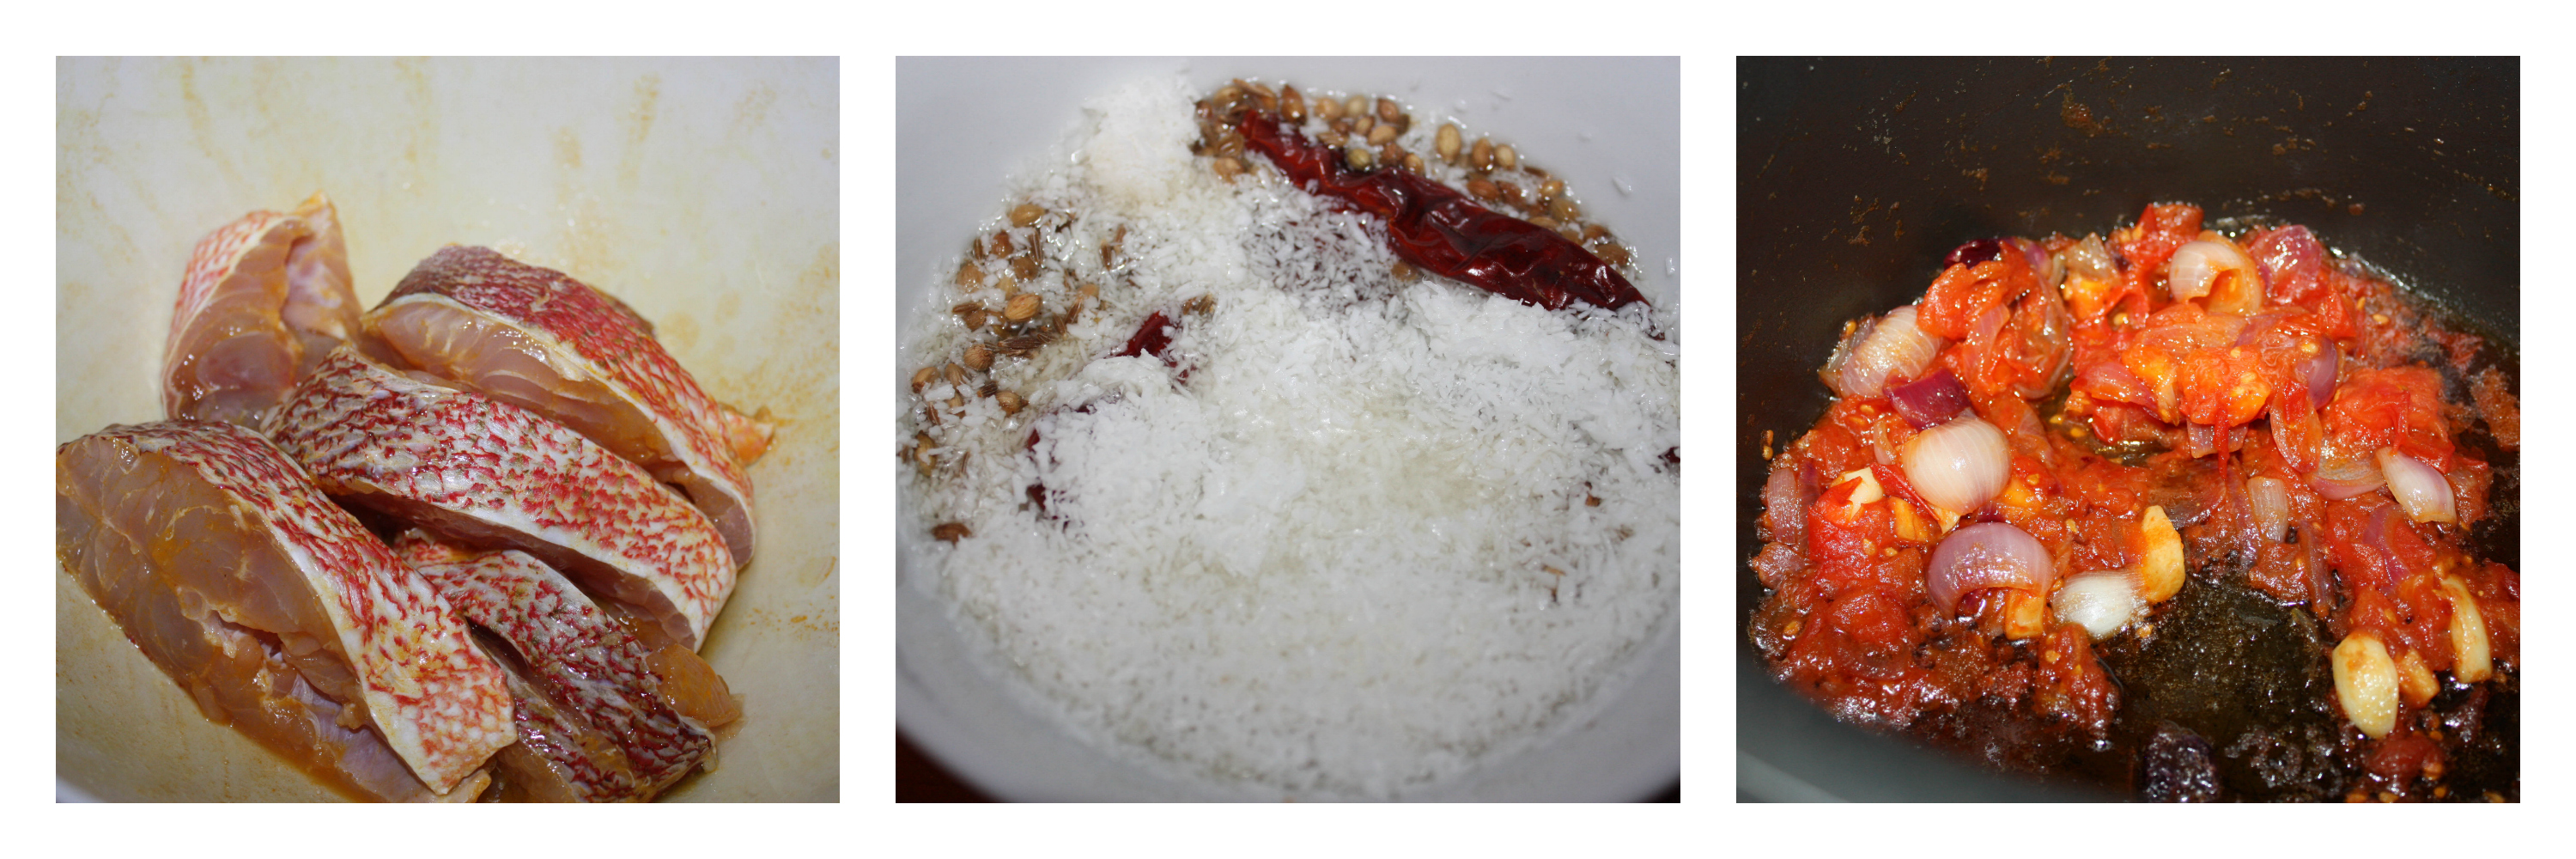
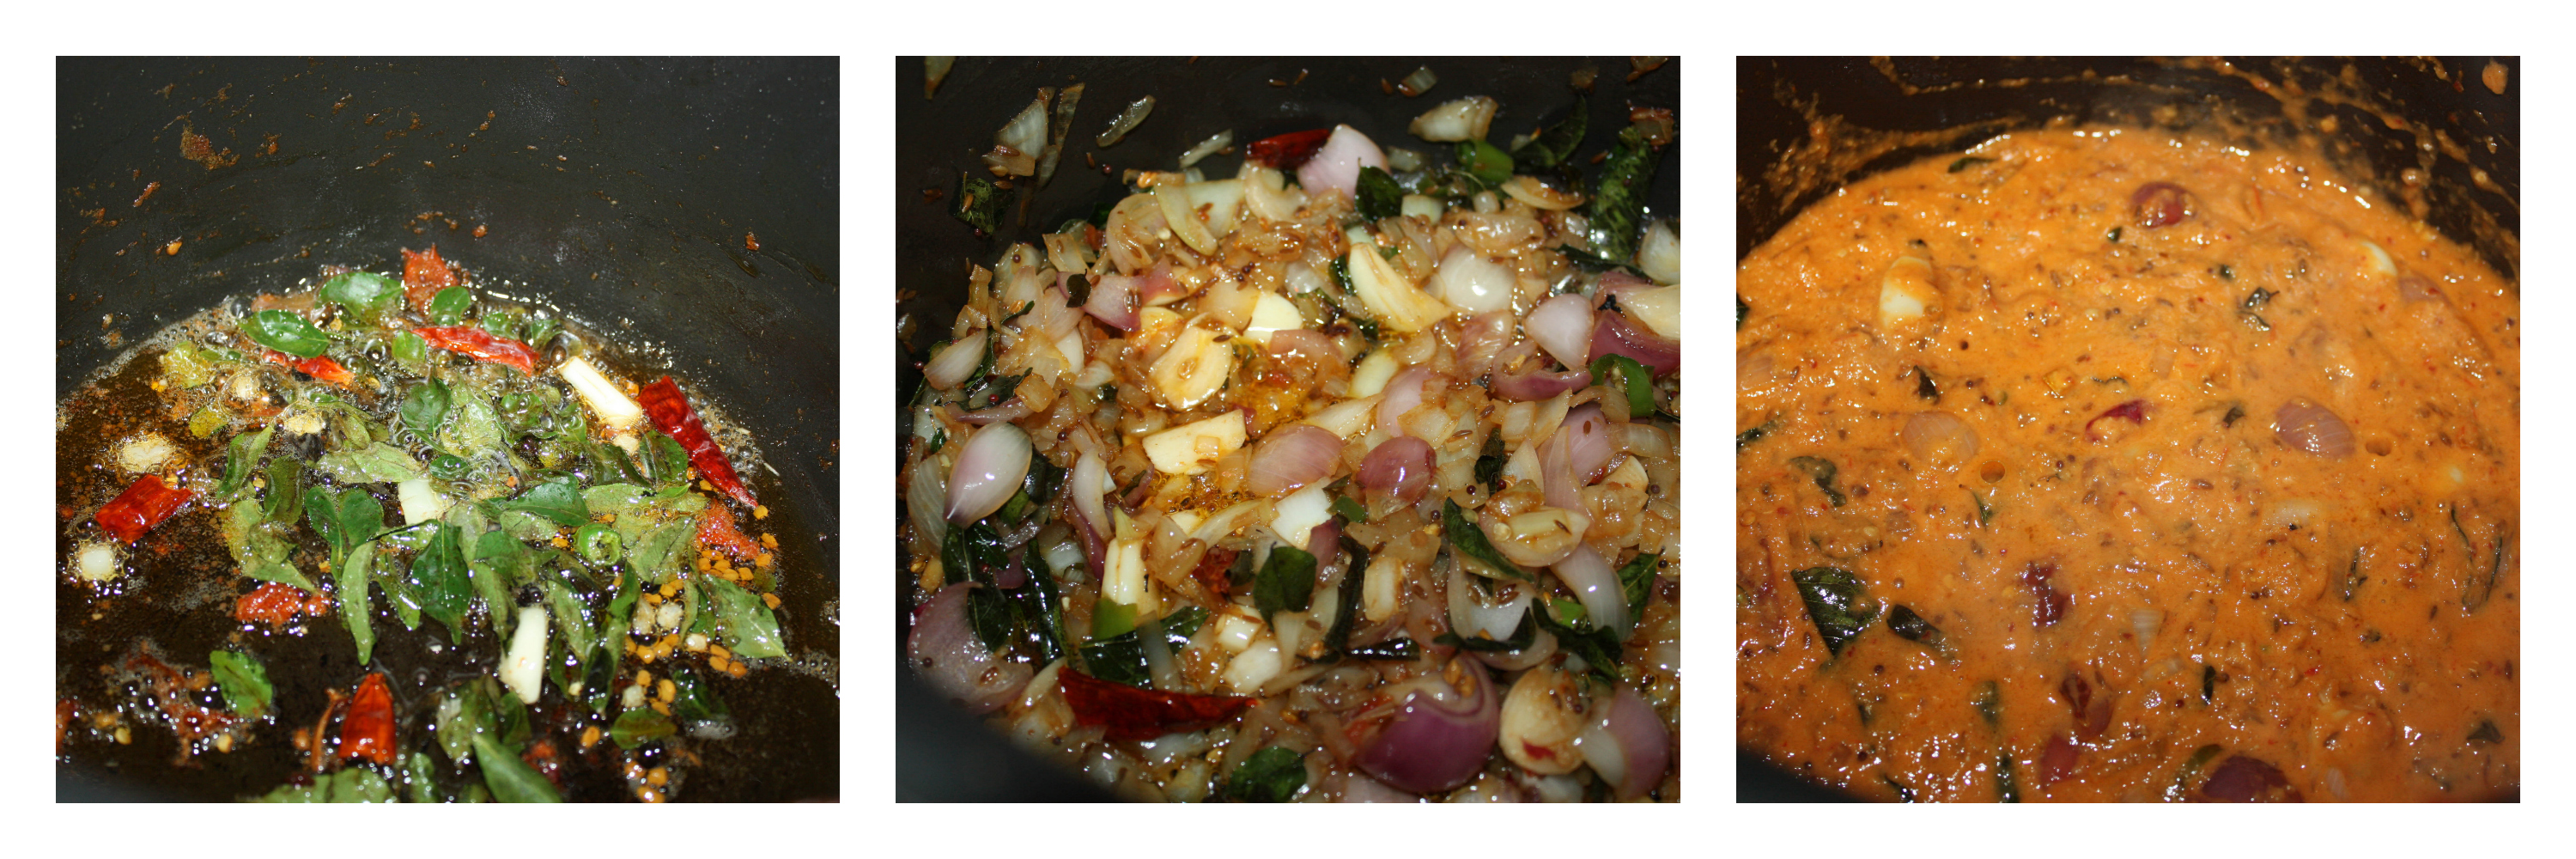
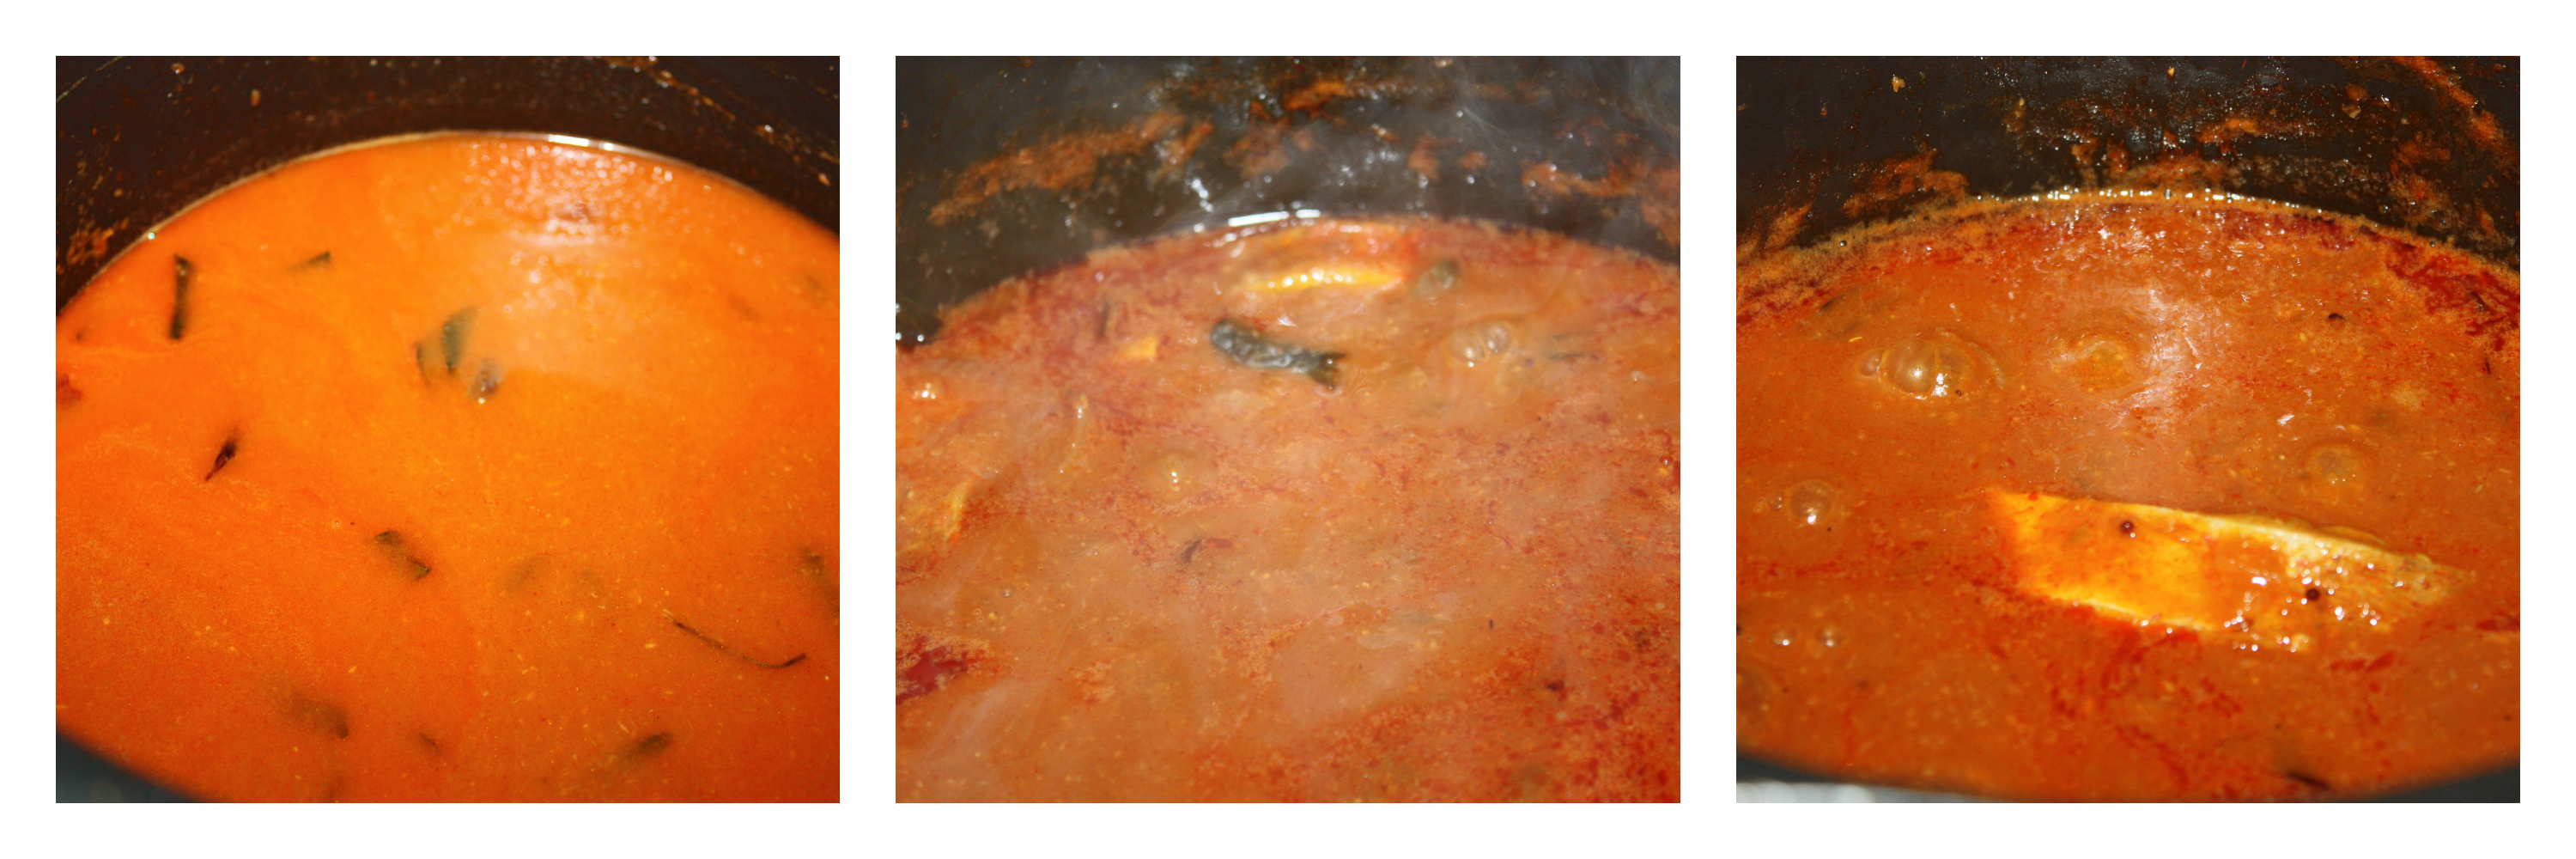
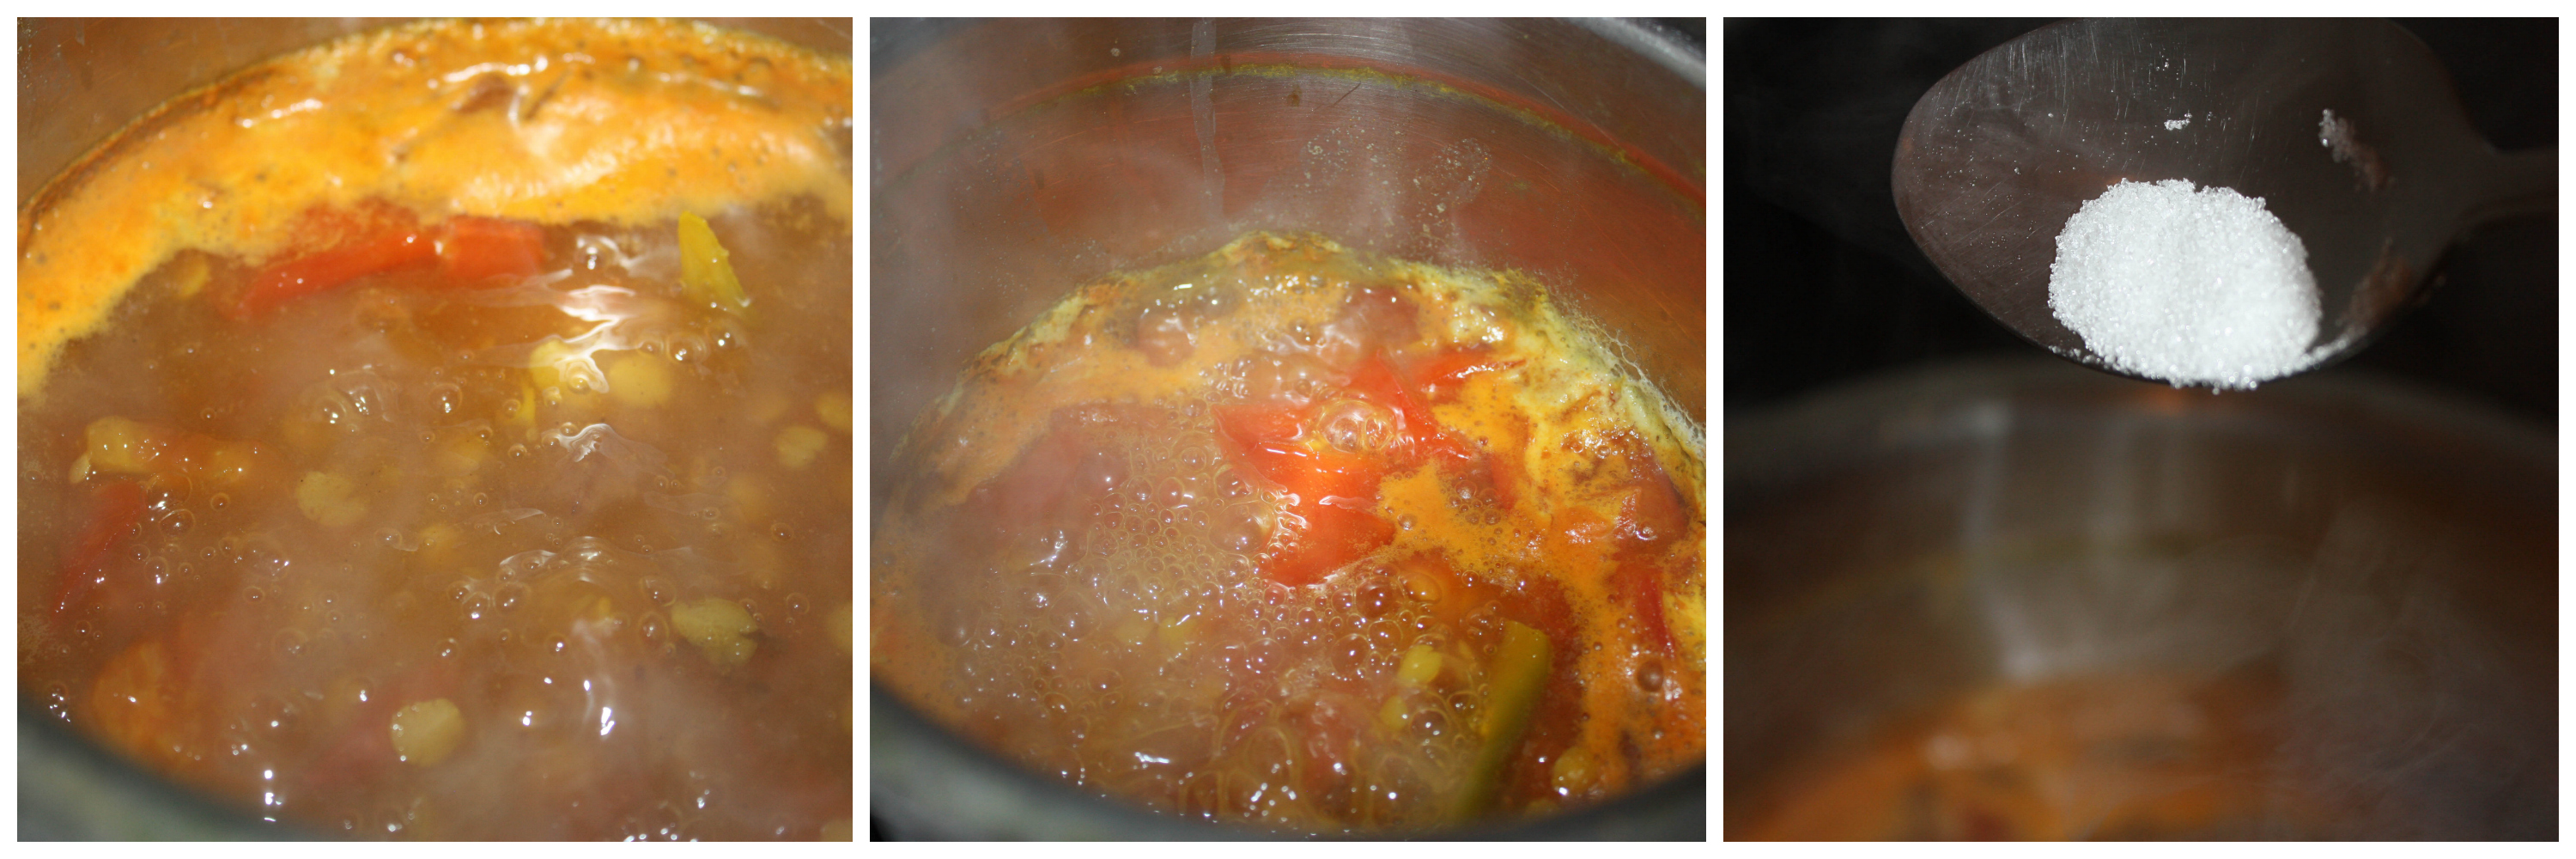
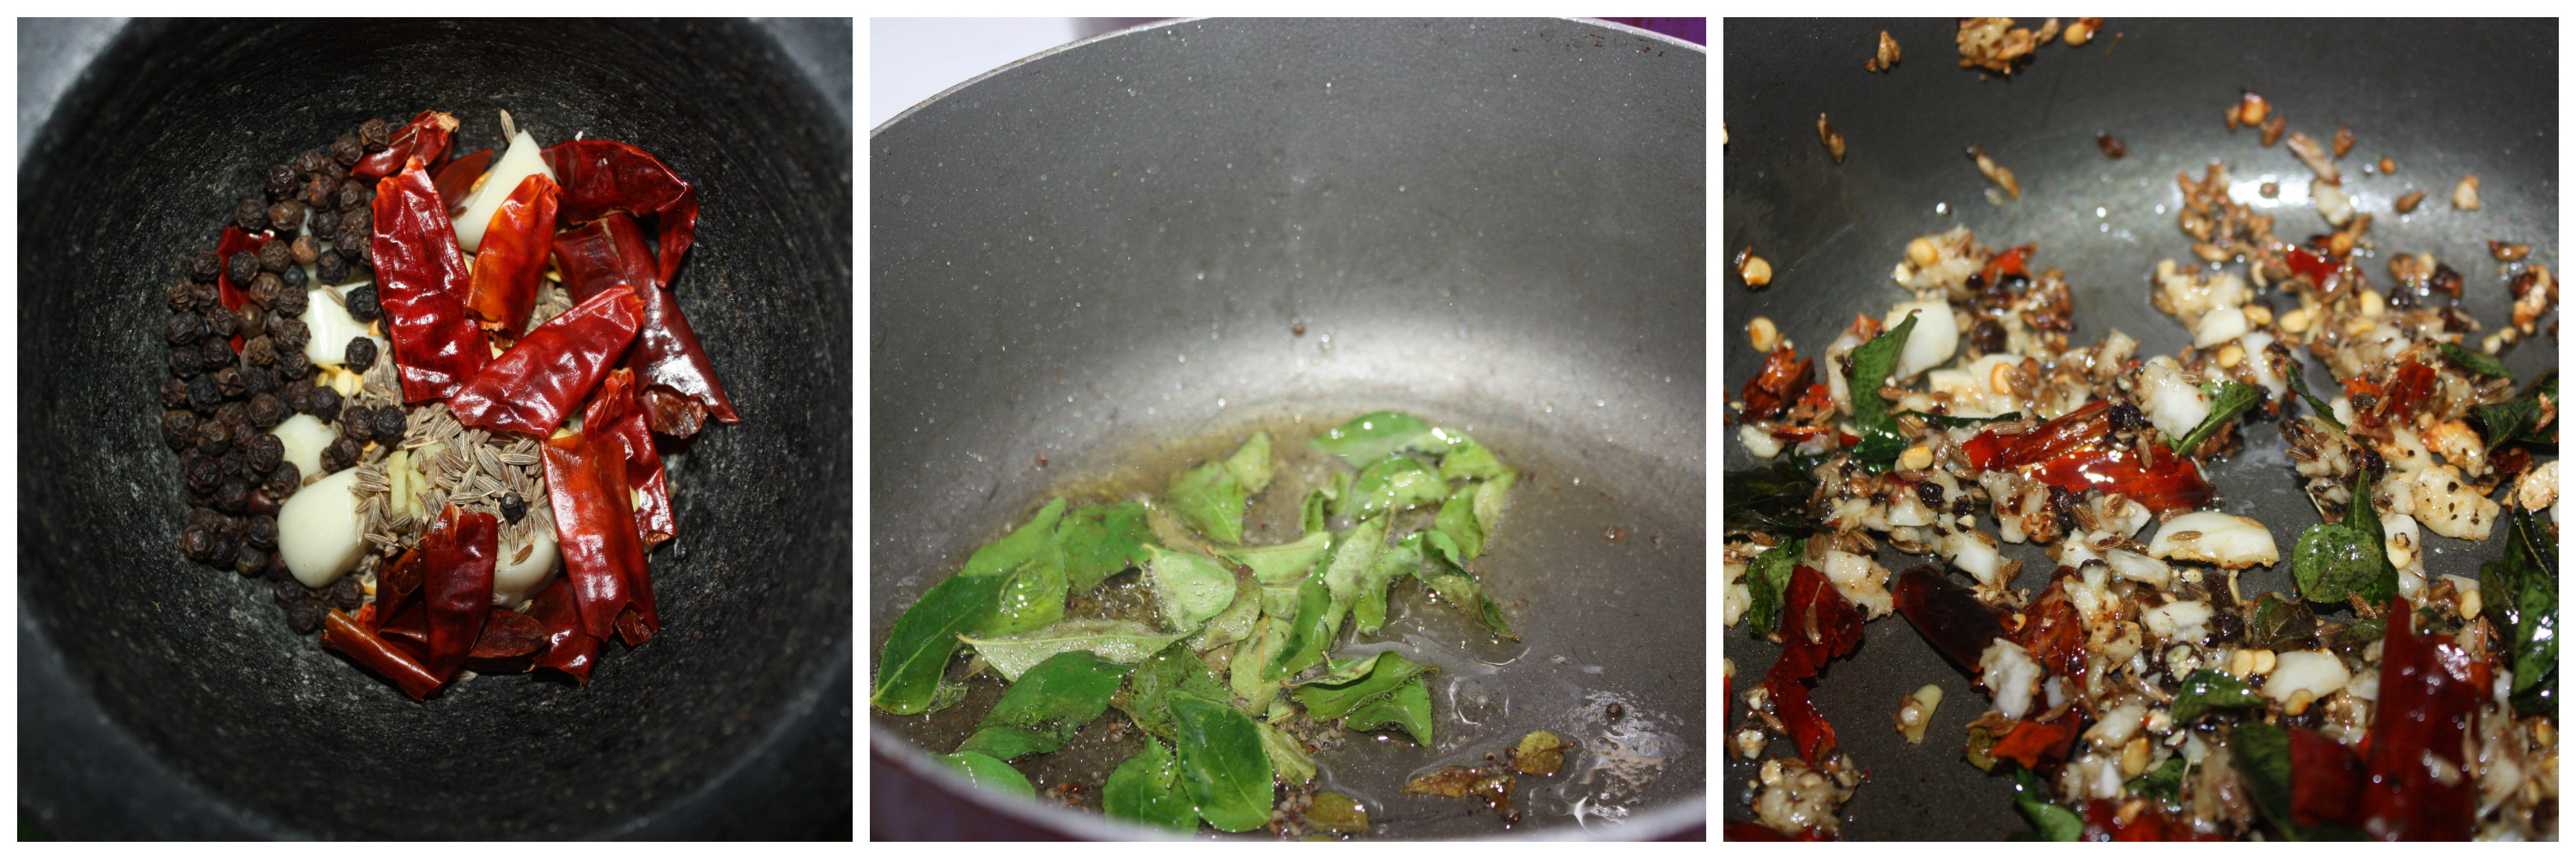
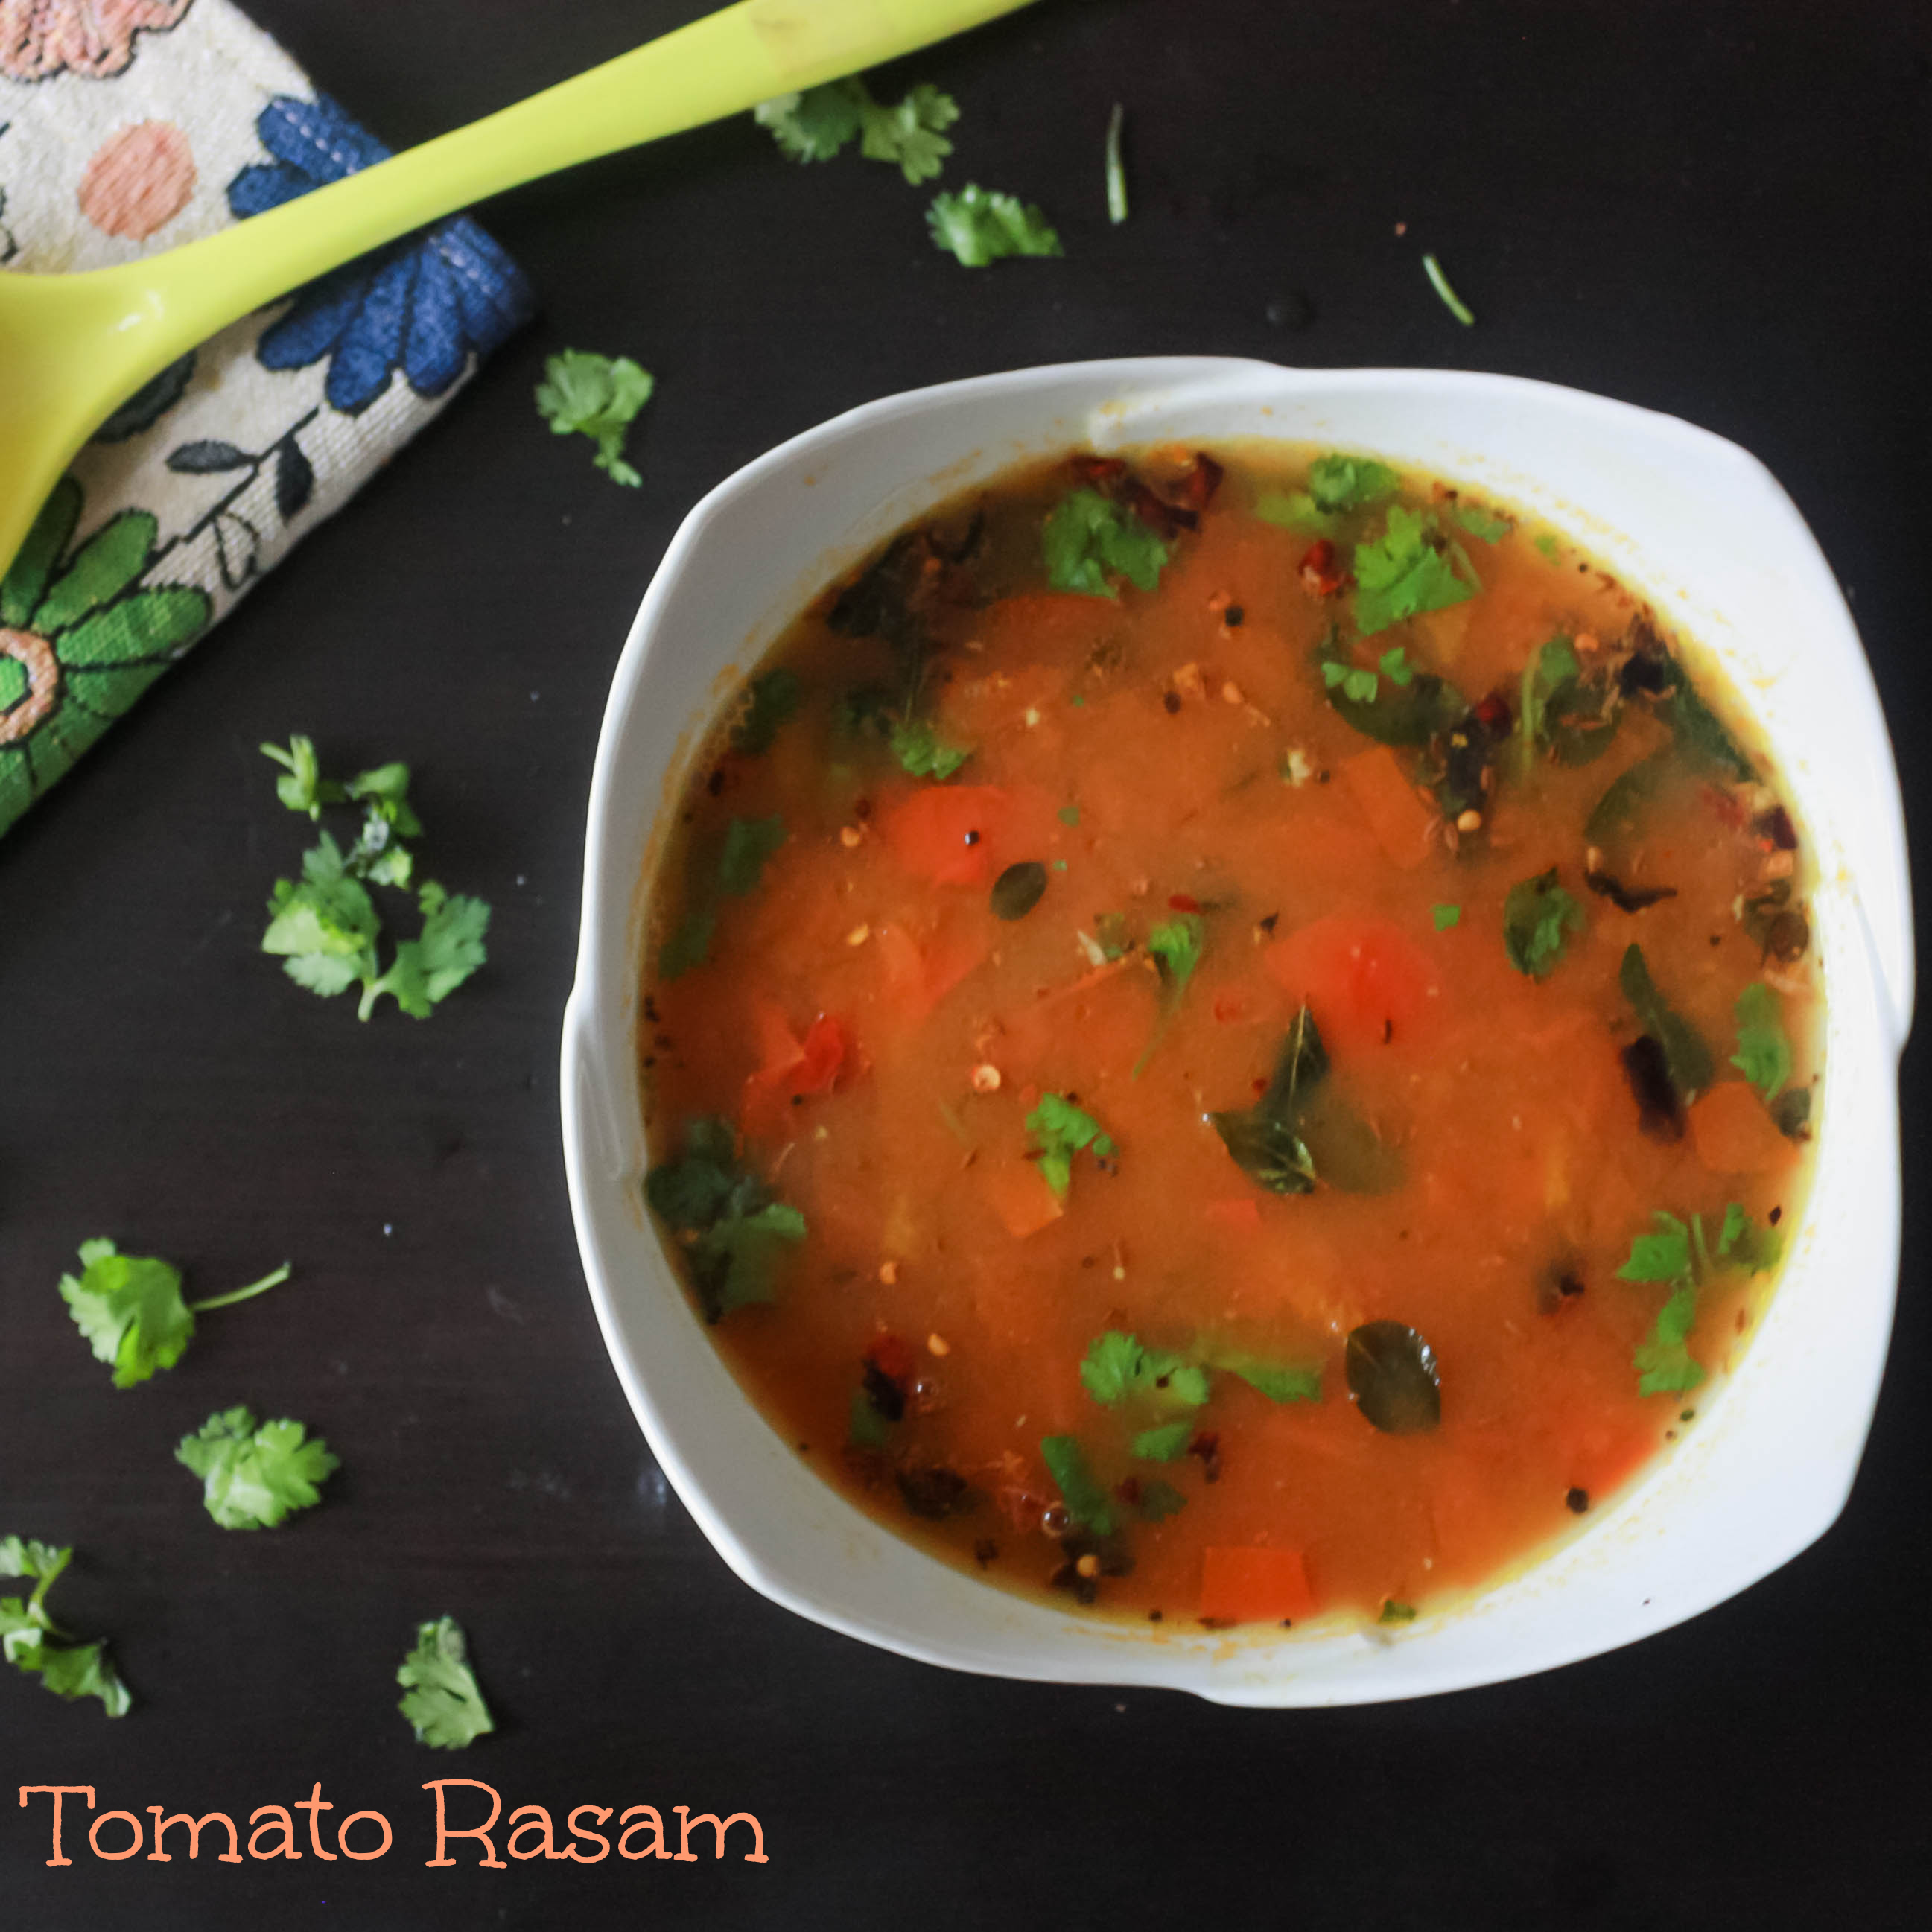
 . And my vacation is the reason for doing this simple and tasty rasam recipe. Rasam is such a comfort food. The whole five days of vacation I just had the same old pizza and burgers. My tongue almost died out of taste. I couldn’t wait to have home food on the last day. I personally feel hotel and outside foods are good to have once in a while only 😀 Home food is the best food. Don’t you agree 😉 ?


