• Home
  • Page Layouts
  • Page Templates
  • Theme Colors
    • Lifestyle Pro Blue
    • Lifestyle Pro Green
    • Lifestyle Pro Mustard
    • Lifestyle Pro Purple
    • Lifestyle Pro Red
    • Lifestyle Pro Teal

Relish The Bite

Taste of happiness

  • HOME
  • ABOUT
  • RECIPE INDEX
    • SNACKS & APPETIZERS
    • BREAKFAST
    • BAKED RECIPES
    • LUNCH & DINNER
      • RICE/BIRYANI VARIETIES
      • SIDES
        • DRY CURRY/STIR-FRY
        • SOUTH INDIAN CURRY/KUZHAMBU
        • NORTH INDIAN CURRY/DAL
        • RAITA/DIPS/CHUTNEY
        • Soups/Salads
      • PASTA PIZZA & TACOS
      • BREAD
      • CHINESE ASIAN INSPIRED
    • NON-VEG RECIPES
    • DESSERTS
    • BEVERAGES
  • SNACKS
  • BREAKFAST
  • NON-VEG RECIPES
  • RICE/BIRYANI VARIETIES
  • LAMB
  • SOUTH INDIAN CURRY/KUZHAMBU
  • VEGAN
  • NORTH INDIAN CURRY/DAL
  • DRY CURRY/STIR-FRY
  • PASTA & TACOS
  • CHINESE ASIAN INSPIRED
  • BAKED RECIPES
  • COLLECTIONS
  • BREAD
  • BEVERAGES
  • DESSERTS
  • FESTIVAL RECIPES
    • SNACKS & APPETIZERS
    • SWEETS/DESSERTS
  • RESOURCES
    • HOW TO START A BLOG
    • TITBITS
    • PRESS
  • CONTACT
You are here: Home / Archives for Indian

Lentil Malai Kofta

March 31, 2016 by Suki 5 Comments

MalaiKofta-2

MalaiKofta-2
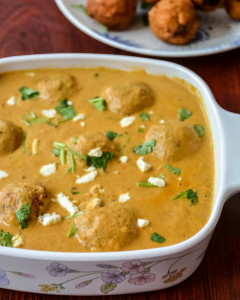
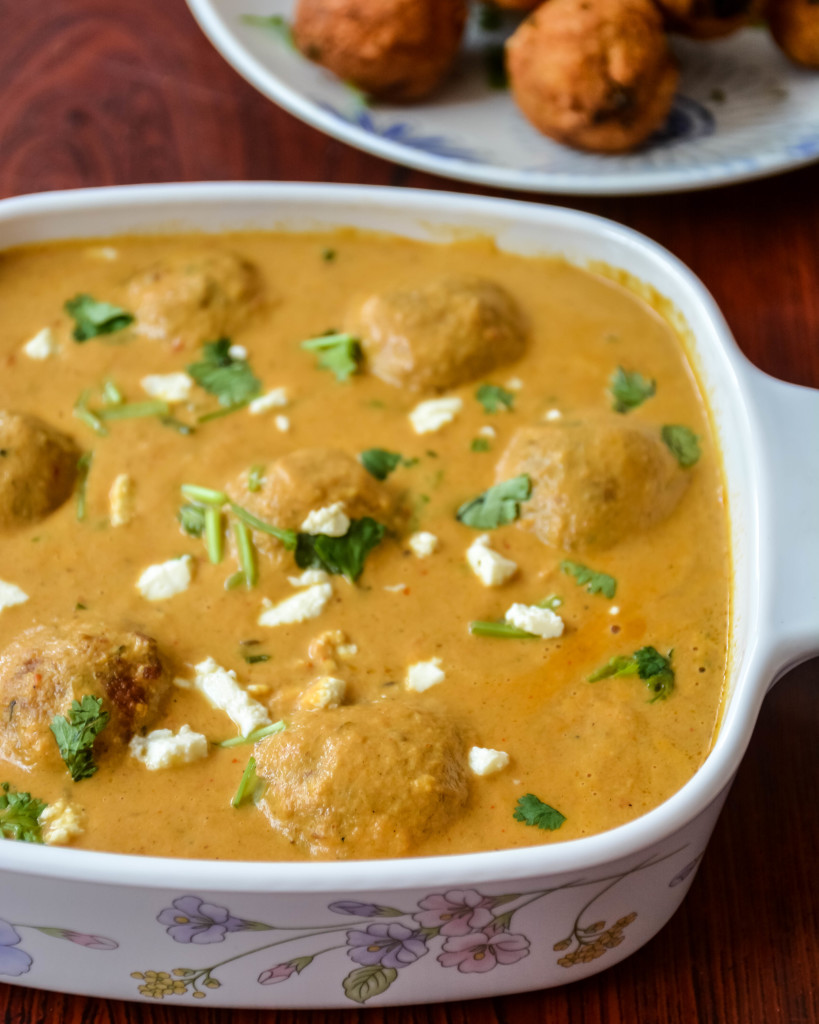
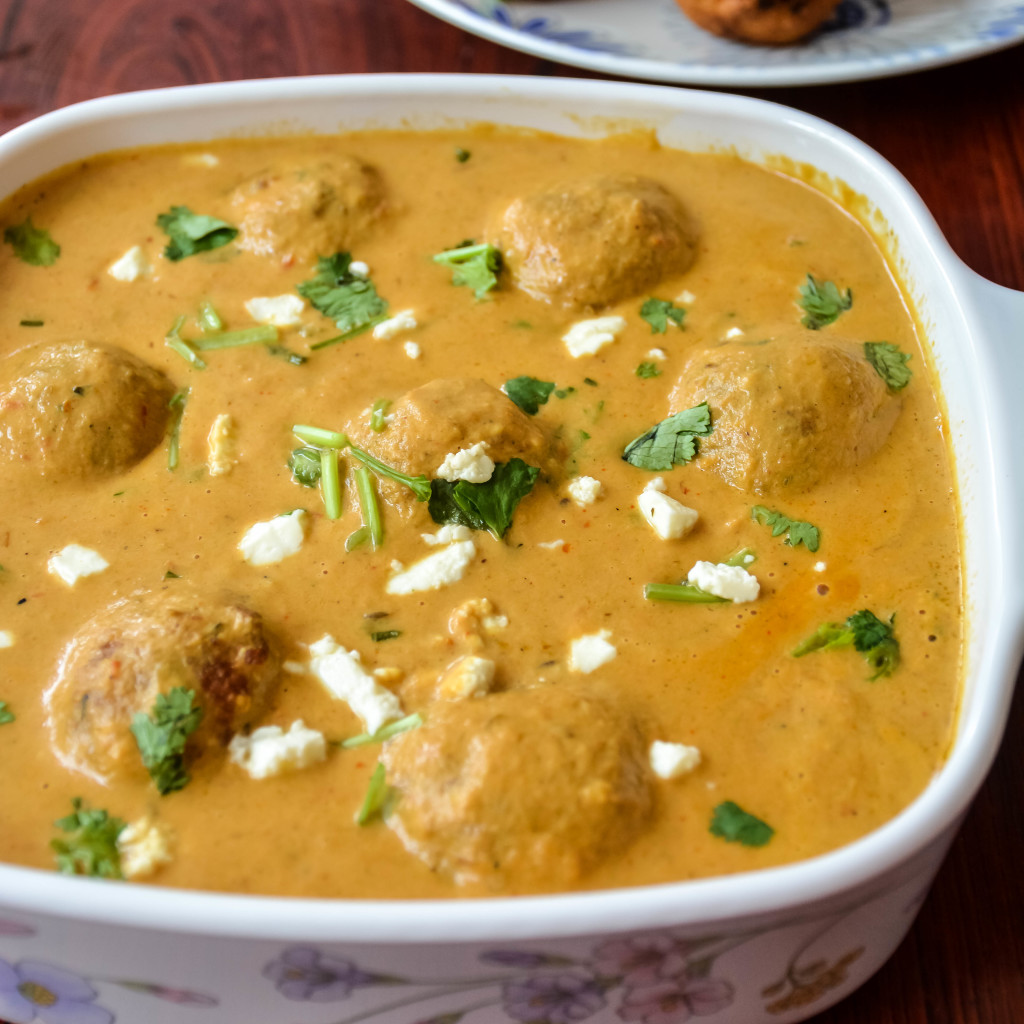
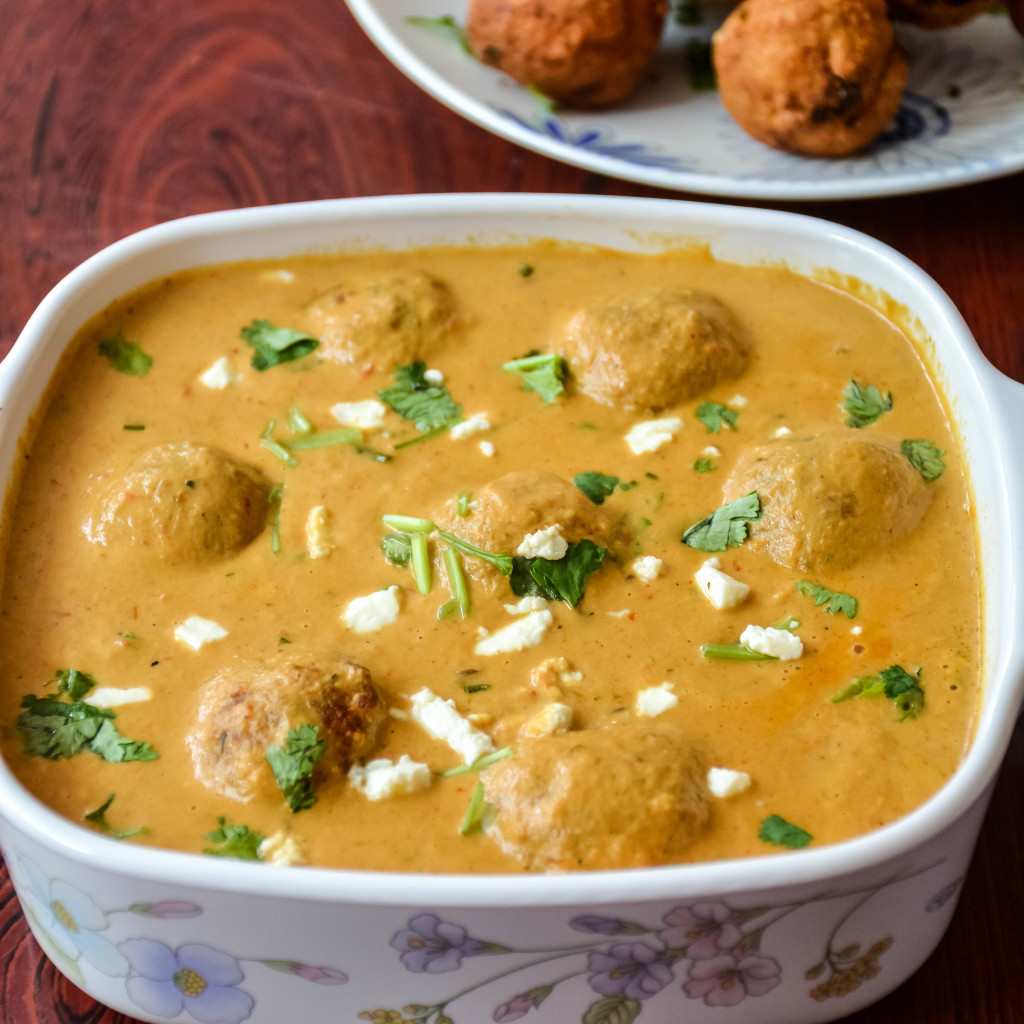
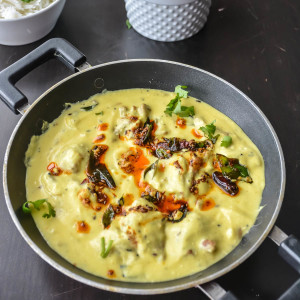
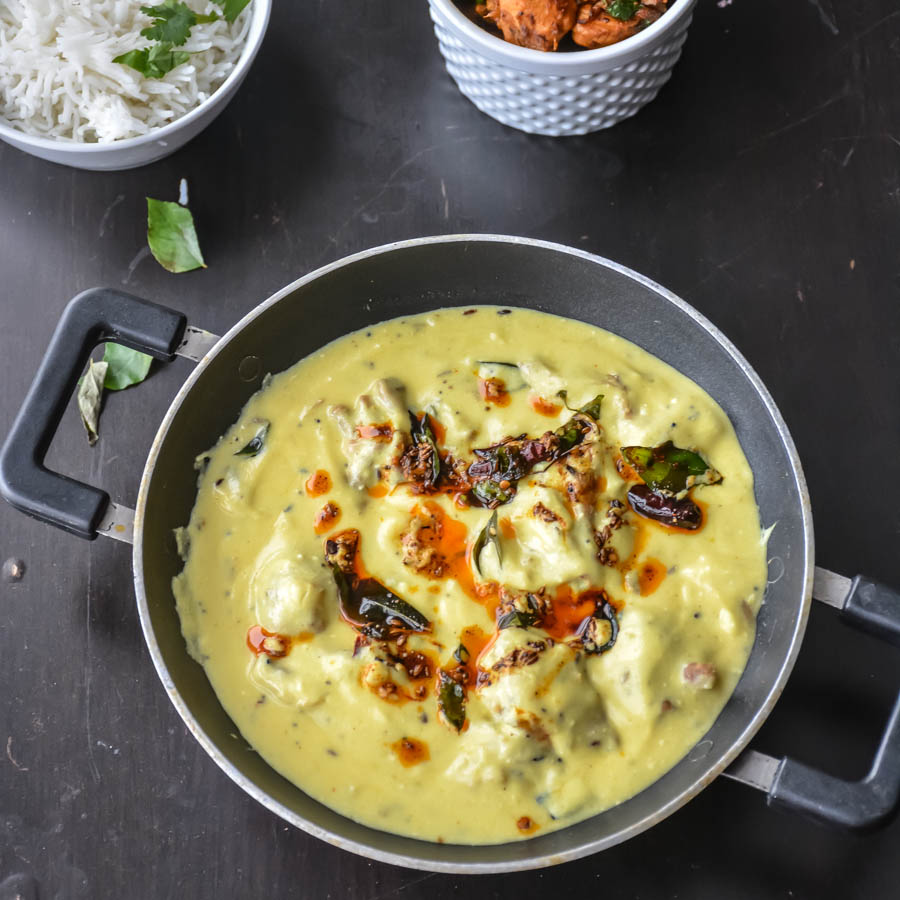
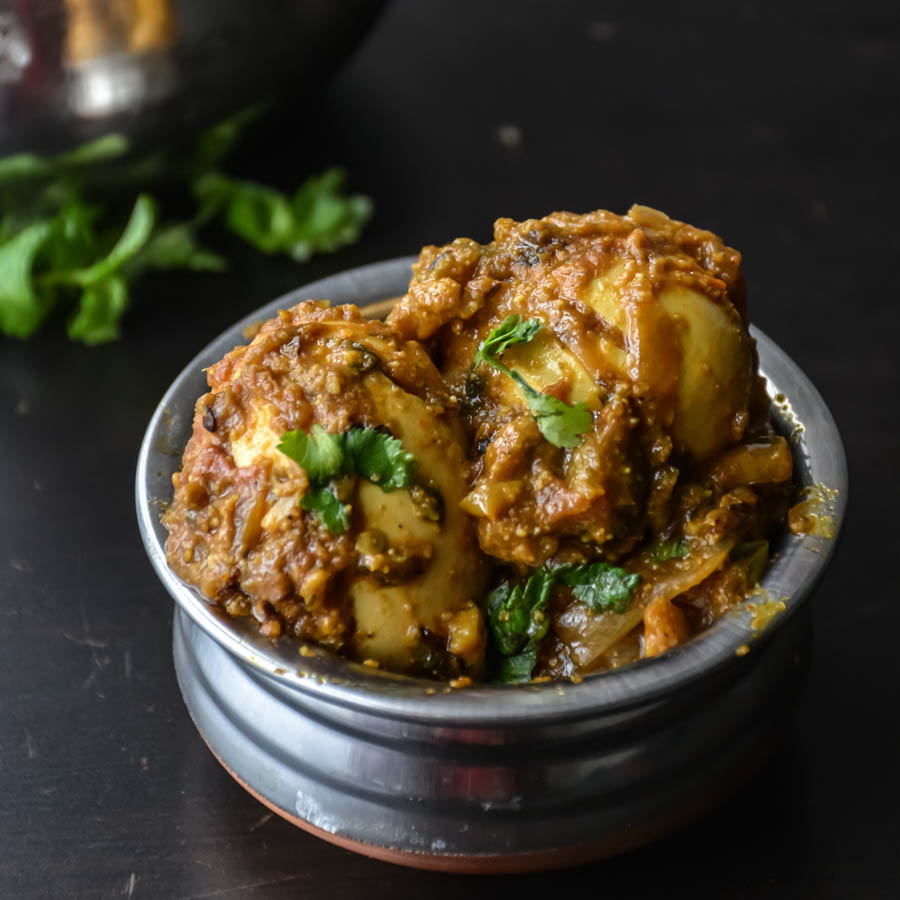
Paneer and Potato cheese dumplings in an almond-cream sauce. A royal Indian treat!

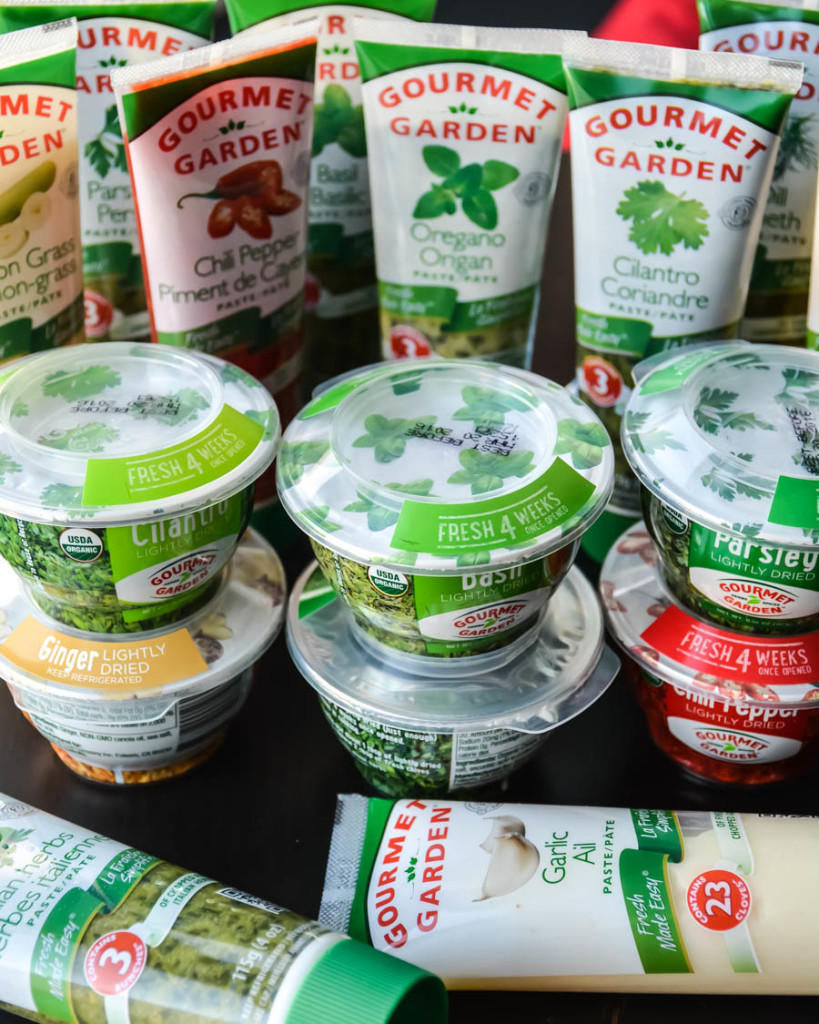
I have used Almond Breeze almond milk for this recipe. I always like to use almond milk for my recipes to replace cream for my gravy recipes  for a healthier option. And I always use them for my milkshakes. And if I wanted to make vegan recipes, almond milk always stays in my refrigerator. You can find these Almond Breeze products in the refrigerated section of your grocery store. 

IMG_3742

MalaiKofta-1


Paneer is a type of fresh cheese that can be made easily at home.  Paneer has a milky flavor on its own, so it taste best when paired with strong spicy flavor like curries or tikka. This is a cheese that won’t melt like mozzarella or cheddar will. We can add them on any curry, or crumble them into flat breads like roti. Or even add them to kebabs and the cheese will keep its shape and chewy texture. Anything with paneer is a definite win. The texture of paneer is similar to greek feta which is prepared in a similar manner. This healthy and delicious vegetarian curry can be on your plate in one hour. It is one of the popular recipe amongst the north Indian recipes. I have seen that it’s a part of most restaurants menu. Goes well with steamed rice, ghee rice, Pulao,paratha, parotta, naan or roti. Paneer can be replaced with tofu also. Don’t add lots of cashews to make it rich, it will spoil the originality of the taste.

 Vegan note: Replace paneer with tofu, ghee/butter with oil. 

I have collection of paneer & tofu recipes collection with all my paneer tofu recipes that you should look at.

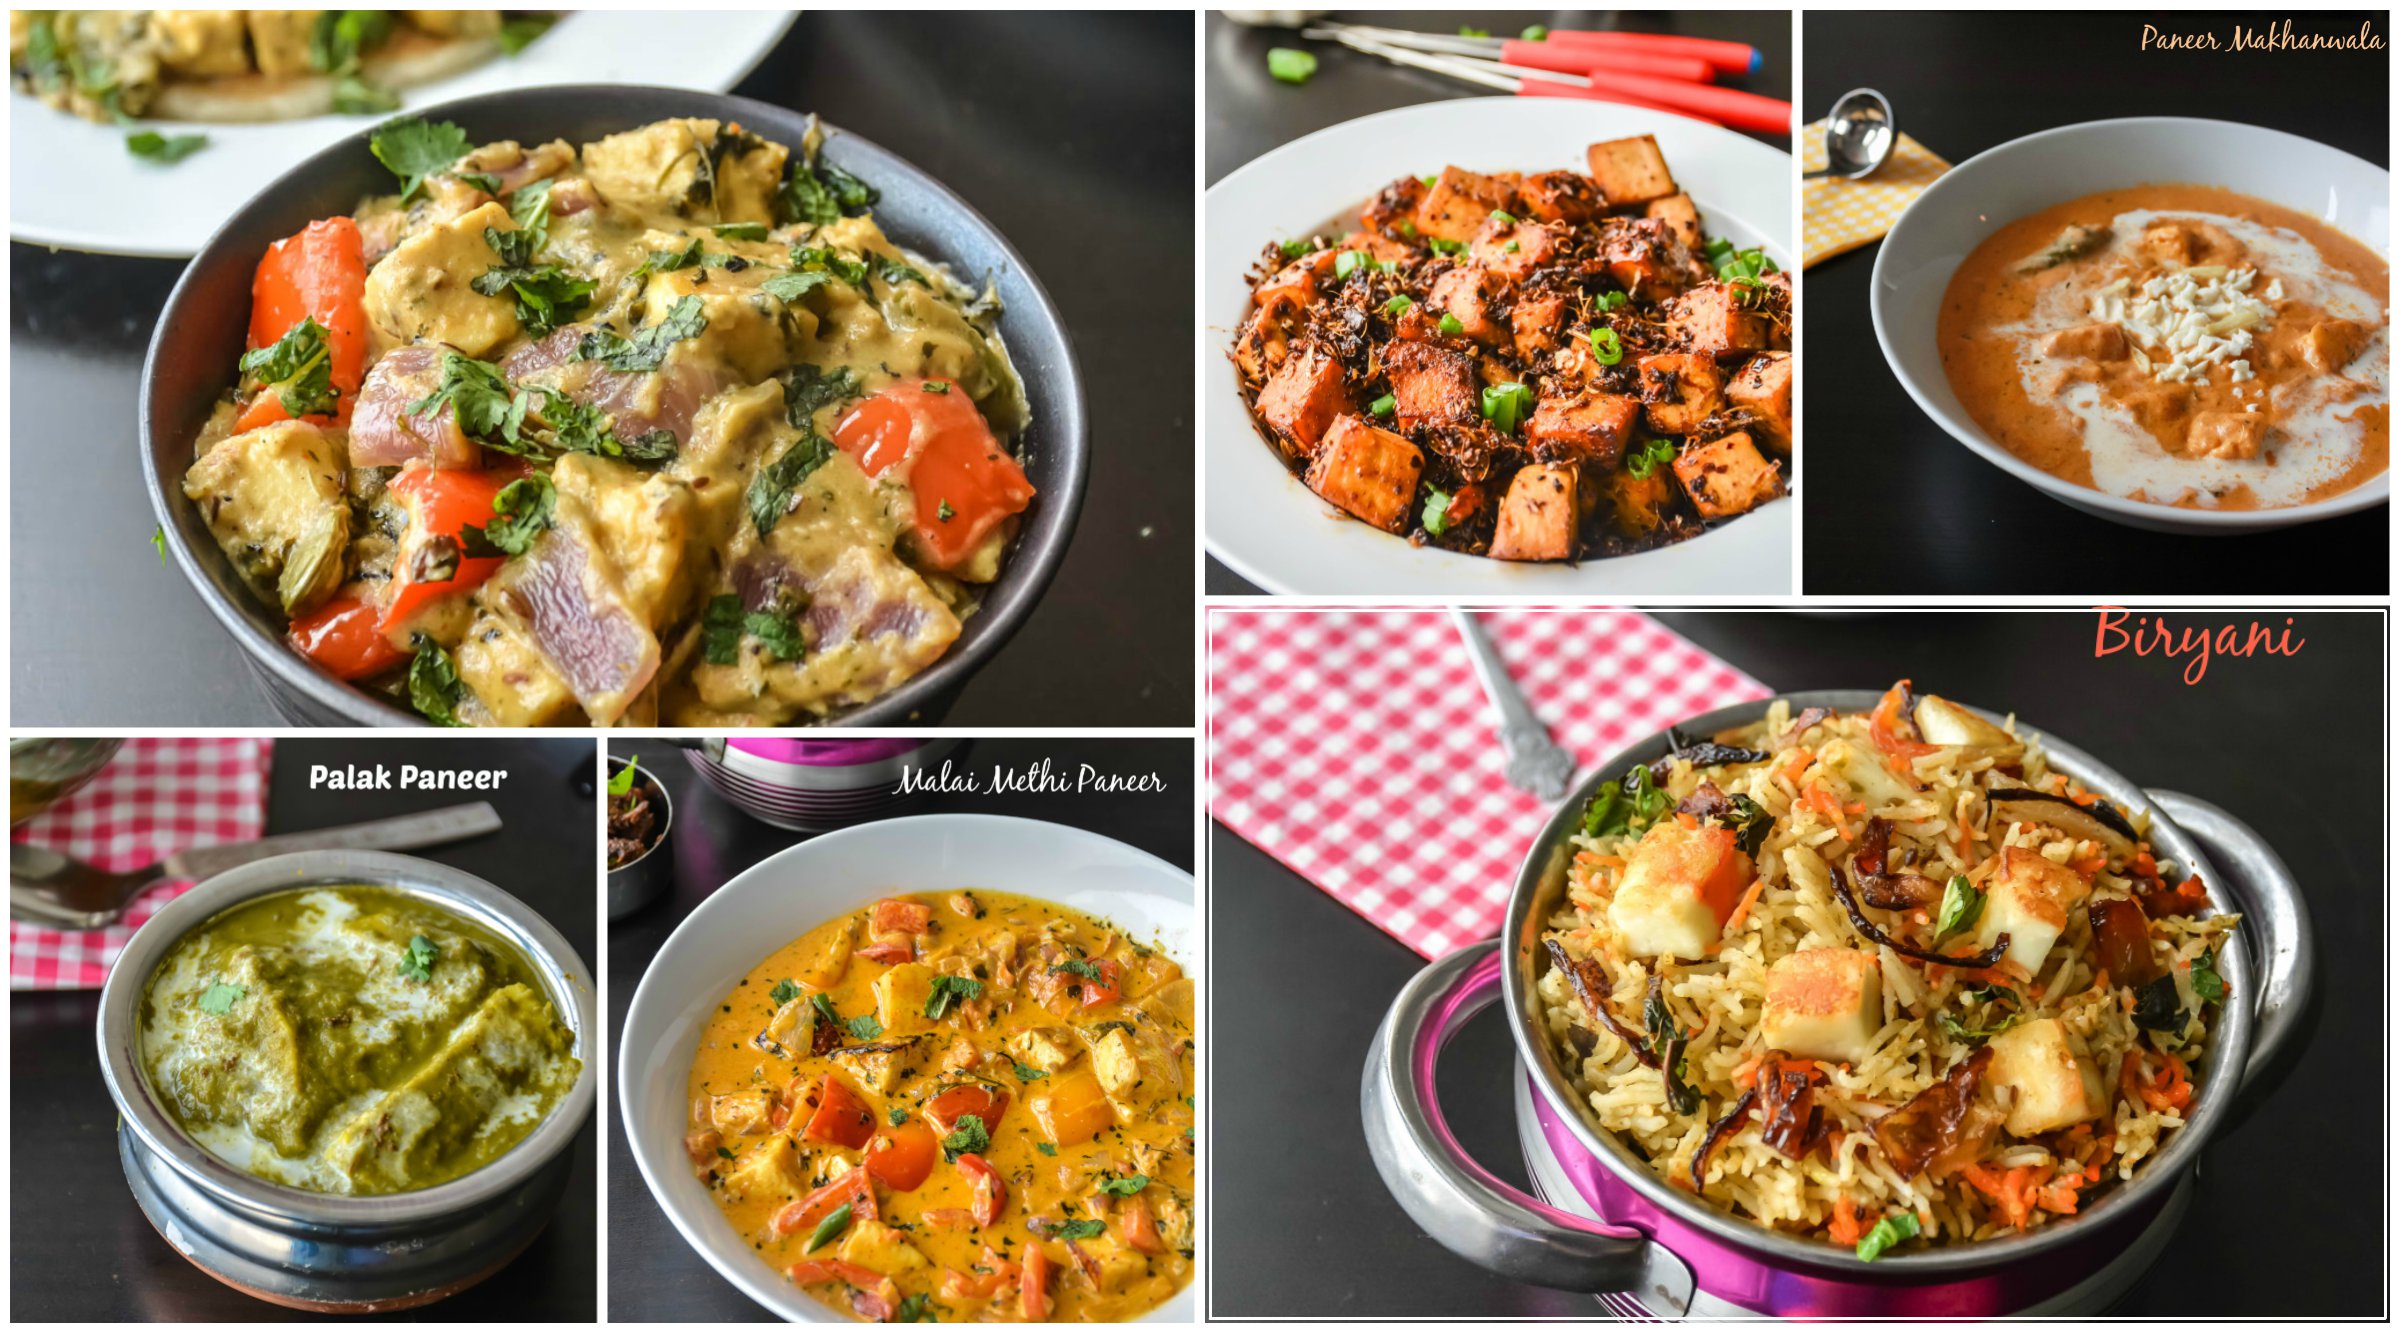
Other favorite Paneer Recipes: Paneer Makhanwala, Paneer peas masala, Palak Paneer, Paneer sandwich.

4.5 from 2 reviews
Print
Lentil Malai Kofta
Author: Suganya Hariharan
Recipe type: Main
Cuisine: Indian
Prep time:  10 mins
Cook time:  50 mins
Total time:  1 hour
Serves: 4 cups
 
Ingredients
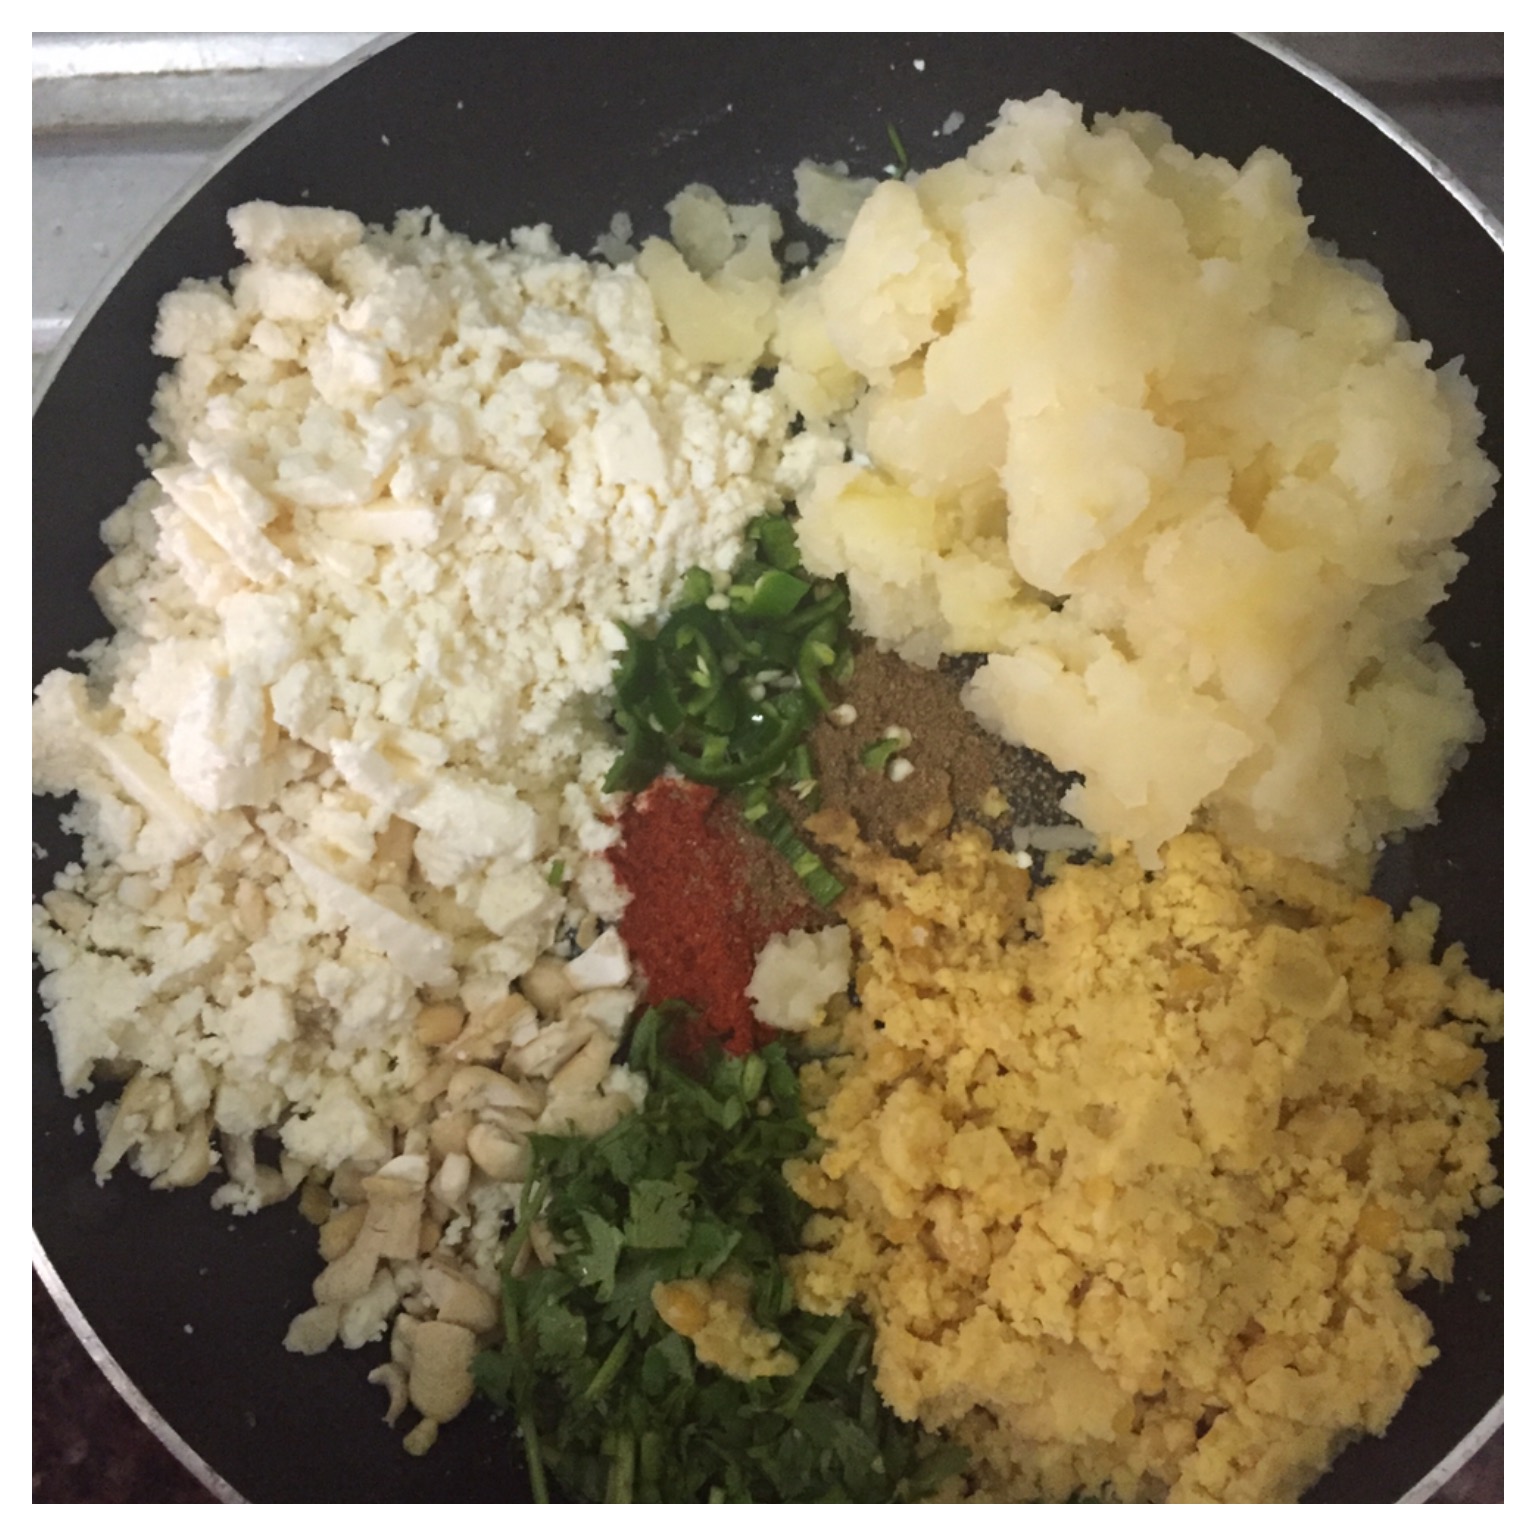
  • For koftas: (roughly makes 10 kofta balls)
  • • Paneer/Firm Tofu(if vegan) - ½ cup,grated
  • • Potatoes - 2 , medium, boiled and washed
  • • Split Bengal gram (chana dal) - ¼ cup
  • • Salt to taste
  • • Red chilli powder - 1.5 tsp
  • • Garam masala powder - ½ tsp
  • • Cashew nuts - 5, broken
  • • Green chillies - 1, finely chopped
  • • Cumin powder- ½ tsp
  • • Coriander powder-1.5 tsp
  • • Cornflour/ corn starch - 4 tbsp
  • • Oil - to deep fry


    For gravy
  • Oil - 2 - 3 tbsp
  • • Onion - 2 medium, roughly chopped
  • • Garlic - 4, roughly chopped
  • • Ginger paste - 1inch, roughly chopped
  • • Turmeric powder - ¼ tsp
  • • Tomato - 2, medium,roughly chopped
  • • Coriander powder - 1 tsp
  • • Cumin powder = ½ tsp
  • • Chilli powder - 1.5 tsp
  • • Dry Methi Leaves - 1 tsp
  • • Cashewnuts - 6
  • • Almond milk - ¼ cup
  • • Fresh coriander leaves chopped 2 tablespoons
Instructions
  1. Wash and Soak the chana dal for 2 hours. Add chana dal with 2 cups of water in a pan and bring to a boil. Cook until the dal is tender, strain and grind to a smooth mixture with no water.
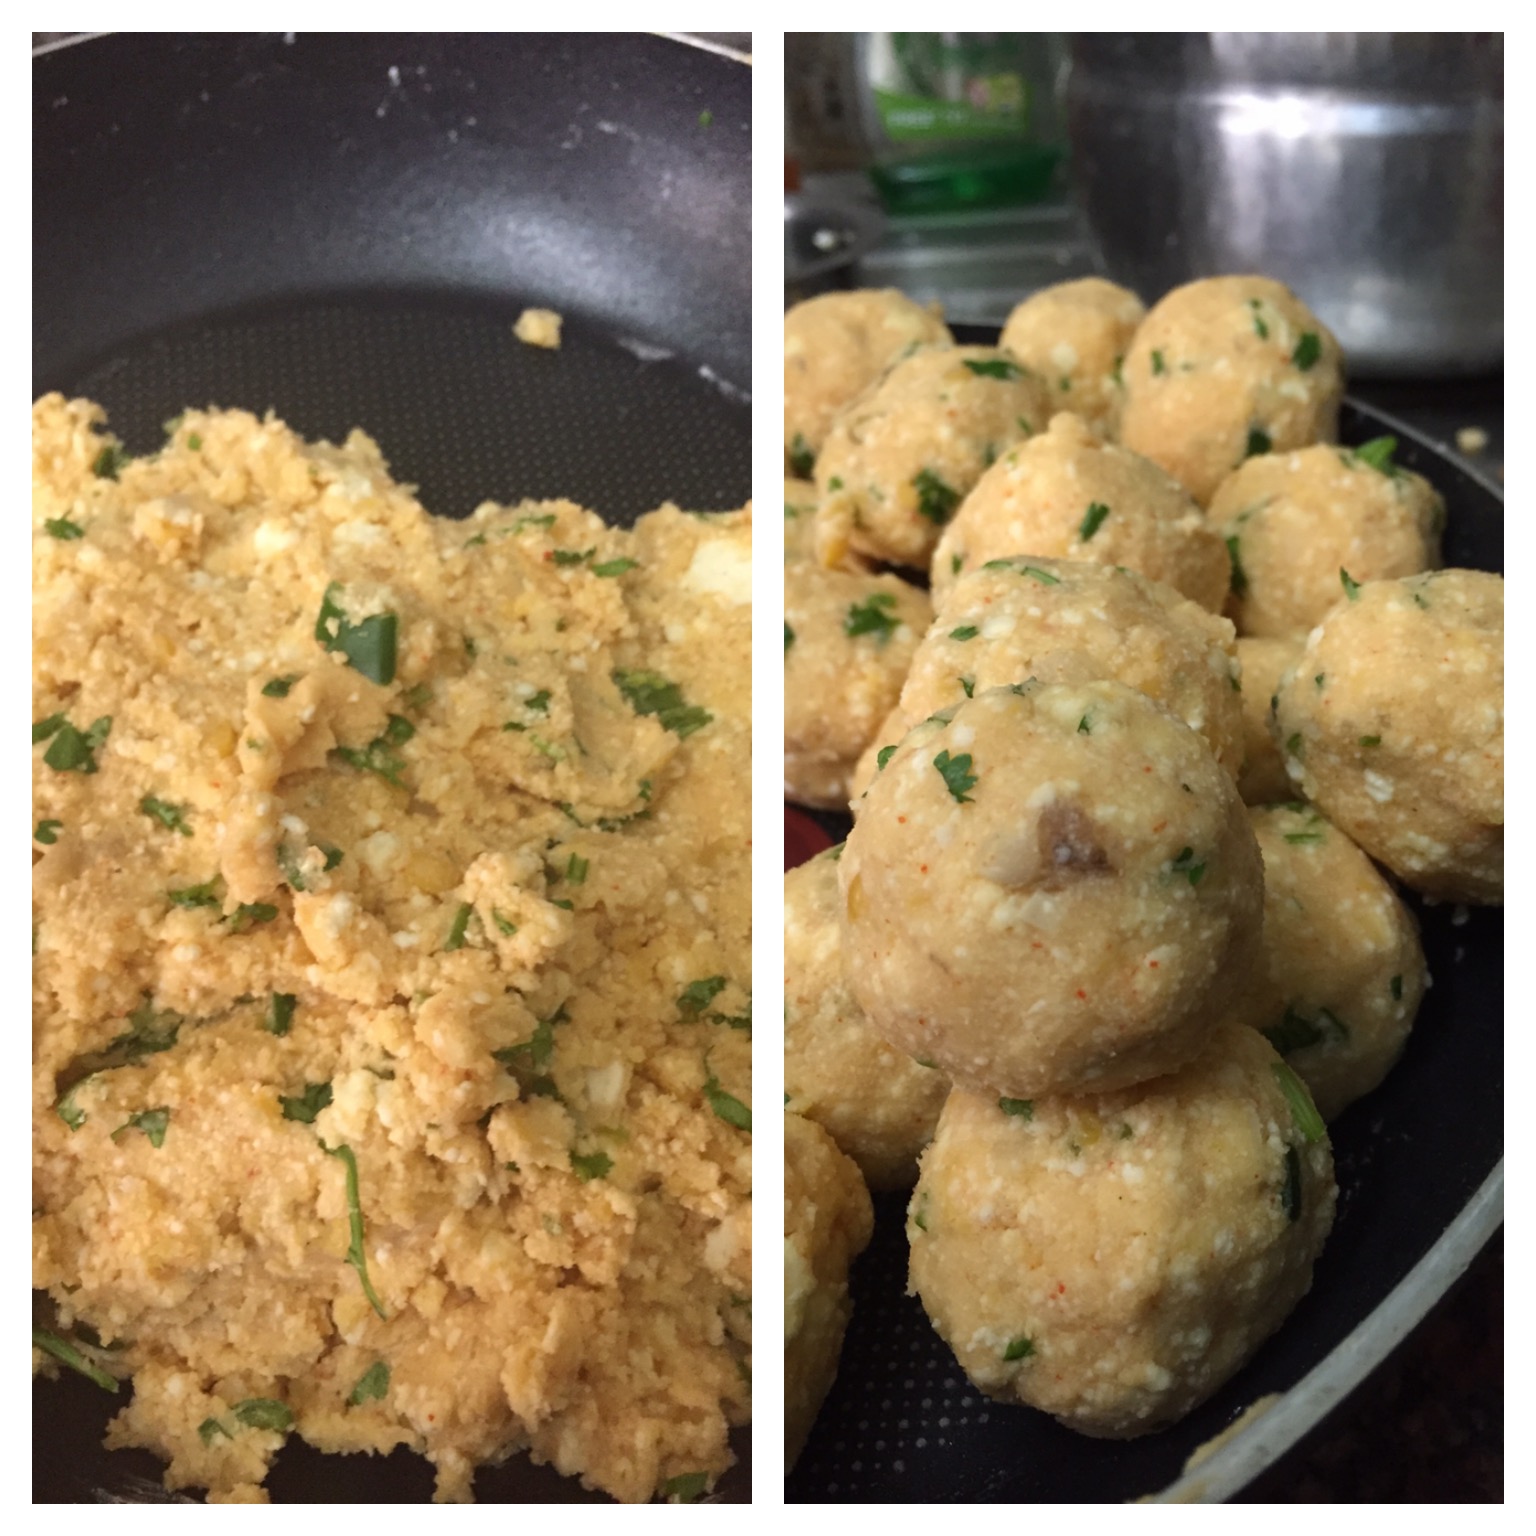
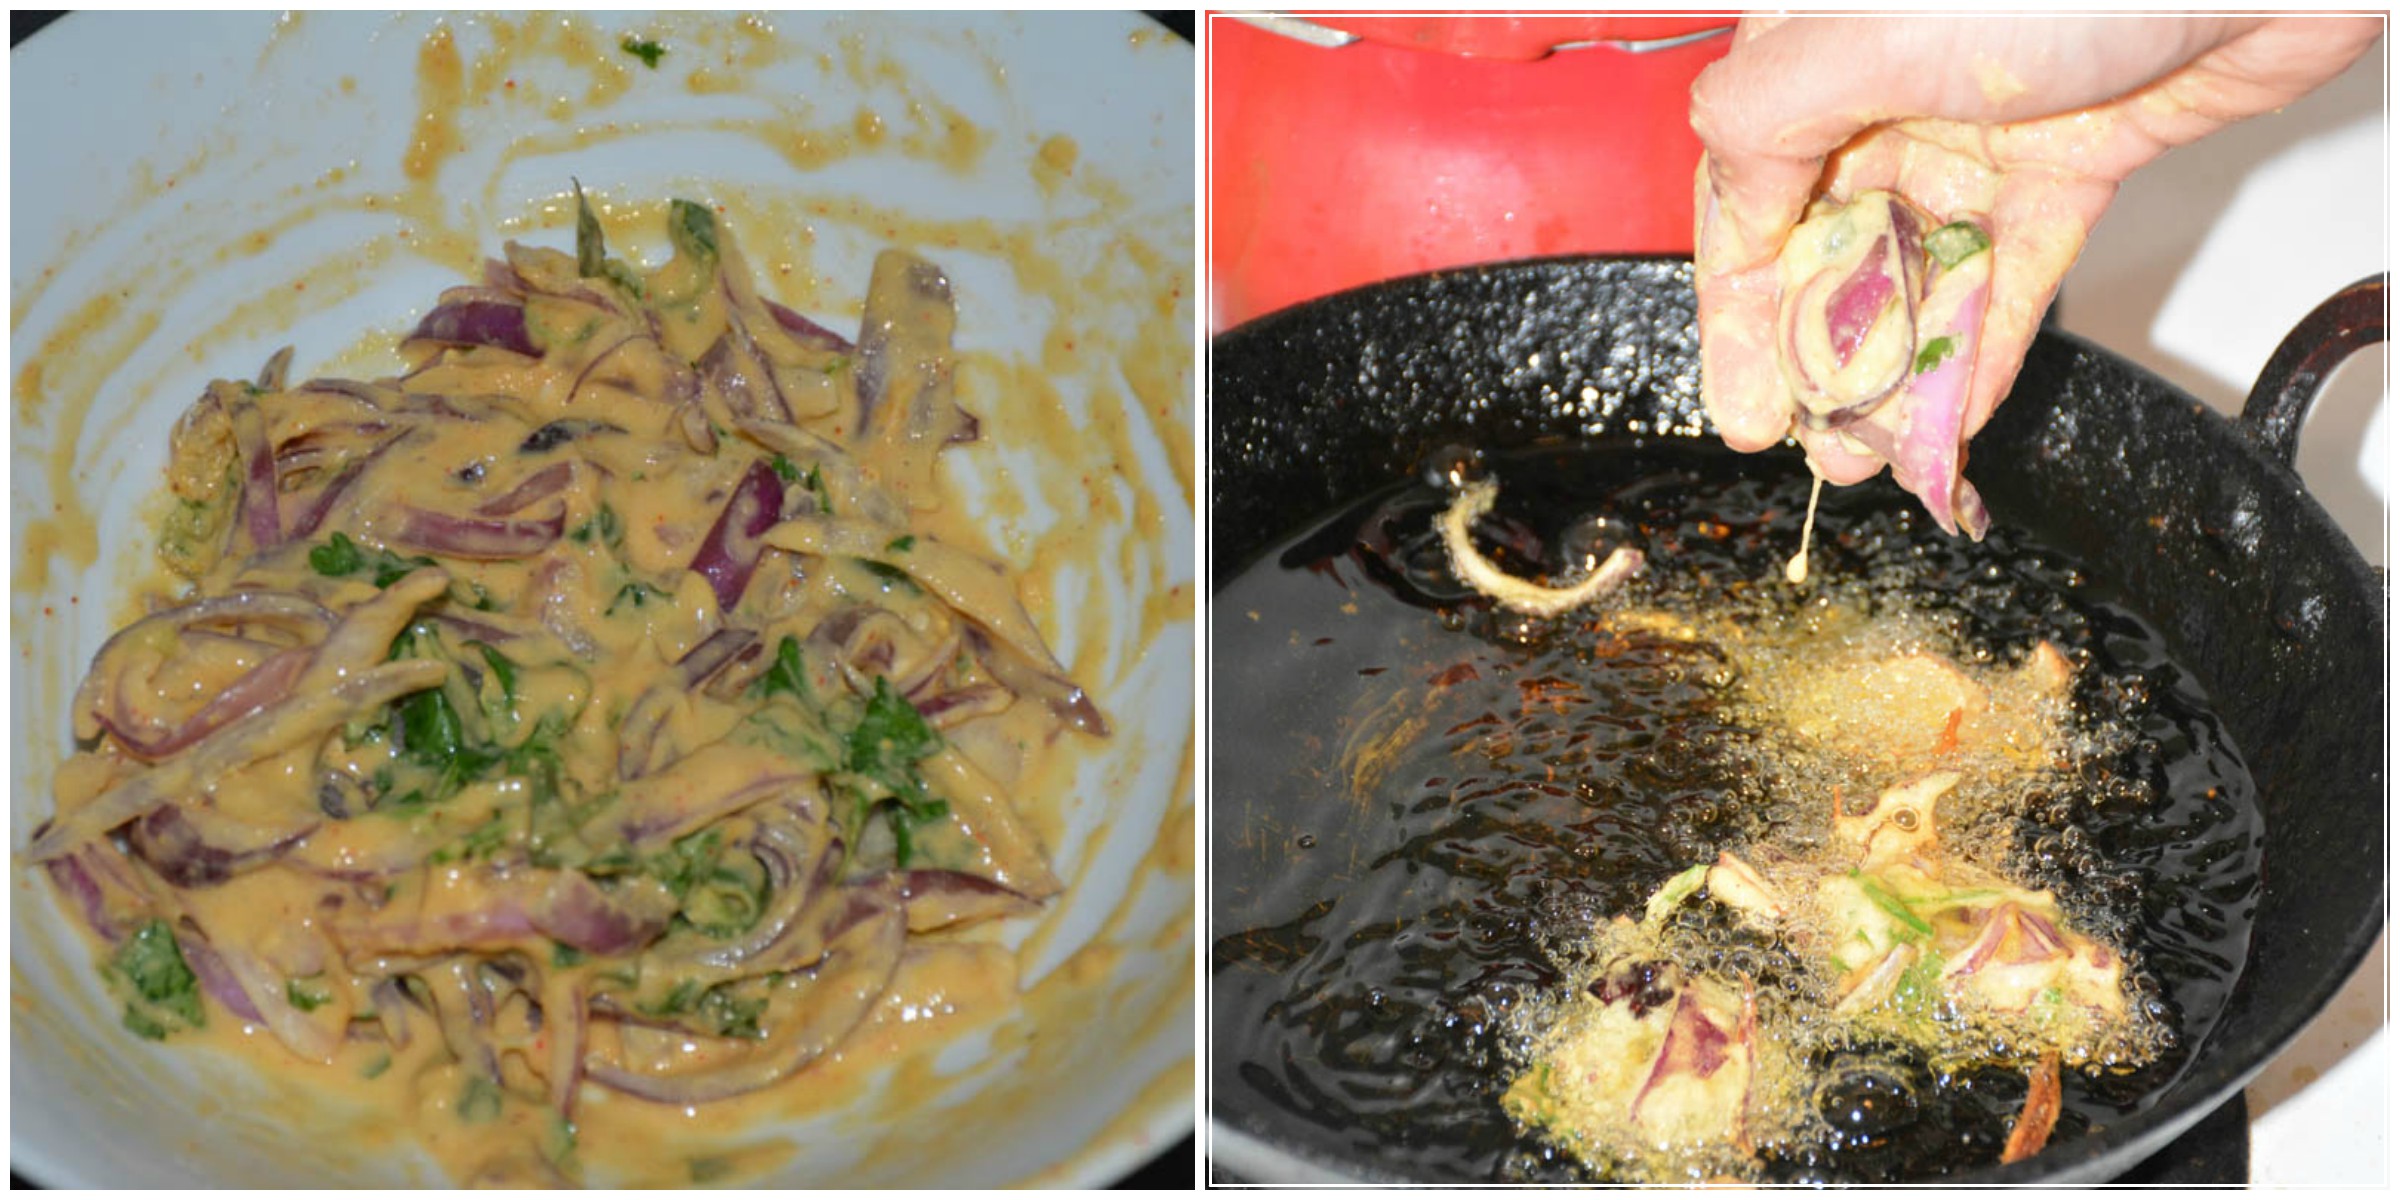
  2. Take all the ingredients under the kofa ingredient list with the blended chana dal, mix together check for salt. Shape them into lemon sized balls. If you think they cannot form into a lemon sized balls, add more corn flour and mix well.


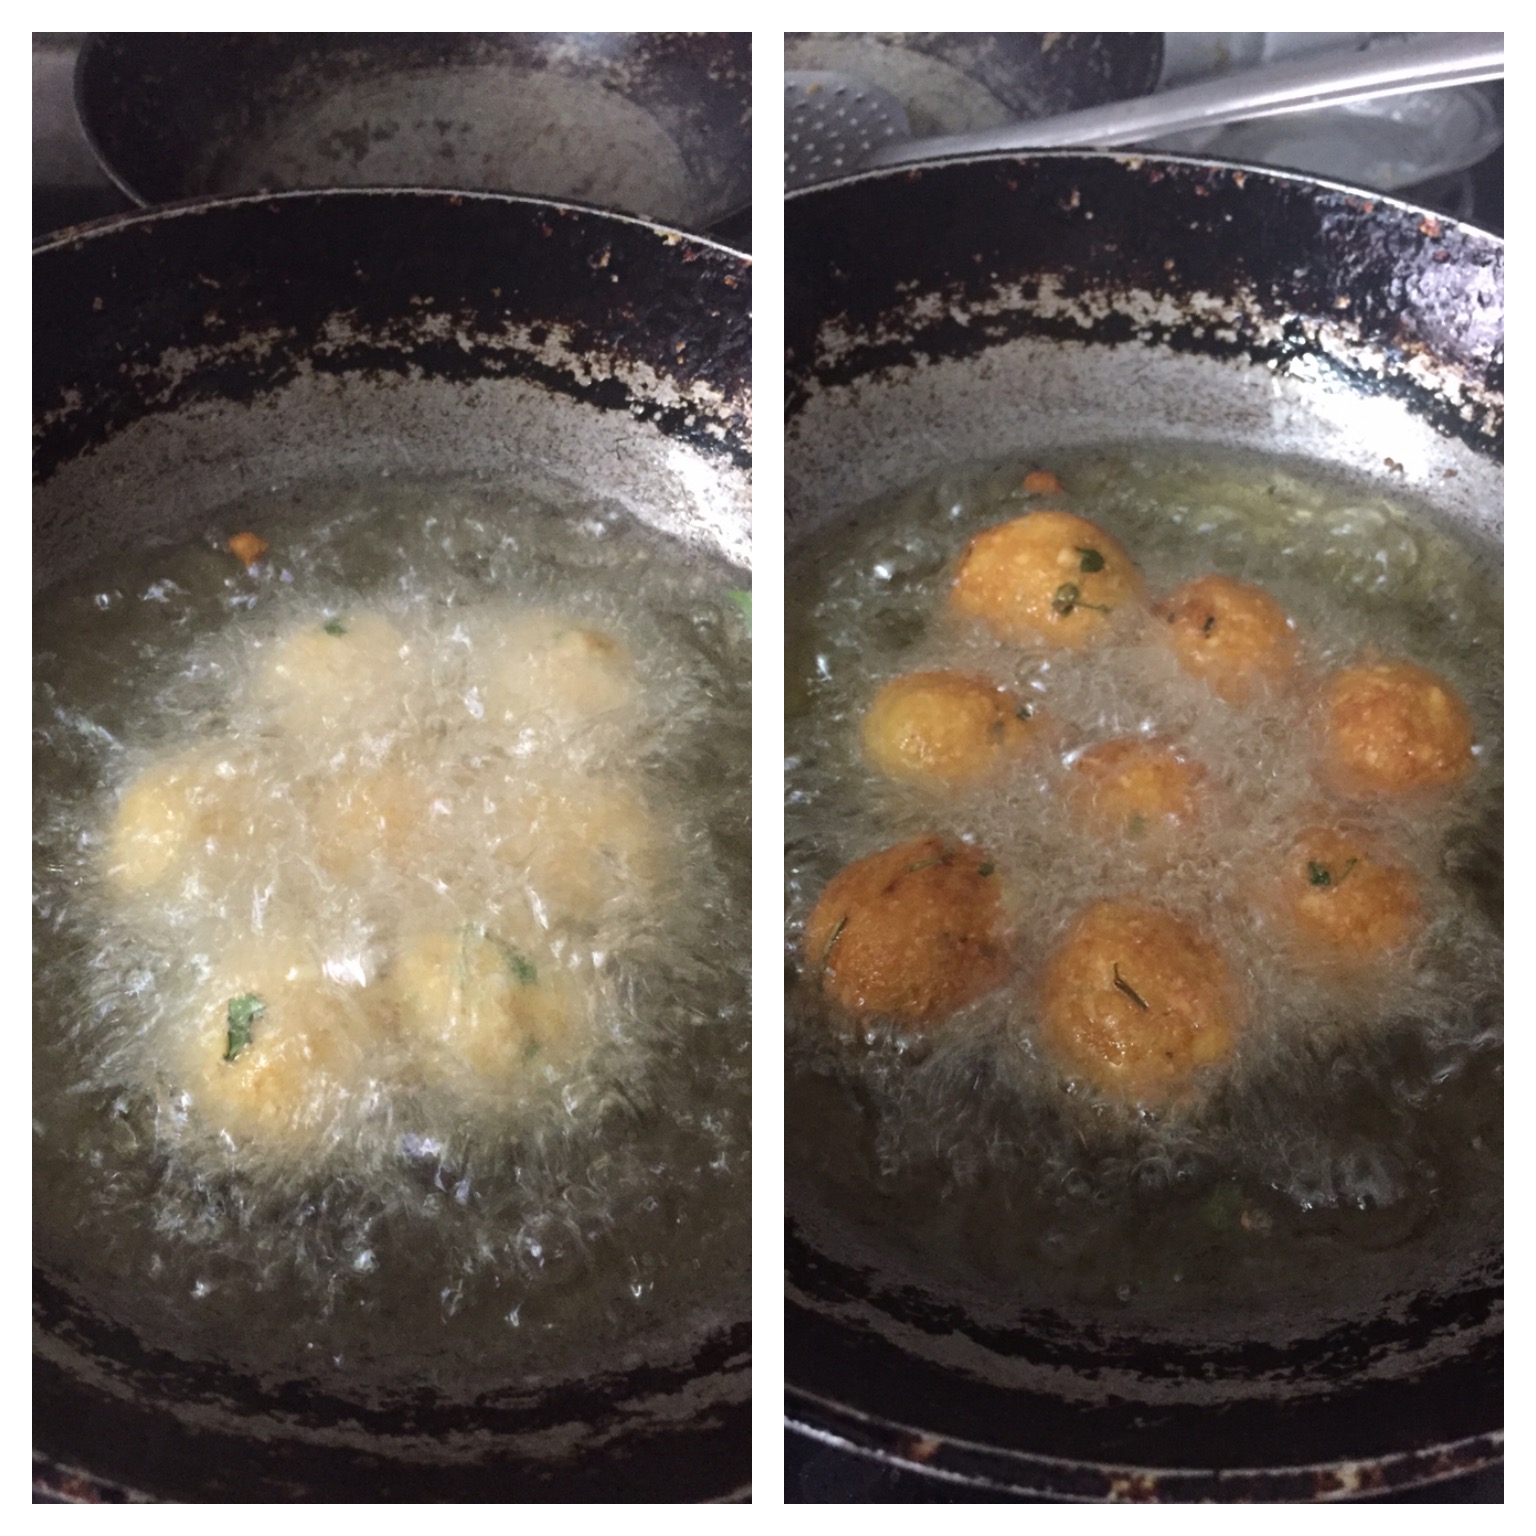
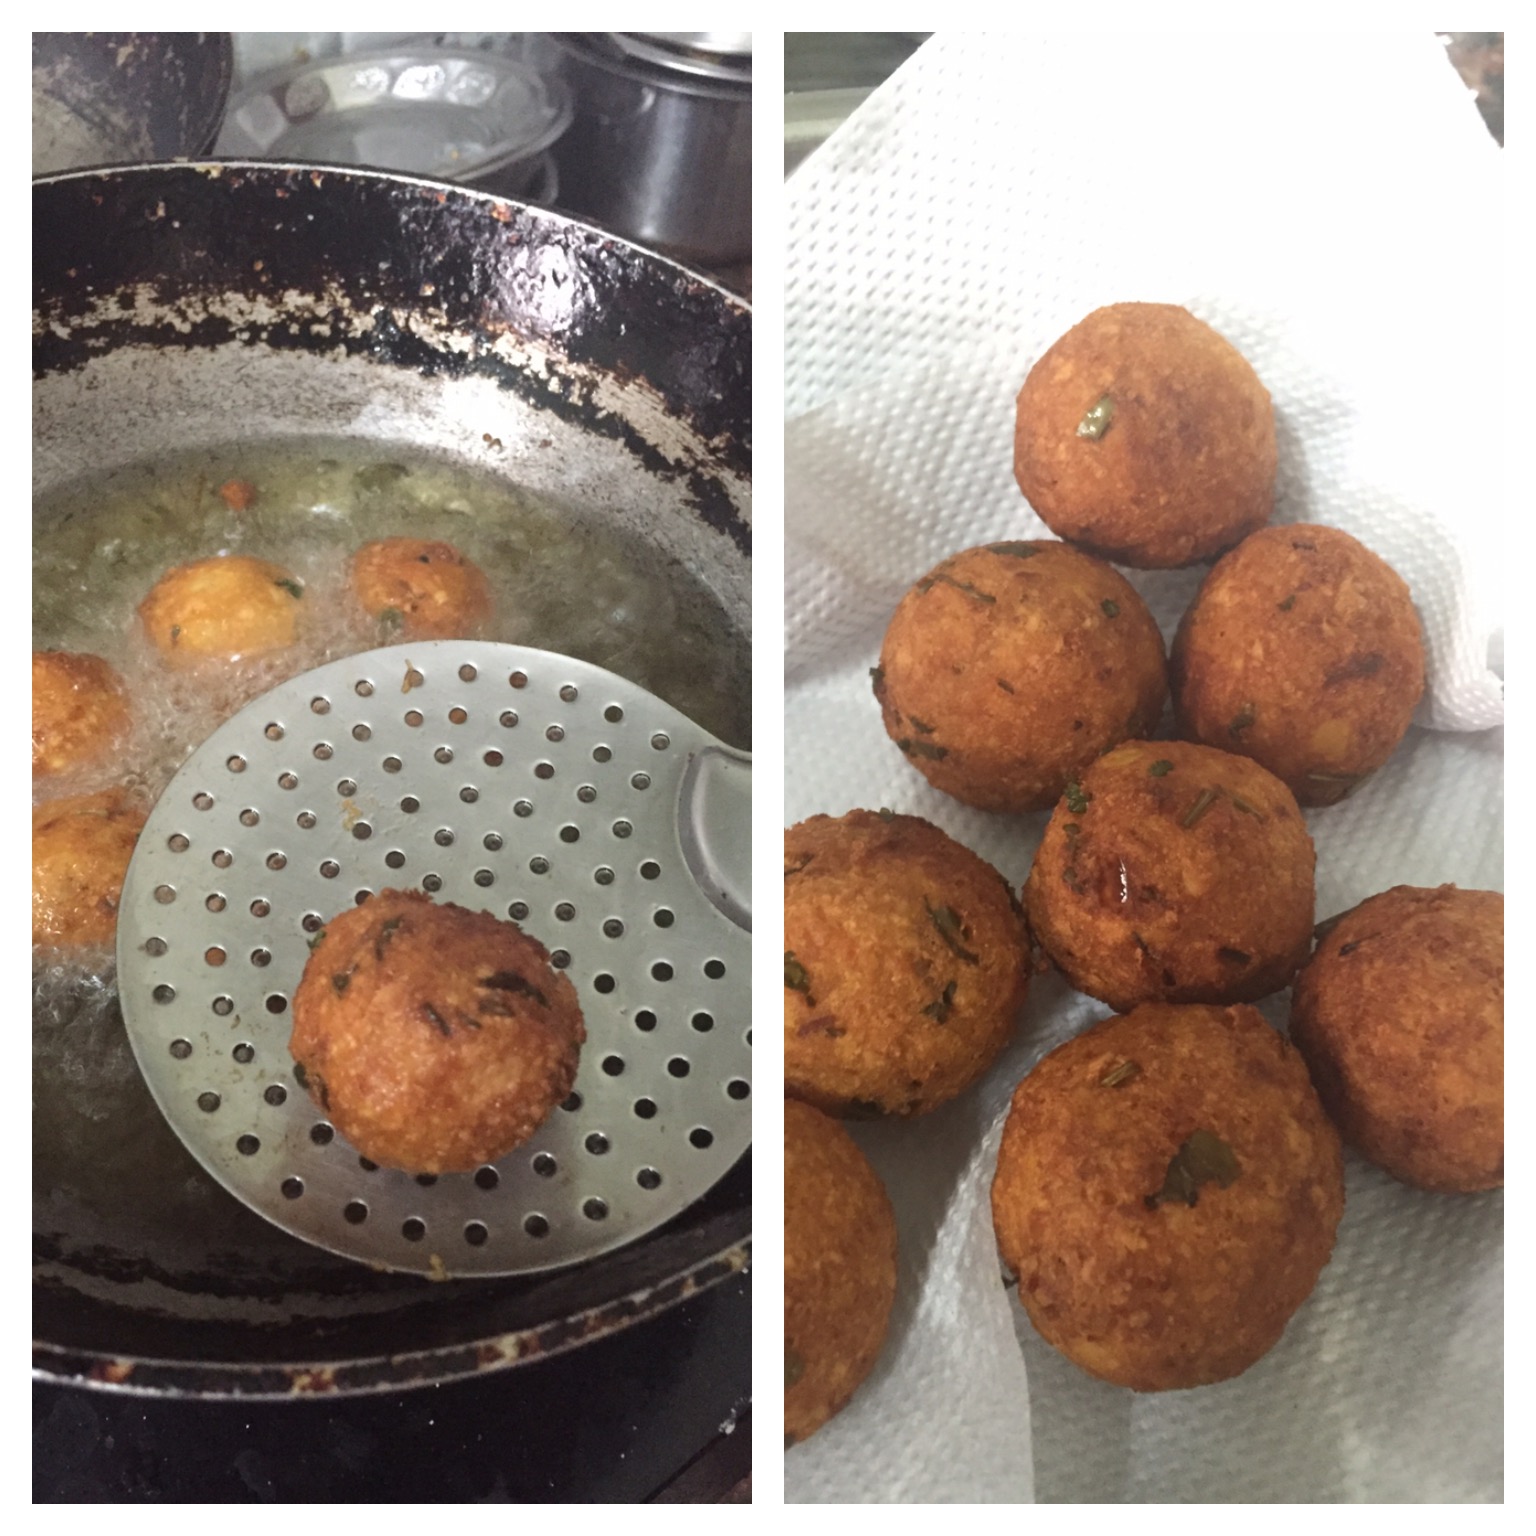
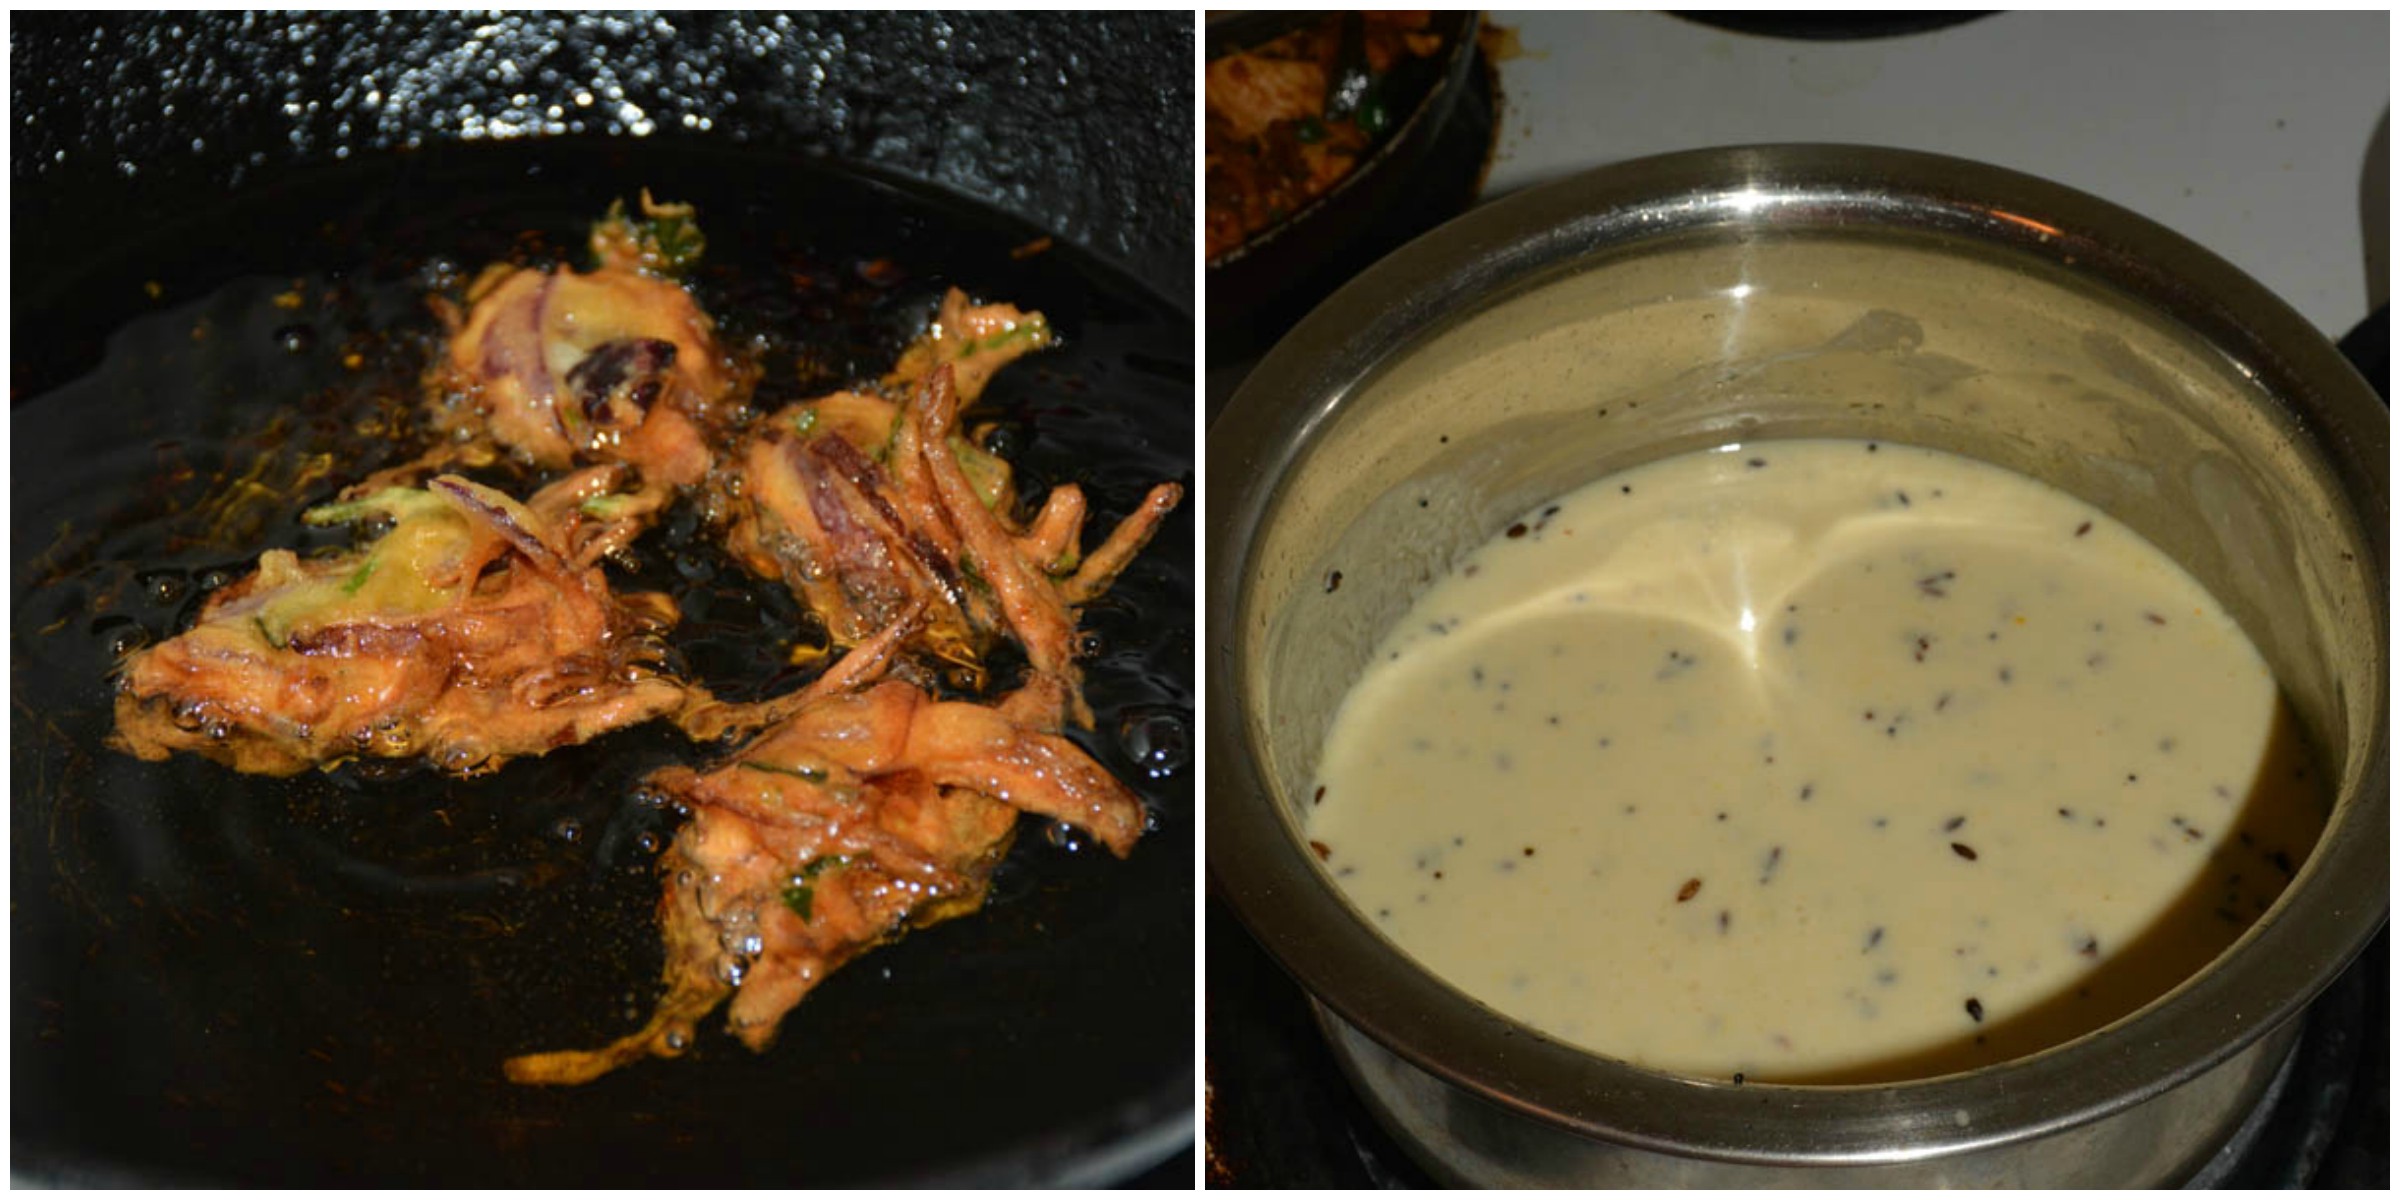
  3. Heat oil in a kadai, deep fry the koftas until golden brown. Drain on a tissue paper and set aside.


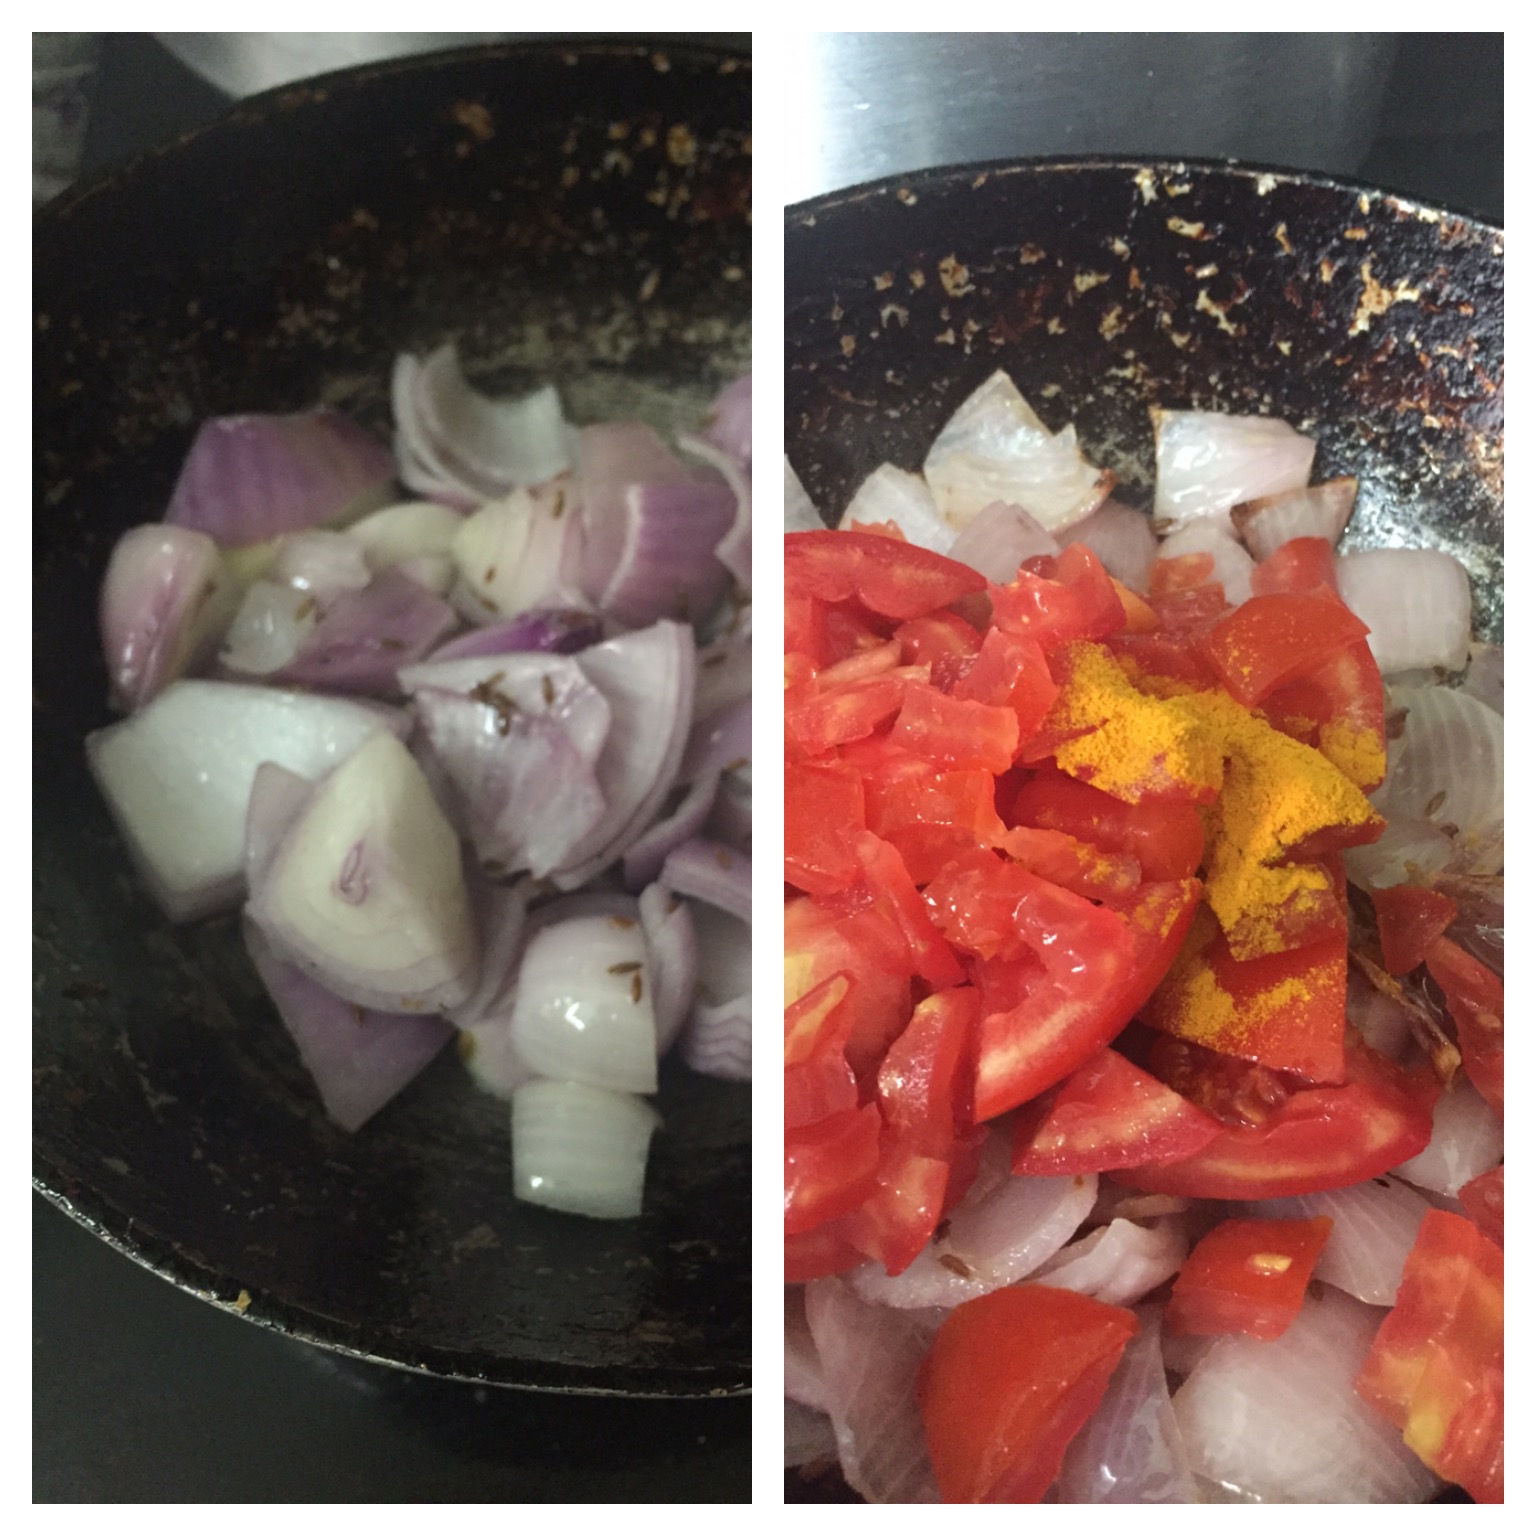
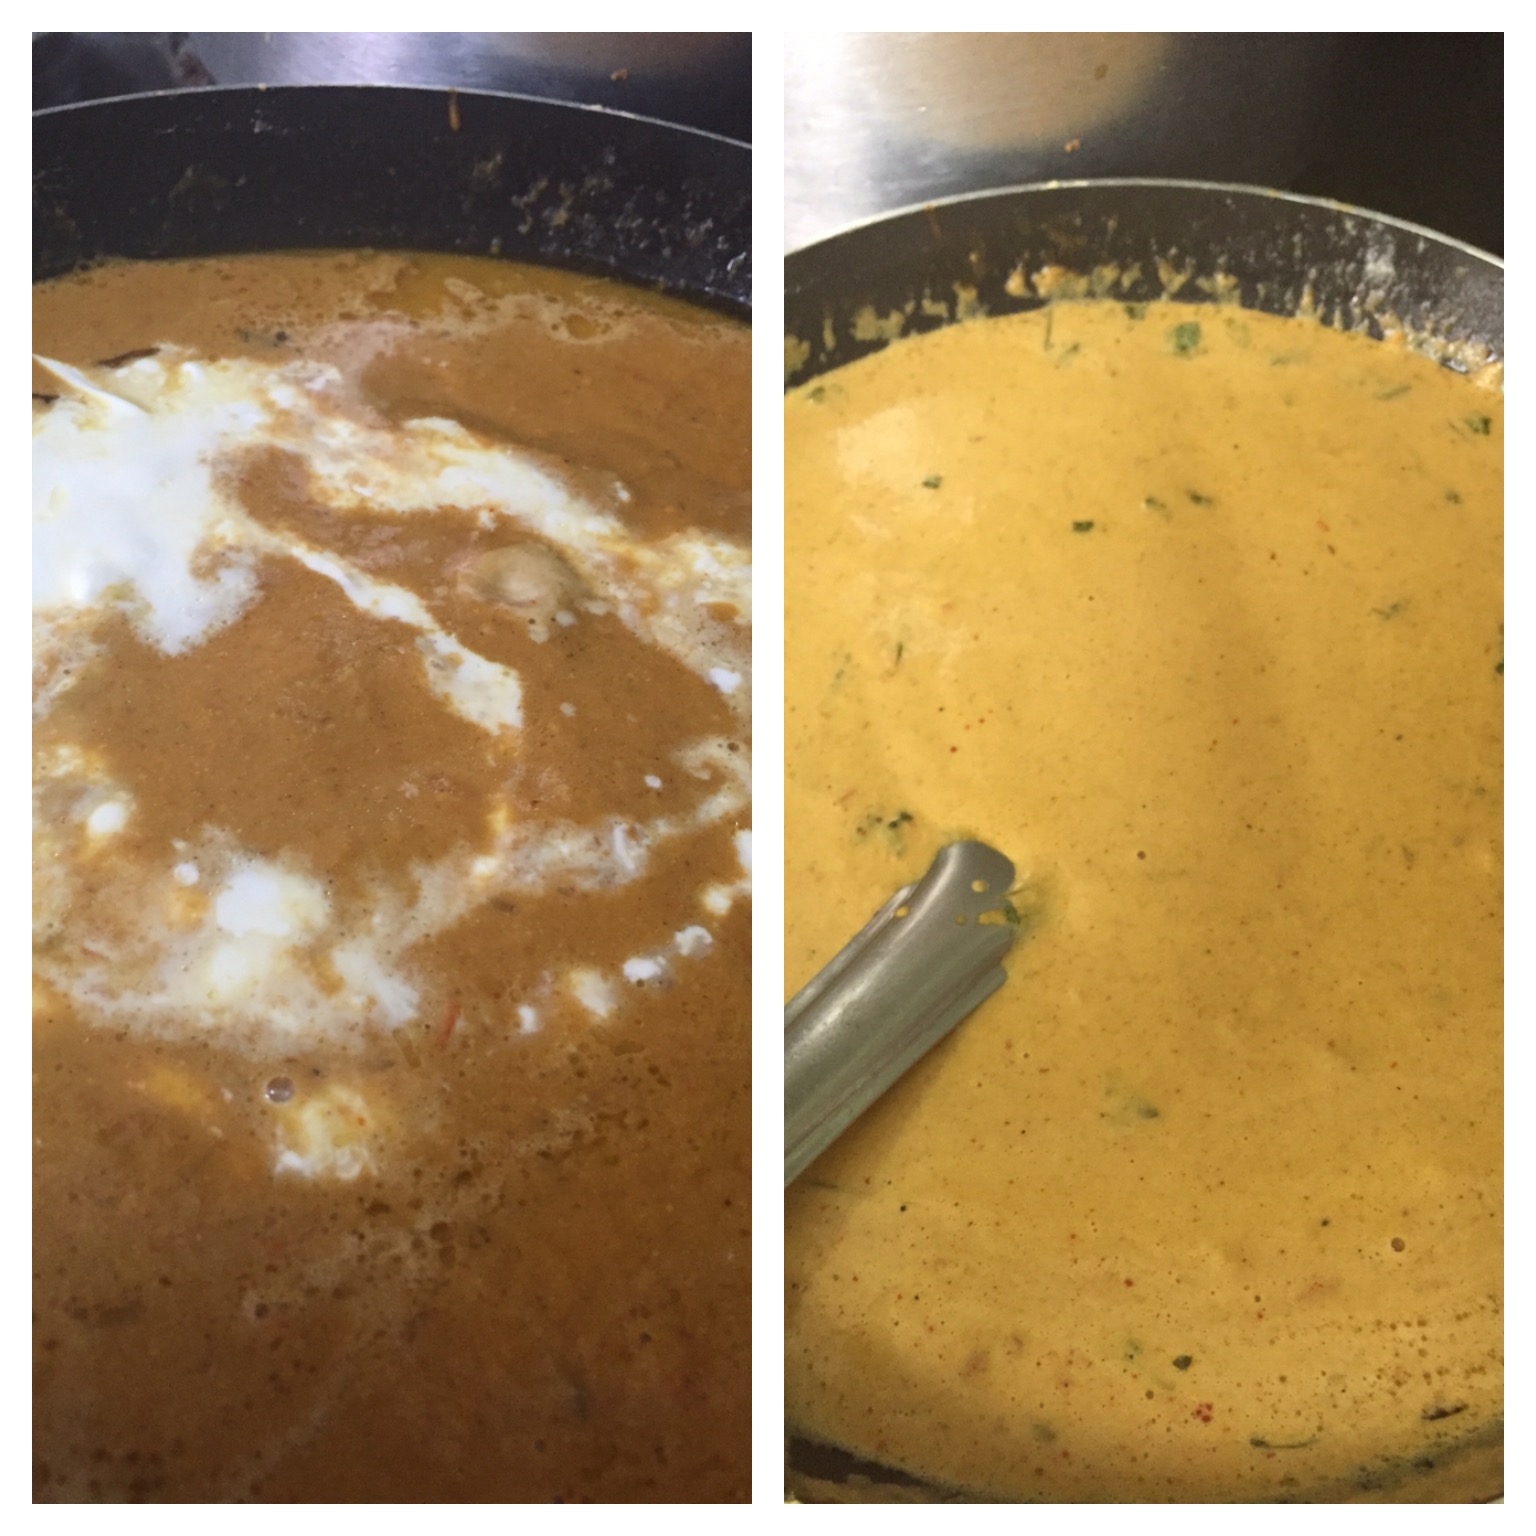
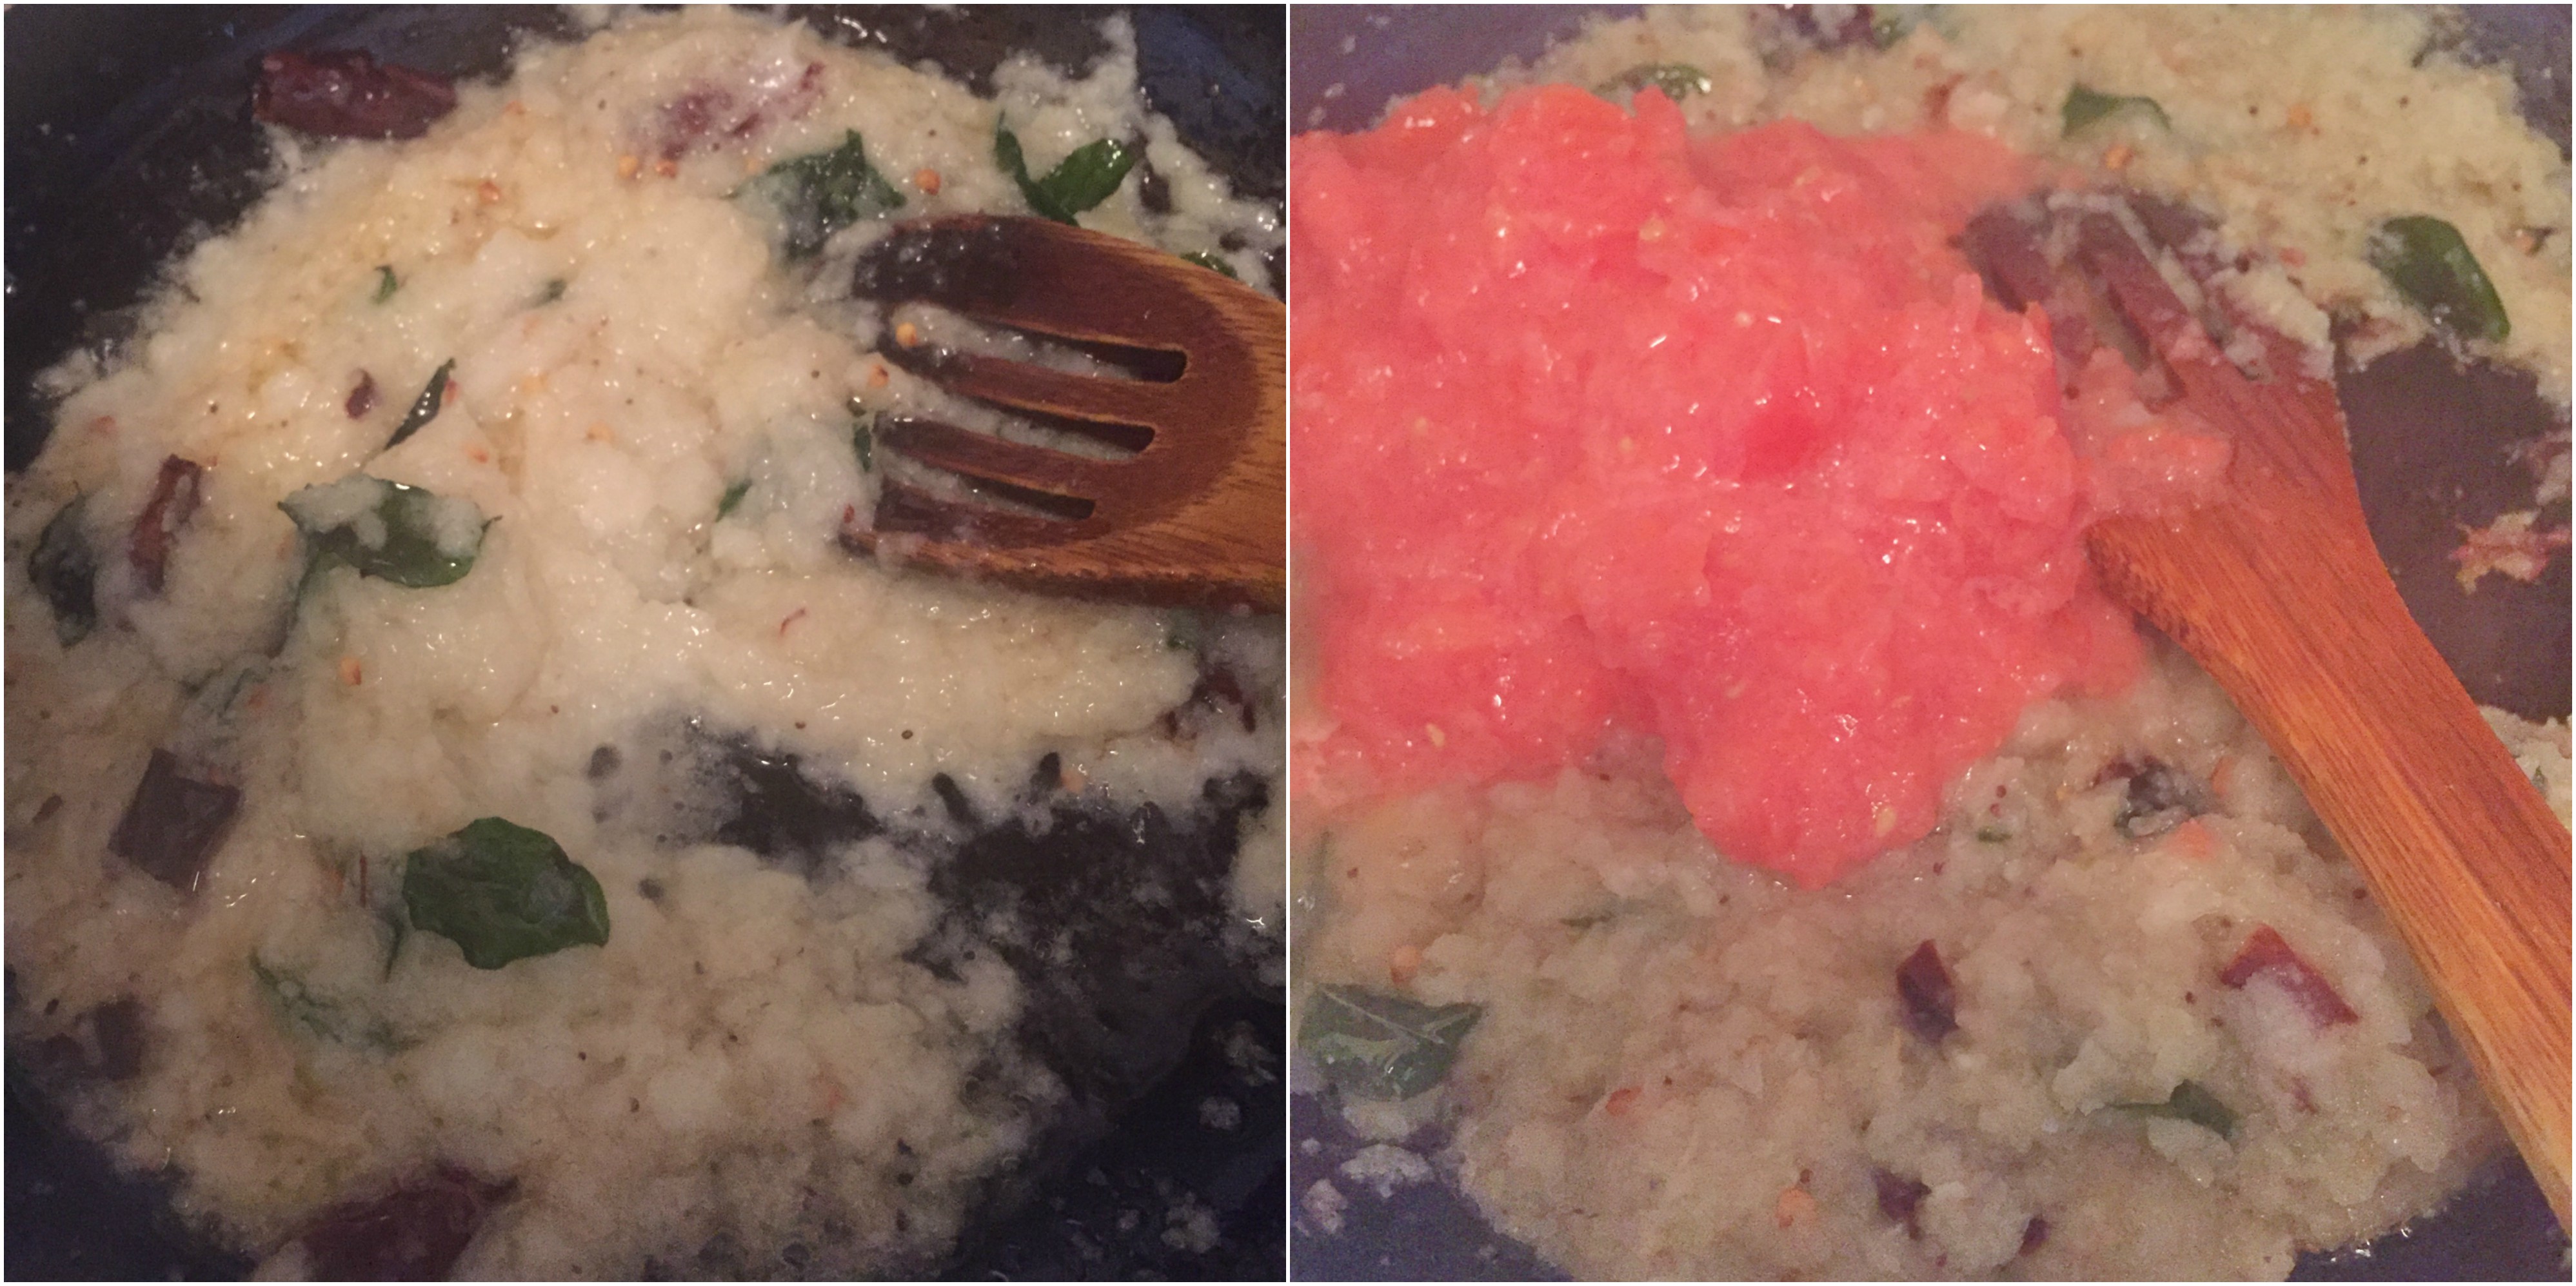
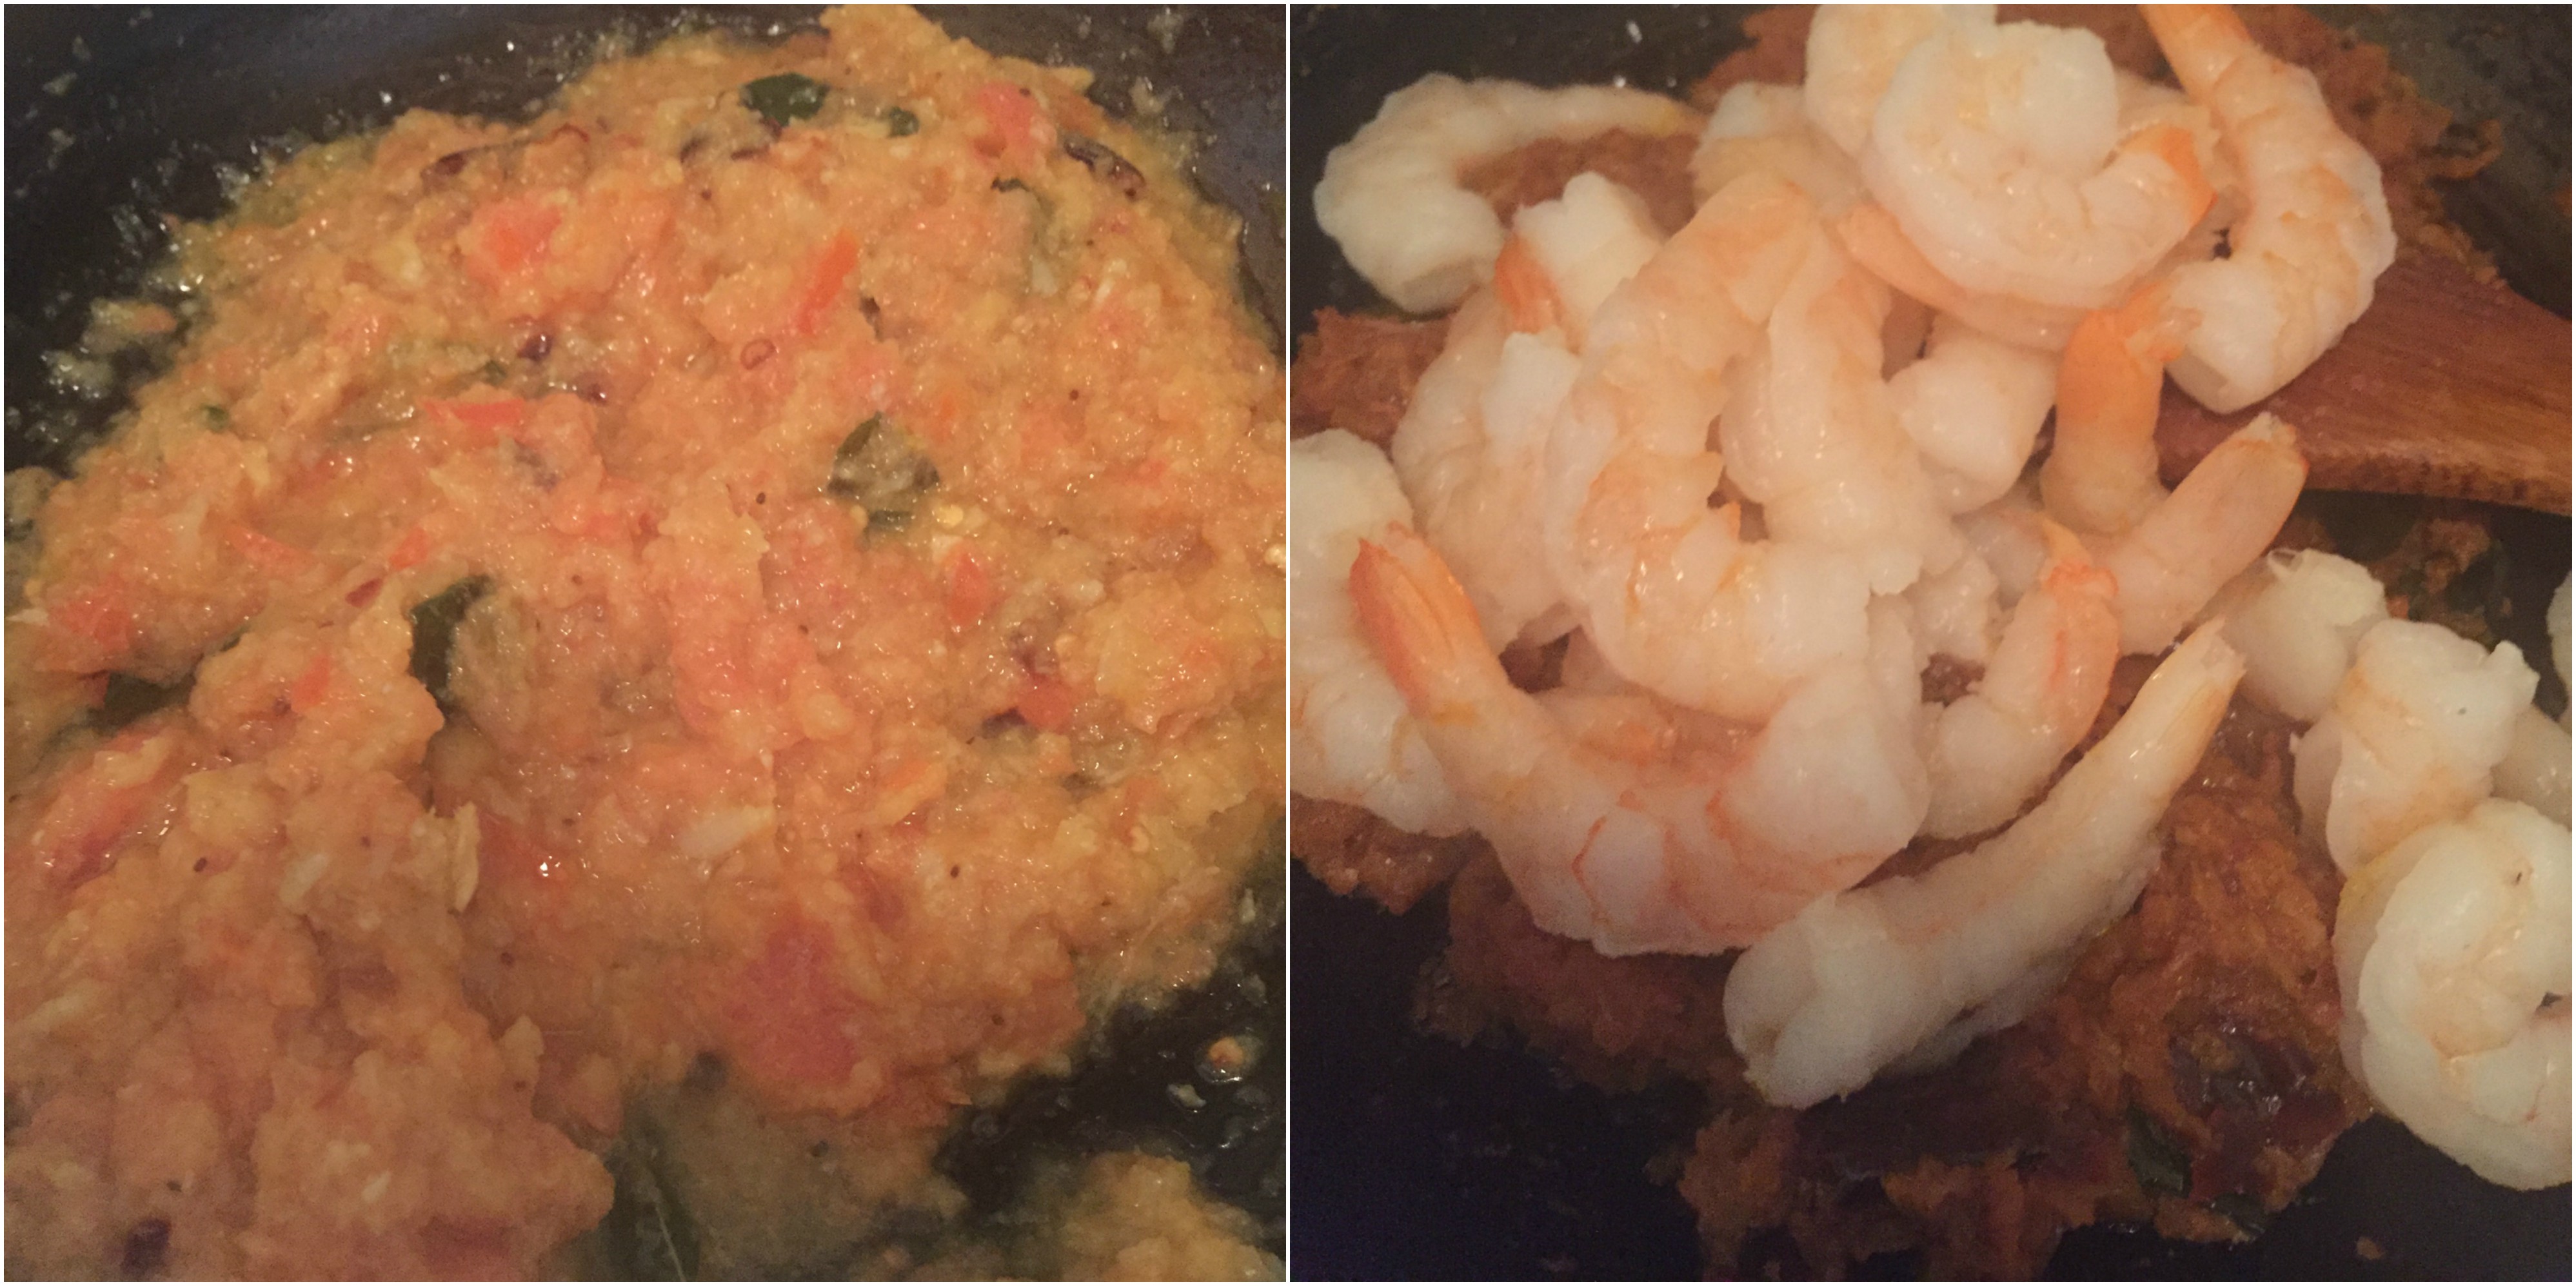
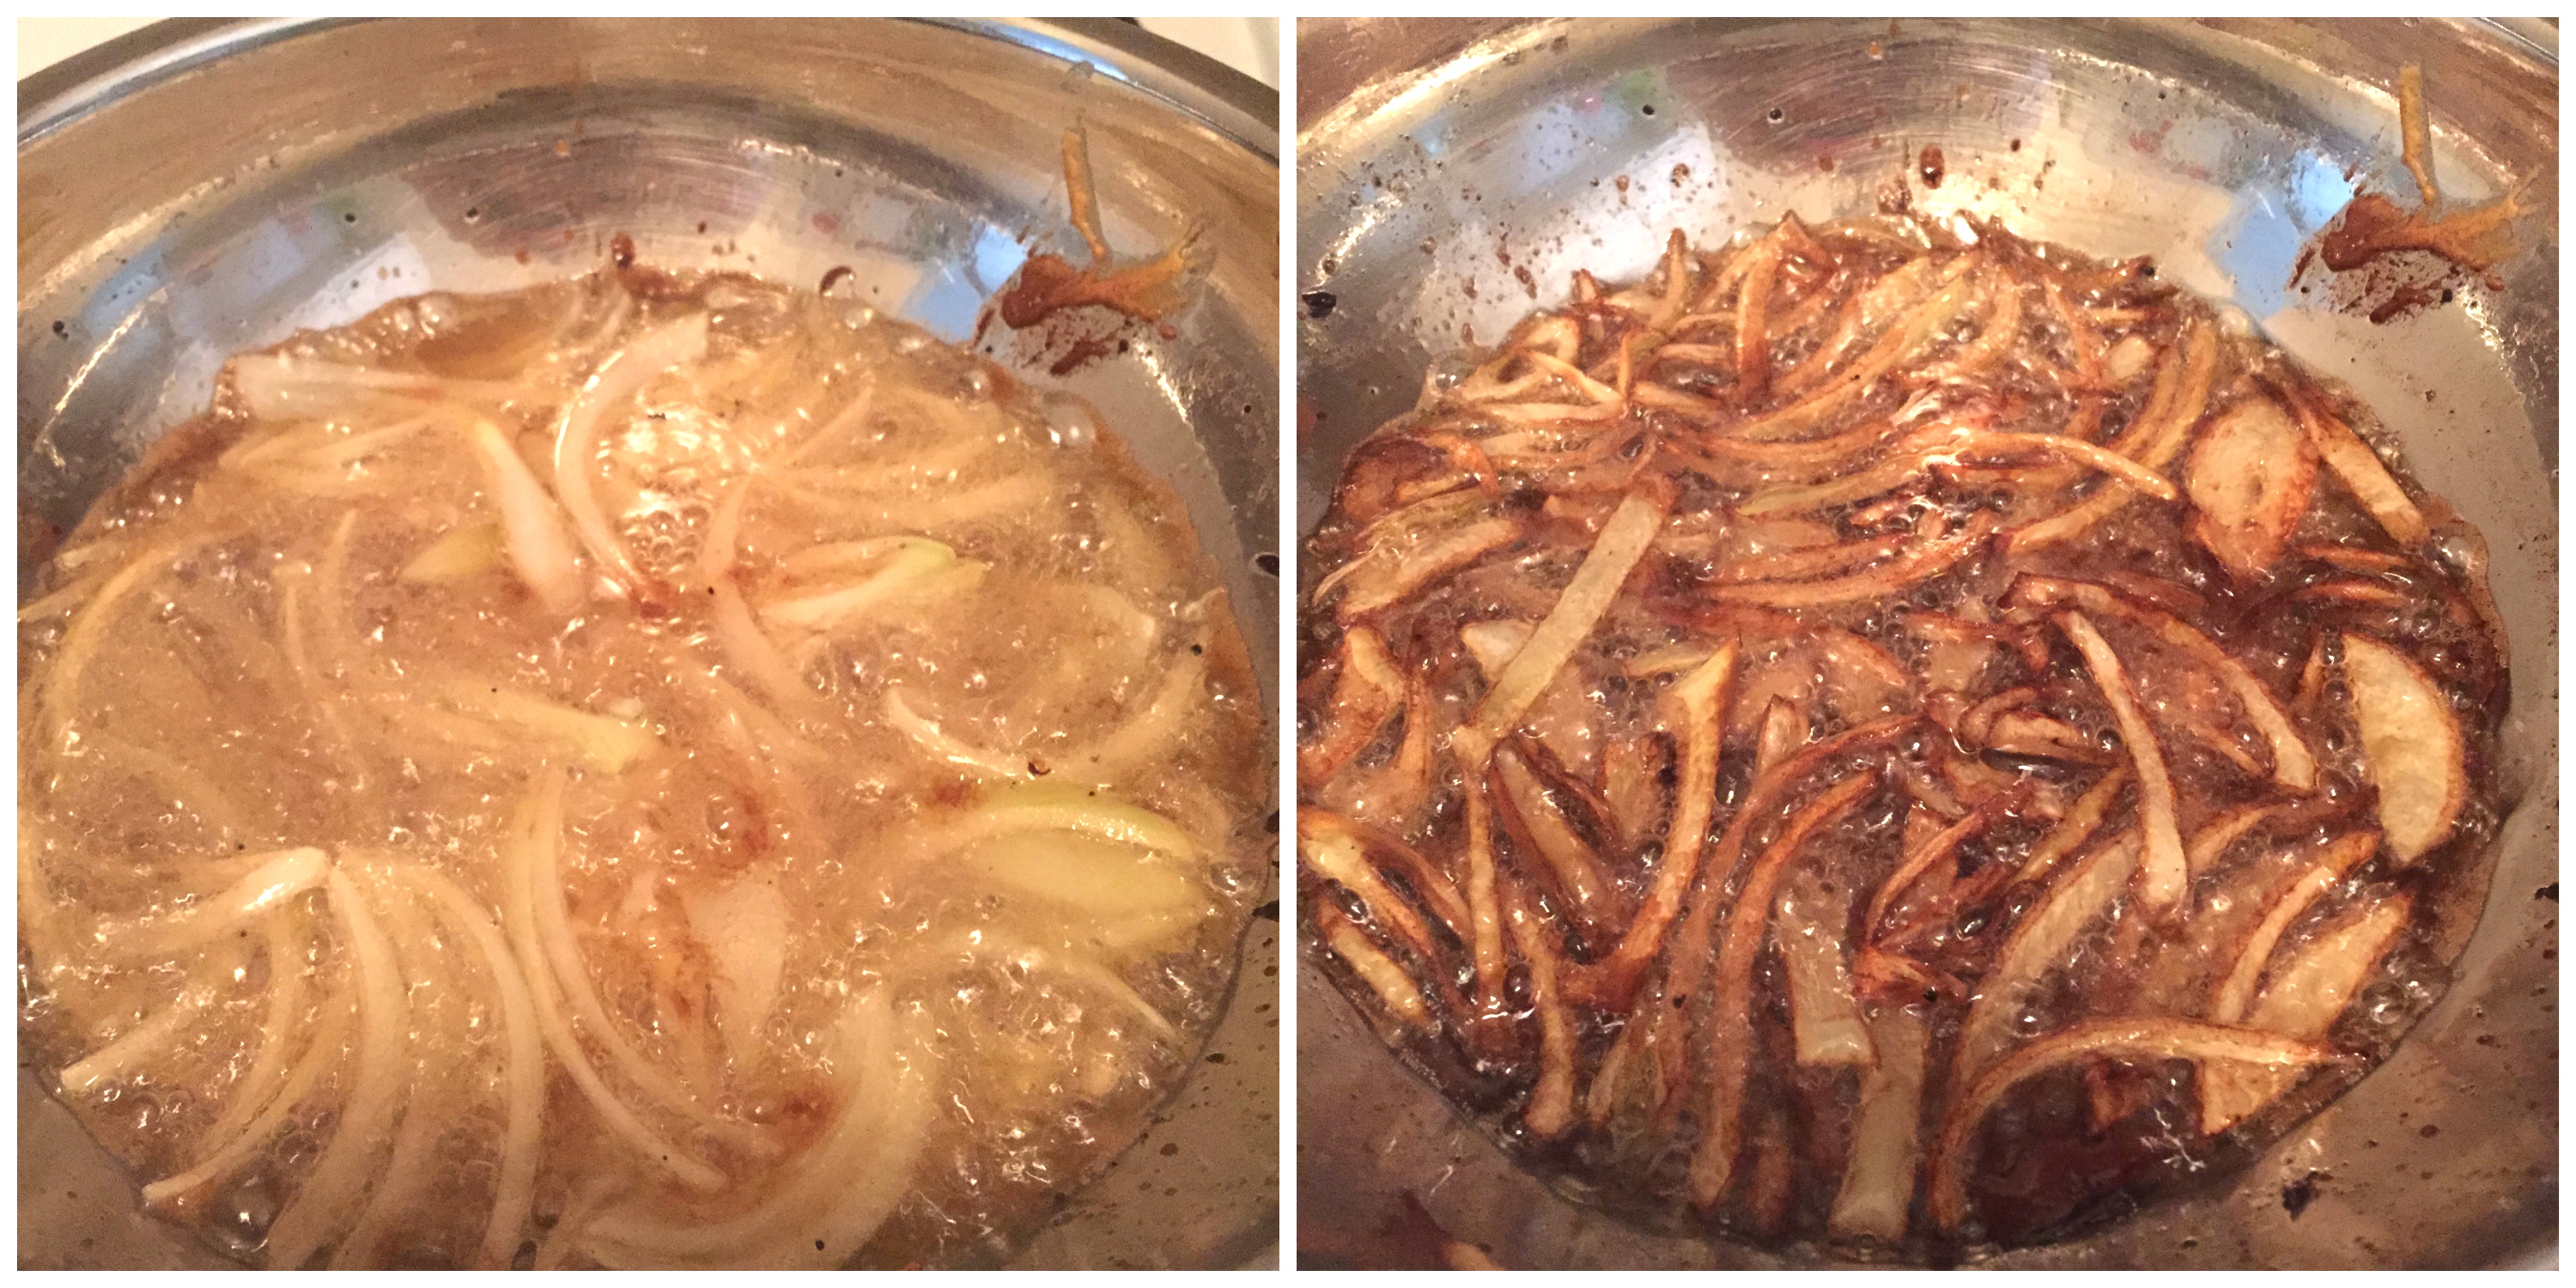
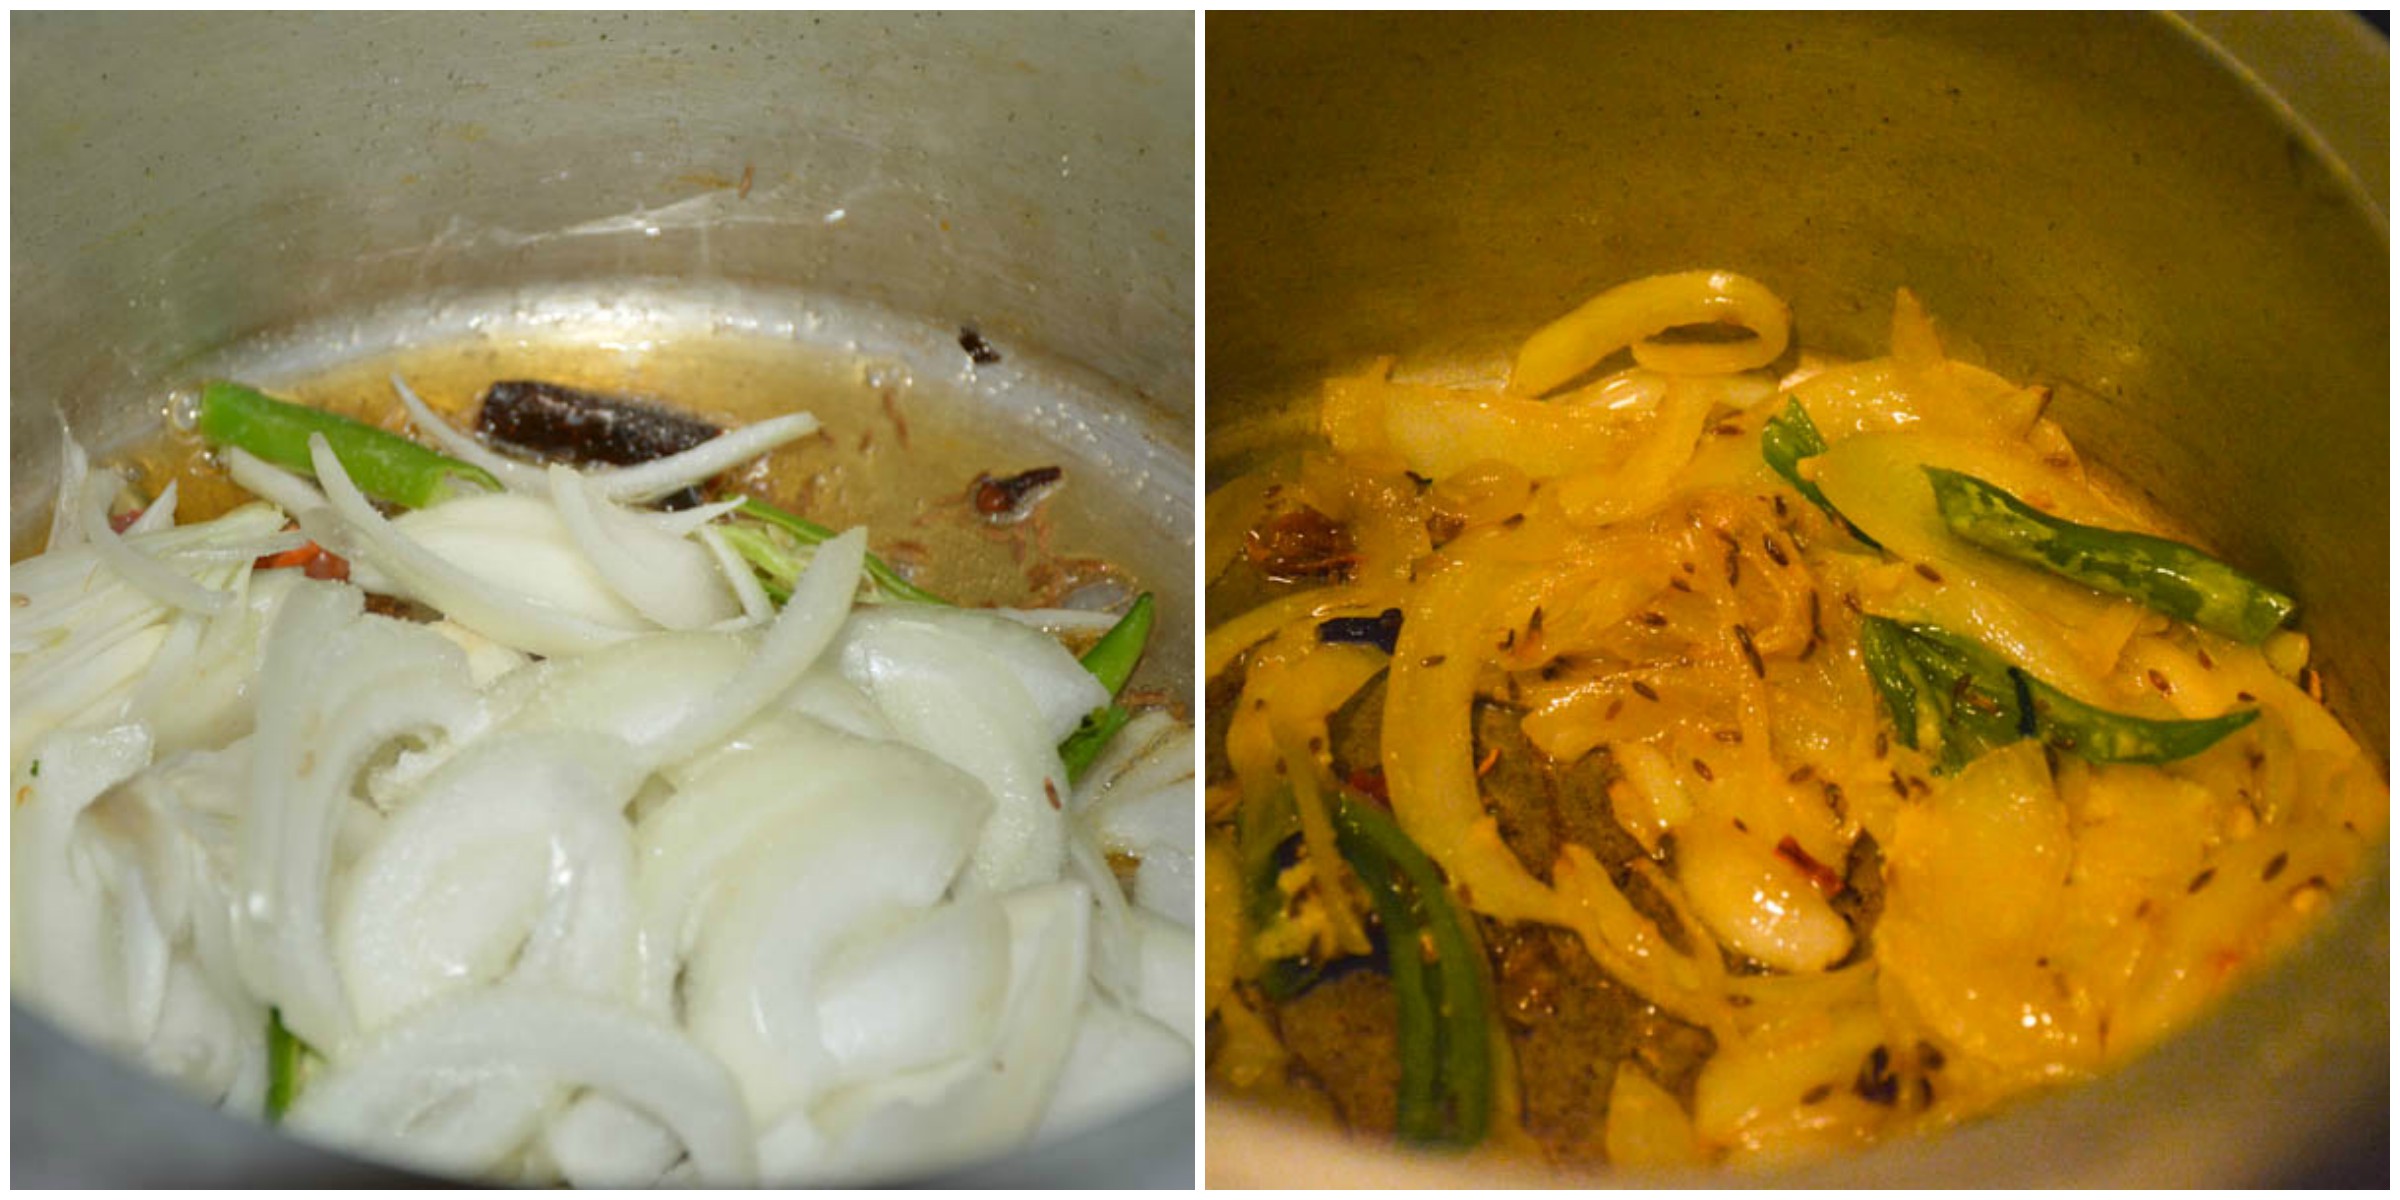
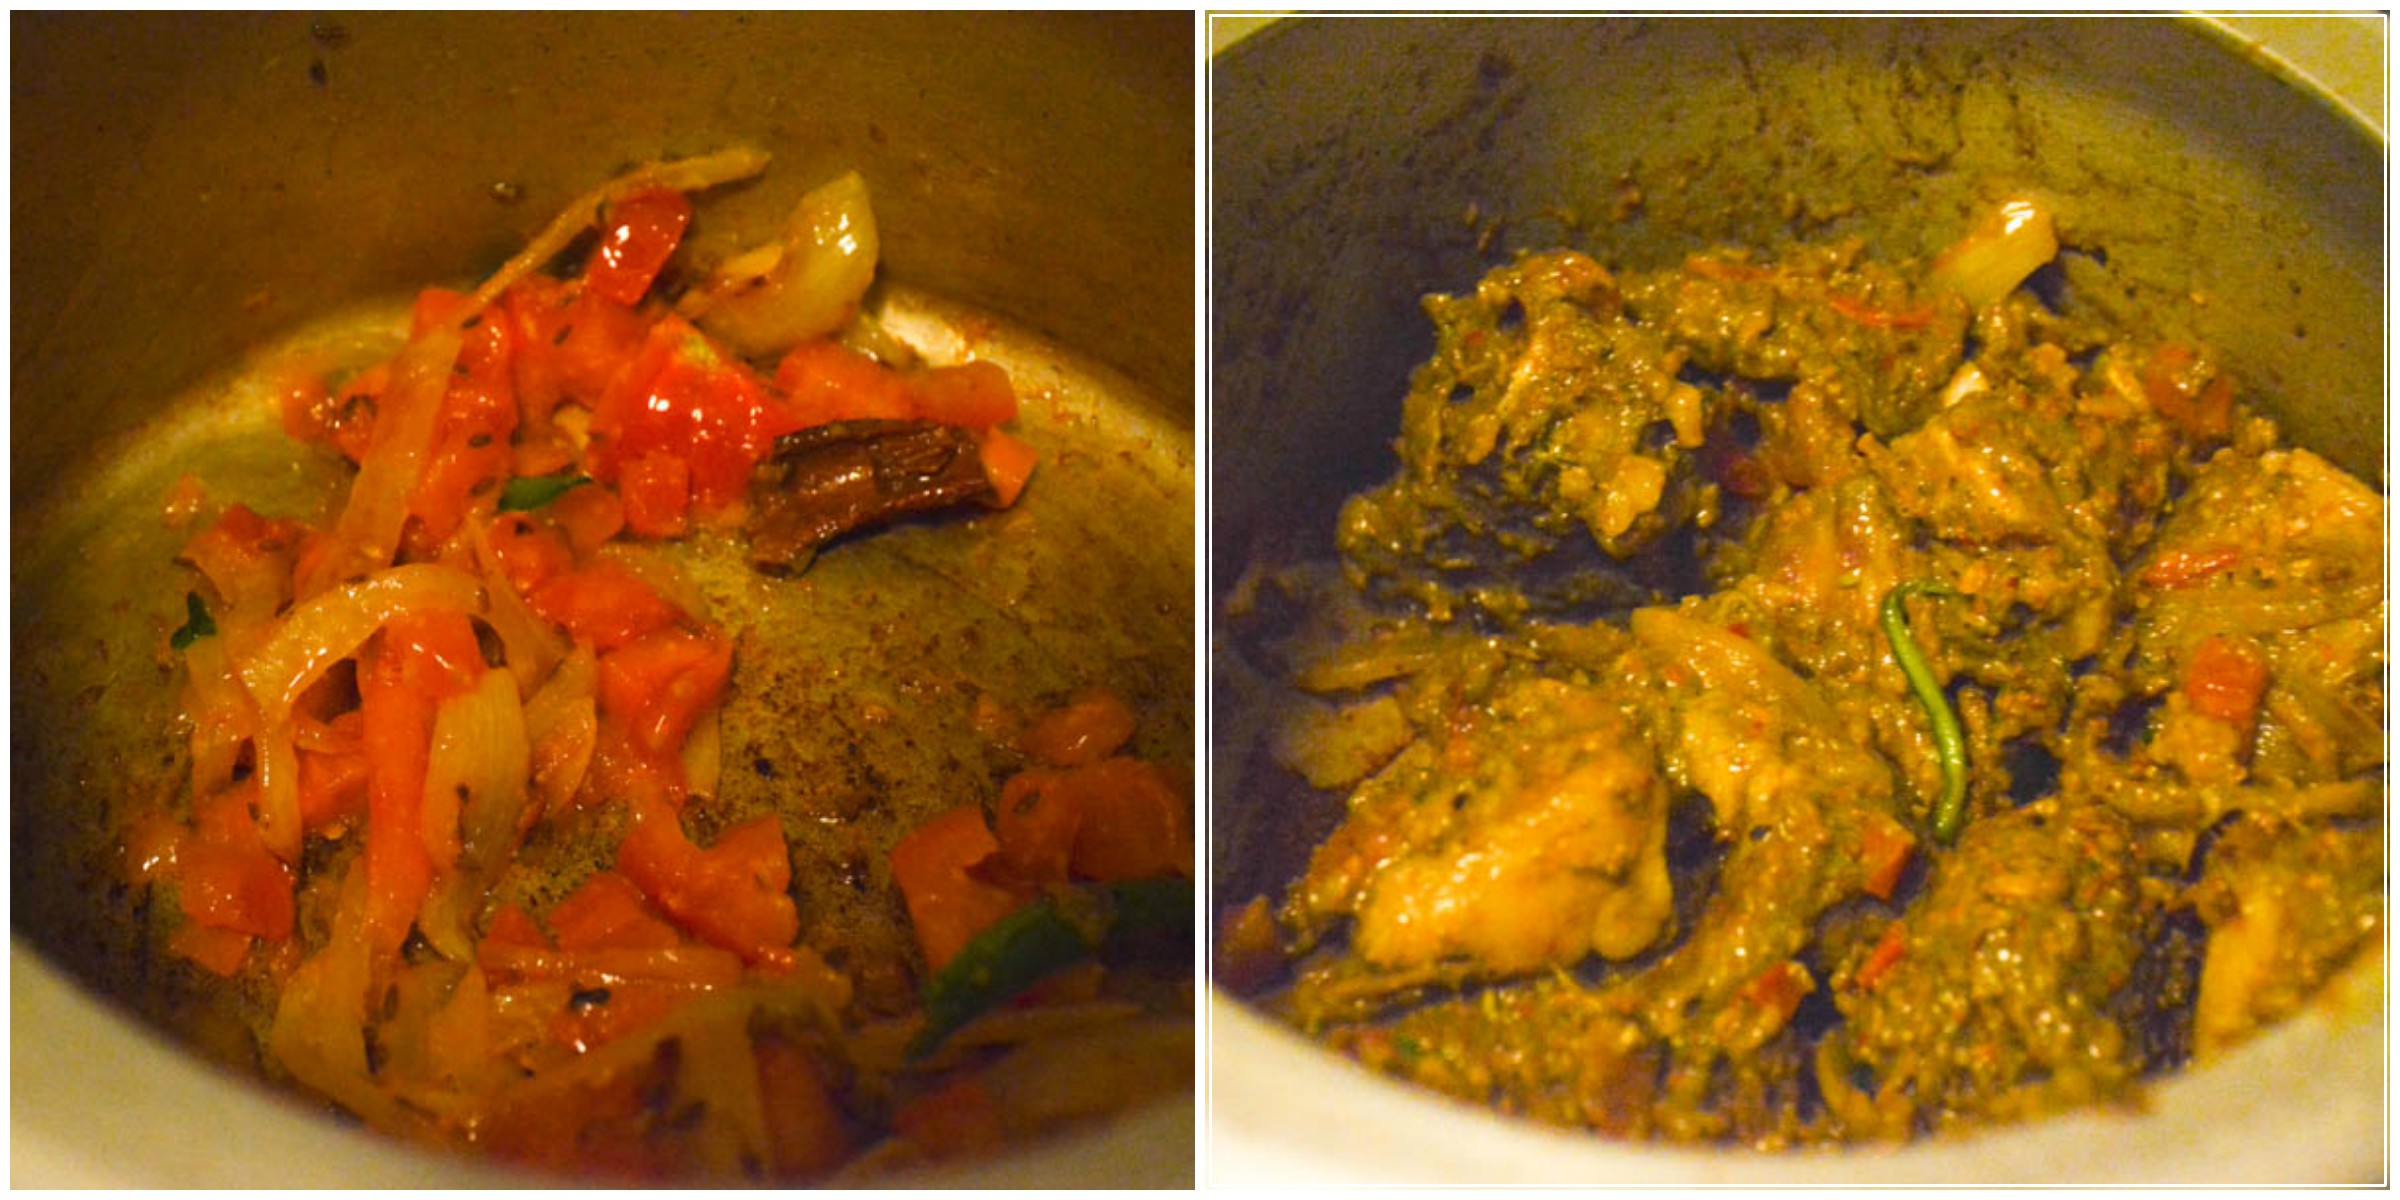
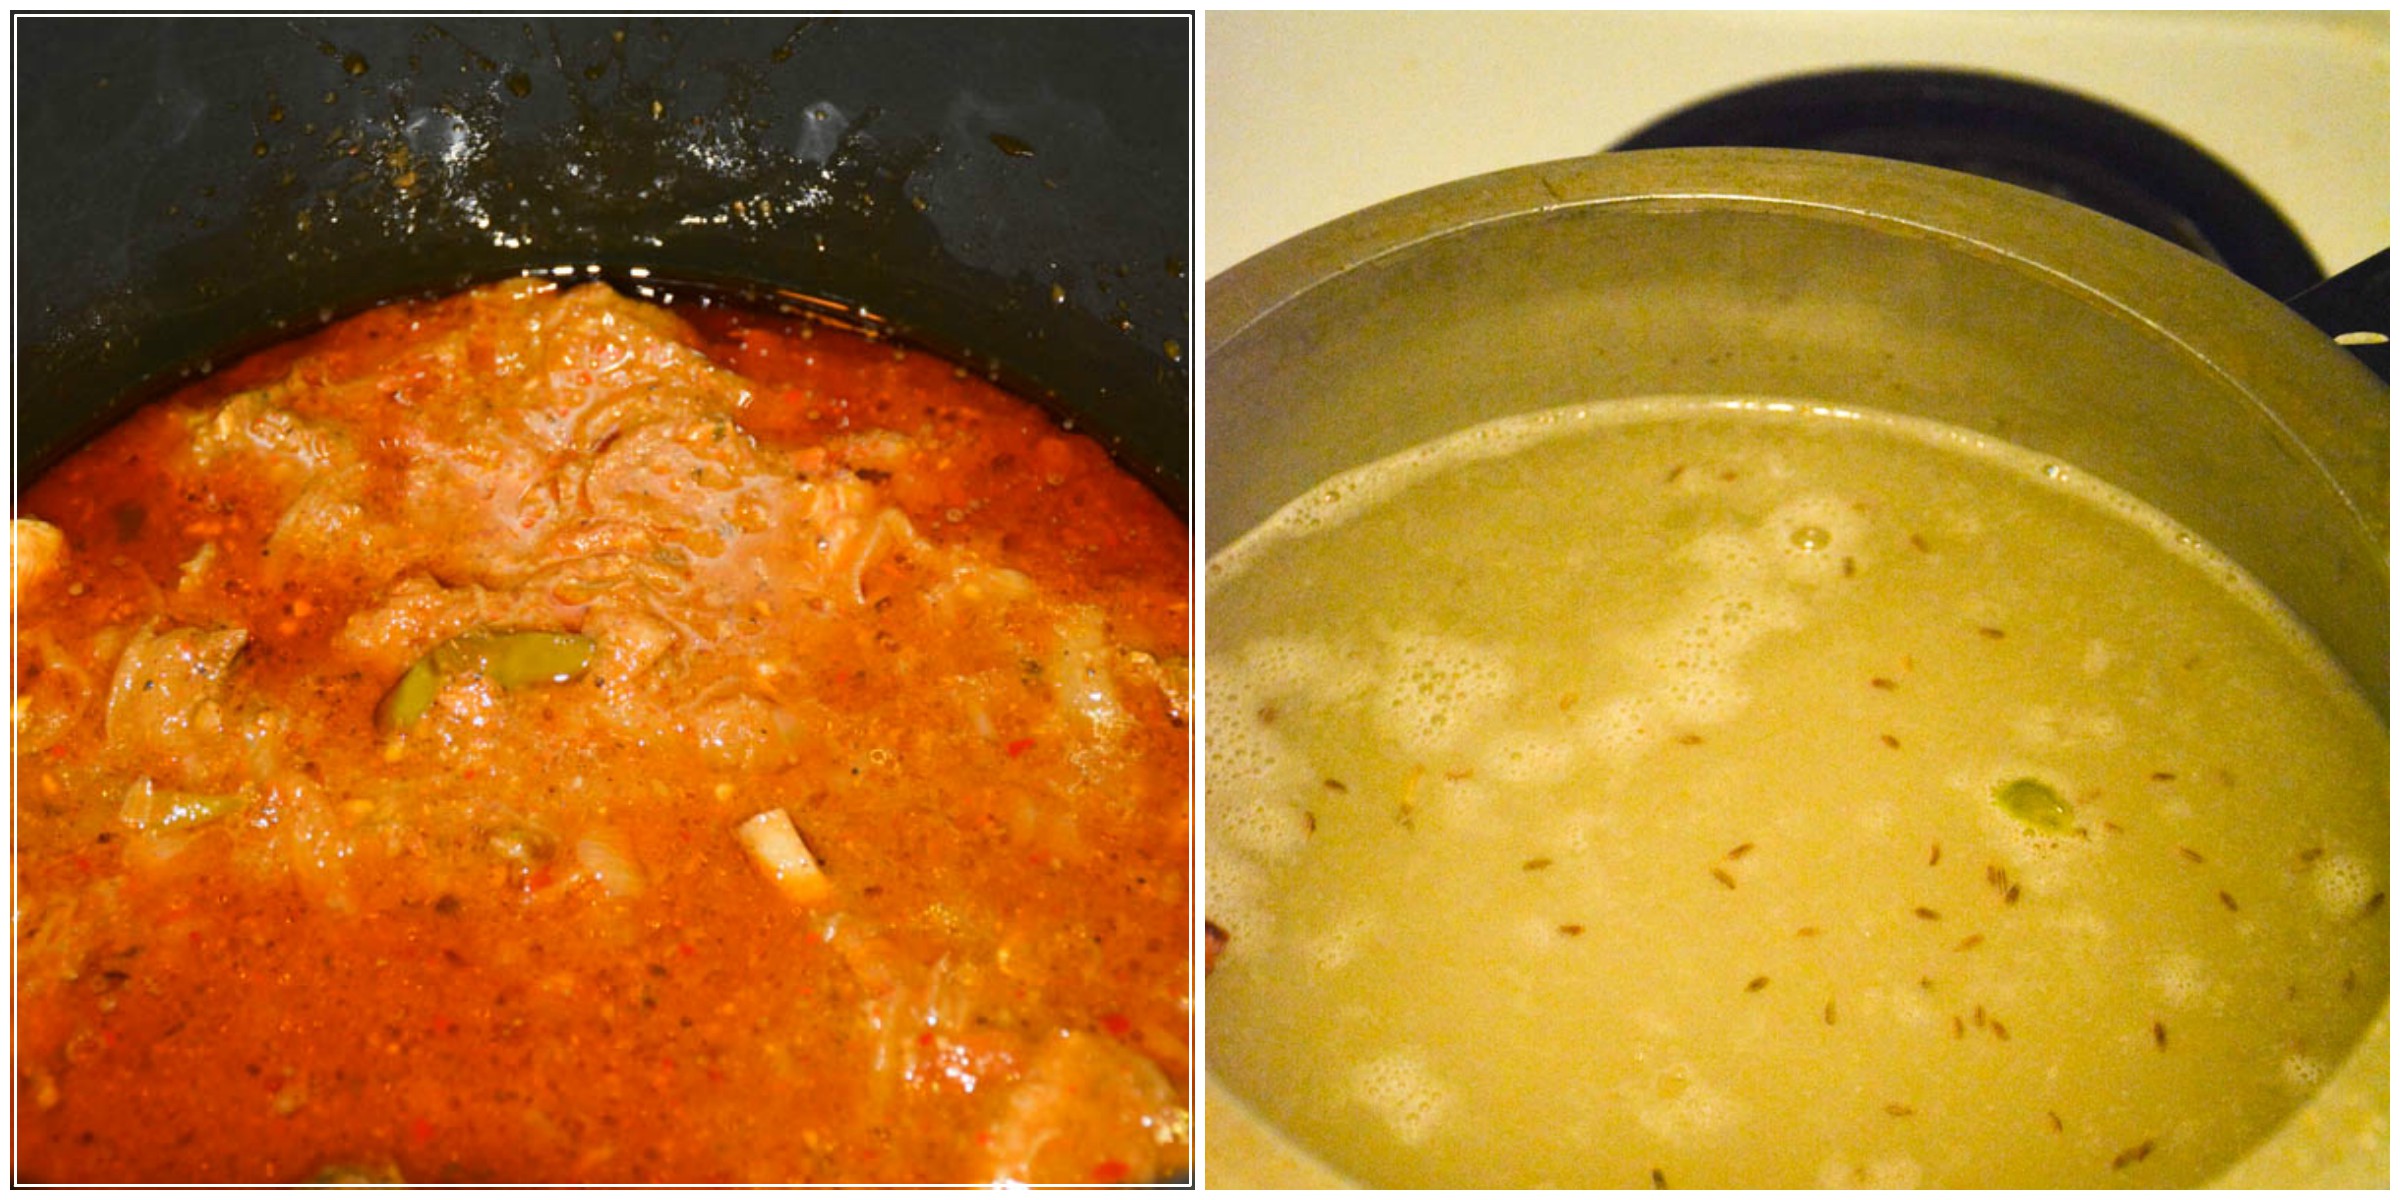
  4. Meanwhile, for the gravy, heat 2 tbso of oil in a pan in medium flame, add chopped onions, garlic, ginger and saute until golden brown. Add tomatoes, turmeric powder, chilli powder, coriander powder and sauté for few mins till it oozes out oil. Add 2 tbsp of water, cashew nuts and cook for 5 mins till they mix together and raw smell goes away. Switch off, cool and blend it into a smooth paste.

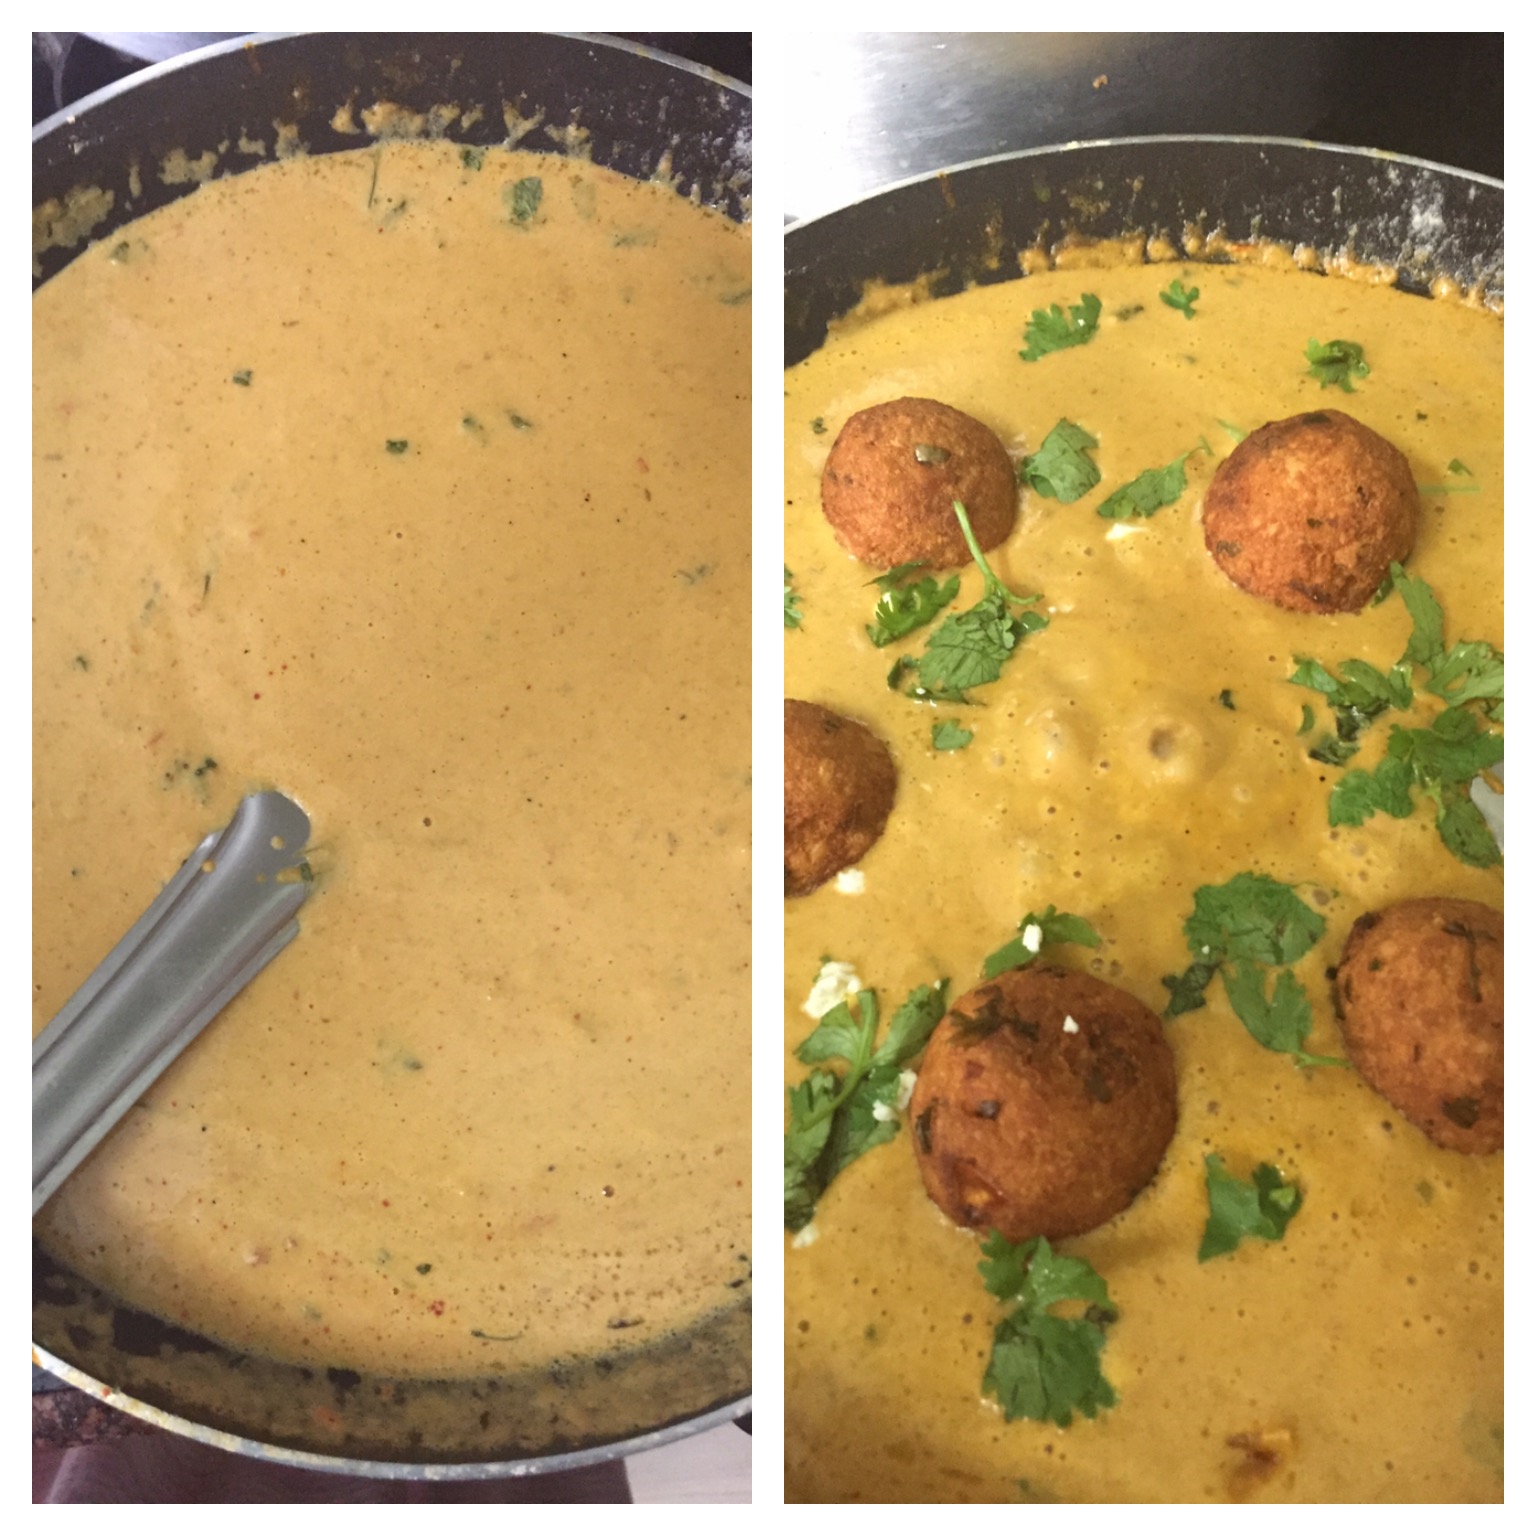
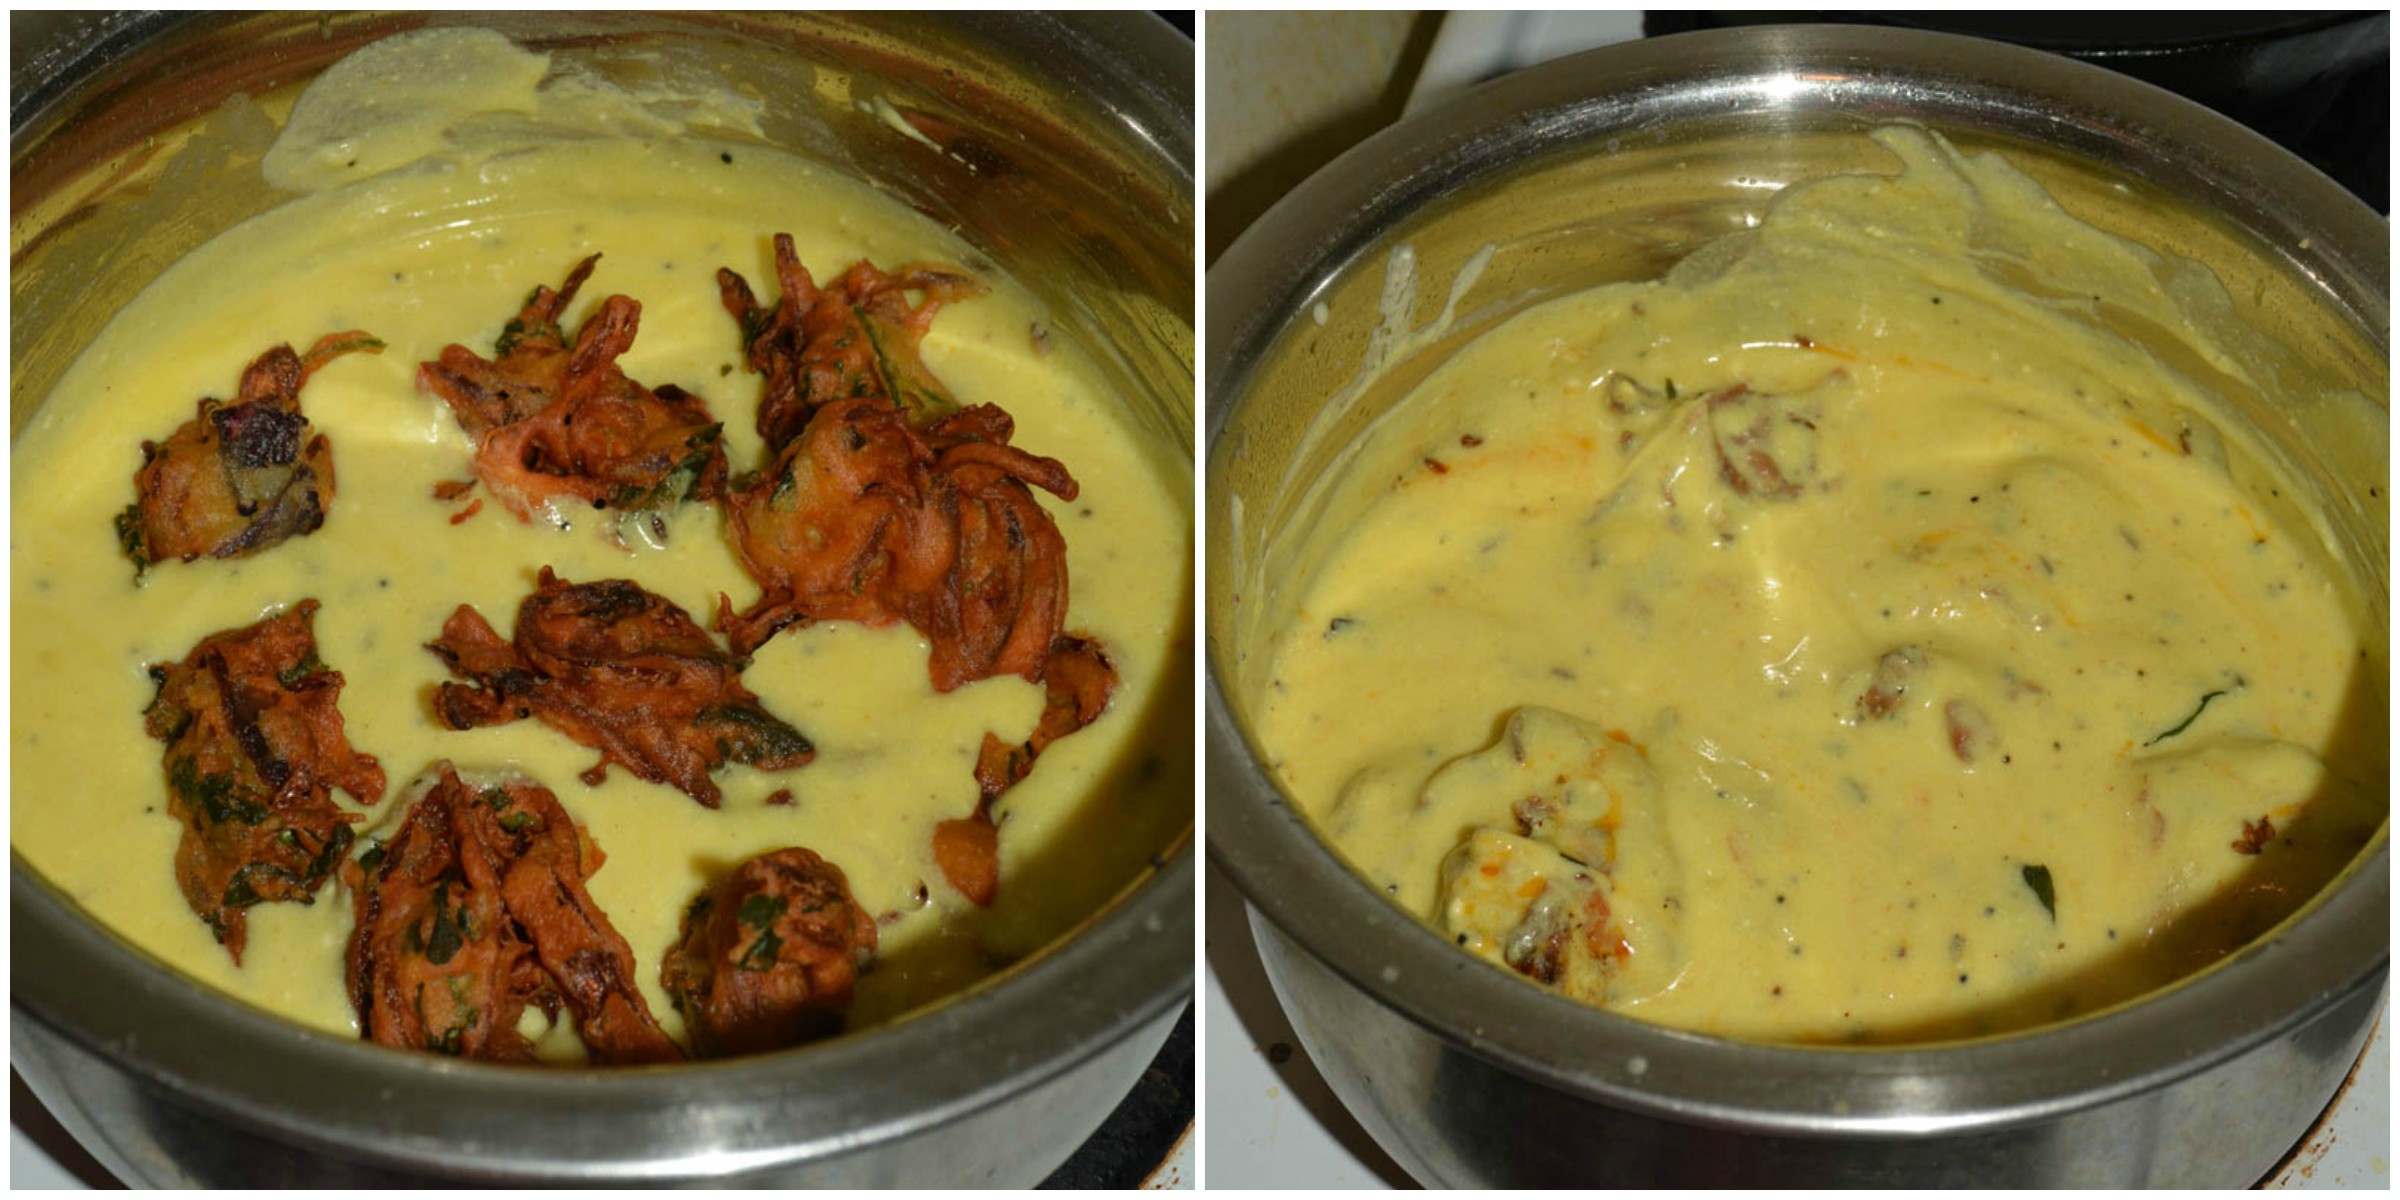
  5. Take the same pan, add 1 tsp of oil/butter, add the blended paste, almond milk, dry methi leaves, 1.5 cups of water , mix and bring to boil for 5-7 mins in medium-low heat.

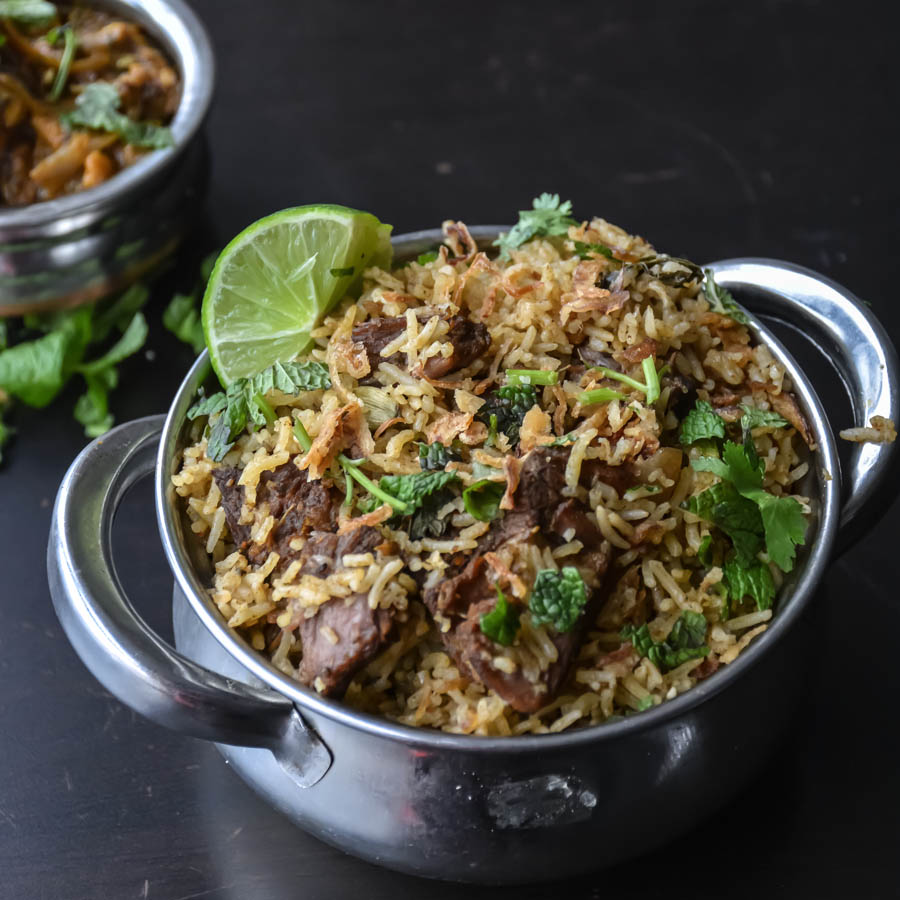
  6. It will form into a correct gravy consistency, now add the kofta balls, top up with chopped coriander leaves, switch off and serve hot.

Wordpress Recipe Plugin by EasyRecipe
3.5.3208

Disclaimer: This post has been sponsored by the Almond Breeze and I have been compensated monetarily! However all opinions are my own as always.

MalaiKofta-4

Filed Under: NORTH INDIAN GRAVIES/DAL/CURRY Tagged With: Bell pepper indian recipes, bell pepper recipes, best paneer recipes, capsicum indian recipes, christmas quick Indian recipes, creamy paneer recipes, healthy vegetarian recipes, indian curry recipes, Indian paneer masala recipes, Indian paneer recipes, Indian potluck recipes, Indian quick recipes for naan, Indian quick vegetarian recipes, Lentil malai kofta, Lentil paneer recipes, lentil recipes, Malai kofta using almond milk, Mushroom masala recipes, Mushroom recipes, Paneer (Indian Cheese) & Tofu Recipe Collection, Paneer Mushroom Bell Pepper curry, paneer recipes, Paneer recipes best, paneer recipes collection, paneer veg recipes collection, party paneer recipes, Potluck Indian quick recipes, Quick Indian curry recipes, Quick Indian vegan recipes, quick paneer recipes, quick tofu recipes, restaurant style paneer masala, restaurant style paneer recipes, spicy thai tofu recipes, spicy tofu chinese recipes, spicy tofu recipes, Tofu recipes, tofu recipes in 10 minutes, vegan tofu recipes, Vegetarian dinner recipes, vegetarian recipes, Vegetarian sides recipes asian tofu recipes

Shrimp/Prawn/Eral Thokku – Shrimp Curry

March 17, 2016 by Suki 6 Comments

PrawnThokku-3

PrawnThokku-3
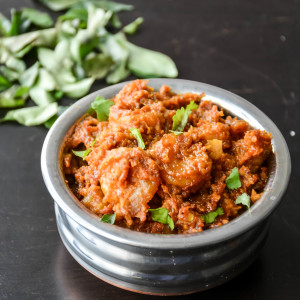
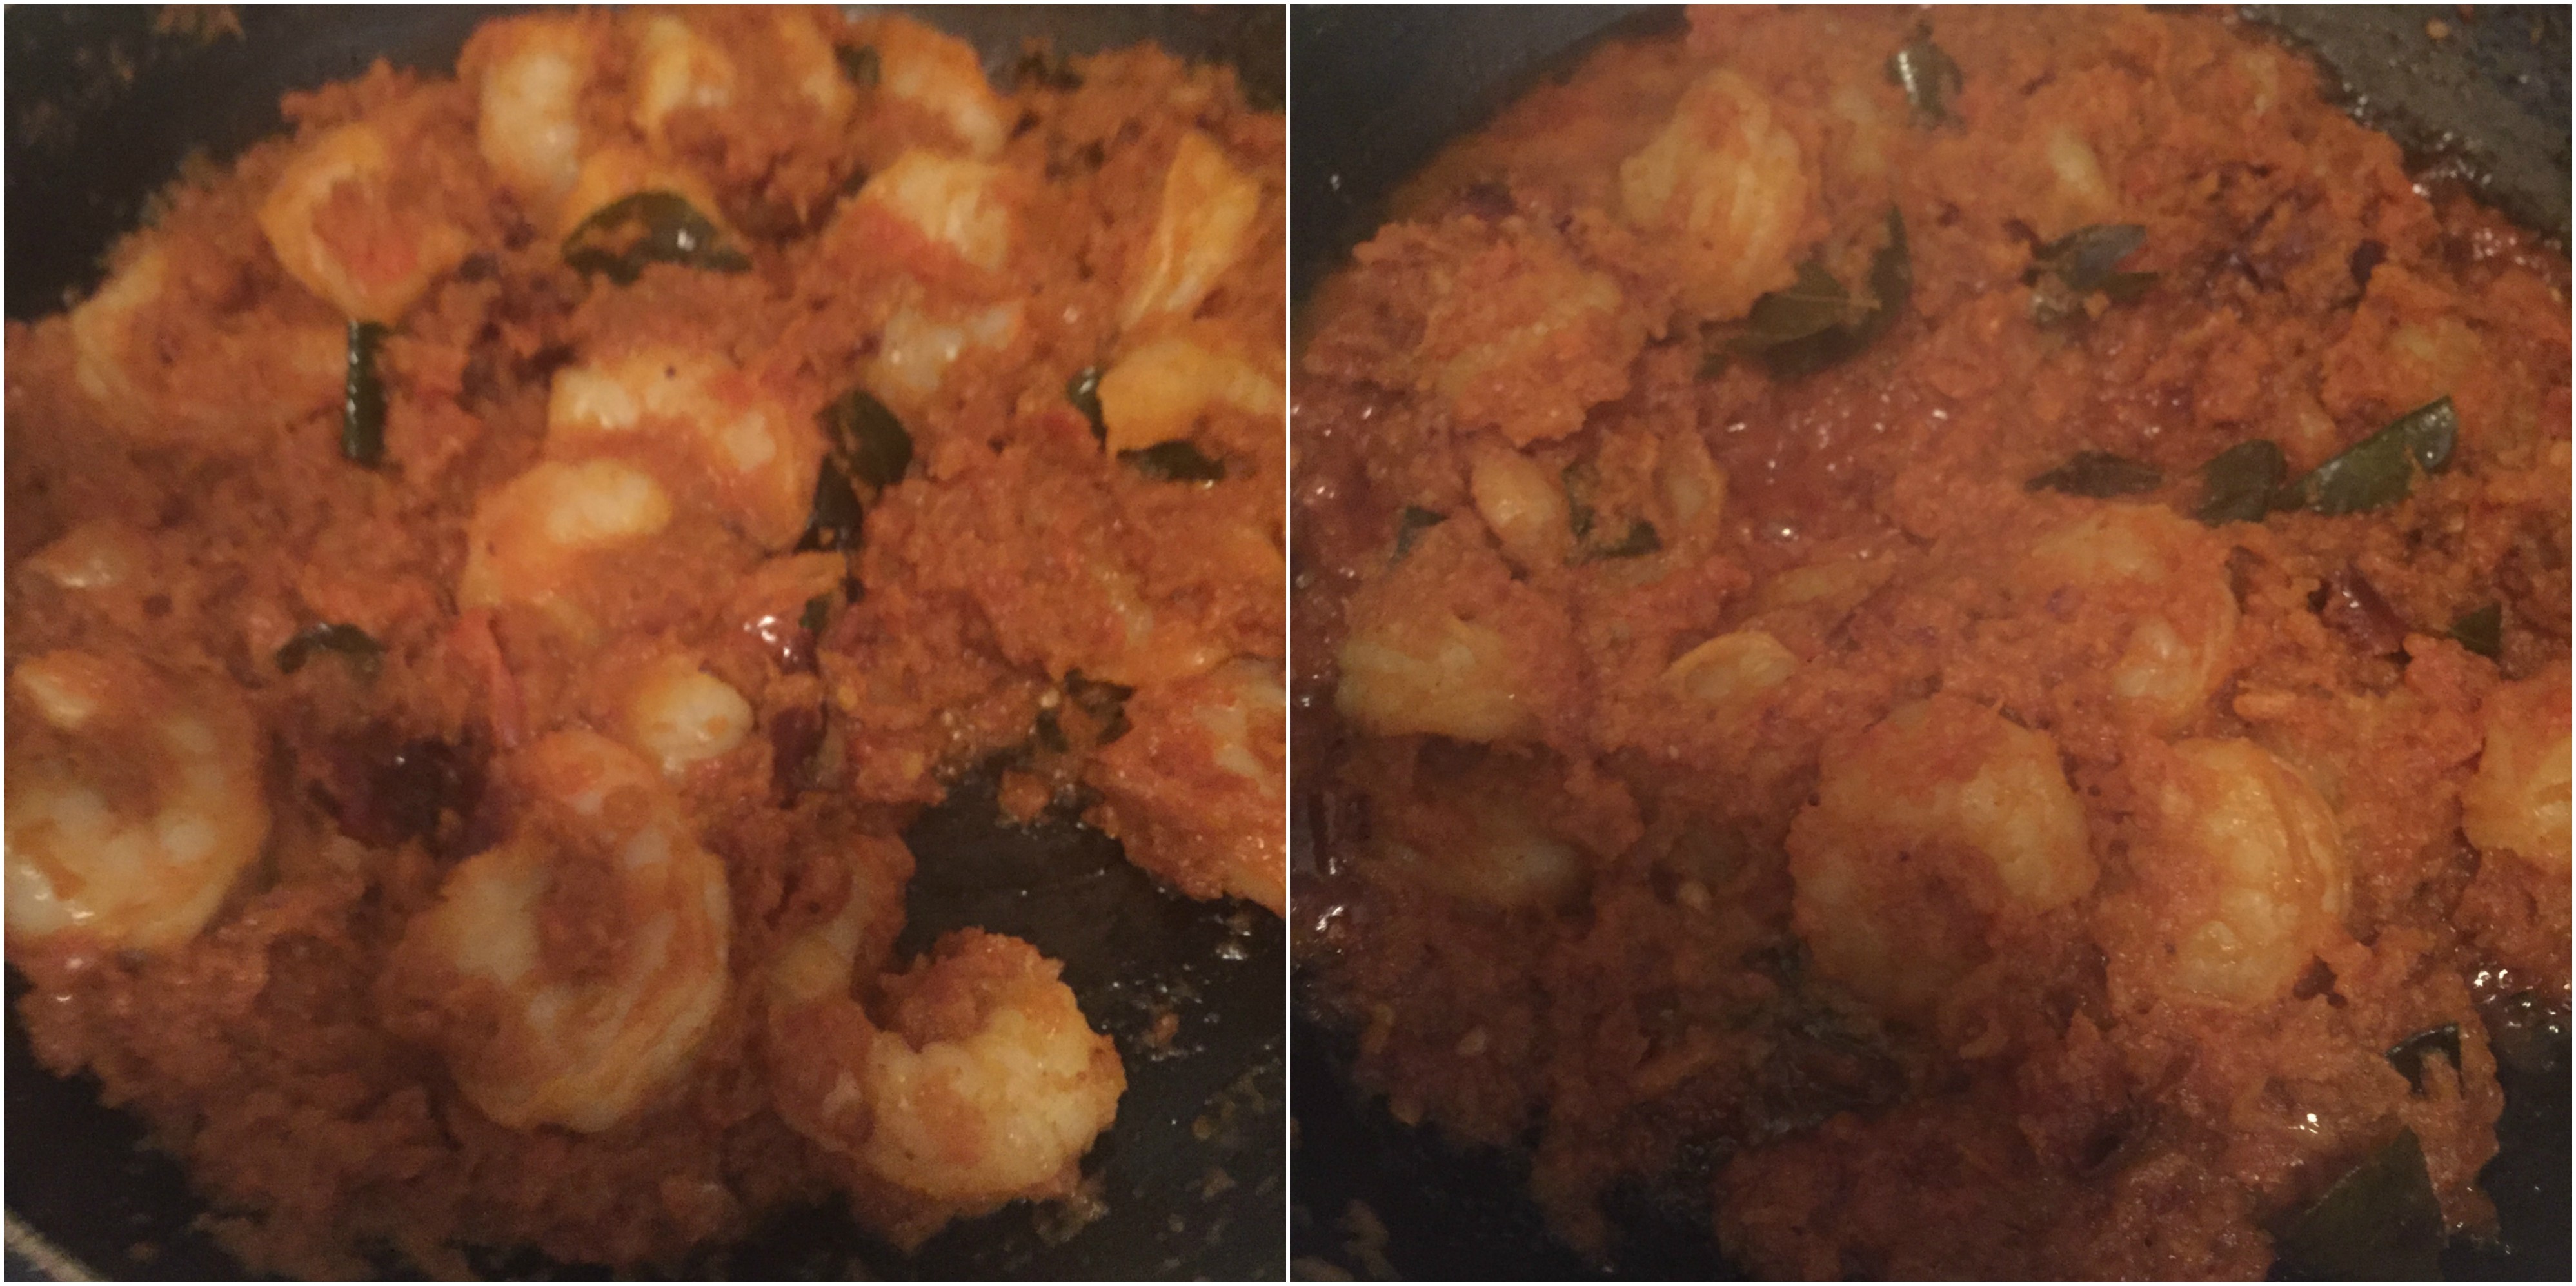
Tangy & Spicy Prawn tomato curry with Indian spices. And it is an excellent side for many dishes. Store and enjoy!

I really love using my freezer to preserve food. I love these homemade chutney or sauce and they are always a great savior when it comes to weekdays. I am alright cooking on weekends, but on a weekday I get so tired that most of the days I tend to make recipes under 30 minutes, finish and sleep. You can also use these for travel, it will not get spoiled easily for a long travel. For this recipe, try to use ripe tomatoes. And adding sugar or jaggery enhances the flavor and helps in balancing out the acidity.

PrawnThokku-4

You can use them as a dip and it also taste great with  plain rice, Lamb Biryani, Chicken  Biryani, Peas pulao, Naan, paratha, bajji or mix it with plain rice and its heaven on earth!

You can store this in the fridge for 3-5 days and you can store it in freezer for 2-3 weeks. When you want to have it, just keep it outside for 30 mins from the freezer, heat and serve.

Other favorite similar recipes: Spicy Tomato Thokku, shrimp Biryani, pavakkai thokku, home style fish curry


Print
Shrimp/Prawn/Eral Thokku - Shrimp Curry
Author: Suganya Hariharan
Recipe type: Main
Cuisine: Indian
Prep time:  5 mins
Cook time:  30 mins
Total time:  35 mins
Serves: 2 cups
 
Ingredients
  • • Prawn -15 (uncooked)
  • • Onion – 1 (medium), chopped & finely blended
  • • Tomatoes – 2 (medium), chopped & finely blended
  • • Garlic – 10 (medium sized cloves), chopped finely
  • • Ginger – 3 inch, grated
  • • Curry Leaves – 1 sprig
  • • Asafoetida/ Hing – 2 tsp
  • • Red Chilli (whole) – 2, broken
  • • Salt – to taste
  • • Turmeric powder – 1 tsp
  • • Red Chilli powder – 2 tbsp
  • • Fenugreek seeds powder – 1 tsp
  • • Fennel Seeds powder - 1 tsp
  • • Jaggery – 1 inch
  • • Gingelly Oil – 3- 4 tbsp
  • Coriander - 1 tbsp, finely chopped for garnishing
Instructions
  1. Heat a pan with oil in medium flame and crackle the mustard seeds. Then add the broken red chilli, asafetida, curry leaves, ginger and garlic. Sauté till they change color slightly.
  2. Add the blended onions with a pinch of salt and sauté till they become translucent.

  3. Add the blended tomatoes at this stage and cook it till it becomes mushy. Stir it occasionally.
  4. Add the red chilly powder, turmeric powder, fennel seeds powder, fenugreek seeds powder with 2 tsp of oil again. Sauté till the raw smell leaves. Add the marinated prawn to this mixture and let it cook in its own juice for 2 mins.

  5. Add 3 tbsp of water with jaggery and allow it to boil for few minutes in medium to low flame.
  6. It will start to ooze out oil in the sides at a stage and will become a thick paste. It takes about 12-15 minutes for this process.
  7. Cook the shrimp for atleast 10 minutes till oil is separated from the prawn gravy.
  8. Garnish with coriander, Switch off and cool it completely.

  9. Store it in an air tight container for 2- 3 weeks in the refrigerator.
Notes
1. we really need the amount of oil in the recipe to make the recipe if you want to store it.
2. If you are using cooked shrimp, you need to cook for minimum 5-8 minutes.
Wordpress Recipe Plugin by EasyRecipe
3.5.3208

Filed Under: HOMEMADE, RAITA/DIPS/CHUTNEY, SOUTH INDIAN GRAVIES/DAL/CURRY/KUZHAMBU Tagged With: easy prawn rcipes, easy shrimp recipes, eral curry recipes, eral indian recipes, eral thokku recipes, prawn curry, prawn indian recipes, prawn recipe to store, prawn thokku recipes, quick shrimp recies, quick shrimp recipes, Quick Thokku Recipes, Shrimp curry, shrimp curry quick recipes, shrimp Indian recipes, shrimp thokku recipes, Shrimp/Prawn/Eral Thokku - Shrimp Curry, thokku recipes, weeknight prawn recipes

Chickpeas Corn Capsicum Puff

March 9, 2016 by Suki 11 Comments

chickpeascorncapsicumpuff-14
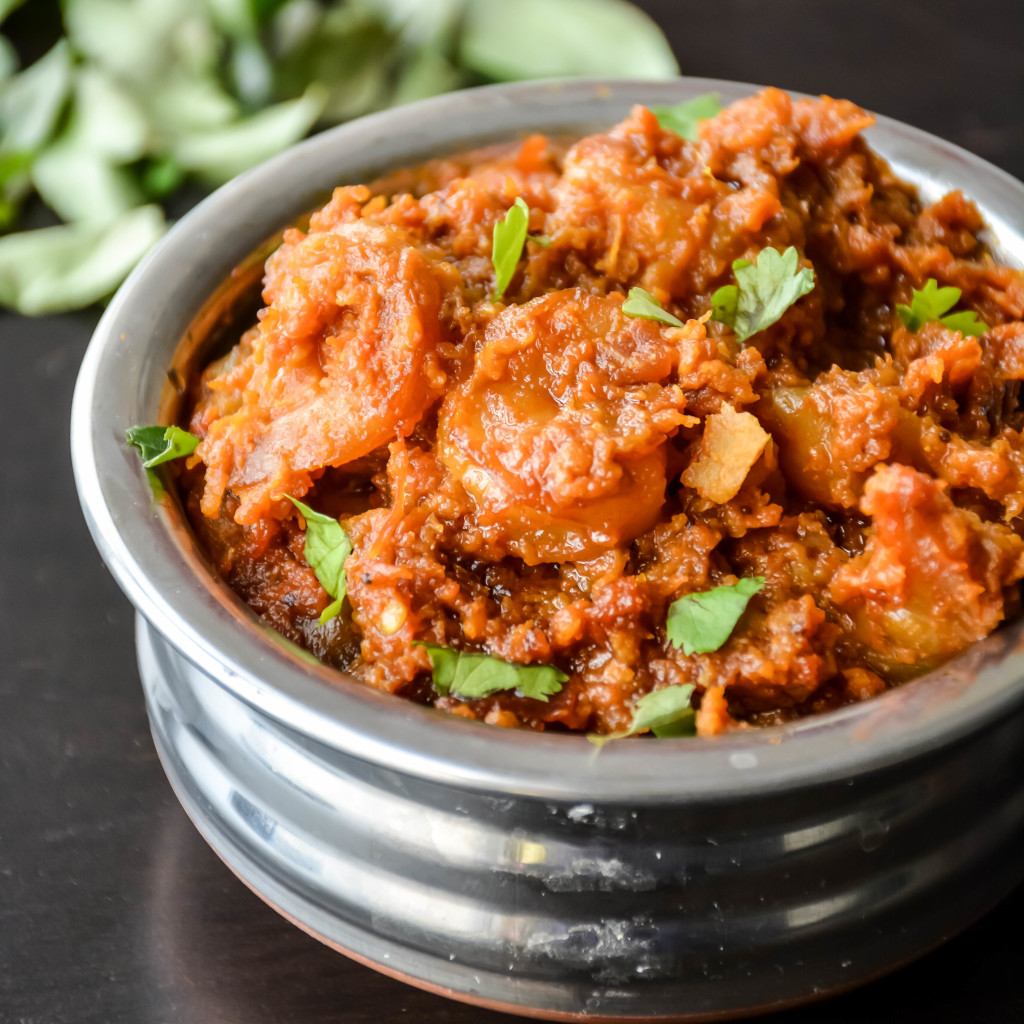
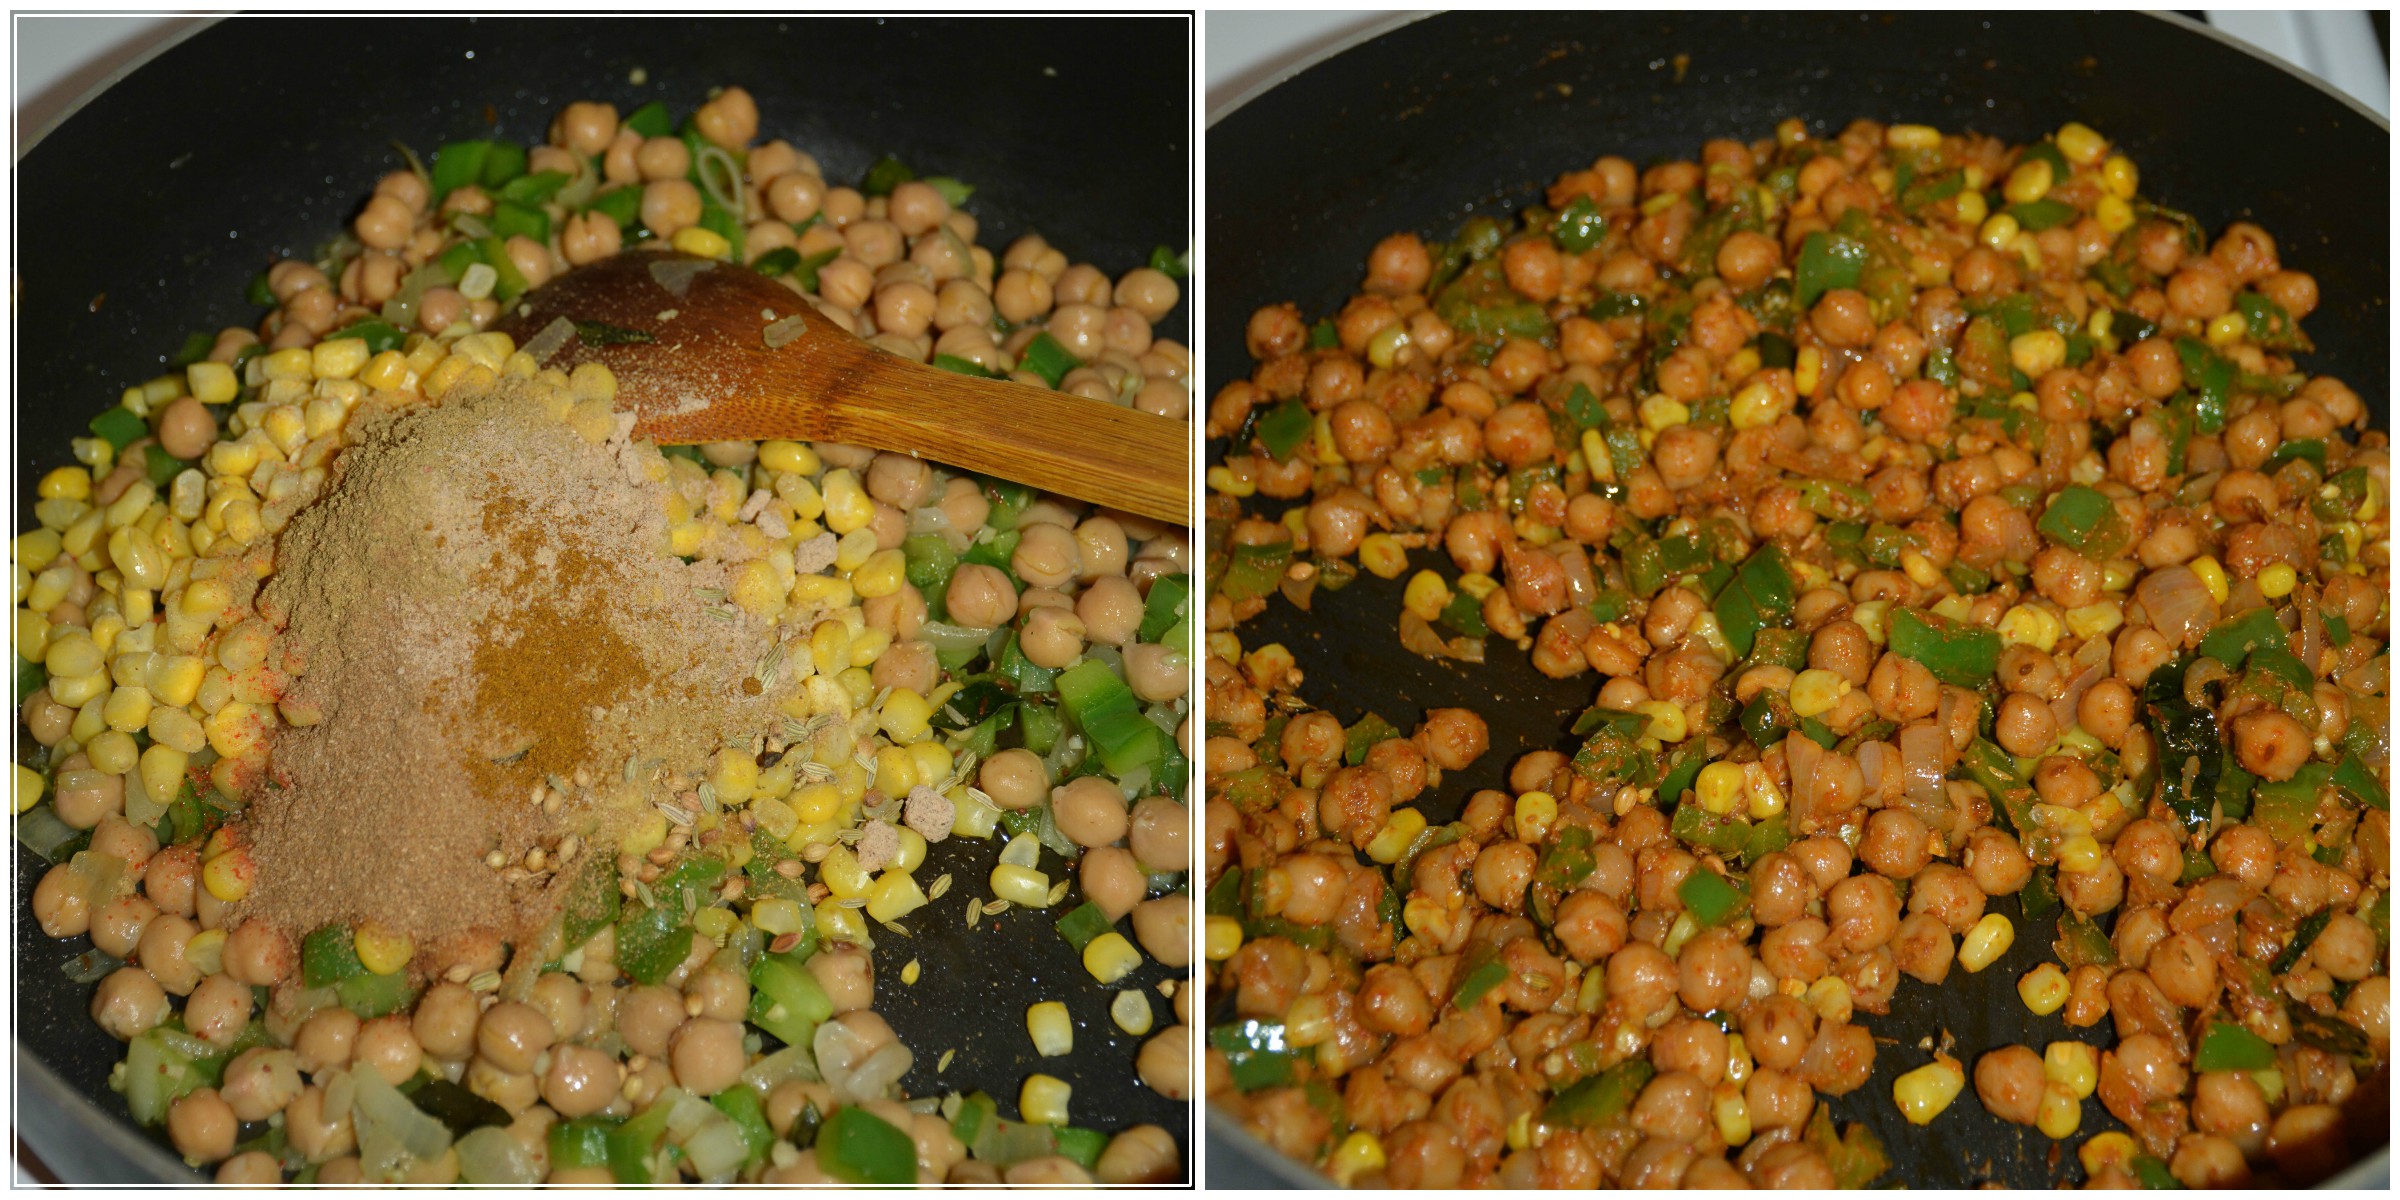
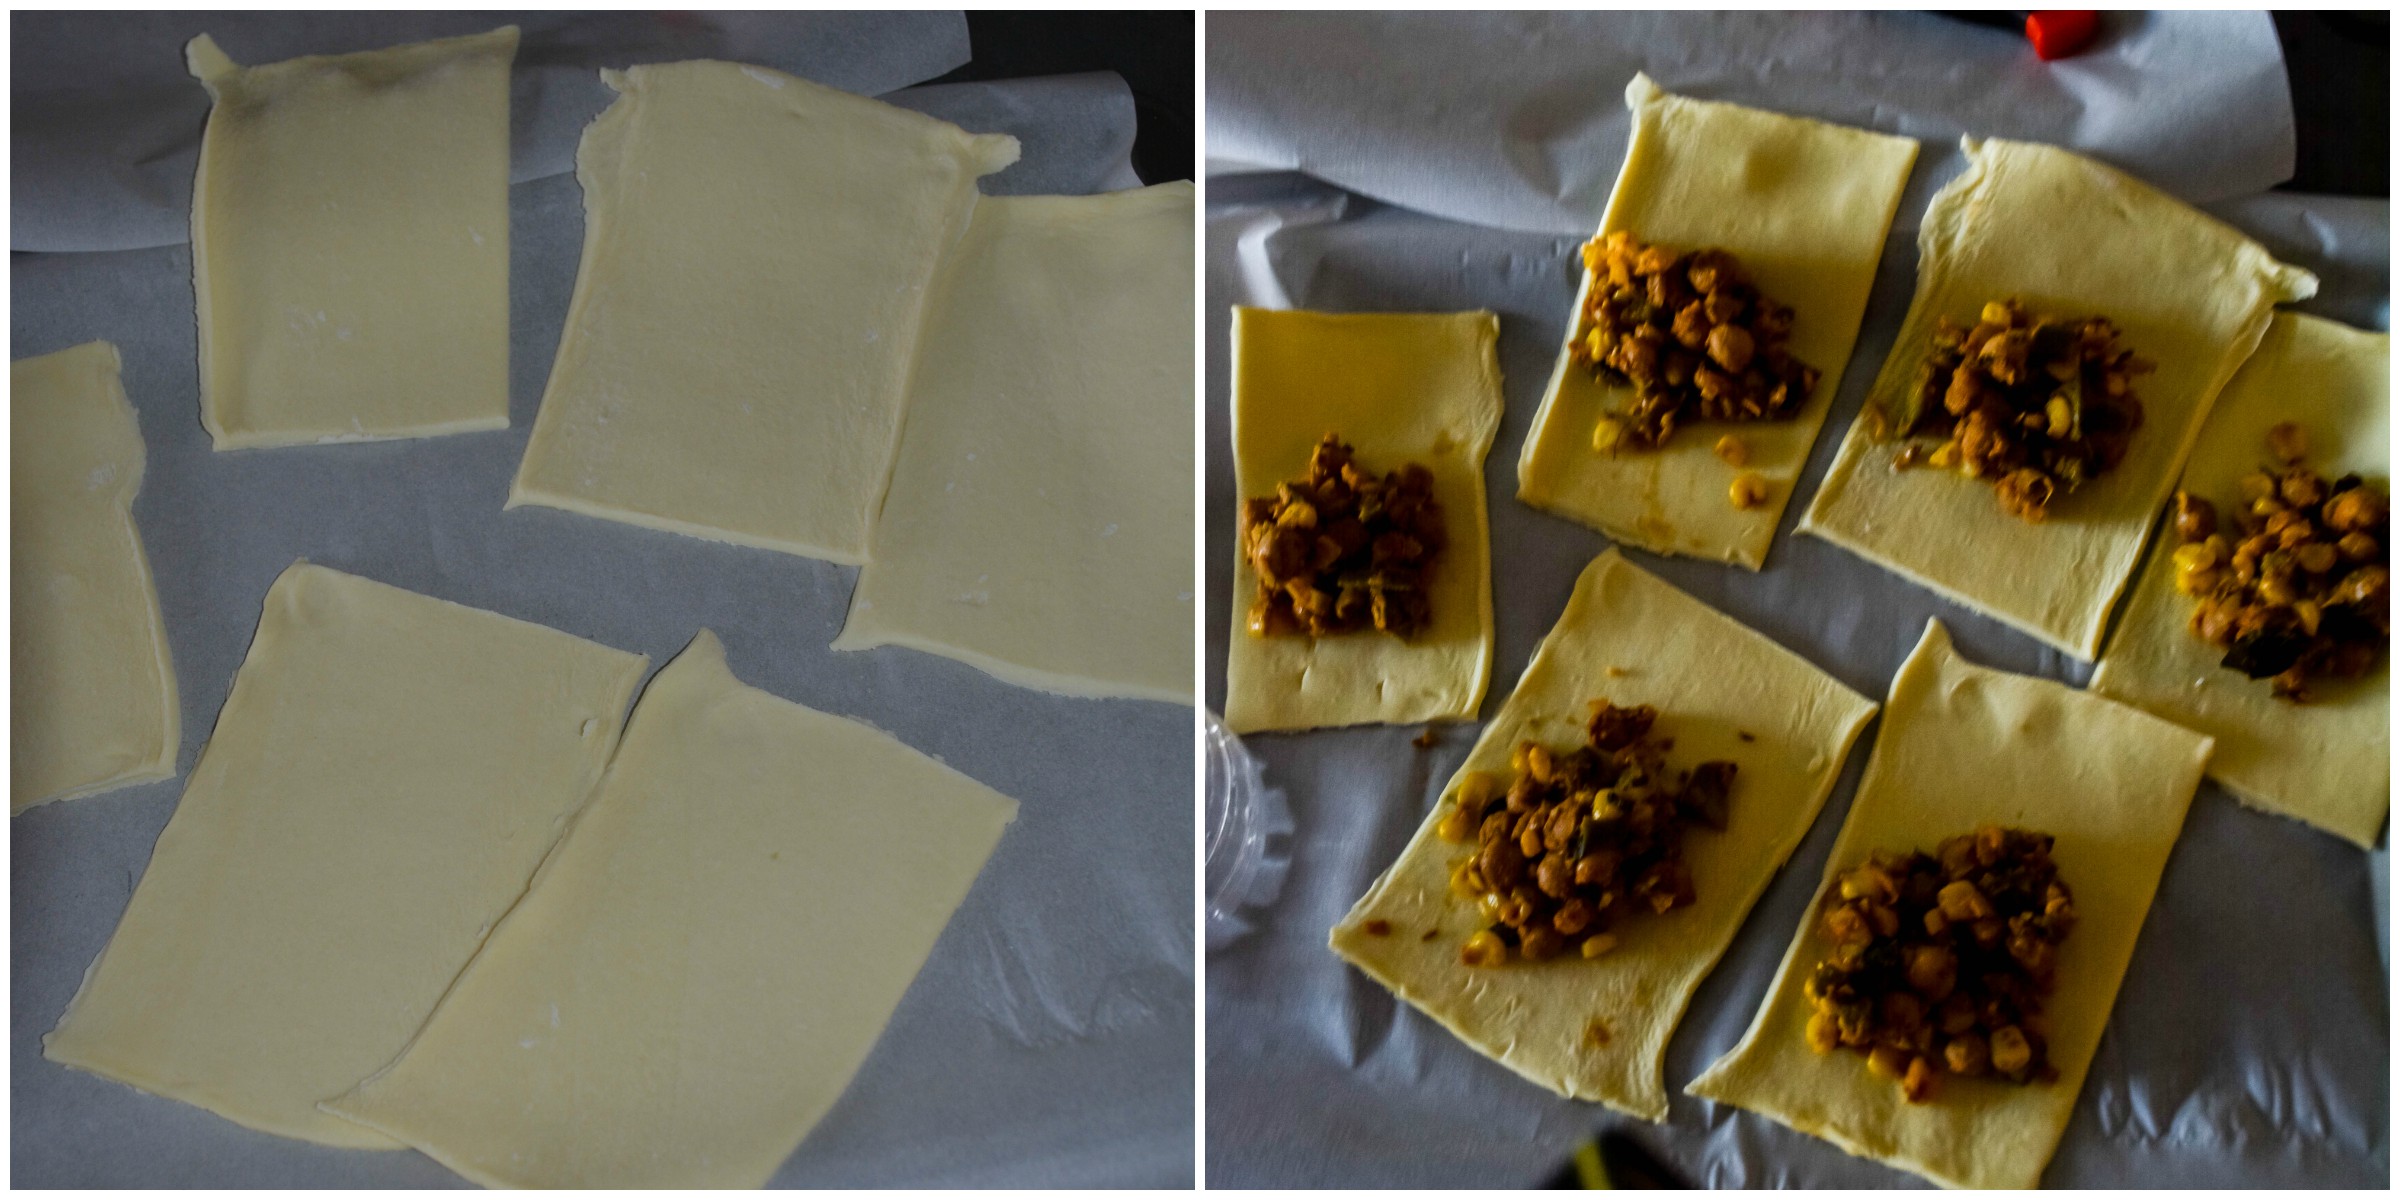
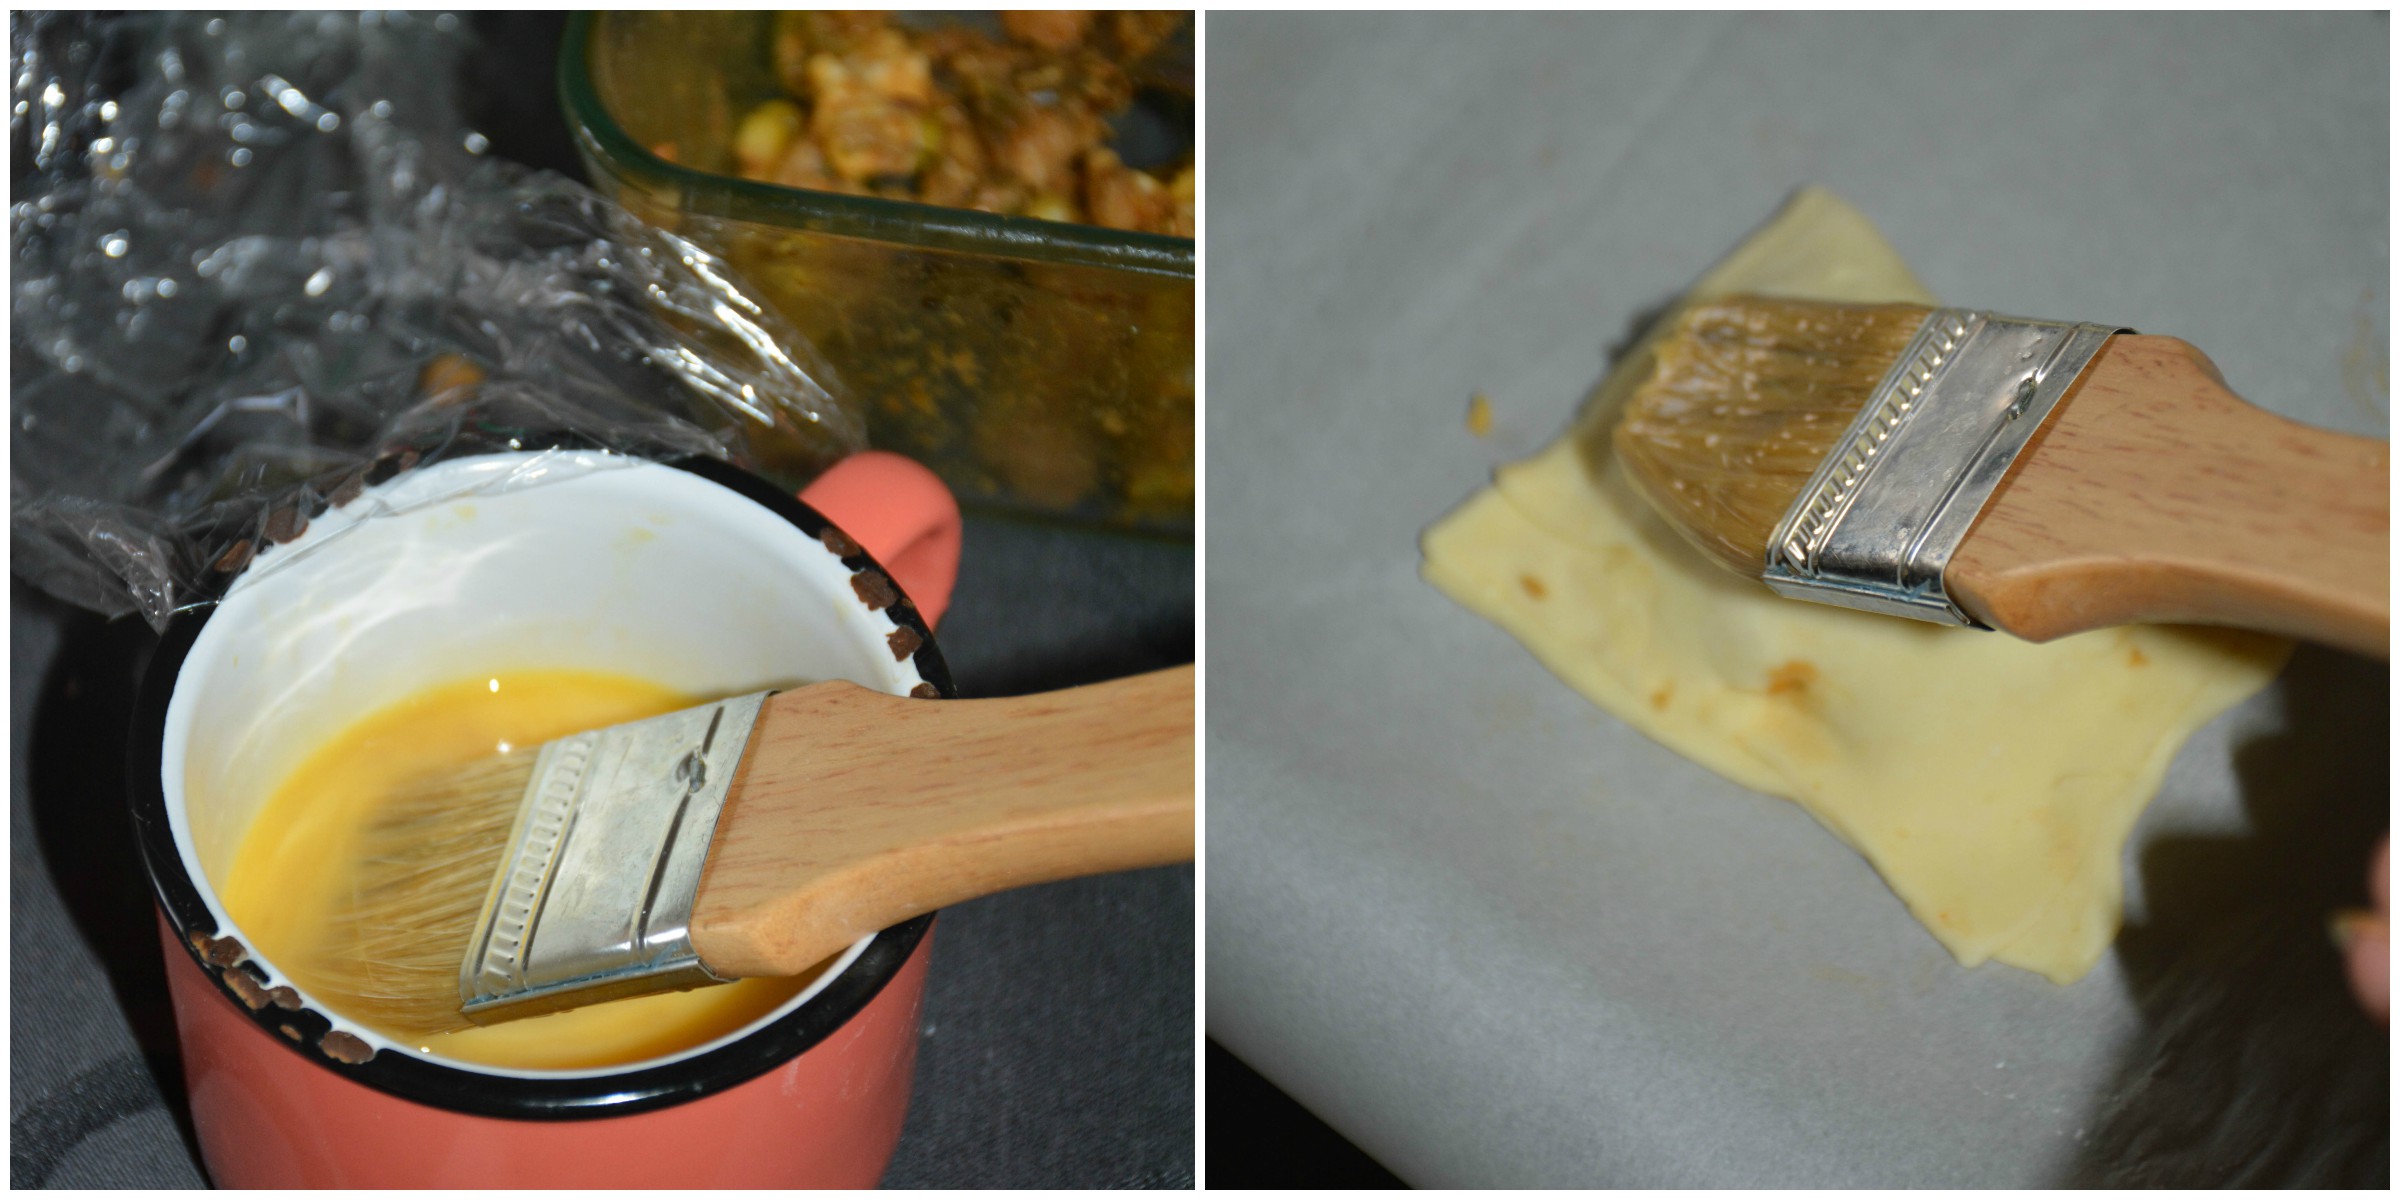
A handy pastry filled with a perfectly crusty, buttery and flaky crust filled with classic Indian flavoured chickpeas, corn and capsicum masala. Delish!

These spicy vegetable pastries make a great vegetarian alternative to sausage rolls or chicken puffs. They are packed with healthy vegetables and chickpeas!

They are the quintessential Indian tea-time snack .Whenever you think of Indian snacks and the first thing that pops up is Samosa. After coming here, I understood that it has got a big name in the foreign world. Many of my colleagues have told me that they love samosas so I made some of my Christmas potluck  at work sometime back. So, this time I wanted to make another classic Indian Puffs this time for valentines potluck at work. But for potluck, I wanted to make more, so thought of making these beauties using the advantage of easy availability of samosa pastry these days. You can just use the puffs with classic potato peas carrot veggies filling. But I am using chickpeas, corn and capsicum filling. You can ditch this and use chicken  filling, egg masala or potato cheese filling and so on. I took mine to work 🙂 and it was a big hit 🙂 I was super happy!

chickpeascorncapsicumpuff-13

Whenever there are some parties or dinner gatherings, these are perfect! I was so scared to make them, not because it is hard to make  It is for the reason that the first batch would be finished before the second batch even gets baked. I should accept the fact that they are super easy to make except that in my area it was hard to find readymade pastry and if the pastry dough is store bought, it’s quick. I have done the pastry dough myself before and it is easy too except that it s life consuming


The idea of Savory puffs and hot chai combination is irresistible.  Perfect as appetizers and you can have more  It is easy to prepare savory’s at home and it is hard to get some here in Canada. I could always get great sweet pastries but savory ones are hard.

My Other Favorite snacks/appetizers: Jalepeno Herbs cheese muffins, Indian spiced kale chips, Potato Garlic Tikka.

chickpeascorncapsicumpuff-16

Print
Chickpeas Corn Capsicum Puff
Author: Suganya Hariharan
Recipe type: Appetizer
Cuisine: Indian
Prep time:  5 mins
Cook time:  20 mins
Total time:  25 mins
Serves: 9
 
Ingredients
  • Readymade pastry
  • Corn(Cleaned & Boiled) - 1 cup
  • Chickpeas(Cleaned & Boiled) - 1 cup
  • Capsicum/bell pepper - ½ cup
  • Garam masala - ½ tsp
  • Chilli powder - ½ tbsp
  • Coriander powder - 1 tsp
  • Cumin powder - 1 tsp
  • Ginger - 1 inch, chopped finely
  • Garlic - 3, chopped finely
  • Onion - 1, small, chopped finely
  • Green Chilli- 2, chopped finely
  • salt - as per taste
  • oil - 1-2 tsp
  • butter - 1- 2 tsp ( to brush- optional)
  • Egg yolk - 1, small ( to brush- optional)
  • Coriander leaves - 1 tbsp, chopped finely
  • Dry Methi/Fenugreek Leaves - 1 tsp
Instructions
  1. Heat a pan with a tsp of oil and add onions, garlic, ginger and fry for 1-2 minutes.

  2. Add the chopped capsicum and saute for a minute

  3. Add the boiled corn, chickpeas and add the chilli powder, turmeric powder, coriander powder, cumin powder and garam masala powder.

  4. Mix well and saute in low flame till all the masala blends well with with the corn and capsicum masala. Lastly add the salt, coriander leaves, methi leaves, mix well and cool down.
  5. Pre heat the oven to 220 Deg C.

  6. Allow the pastry sheet to soften slightly, then unwrap , cut into desired sizes. I cut them to rectangular sizes.

  7. Spoon the vegetable mix along one of the sides of the pastry, fold and cover the stuffing.
  8. Line a baking tray with aluminium foil and grease it with oil and arrange the puffs. Brush the puffs with oil/butter/beaten egg. sprinkle some sesame seeds.

  9. Bake for 15-20 mins, until golden brown in colour.
  10. Brush again with oil or butter if desired.
Wordpress Recipe Plugin by EasyRecipe
3.5.3208

chickpeascorncapsicumpuff-17

Filed Under: SNACKS & APPETIZERS Tagged With: chickpeas puffs, chickpeas vegan recipe, chickpeas vegetarian recipes, corn vegetarian recipes, Indian snacks recipes, party appetizer recipes, party recipes, party vegetarian recipes, potluck recipes, potluck vegan recipes, potluck vegetarian recipes, Puff pastry savory recipes, quick party appetizers recipes, quick puff recipes, quick snacks recipes, savory puff recipes, snacks recipes, vegetable puff recipes, vegetable puffs, vegetarian appetizer recipes\Indian appetizer recies

Blueberry Banana Pecan Oats Milkshake + Oatbox Review

February 22, 2016 by Suki 4 Comments

oatboxMilkshake

oatboxMilkshake
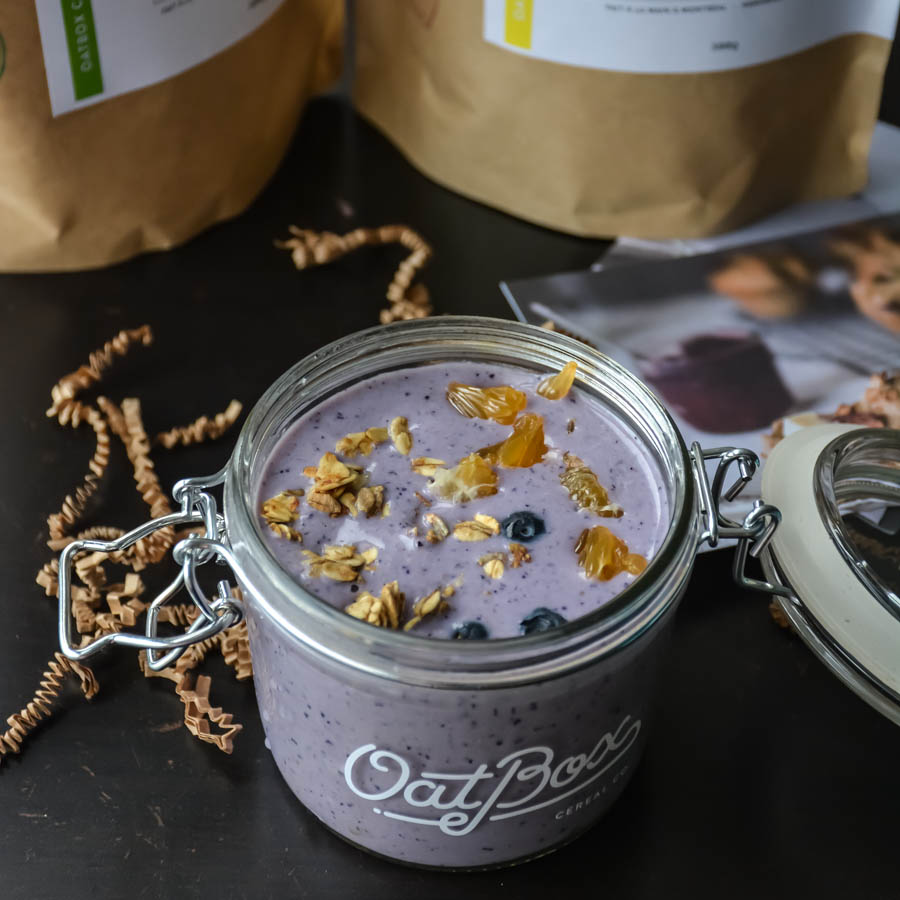
I always look for a substantial breakfast beverage that is easy, quick, nutritious and delicious!

I totally love these Oatbox oats! I am not paid to say you this! 🙂 Oatbox – Handmade in Montreal, Free shipping & no taxes, only $20 per month and Here is a link to get some $5 off an oatbox subscription: http://oatb.co/1ZybwnB You’ll get two different mixes, every month! And also every time they ship you a box, a child will be given a full breakfast at school.

Oats is something I have 5 days a week for my breakfast. It is very quick to make oats. Oats are packed with fiber which will keep us full longer. I had this milkshake one day, and the next day I was totally looking forward to make the same. It really made me feel full 🙂 and thereby made me have normal lunch and small dinner box 🙂 purpose solved!

oatboxMilkshake

Regarding Oatbox:

Oatbox is handmade in Montreal (where I live now):), so I am just going to buy them always no matter what. I loved their product oats, oats jar, photos in the website, the packaging when they ship, the little beautiful note, and few small recipe notes.I tried mine straight up in a bowl and it was yum! You can have them with a splash of milk or as a breakfast parfait, snacks, make it to a muffin, cookies, milkshake like me.

oatboxMilkshake

If you sign up with oatbox, you’ll receive two bags of oats every month in a beautifully package. And the first order comes with a free glass jar. I guess every month they change flavors, mine were banana,pecan& walnut oats and Coconut,Kiwi &Almonds Oats. And I have something for you, you will receive $5 offer off your subscription! To sign up, just click here: http://oatb.co/1ZybwnB

And also every time they ship you a box, a child will be given a full breakfast at school. Oatbox have a monthly subscription that delivers right to your door, once a month. You’ll get an email a few days before your box is sent, in which case you can decide to go ahead with the order, or skip until the next month. You can skip months or cancel subscription at any time.
oatboxMilkshake

Print
Blueberry Banana Pecan Oats Milkshake + Oatbox Review
Author: Suganya Hariharan
Recipe type: Main
Cuisine: Indian
Prep time:  2 mins
Cook time:  3 mins
Total time:  5 mins
Serves: 2 cups
 
Ingredients
  • Oats ( I used banana pecan and almond oatbox oats) – ¼ cup
  • Almond milk/ milk – 1 cup
  • Honey – 1 tsp
  • Ground cinnamon – ¼ tsp
  • Fruits like blueberry, orange, apple, berries – ¼ cup
Instructions
  1. In a blender, combine all ingredients, puree until smooth.
  2. Serve immediately with some granola oats, fruits on top.
Wordpress Recipe Plugin by EasyRecipe
3.5.3208

Disclaimer: Oatbox provided me with the oats package for sampling and review purposes.  I’m not being paid, and oatbox has not reviewed this post prior to publication. However all opinions are my own as always.  This is an affiliate program so we are compensated if you order via the link mentioned!

oatboxMilkshake

Filed Under: BREAKFAST Tagged With: 3 minute breakfast recipes, blueberry recipes, breakfast recipes, fibre oats recipes, fitness milkshake recipes, milkshake recipes, oatbox discount, oatbox montreal, oatbox morning recipes, oatbox recipes, oatbox review, oatbox subscription, oats healthy recipes, oats milkshake recipes, oats morning recipes, oats recipes, qucik walnut pecan recipes, quick breakfast recipes, quick breakfast vegetarian recipes, quick kid friendly recipes, quick morning recipes

Home Style Spicy Chicken Dry Roast

February 10, 2016 by Suki 1 Comment

SpicyDryChickenRoast-15

SpicyDryChickenRoast-15
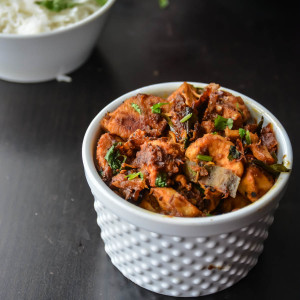
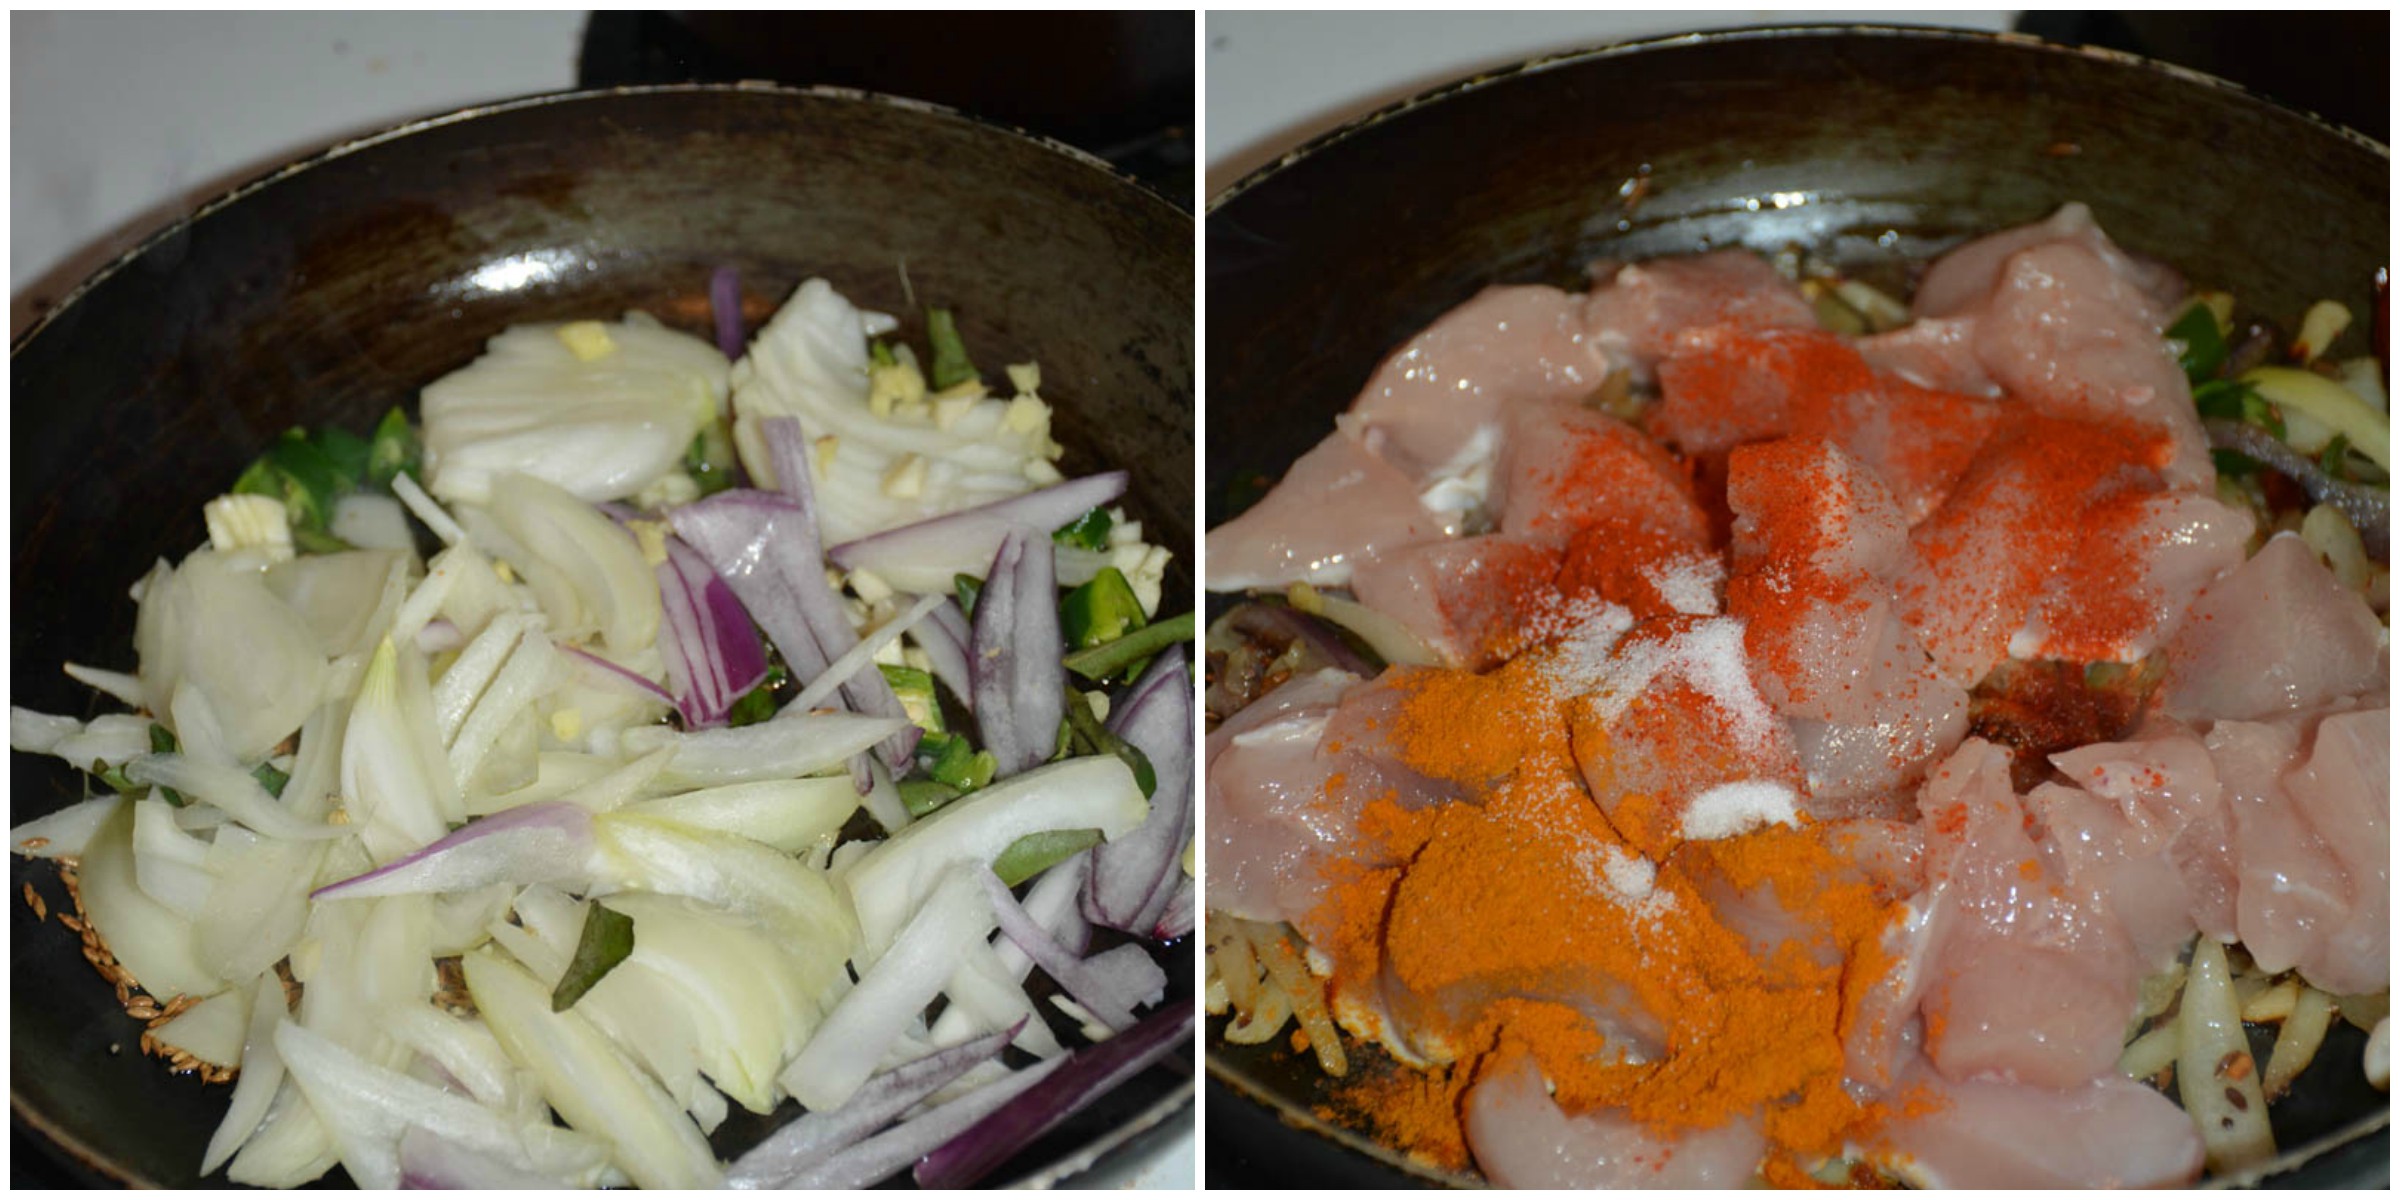
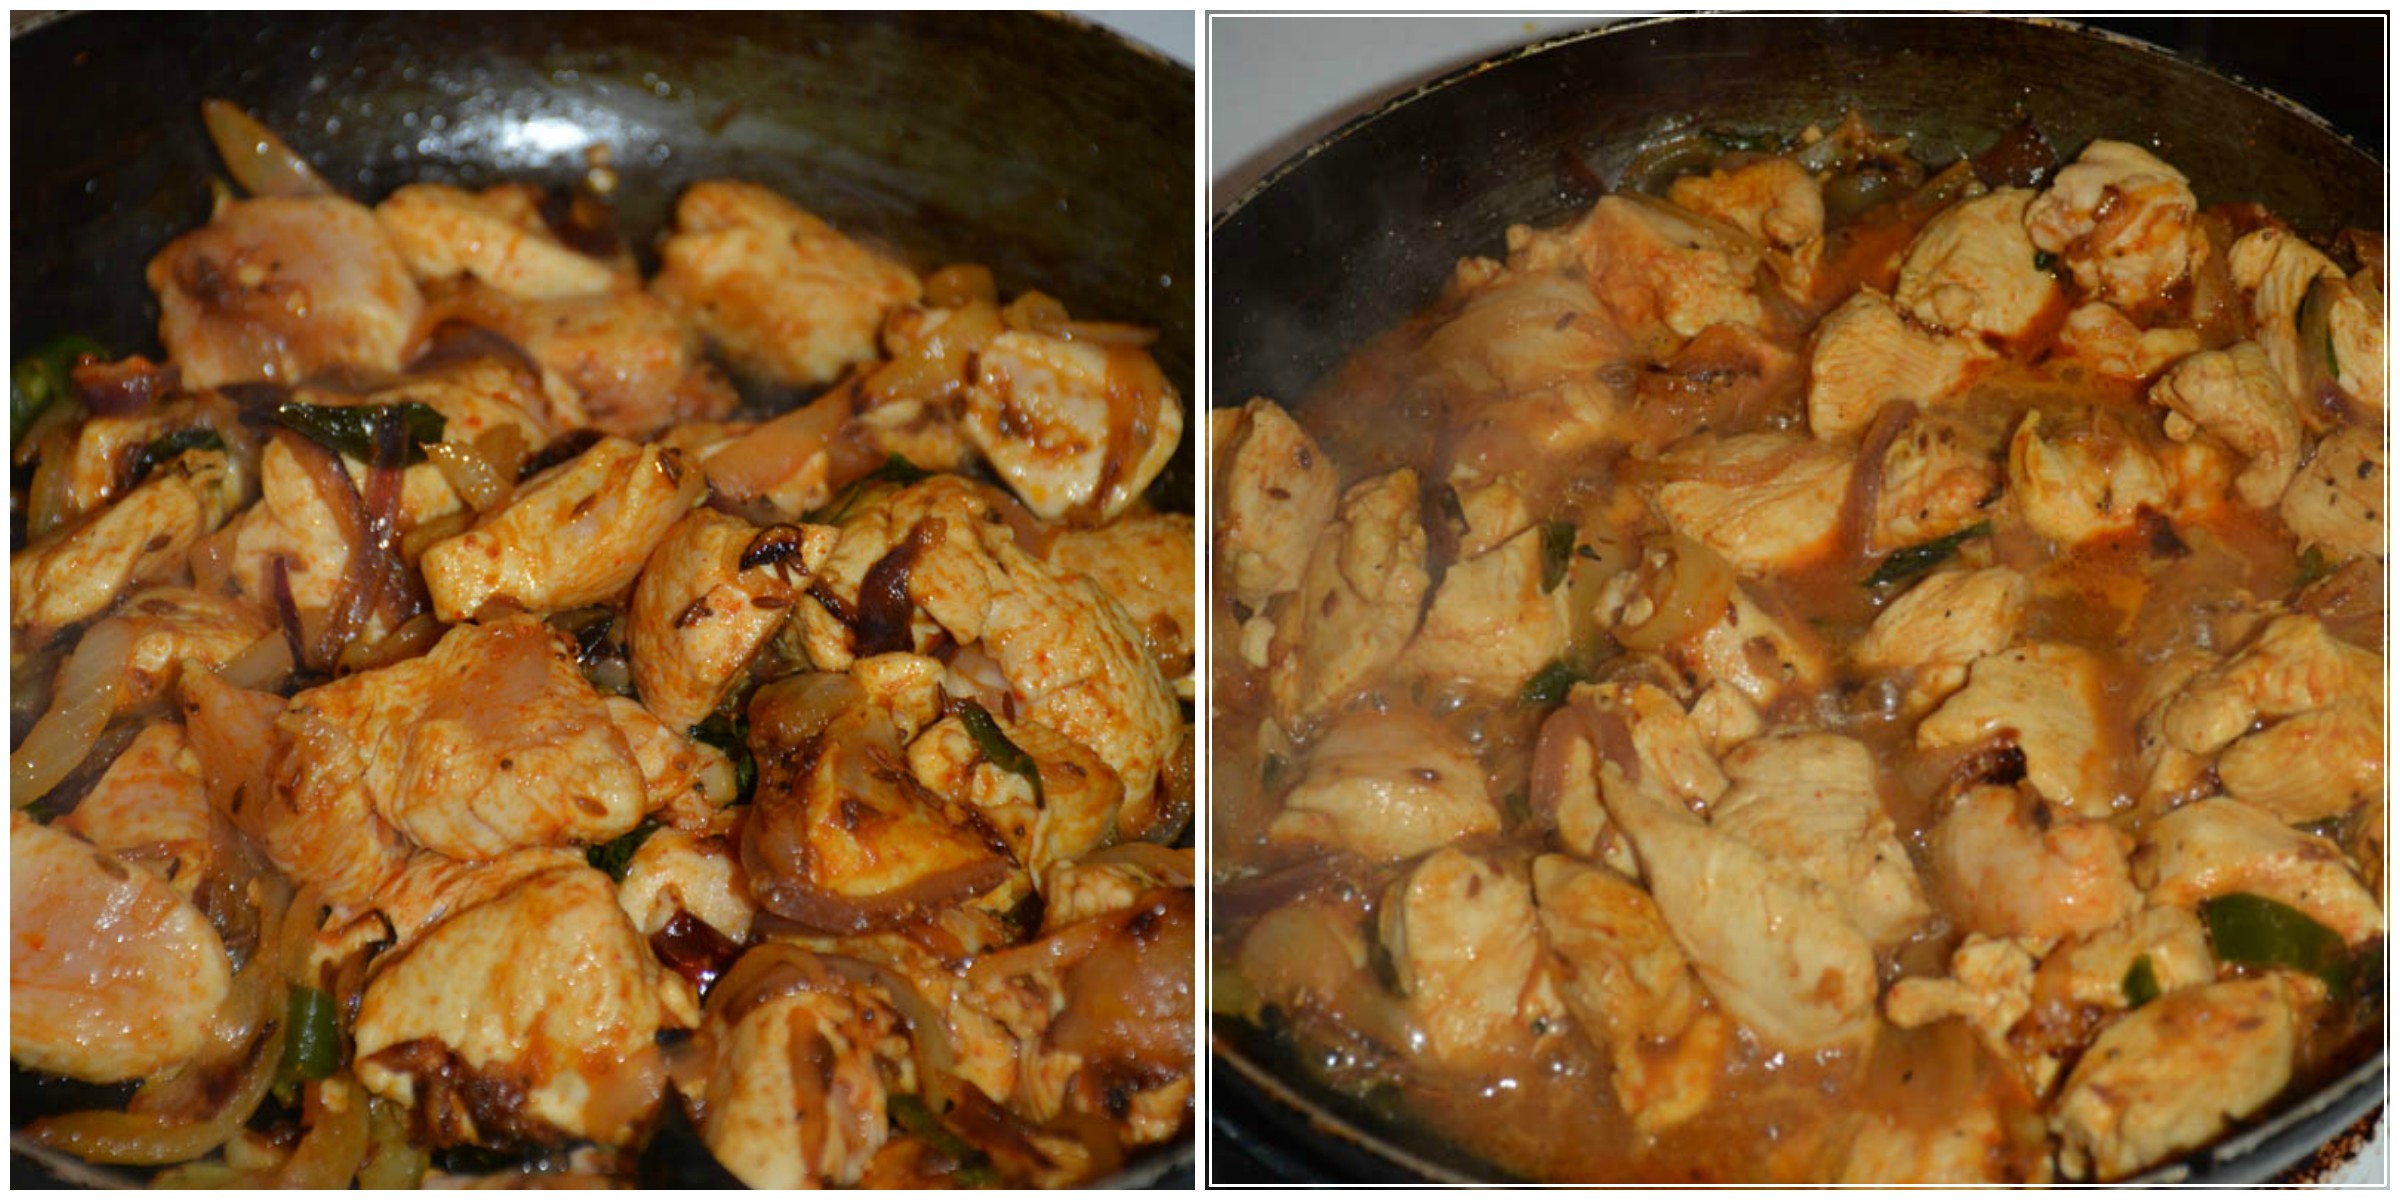
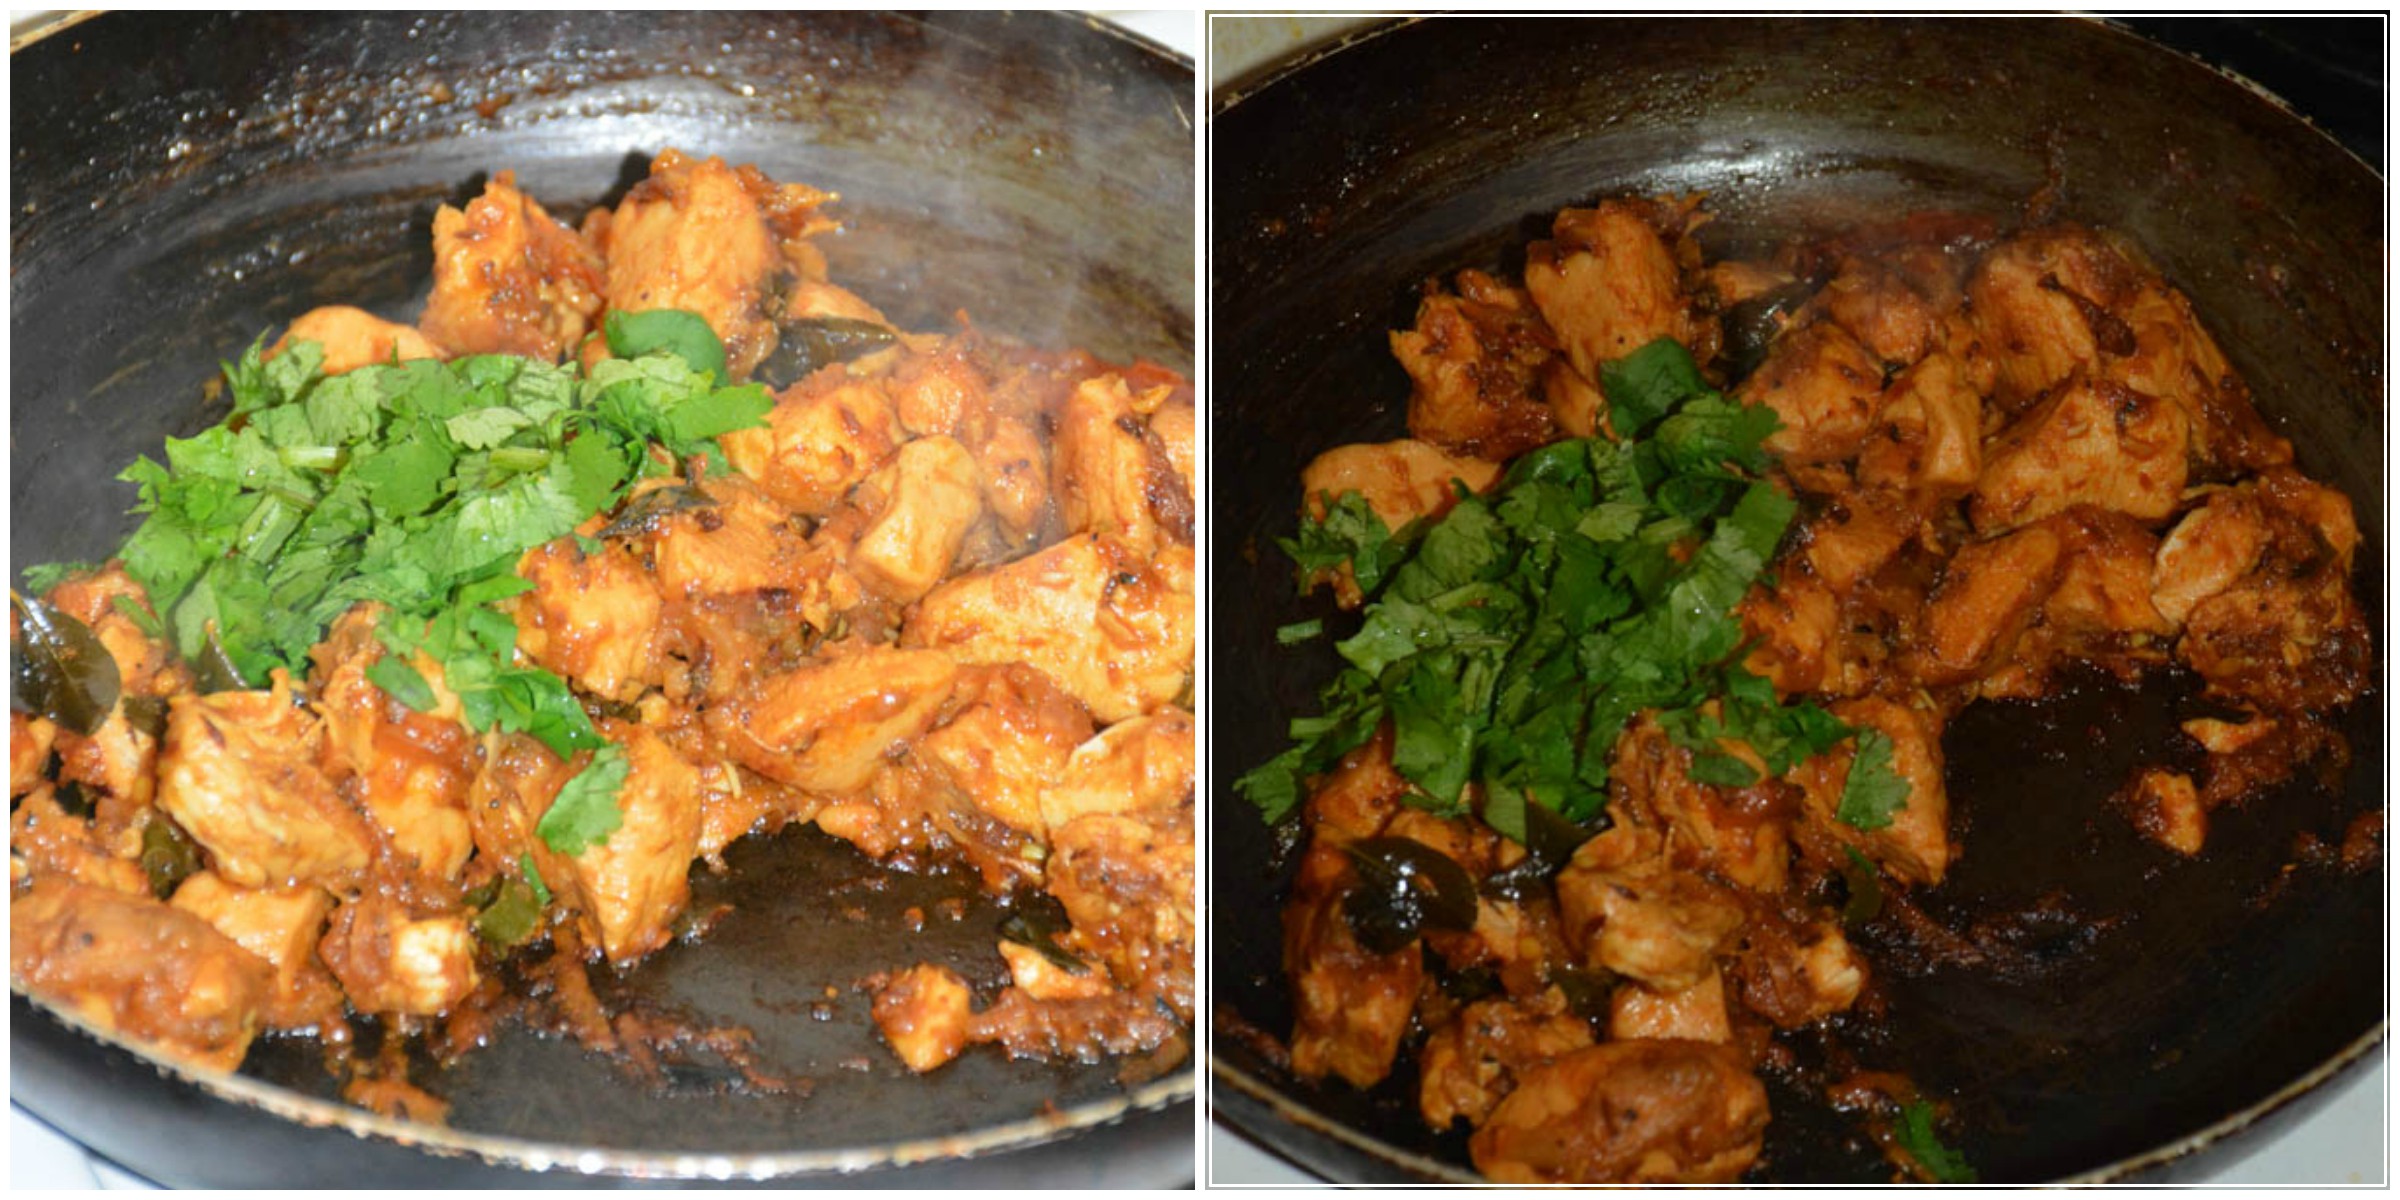
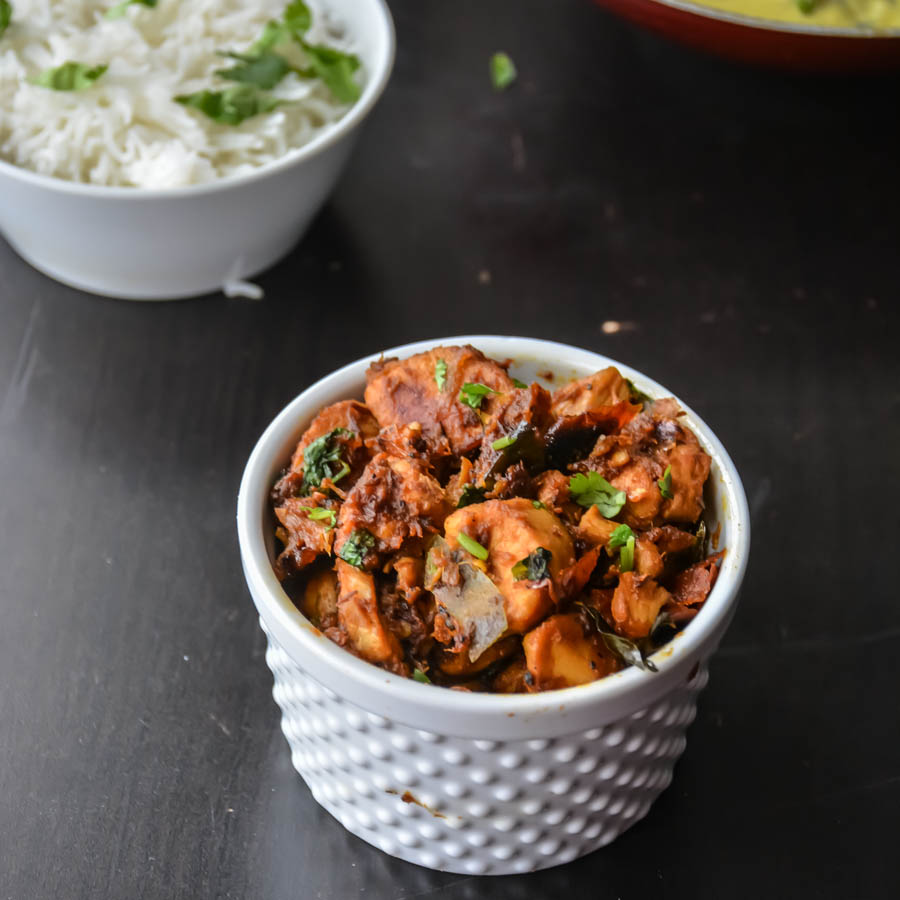
Spice coated chicken slowly roasted and browned in the hot pan scraping up the juices and flavor on the bottom.

This is the most indulgent, easy and delicious way of preparing chicken in Indian style. The ingredient is very simple and pretty straight-forward. I used just garlic, ginger, curry leaves and onions for this recipe. But 😉 hopefully you should miss these ones. It is simple, spicy and succulent. This is such an easy dish, yet so delicious and flavorful.


When you wanted to make a dry side dish with chicken, you might be guilty to make chicken 65 always which is fried. So, this one taste like it is been fried but it is not. I have another recipe Butter chicken roast which is similar but uses ghee and coconut in it. It tastes like butter coated chicken. I made this with a lot of recipes on a weekday so you could have guessed how easy it is to make. I would say it is the easiest recipe of all my chicken recipes yet tasty. It taste great with Biryani like lamb biryani or egg biryani, with plain rice and tomato rasam or  sambar.

My other chicken recipes: chicken 65, Spicy chicken roast,pepper chicken curry, sweet and spicy garlic chicken drumsticks, spicy chicken egg fry noodles

SpicyDryChickenRoast-13

Print
Home Style Spicy Chicken Dry Roast
Author: Suganya Hariharan
Recipe type: Main
Cuisine: Indian
Prep time:  5 mins
Cook time:  25 mins
Total time:  30 mins
Serves: 3 servings
 
Ingredients
  • • Chicken – 400 grams, bite sized pieces, cleaned and washed
  • • Cardamom – 2 , Cinnamon – ½ inch stick, cloves - 2
  • • Curry leaves – 1 spring
  • • Dried Red chilli - 1
  • • Cumin seeds/ Jeera – 1 tsp
  • • Small Shallots – 10, chopped finely or medium sized onions – 2, sliced thinly
  • • Green Chillies – 2
  • • Garlic – 3, chopped finely
  • • Ginger – 2 inch, chopped finely
  • • Turmeric powder – a pinch
  • • Pepper powder – 1 tsp
  • • Sambar powder – 1 tbsp or (Chilli powder – 1 tsp and Coriander powder – 2 tsp)
  • • Garam Masala Powder – 1 tsp
  • • Coriander leaves – 1 tbsp, chopped, for garnish
  • • Salt – as needed
Instructions
  1. Take a pan and add oil in medium flame, add dried red chilli, cardamom, cinnamon, cloves, cumin seeds and when their color changes, add garlic, ginger, shallots, green chillies and curry leaves.

  2. After the onion is sautéed well, add the chicken with turmeric powder, sambar powder (or chilli powder, coriander powder and salt. Sauté well for 2 mins, and add 2 tbsp of water.
  3. Close it with the lid and do not add more water. Let the chicken cook from the water that chicken oozes out.

  4. Once it is almost 90% done, add pepper powder, garam masala and cook till the chicken is dry, browned scrapping up the juices from the pan and roasted. Keep the vessel open and not close it with lid now.

  5. When it is perfectly roasted, garnish with chopped coriander leaves.
Notes
1. Do not add a lot of water when you cook chicken. The chicken has to get cooked with the chicken juices itself.
Wordpress Recipe Plugin by EasyRecipe
3.5.3208


It taste perfect with rasam, sambar or restaurant style lamb biryani.

SpicyDryChickenRoast-9

Filed Under: NON-VEG RECIPES Tagged With: Andhra style chicken roast recipe, butter chicken recipe, chciken thokku recipes, Chicken Andhra style, chicken curry, chicken gravy recipe, chicken iguru recipe, chicken kuzhambu recipe, chicken recipes, Chicken roast Indian style, Chicken roast recipe, chicken spicy roasted recipe, Coconut Butter Chicken Roast, coconut chicken recipe, dry chicken recipe, dry chicken recipes, healthy chicken recipe, Home Style Spicy Chicken Dry Roast, indian chciken curry recipe, Indian chicken recipe, Indian chicken recipes, Indian food recipes, Indian Recipes, Kozhi milagu curry recipe, madras chicken curry., non vegetarian Indian recipes, pepper chicken gravy recipe, pepper chicken recipe, quick indian chicken recipe, side dish for biryani recipe, side dish for fish curry recipe, side dish for fish kuzhambu recipe, south indian chicken recipe, Spicy chicken recipe

Punjabi Kadhi Pakora/ Fritters in yogurt gravy

February 8, 2016 by Suki 2 Comments

PunjabiPakoraKadi-19

PunjabiPakoraKadi-19
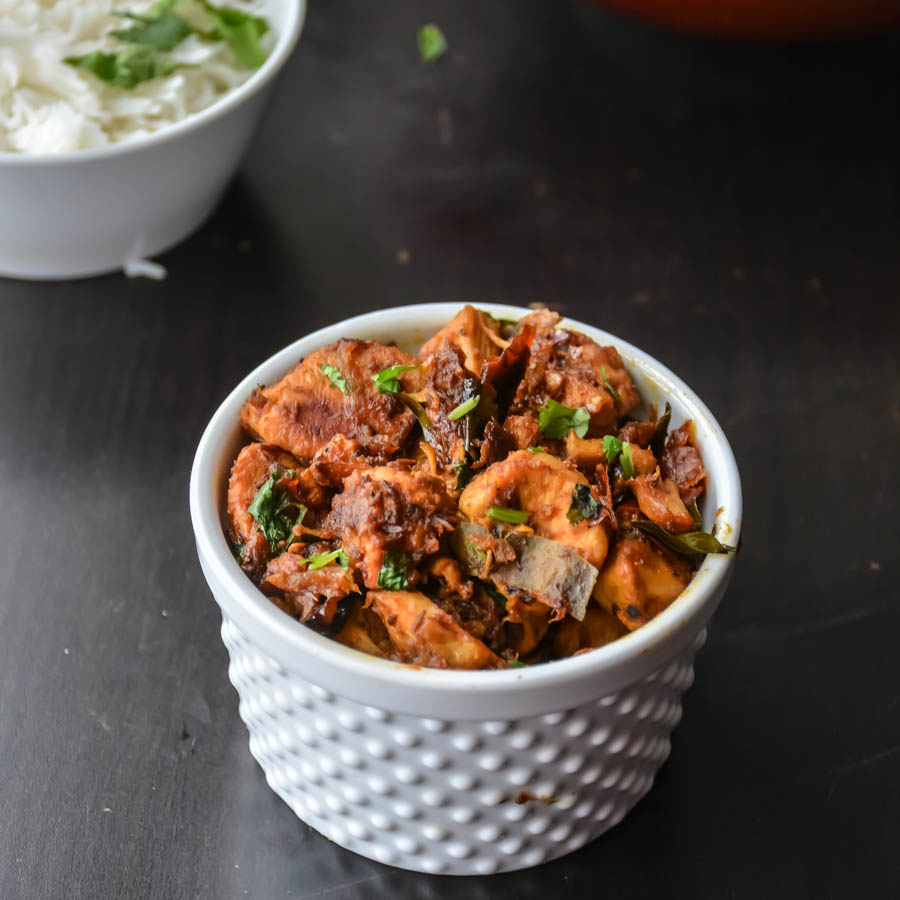
Crispy onion pakoras simmered in yogurt besan gravy. Perfect Comfort food!

Kadhi is yogurt besan based gravy and pakoras are fritters. It is very quick to make surprisingly. I thought it might take quite a lot  time, I tasted this few times in restaurants and wanted to try it. So asked one of my friends who does it well, tried and now I just love it more than the restaurants ;).  After having at restaurants, I realized that many states of India has their own version of kadhi like gujarati kadhi, maharashtrian kadhi, Punjabi kadhi and so on. And this here is my version ;)! I am sure everyone has their own version with a few tweaks here and there like any other food. Some add veggies to it, but I heard the authentic recipe is just plain pakoras in besan yogurt gravy. Make sure to simmer the kadhi for 2-3 minutes, so it soaks up some gravy and flavors. I have heard adding ghee making a lot of difference to the gravy 😉 and I always love ghee (Indian clarified butter) so I would say yes. Try and let me know! Even oil tasted perfect to me. I had this for my lunch with some parathas, plain hot rice and spicy potato roast.

Vegan note: Replace yogurt with coconut milk or vegan yogurt

Other Favorite North Indian curry: Pepper Paneer Do Pyaza, Trevti Dal/Three Lentil Dal, Mushroom Peas Spring Onions masala, Roasted bell pepper gravy, Paneer Makhanwala

 PunjabiPakoraKadi-15


5.0 from 1 reviews
Print
Punjabi Kadhi Pakora/ Fritters in yogurt gravy
Author: Suganya Hariharan
Recipe type: Main
Cuisine: Indian
Prep time:  10 mins
Cook time:  45 mins
Total time:  55 mins
Serves: 4 servings
 
Ingredients
  • • For Pakora: (yields 7-8 pakoras)
  • Besan flour/ Gram Flour/ Chcikpeas flour/ Kadalai maavu – ½ cup
  • Baking powder – a pinch
  • Chilli Powder – ¼ tsp
  • Green chilli – 1, chopped finely
  • Ajwain/ Carom seeds – a pinch
  • Onions – 1, thinly sliced (approx. ½ cup)
  • Cilantro/ Coriander leaves – 2tbsp (finely chopped)
  • Curry leaves – 1 Sprig (finely chopped)
  • Salt – to taste
  • Water – ⅛ - ¼ cup as needed
  • Oil – to deep fry


    For Kadhi:
  • Yogurt – 1.5 cups (preferably sour)
  • Besan flour – 2-3 tbsp
  • Oil/ghee – 1 tbsp
  • Asafetida - pinch
  • Red Whole dry Chillies - 2
  • Methi seeds – ½ tsp
  • Cumin seeds – ½ tsp
  • Curry leaves – few
  • Ginger – 1 tsp (finely chopped)
  • Garlic – 2 (finely chopped)
  • Turmeric powder – ½ tsp
  • Chilli Powder – ½ tsp
  • Cilantro – 2 tbsp (finely chopped)
Instructions
  1. For Pakora/Fritters:
  2. Mix the chickpea flour, ajwain seeds, baking powder, onion, chilli powder, green chillies, salt, curry leaves and coriander leaves. Make sure to add righta mount fo salt, as it is going to absorb jucies and flavor from the kadhi gravy later.

  3. Add water slowly by whisking the batter, so that there are no lumps in the batter. It should be light, thick and smoother than a pancake batter I would say.
  4. Heat oil in a pan and drop small portions of the mixture into the hot oil and deep-fry till golden brown. Drain on absorbent paper and set aside.


    For kadhi:
  5. Take a bowl, whisk together yogurt and besan flour until its smooth. Authentic kadhi is thick, but if you want to thin it out, add some water and set aside. I added 1 cup of water as I was going to simmer for some time.

  6. Heat oil in a big wide pan in medium low heat, add methi seeds, cumin seeds, curry leaves, red chillies, ginger, garlic, and asafetida. When the red chilli turns color, add the besan yogurt mixture, salt ( as per your taste) and turmeric.
  7. Turn the heat to low, bring to a boil and cook on low heat for about fifteen to twenty minutes, stirring occasionally.

  8. Heat 1 tsp of oil/ghee in a small pan,add the red chilli powder and sauté for few seconds.
  9. Add this to the gravy , add also the fried pakora, and continue to simmer for two to three minutes.
  10. Switch off and garnish with coriander leaves.
Wordpress Recipe Plugin by EasyRecipe
3.5.3208

Serve with hot plain rice or ghee rice or Peas pulao or paratha or phulka or naan.

PunjabiPakoraKadi-10

Filed Under: NORTH INDIAN GRAVIES/DAL/CURRY Tagged With: authentic Punjabi kadhi pakora, How to make punjabi kadhi pakora recipe, kadhi recipe, North Indian recipes, pakora curry, Punjabi kadhi pakoda recipe, Punjabi kadhi pakora recipe, Punjabi Kadhi Pakora/ Fritters in yogurt gravy, Punjabi kadhi recipe, Punjabi kadhi with pakora, Punjabi Kadi recipe, Punjabi pakorewale kadhi, Quick Indian vegan curry, quick Indian vegetarian recipes, quick vegan Indian recipes, Quick vegan recipes, quick weeknight dinner recipe, Restaurant style Punjabi kadhi pakora, vegetarian indian recipes

Pavakkai Thokku/ BitterGourd Pickle

February 3, 2016 by Suki 3 Comments

PavakkaiThokku-10

PavakkaiThokku-10
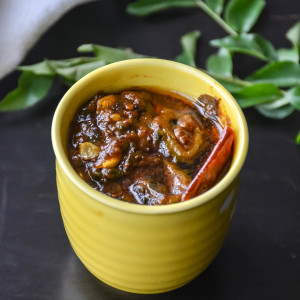
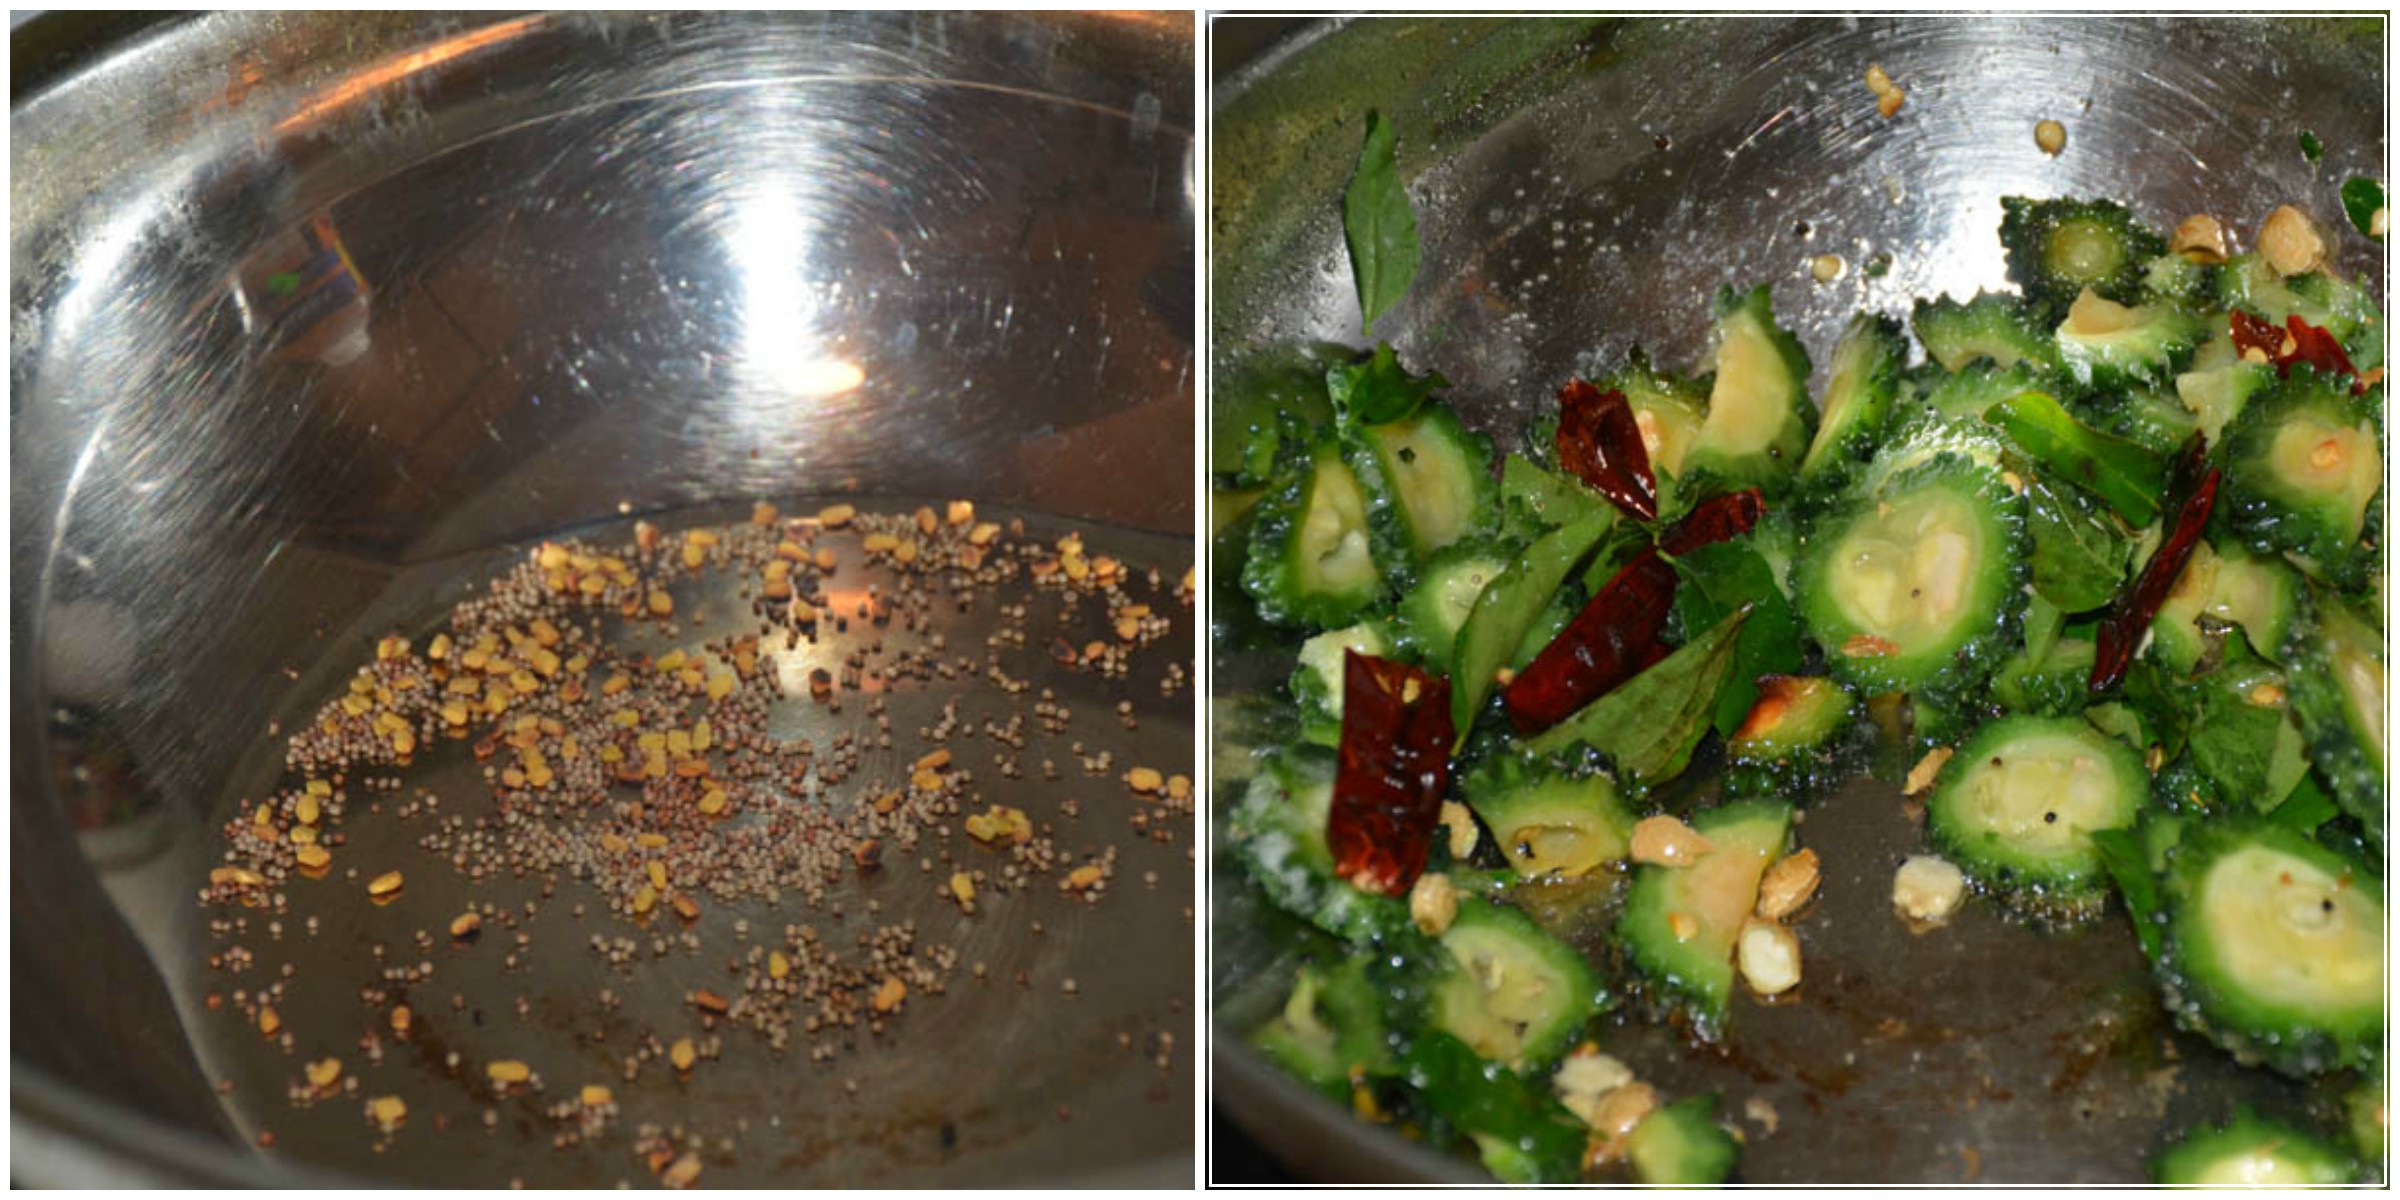
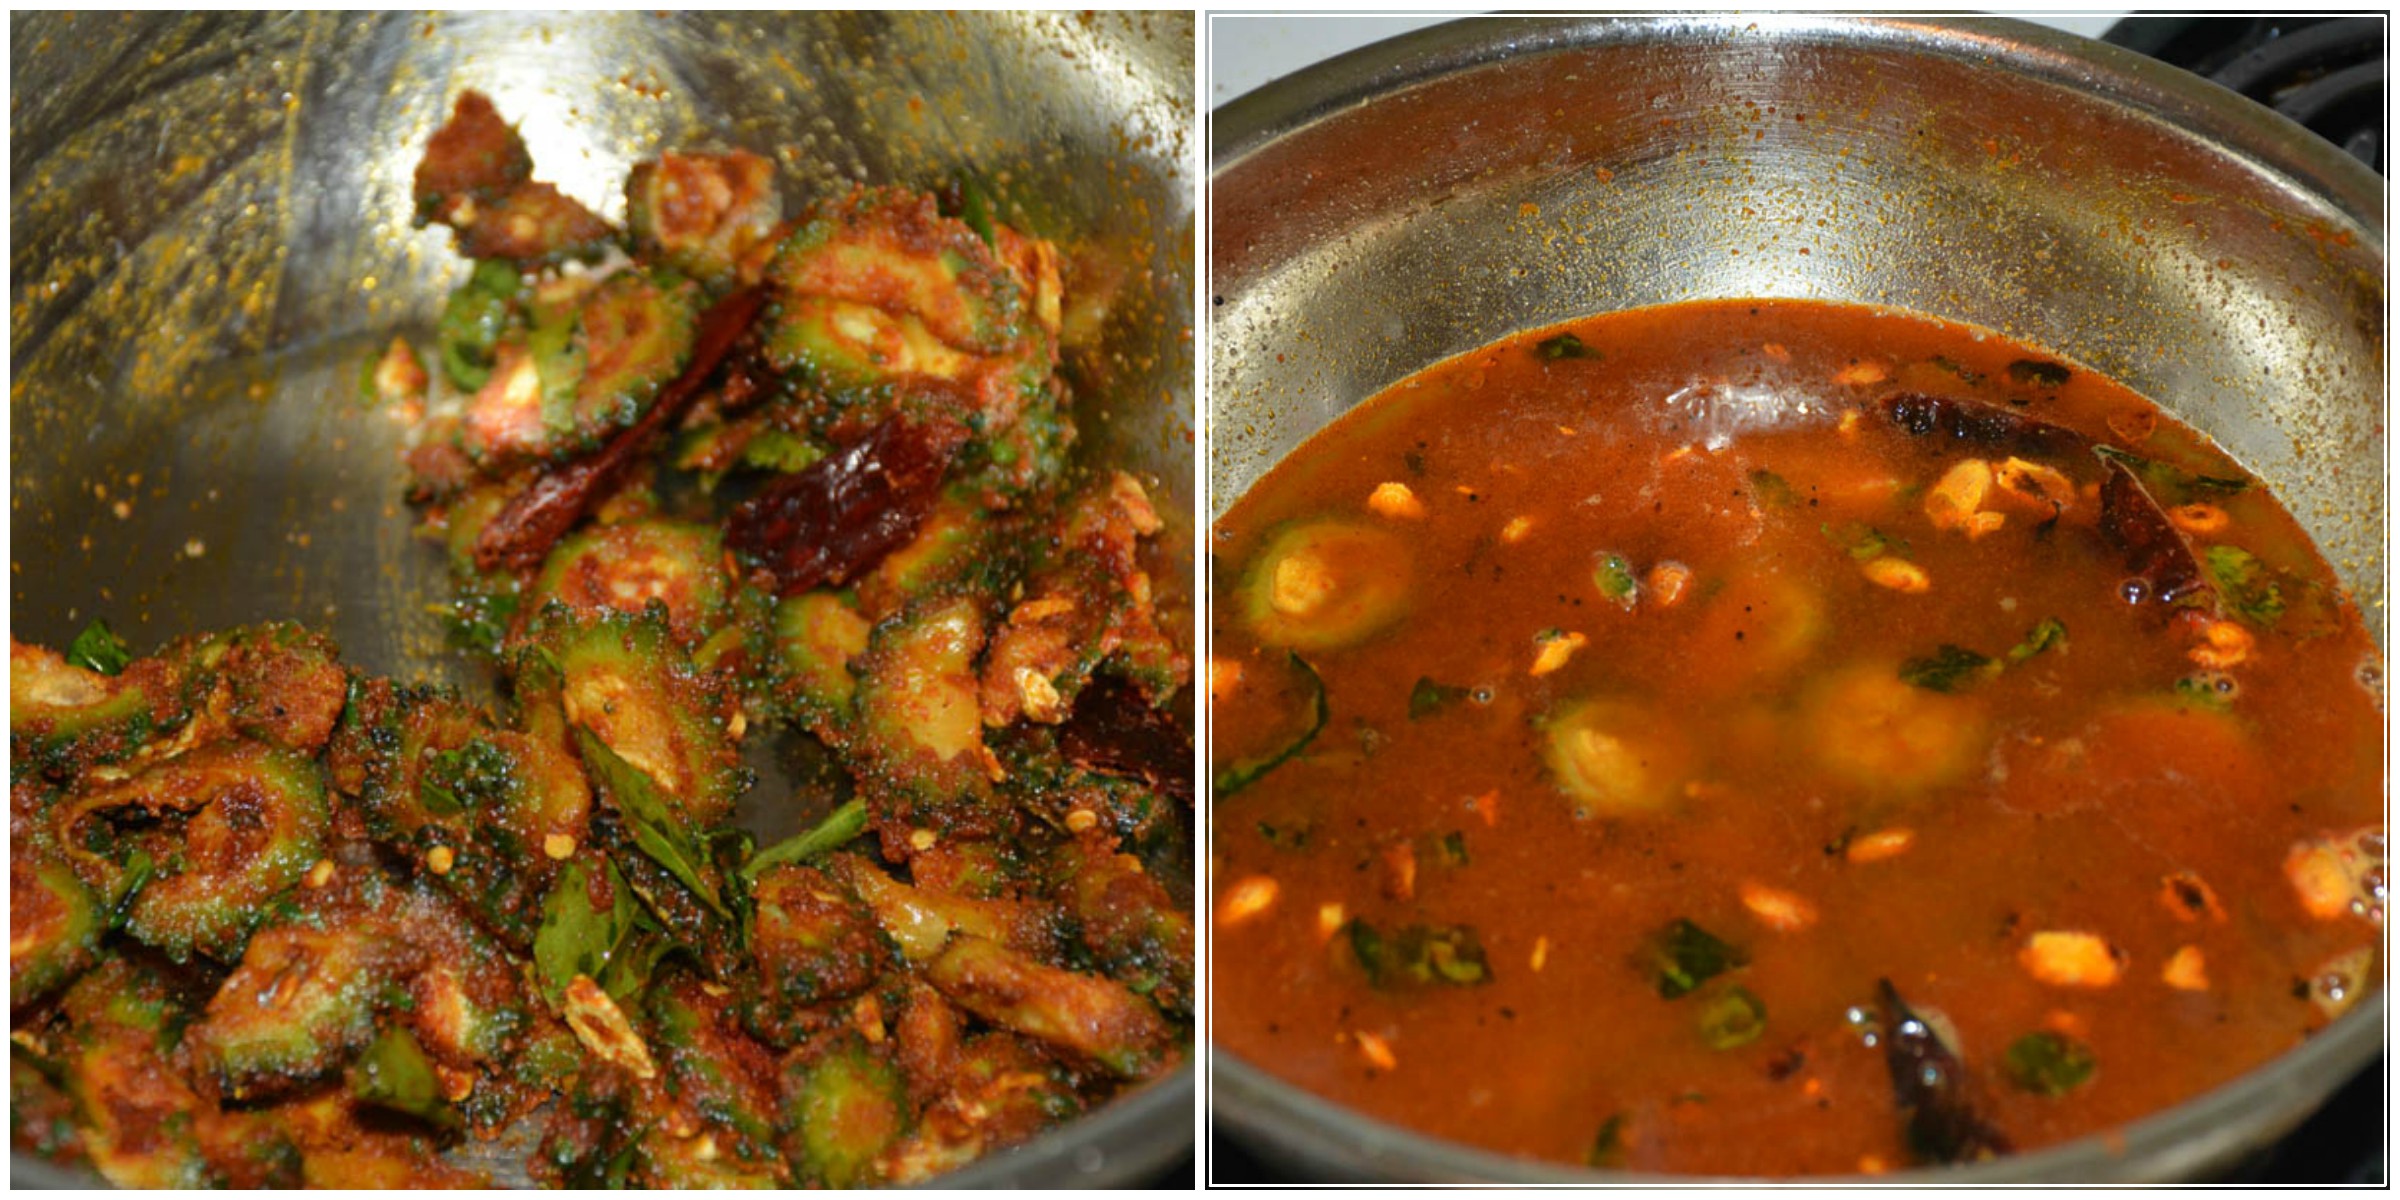
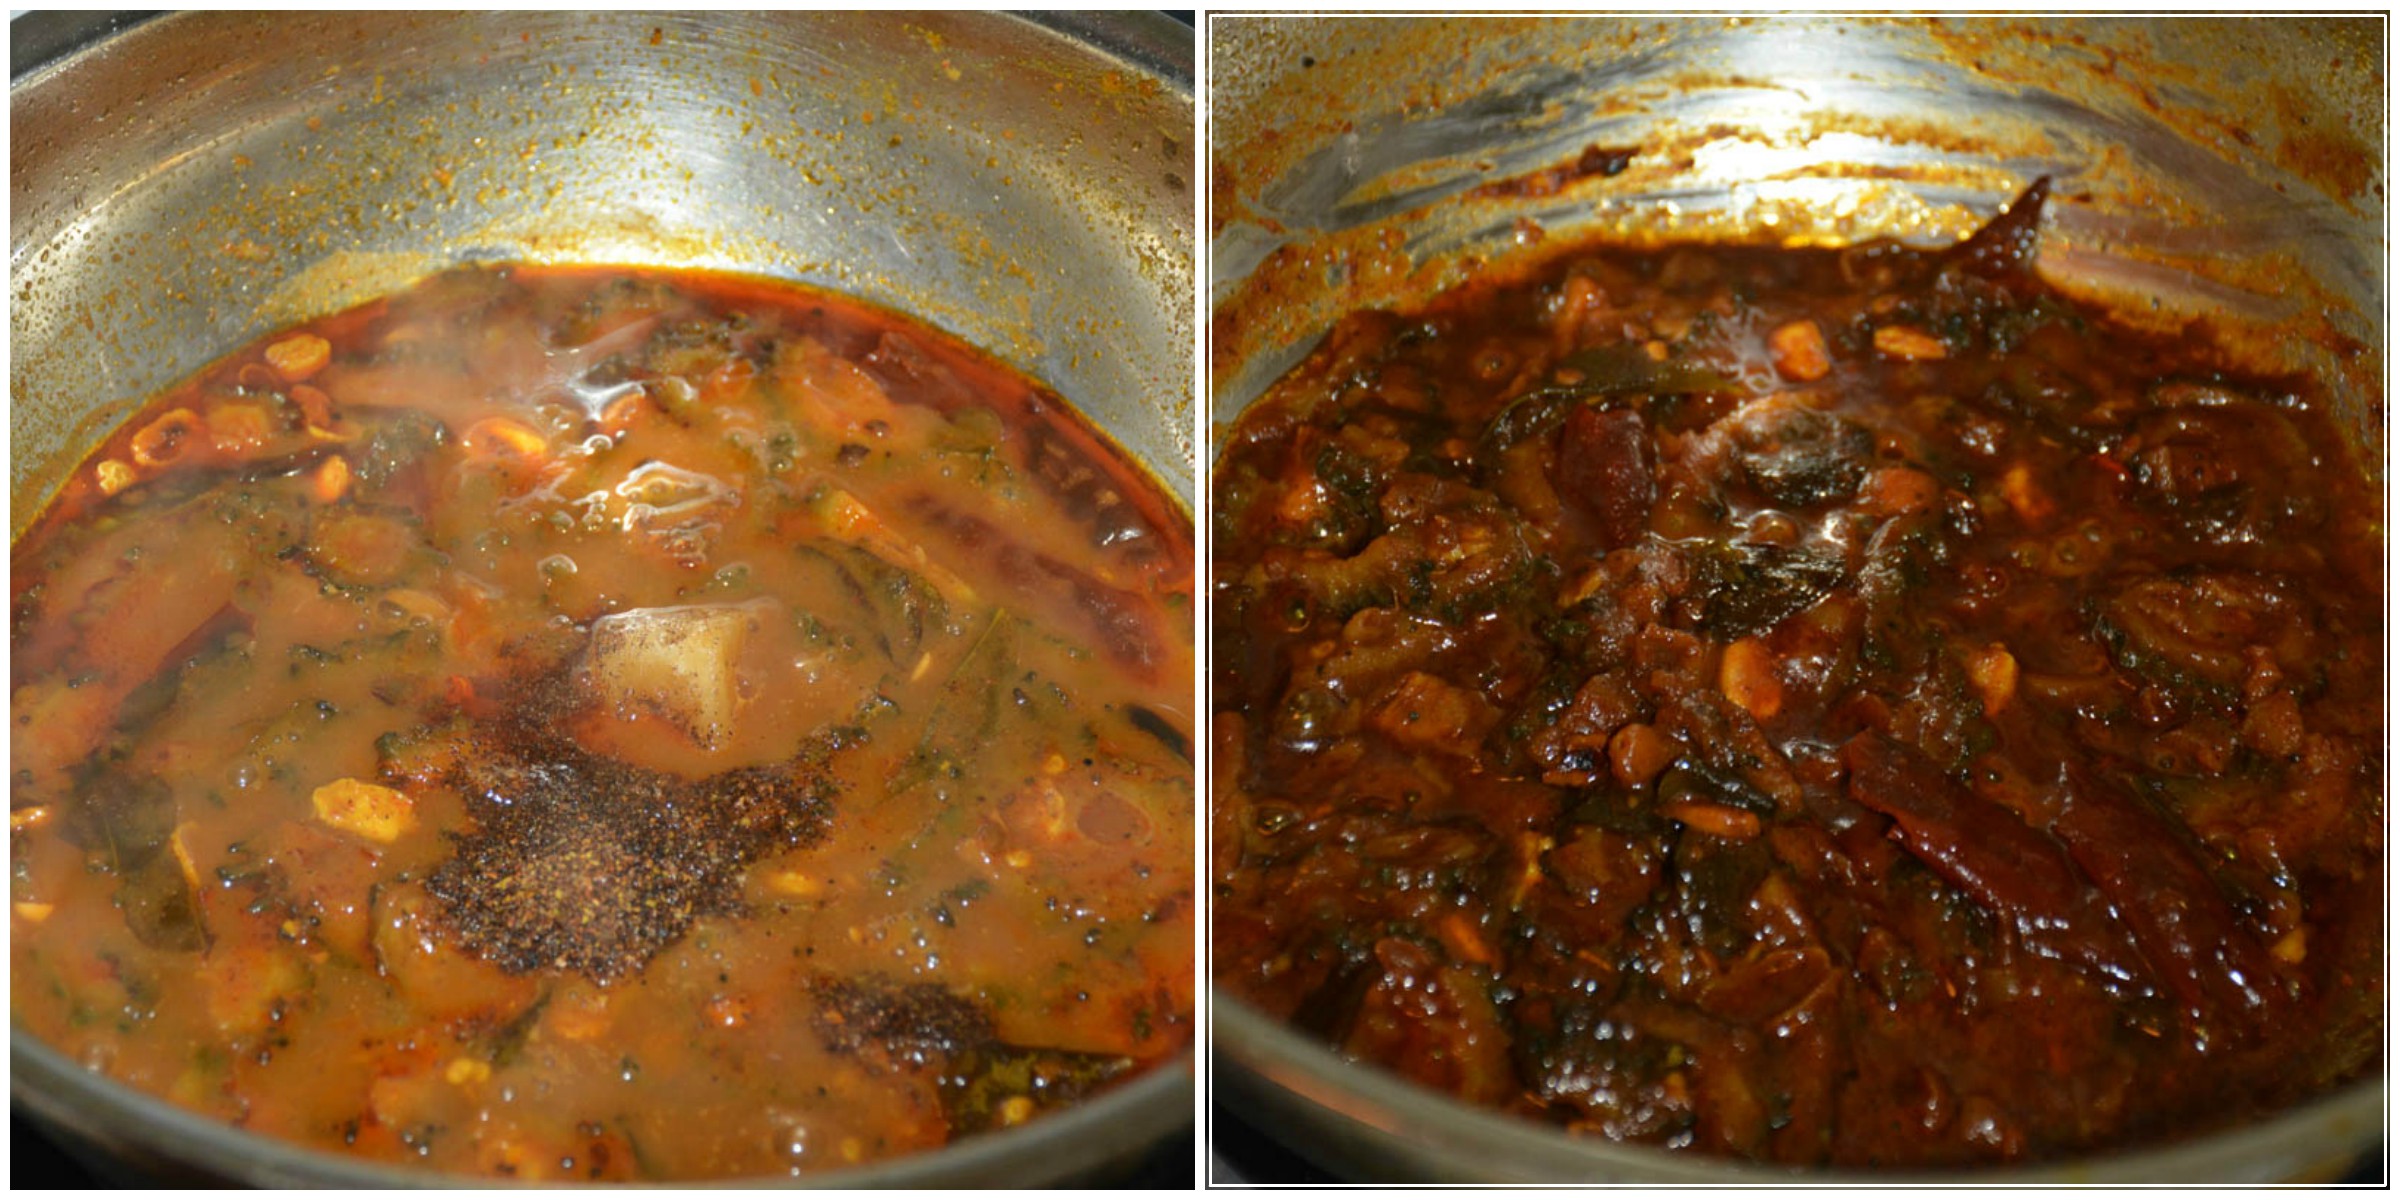
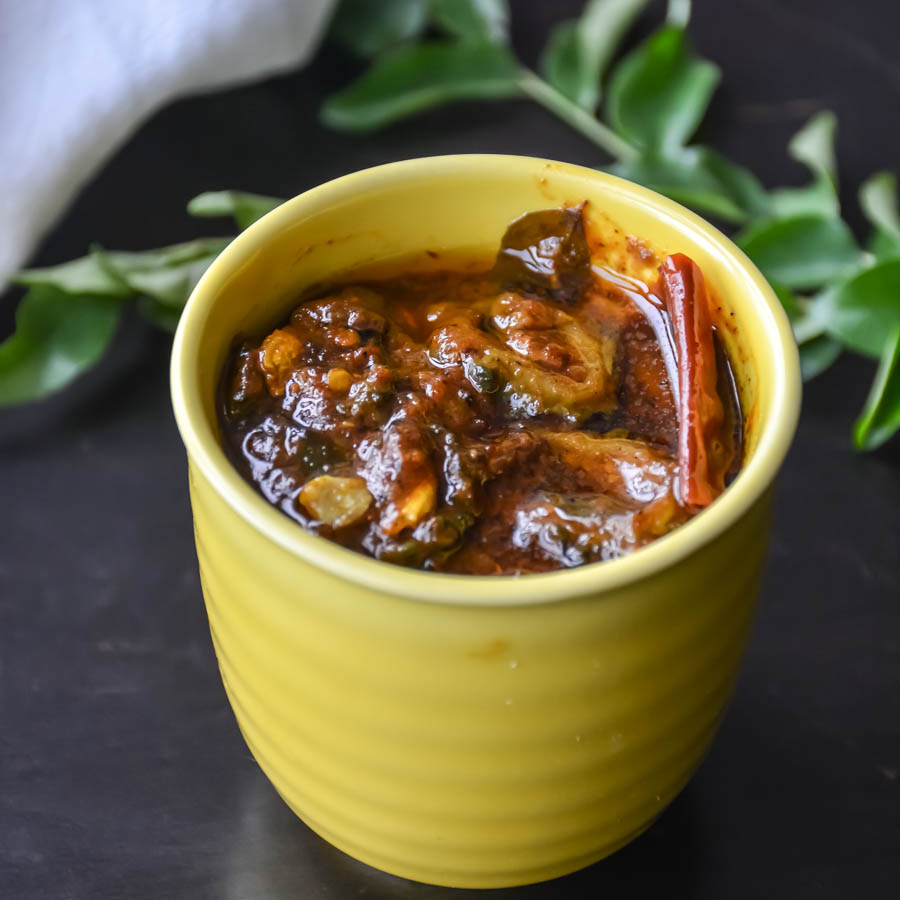
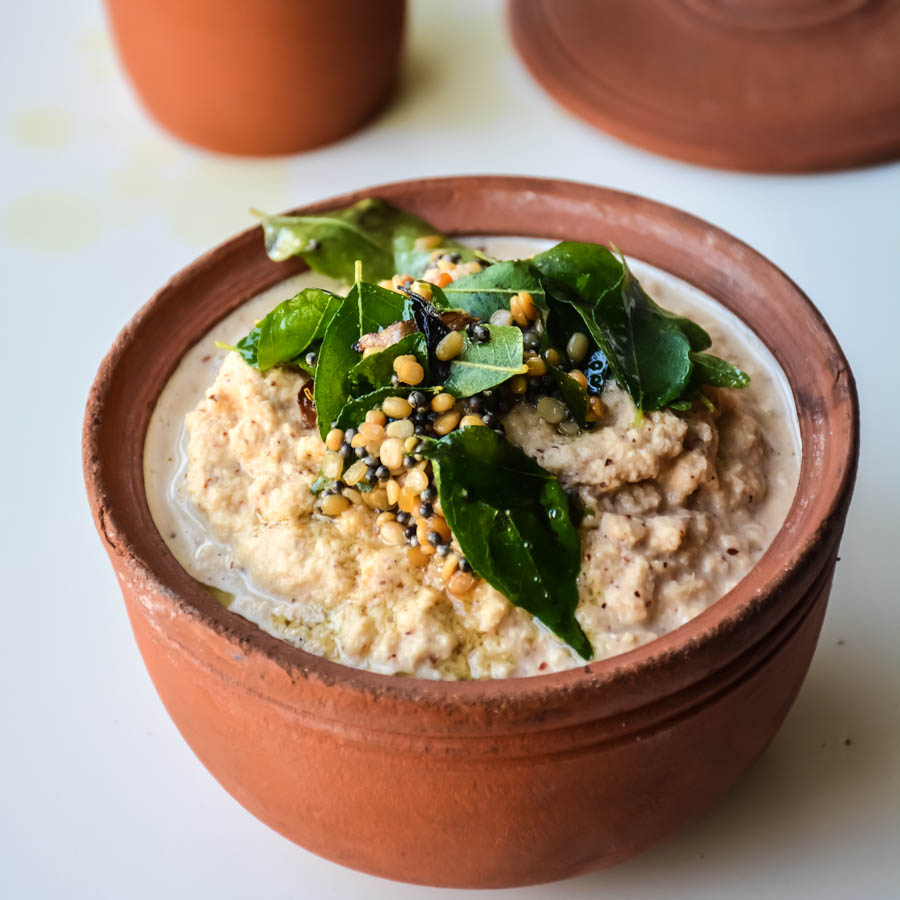
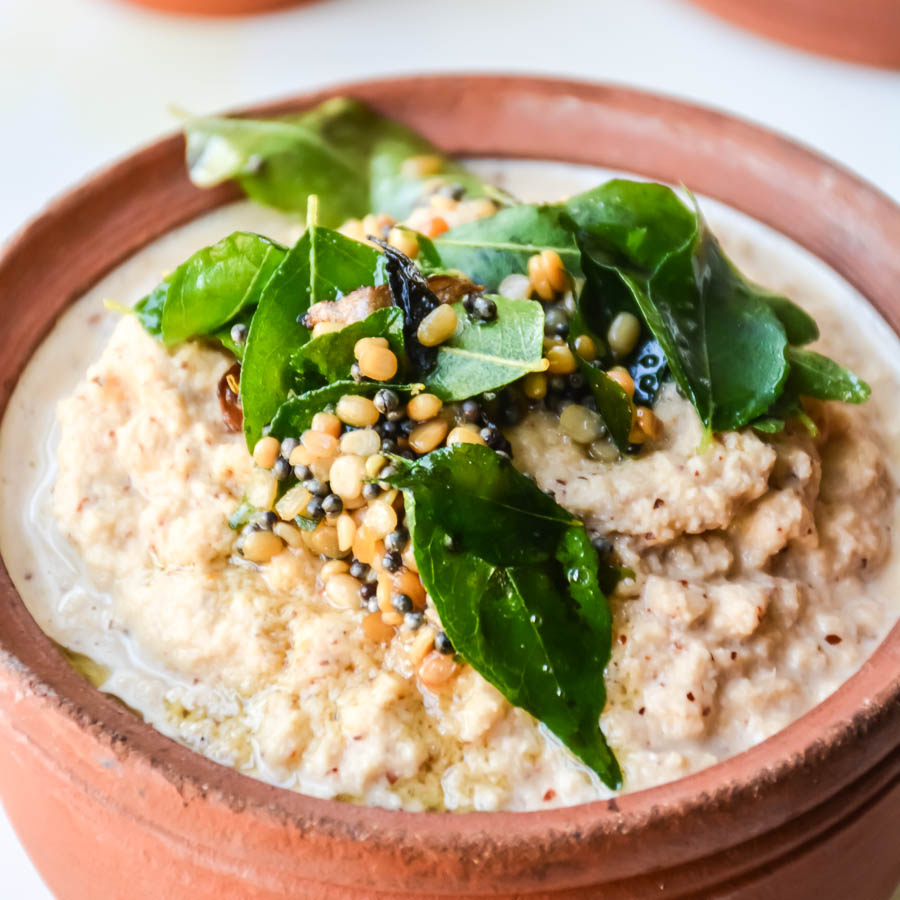
Tangy & Spicy bitter gourd chutney with Indian spices. And it is an excellent side for many recipes. Store and enjoy it for 2- 3 weeks!

Whenever I leave from India, my mother used to make some homemade recipes that I can preserve for a month or two.  She used to make some coriander thokku, curry leaves thokku, tomato thokku, pulikachal, pickles and so on. So I thought of preparing some now. I tasted this thokku in Grand sweets and I totally fell in love with the taste. You can just mix with plain rice. Or have it with rotis, curd rice. You can also use them as a dip for bajjis or vada or other appetizers.

I really love using my freezer to preserve food. I love these homemade chutney or sauce and they are always a great savior when it comes to weekdays. I am alright cooking on weekends, but on a weekday I get so tired that most of the days I tend to make recipes under 30 minutes, finish and sleep. You can also use these for travel as it will not get spoiled easily for a long travel.  And adding sugar or jaggery enhances the flavor and helps in balancing out the acidity.

Bitter gourd is one of the healthy veggie that most kids fend off because of it bitterness. But by the method I prepare, you will not taste the bitterness at all. It is really good for health and has natural power to kill worms and germs present in the stomach and intestine. It is very good for diabetic patient’s .People having a low sugar level should try to avoid this veggie.

PavakkaiThokku-11


Other favorite Thokku recipe: Spicy tomato onion thokku

Other Favorite Pavakkai recipe: Pavakkai Chips/ Bitter gourd chips, Pavakkai stir fry/Bitter Gourd fry.

5.0 from 2 reviews
Print
Pavakkai Thokku/ BitterGourd Pickle
Author: Suganya Hariharan
Recipe type: Main
Cuisine: Indian
Prep time:  5 mins
Cook time:  30 mins
Total time:  35 mins
Serves: 1 cup
 
Ingredients
  • Bitter Gourd – 2
  • Yogurt – 1 tbsp
  • Sesame Oil – 2 – 3 tbsp
  • Mustard seeds – 1 tsp
  • Fenugreek Seeds – ½ tsp
  • Whole Red Chillies - 2
  • Curry leaves – 1 Sprig
  • Sambar powder – 1 tbsp
  • Chilli powder – 2 tsp
  • Turmeric powder – 1 tsp
  • Tamarind – 1 lemon Size
  • Salt – to taste
  • Grated Jaggery – 1 tbsp
  • Hing – a pinch
Instructions
  1. Wash bitter gourd and thinly slice them into circles. Discard any seeds. Soak the bitter gourd in curd, turmeric and 1 tbsp of salt for 20 minutes.
  2. Soak the tamarind in 1.5 cups of water and extract the juice.
  3. Dry roast the mustard seeds with fenugreek seeds for 30 seconds in medium-low flame. Blend or use a mortar pestle to grind them into powder.

  4. Now take a pan with 2 tbsp of oil in medium flame, add the red chillies,curry leaves and hing. When red chillies changes color, now squeeze out the juice from the marination of bitter gourd with your hands and add them into the pan. Saute for 20 seconds.

  5. Then add sambar powder, chilli powder, slat and the sauté them in oil keeping the flame in medium.
  6. When the bittergourd stir fried with the spices, add the tamarind extract and fenugreek mustard seeds powder. Mix well and close it with the lid. Keep the flame low and allow the whole mixture to get thicken and become like a thick thokku. It might take 20-25 minutes. It will be only ¼ th of the whole quantity you saw before 20 minutes. t will start to ooze out oil in the sides at a stage and will become a thick paste.

  7. Add grated jaggery and mix well. Switch off the flame.
  8. Cool it completely, store it in air tight container by topping 1 tbsp of oil at the end. The oil is added for the shelf life. Store it in an air tight container for 2- 3 weeks in the refrigerator.
Notes
Sour curd and turmeric takes out the bitterness.
Oil topped at the end is for shelf life. If you are going to finish it in 2 days, you need not add the oil.
Wordpress Recipe Plugin by EasyRecipe
3.5.3208

PavakkaiThokku-9

Filed Under: HOMEMADE, RAITA/DIPS/CHUTNEY Tagged With: BitterGourd Pickle, Freezer store pickle recipes, Grand sweets pavakkai thokku recipes, hotel style pavakkai pickle, Indian pickle recipes, karela pickle, karela recipes, Pavakkai healthy recipes, Pavakkai recipes, Pavakkai Thokku, Quick healthy recipes, quick Indian pickle recipes, Quick Indian travel thokku recipes, quick karela recipes, quick Kids recipes, Quick pickle recipes, quick side dishes recipes, Quick Thokku Recipes, Quick Travel recipes, restaurant style karela, restaurant style pavakkai

Lamb Shami Kabab + $100 US worth Gourmet Garden herbs collection Giveaway (Open to U.S & Canada)

January 27, 2016 by Suki 49 Comments

Lambcutlets-4

Lambcutlets-4
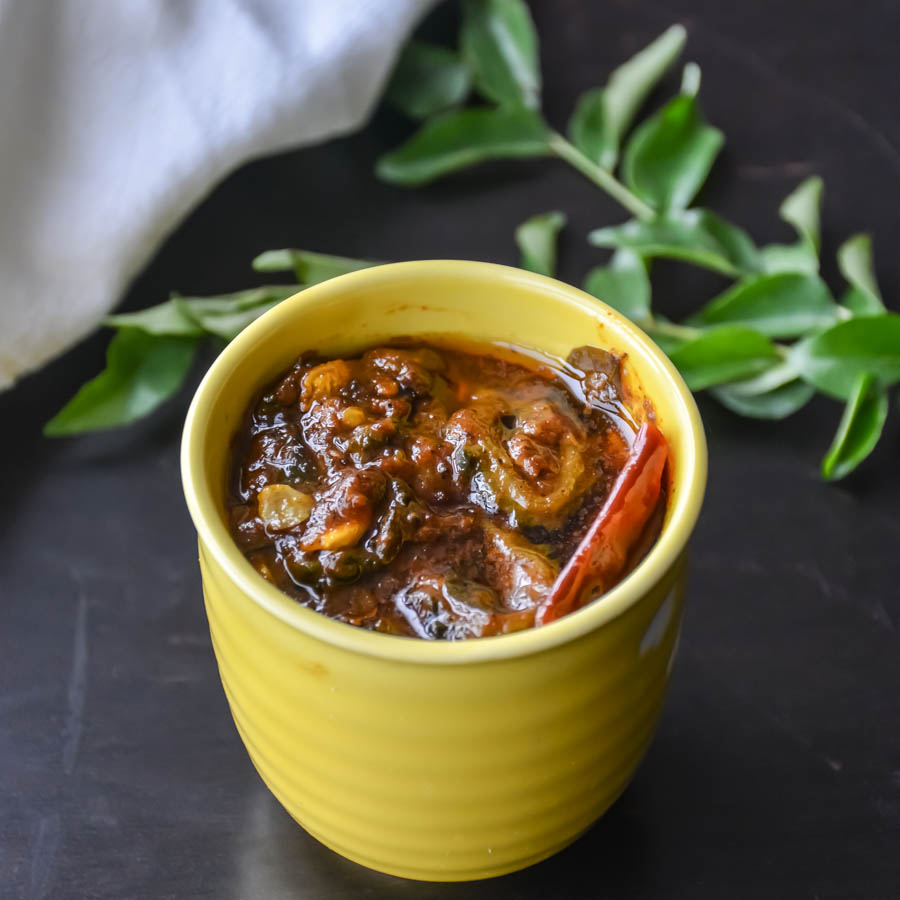
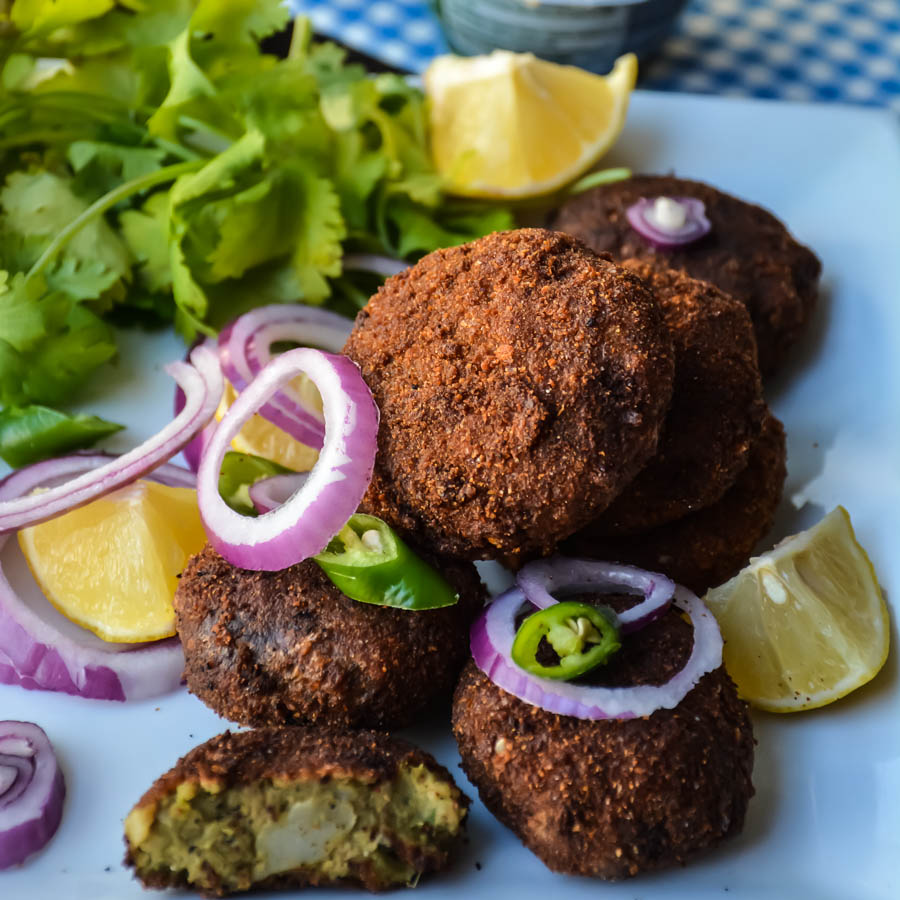
Soft, spicy, flavorful little treats for appetizers packed full of goodness! Perfect for winter! 🙂 I am sure this is one of the finger food that is finger licking good.

Shami kababs can be made from lamb (mutton) or beef. This is made using split chickpea and spices. They are perfect appetizer for any parties, get together or evening snacks. I made these for my office potluck and everyone loved it 🙂 and had a couple of request for the recipe 🙂 You can very well stored these shami kababs in freezer and enjoy it later. You can freeze the lamb mixture before making a patty or freeze the patty in ziplock bag. You can thaw the patty or lamb mixtures when needed and shallow fry them. Try not refreezing after thawed. If you think you have a big batch stored, try to store them in small batches.


Other Favorite Lamb Recipes: Spicy Honey Rack Of Lamb,Lamb & spinach Curry,  dry Goat curry, Insanely Delicious Lamb & Chicken recipes, Restaurant style lamb biryani, Lamb pepper curry Roast, Kadai Ghost/Lamb Curry, Mutton sukka, Ambur Mutton Biryani.

Lambcutlets-8

GIVEAWAY

I recently received a complimentary package from Gourmet Garden and I was super excited to try out them. I was totally impressed when I tried them! They have herbs like basil, chili pepper, chives, cilantro, coriander, dill, garlic, ginger, lemongrass, mint, oregano, parsley, rosemary, Thyme…! They had the paste variety before. Now they have lightly dried herbs which are fresh for 4 weeks after opening. Fresh herbs and spices always make an amazing difference to any meal. But you cannot always have fresh herbs at home. These lightly dried herbs closely resemble to original and can be stored in refrigerator for a month! This seems like a reasonable way to keep herbs fresh and full of flavor for longer. I am not paid to say this 😉 I tried their herbs and totally loved it! And that is the reason for the review! I have to tell you, their packing was just amazing! Best packing I received home so far. I even used their mint & coriander leaves for this recipe.

Lambcutlets-10

The great news today is that GOURMET GARDEN is offering readers of Relishthebite the chance to win a similar herb collection (Similar to the one in the picture I have shown above). The giveaway is open to all residents of U.S & Canada only. (Apologies to my other country readers)

To enter, just leave a comment below, answering the question: 1. “What would you like to cook using these herbs:)”

2.Visit Relishthebite Facebook page, like it also!

3. Follow Relishthebite on Twitter page.

4. Tweet about the giveaway.

a Rafflecopter giveaway

The giveaway closes at 23:59 February 14th, 2016

The lucky winner will be chosen by Raffle copter and I will notify that person by email. The winner will have 48 hours to respond and provide me their mailing address and phone number (No post office box numbers, please, for delivery purposes).

Also please note, by entering the giveaway and should you win, you are providing consent for me to give your mailing address and phone number to Gourmet Garden.

4.7 from 7 reviews
Print
Lamb Shami Kabab + $100 US worth Gourmet Garden herbs collection Giveaway (Open to U.S & Canada)
Author: Suganya Hariharan
Recipe type: Appetizer
Cuisine: Indian
Prep time:  30 mins
Cook time:  90 mins
Total time:  2 hours
Serves: 15-20
 
Ingredients
  • Minced Lamb – 500 gm
  • Chana dal (Bengal gram or split yellow peas) – ¼ cup, soaked in cold water for an hour, drained.
  • Potato – 1, boiled, peeled & mashed
  • Cumin seeds – 1 tsp
  • Onions – 2, medium, chopped
  • Garlic – 7, peeled
  • Ginger – 2 inch, chopped
  • Green chillies – 3, roughly chopped
  • Coriander leaves – ¾ cup, finely chopped
  • Mint leaves – ½ cup, finely chopped
  • Kashmiri chilli powder – 1 tsp
  • lime juice - 1 tsp
  • Garam Masala – 1 tsp
  • Salt - 1- 2 tbsp
  • Oil – 1 tbsp

    For coating:
  • All purpose flour - 2 tbsp
  • eggs , slightly beaten (or) all-purpose flour &water
  • Breadcrumbs - 3 tbsp
  • Oil - for deep frying
Instructions
  1. Boil the potatoes, season with salt until tender. Then drain, peel and mash.
  2. Heat 1 tsp of oil in a pan in medium flame, add cumin seeds and when it changes color, add the onions, ginger and garlic with little salt. Sauté them till the onions becomes translucent.
  3. Then add the minced lamb, drained split peas,potatoes and add enough water to just cover the meat and not more than that. Add little (a tsp ) of salt, cover and bring to a simmer.
  4. It takes around to 20-25 minutes, open the lid and cook for 5-10 minutes till the water is totally evaporated and there is no excess moisture.
  5. Cool and blend into a coarse paste, do not blend it smooth, just pulse it for 2-3 times.
  6. Add the green chillies, coriander, mint, garam masala, chilli powder, lime juice and mix well. Add 2-3 tsp of salt according to your taste and mix well.
  7. Take the lamb potato mixture, make it to small balls. Place in your hands, now press it gently to flatten it to round thick cutlets. You can make it to any shape you fancy.
  8. Dust it to flour, then dip it in egg mixture and shake off any excess for a thin coating and then dip in the breadcrumb mixture to coat evenly.
  9. If you want, you can freeze the cutlets at this point up to one day. You do not need to thaw before frying. They can also be frozen up to 2 weeks and defrost completely before frying.
  10. Heat oil in a large pan in medium-high heat. Deep fry the cutlets till they are crisp and golden brown on all sides, turning once in between. Drain the excess oil by placing on kitchen paper.
  11. Serve hot with tomato ketchup or yogurt mint dip and thinly sliced onion rings and lemon slices.
Notes
1. If you think you cannot hold them together, just add 1-2 tbsp of rice flour to the mixture.
Wordpress Recipe Plugin by EasyRecipe
3.5.3208

Lambcutlets-6

Filed Under: LAMB, NON-VEG RECIPES, SNACKS & APPETIZERS Tagged With: canada giveaways, cutlet recipes, fried snacks recipes, herbs giveawyas, Indian lamb recipes, kids cutlet recipes, lamb appetizers, lamb cutlets, lamb indian appetizers, lamb kebabs, lamb potluck recipes, Lamb quick party recipes, lamb quick recipes, lamb recipes, Mutton party recipes, Quick lamb herbs recipes, Quick lamb snacks, Shami kabab, shami kebabs

Spicy Arbi Fry/ Seppankizhangu Roast

January 26, 2016 by Suki Leave a Comment

QuickArbiSeppankezhanguRoast-7

QuickArbiSeppankezhanguRoast-7
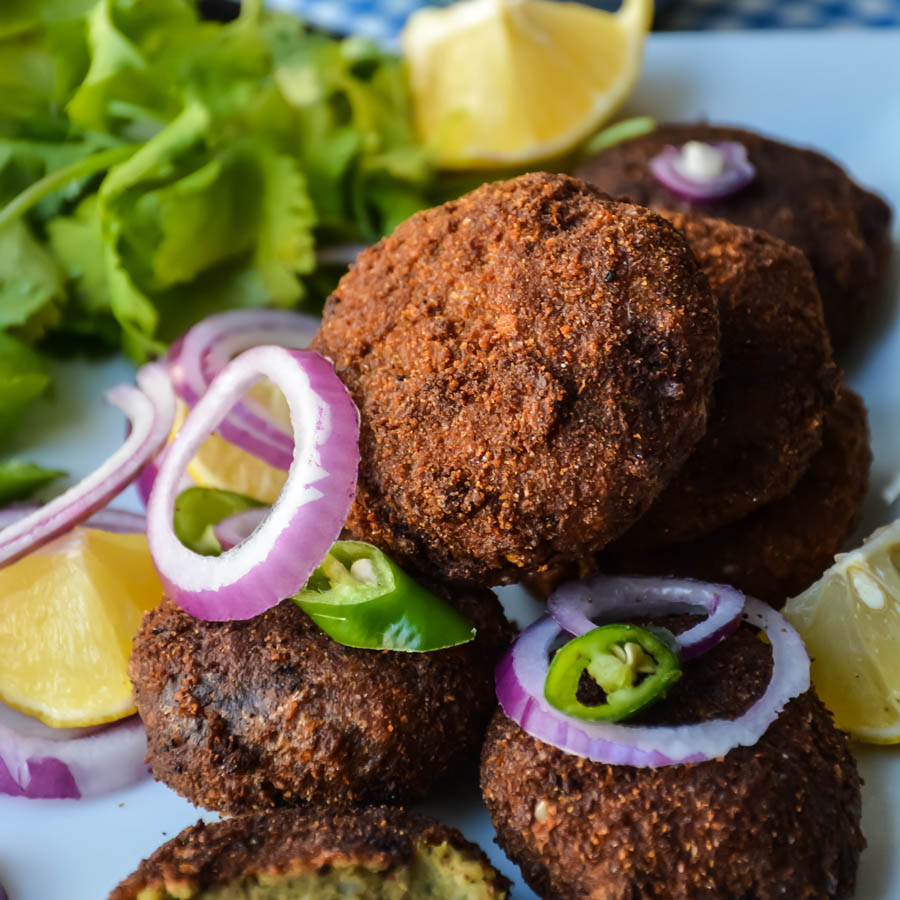
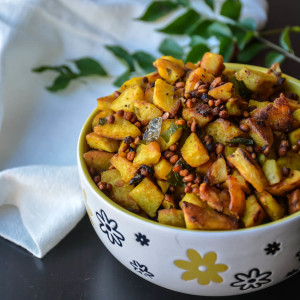
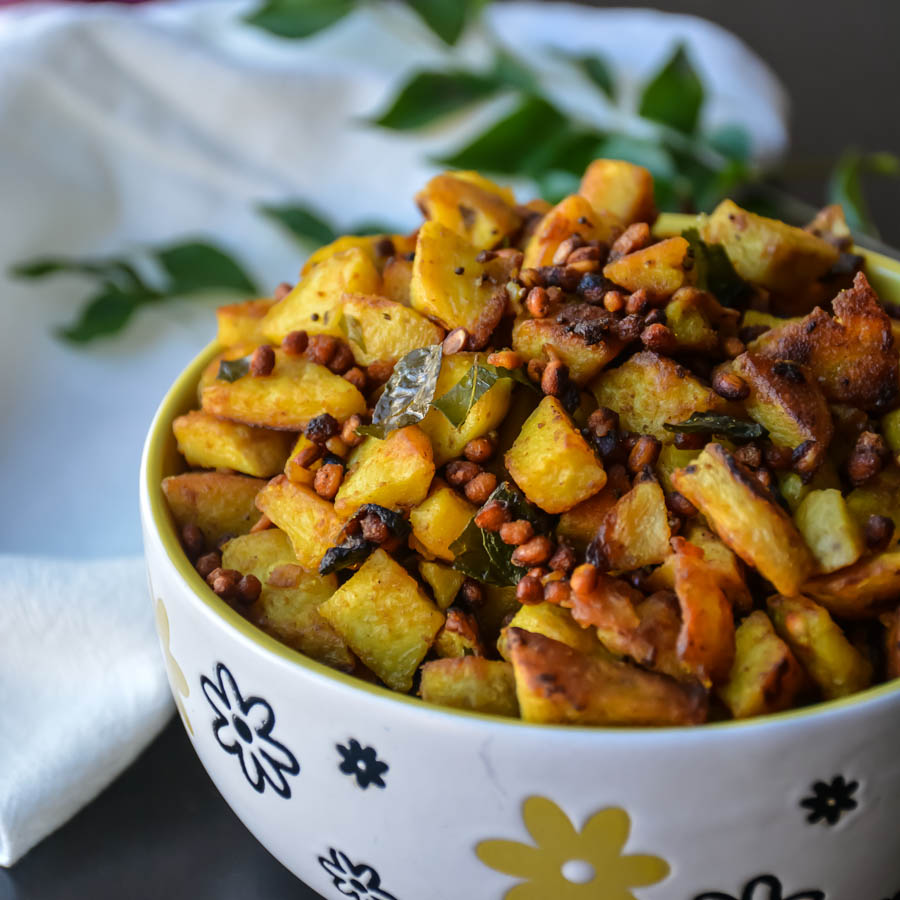
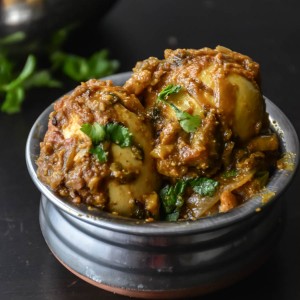
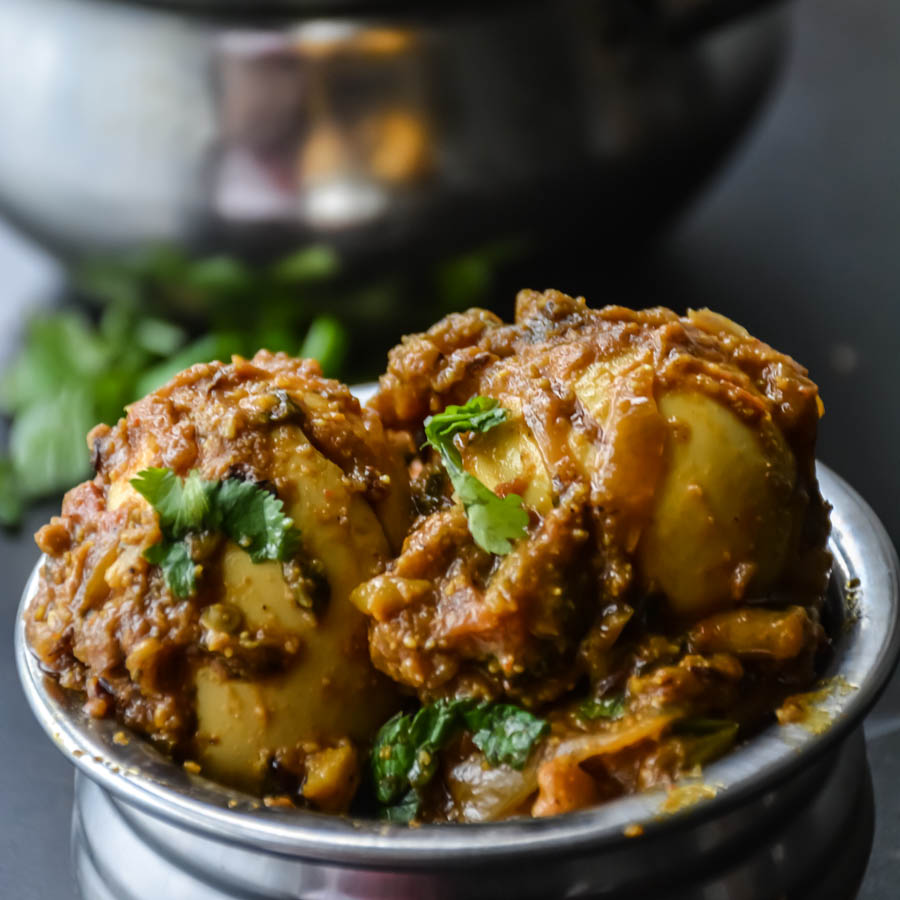
Perfectly roasted arbi with spices!
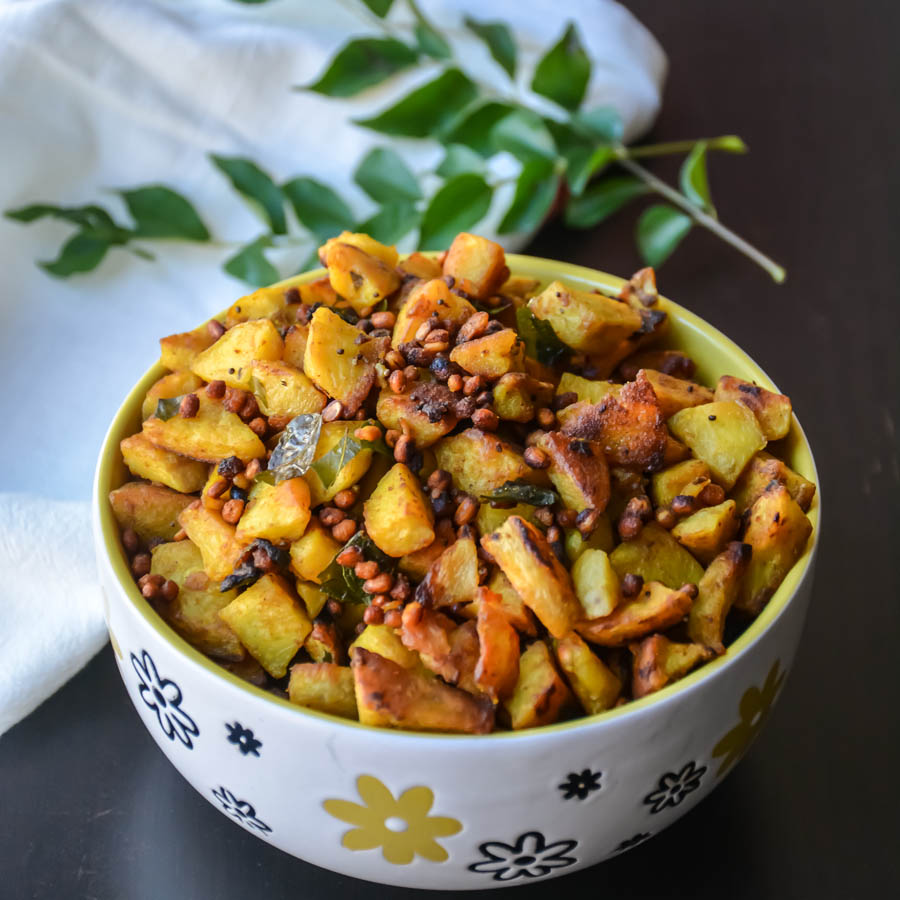
Seppankizhangu is also known as colocasia/arbi/taro root/chembu-kizhangu. I usually make it as roast by boiling but this one where I just peel and chop was my parents recipe. My mom said try it and you will love it! 🙂 and I totally loved it. And here I am sharing with you! Sometimes add it in yogurt curry (mor kuzhambu), once pan roasted and once have fried it. Everything tasted great but did not want to fry it anymore  made me guilty. So, here is my another recipe and it taste great with any rice, rasam,sambar and  I made it for one lunch for meals before two months and it tasted really good! It has some essential minerals like iron, copper, potassium, zinc. When you buy them, always buy fresh, medium sized firm ones. Arbi is very good in fiber and also good for the digestive system. It has zero cholesterol. It is heavy but and may cause bloating so addition of asafetida makes it easy to digest. I added tamarind as some kind souring agent to balance the sliminess and that sourness gives a different flavor.

I have other vegetarian side dish stir fry recipe: raw banana roast, carrot stir fry, beans masala stir fry, potato roast,cauliflower fry, bittergaurd fry, beettroot fry, eggplant fry

QuickArbiSeppankezhanguRoast-4

Print
Spicy Arbi Fry/ Seppankizhangu Roast
Author: Suganya Hariharan
Recipe type: Main
Cuisine: Indian
Prep time:  10 mins
Cook time:  20 mins
Total time:  30 mins
Serves: 1.5 cups
 
Ingredients
  • • • Arbi – 6 medium sized( 2 cups)
  • • • Oil - 2 tbsp
  • • • Mustard seeds - ¾ tbsp
  • • • Cumin seeds (Jeera) - 1 tsp
  • • • Tamarind – 2 tsp ( 1 inch sized tamarind or pulp)
  • • • Urad dal - 1 tbsp
  • • • Curry leaves - 5
  • • • Turmeric powder - 2 tsp
  • • • Sambhar powder – 1 tbsp
  • • • Chilli Powder - 1 tbsp
  • • • Sugar - 1 tsp
  • • • Salt - to taste
Instructions
  1. • Wash Arbi and peel the outer layer totally. Chop them finely into small cubes.
  2. • Add turmeric powder, salt, sambar powder, chilli powder, asafetida, tamarind and 1 tsp of oil.
  3. • Heat 1 tbsp of oil in a pan in medium heat, add mustard, after it crackles, add urad dal, curry leaves and jeera.
  4. • Bring the heat to medium,now add the chopped raw arbi. Sprinkle 1 tbsp of water, close the lid and cook for 5-7 minutes in medium heat.
  5. • Add 1 tsp of sugar and keep frying until the raw arbi gets roasted here and there in color. Change to low heat, it takes around 5-7 minutes. Switch off the flame.
Notes
Adding sugar makes retain the color and turns it crispy.
Wordpress Recipe Plugin by EasyRecipe
3.5.3208


Taste great with rice and sambar or rasam or milagu kuzhambu or vengaya kuzhambu or dal fry. You can have them plain as snacks too.QuickArbiSeppankezhanguRoast-5

Filed Under: DRY CURRY SIDE DISH/ STIR-FRY, VEGAN Tagged With: arbi recipes, arbi roast, best vegan recipes, best vegetarian Indian side dish recipes, chembu recipes, colacasia roast, colocasia indian recipes, colocasia/arbi/taro root/chembu-kizhangu recipes, Meals recipes, Roast recipes, Seppankilangu Roast, Seppankizhangu Roast, Seppankizhangu/Arbi Roast, sepppankizhangu fry recipe, south Indian meal recipe, south Indian recipe, south Indian side dish recipes, Spicy Arbi Fry, Taro root recipes, Vegan Indian side dish recipes, vegan recipe, Vegetarian fry recipe, Vegetarian Indian side dish recipes, vegetarian recipes, veggie roast

Garlic Coconut Red Chutney

January 11, 2016 by Suki Leave a Comment

CoconutRedGarlicCHutney (3)

CoconutRedGarlicCHutney (3)One of the easiest spiced flavorful dips made with few ingredients  Absolutely delicious!

It can be kept in the fridge and can be used for 1-2 days. I make coconut chutney, mint chutney, carrot chutney, eggplant chutney, tomato chutney, pumpkin chutney, channa dal chutney, coriander chutney and so on. I always make them on a busy weekday night and next day I will have it with a quick dosa/idli/paniyaram. Roasting onions, garlic and red chillies give great aroma and taste. Goes well with idli, dosa,bajji,pongal,roti and any kind of bread you fancy!

I use coconut oil for tempering as it gives a unique flavor to this. As I type, I feel like making some and having with hot dosas. I always love chutneys  and I love this homemade chutney or sauce and they are always a great savior when it comes to weekdays. I am alright cooking on weekends, but on a weekday, I get so tired that most of the days I tend to make recipes under 30 minutes, finish and sleep. 

My other favorite chutney recipes:  Ridgegourd chutney, Spicy onion tomato chutney, spicy garlic tomato thokku chutney.

CoconutRedGarlicCHutney (5)


Print
Garlic Coconut Red Chutney
Author: Suganya Hariharan
Recipe type: Sides
Cuisine: Indian
Serves: 1.5 cups
 
Ingredients
  • Coconut – 1.5 cups, cut in small pieces
  • Sambar onions/ Shallots – 6
  • Garlic cloves – 4
  • Tamarind – a small piece (if using paste use 1 tsp.)
  • Ginger piece – 1 ½ inch
  • Dried whole red chillies – 4
  • Roasted chana dal – 2 tbsp
  • Salt – as per taste
  • Coconut oil – 2 tsp

    For tempering:
  • Coconut oil – 1 tbsp
  • Mustard seeds – 1 tsp
  • Urad dal – 2 tsp
  • Curry leaves – 1 sprig
  • Dried Red chili – 2
  • Hing – a pinch
Instructions
  1. In a pan, heat 2 tsp. of coconut oil, add shallots, ginger, dried red chillies and garlic cloves. Sauté them until golden brown.
  2. Take a blender jar, add roasted onion mixture with tamarind, roasted chana dal and blend into a smooth paste. Use 2 tbsp. of water or more for required consistency.
  3. For tempering, add coconut oil, add mustard seeds, when it crackles, add urad dal and when it turns color to golden color, add the red chillies, curry leaves and hing.
  4. Top this on your chutney, mix well and enjoy as a dip
Wordpress Recipe Plugin by EasyRecipe
3.5.3208

CoconutRedGarlicCHutney (4)

Filed Under: RAITA/DIPS/CHUTNEY Tagged With: chutney recipespeanut chutney without coconut, coconut chutney with redchillies, coconut recipes, easy chutney recipes indian, easy coconut chutney recipe, garlic chutney, Garlic Coconut Red Chutney, garlic onion chutney, how to make red coconut chutney, prepare coconut chutney with red chillies, quick chutney recipes, quick chutneys, quick dips, quick dips for party, quick Indian chutney recipes, quick red coconut dips, quick red dips, quick spicy dips, red chilli chutney, red coconut chutney, red coconut chutney preparation, side dish for kids, side dishes for dosas, sides for chutneys

Quick & Simple Egg curry in 20 Minutes

January 4, 2016 by Suki 34 Comments

QuickEggcurry-3
 QuickEggcurry-3
Eggs are simmered in spicy & delicious Indian gravy ! 🙂


I always tend to have eggs at home. So, if you are having some guest coming home, and you wanted to make a quick tasty side dish, this is the one you need to make. And quickly serve with some hot basmati rice.
I made this egg  masala long back when some of my friends came for lunch with my favorite Hyderabad Lamb Biryani. It was drafted for a long time in my list to post, thought this is the right time to post it because I did not pretty much cook anything for past one week. The masalas in this egg roast are finger licking good. Eggs are the best friend for bachelor cooking I guess, easy to make it for a side dish. So, if you wanted to make it special with a comfort lunch without much of work and grocery shopping ;) Then go for this!
 QuickEggcurry-7

My other favorite Egg recipes:  Egg pepper Roast, Hyderabadi Egg Biryani, Egg Masala Toast, Mumbai-style Egg Bhurji, Simple poached egg and avocado toast, Spicy Chicken stir fry egg noodles
4.5 from 8 reviews
Print
Quick & Simple Egg curry in 20 Minutes
Author: Suganya Hariharan
Recipe type: Main
Cuisine: Indian
Serves: 3
 
Ingredients
  • Eggs - 4
  • Oil - 2 tbsp
  • Cumin Seeds/ Jeera - 1 tsp
  • Red chilli - 2, Broken
  • Curry Leaves - 1 sprig
  • Garlic - 4, very finely chopped
  • Ginger -1/2 inch, finely chopped
  • Green chilli - 1, small, finely chopped
  • Onion - 1 big or 1 cup, very finely chopped
  • Tomato - 2 small, or 1 cup, very finely chopped
  • Turmeric powder - ¼ tsp
  • Red chilli powder - 1 tsp
  • Coriander powder - 1 tsp
  • Cumin powder - 1 tsp
  • Pepper powder - 1 tsp
  • Fennel powder - 1 tsp
  • Garam masala - ¼ tsp
  • salt - about 1 tbsp ( as per your taste)
  • Coriander leaves - 1 tbsp, finely chopped, for garnishing
Instructions
  1. Hard boil the eggs by boiling the eggs – Boil water, add a tsp. of salt, add eggs and cook for 10 mins in medium flame. Once done, add them to cold water and set aside for 5 mins, make a small crack using a knife or just cracking in a nearby object and remove the egg shell carefully. Do not cut the eggs, but just give a quick 4 slits on the eggs but not chop them. this will make the masalas go on into the curry.
  2. Heat oil in a pan; add hing, broken red chilli and jeera and sauté for few seconds. Add chopped onion, curry leaves, chopped ginger and chopped green chilli, chopped garlic and sauté till onion becomes translucent and golden brown. Add chopped tomatoes and turmeric powder, sauté till its little mushy.
  3. Now add the chilli powder, coriander powder, cumin powder, pepper powder, garam masala and mix well. Saute it well for 2-3 minutes to raw masala. Now add the eggs and then add ½ cup of water and make it boil in medium flame closed for 2-3 minutes.
  4. It will reduce into an onion tomato pasty consistency and will ooze out oil on sides.
  5. Finish with coriander leaves and serve it hot!
Notes
1. It is spicy curry, so adjust your spice level according to it!
Wordpress Recipe Plugin by EasyRecipe
3.5.3208
If you make a some  restaurant style Biryani, pulao for this egg fry,:) that’s a complete lunch. Even it tastes great with  plain rice or Indian bread.
QuickEggcurry-4

Filed Under: NON-VEG RECIPES, STREETFOOD Tagged With: easy egg masala recipe, egg masala recipe, Egg pepper curry, egg recipes, egg vegetarian quick recipe, how to make egg masala, Indian egg curry recipes, prepare egg masala recipe, quick egg curry, quick egg Indian recipes, quick egg masala, quick egg recipes, Quick Simple Egg curry in 20 Minutes, simple anda curry, simple egg masala, simple egg masala recipe, Simple egg recipes, spicy egg curry, spicy egg curry recipe, step by step egg masala

Hyderabadi Lamb Biryani

December 10, 2015 by Suki 2 Comments

HyderabadiLambBiryani-12

HyderabadiLambBiryani-12A classic Indian dish prepared using spiced Marinated lamb, layered by basmati rice, fried onions, mint & cilantro leaves.

Biryani is one of the most popular dishes in India. There are varieties of biryani like Hyderabadi biryani, Mughal biryani, chettinadu biryani, Kashmiri biryani. It is a perfect Sunday lunch idea.  There will be no one saying  NO to biryanis, let it be vegetable biryani, chicken biryani, shrimp biryani, palak biryani, chickpea briyani, potato biryani, paneer biryani, duma loo biryani, cashew biryani, lamb biryani, egg biryani, mushroom biryani and so on! I have a biryani collection and it is one of the highest viewed pages. I have two lamb Biryani recipes – Ambur Lamb Biryani & Restaurant Style Lamb Biryani.


HyderabadiLambBiryani-19

Biryani is not strenuous at all to prepare like many of them believe. It’s just time-consuming and it need that little extra special care when we do it. Try to use all the ingredients listed, each ingredient has a special role in the biryani and compliments one with another. It is worth to do all this for the final taste 😉 Rich and delicious biryani made with lamb. It is surely a festive dish and this is perfect to cook when you have guests over or make it for dinner parties.

Other Favorite Lamb Recipes: Spicy Honey Rack Of Lamb, Lamb & spinach Curry,  dry Goat curry, Insanely Delicious Lamb & Chicken recipes.

Sides for Lamb Biryani: Garlic Tomato raita or any raitas, Mutton sukka, Mirchi Ka salan, chicken 65.

HyderabadiLambBiryani-13

Print
Hyderabadi Lamb Biryani
Author: Suganya Hariharan
Recipe type: Main
Cuisine: Indian
Prep time:  2 hours
Cook time:  1 hour 30 mins
Total time:  3 hours 30 mins
Serves: 6 servings
 
Ingredients
  • • Lamb – 1 lb

    Grind:
  • • Bay leaf – ½
  • • Cinnamon – 1 thin piece
  • • Lime juice - 1 tbsp
  • • Cloves – 3
  • • Cardamom pods -2
  • • Khus khus (white poppy seeds) – ½ tbsp.
  • • Cumin seeds/ jeera – ½ tbsp.
  • • Green chillies - 2
  • • Fennel seeds – ½ tbsp.
  • • Garlic – 4 pods
  • • Ginger – 1 inch
  • • Mint – ½ cup, chopped finely
  • • Coriander leaves – ½ cup, chopped finely.
  • • Pepper powder – 1 tsp
  • • Salt – 1 tbsp
  • • Biryani masala – 1 tbsp
  • • Red chilli powder – 1 tsp
  • • Yogurt – 2 tbsp
  • • Oil – 1 tbsp

    For garnish:
  • • Ghee – 2 tbsp
  • • Lime - small cube or 1 tsp
  • • Mint – 2 tbsp finely chopped
  • • Coriander leaves – 1 tbsp, chopped finely

    For mutton gravy:
  • • Oil – 1tbsp
  • • Bay leaf – ½
  • • Cinnamon – 1 thin piece
  • • Cloves – 3
  • • Cardamom pods -2
  • • Green chilli – 1, slit
  • • Onion – 1, medium, sliced
  • • Tomato - 1, small, chopped
  • • Turmeric powder – ½ tsp

    For rice:
  • • Basmati rice – 3 cups
  • • Salt – 2 tbsp
  • • Cumin Seeds/ Jeera – 1 tbsp

    For fried onions:
  • • Onions – 2 small onions, ½ cup, sliced thinly
  • • Oil – to fry (3 tbsp)
Instructions
  1. For Fried onions:
  2. Heat a pan with oil, add the sliced onions and cook in medium heat till turn golden brown. Stir in the middle so that it does not stick to the bottom. Set aside.


    For Marinating:
  3. Grind everything under “to grind” to a smooth paste.
  4. Wash lamb, add ½ of the fried onions to it, salt and blended paste. Mix everything together.
  5. Marinate it overnight or at least for 2 hours.

    For lamb masala:
  6. Add oil in medium heat, add the bayleaf, cinnamon, cloves, cardamom pods, sliced onions,the green chillies, and sauté till the onions are golden brown.

  7. Then add the tomatoes with ½ tsp of turmeric powder and sauté them well till they are cooked and not mushy.
  8. Add the marinated lamb and sauté for a minute.

  9. Then add water till it the lamb is correctly covered, not more or less. Cook for 1 hour and cook it covered in medium low heat or put it in a pressure cooker for 6 whistles. Water will not be evaporated totally which is good.

    For rice:
  10. Meanwhile Wash the rice and soak in water for twenty minutes.
  11. Take another big pan, add thrice the cup of rice you use, and boil it. When it is boiling high, add the rice, salt and jeera and mix well. After 5 minutes exact or when the rice is 50% done. Switch off and drain the rice.


    Layering:
  12. Now, the layering starts. Add the lamb with gravy to a big heavy bottom pan, pat and level it. Add the drained hot rice on the top of it. Mix everything together ( mix it with the gravy, not just layer it) well if you have lot of gravy. Garnish with fried onions, ghee, mint and coriander leaves.

  13. Cover the pan with a tight lid, keep it in medium flame for 10 minutes and then keep it in low flame. Keep an open pan (like a dosa or crepe pan, place the biryani pan on top of it and cook it for 40 minutes)
  14. Squeeze some lemon and switch off. Mix and serve hot!
Notes
1. You can skip biryani masala if you don’t have and add just garam masala (1 tsp and red chilli powder – 3 tsp instead of 1 tsp)
3. If it is spicy in the end, squeeze some lemon, it will reduce the heat and enhance the flavors also.
2. Adjust your salt level as per your taste.
Wordpress Recipe Plugin by EasyRecipe
3.5.3208

 HyderabadiLambBiryani-17

Filed Under: LAMB, NON-VEG RECIPES, RICE/BIRYANI VARIETIES Tagged With: Basmati rice recipe, biryani masala recipe, Biryani recipe, biryani restaurant style recipes, hotel biryani recipes. Mutton biryani recipes, how to make biryani, how to make rice, hyderabadi mutton biryani recipes, hyderbadi biryani recipes, hyderbadi recipes, Indian, Indian food, jasmine rice, lamb recipes, non-veg biryani recipes, one pot meal, restaurant style biryani recipes, restaurant style lamb biryani recipe

Page 8 of 19
« Previous 1 … 3 4 5 6 7 8 9 10 11 12 13 … 19 Next »
  1. Pages:
  2. «
  3. 1
  4. ...
  5. 5
  6. 6
  7. 7
  8. 8
  9. 9
  10. 10
  11. 11
  12. ...
  13. 19
  14. »
  • « Previous Page
  • 1
  • …
  • 6
  • 7
  • 8
  • 9
  • 10
  • …
  • 19
  • Next Page »
  • Facebook
  • Google+
  • Instagram
  • Pinterest
  • Twitter

LOOKING FOR SOMETHING?

logo
Food Advertisements by
logo
Food Advertisements by

Categories

STAY CONNECTED

  • Facebook
  • Google+
  • Instagram
  • Pinterest
  • Twitter

SUBSCRIBE BY EMAIL

SEARCH RELISH THE BITE

logo
Food Advertisements by

Copyright © 2025 · Lifestyle Pro Theme on Genesis Framework · WordPress · Log in