• Home
  • Page Layouts
  • Page Templates
  • Theme Colors
    • Lifestyle Pro Blue
    • Lifestyle Pro Green
    • Lifestyle Pro Mustard
    • Lifestyle Pro Purple
    • Lifestyle Pro Red
    • Lifestyle Pro Teal

Relish The Bite

Taste of happiness

  • HOME
  • ABOUT
  • RECIPE INDEX
    • SNACKS & APPETIZERS
    • BREAKFAST
    • BAKED RECIPES
    • LUNCH & DINNER
      • RICE/BIRYANI VARIETIES
      • SIDES
        • DRY CURRY/STIR-FRY
        • SOUTH INDIAN CURRY/KUZHAMBU
        • NORTH INDIAN CURRY/DAL
        • RAITA/DIPS/CHUTNEY
        • Soups/Salads
      • PASTA PIZZA & TACOS
      • BREAD
      • CHINESE ASIAN INSPIRED
    • NON-VEG RECIPES
    • DESSERTS
    • BEVERAGES
  • SNACKS
  • BREAKFAST
  • NON-VEG RECIPES
  • RICE/BIRYANI VARIETIES
  • LAMB
  • SOUTH INDIAN CURRY/KUZHAMBU
  • VEGAN
  • NORTH INDIAN CURRY/DAL
  • DRY CURRY/STIR-FRY
  • PASTA & TACOS
  • CHINESE ASIAN INSPIRED
  • BAKED RECIPES
  • COLLECTIONS
  • BREAD
  • BEVERAGES
  • DESSERTS
  • FESTIVAL RECIPES
    • SNACKS & APPETIZERS
    • SWEETS/DESSERTS
  • RESOURCES
    • HOW TO START A BLOG
    • TITBITS
    • PRESS
  • CONTACT
You are here: Home / Archives for Indian

Ambur Mutton Biryani

May 15, 2015 by Suki 9 Comments

Amburbiryani

Amburbiryani

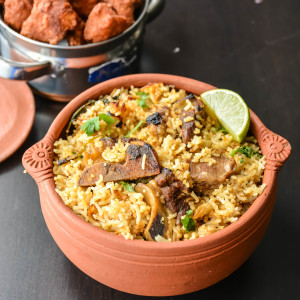
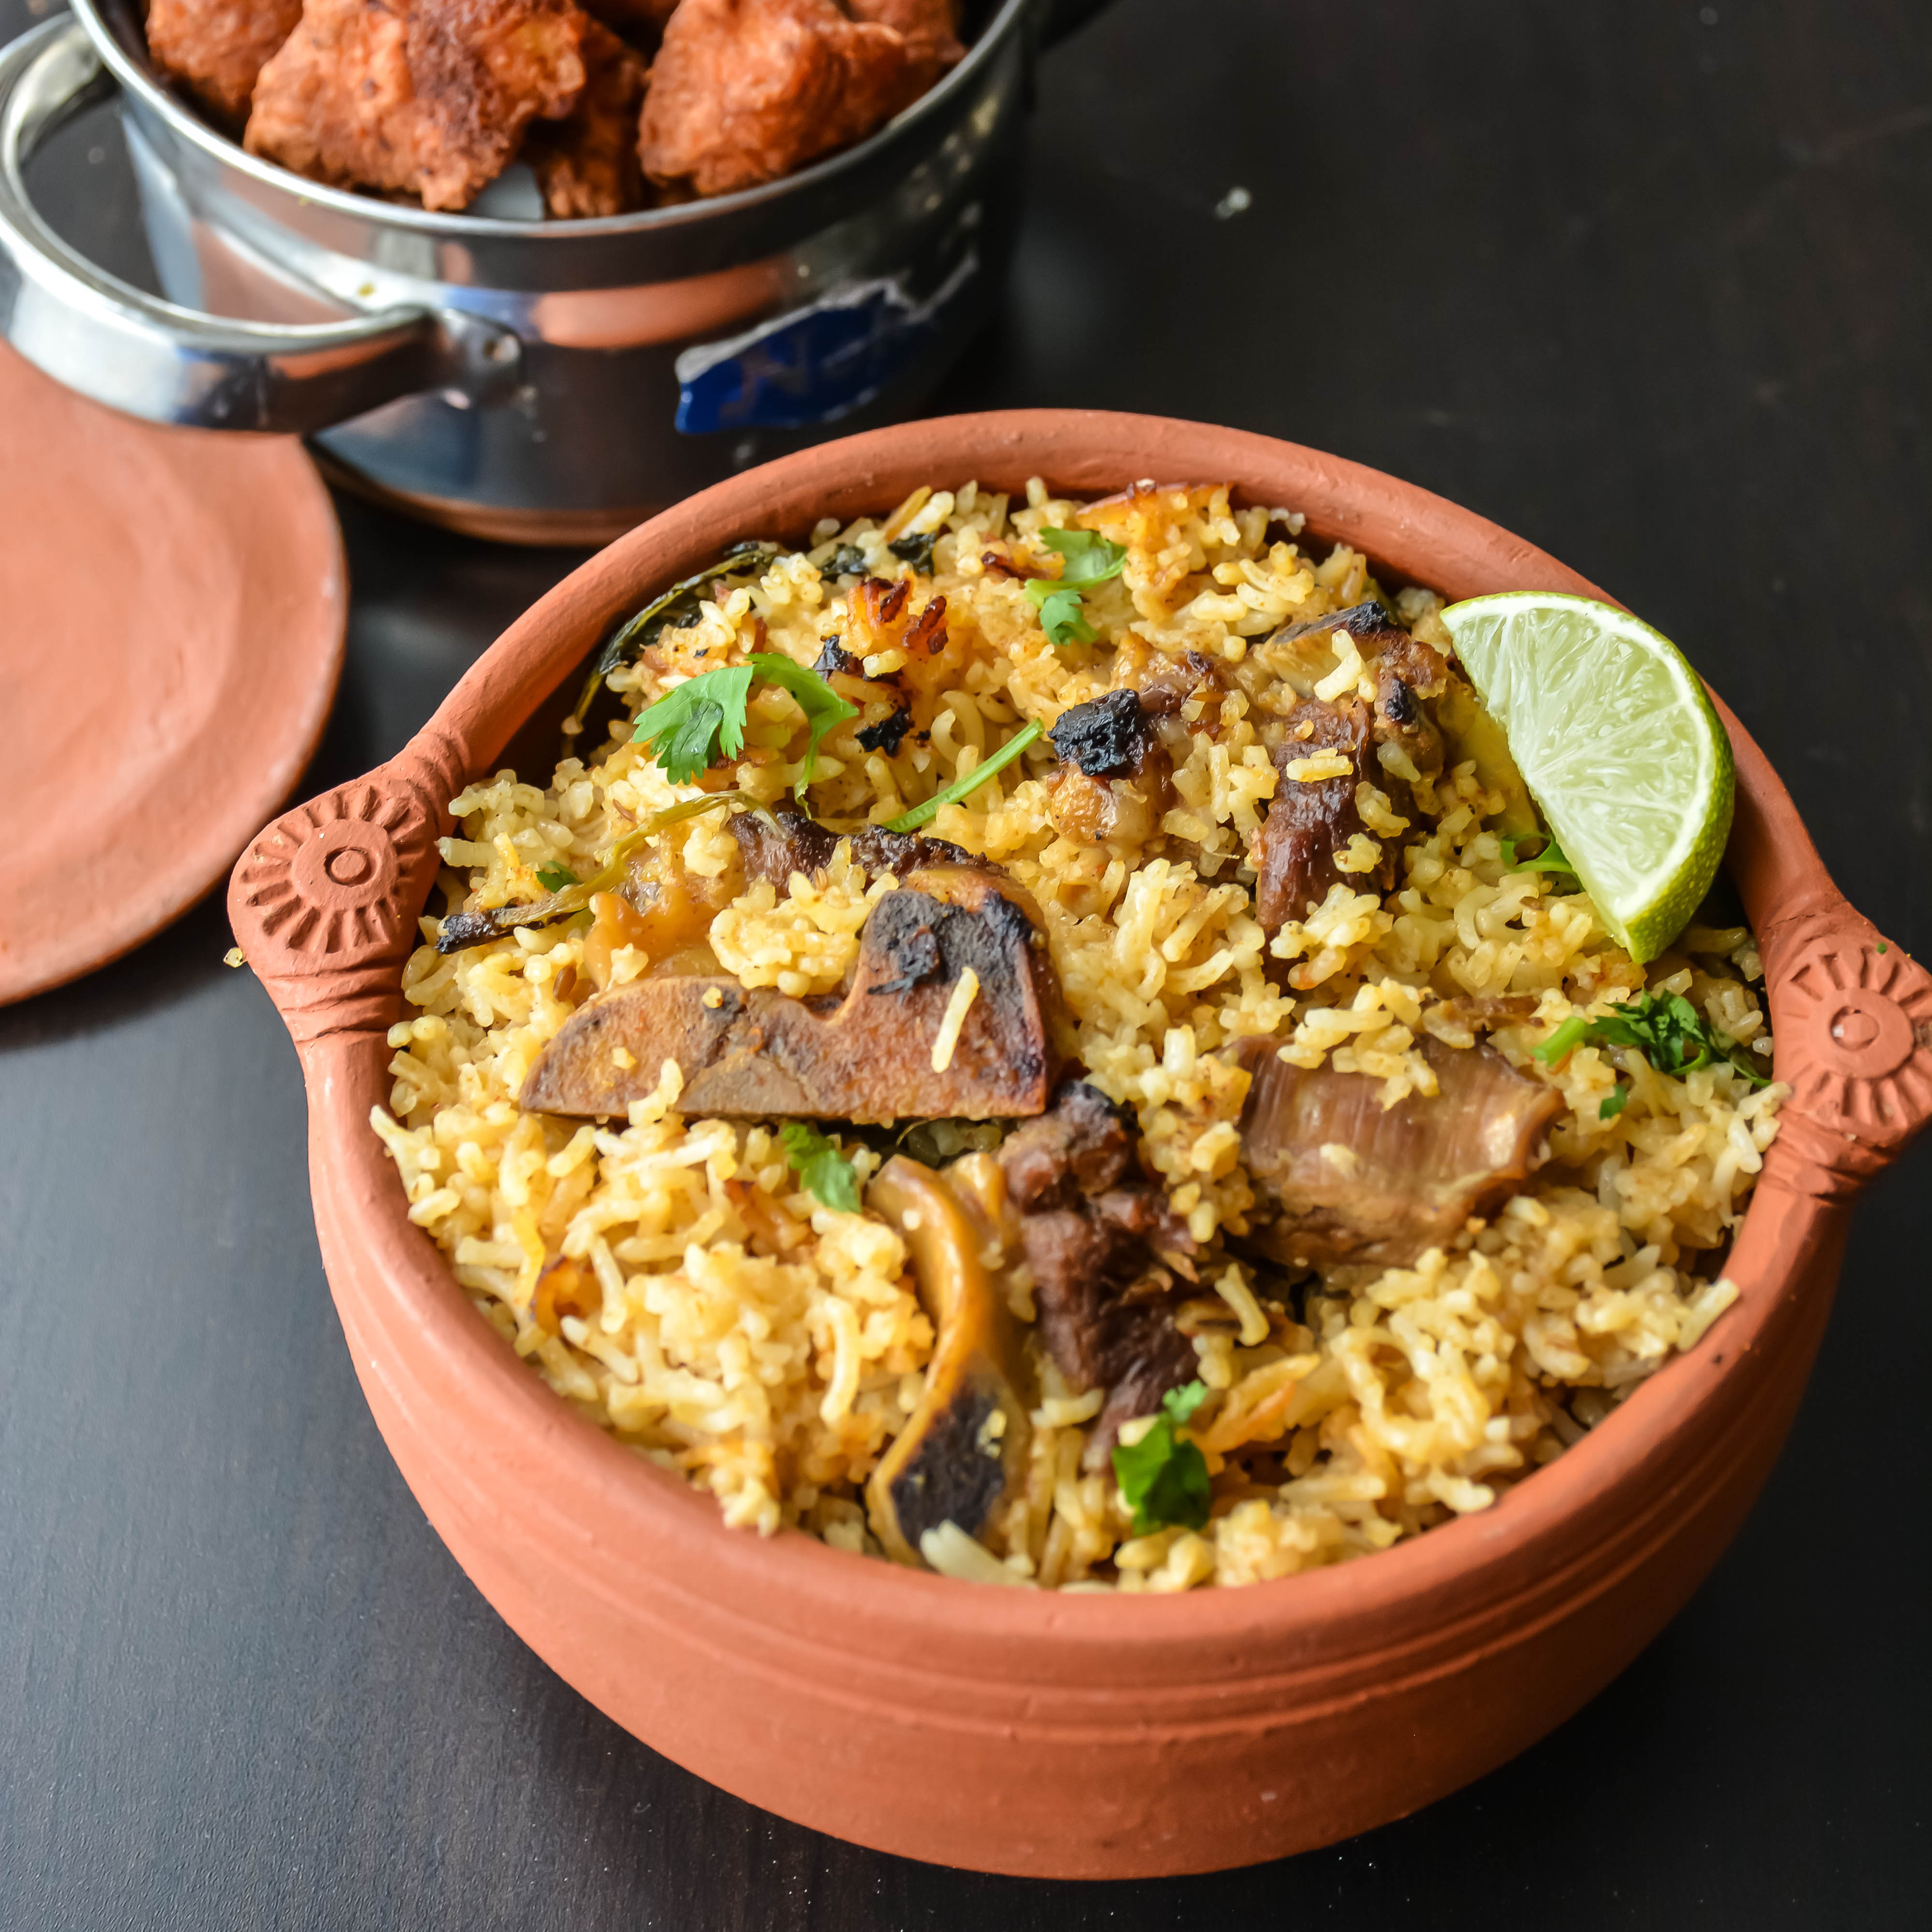
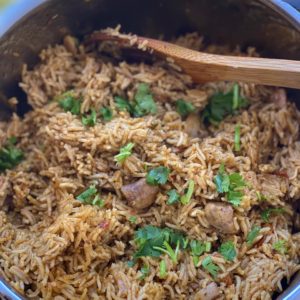
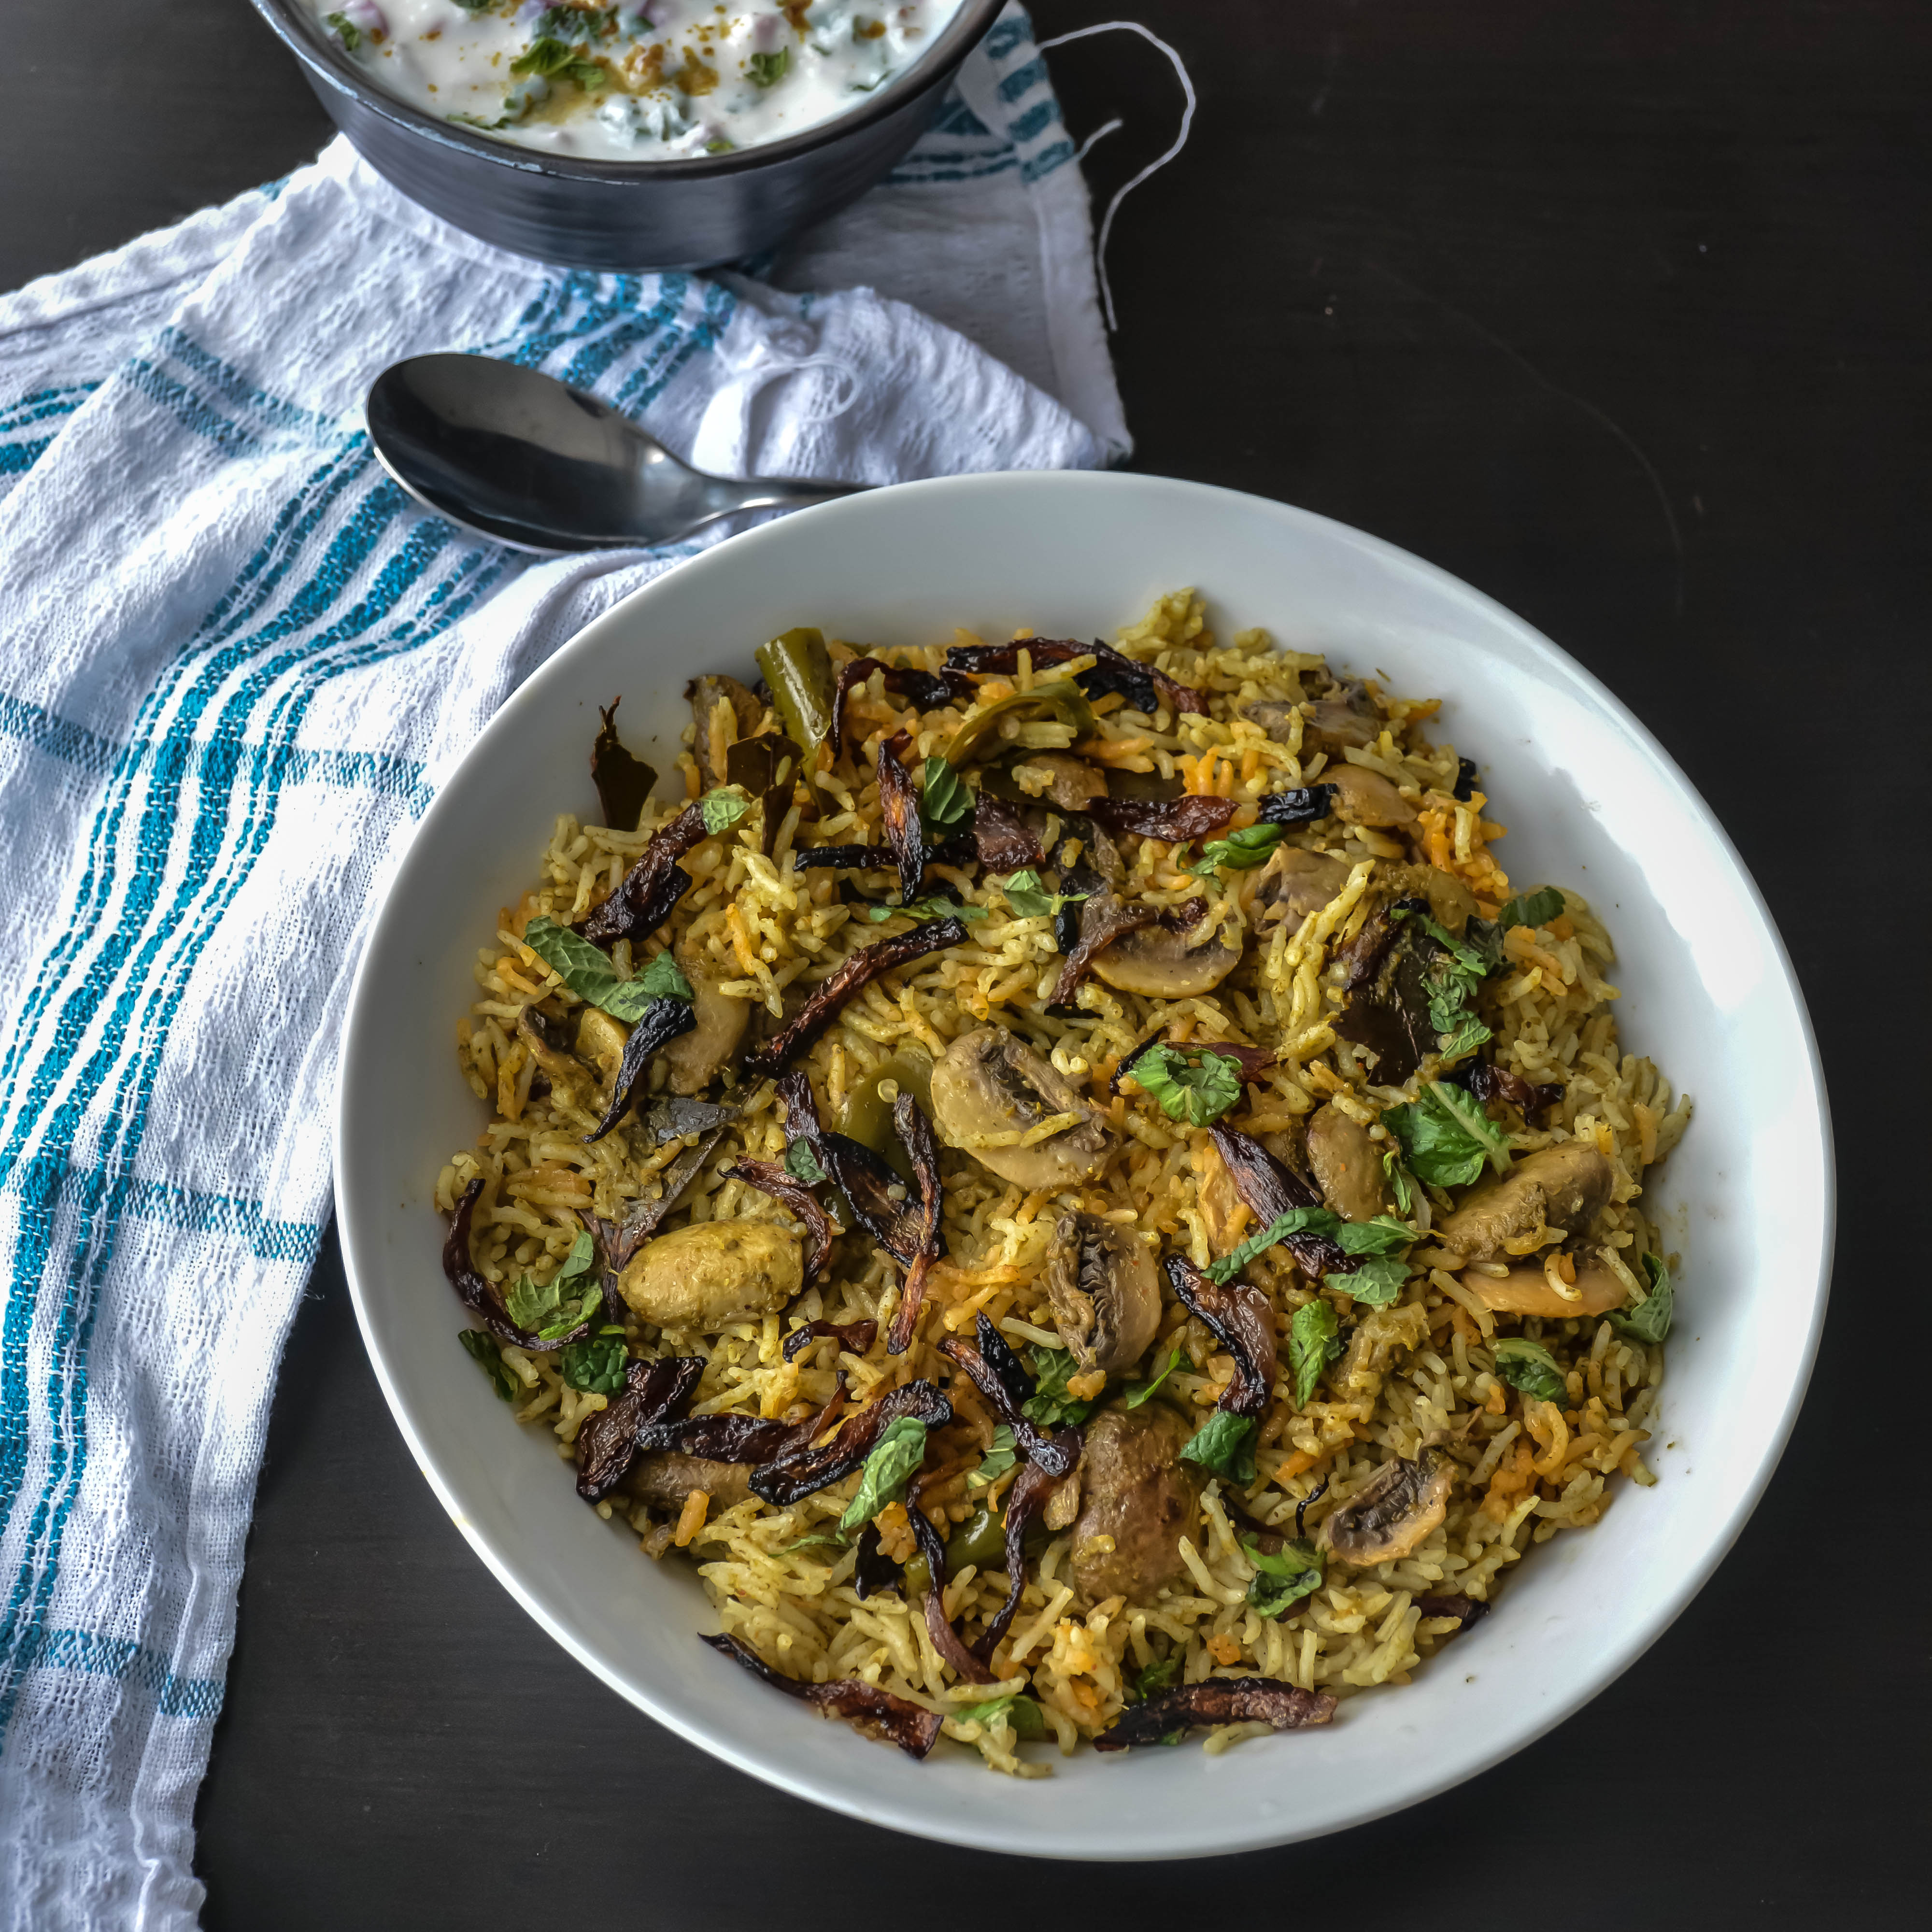
Ambur biryani is one of the south-Indian special biryani recipes. Ambur is a town in vellore district in Tamilnadu, India and is famous for leather. Ambur is famous for biryani. Authentic recipe is to cook the mutton in slow cooker so I first cooked the mutton in pressure cooker and then proceeded with dum process. I have heard they have more biryani shops than any other town.  Seeraga samba rice, a traditional Tamilnadu variety of biryani rice is used for this authentically. That makes this biryani even tastier. The rice is parboiled, meat is cooked separately and both are cooked together on dum on a closed vessel with some weight on top of it. There are different types of biryani and different biryani from many towns. There is another famous biryani called dindugal biryani.

AMbur biryani

I posted biryani collection recipes last week with all biryani recipes and their side dish and I thought should not post biryani recipe for a while. But this recipe came out so good that I wanted to post it this week. I tried this on Sunday with chicken 65 and it came out Yum!!! I saw a video from a chef making ambur biryani from star biryani hotel, so I adapted from that and tried this recipe. I wanted to share this biryani because of its simplicity.

AMbur biryani

5.0 from 1 reviews
Print
Ambur Mutton Biryani
Author: Suganya Hariharan
Recipe type: Main
Cuisine: Indian
Prep time:  10 mins
Cook time:  40 mins
Total time:  50 mins
Serves: 4 cups
 
Ingredients
  • Oil – 4 tbsp
  • Mutton – ½ kg
  • Cinnamon sticks -1
  • Cloves – 2
  • Cardamom- 2
  • Bay leaves – 2
  • Star anise – 1
  • Fennel seeds – 1 tsp
  • Cumin seeds – 1 tbsp
  • Garlic – 5 (blended)
  • Ginger – 2 inch (blended)
  • Red chillies – 4 soaked in 1 tbsp of hot oil. And blended
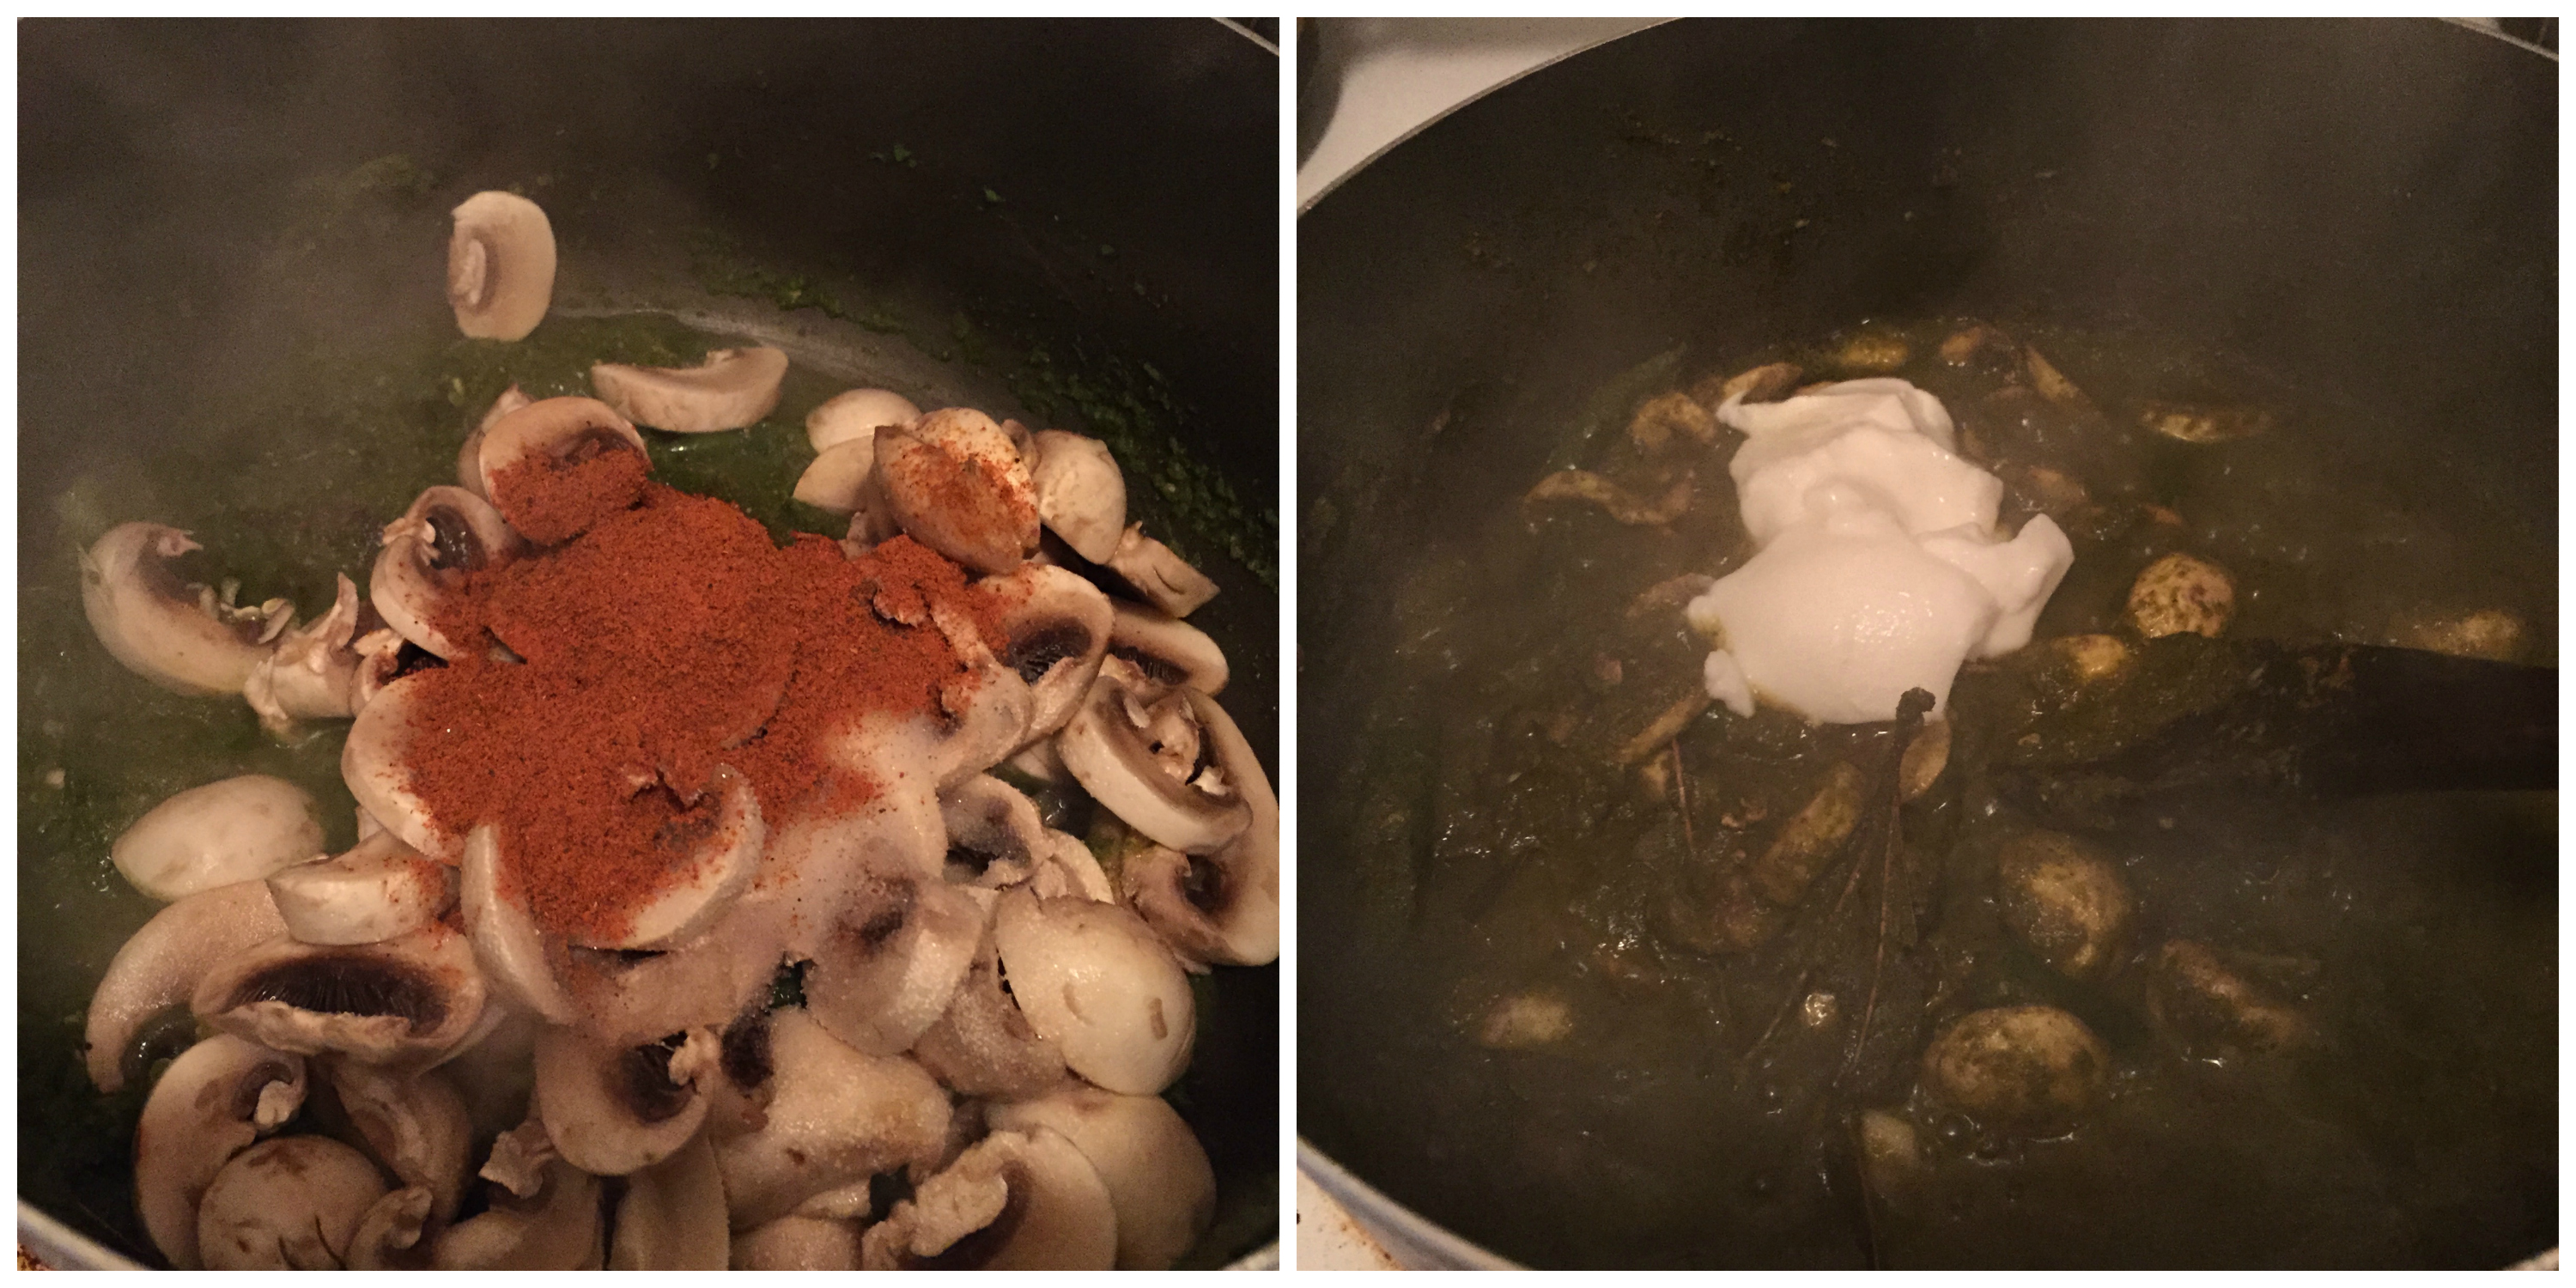
  • Chilli powder -1 tbsp
  • Onion – 1.5, sliced
  • Tomato – 1,sliced/chopped
  • Curd – 5 tbsp
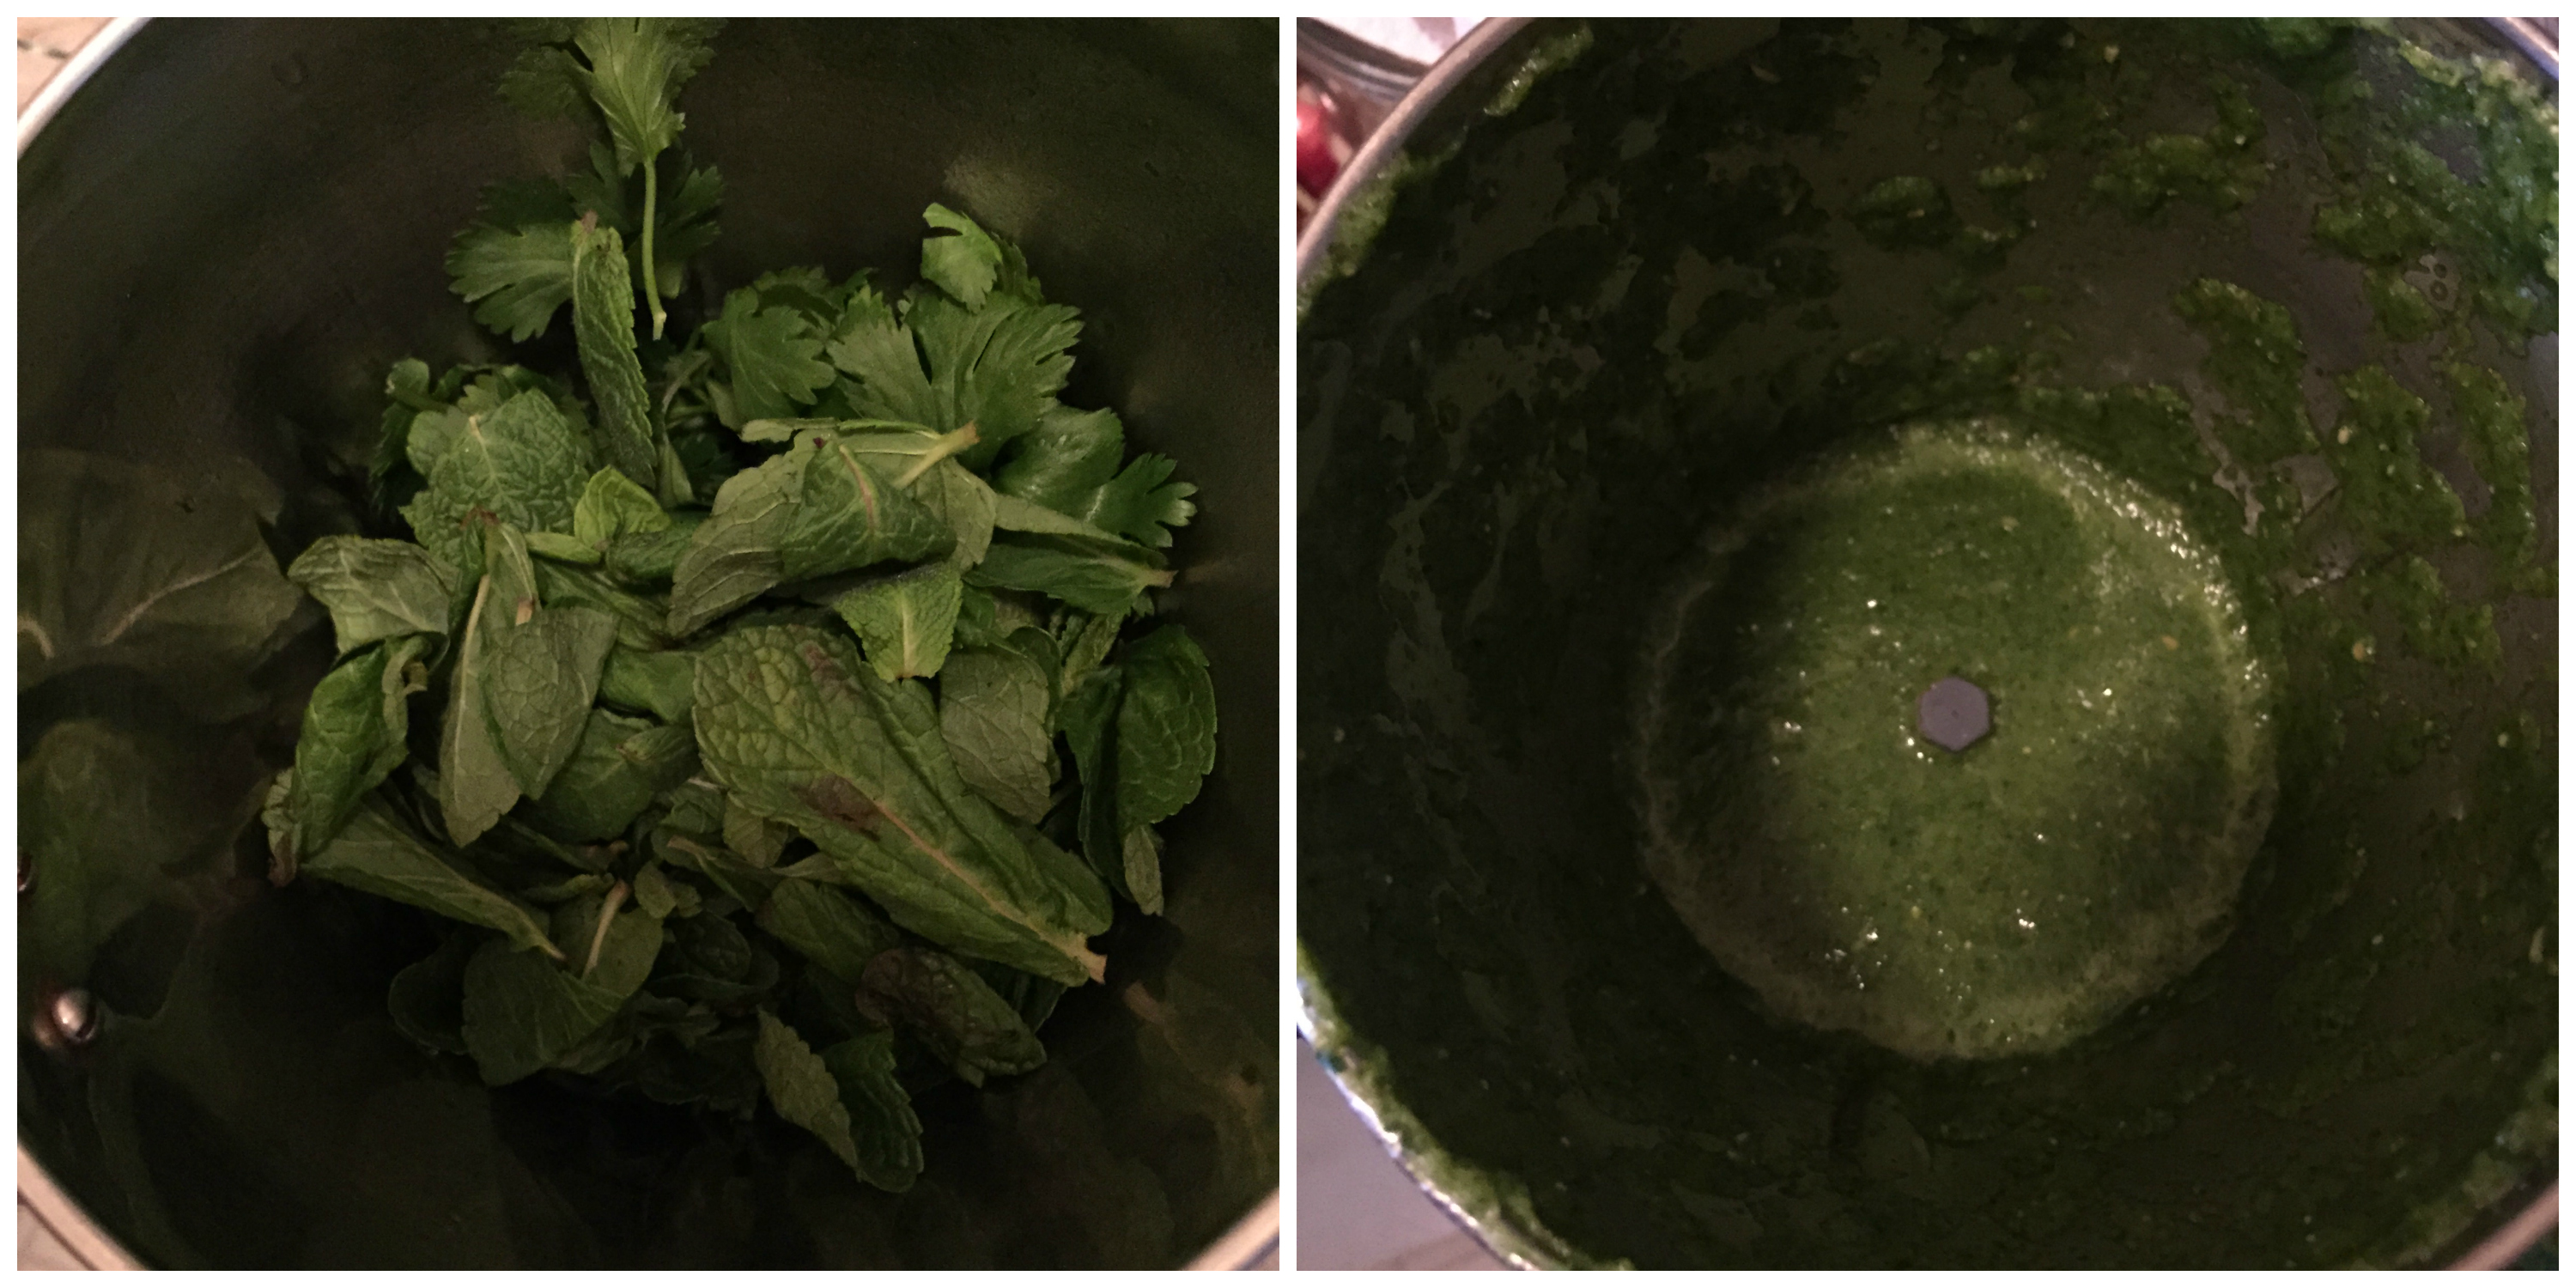
  • Mint – ½ cup,chopped
  • Coriander leaves – ½ cup,chopped
  • Lime – 2 nos
  • Salt – 1 tbsp
  • Ghee – 1.5 tbsp
  • Mint and coriander leaves – 1 tbsp, to garnish

    For rice:
  • Rice – ½ kg
  • Salt – 2 tbsp
  • Cumin seeds – 1 tbsp
Instructions
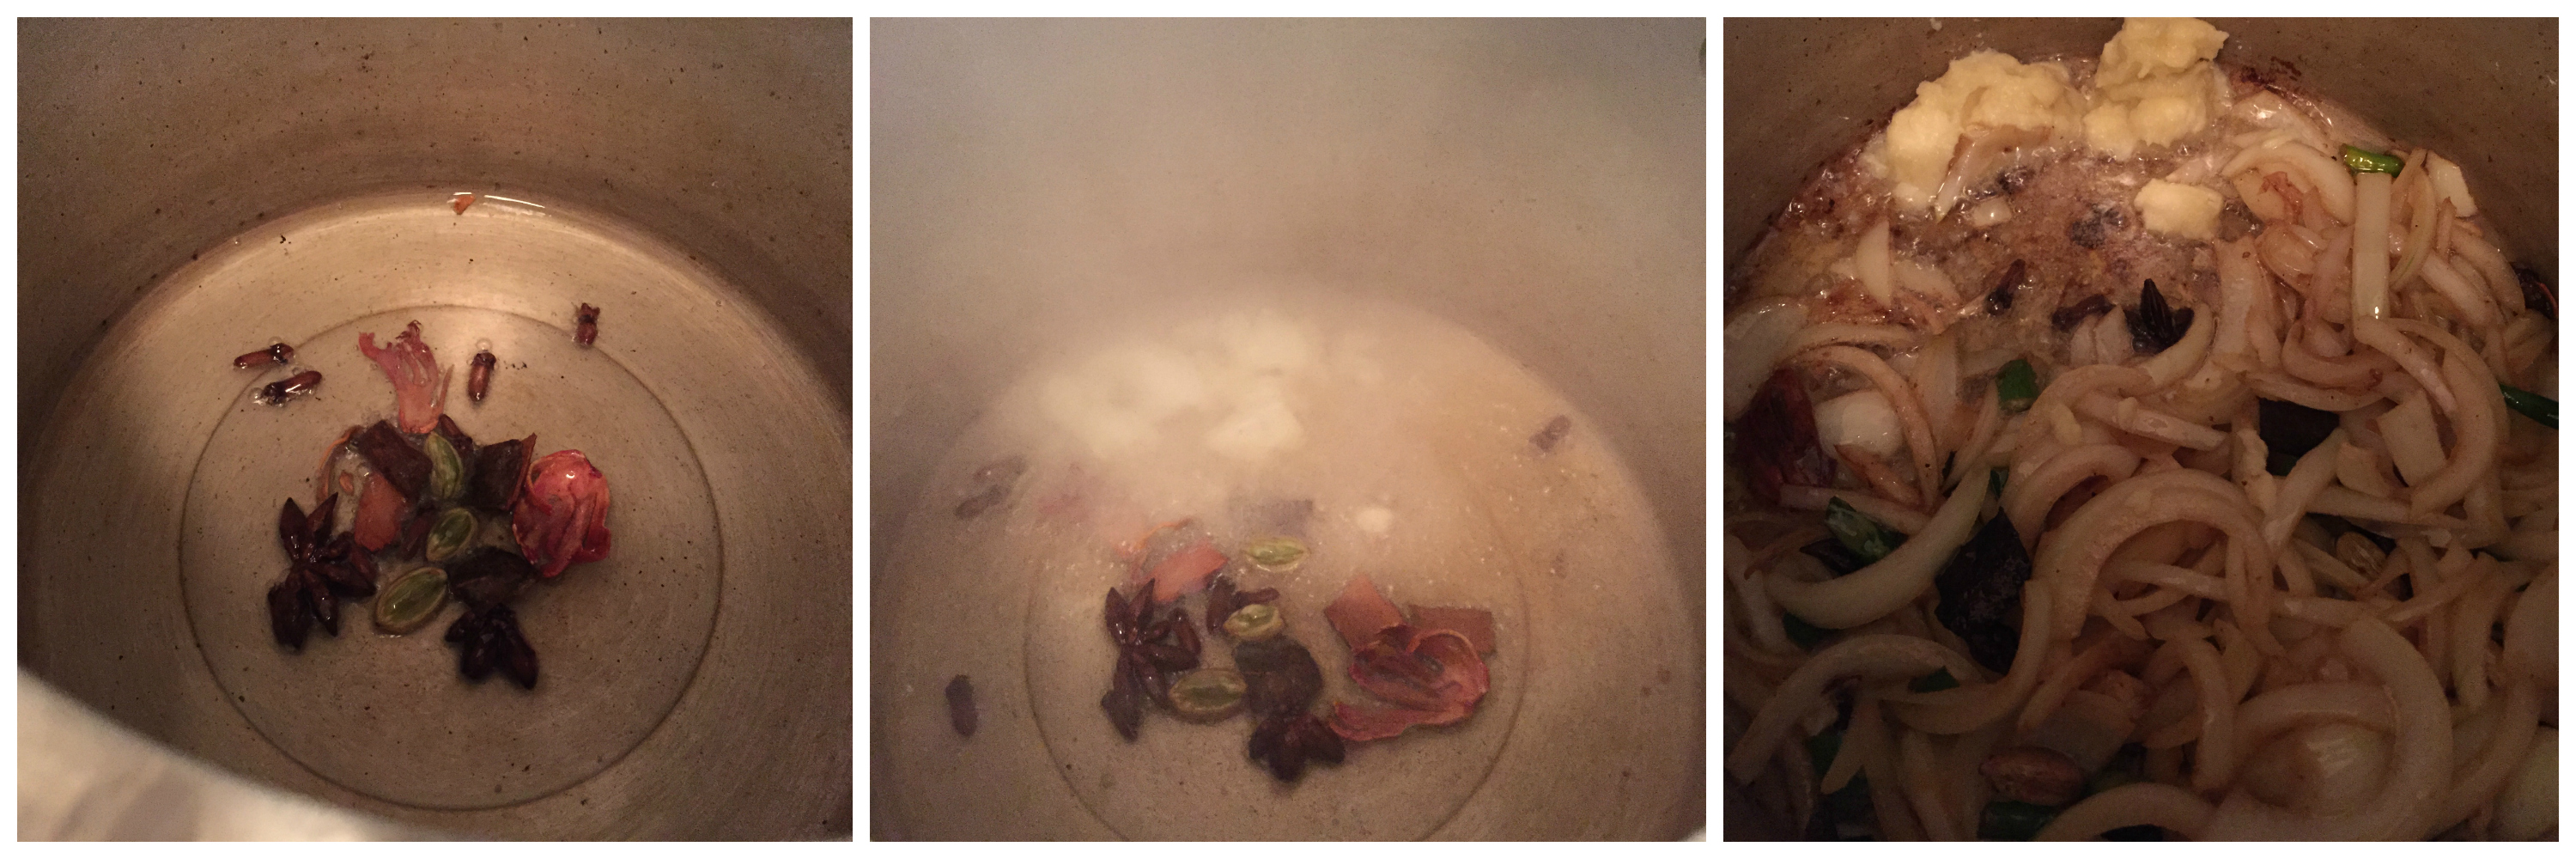
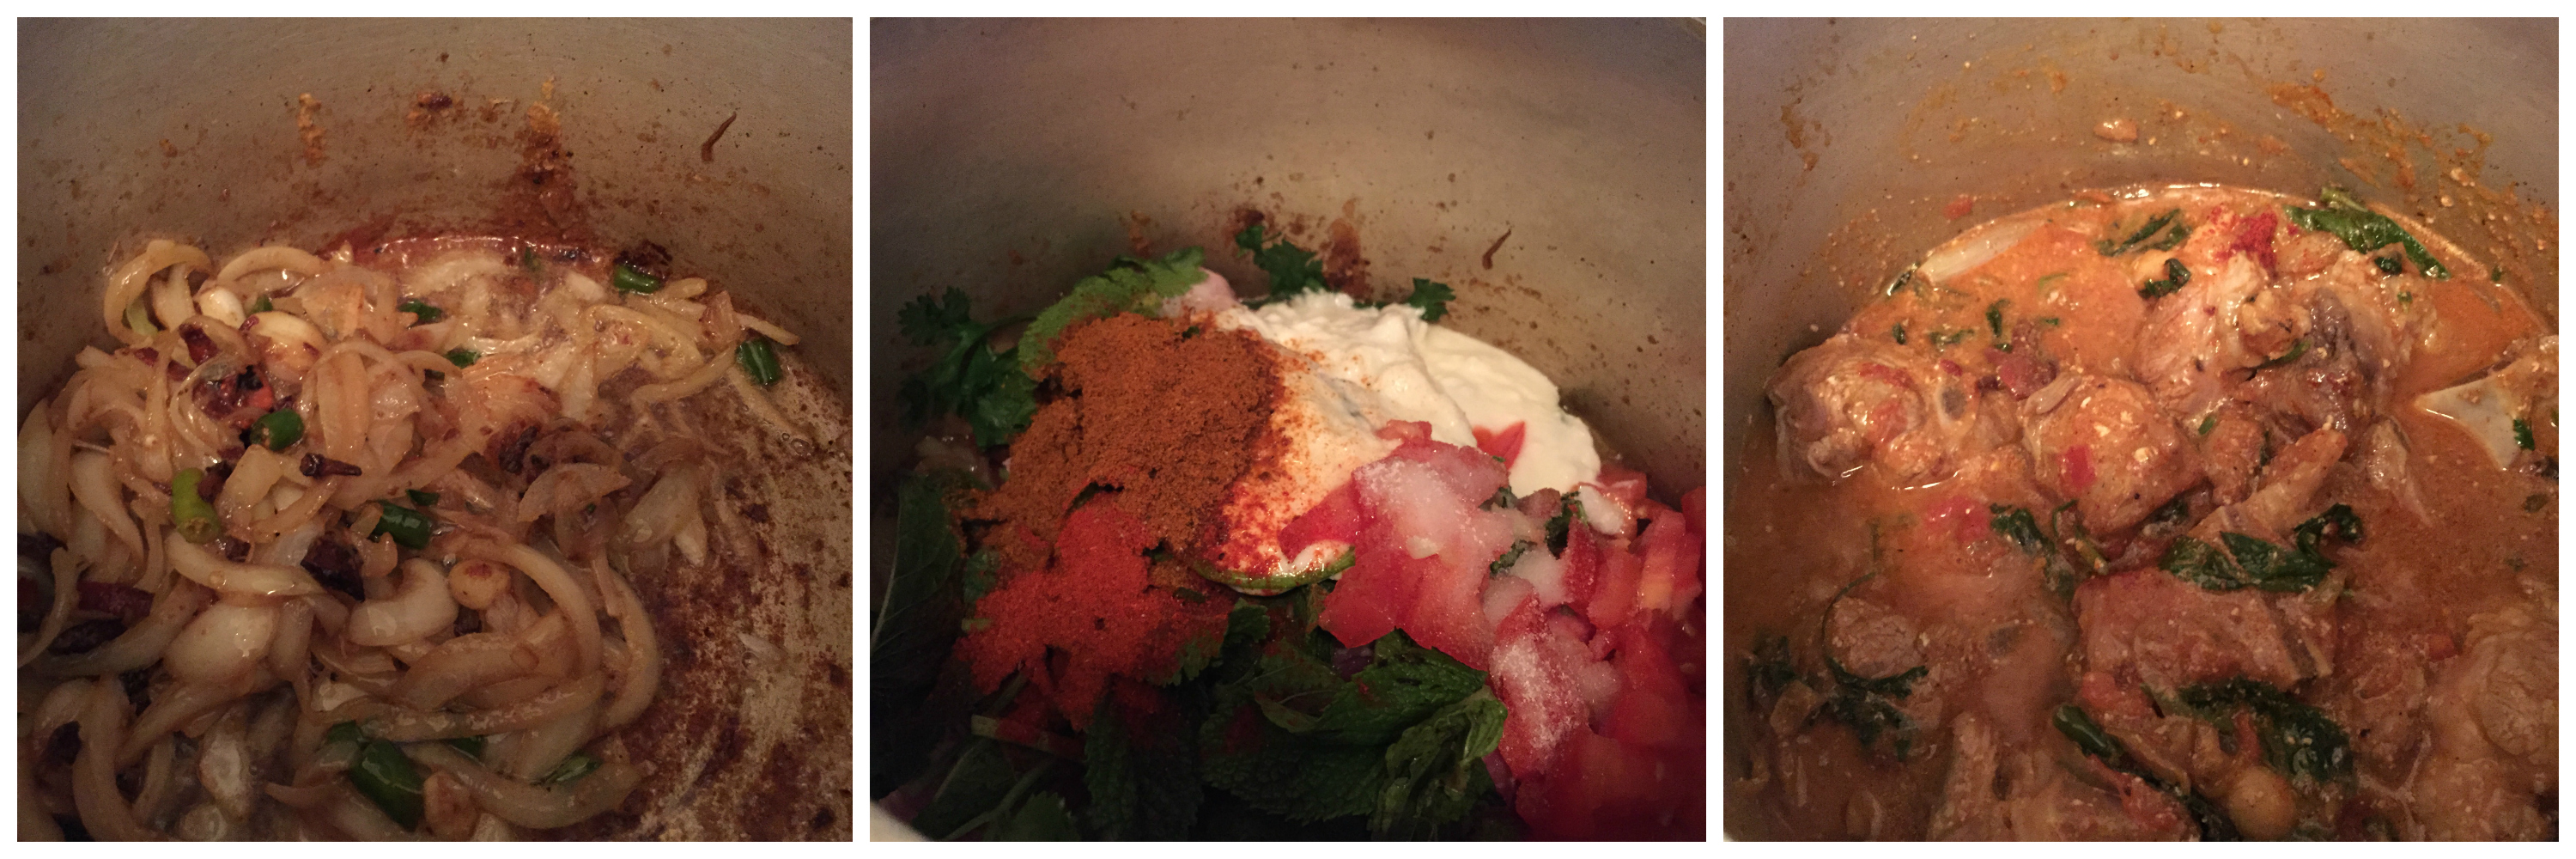
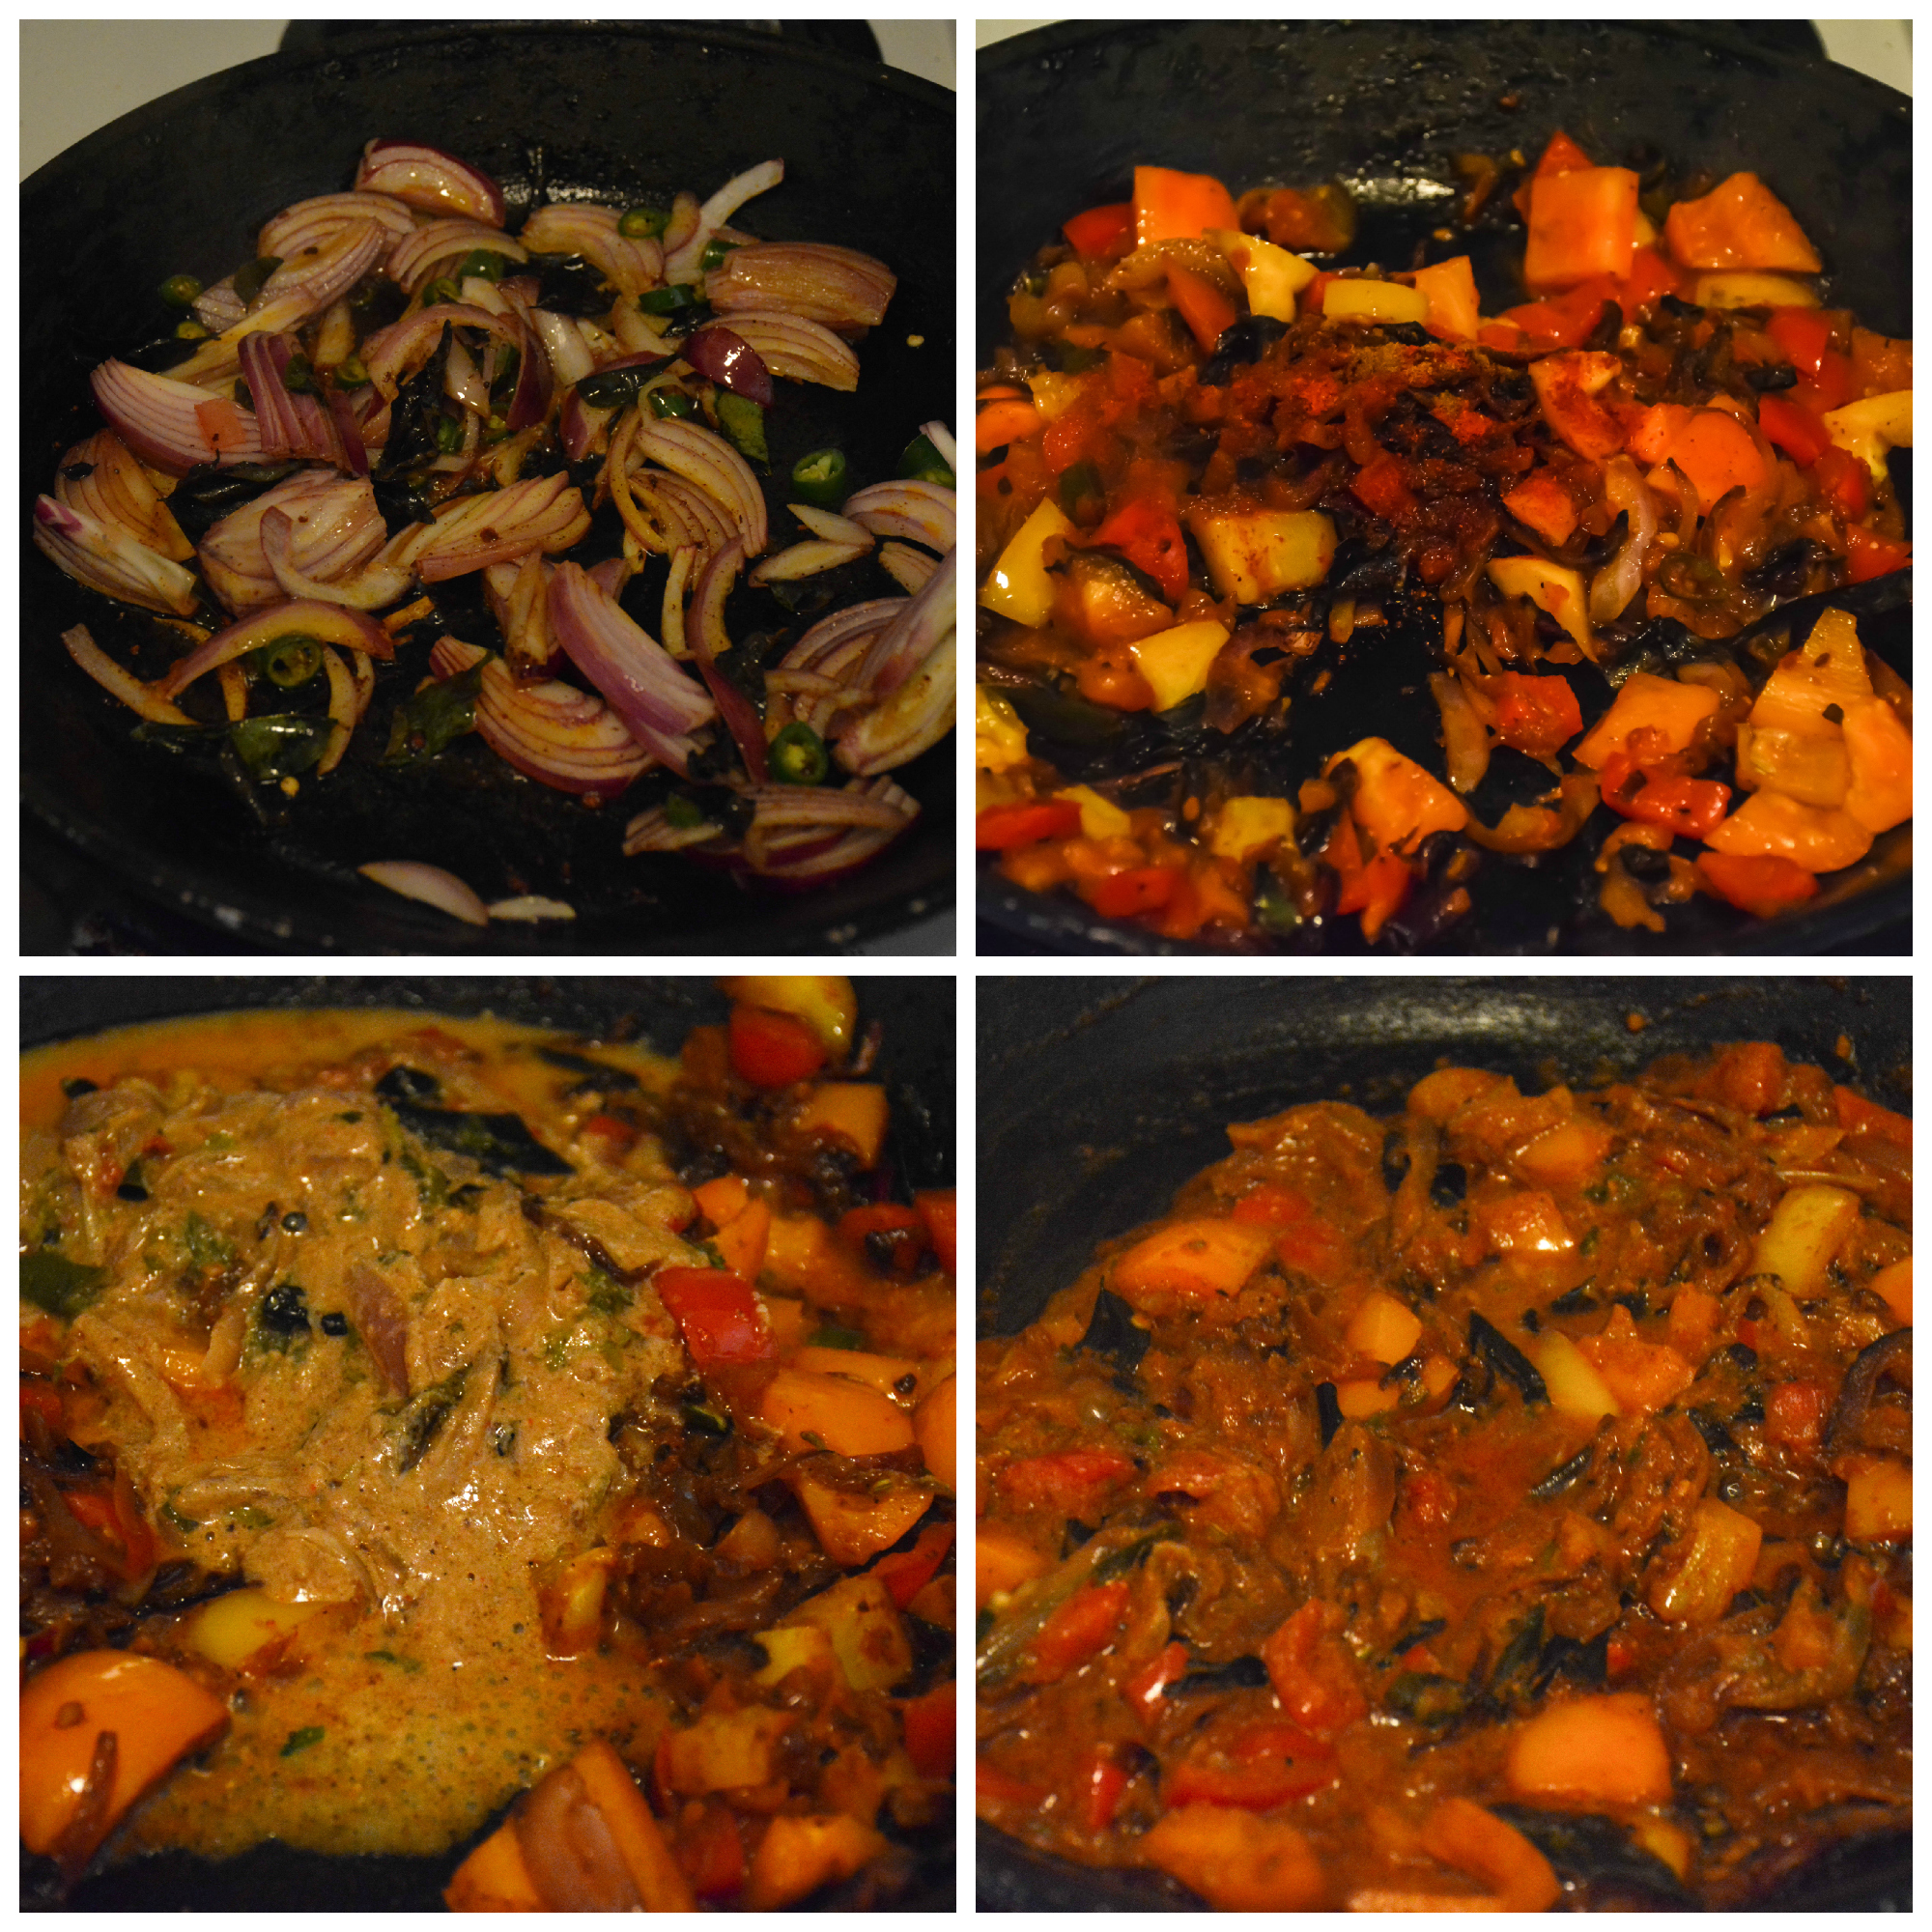
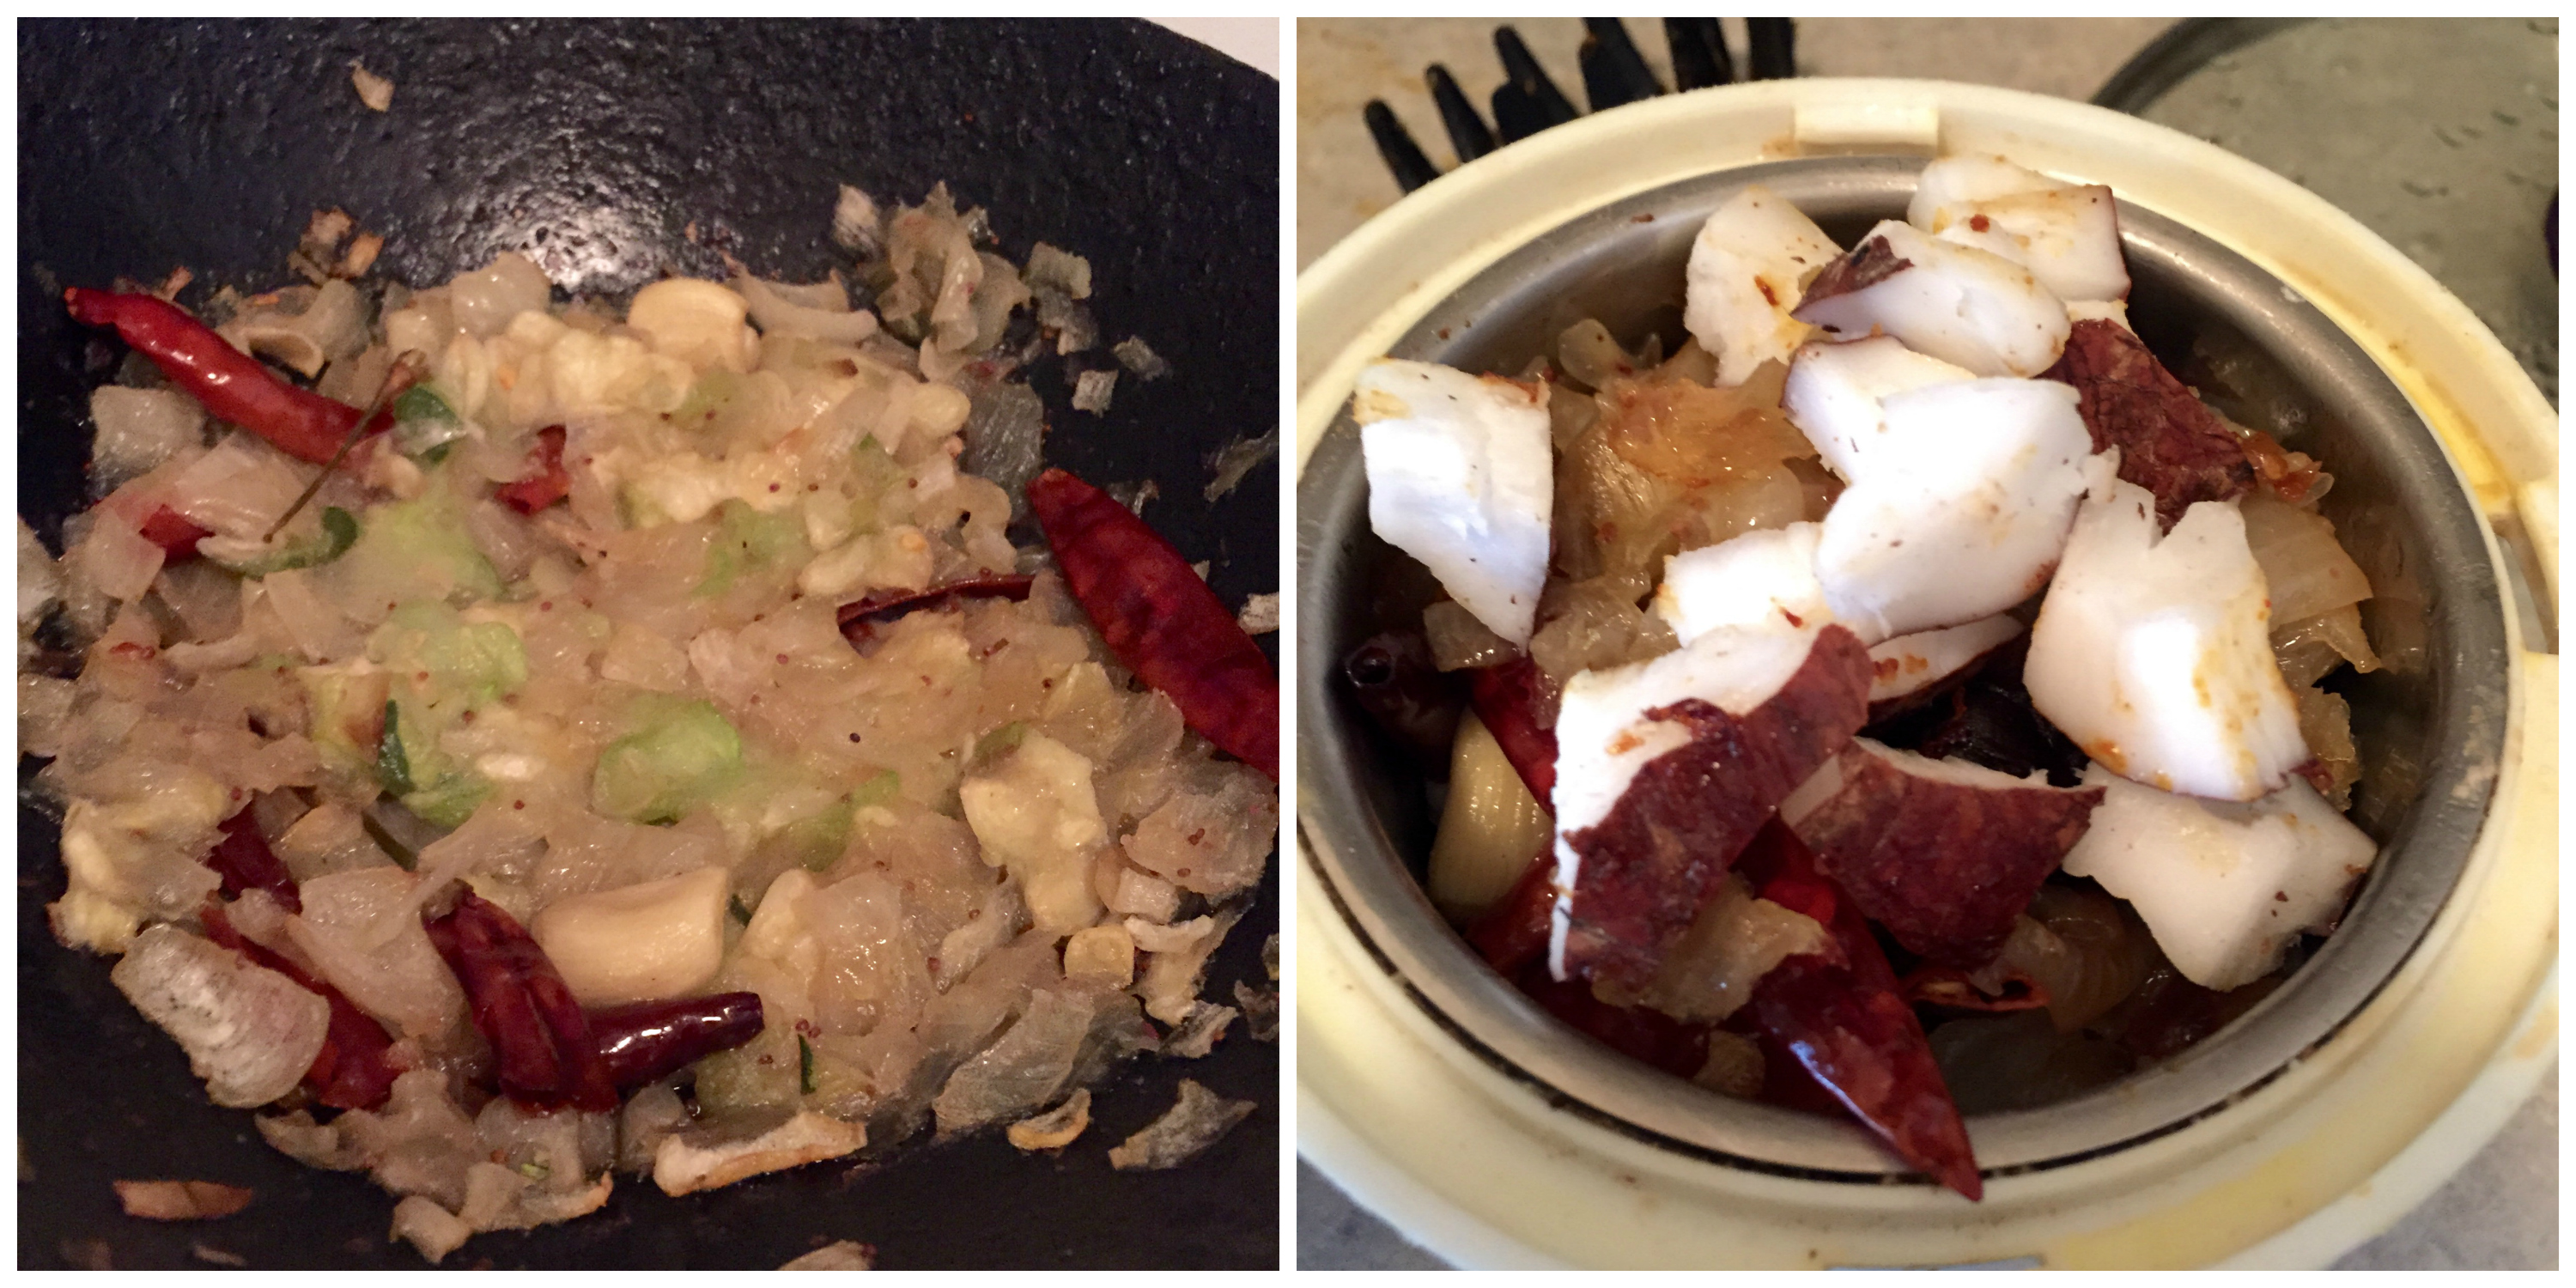
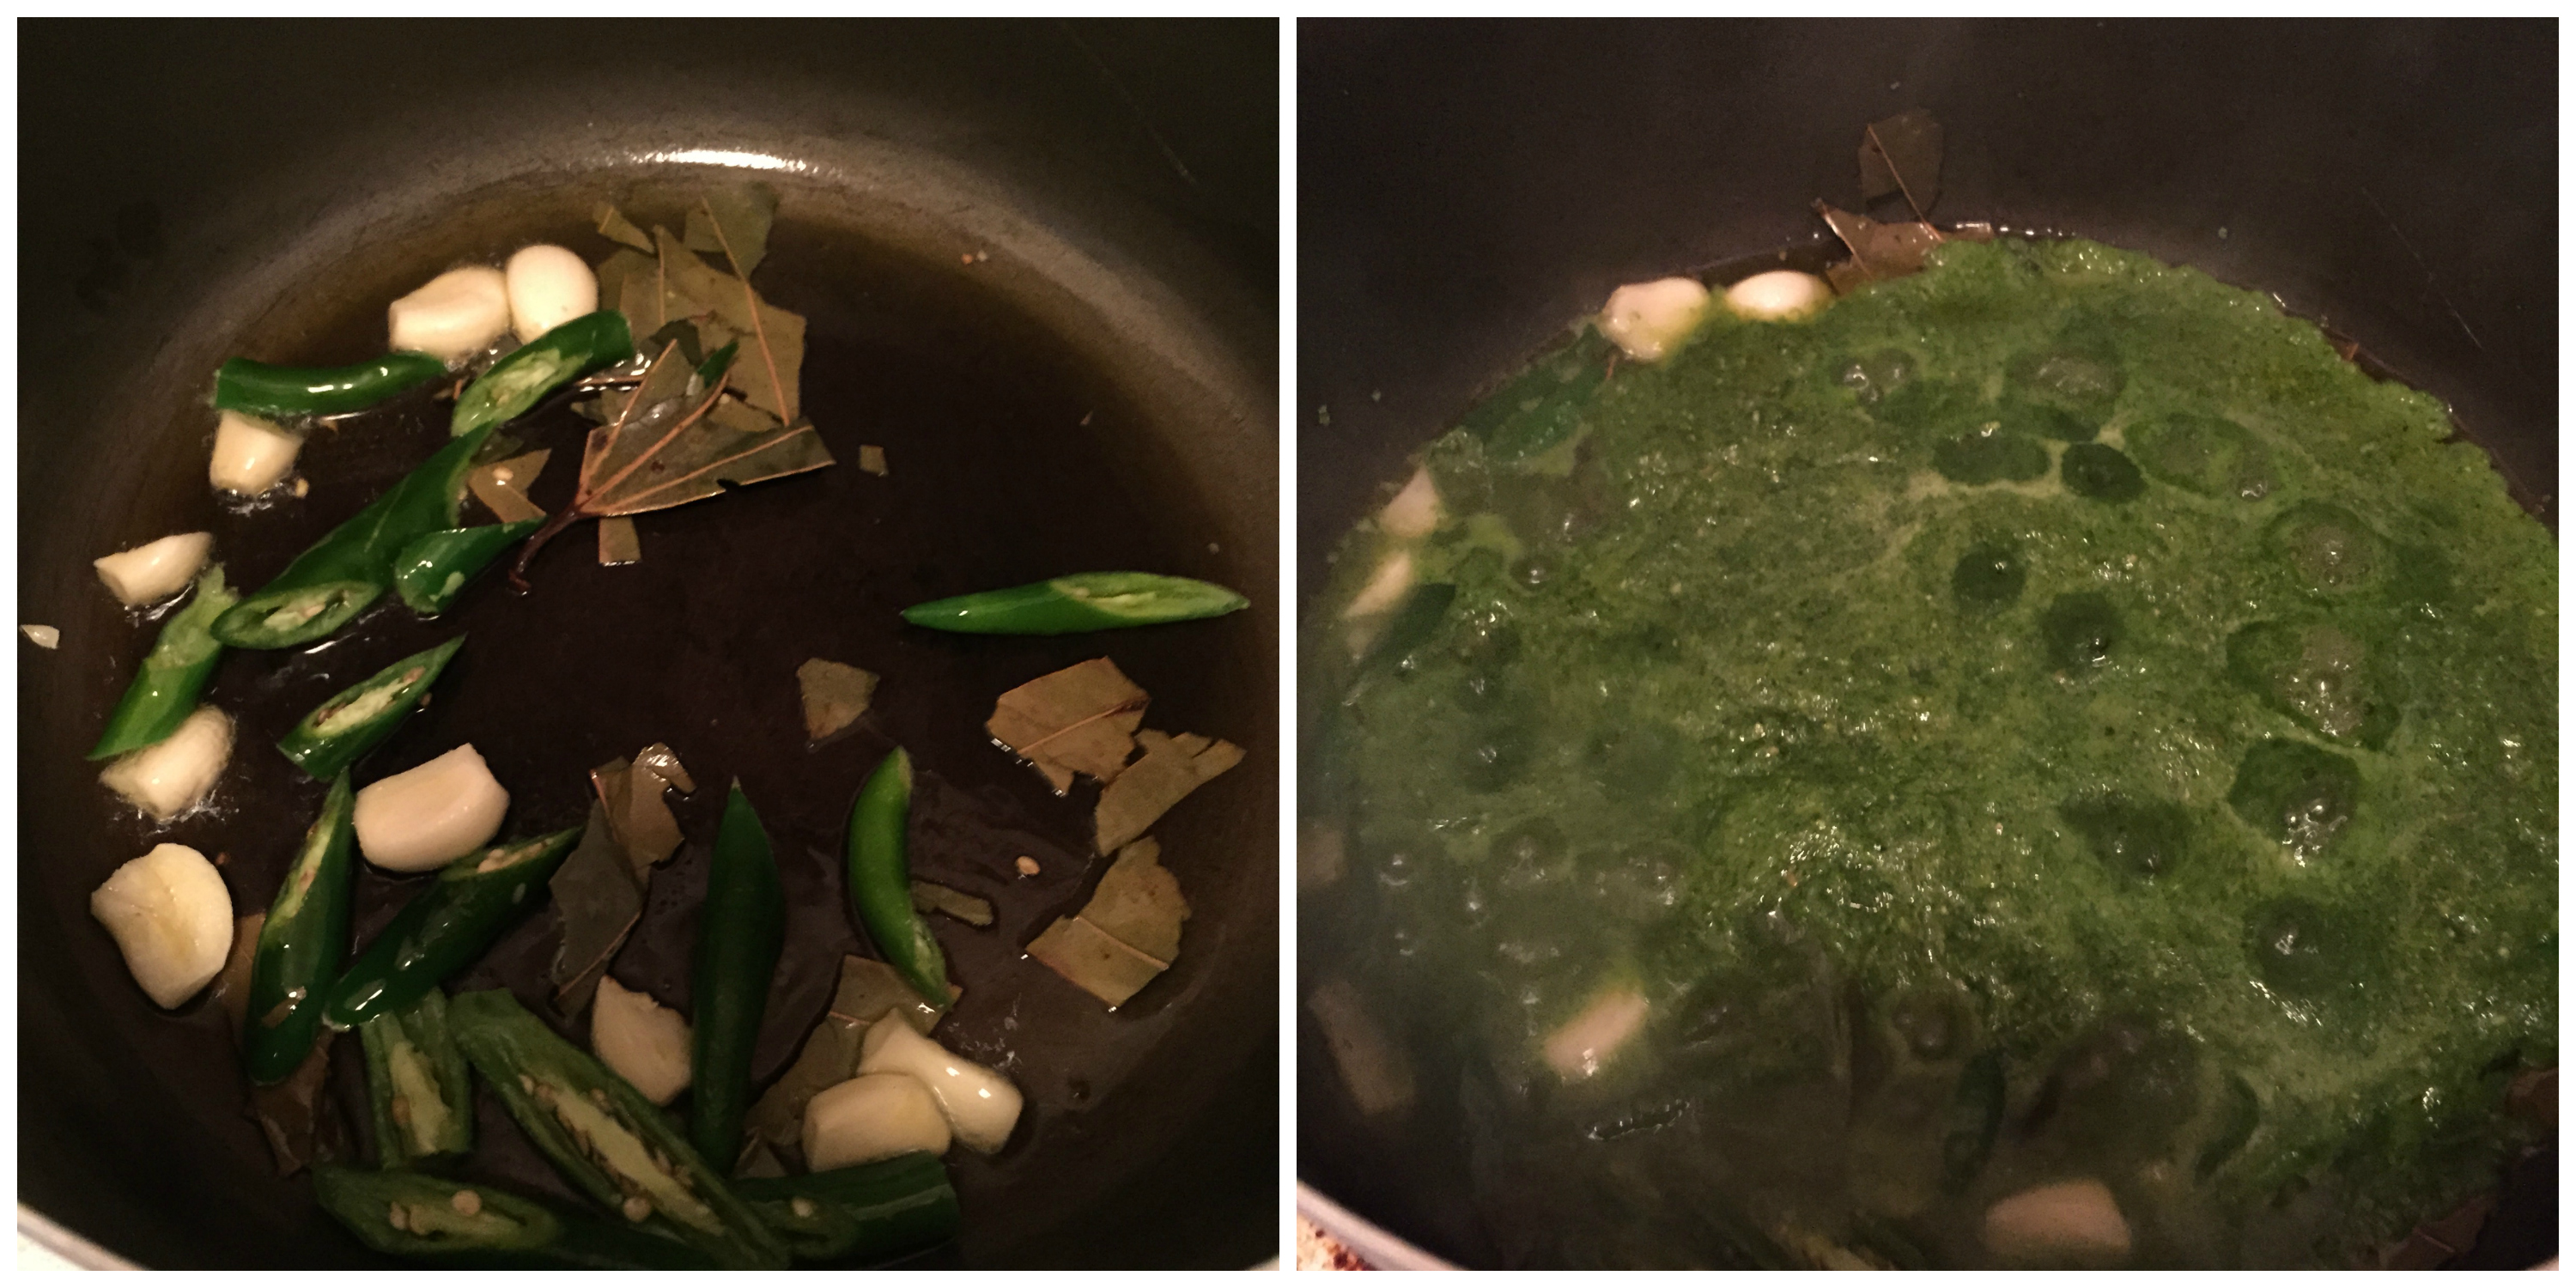
  1. Heat oil in a big vessel,add clove, cinnamon, cinnamon sticks, bay leaves,cardamom and star anise.
  2. Now , sprinkle 1 tbsp of curd.
  3. Add onions, garlic paste and ginger paste. Sauté till they are golden brown.

  4. Now add the mutton, salt, tomato, remaining curd, mint and coriander leaves. Stir everything and now add the water. Close the lid and boil it under low fire.You can even pressure cook it for 6 whistles.

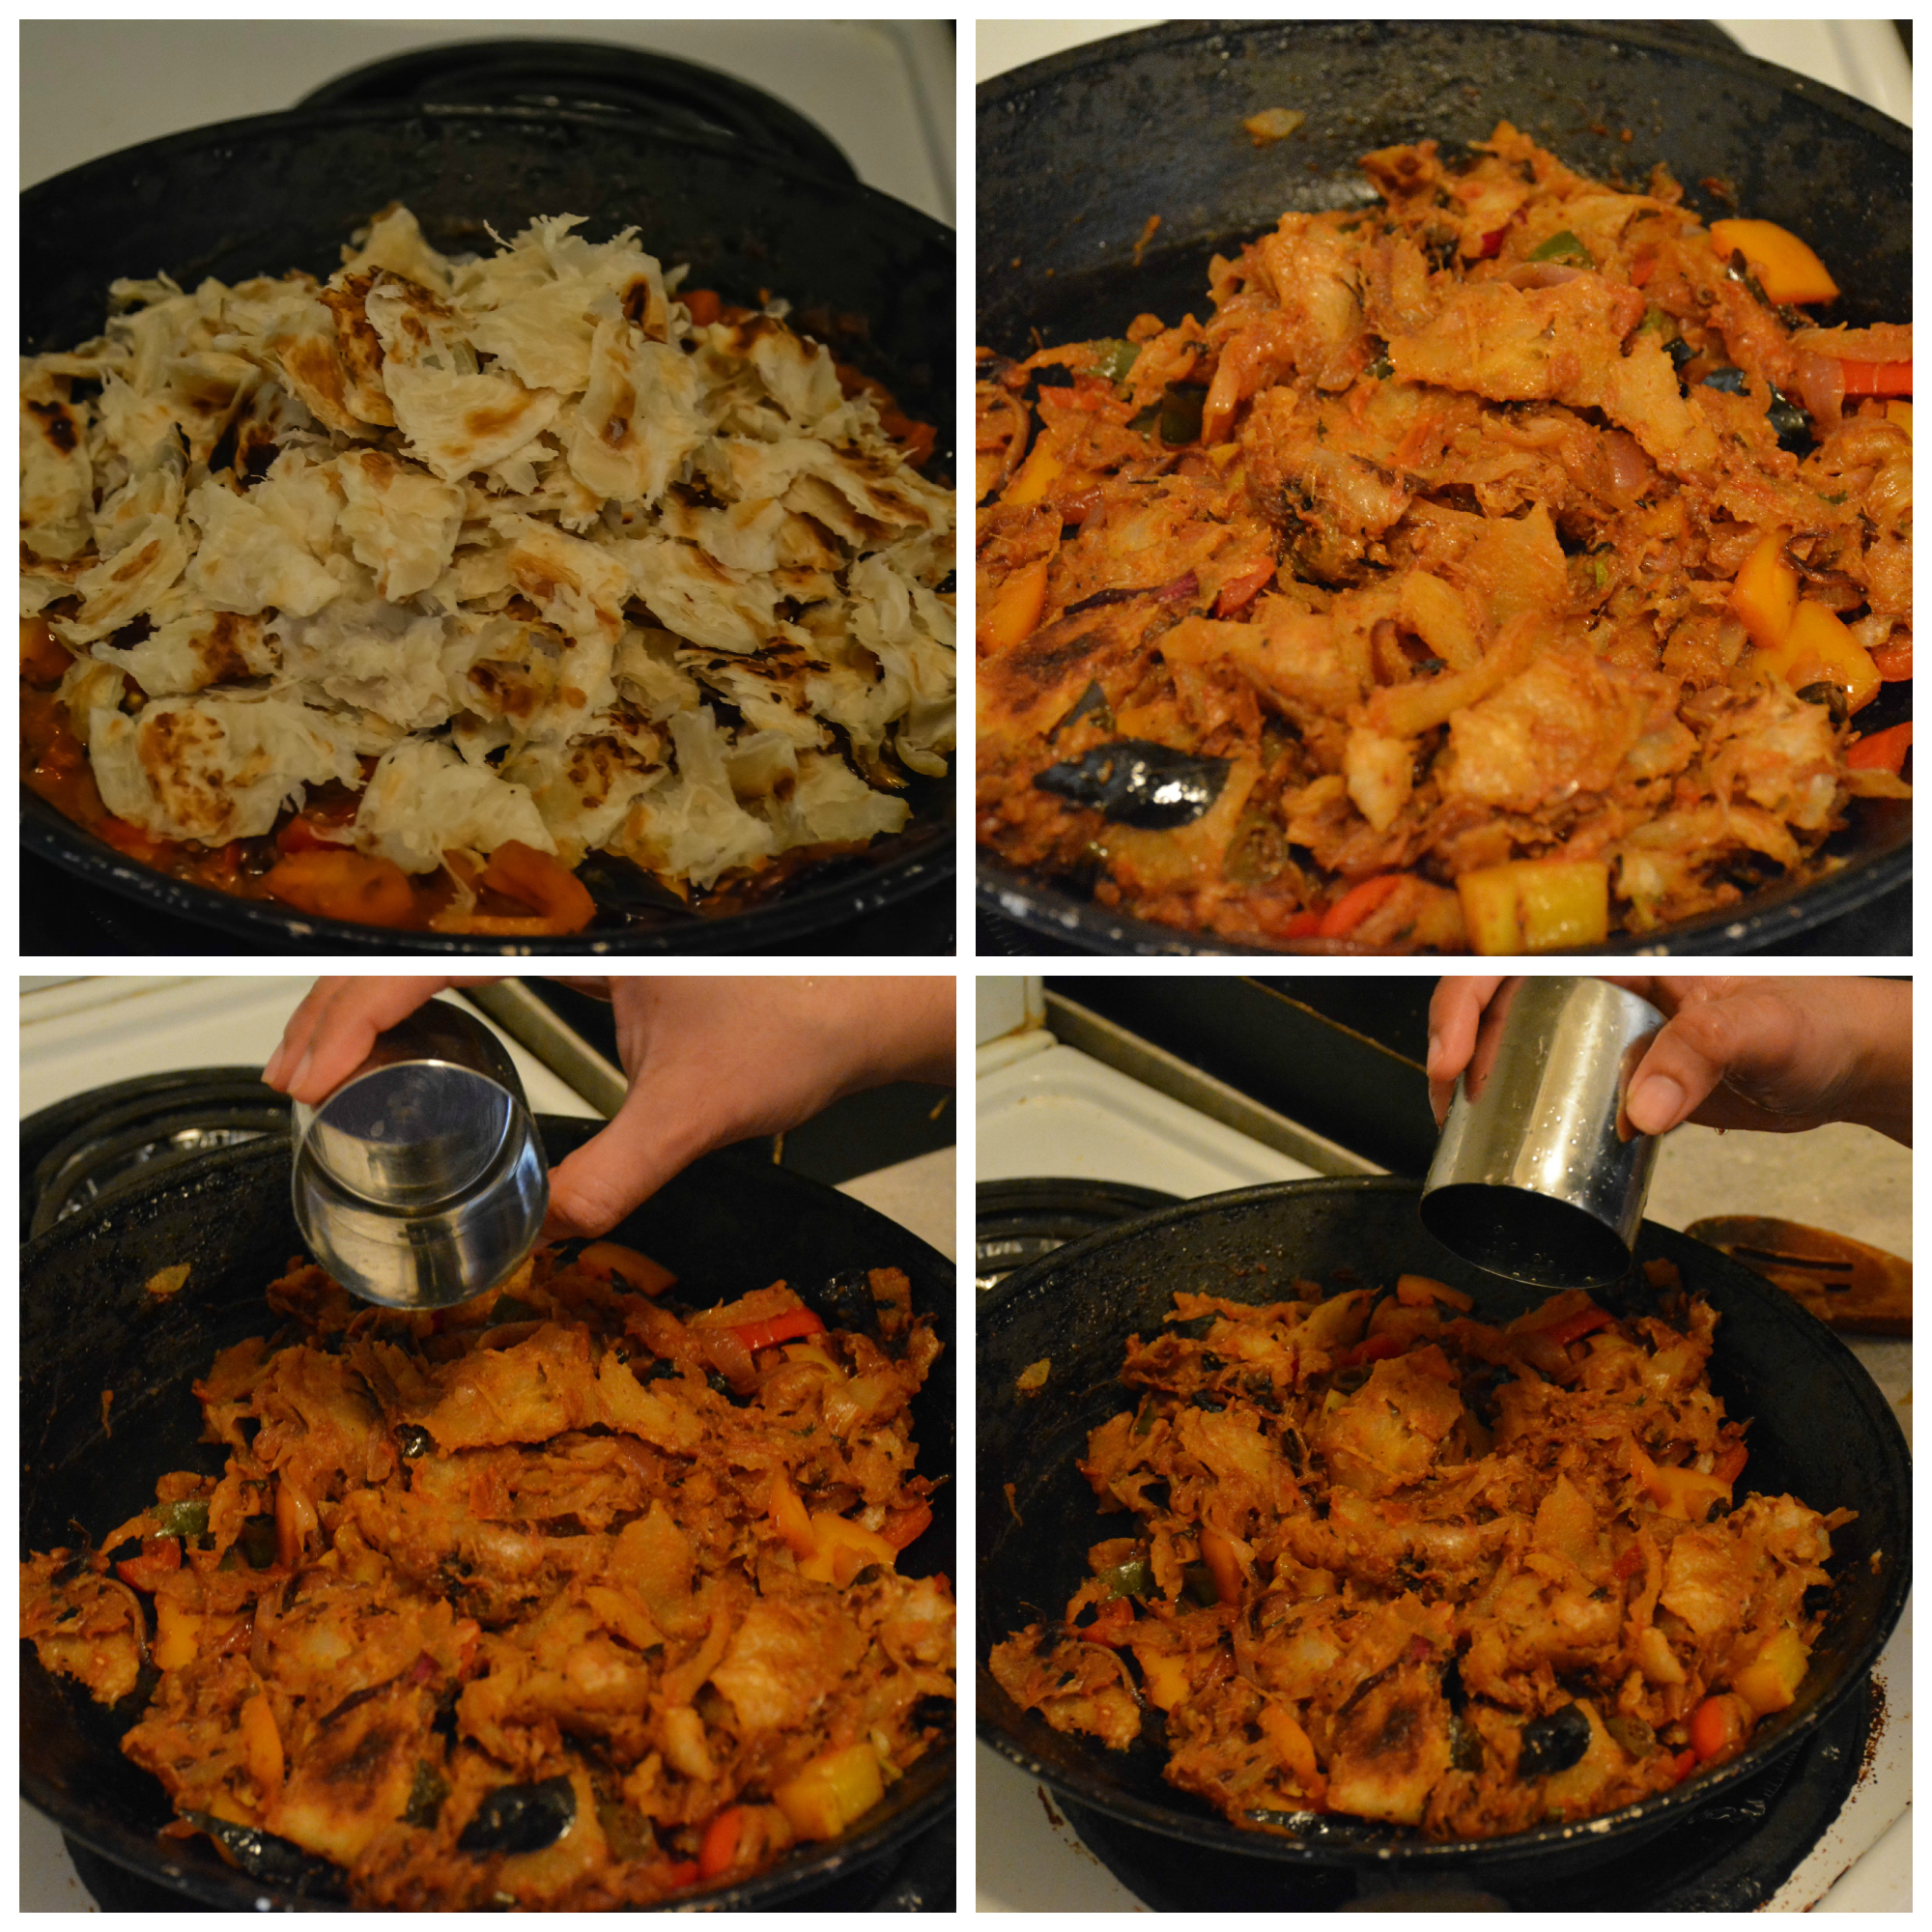
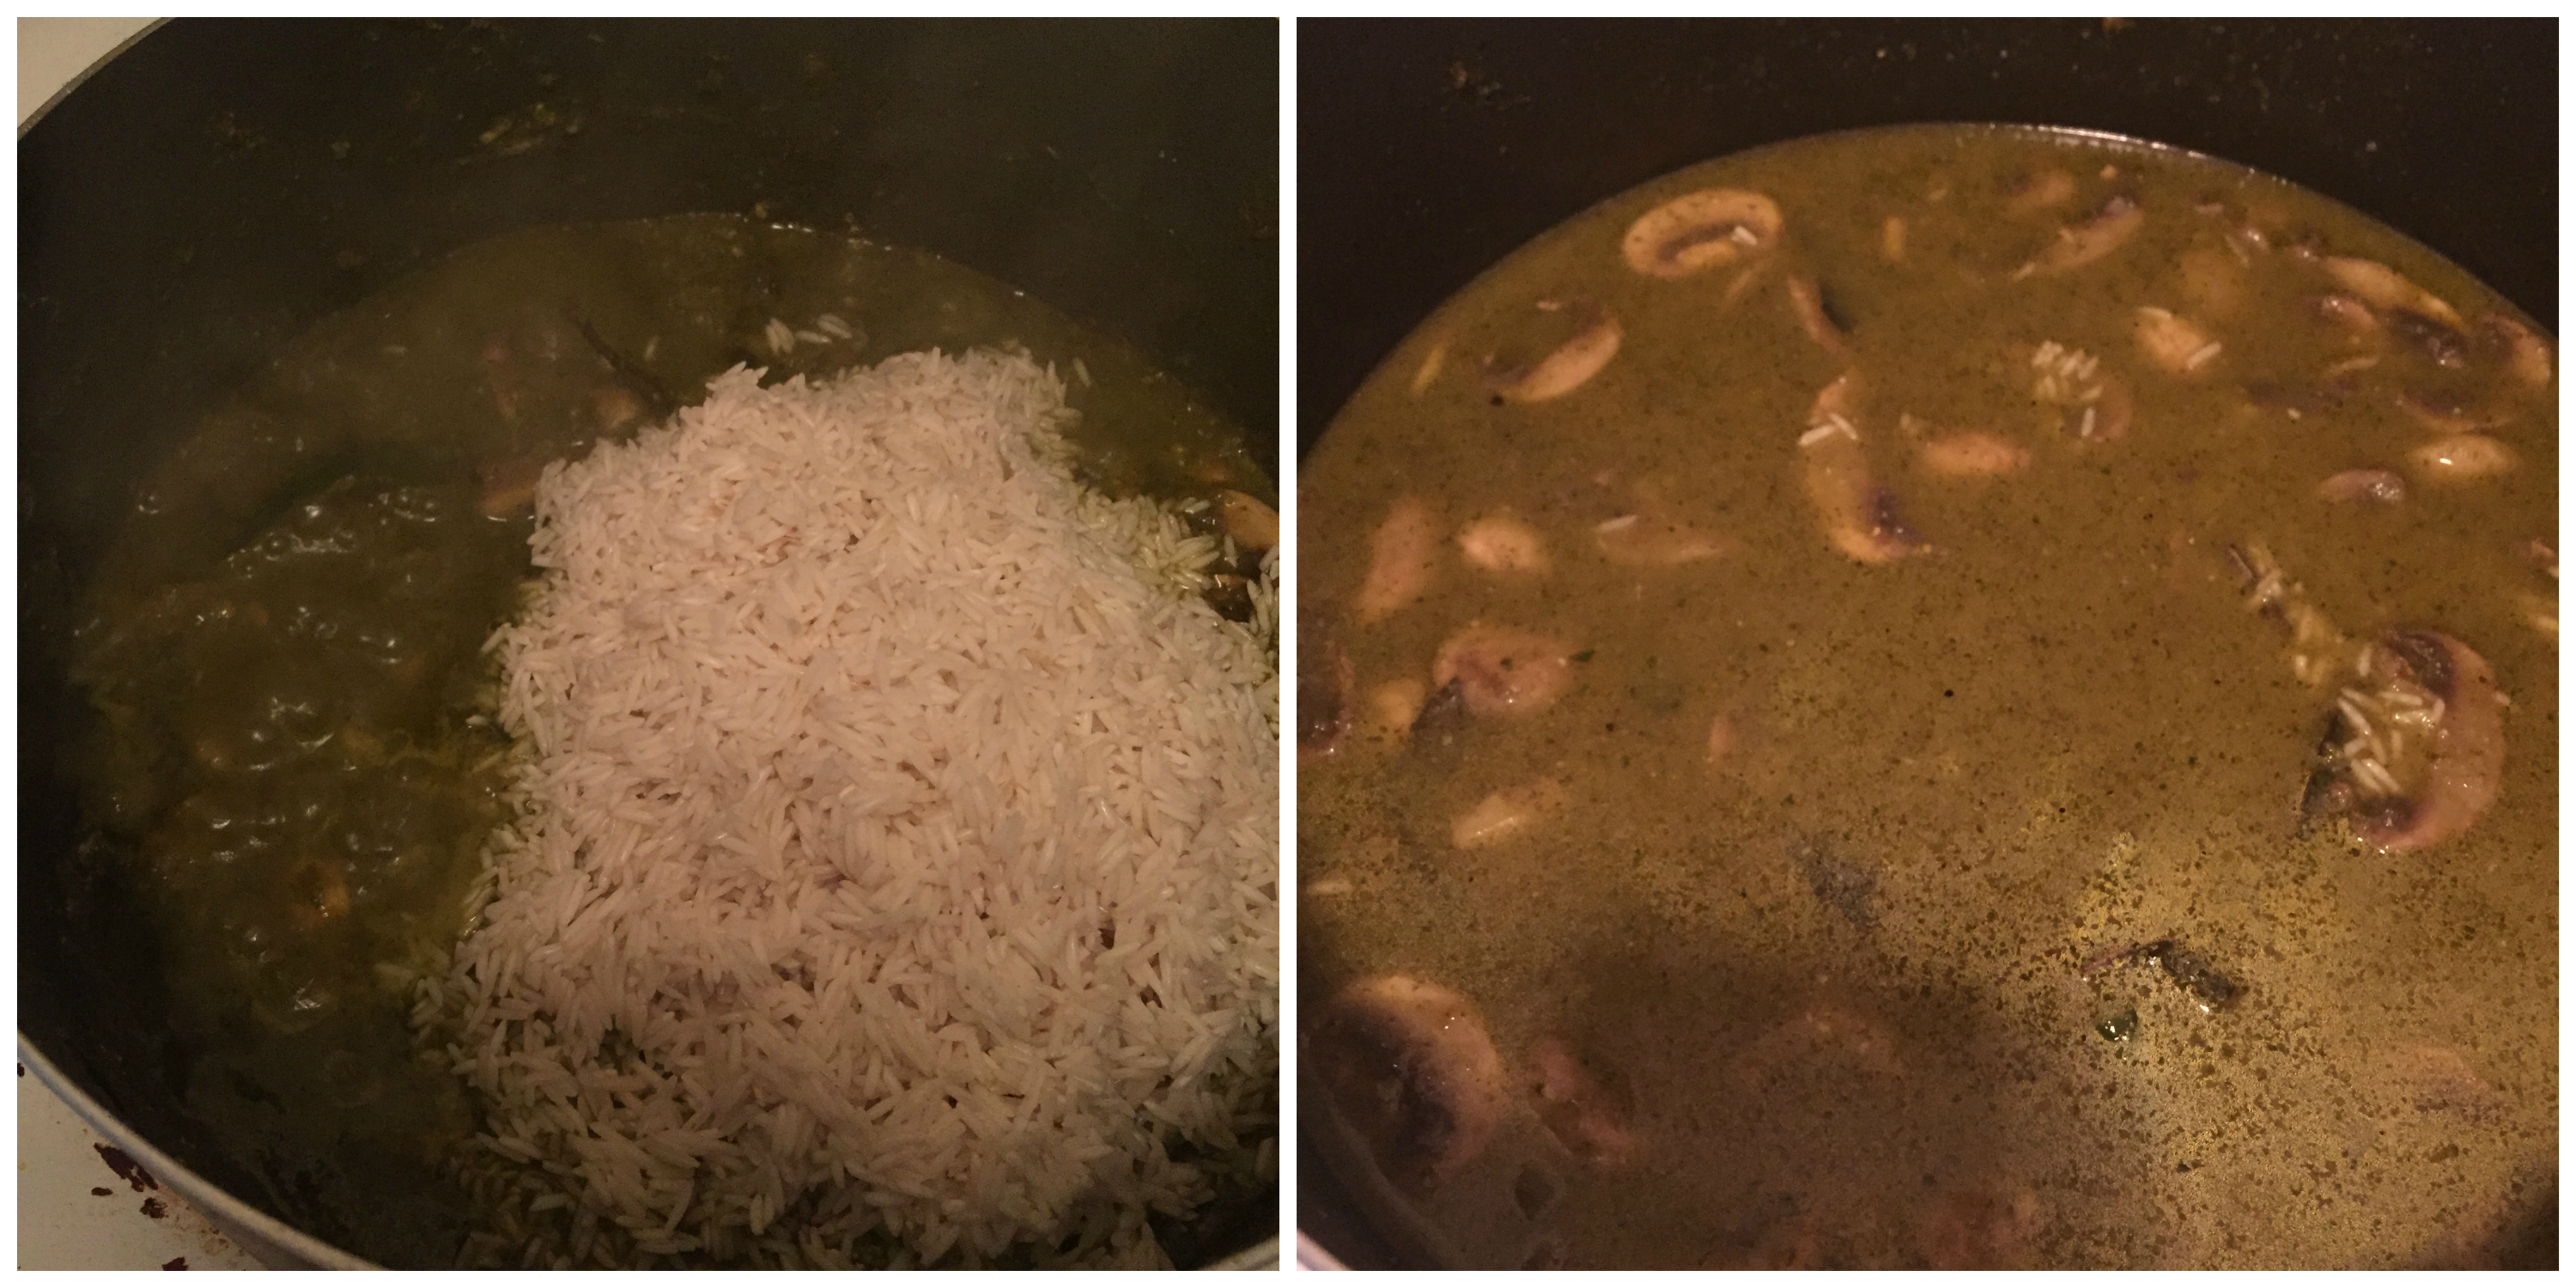
  5. Meanwhile boil water and when it is boiling nicely, add rice, salt and cumin seeds to it. Boil till it is half done. Probably should take 6-8 mins.

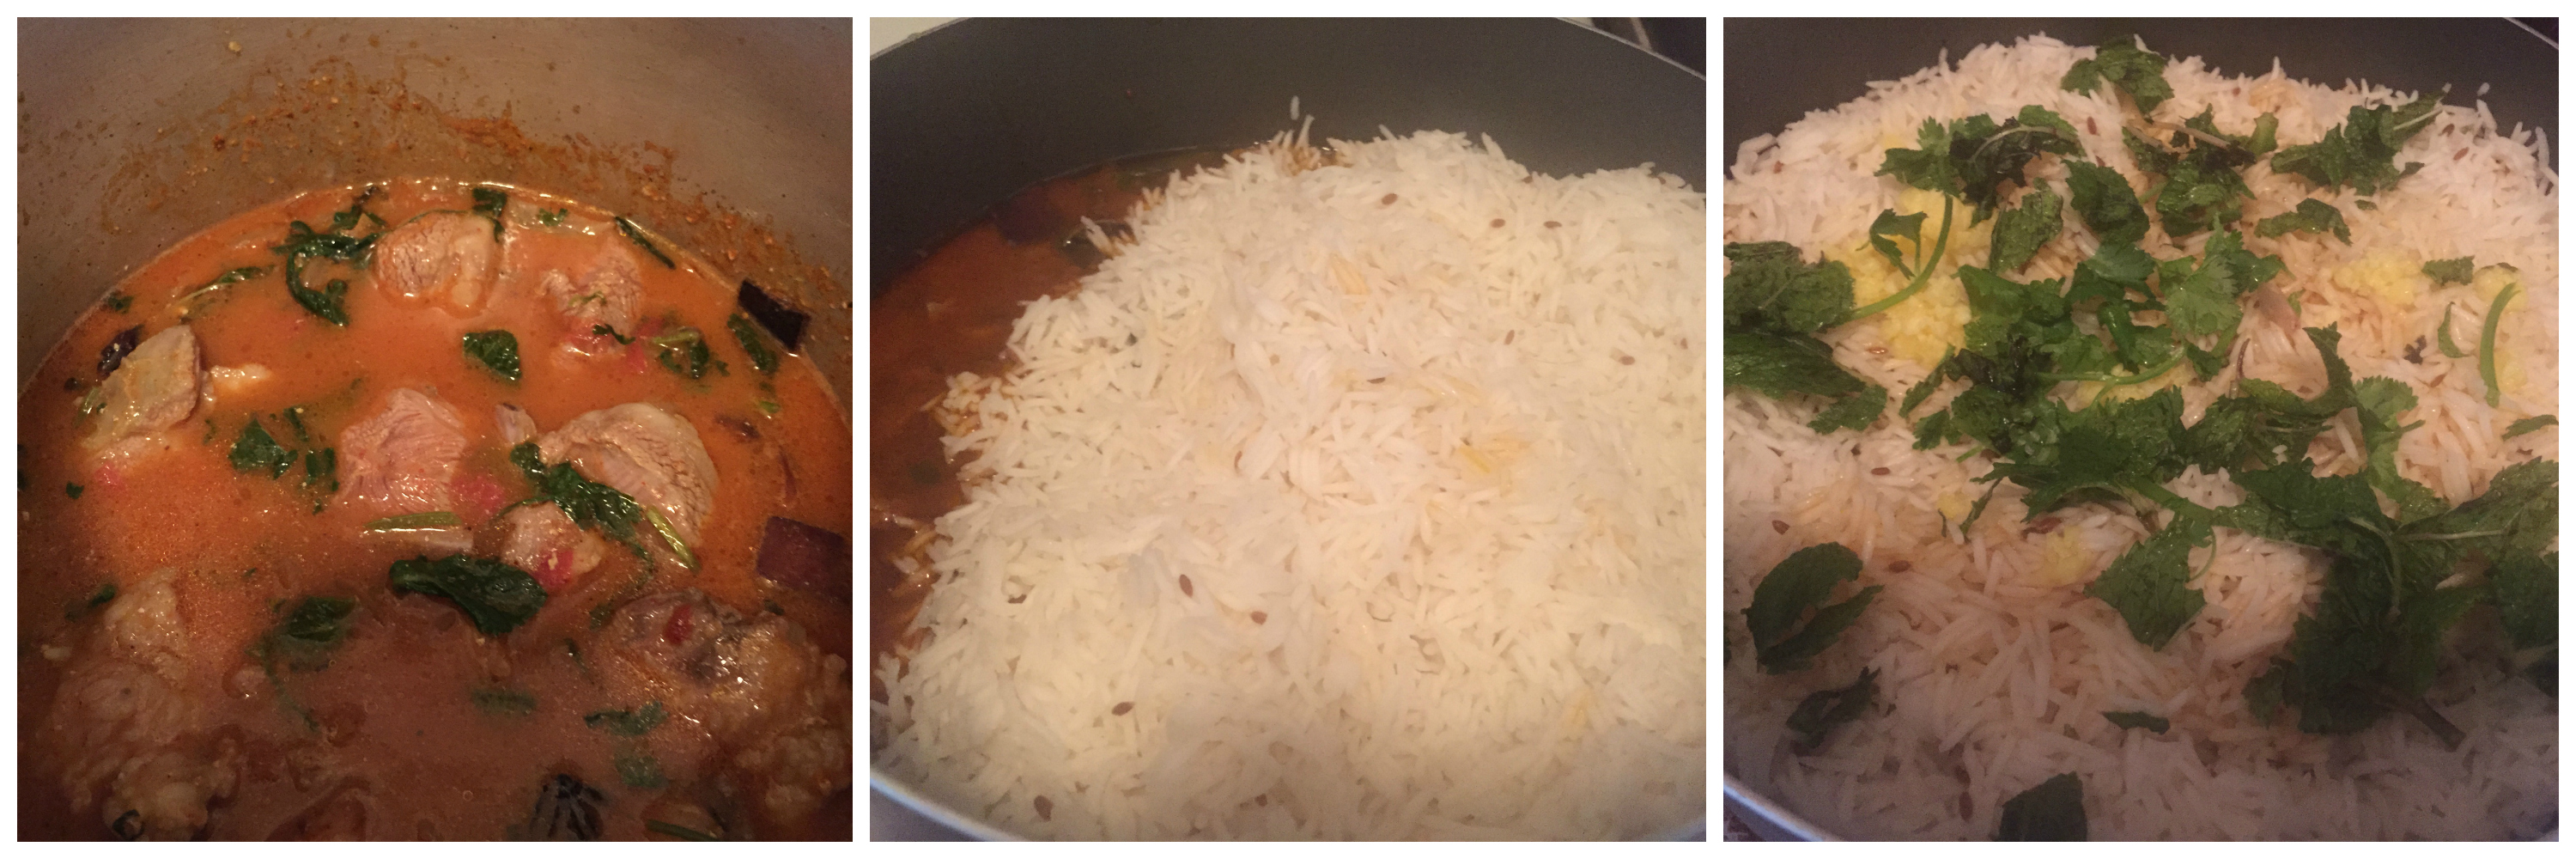
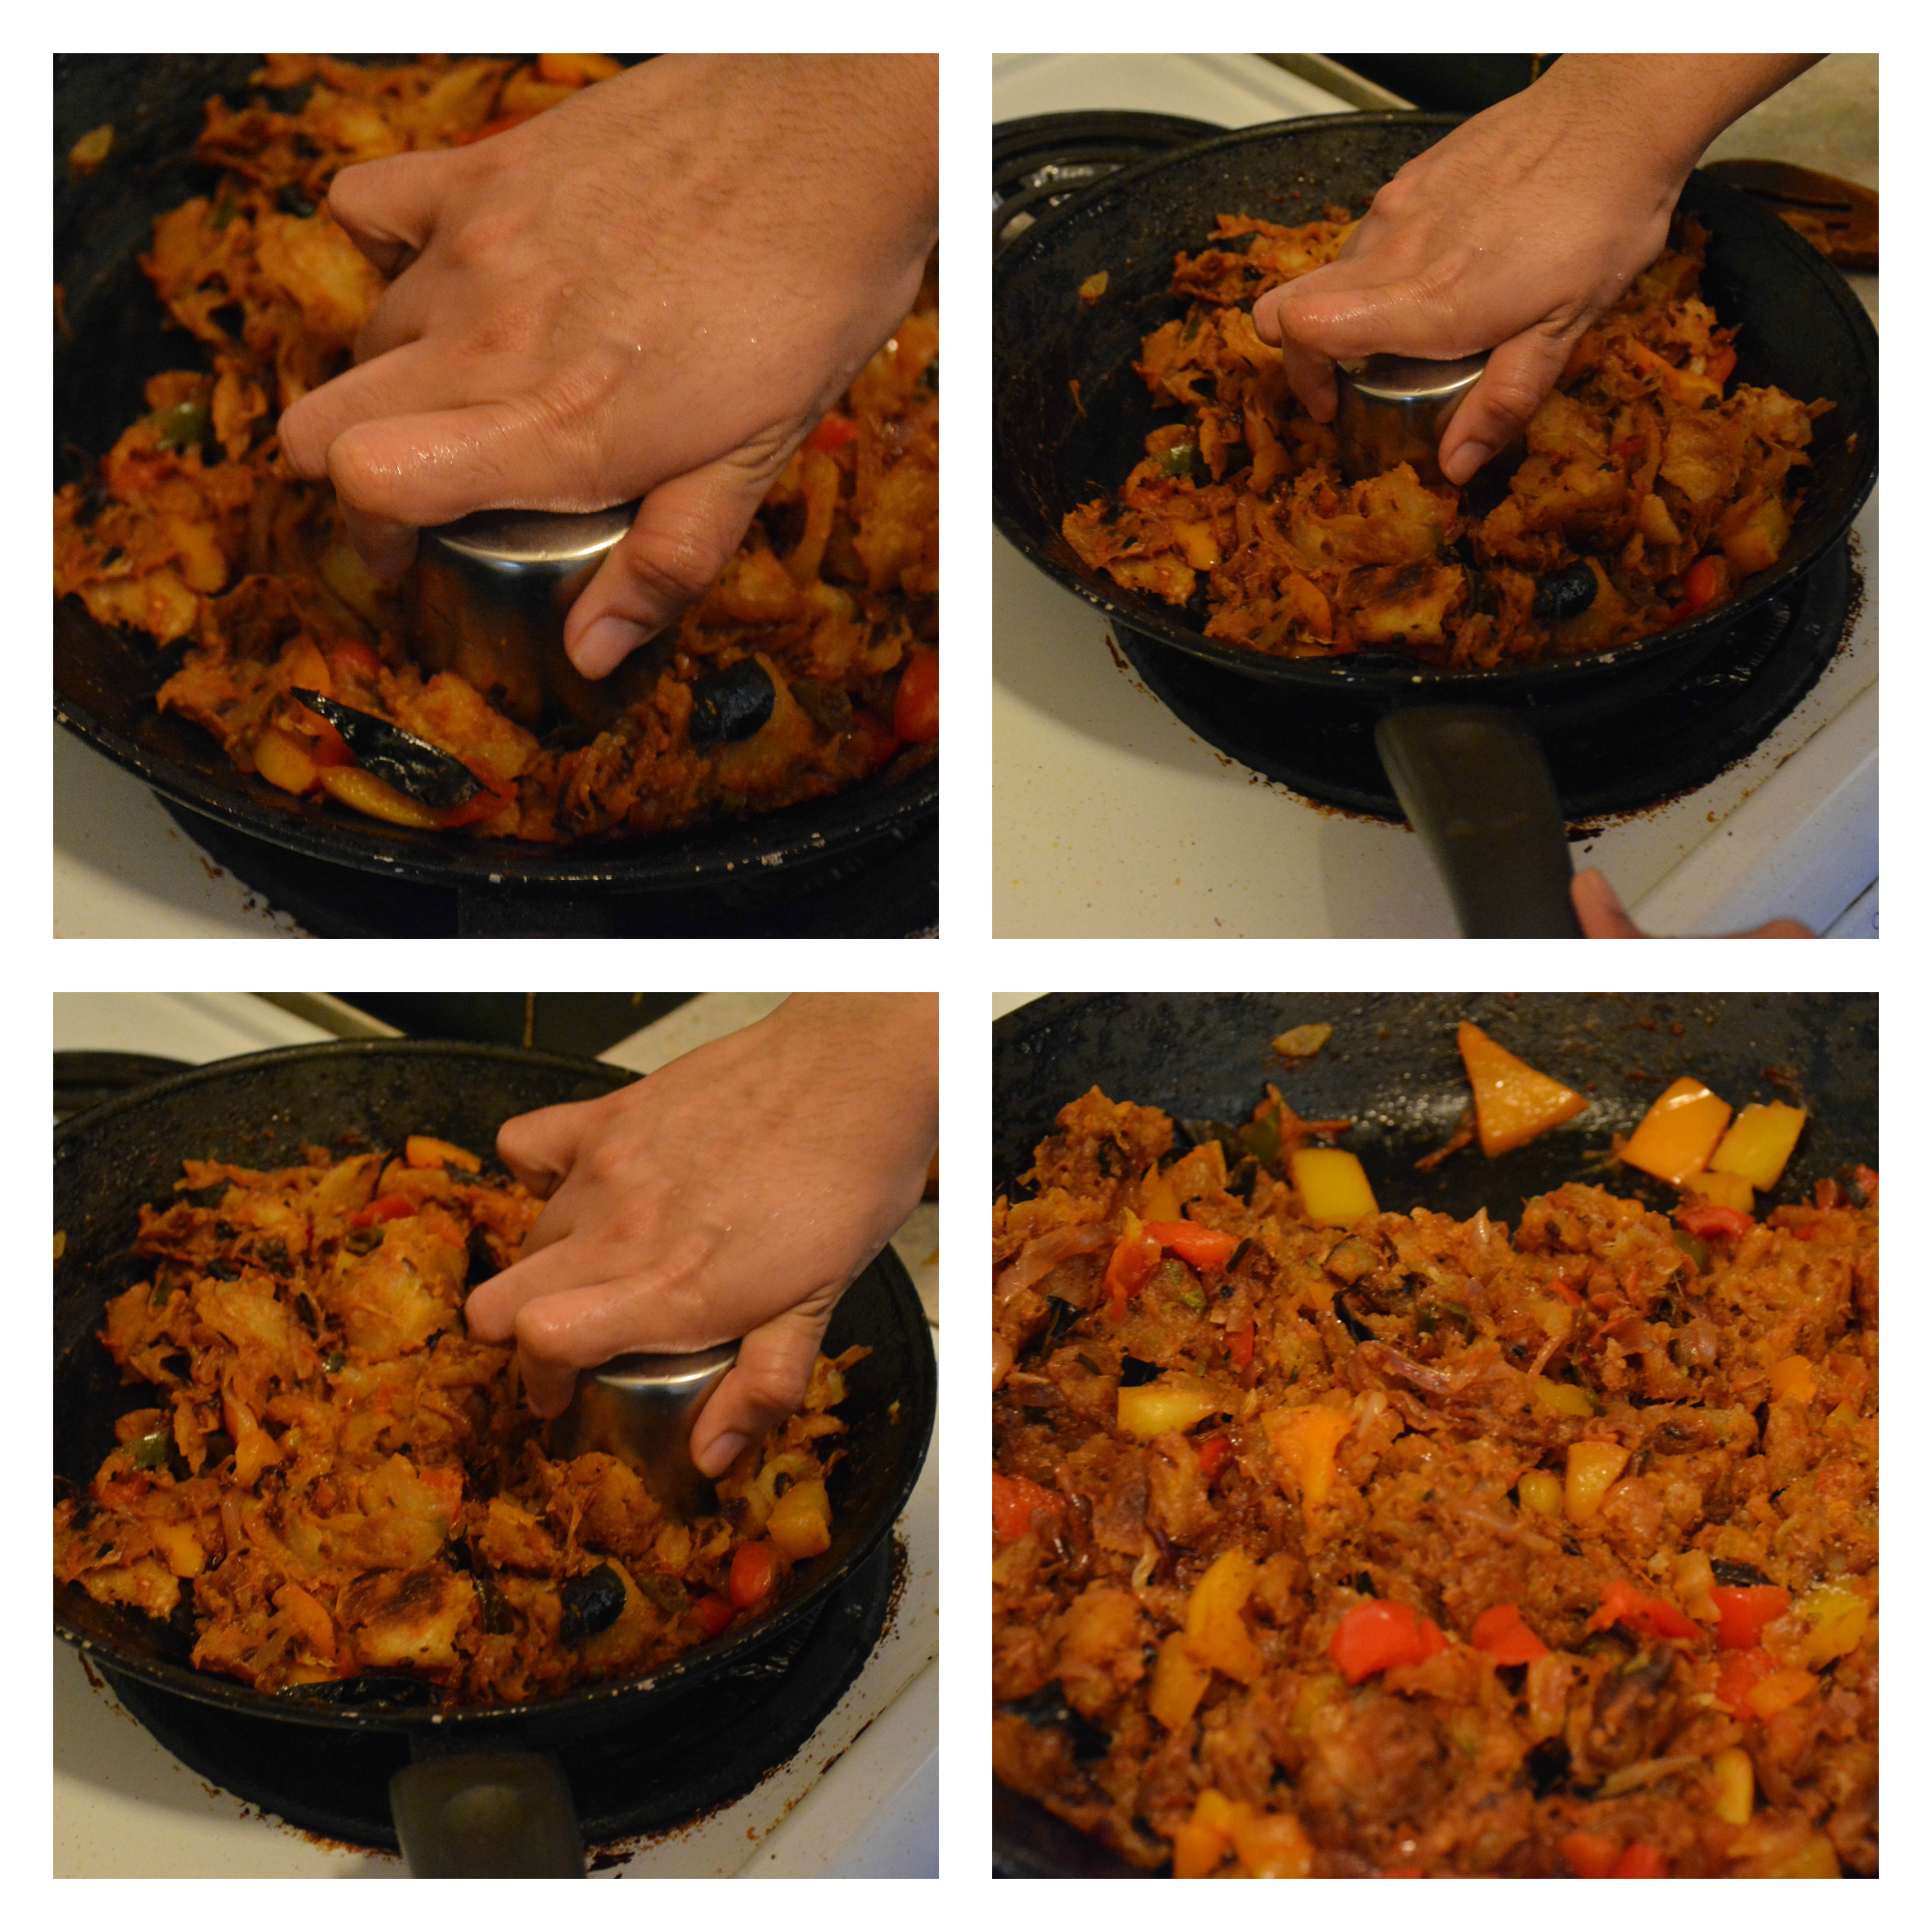
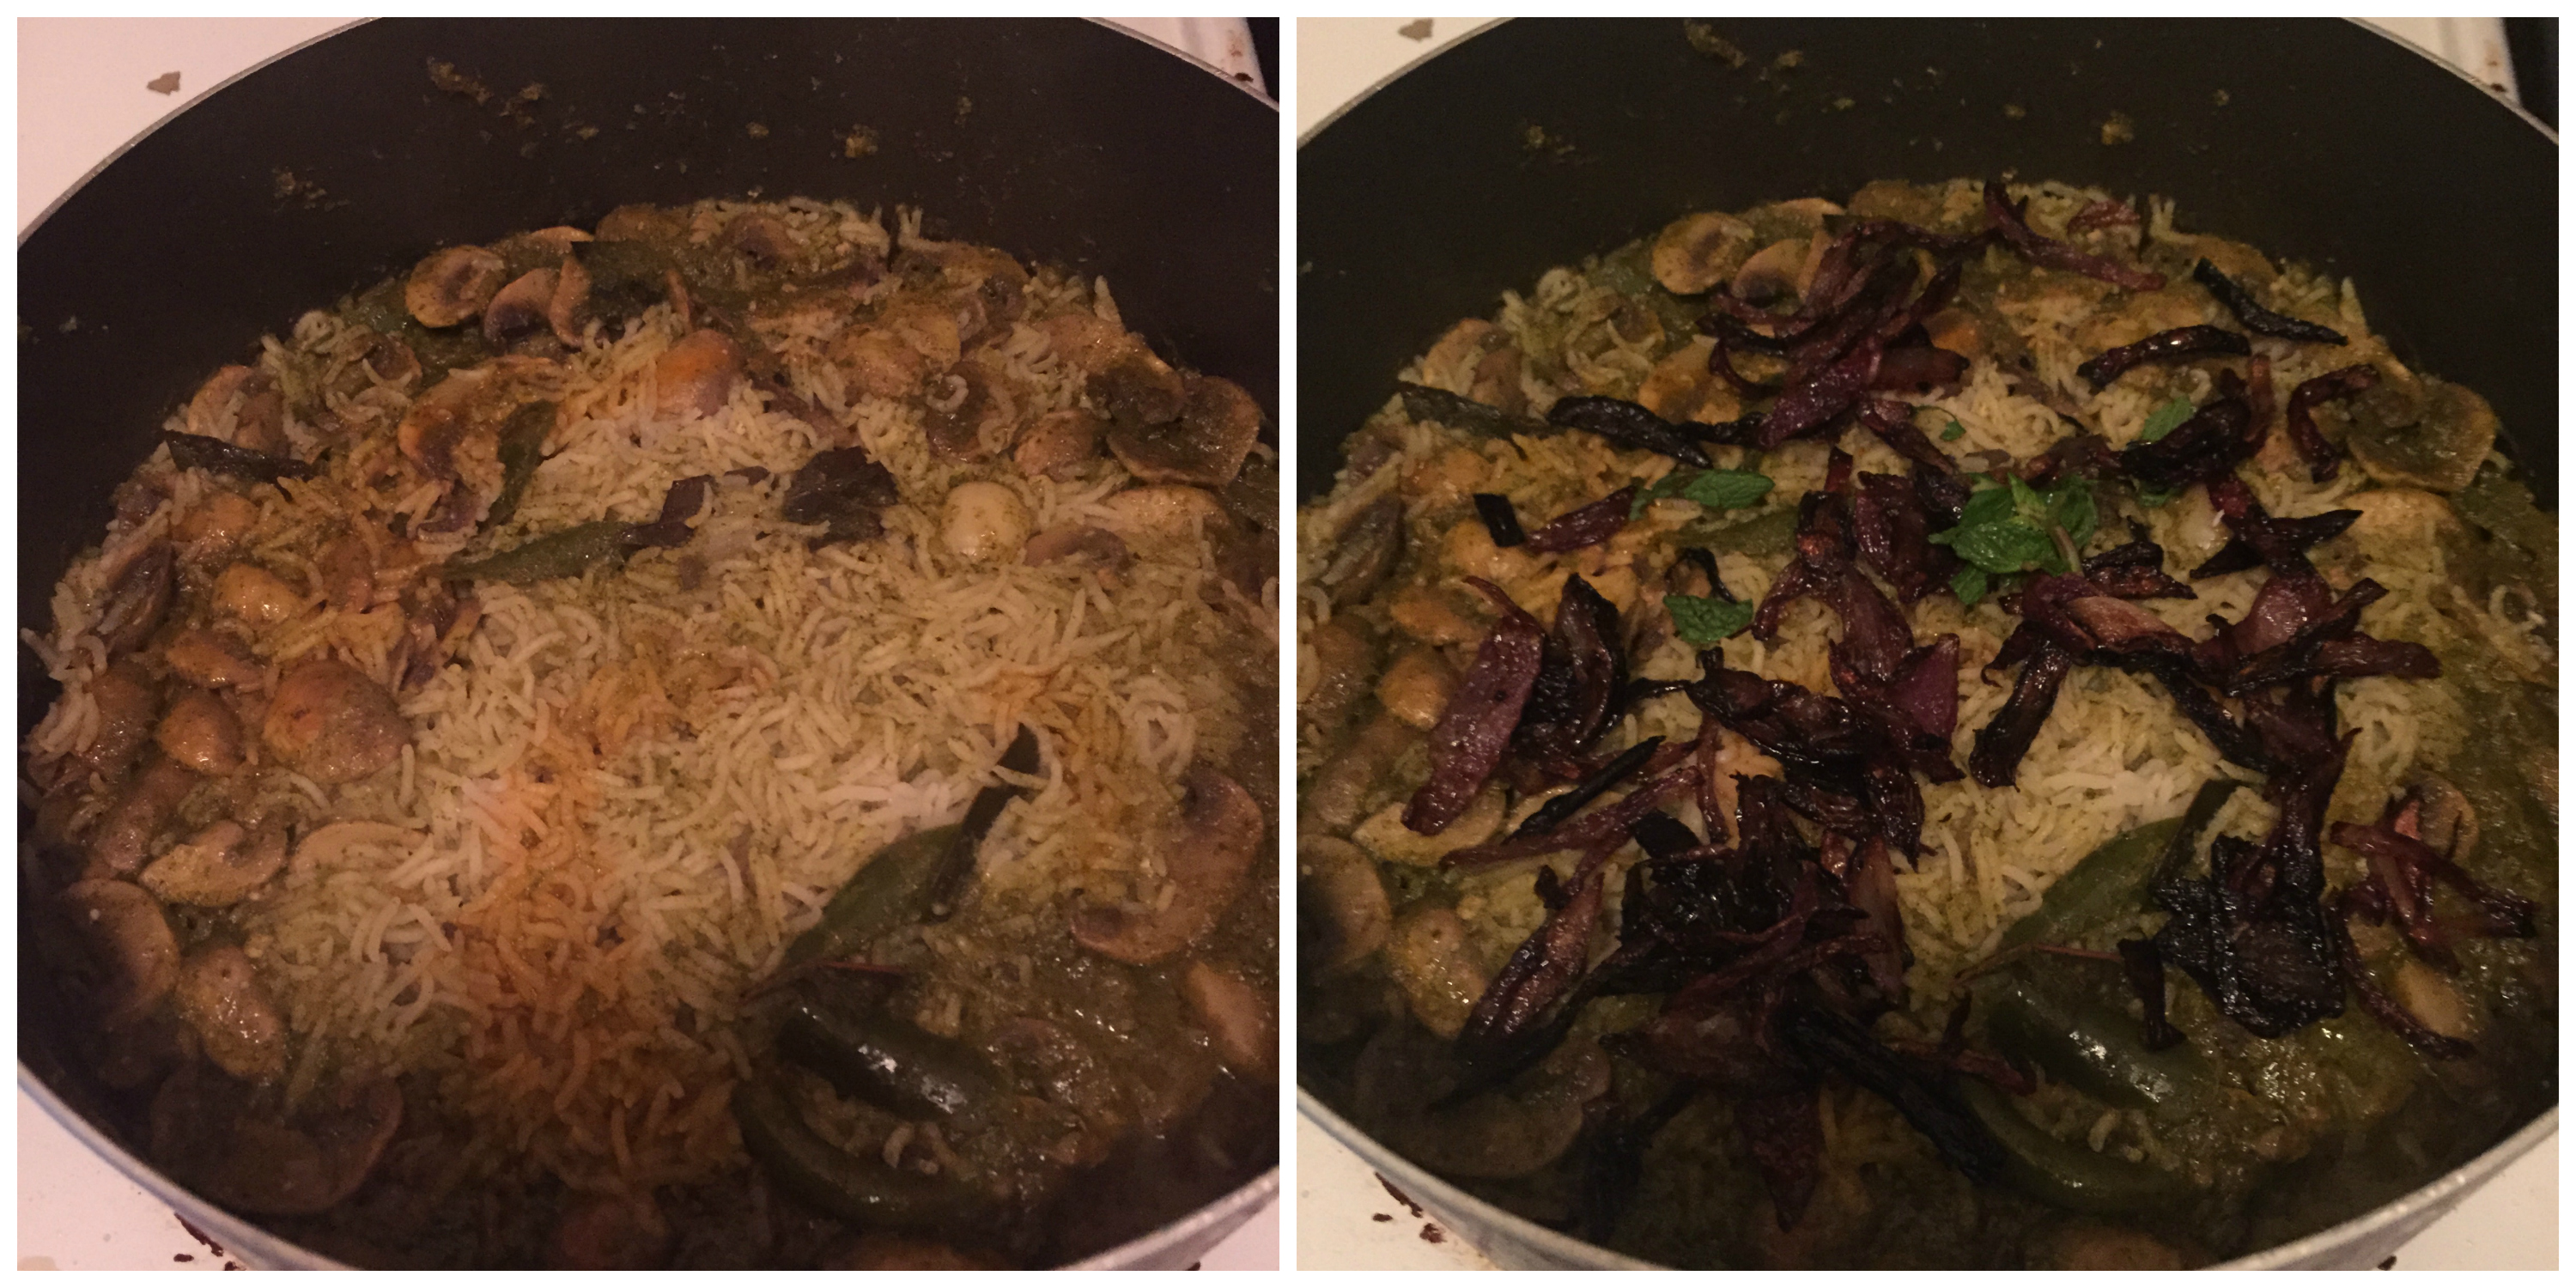
  6. When the mutton is cooked, top the rice to it, add ghee and coriander leaves to it. close the vessel with a lid tight and keep some weight (like stones, vessel with water) on top of it and keep on medium for 7 minutes and and low on 5 minutes. Switch off and close and keep for 10 minutes.
Notes
There will be some water left in mutton when you top the rice but its good to help the biryani get its fluffy texture and boil to perfection.
Wordpress Recipe Plugin by EasyRecipe
3.2.2885

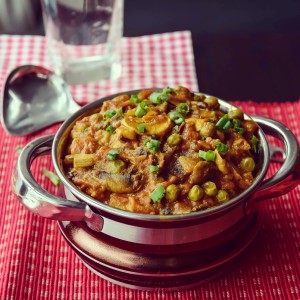
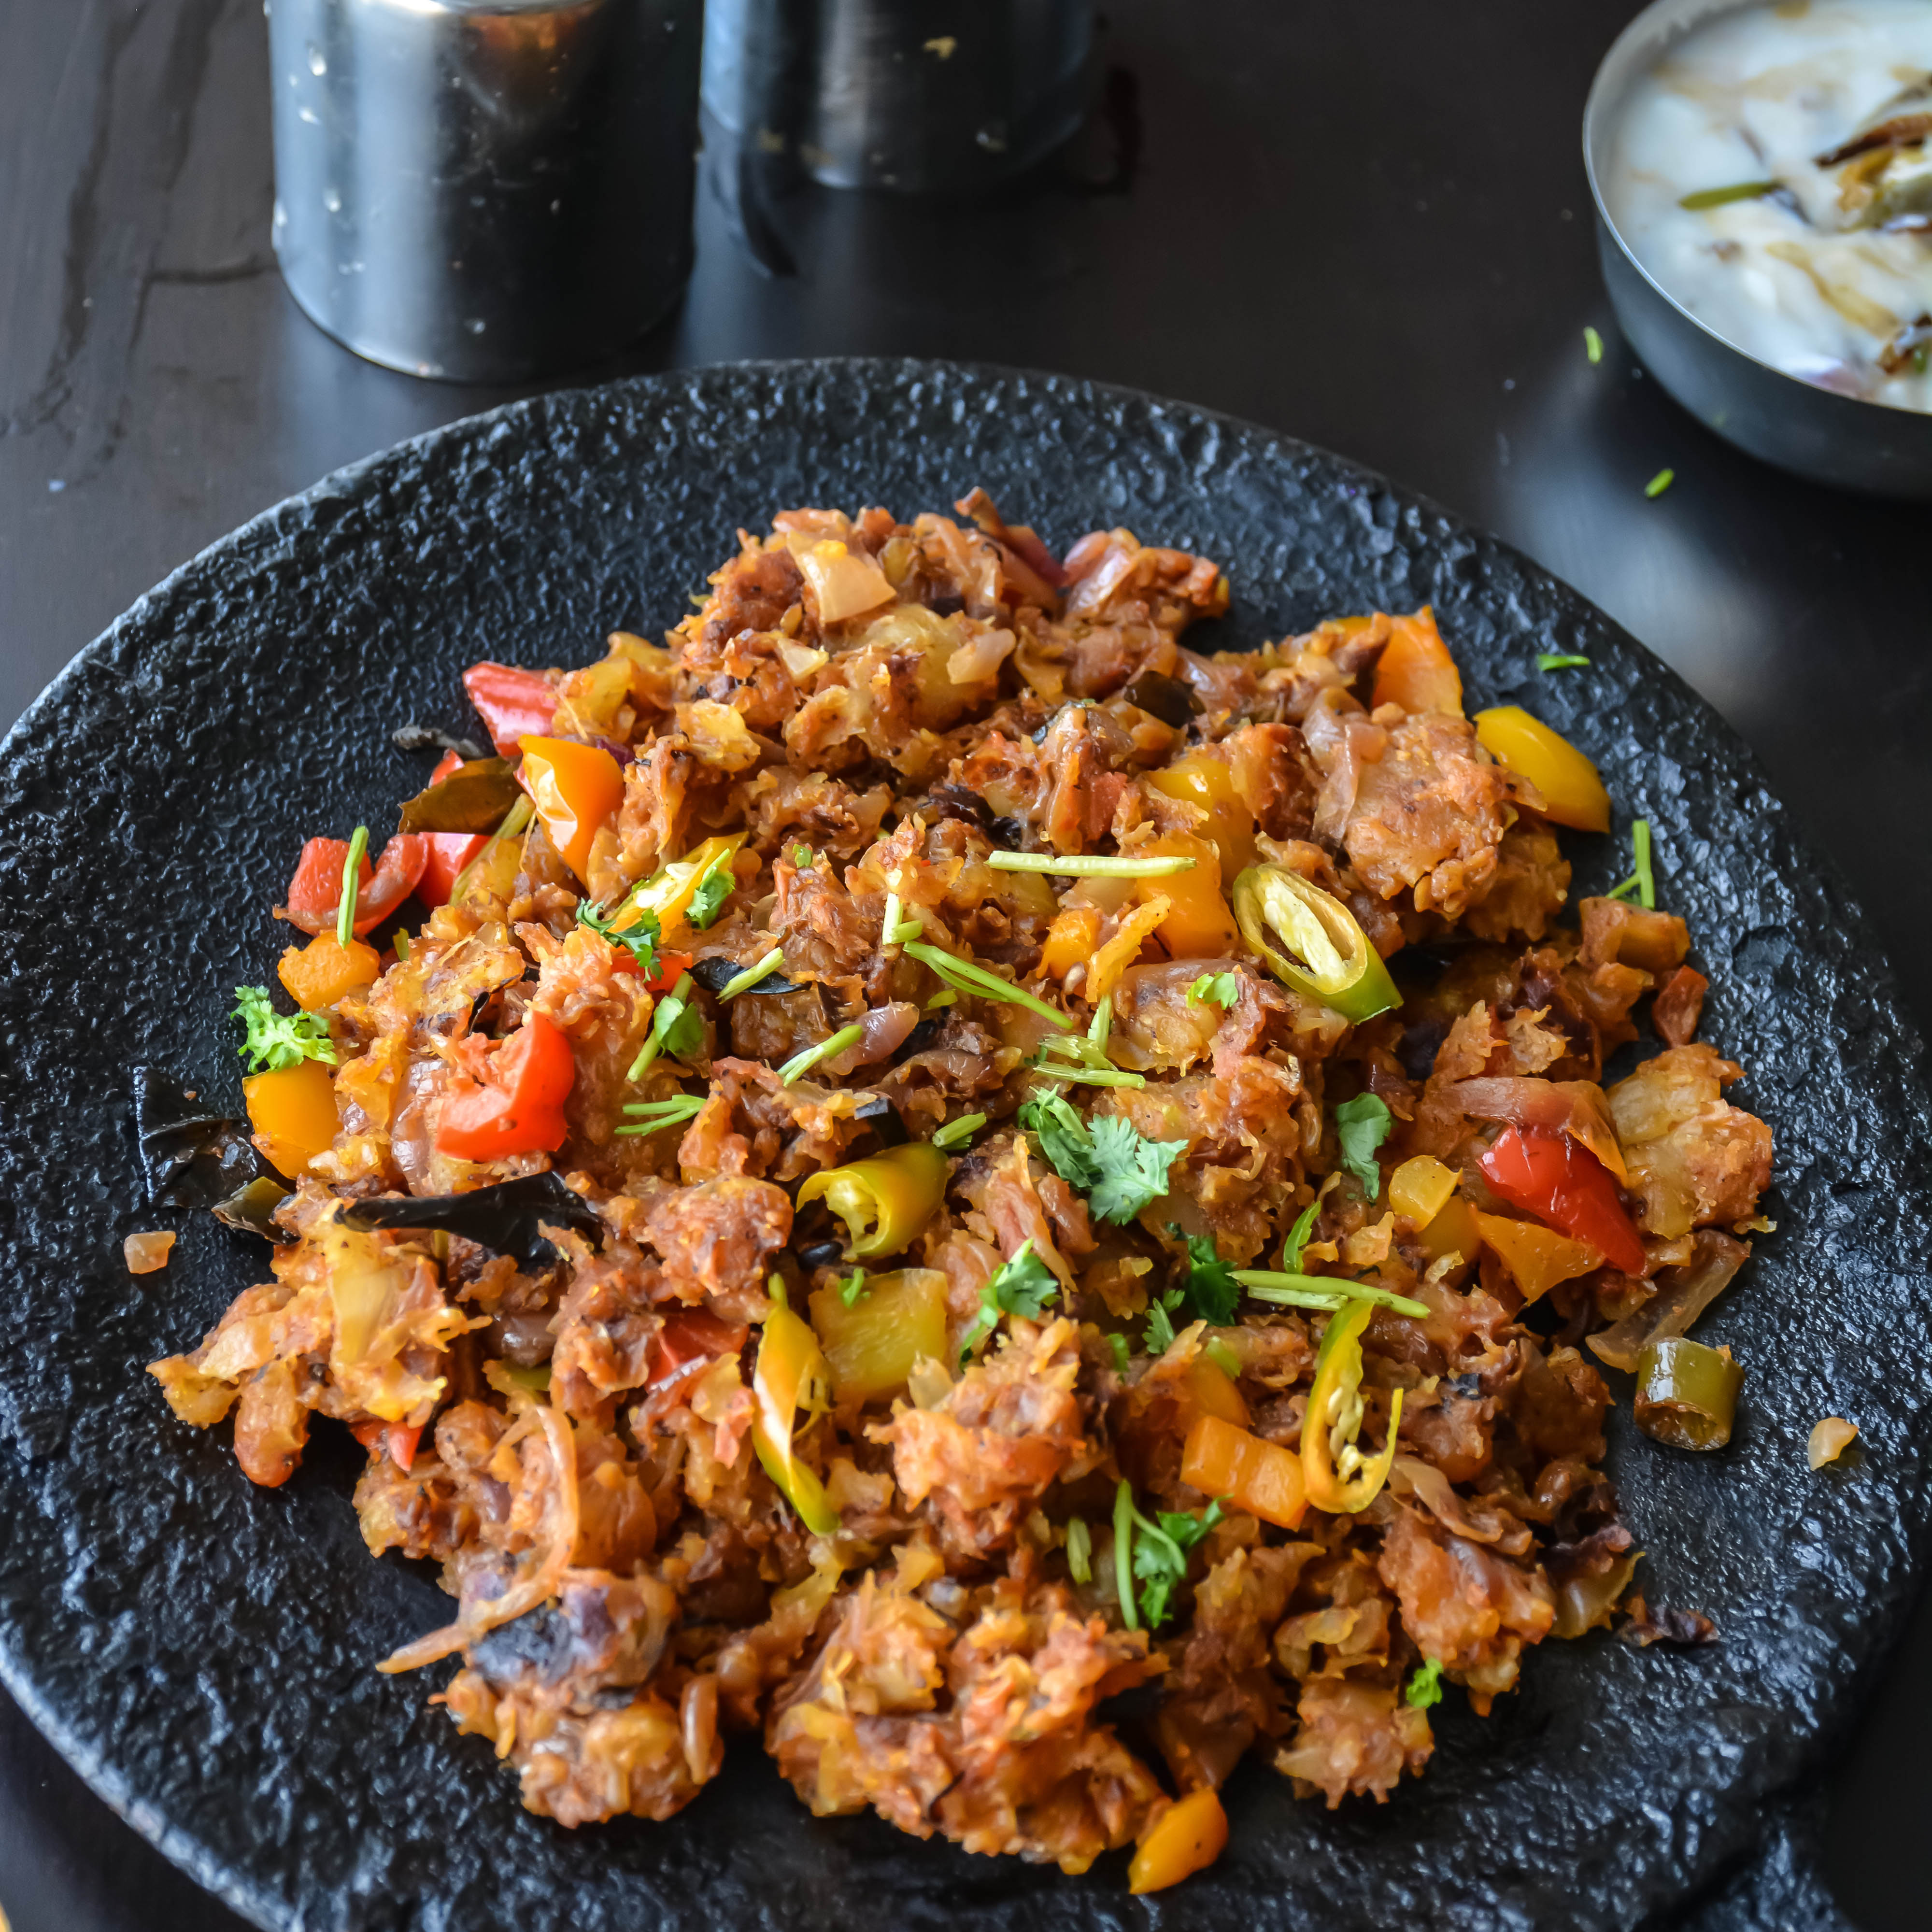
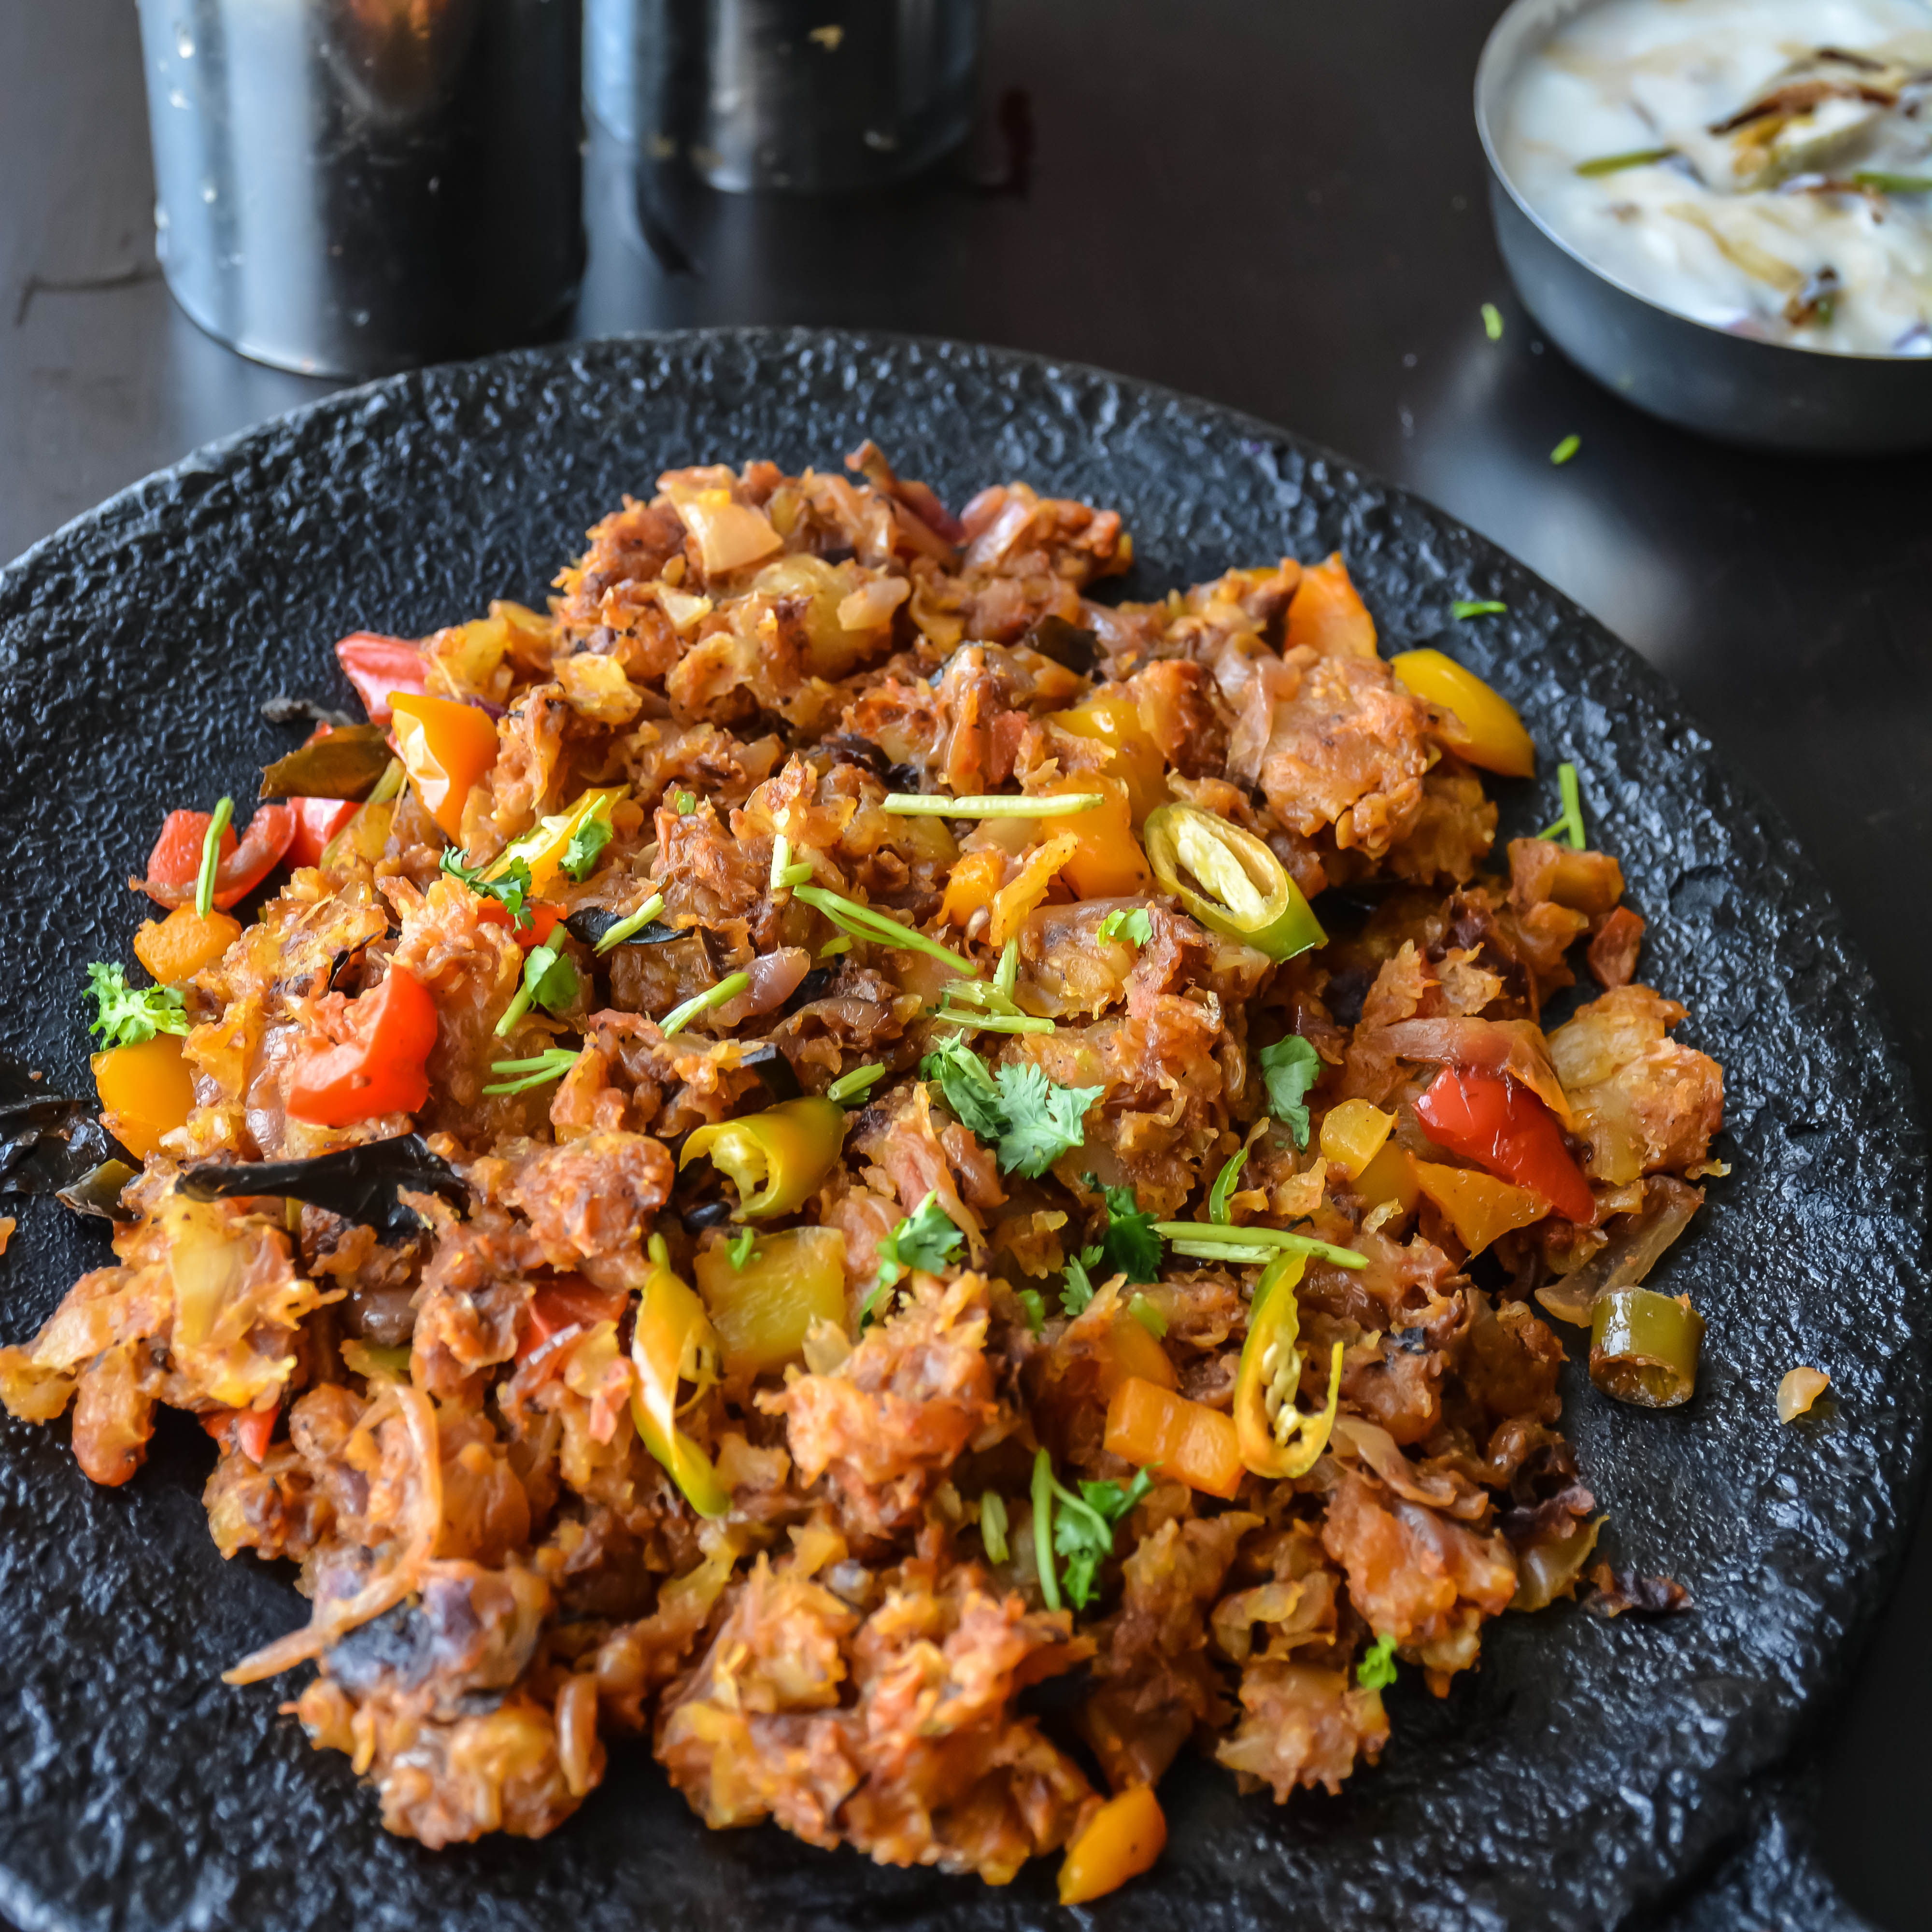
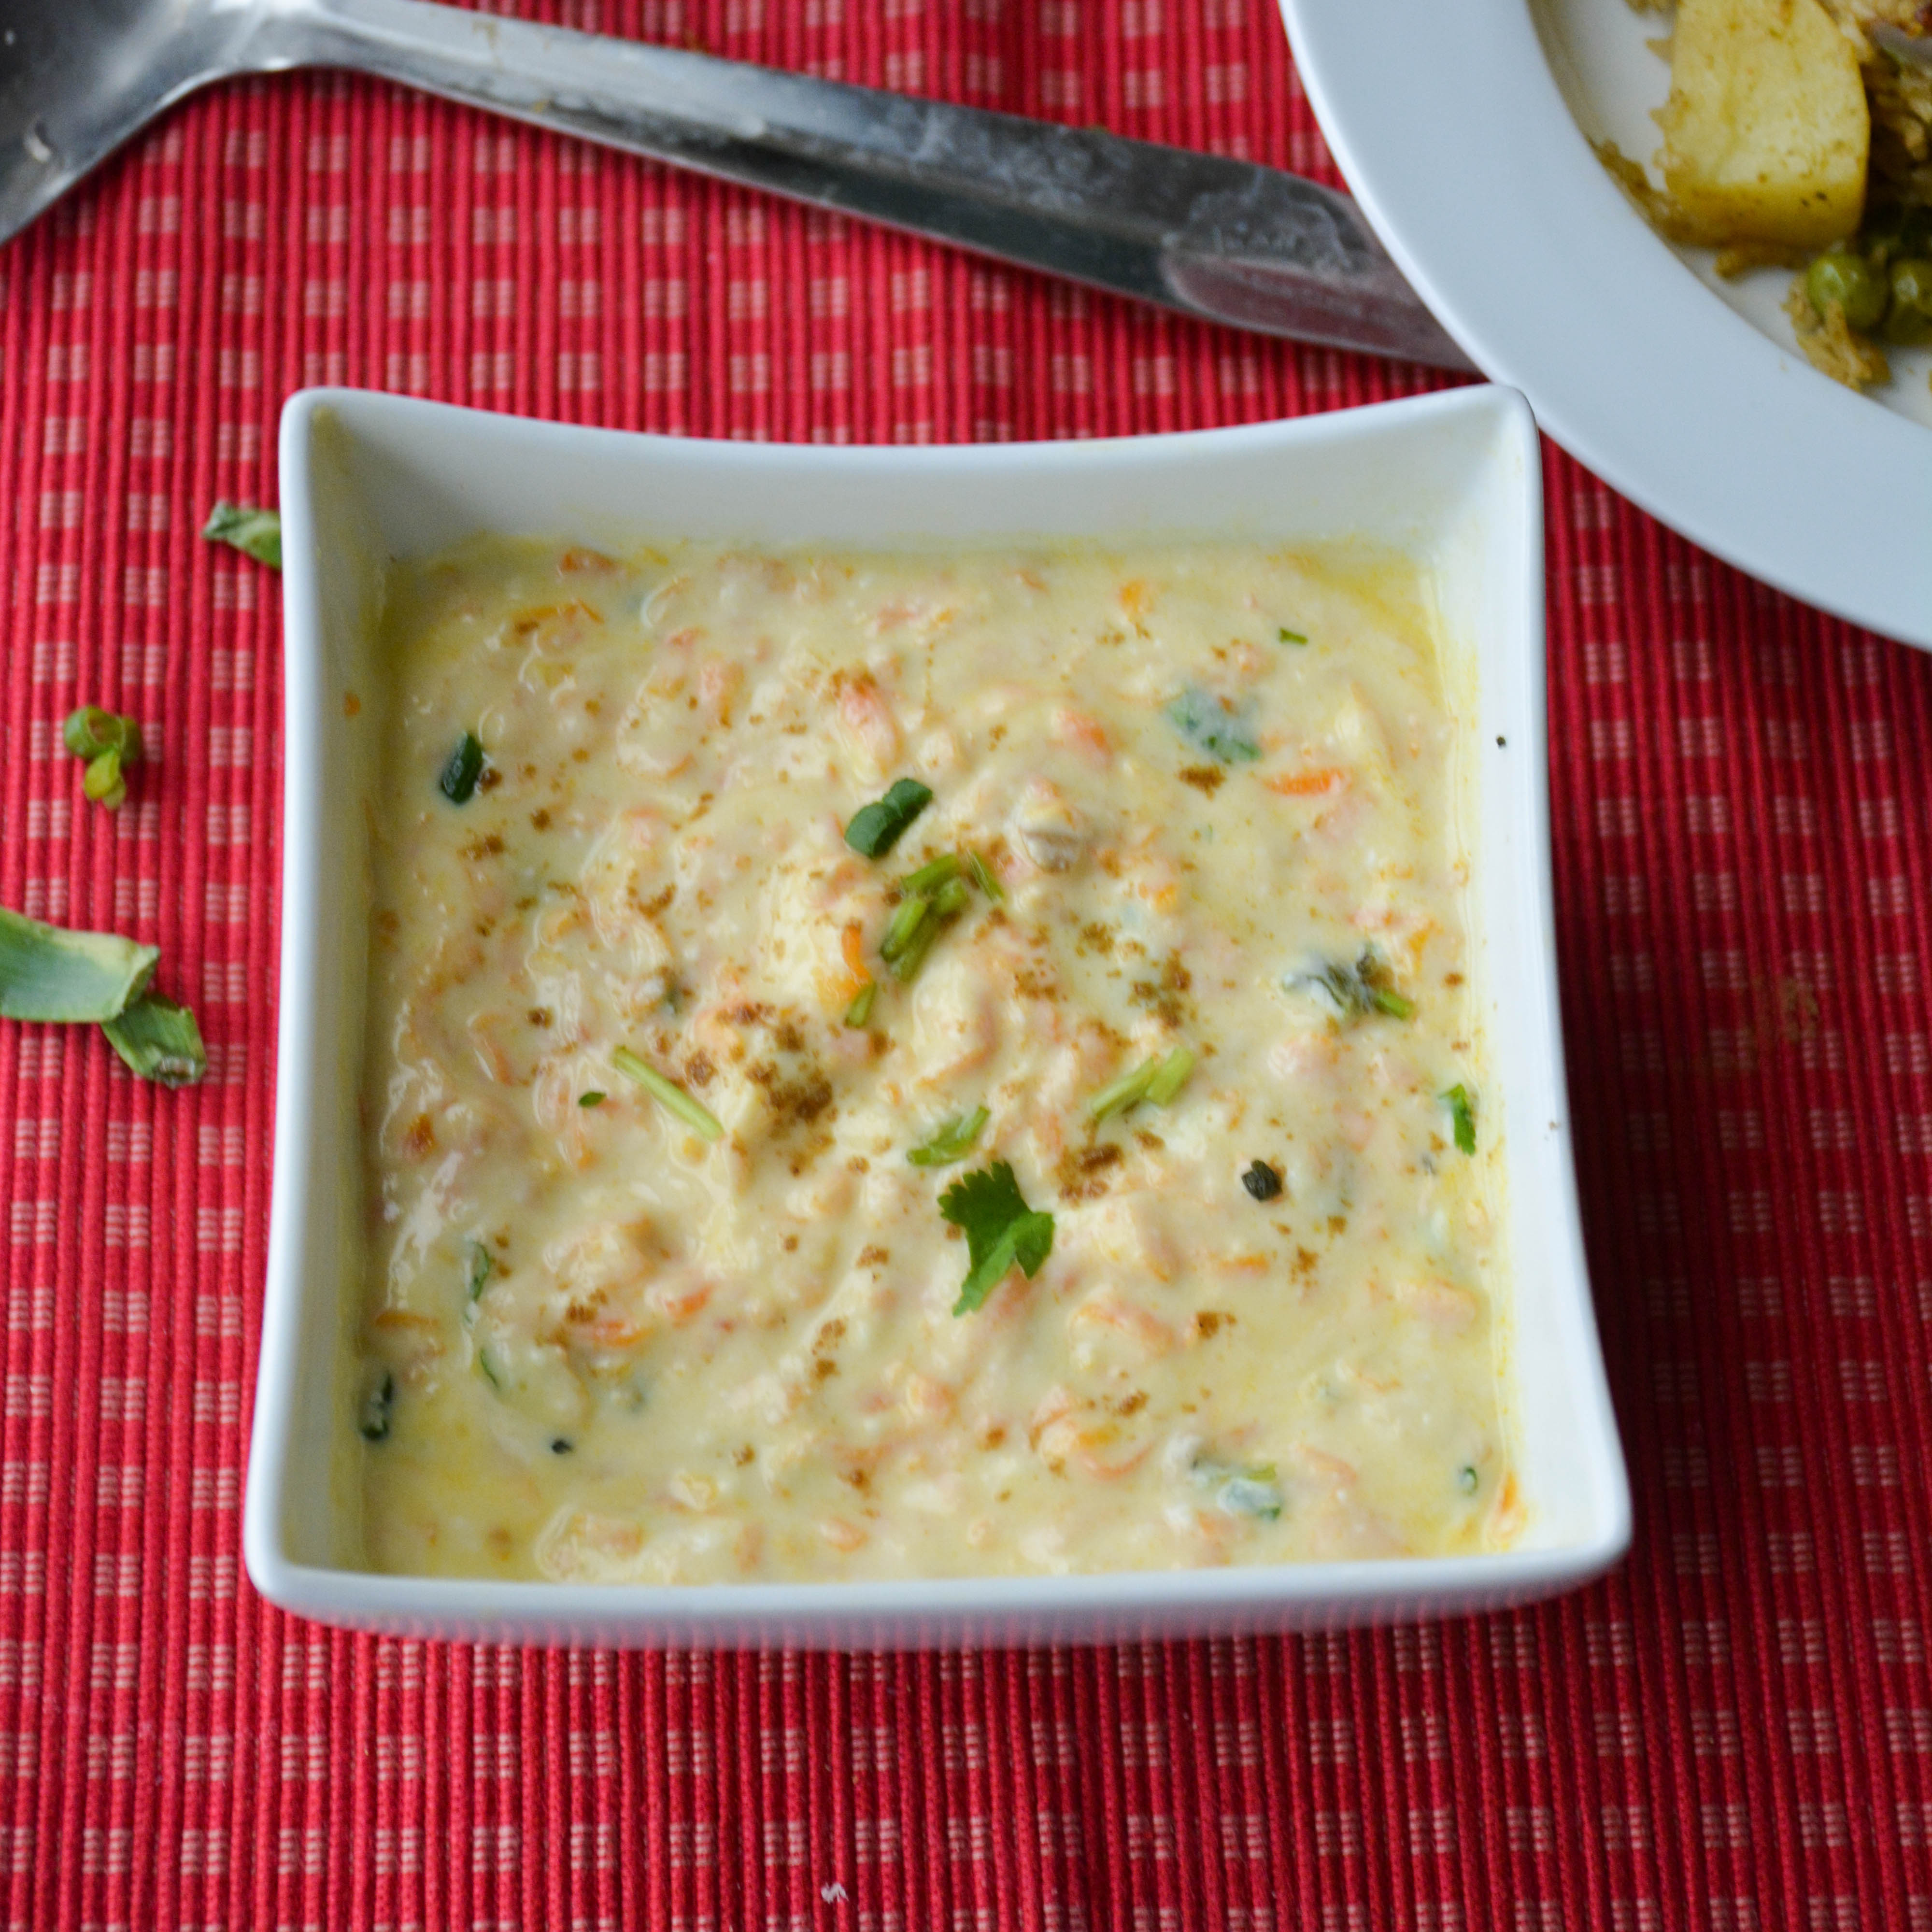
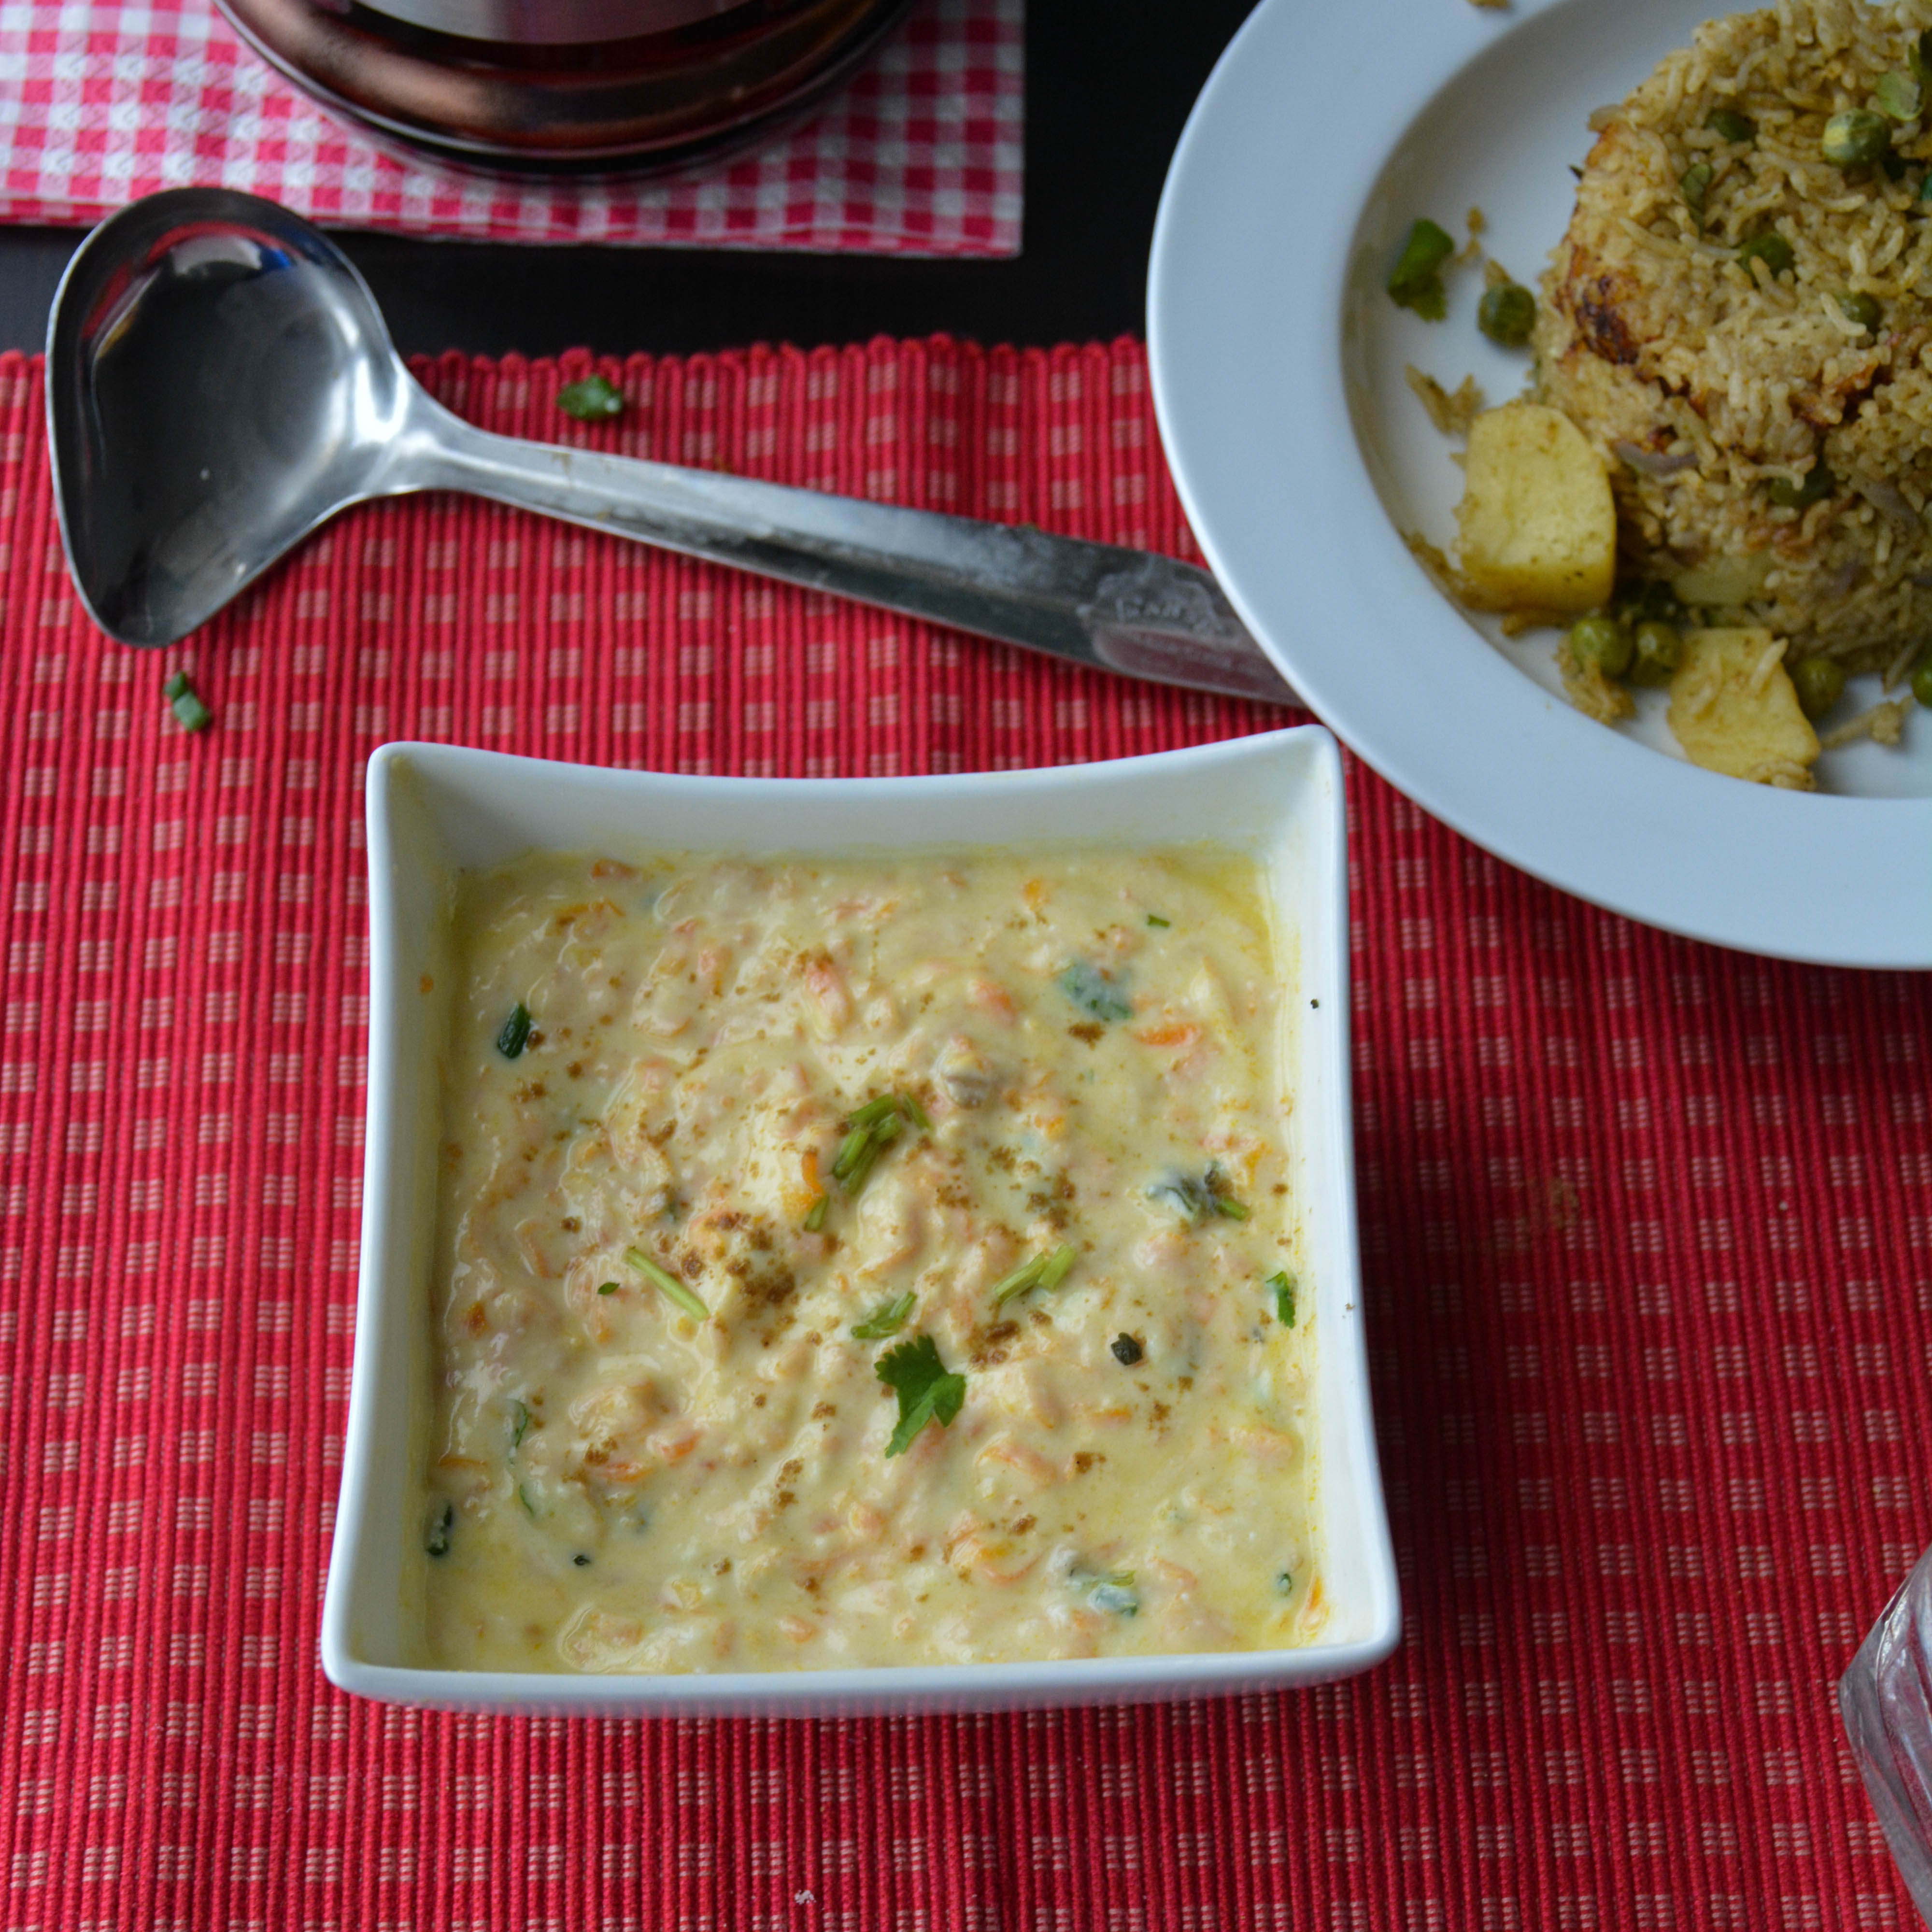
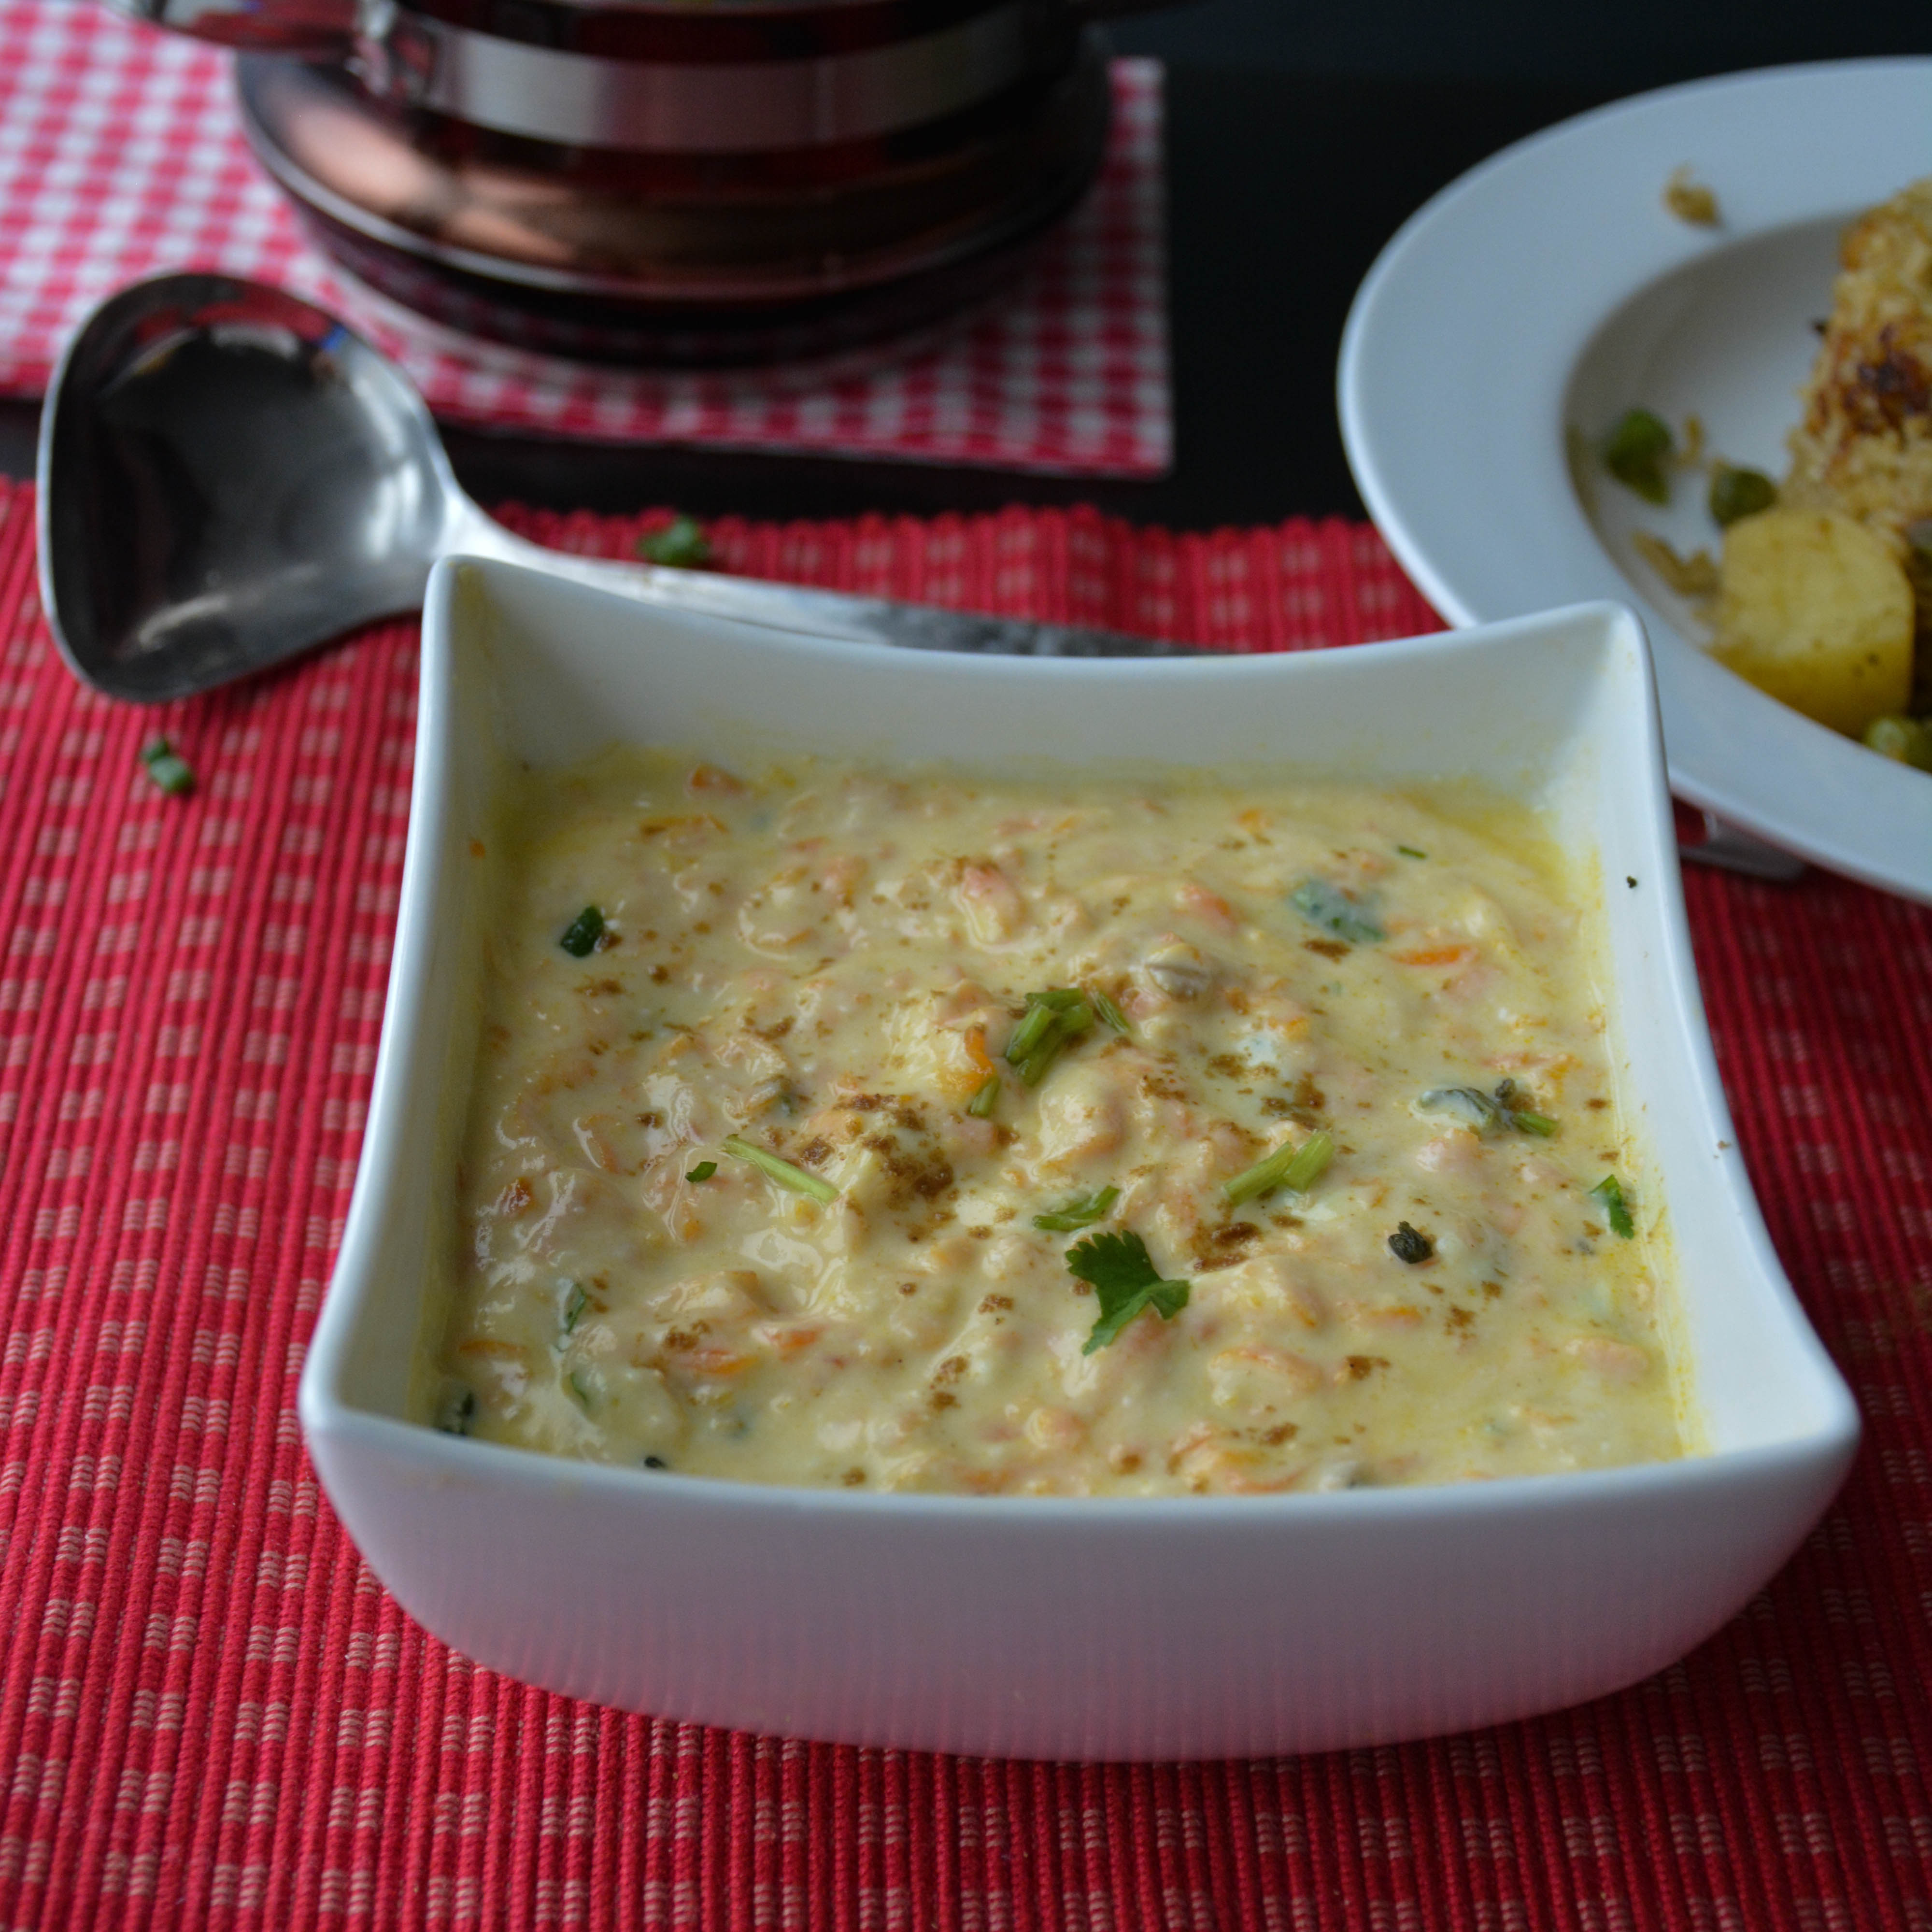
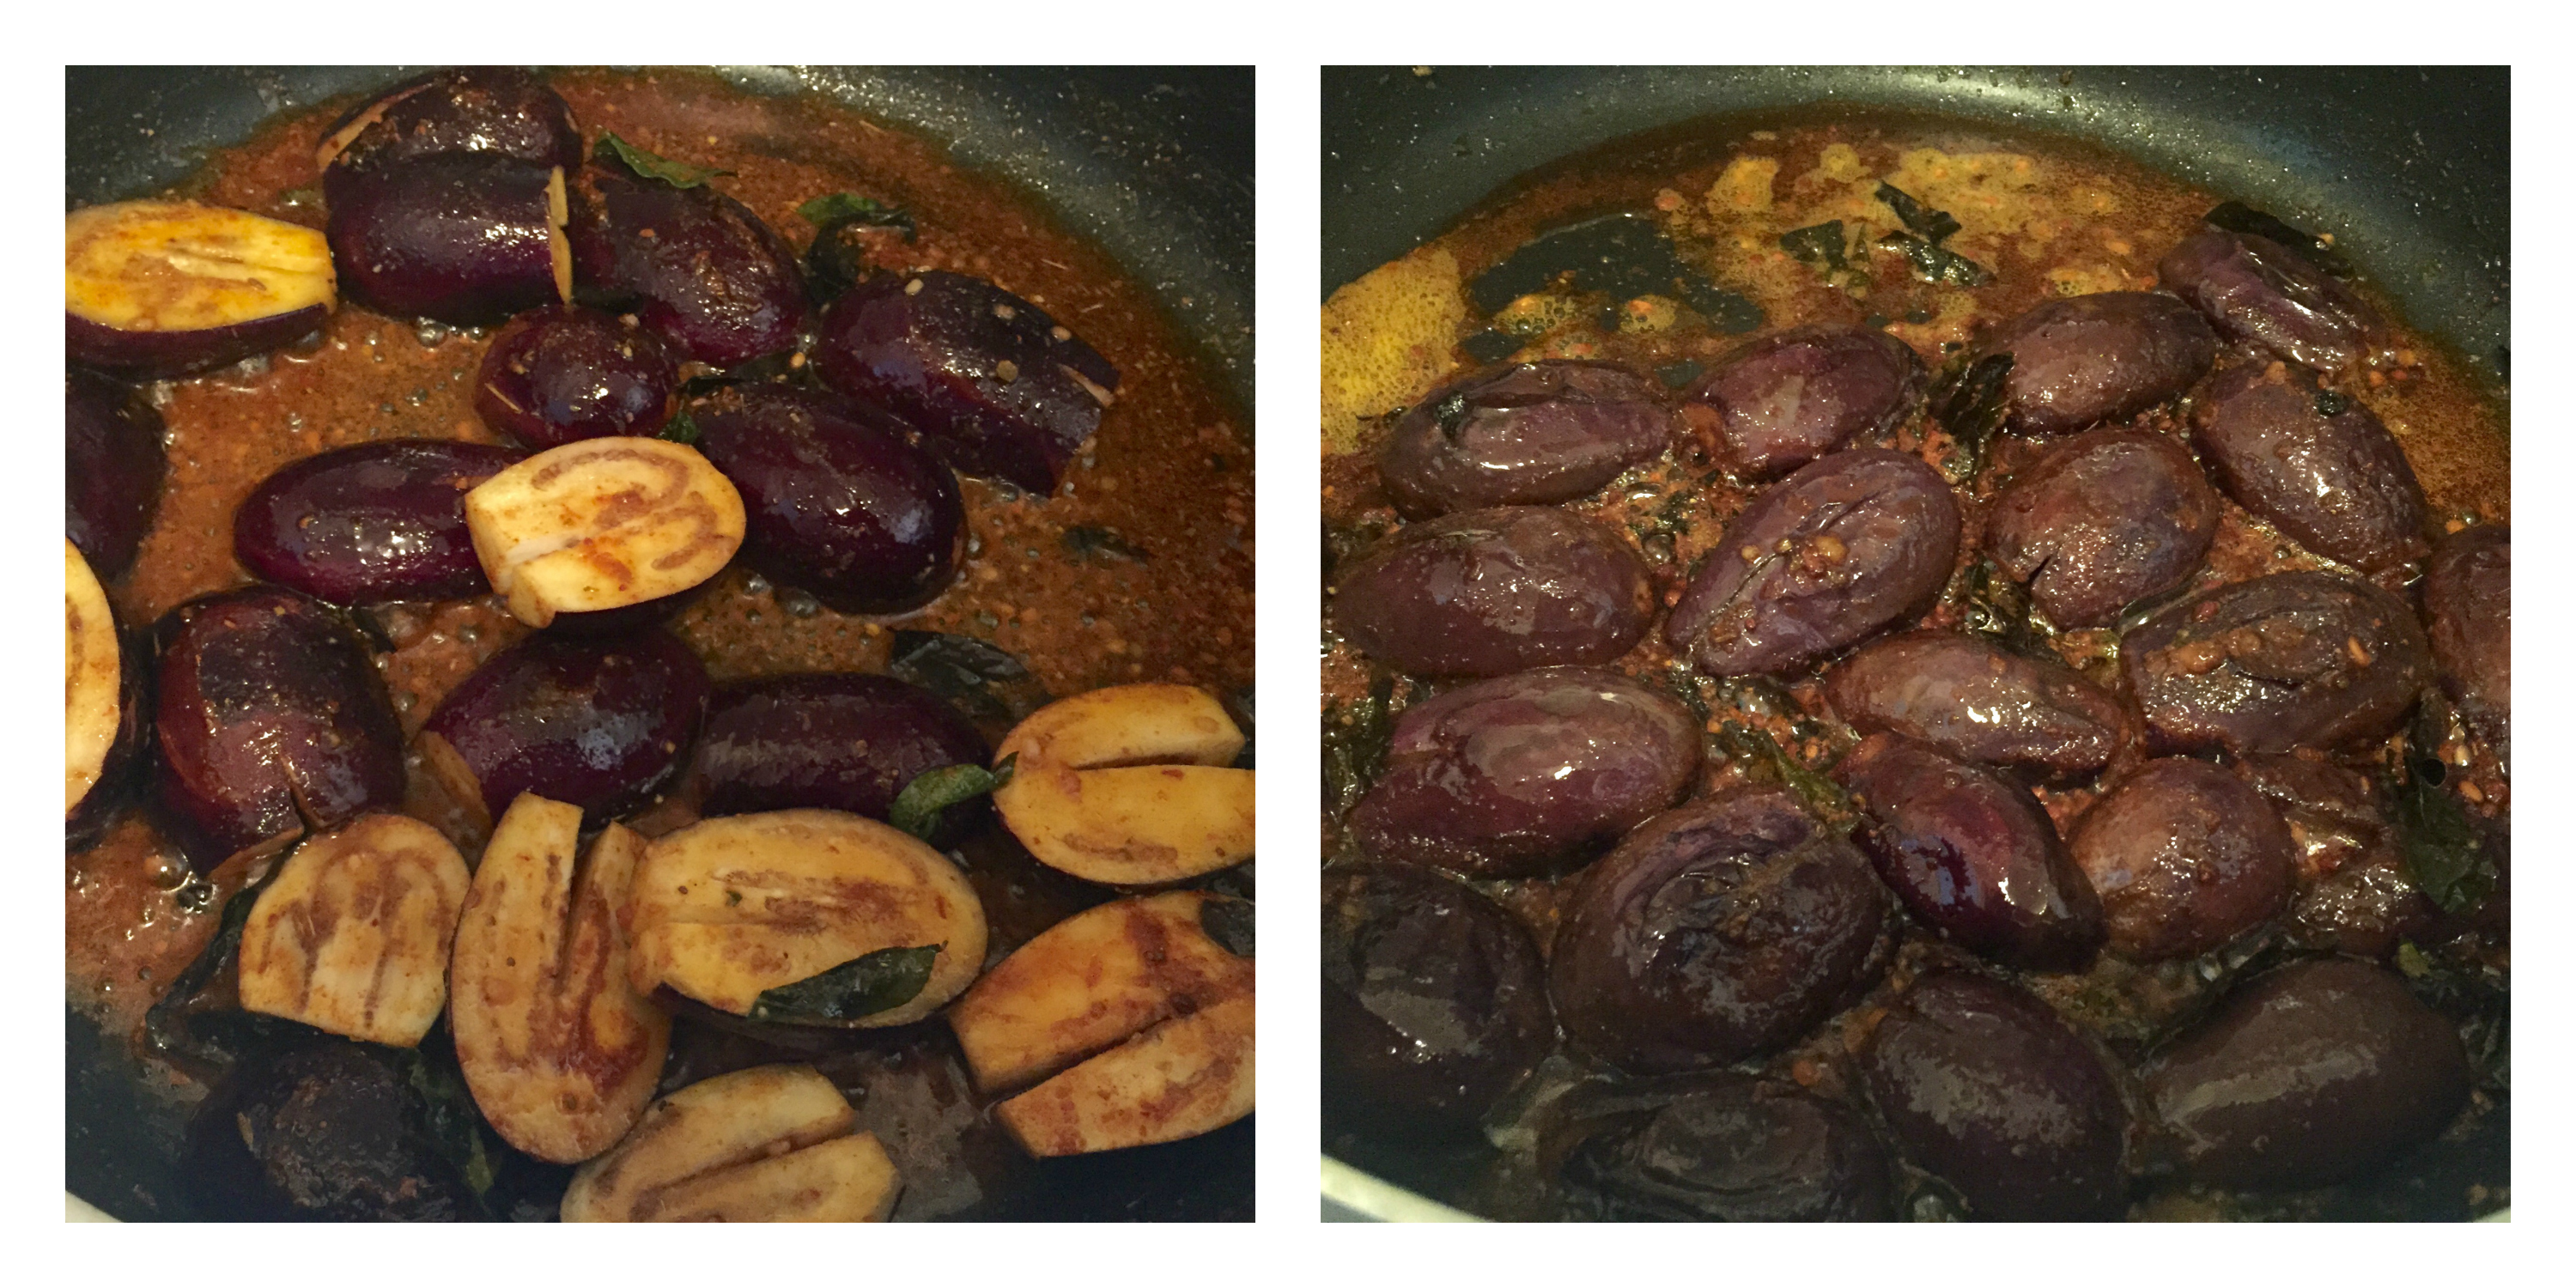
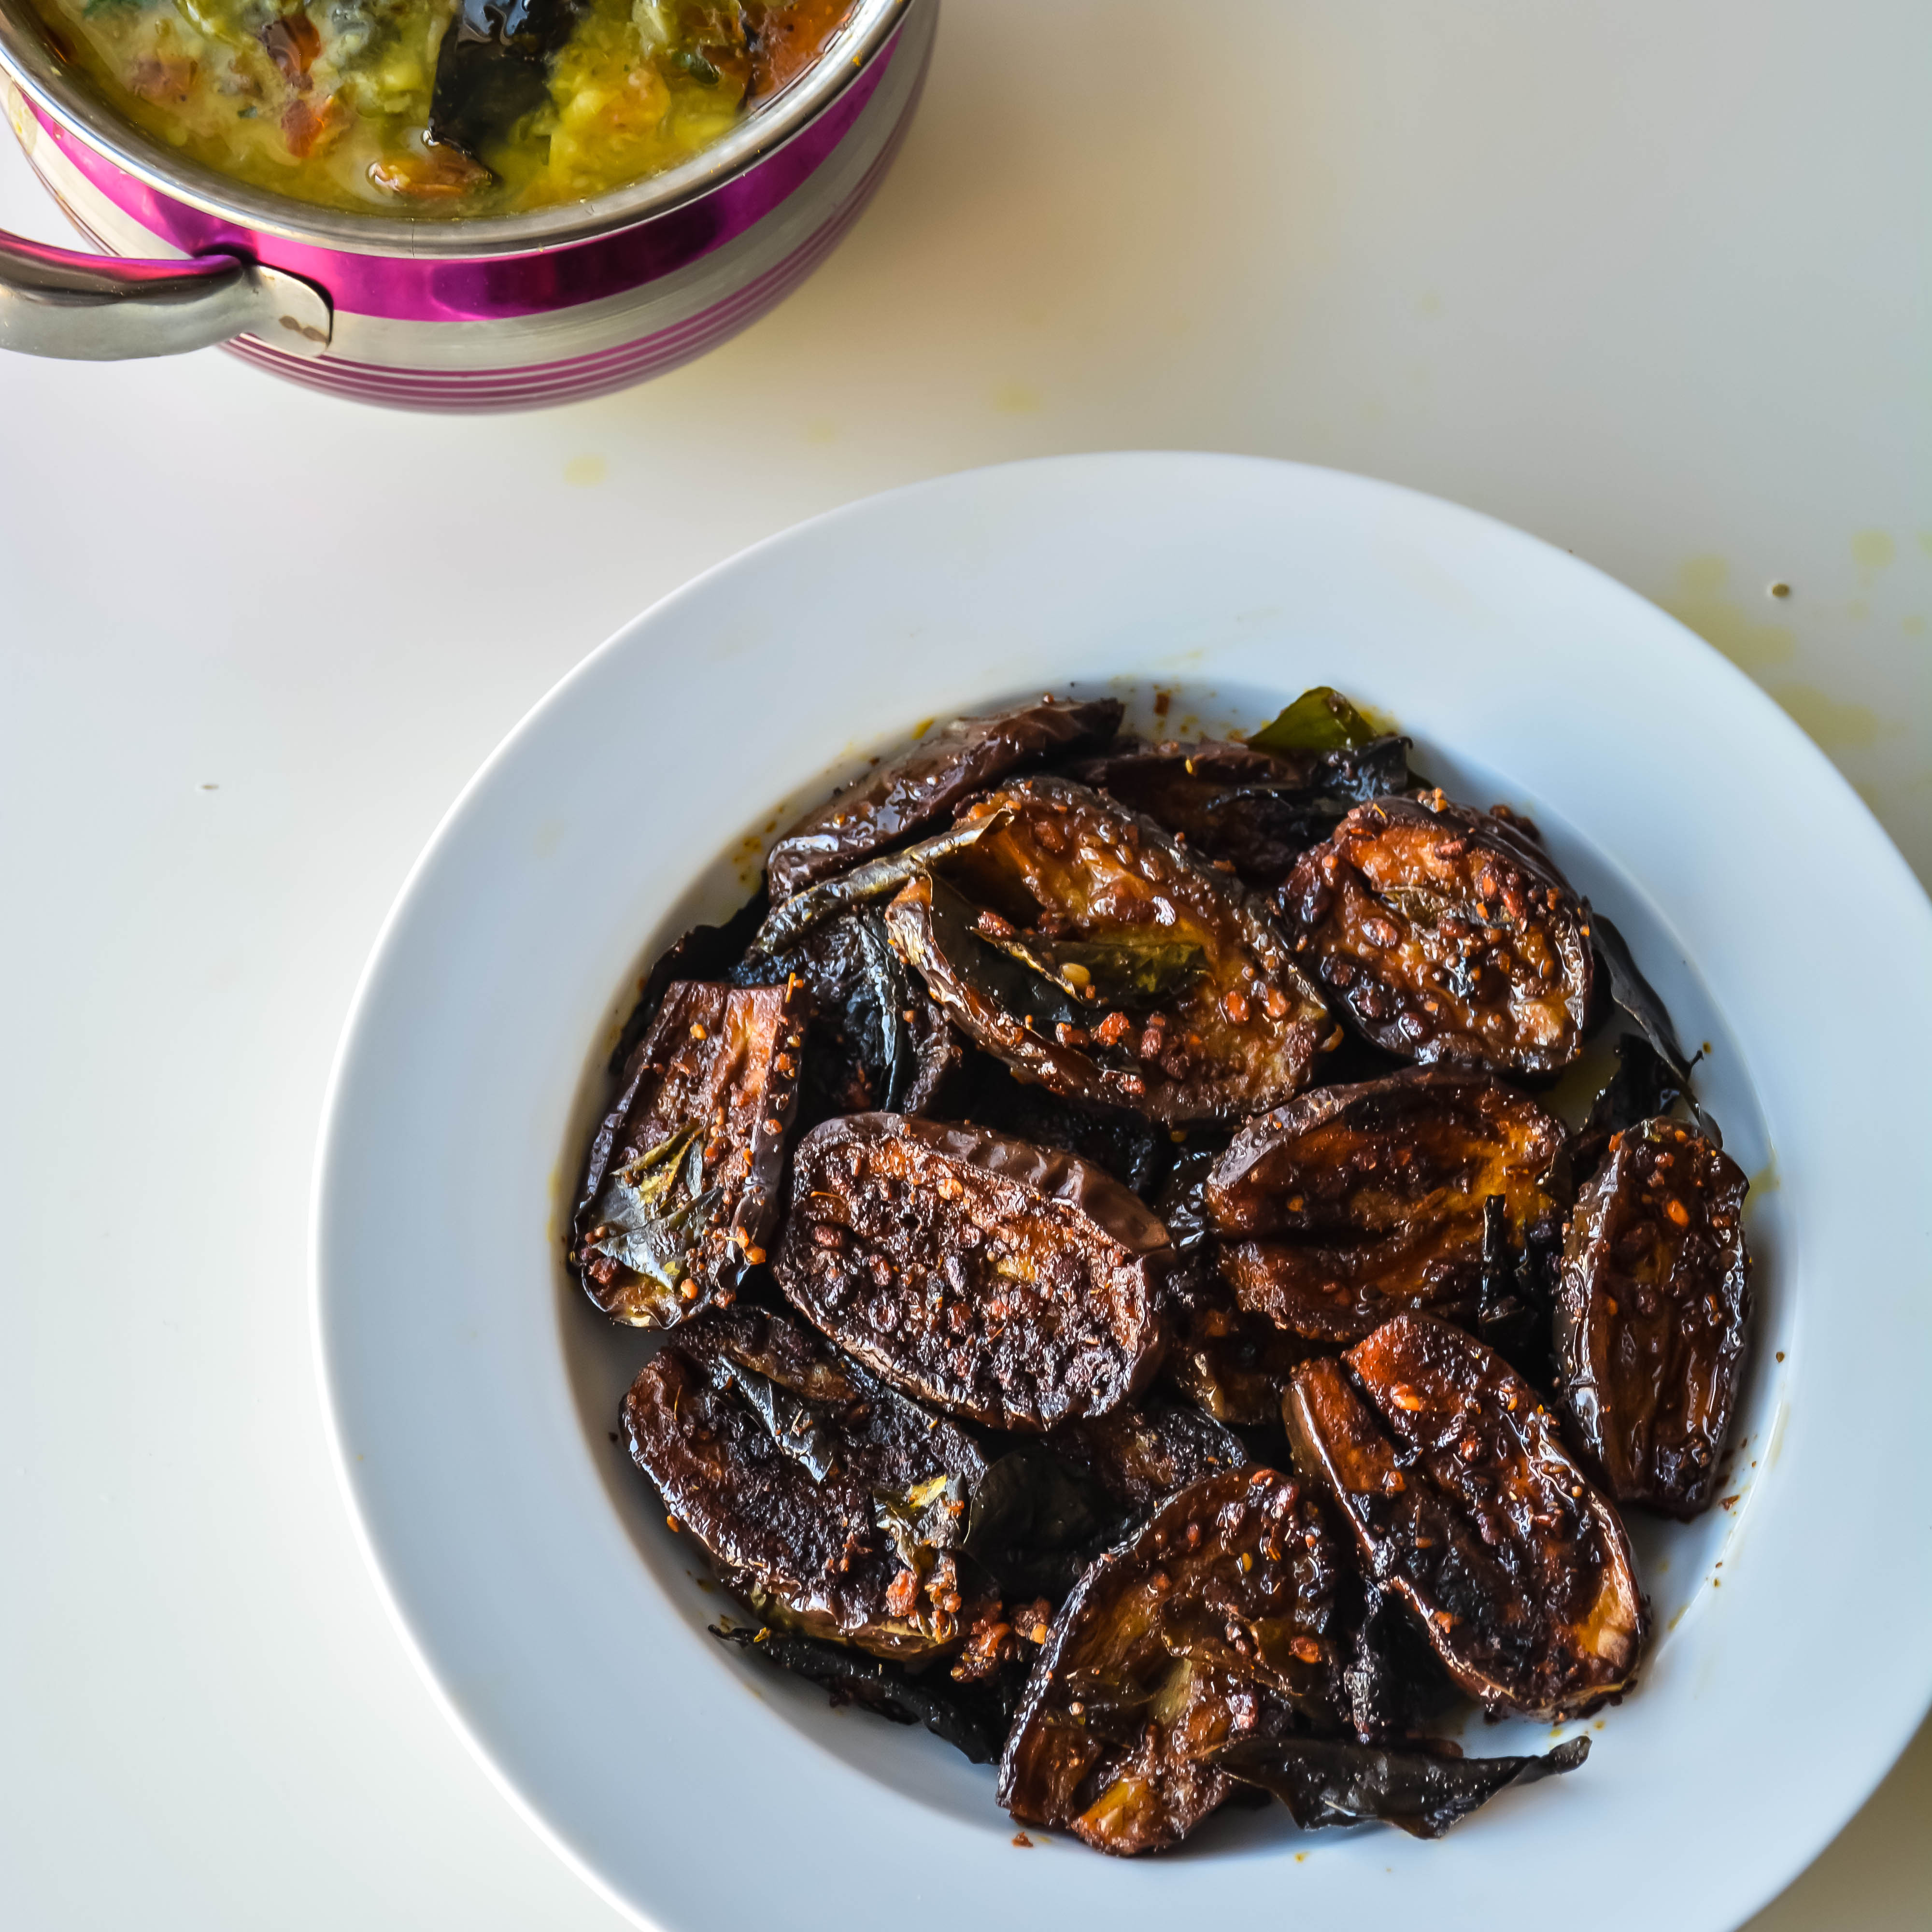
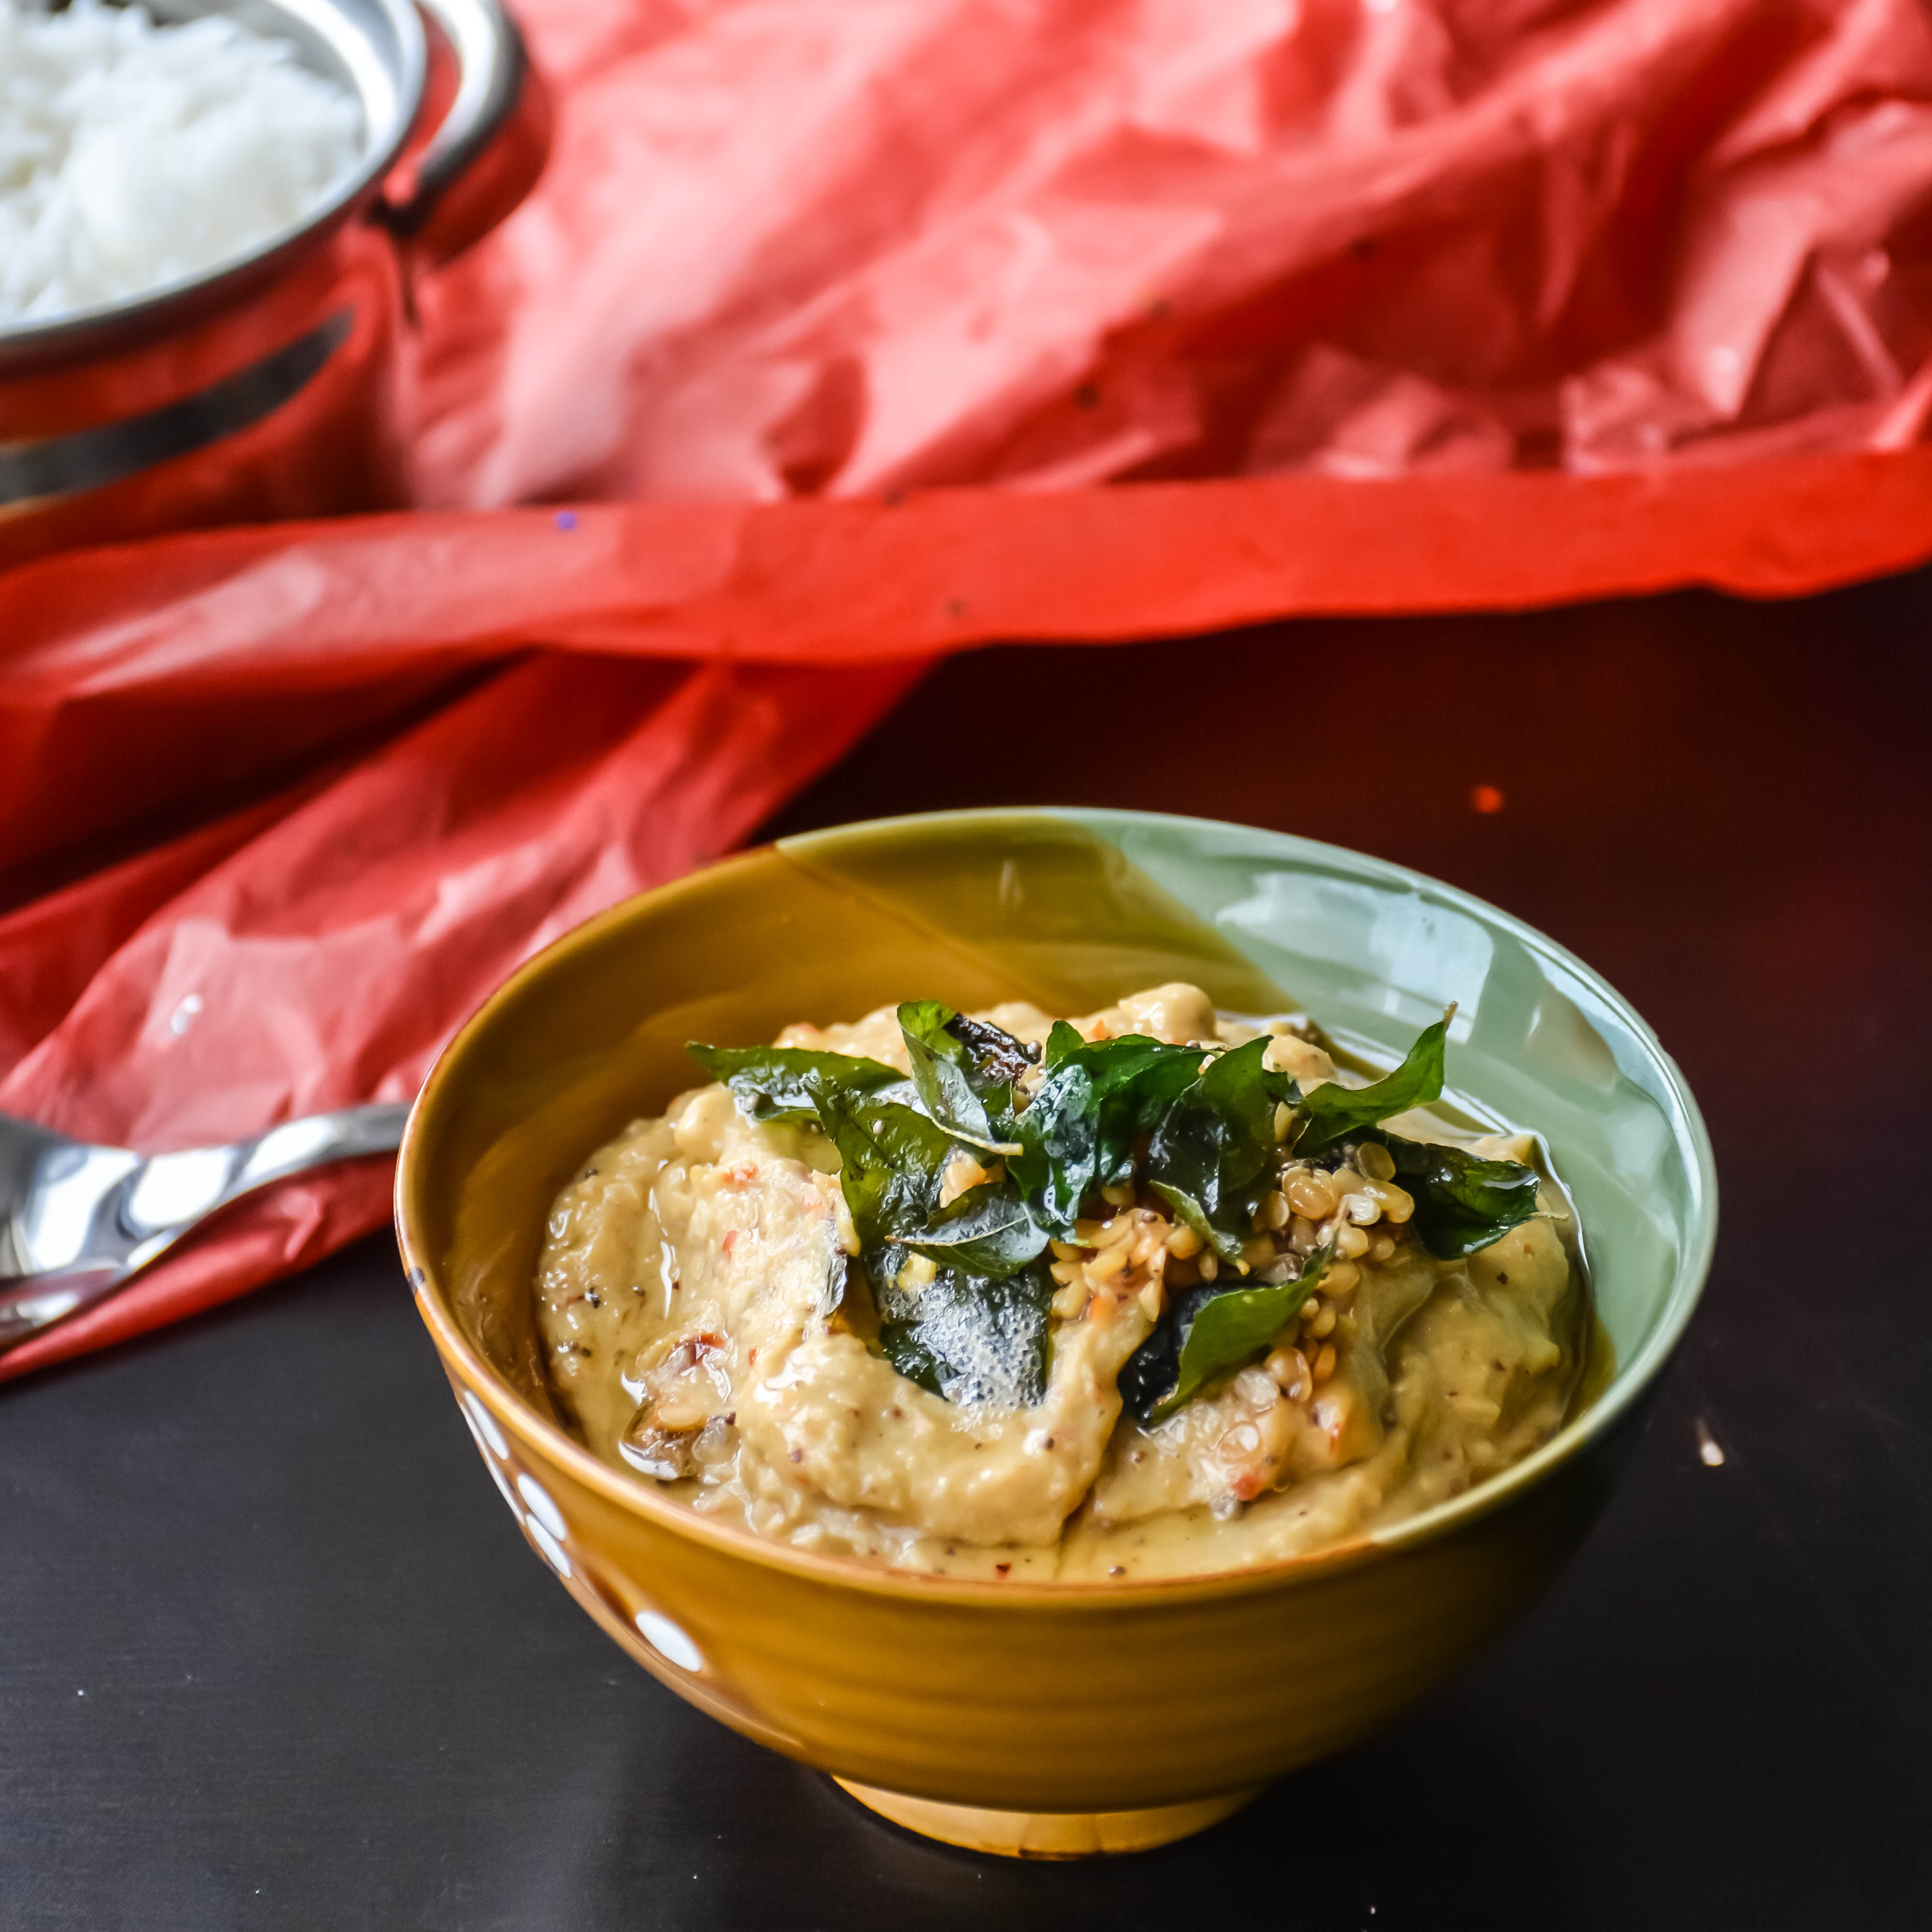
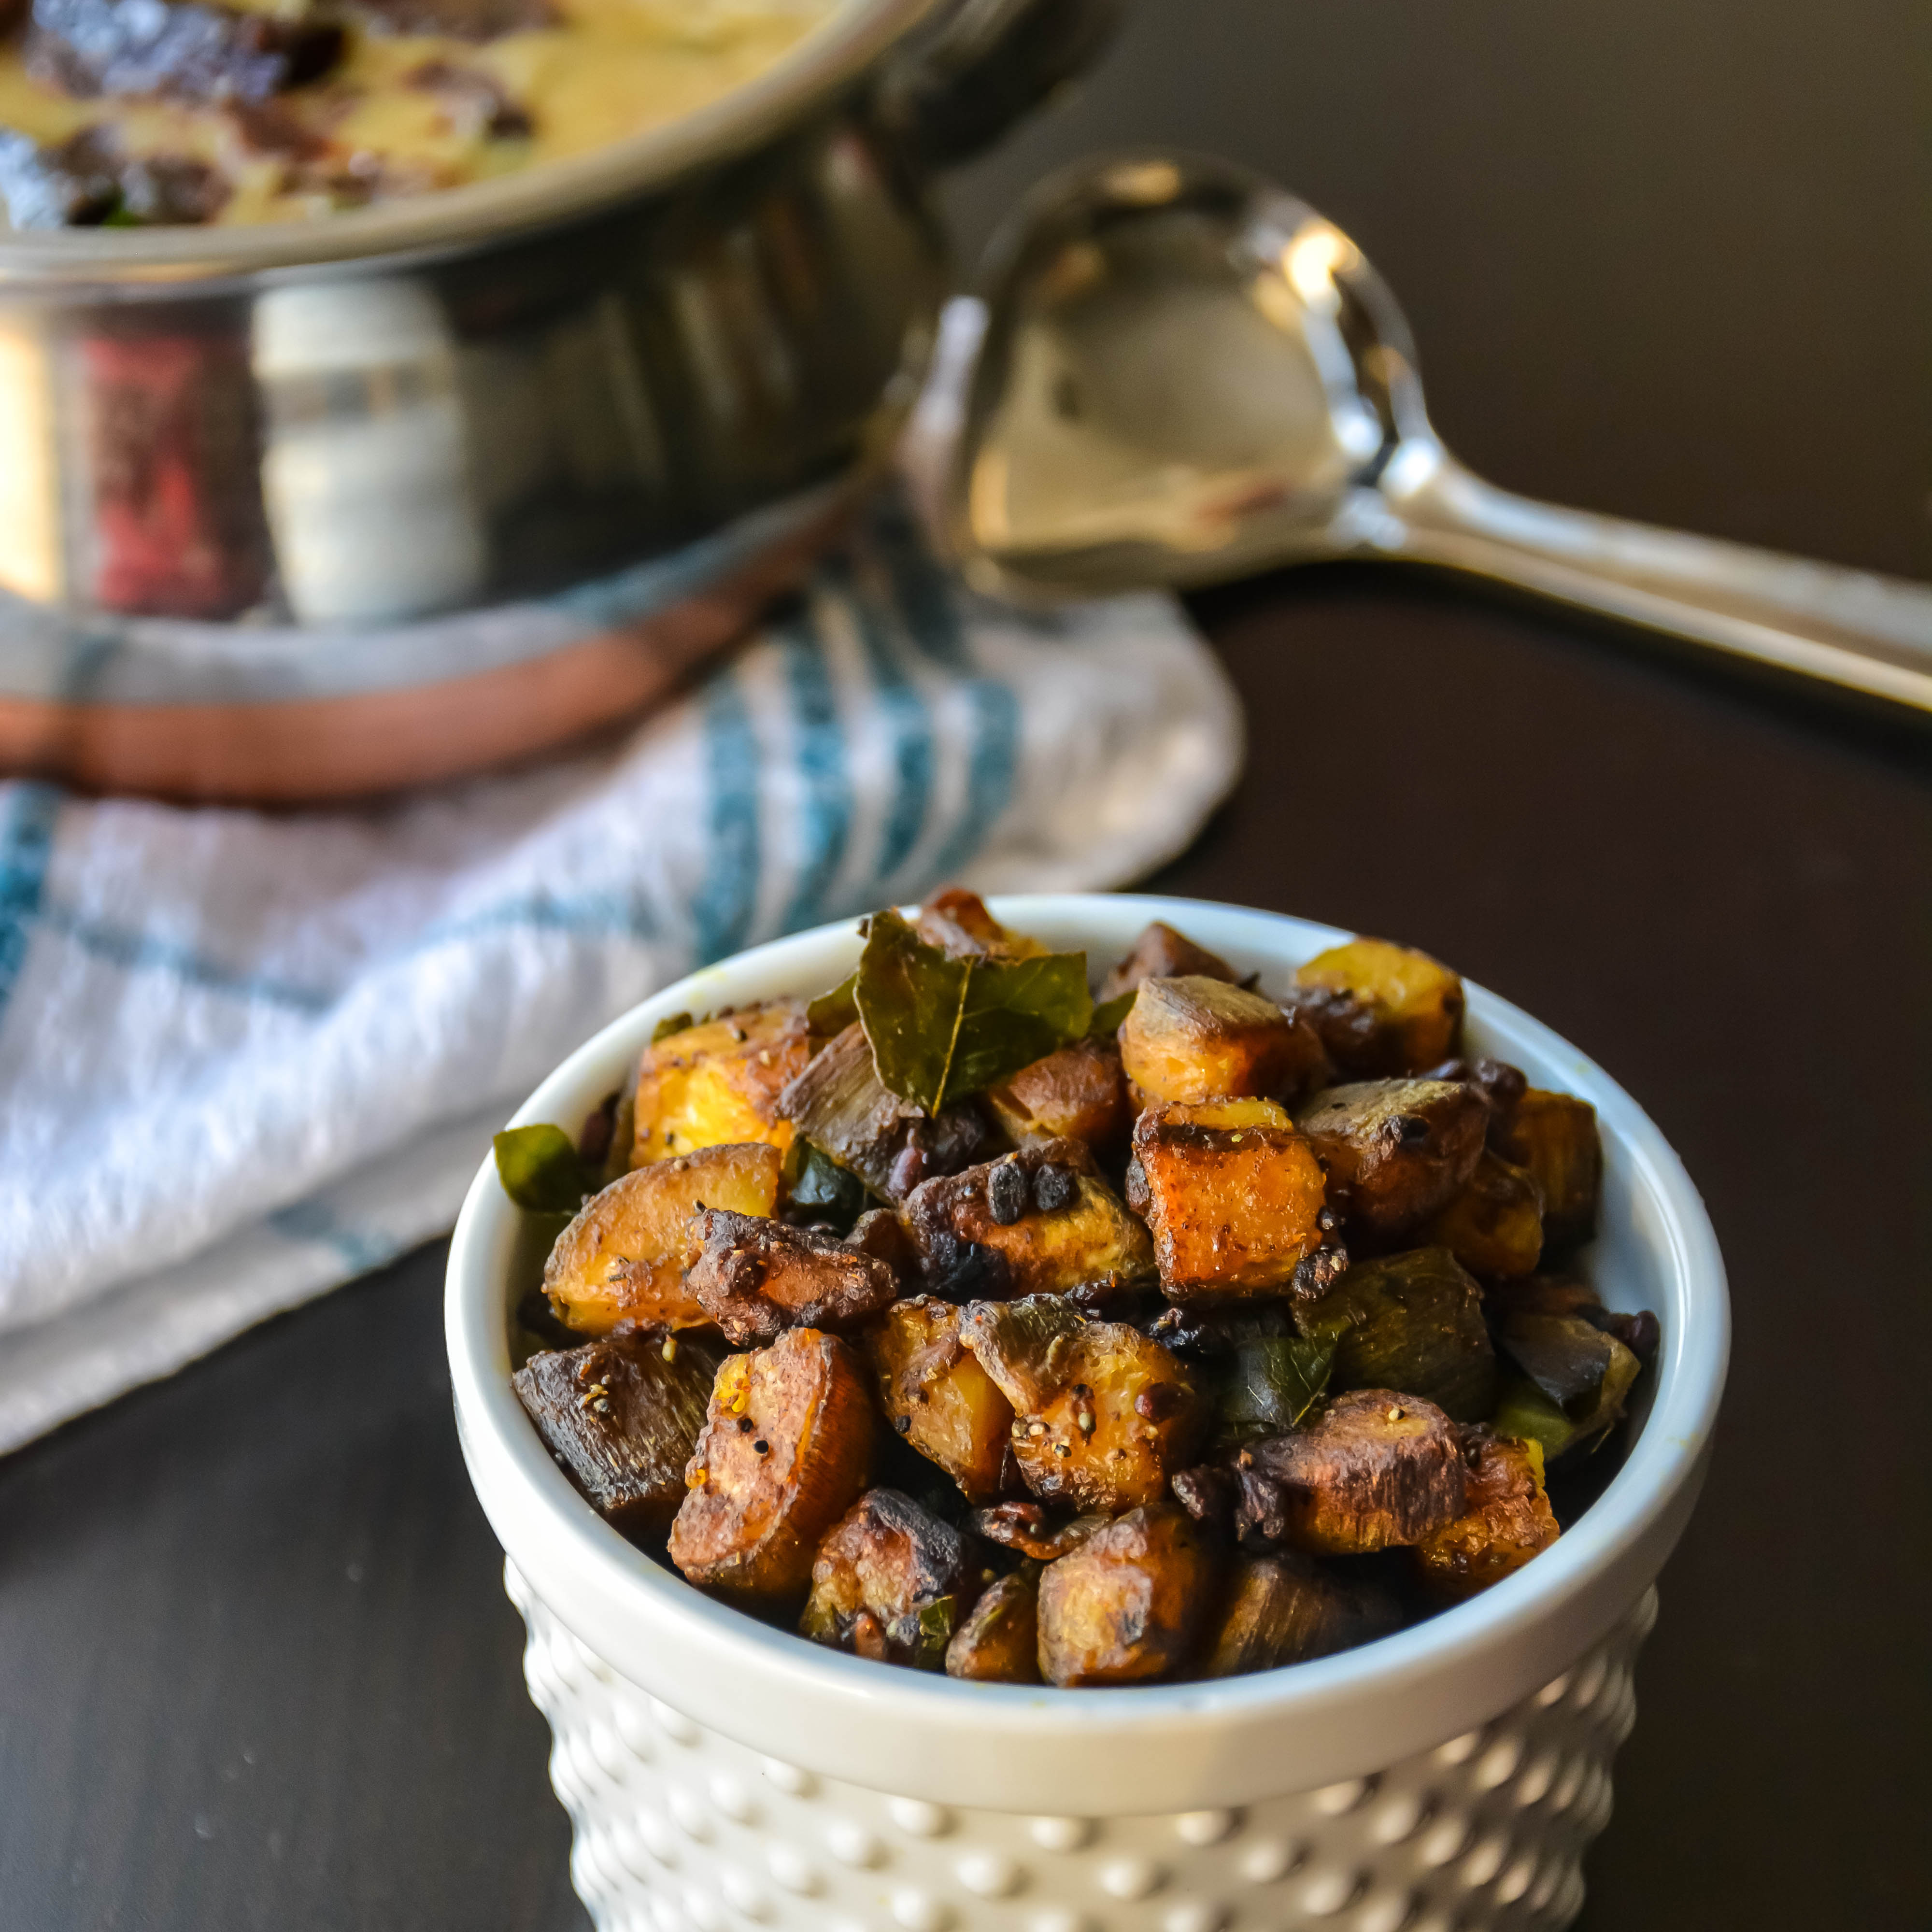
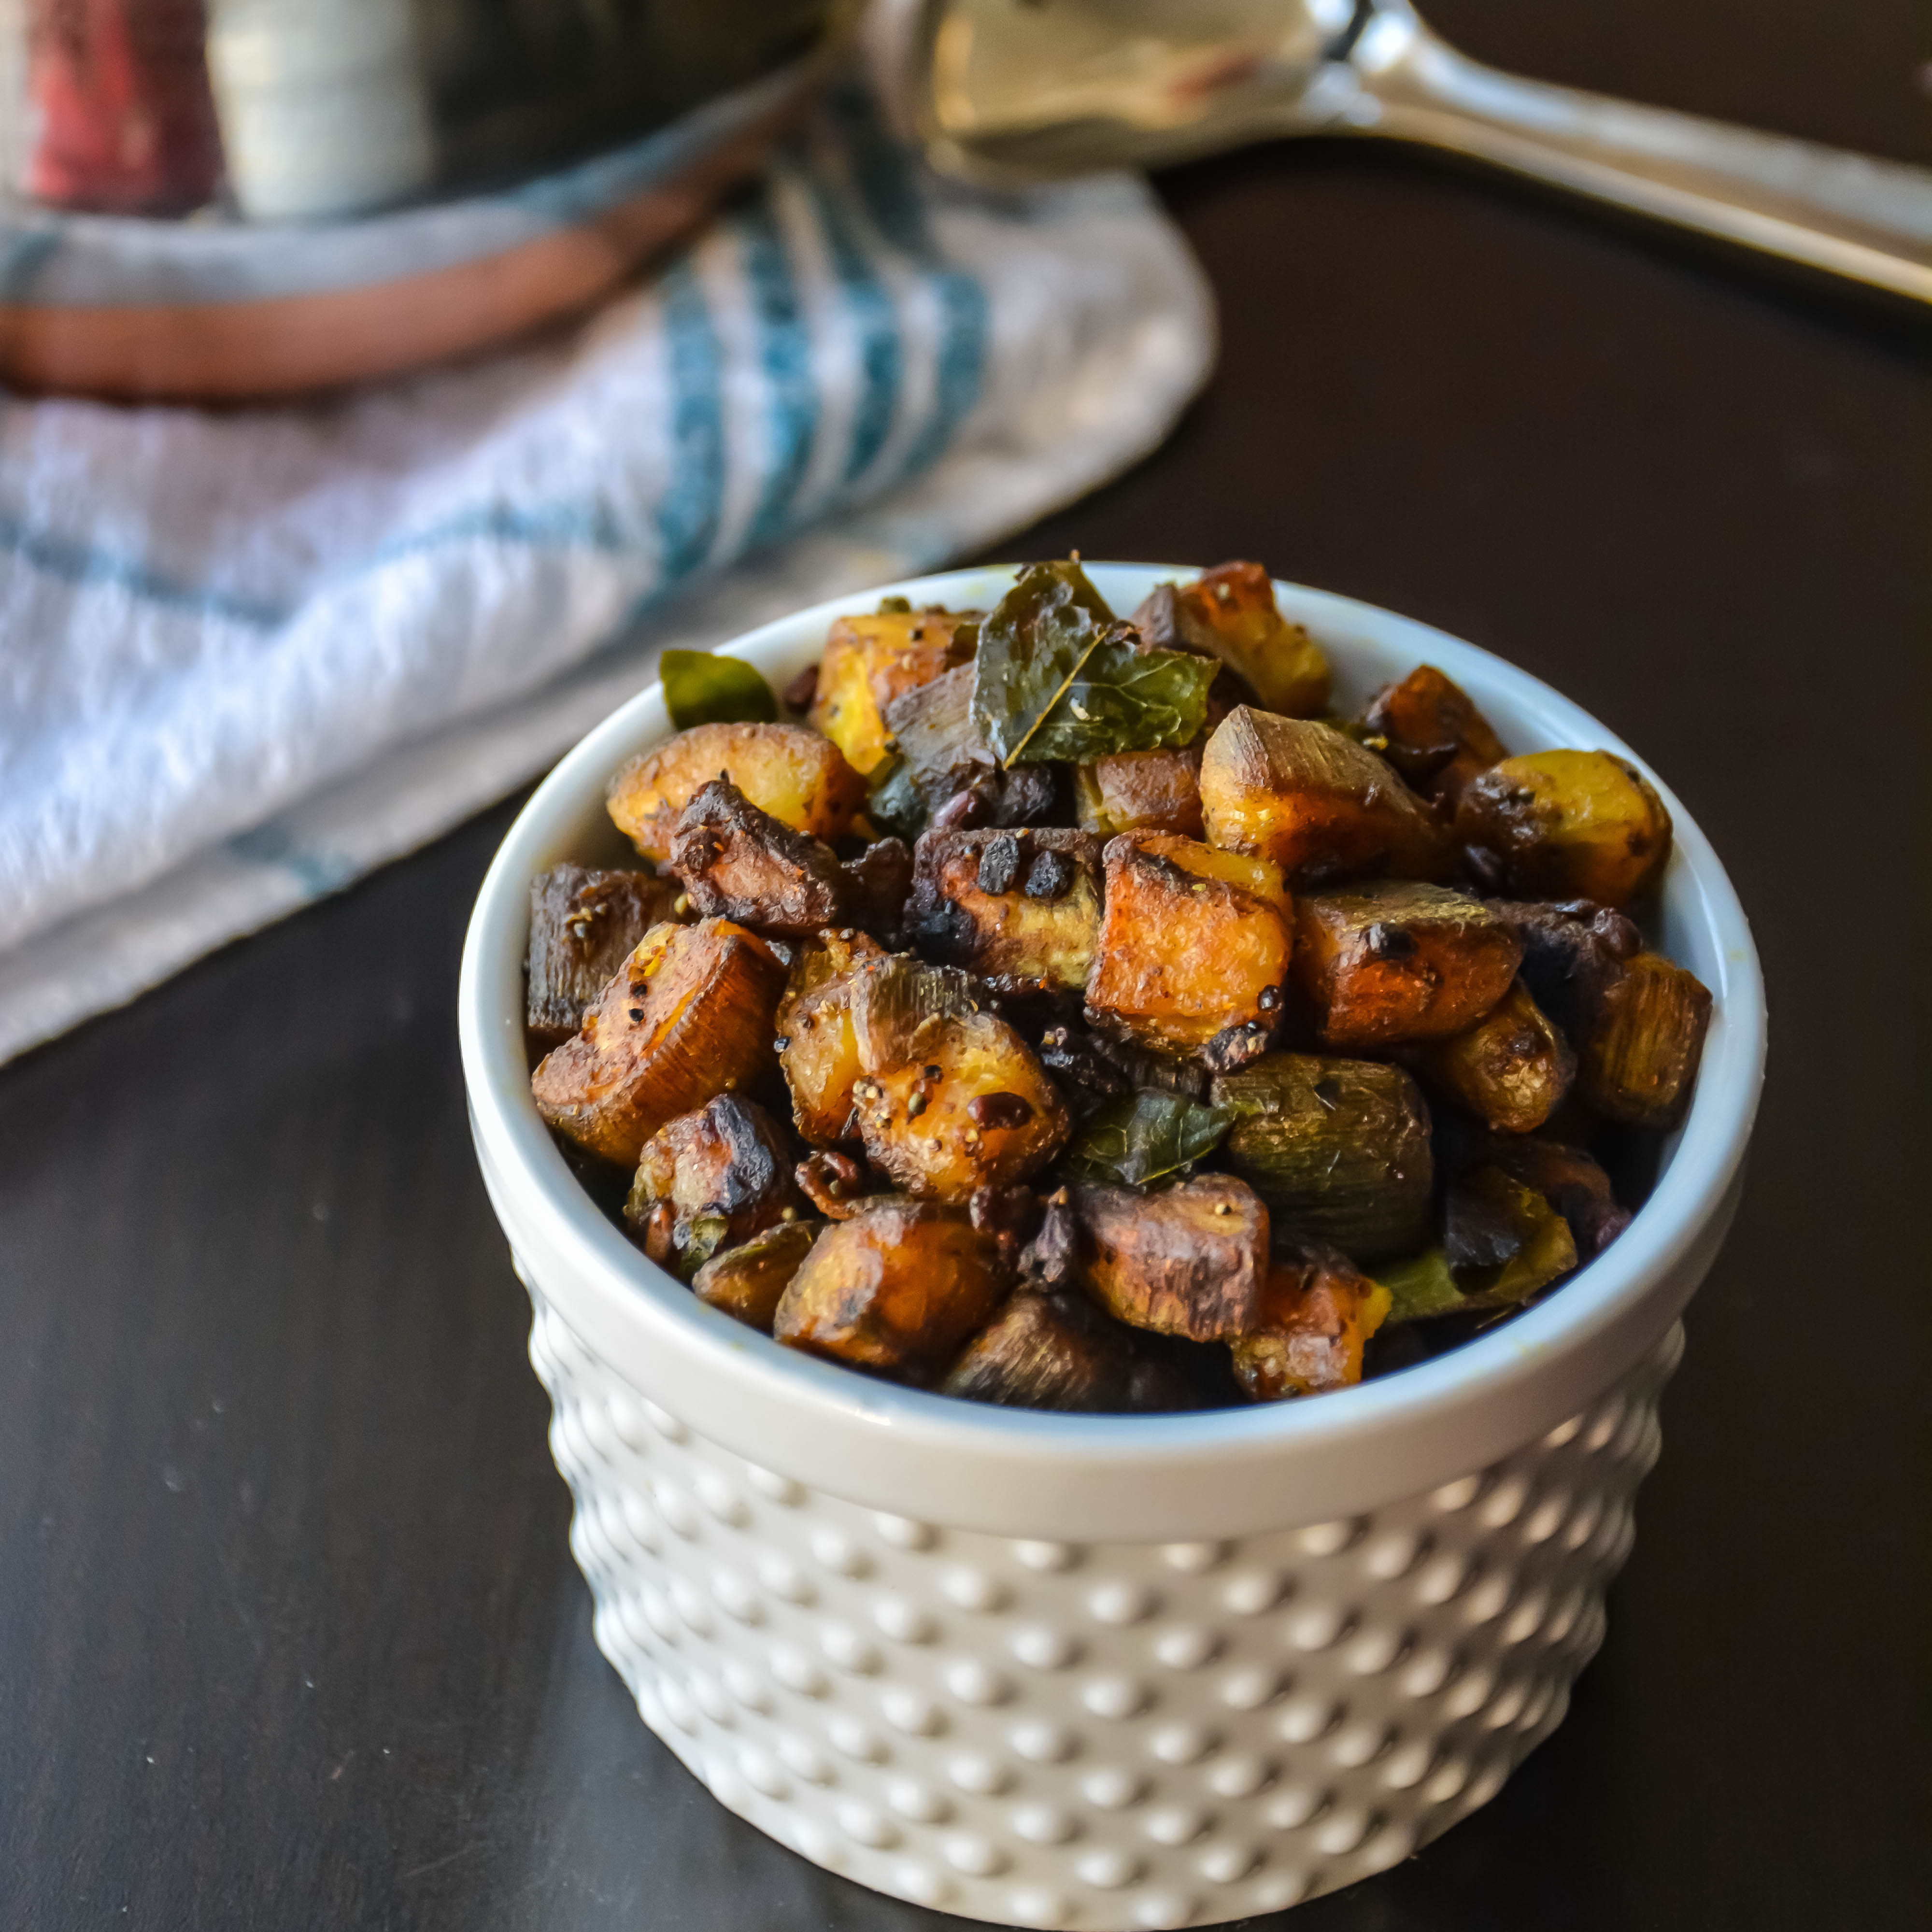
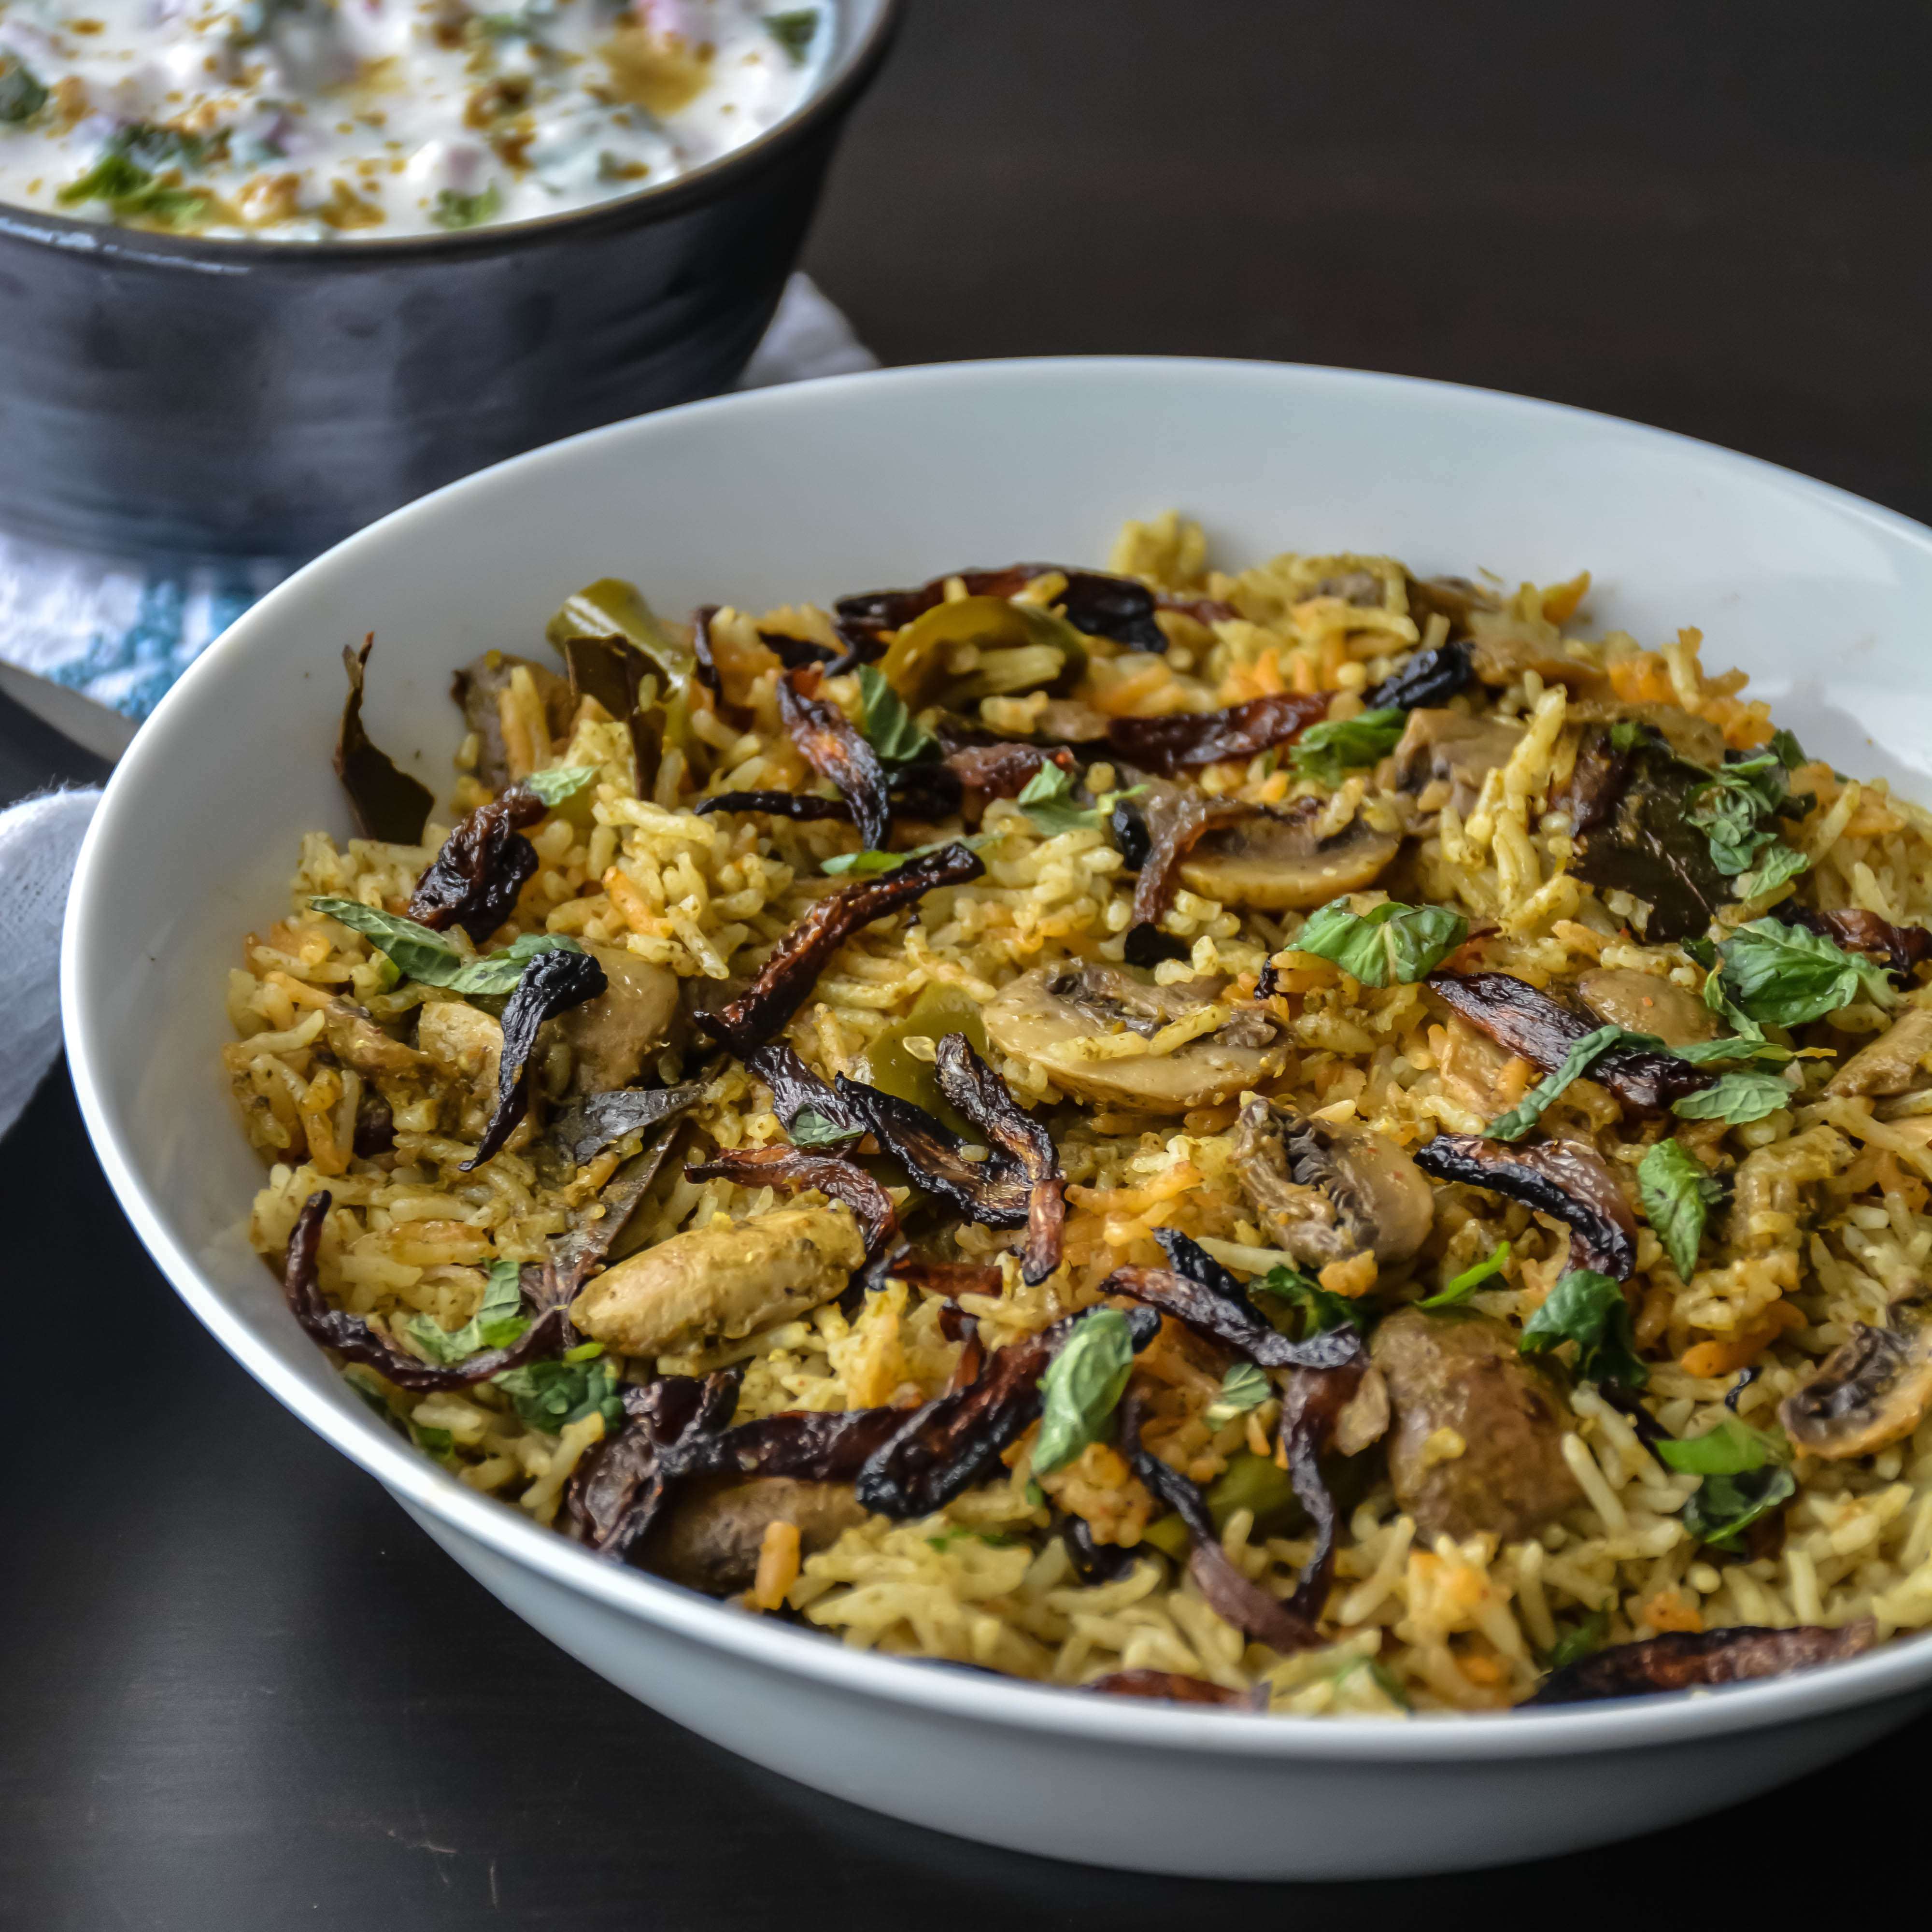
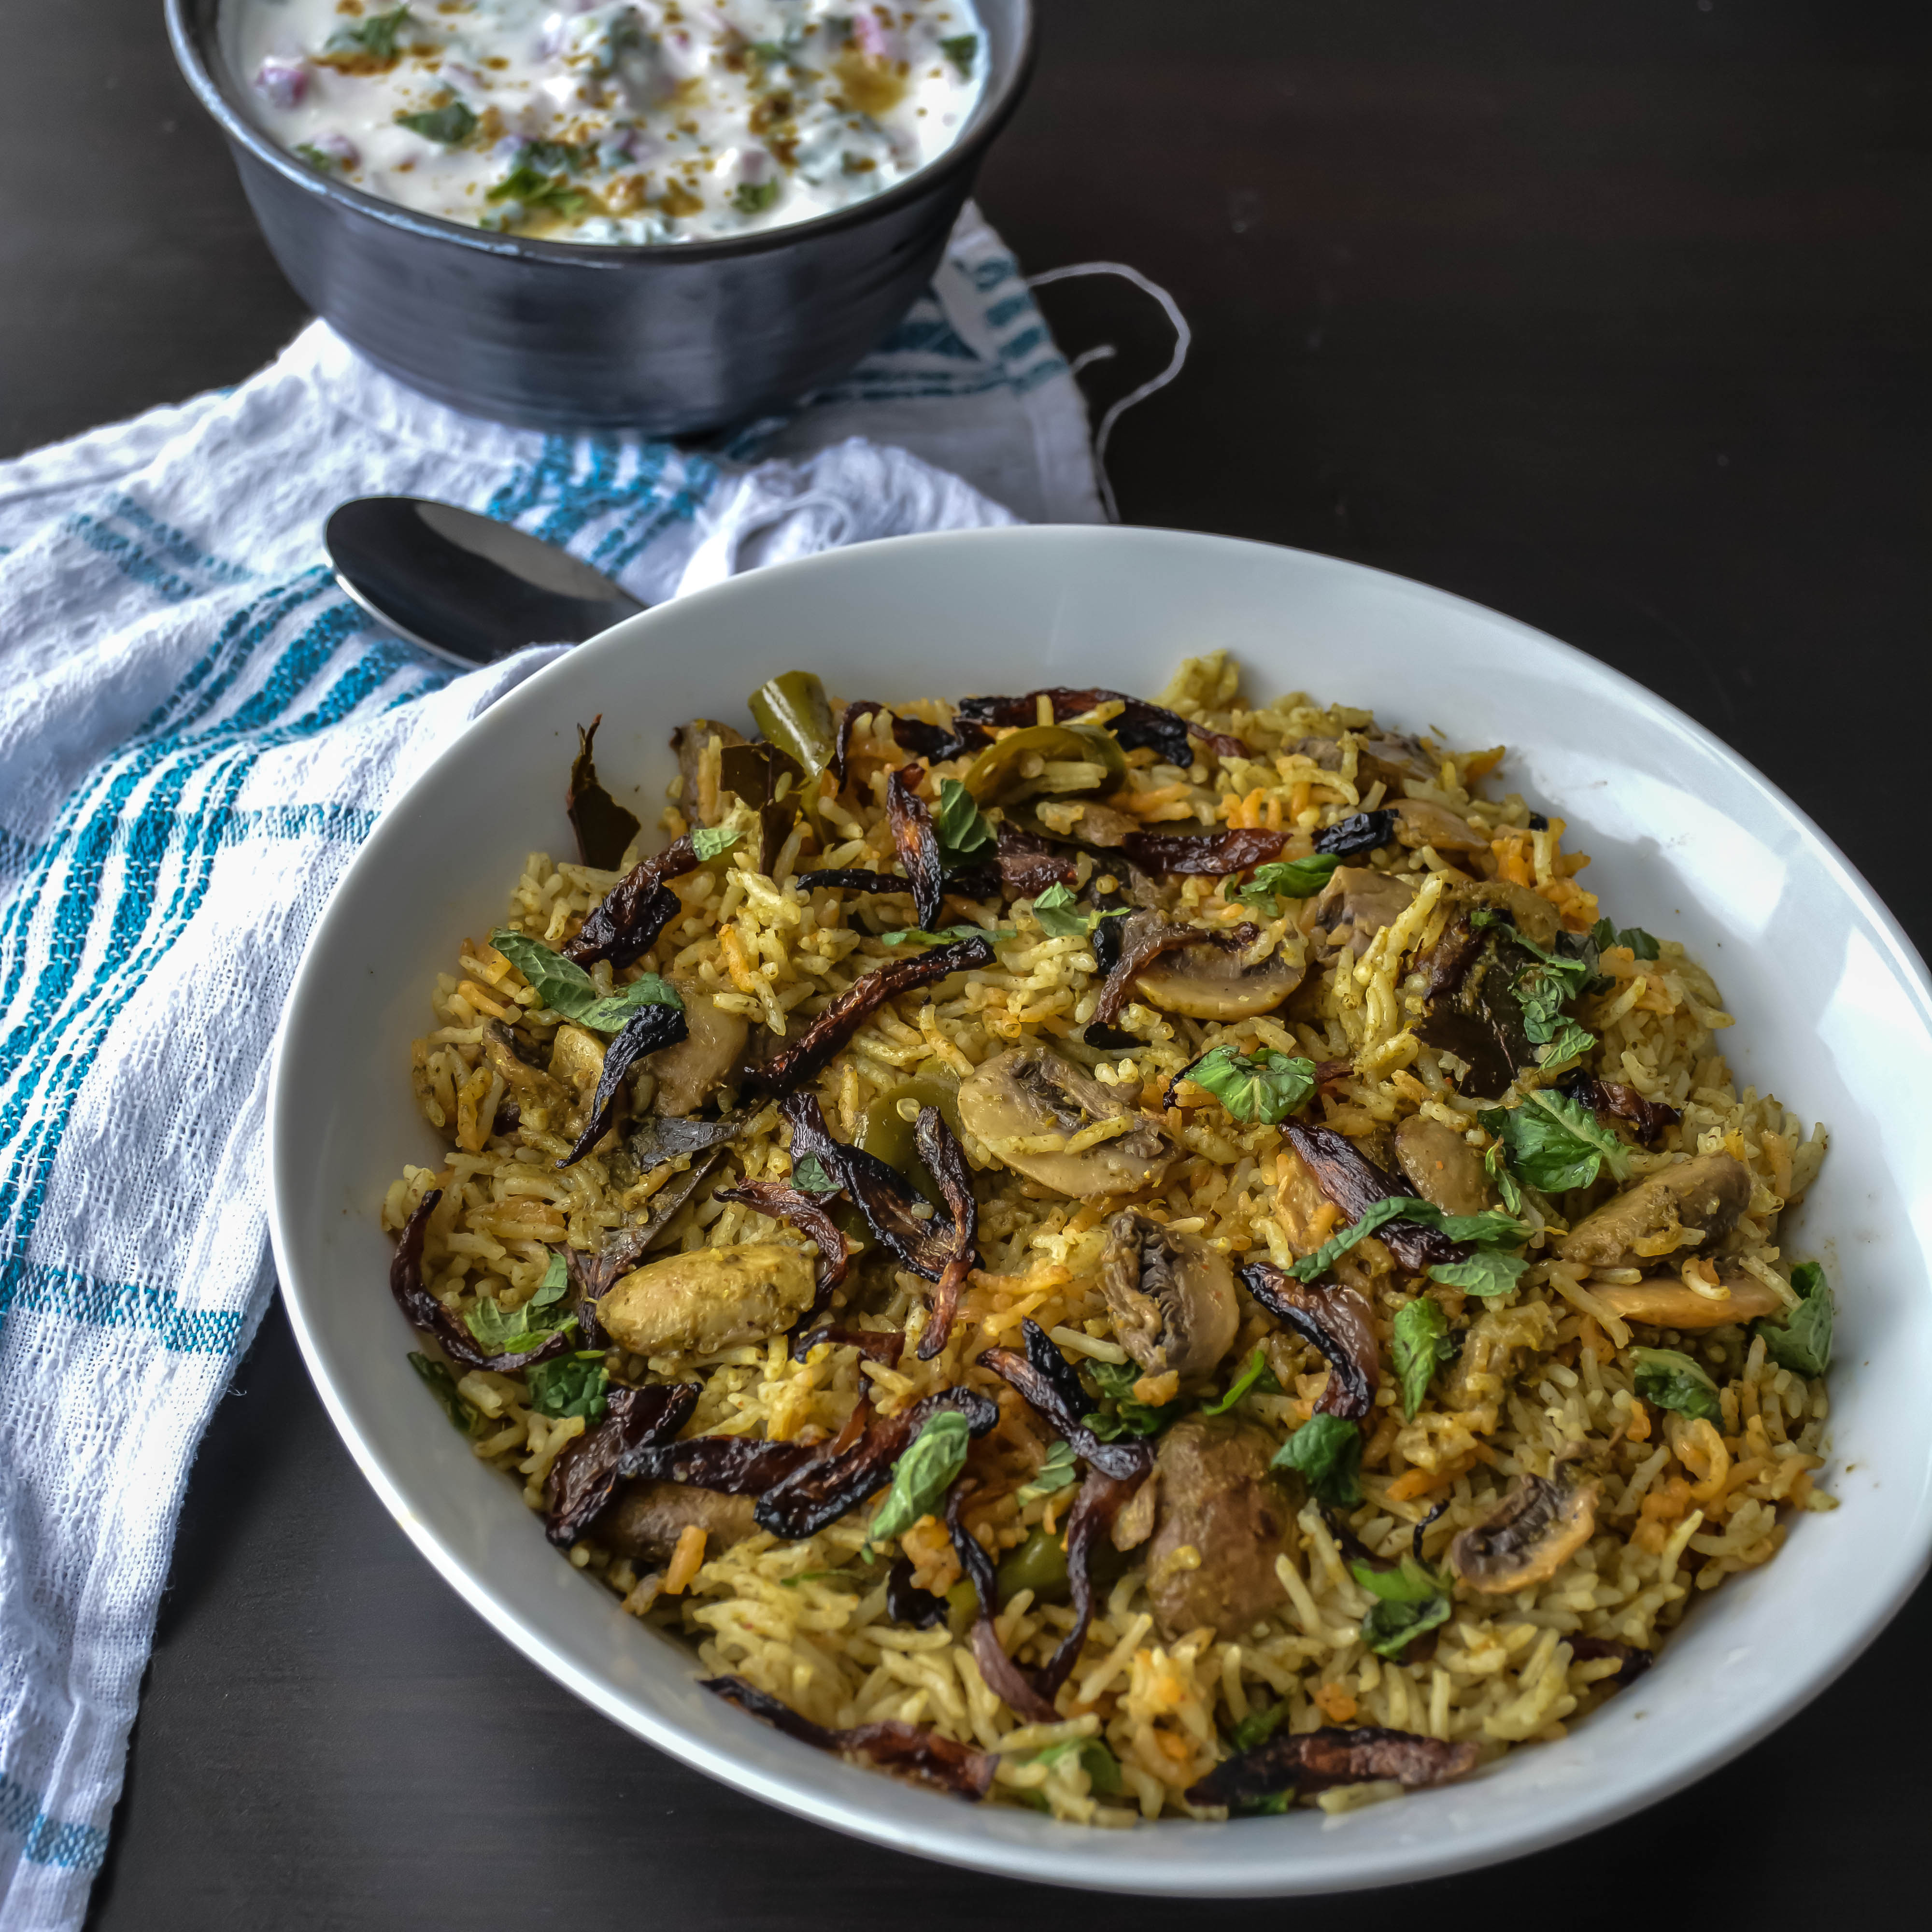
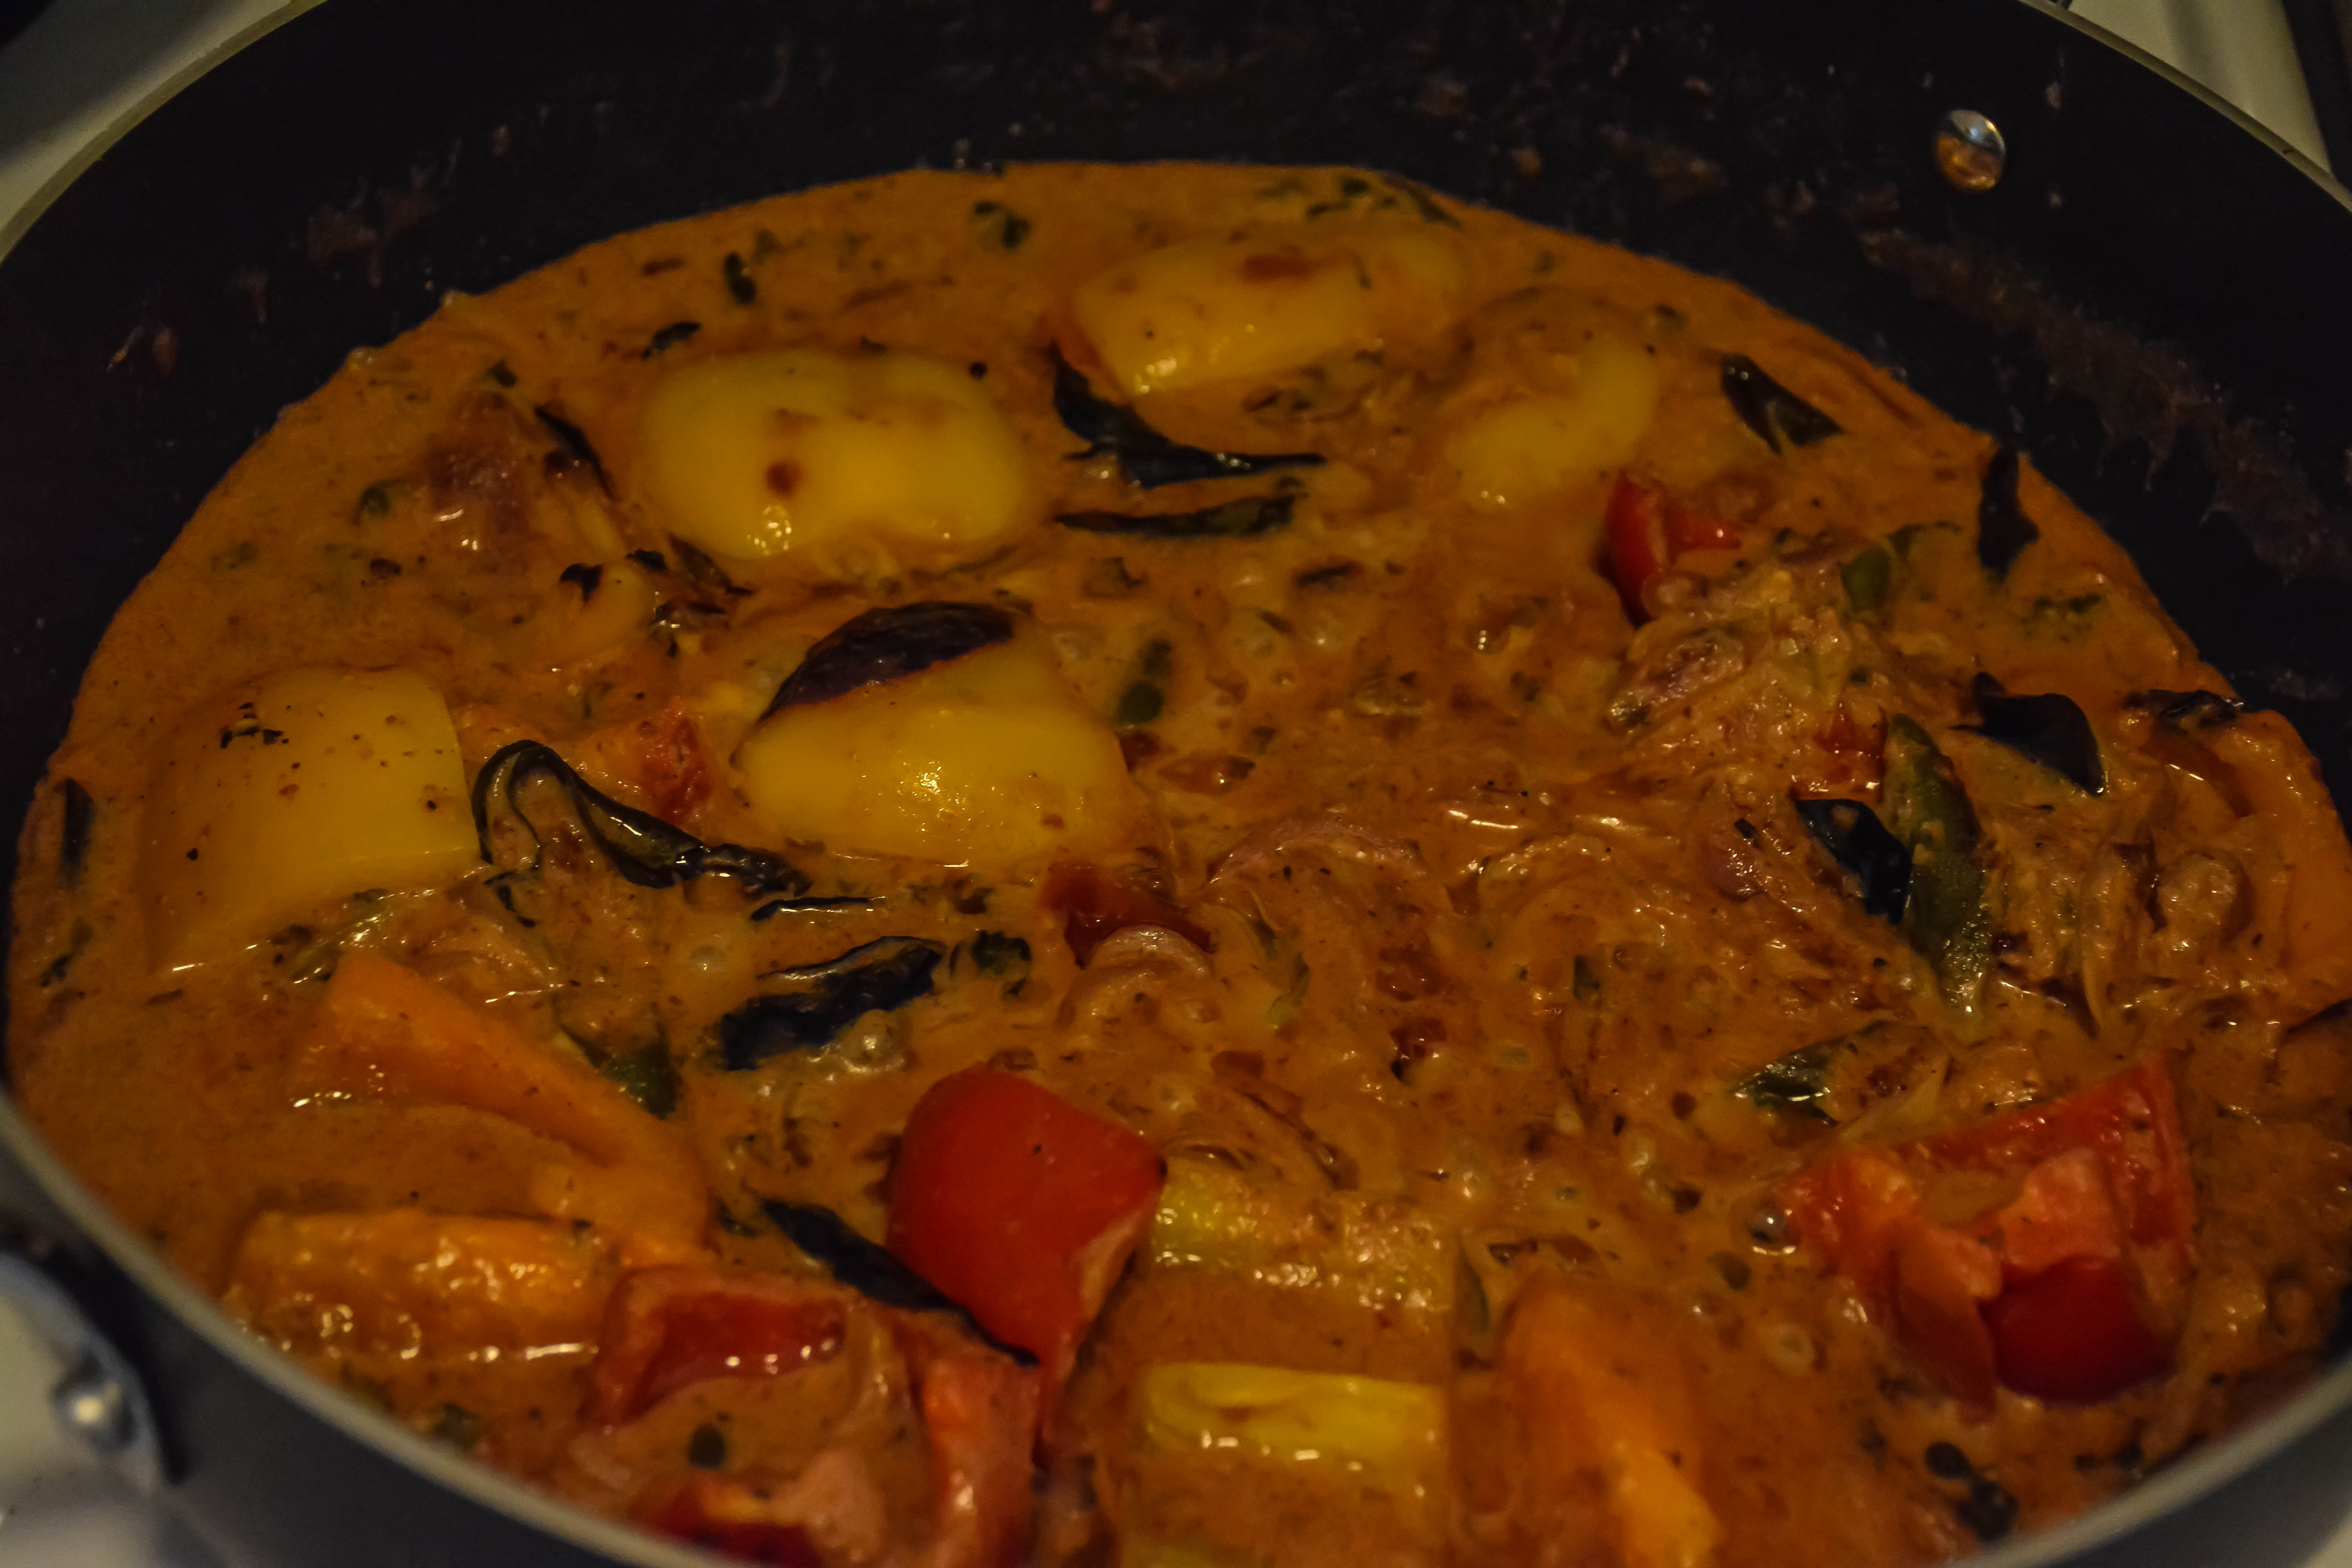
 Taste great with tomato garlic raita,cucumber carrot raita,mirch ka salan,mutton sukka

AMbur biryani

Filed Under: LAMB, NON-VEG RECIPES, RICE/BIRYANI VARIETIES Tagged With: ambur biryani, ambur lamb biryani, ambur mutton biryani, ambur style biryani, chennai ambur biryani, Indian biryani recipes, Indian lamb briyani, lamb biryani restaurant style, madras lamb biryani, Mutton recipes, non veg recipes, star biryani ambur style, sunday lunch Indian recipes

Mushroom peas spring onions masala

May 12, 2015 by Suki 9 Comments

MushroomPeasMasala-7Simple quick stir fry of Mushroom, peas and spring onions flavoured with aromatic Indian spices.

This recipe is for those days where you literally want to dump everything on the pot and return to your dent in the couch. The thought of cooking curry from scratch probably scares many of us, but it’s really easy when you know the flavor combinations of the different spices. This isn’t tricky to make at the best of times. You just need one pan and one spoon to make this and you may as well have cooked the whole meal on your one stovetop. I made this long back and drafted it, but posting it now. I cook a lot of mushroom recipes; it is one of the best vegetarian side dish curries. I know paneer is the best 😉 but when I want to have it with less fat, I just make with the mushroom with no cream, cashew or anything. I love the flavor of scallions/ green onion flavor. I love to add them to my gravies and even rice.

IMG_0349

Other interesting North Indian curries: Roasted Bell Pepper Gravy / Shimla Mirch ka salan, Aloo Rasedar Recipe, Cauliflower Potato Peas Masala / Aloo Gobi Matar Masala ,Saag Aloo Capsicum / Spinach Potato Pepper, Malai Pepper Mushroom, Baby Corn Makhani

MushroomPeasMasala-8

MushroomPeasMasala-8

5.0 from 4 reviews
Print
Mushroom peas spring onions curry
Author: suganya hariharan
Recipe type: Main
Cuisine: Indian
Prep time:  10 mins
Cook time:  30 mins
Total time:  40 mins
Serves: 2.5 cups
 
Ingredients
  • Mushrooms – 1.5 cup, chopped in 1 inch
  • Peas – 1 cup
  • Oil – 2 tbsp
  • Cumin seeds – 1 tsp
  • Onion – 1 cup, chopped finely
  • Spring onion – ½ cup, chopped
  • Tomato – 1 cup, chopped finely
  • Garlic – 4, Minced finely
  • Ginger – 1 inch, minced finely
  • Green chilly – 2, finely chopped
  • Turmeric – ¼ tsp
  • Chilly powder – 1 tbsp
  • Coriander powder – 2 tsp
  • Cumin powder – 1 tsp
  • Garam Masala – 1 tsp
  • Dry methi leaves – 2 tsp, crushed
  • Lime, coriander leaves and Spring onions - Garnish
Instructions
  1. Heat oil in a large heavy bottomed non-stick skillet over medium heat, cumin seeds, and add the onions, chillies and fry until they are translucent. Then add the spring onions, ginger, garlic. Give it a stir till raw smell disappears for a minute.
  2. Add chopped tomatoes and turmeric powder. Saute for a minute till it becomes mushy.
  3. Now add the Mushroom, and give a good stir for 2 minute. Now add the peas and Mix well.
  4. Now add the chilli powder,garam masala, coriander powder and cumin powder. Add 4 tbsp of water; mix well and make sure each piece is coated with the spice powder and simmer it for 7-10 minutes
  5. Stir in the mixture a few handfuls at a time. Add crushed methi leaves to it and mix well. The mushroom and peas should be nicely cooked and have the flavors deep in it.
  6. Garnish with coriander leaves, spring onions and squeeze in some lime.
Notes
. Be careful when adding water, it might become mushy if you add more water.
Wordpress Recipe Plugin by EasyRecipe
3.2.2885


Taste great with paratha, parotta, roti or plain rice or peas pulao or Veg fried rice.

MushroomPeasMasala-9

Filed Under: NORTH INDIAN GRAVIES/DAL/CURRY, VEGAN Tagged With: best vegetarian Indian side dish recipes, green onion recipes, mushroom curry, Mushroom peas masala, north Indian gravy recipes, restaurant style mushroom curry, scallions recipes, side dish for rice recipes, simple mushroom curry, Spring onion curry, vegan mushroom recipes, vegetarian mushroom curry

Chilli Kothu parotta

May 5, 2015 by Suki 16 Comments

Kothuparotta7relishthebite
The most banginest South Indian street food, prepared to perfection at home!

You’ve heard about parotta Right? If not I have a post on how to do parotta at home. It is an Indian layered bread. Kothu means chopped. You get readymade parotta these days in freezer section. You can use that as well. I had chilli kothu parotta only when I did my bachelors. 😀 stupid me! I never felt like tasting it. But when I tasted it, I was totally in love with that! I had it then once in a while. After coming to Canada, I made a chicken egg kothu parotta for my friends- roommates! They liked it 😀 then I started doing it frequently and it has never put me down. I use the leftovers curry and parotta, and eggs and make it real quick. Sometimes I use readymade parotta and do this. Later I started doing this veggie version of kothu parotta for me and I really loved it! Who will not love it 😉 when it has all spices, parotta and curry together in one plate?

Kothuparotta1

Kothu2

Kothuparotta6

It is a popular street food from India. I have never tasted it from streets though 😉 as my parents were very cautious that it would be bad for my health. But I have seen a lot of times how they prepare it. They make it so quick and just by seeing the way it is made; you would want to prepare it. You can always use scissors or knife to chop them into triangle pieces, but the authentic way of making it is by placing few parottas together and tearing them into small pieces. I loved making these and clicking pictures if it. I used my Shimla Mirch ka salan curry, you can use any curries like mirch ka salan, mushroom curry or malai methi paneer or for a meat recipe use pepper chicken curry,lamb curry.

Kothuparotta8

5.0 from 2 reviews
Print
Chilli Kothu parotta / Curried Shredded Indian flatbread
Author: Suganya Hariharan
Recipe type: Main
Cuisine: Indian
Prep time:  10 mins
Cook time:  35 mins
Total time:  45 mins
Serves: 3 cups
 
Ingredients
  • Fresh Parotta – 5
  • Onions – 6, large thinly sliced
  • Tomato – 2, chopped finely
  • Bell pepper/ capsicum- 2, diced, I used coloured ones
  • Green chillies – 3, cho[[ed finely
  • Ginger garlic paste – 1 tbsp
  • Chilli powder – 1 tbsp
  • Turmeric powder – ½ tsp
  • Coriander powder – 1 tsp
  • Garam masala powder – ¾ tsp
  • Pepper powder – ½ tsp
  • Oil – 4 tbsp
  • Salt – 2 tbsp
  • Curry – 1 cup
    [To garnish:]
  • Coriander leaves - 2 tbsp
  • Garam masala – 1 tsp
  • Lemon juice – 1 tbsp
Instructions
  1. Cut parotta into pieces or just tear them into pieces as shown in pictures.
  2. Heat oil on a medium flame, add onions, and sauté the onions for several minutes.
  3. Once the onions start turning to golden brown, add the chillies and ginger garlic paste and cook for a few minutes.
  4. Now add tomato, bell pepper and turmeric powder and sauté till the raw smell goes from tomato and it turns mushy.
  5. Add chilli powder, coriander powder, garam masala, pepper powder and salt, sauté till the raw smell leaves.
  6. Add the chopped parotta and mix well into the mixture.
  7. Now add the curry and mix well.
  8. The contents should be minced now, so use a sharp end of a flat spatula or a stainless steel bowl. Do remember that ends should be sharp. Use a pounding action using the end of a flat spatula and mince it.
  9. Cook on a medium flame for 3-4 minutes and toss the contents well.
  10. Add chopped coriander leaves, garam masala, lemon juice and mix well. Turn off flame.
Notes
1. Once the parotta has been added, cook or work quickly to finish the dish to make sure the parotta fluffy and soft.

2. You can use any curry for this recipe, to make it chicken kothu parotta, add chicken curry and egg to it it.
Wordpress Recipe Plugin by EasyRecipe
3.2.2885

 Serve this plain or with raitas like carrot ginger raita or tomato garlic raita.

Kothuparotta9

Filed Under: STREETFOOD, VEGAN Tagged With: chilli kothu parotta, Curry recipes, Famous Indian Recipes, Indian streetfood recipes, kothu parotta recipe, Parotta recipes, Popular Indian streetfood recipe, Quick Indian dinner recipes, Vegetarian Idnian dinner recipes, Vegetarian kothu parotta recipe

Spinach with Lentils/ Keerai Molagootal

May 1, 2015 by Suki 4 Comments

KeeraiMolagootal-7name

KeeraiMolagootal-7name

Simple and flavorful dish with spinach, lentils and coconut!

Spinach as we all know is really rich in iron, vitamin A, B and C and very healthy so I try to include them as much as I can. I like them even raw :D! But I can’t have a whole cup raw. But surely I can have half a cup.I used the normal spinach, but I guess the authentic recipe includes manathakali keerai. So, if you could get it, you could use that. In India, We have so much of varieties of spinach like mulai keerai, paruppu keearai, thandu keerai, aria keerai and the list goes on. I always wanted to cook with that. When I went to India, I wanted to make some recipes there, click pictures and come. But I never got some time for that. I mainly wanted to make recipes with spinach and tender coconut. Wanted to make tender coconut kheer ( elaneer payasam), tender coconut idli and so on.

KeeraiMolagootal-9

Molagootal is a dish form kerala, I made them long back before 3 years, wanted to make it again last month.  It is very simple and flavorful dish, full of nutrients. It is great food for both yound and old. This way we can include both lentils and spinach into our food. Molagootal can be even made with mixed vegetables like winter melon, pumpkin and even broccoli.  Most kerala recipes include coconut. Some say it is good for health and some say it is not. So, I try not including coconut always into my recipes. But some dishes it is a must 😉 and I do include them. This recipe is very easy to make. It is just the name 😉 which sounds difficult. I made this with some spicy baked cauliflower bites and steamed rice. You can use any kind of lentils.

I used this vessel of mine to place and take pictures, where my mom got this from India in October, but she taped it with keeping some pot or something inside. So, I have this brown tape everywhere. Do not think 😉 it’s my food that it is all over my vessel.\

Vegan Note: avoid ghee!


Print
Spinach with Lentils/ Keerai Molagootal
Author: Suganya Hariharan
Recipe type: Main
Cuisine: Indian
Prep time:  15 mins
Cook time:  20 mins
Total time:  35 mins
Serves: 2 cups
 
Ingredients
  • Oil – 4 tsp
  • Mustard – 1 tsp
  • Curry leaves - 5
  • Spinach – 3 cups, firmly packed
  • Moong Dal (split green gram) – ½ cup
  • Turmeric powder – a pinch
  • Water – 3 cups
  • Ghee – 1 tbsp
  • Salt – 1.5 tbsp


    To blend:
  • Coconut – 4 tbsp, (fresh blended coconut or dessicated coconut)
  • Urad dal – 1 tbsp
  • Red chili – 5
  • Cumin Seeds – 2 tsp
Instructions
  1. Pressure cook moong dal with 2 cups with a pinch of turmeric powder for 3 whistles. Once the pressure subsides, open the cooker and mash the dal well.
  2. In a wide pan, add 1 tsp of oil in medium flame, sauté the cumin seeds, red chilli, urad dal and when it is sautéed for few seconds, now add the coconut and sauté till they are light golden brown. Switch off and blend them without water.
  3. In the same pan, add 1 tbsp of oil in medium flame, add the mustard seeds and wait till it crackles, and then add the curry leaves and sauté well. Now add the blended coconut paste and sauté nicely for few seconds. But make sure you don’t burn them.
  4. Add the washed spinach and cooked dal, sauté them for a minute till they blend into the coconut paste well.

  5. Add 1 cup of water to this and add salt, mix well and close the pan with a lid and keep in medium to low flame. Let the flavor get into spinach and dal well.

  6. After 5 -6 minutes, open the lid, it should be in a consistency not watery and not dry.
  7. Top it a tbsp of ghee(Indian clarified butter)/ butter.
Notes
1. Add more red chillies if you want to make it more spicy.
2. You can use any kind of lentils.
Wordpress Recipe Plugin by EasyRecipe
3.2.2885

Taste great with steamed rice and potato roast, or raw banana roast.

KeeraiMolagootal-9

Filed Under: SOUTH INDIAN GRAVIES/DAL/CURRY/KUZHAMBU, VEGAN Tagged With: coconut recipes, Healthy spinach recipe, Indian spinach recipe, Kerala molagootal recipe, lentils recipe, Quick south Idnian recipe, south Indian dal recipe, south indian gravy recipe, spianch with lentils and coconut, spinach recipes, spinach with lentils recipes, vegan lentil recipes, Vegan Spinach recipes, vegetarian indian recipes, vegetarian spinach recipe

Strawberry Lassi

April 27, 2015 by Suki Leave a Comment

StrawberryLassi-3

StrawberryLassi-3

It only takes 4 ingredients to make this delicious and refreshing drink. A healthy alternative to a strawberry milkshake!

Lassi is a sweet, yogurt based Indian drink that is easy to make and is outright delicious. With weather warming up , here is one of my absolute favourite summer drink with a twist. I am sure it is a healthier substitute to strawberry milkshake.Sweetness of strawberry and coolness of yogurt makes this dish heavenly. Simple blend of few ingredients and you are done with the dessert for the day.Mangi Lassi is a refreshing, cold beverage originating from India.And i made a  twist to that an made this. Actually Lassi is a yogurt-based drink blended with a bit of sugar and ice, which is great to have in summers. I would say a lassi is more of a healthier, lighter version of a milkshake.

I dipped my strawberries in honey and decorated in the glass so it was more tastier!

StrawberryLassi-2

StrawberryLassi-4

StrawberryLassi


Print
Strawberry Lassi
Author: Suganya
Recipe type: Dessert
Cuisine: Indian
Prep time:  5 mins
Cook time:  10 mins
Total time:  15 mins
Serves: 8 cups
 
Ingredients
  • • Freshly Chopped strawberry pieces – 2 cups
  • • Yogurt – 1 ½ cups
  • • Sour cream – 3 tbsp (optional if the yogurt is not sour)
  • • Cream – 1 tbsp
  • • Cardamom powder – ½ tsp
  • • Sugar – 5 tbsp or honey.
  • • Few mint leaves – for garnish
Instructions
  1. chop the strawberriues end.
  2. In a blender or mixer, puree the strawberries with sugar or honey, IF you are using the pulp, skip this step.
  3. Now blend the chilled yogurt, cream, sour cream, the cardamom powder,strawberries. blend for some seconds till everything is mixed well and the yogurt is smooth and creamy.
  4. Pour lassi in glasses and serve garnished with mint leaves or strwaberries,
Notes
1. If you want a slightly thin consistency, then add some milk to the lassi while blending. or you can even use ice cubes while blending.
2. Instead of sugar, you can use jaggery or honey.
Wordpress Recipe Plugin by EasyRecipe
3.2.2885

StrawberryLassi-5

Filed Under: DESSERTS, DRINKS & BEVERAGES Tagged With: lassi, lassi recipe, Strawberry Lassi

Carrot Ginger Raita

April 23, 2015 by Suki 6 Comments

CarrotGingerRaita-5
CarrotGingerRaita-5
This is a unique combo and that Sauteed ginger in yogurt gives great flavor. It has cooling and soothing taste and it is perfect side dish for any biryani recipes like vegetable biryani or lamb biryani. And the ginger us perfect for health.There are countless varieties of raita – Onion raita,cucumber raita,tomato raita, carrot raita, fried onion raita, mint raita, spinach raita and pomegranate raita and so on. Raitas are always a good way to include yogurt in your everyday meal. I like to even have plain yogurt but for many i understand it is really hard. So this is the best way. I know many might think the ginger flavor is overpowering but it is not and lends a fresh aroma to the raita. I always make raita, chill and serve. 
CarrotGingerRaita-3
I have never tried this combo of carrot and ginger. But when i tried this, i was in pure love.
Other raita recipes if you would like to have a look 🙂 – Garlic raita or cucumber carrot raita. 
Vegan Note: You can use soy yogurt instead.
 
 
Print
Carrot Ginger Raita
Author: Suganya Hariharan
Recipe type: Main
Cuisine: Indian
Prep time:  5 mins
Cook time:  5 mins
Total time:  10 mins
Serves: 1.5 cups
 
Ingredients
  • Oil – 2 tsp
  • Carrot – 1 cup, grated finely
  • Ground cumin – ½ tsp
  • Salt – 1 tsp
  • Ginger - 2 inch, minced finely
  • Red chilli flakes – ¼ tsp, garnish
  • Fresh cilantro – 1 tbsp, finely Chopped
  • Yogurt - 1.5 cups
Instructions
  1. Take a small pan; add the oil and ginger and roast till golden.
  2. , In the same pan, add the grated carrot and minced garlic and salt and sauté well. And keep aside.
  3. Combine the yogurt with the sauted carrot ginger and cumin powder. Mix well.
  4. Garnish with red chilli flakes and coriander leaves.
Wordpress Recipe Plugin by EasyRecipe
3.5.3229
 
Raitas are best to have plain or with pulao,veg biryani or shrimp biryani or with parotta or paratha.
CarrotGingerRaita-4

Filed Under: RAITA/DIPS/CHUTNEY Tagged With: Carrot Ginger Raita recipe, carrot recipes, ginger raita recipes, ginger recipes, raita recipes, side dish for biryani, side dish for pulao recipes, side dish for rice, vegan raita recipe, vegetarian recipes, yogurt recipes

Roasted Bell Pepper Gravy / Shimla Mirch ka salan:

April 11, 2015 by Suki 4 Comments

shmilaMirchKaSalan-18

shmilaMirchKaSalan-18Bell Peppers in spicy peanut sesame gravy.

Salan means gravy here and shimla mirch is bell pepper/capsicum. It taste great with simple jeera rice, peas pulao or even plain rice. It is perfect with Indian breads like roti,chana dal paratha, parotta and so on. I made this with parotta and it was scrumptious. Usually salan is something that goes well with biryani. I usually make the mirchi ka salan for biryani but this time I wanted to try something else and did this. I adapted the idea from Vahchef and then made my twist and turns. You can replace the bell pepper with any vegetable you fancy. This goes great with Biryani recipes. Its light spiced, creamy and tangy! I used different coloured ones to make it more attractive 🙂 You can use the same color. Looks Colorful 😀 right?!

Vegan Note: replace yogurt with coconut milk! 🙂

shmilaMirchKaSalan-13

shmilaMirchKaSalan-17

Print
Roasted Bell Pepper Gravy / Shimla Mirch ka salan:
Author: Suganya Hariharan
Recipe type: Main
Cuisine: Indian
Prep time:  5 mins
Cook time:  40 mins
Total time:  45 mins
Serves: 45 mins
 
Ingredients
  • • To roast & grind:
  • • Peanuts –2 tbsp
  • • Sesame seeds – 1 tbsp
  • • Coconut – 1 tbsp


    For gravy:
  • • Oil – 1 tbsp
  • • Red chillies – 2 broken roughly
  • • Cumin seeds – 1 tsp
  • • Mustard seeds – 1 tsp
  • • Fenugreek – 1 tsp
  • • Curry leaves – 6-8 leaves
  • • Hing - a pinch
  • • Onions – 1 large, sliced, 1 cup
  • • Salt – as needed
  • • Turmeric – 1 tsp
  • • Ginger garlic paste – ½ tbsp
  • • Red chilli powder – 1 tsp
  • • Coriander powder – 1 tbsp
  • • Cumin powder – 1 tsp
  • • Mint – 1 tbsp, chopped finely
  • • Coriander – 1 tbsp, chopped finely
  • • Yogurt – ½ cup beaten
  • • Bell pepper – 3 medium,Diced ( I used different coloured ones)
Instructions
  1. Heat a tbsp of oil in a pan, when the Bell pepper/ Capsicum are dry, then add them to oil and fry till they look little lighter shade in low to medium flame.
  2. Dry roasts the peanuts in a medium flame. When the peanuts are roasted, add the sesame seeds. When the sesame seeds are golden brown, Add coconut. Keep an eye on this. It gets brunt easily. Add this mixture to the blender and blend it with some water to a fine paste.
  3. , Now add the oil in the pan and when the oil is hot, add the whole red chillies, and then add mustard seeds. And when the mustard seeds crackle, add fenugreek seeds and cumin seeds.
  4. Now add the curry leaves, onions, hing and little salt. Cook the onions till they are golden brown, Add turmeric and ginger garlic paste and cook to remove the raw smell.
  5. Add the blended mixture, cumin powder, red chilli powder and coriander powder to the mixture. Fry for two minute and add some water to it. Cook for fifteen minutes. Stir in between till the oil oozes out nicely. Add the chopped mint and coriander leaves. Boil for two minutes.
  6. add the beaten yogurt and simmer for another ten minutes. When it oozes out oil again add the roasted capsicum and jaggery to the gravy and let it cook for 5 mins so that the juices of the gravy het absorbed by the chilies.
Wordpress Recipe Plugin by EasyRecipe
3.2.2885

Vegan Note: replace yogurt with coconut milk! 🙂

 Taste great with Vegetable Biryani or Shrimp Biryani, peas pulao, parotta, chana dal paratha or simple jeera rice.


shmilaMirchKaSalan-12

Filed Under: NORTH INDIAN GRAVIES/DAL/CURRY, VEGAN Tagged With: bell pepper recipes, biryani side dish, Chilli recipes, coconut recipes, Cpasicum recipes, Hyderabad recipes, Indian gravy recipes, mirchi ka salan recipe, shimla mirch ka salan, side dish for biryani, side dish for roti recipe, Spicy Indian side dish recipes, vegetarian side dish recipes

30 Minute Spicy Brinjal/Eggplant Fry

April 5, 2015 by Suki 4 Comments

Brinjalfry-6

Brinjalfry-6Extremely easy vegan eggplant recipe!

It is perfect for rice or roti. I love this recipe because you don’t have to chop anything much other than eggplant. And it is very quick to make this. I made this on a weekend where I wanted to make something quick. Usually on weekends I would have all patience to cook big lunch, but that weekend I wanted to make something quick and tasty for my spinach dal. I tried this and it turned out so roasted and beautiful. Anybody would love to make quick lunch or dinner, if they are given an option. So, these days I am trying to make a lot of quick recipes. This recipe is good only for the smell tender eggplants. You can surely use the big eggplant, but I am not sure how it will turn out. This recipe taste good for the small eggplants because of the cutting style and the roasting style.

Brinjalfry

Brinjal is one of the low calorie vegtable when it comes with antioxidants, magnesium but it takes a lot of oil. So add as much of oil you want and do not add more, so make it with the same amount of oil and roast it. I never used to eat the brinjal when I was a kid, now I just love them. I have few more eggplant recipes if you would like to have a look – Masala Stuffed Baby Eggplants/Ennai Kathirikkai,Roasted eggplant mozzarella pasta and Honey garlic EGgplant.

 This roast is perfect for rice and tomato rasam/Buttermilk rasam/dal/sambar !

Brinjalfry-2

Print
30 Minute Spicy Brinjal/Eggplant Fry
Author: Suganya Hariharan
Recipe type: Main
Cuisine: Indian
Cook time:  25 mins
Total time:  25 mins
Serves: 10 small
 
Ingredients
  • • Small Eggplant/ Kathirikkai – 12
  • • Mustard seeds – ¼ tsp
  • • Urad dal /black gram – 2 tsp
  • • Curry leaves – 1 sprig
  • • Turmeric powder – ½ tsp
  • • Salt – 1 tbsp
  • • Oil – 2 tbsp
  • •


    [To grind:]
  • • Red chilly – 3
  • • Cumin seeds – 1 tsp
  • • Garlic – 4
  • • Fennel seeds – 2 tsp
  • • Chilli powder – 2 tsp
  • • Sambar powder – 1 tsp
Instructions
  1. Blend the ingredients under “to grind” smoothly.
  2. Remove the ends of the eggplant and cut into half lengthwise. Put a slit in the middle of the eggplant and soak them in water till you cook. Slitting helps in masalas to get in.
  3. Heat a wide pan with oil and add mustard seeds. When it crackle, add the urad dal and when it gets lightly golden brown, add the curry leaves.
  4. Now add the eggplants to it. Add the ground paste,turmeric powder,salt and add 2 tbsp of water. Mix it well and cover it for 7-8 minutes.
  5. After 7-8 minutes, open the pan, the water would have evaporated and now turn the brinjal the other side and cook it uncovered in medium heat till both sides get evenly roasted.
  6. Switch it off and serve with some hot rice and dal.
Notes
1. Use a wide pan as it helps to turn the eggplants.
2. Reduce the amount of spicyness if you want by avoiding the chilli/sambar powder.
Wordpress Recipe Plugin by EasyRecipe
3.2.2885

 Taste great with rice and tomato rasam/Buttermilk rasam/dal/sambar !

Brinjalfry-5

Filed Under: DRY CURRY SIDE DISH/ STIR-FRY, VEGAN Tagged With: 30 minute eggplant recipe, Brinjal fry, Brinjal roast recipe, Eggplant fry, Eggplant roast, healthy eggplant recipes, Indian eggplant recipes, Kathirikkai curry, Kathirikkai fry, Quick brinjal fry recipe, Quick brinjal roast recipe, quick eggplant recipe, Quick vegan brinjal recipes, roasted eggplant, side dish for naan, Side dish for rasam, side dish for rice, SPicy brinjal fry recipe, spicy brinjal recipe, Spicy eggplant fry, SPicy eggplant fry recipe, vegan brinjal recipes, Vegetarian eggplant fry recipe, Vegetarian eggplant recipe, vegetarian quick recpes

Carrot Coconut Truffles/ Ladoo recipe

April 2, 2015 by Suki 18 Comments

CarrotLadoo-14namee

CarrotLadoo-14namee

Easter weekend special!!!

These gorgeous ladoos can be made in 30 minutes! Perfect thing ever for an After Dinner Bite-Sized sweet!

If you have some guest or family coming over or a get together or for any pot luck, this is the best recipe to make. You can never go wrong with this recipe. I prepared this and even brought it to work and my colleagues loved it. I got all great reviews :D! These scrumptious coconut fudges needs only few ingredients and takes only 30 minutes. A perfect dish to make at the last minute and also everyone will love it. Or if you’re planning for a big heavy dinner, this is perfect to make as it just melts in your mouth. I just developed this recipe from my coconut ladoo recipe. But I was very sure that it is going to taste great. I know anything with coconut and condensed milk taste great. It is a great way to feed the kids with veggies. It looks gorgeous! Right? 🙂

carrotladoocollage

Before few months, I had that craving for something sweet after dinner. So I would say this is the most perfect thing ever for an After Dinner Bite-Sized Something Sweet! If it is something big, wouldn’t resist myself for eating :)You can change the nuts you want to add or even make this with no nuts. These are so easy to prepare that even little kids can prepare them. It is just perfect for any occasion.  Even carrot hatred people would love this 🙂 It is that good! I am saying this because one of my colleague is not fond of carrots and she said she still loves it 😀 😀 😀 Happy me!

You can prepare the way you prepare carrot Gajar halwa and just add coconut to it and make ladoos. You can use the leftovers of gajar halwa and prepare this. 😉 I am sure there wont be any leftovers of gajar halwa. Gajar halwa is a famous Indian dessert made with carrot, milk, ghee and nuts.I have some recipes made with condensed milk and you should check it. They are all quick recipes – Sweetened condensed milk toast with orange zest, coconut fudge, and coconut ladoo.

CarrotLadoo-12

I have a lot of vegan friends, so making a note of how to make sweetened condensed milk using coconut milk. You can buy the coconut milk in the milk section as a carton and use it:

Vegan sweetened condensed milk:

In a heavy-bottomed small pot, whisk together the1 can of coconut milk and 2 tbsp of brown sugar. Bring this to a boil over medium heat for about 20 minutes until mixture had reduced by half. Cook it uncovered. Stir in. Stir in ½ tsp of vanilla and salt. Keep stirring for every 5 minutes.

CarrotLadoo-11 CarrotLadoo-17

5.0 from 1 reviews
Print
Carrot Coconut Truffles/ Ladoo recipe
Author: Suganya Hariharan
Recipe type: Dessert
Cuisine: Indian
Prep time:  5 mins
Cook time:  20 mins
Total time:  25 mins
Serves: 12 ladoos
 
Ingredients
  • • Carrots – 4 medium, about 1.5 cups when grated.
  • • Cardamom powder – 1 ½ tsp (optional)
  • • Unsalted butter/ ghee – 1 tbsp ( use oil if vegan)
  • • Sweetened condensed milk – 1 cup
  • • Almonds – 7, sliced
  • • Rose water – 1 tsp (optional)
  • • 1 cup of desiccated coconut – 1 cup (keep ¼ of coconut aside for rolling)
Instructions
  1. Wash, peel and grate carrots.
  2. In a wide pan, melt 1 tbsp of butter/ghee/oil and toast the almonds till it turns golden. Drain and keep it aside.
  3. To the same pan, add grated carrots and sauté on medium heat for 5 minutes until carrots are little soft and it will ooze out some water and get dried.
  4. At that stage, add the dessicated coconut. Toast for a minute.
  5. To the same pan, pour the sweetened condensed milk and rose water to it. Mix well and cook on low flame.
  6. Cook it until the mixture gets thick and starts to roll like a ball. It will take around 5-8 mins.
  7. Add the roasted almonds, cool the mixture but not make it really cold. Cool it little so that you can handle by hand.
  8. Just apply ghee/oil in your hand, make round balls by taking that mixture in your hand.
  9. Roll these balls in the ½ cup of desiccated coconut. And serve.
  10. You can store them in airtight container upto four days. I refrigerate them as it is coconut based dish.
Notes
1. If you have doubt to when you can switch off the heat, it is when the spatula will refuse to get stir anymore and mixture will almost stick to your spatula.
2. You can also use fresh coconut but you can’t store it for long time. So i prefer to use desiccated coconut. And also you have to cook the fresh coconut for a longer time since fresh coconut can be moister.
Wordpress Recipe Plugin by EasyRecipe
3.2.2885

 ** Ghee – Indian clarified butter

** Cardamom – Indian spice. You can get this in any Indian store as a powder or as whole. 

CarrotLadoo-22

Filed Under: DESSERTS, SWEETS/DESSERTS Tagged With: best way to make coocnut recipes, carrot dessert recipes, carrot recipes, carrot sweet recipes, coconut carrot ladoo recipe, coconut dessert recipes, Coconut ladoo recipe, easter dinner recipes, easter quick dessert recipes, How to make ladoo, Indian quick dessert recipes, Indian Recipes, Milkmaid quick recipes, potluck recipes, potluck sweet recipes, quick Easter recipes, quick party dessert recipes, quick party sweet recipes, quick potluck recipes

Ridge gourd chutney/ Peerkangai Thogayal

March 27, 2015 by Suki 4 Comments

PeerkangaiChutney-3

PeerkangaiChutney-4nameOne of the easiest spiced healthy dip made with few ingredients 🙂 Absolutely delicious!

It can be kept in fridge and can be used for 2-3 days. You can skip onions if you do not want to add it. My mom makes without onion. But I like it with onion. Thogayal/chutney is a saviour for us on weekdays. I make coconut chutney, mint chutney, carrot chutney, eggplant chutney, tomato chutney, pumpkin chutney, channa dal chutney, coriander chutney and so on. It taste best with plain rice and chips/papad. I always make them on a busy weekday night and next day I will have it with a quick dosa/idli/paniyaram.

PeerkangaiChutney-3

On a weekday night it is so hard to cook after the work and that too on a long day, it is even harder. And that time, I used to think any recipes under 20 minutes and not more than that. I will cook them quick and sit in my couch till I sleep watching TV 🙂 I am sure a couch potato on weekday nights. I am sure many are 😉 . Ok enough of my blah..blah..blah! Lets go straight to the recipe today 🙂

PeerkangaiChutney-2

5.0 from 1 reviews
Print
Ridge gourd chutney/ Peerkangai Thogayal
Author: Suganya Hariharan
Recipe type: side dish
Cuisine: Indian
Prep time:  5 mins
Cook time:  15 mins
Total time:  20 mins
Serves: 1 cup
 
Ingredients
  • Ridge Gourd/ Peerkangai – 1 medium sized(peeled roughly and chopped roughly), gives about 2½ cups
  • Onion – 1, chopped roughly
  • Green chillies – 3, chopped roughly
  • Red chillies -3
  • Tamarind – small marble size (Soaked in 1 tbsp of water)
  • Coconut – 2 tbsp
  • Salt – ½ tbsp
  • Oil - 1tsp
    [To temper]
  • Oil – 1tsp
  • Mustard – ¾ tsp
  • Red chilli -1, broken
  • Urad dal – 1 tsp
  • Asafoetida – a pinch
  • Curry leaves – 1 sprig
Instructions
  1. Peel the skin (it is alright if you cant peel it totally), wash and chop the ridge gourd roughly.
  2. Heat a pan with a tsp of oil and then add the onions and sauté tll transparent along with green chillies and red chillies.
  3. Add the chopped ridge gourd and salt. Cook it covered till the ridge gourd softens and also it will reduce in volume. Switch off.
  4. Cool completely and blend them smoothly with tamarind and coconut.
  5. To temper, add oil in a small pan, add the mustard seeds, when it cracks and now add the urad dal and red chilli till it turns golden brown. Add the red curry leaves and switch it off.
  6. And add the tempered ingredients to the chutney and enjoy with some rice, dosa, idli.
Wordpress Recipe Plugin by EasyRecipe
3.2.2885

Taste great with rice and papad, idli, dosa, paniyaram and so on.

PeerkangaiChutney-4

Filed Under: RAITA/DIPS/CHUTNEY, VEGAN Tagged With: coconut recipes, Dipping curry sauce recipe, dosa chutney recipes, dosa side dish recipes, idli chutney recipes, Indian dipping recipes, peerkangai thogayal, peerkangairecipes, Ridge gourd chutney/ Peerkangai Thogayal, ridge gourd recipes, thogayal recipes, vegetarian chutney recipe

Vazhakkai Fry/ Raw Banana Fry

March 21, 2015 by Suki 6 Comments

VazhakaiFry_name

VazhakaiFry_namePerfectly roasted plantain with curry leaves and spices.

I usually prepare the raw banana in two other different styles. One is by chopping them in circles, marinate in the masala and pan roasting them. Other is by grinding few masala with coconut and cooking raw banana with the masalas. And the one I am doing now is a classic recipe at my house 🙂 My mom does this for some rice and rasam. Because this one is crispy, it tastes great with any rice. My dad actually makes this at my place. My mom makes raw banana podimas by boiling it and mixing with few masalas. OMG! I am drooling! Even if I cook the best recipe of mine or have my favorite food in my favorite restaurant, my vote and my option is for my Moms food at any day. I guess it is the same for most of us. 🙂 I was raised having this comfort food and I love them.

I noticed that there are no raw banana recipes in my site. I noted 😉 in my list to add few more.

VazhakaiFry-3

VazhakaiFry-2

5.0 from 1 reviews
Print
Vazhakkai Fry/ Raw Banana Fry
Author: Suganya Hariharan
Recipe type: Main
Cuisine: Indian
Prep time:  10 mins
Cook time:  20 mins
Total time:  30 mins
Serves: 2 cups
 
Ingredients
  • • Raw banana/ vazhakkai – 2 medium sized( 2 cups), thinly sliced into circles
  • • Oil - 2 tbsp
  • • Mustard seeds - ¾ tbsp
  • • Cumin seeds (Jeera) - 1 tsp
  • • Urad dal - 2 tsp
  • • Curry leaves - 5
  • • Turmeric powder - 2 tsp
  • • Sambhar powder - 1 tbsp
  • • Chilli Powder - 1 tbsp
  • • Sugar - 1 tsp
Instructions
  1. Wash raw banana and peel the outer layer. Chop them finely into small cubes. Soak them in water till you use them.

  2. Heat 1 tbsp of oil in a pan in medium heat, add mustard, after it crackles, add urad dal,curry leaves and jeera.
  3. Bring the heat to low, and add turmeric powder, sambar powder, chilli powder,salt and asafetida Stir well. But make sure not to burn them, so keep it in low heat.
  4. Now add the chopped raw banana and bring the heat to medium. Sprinkle 1 tbsp of water, close the lid and cook for 5-7 minutes.

  5. Add 1 tsp of sugar and keep frying until the raw banana gets roasted here and there in color. Takes around 5-7 minutes again. Switch off the flame.
Notes
Adding sugar makes retain the color and turns it crispy.
Wordpress Recipe Plugin by EasyRecipe
3.2.2885

Taste great with rice and sambar or rasam or milagu kuzhambu or vengaya kuzhambu or dal fry. You can have them plain as snacks 🙂

VazhakaiFry-4

Filed Under: DRY CURRY SIDE DISH/ STIR-FRY, VEGAN Tagged With: Raw Banana Fry recipe, sambar recipe, Side dish for rasam, Side dish for rice recipe, Vazhakkai Fry recipe, vazhakkai kari recipe, vazhakkai poriyal recipe, vegan plantain recipe, vegetarian indian recipes, vegetarian south indian recipe

Mushroom Biryani

March 19, 2015 by Suki 7 Comments

mushroomBiryani

Mushroom Biryani-7

A plate full of hot, fragrant rice and mushroom cooked with crispy onions and spiced yoghurt sauce.

I have already 5 Biryani recipes 🙂 which means you would have known by now that I love cooking Biryani. Many find it difficult but it is not and it is worth the time it takes. I am not saying this 😉 Just like that! Trust me! I remember when I first tried to cook biryani before 3 years I would always make the rice mushy so I never liked to do Biryani after it. I will motivate again myself to do it and tried. I somehow found the tricks after a first few times 🙂 Now I am sure a pro 😀 proudly would say that! Never failed 🙂 And I still love to get comments even I know that it is good 😀 Like today when I received a comment for my sambar 😉 I went all blushing! 😀 May be I got the comment to see me blush 😉 whatever..:)heart It is always that comments and love
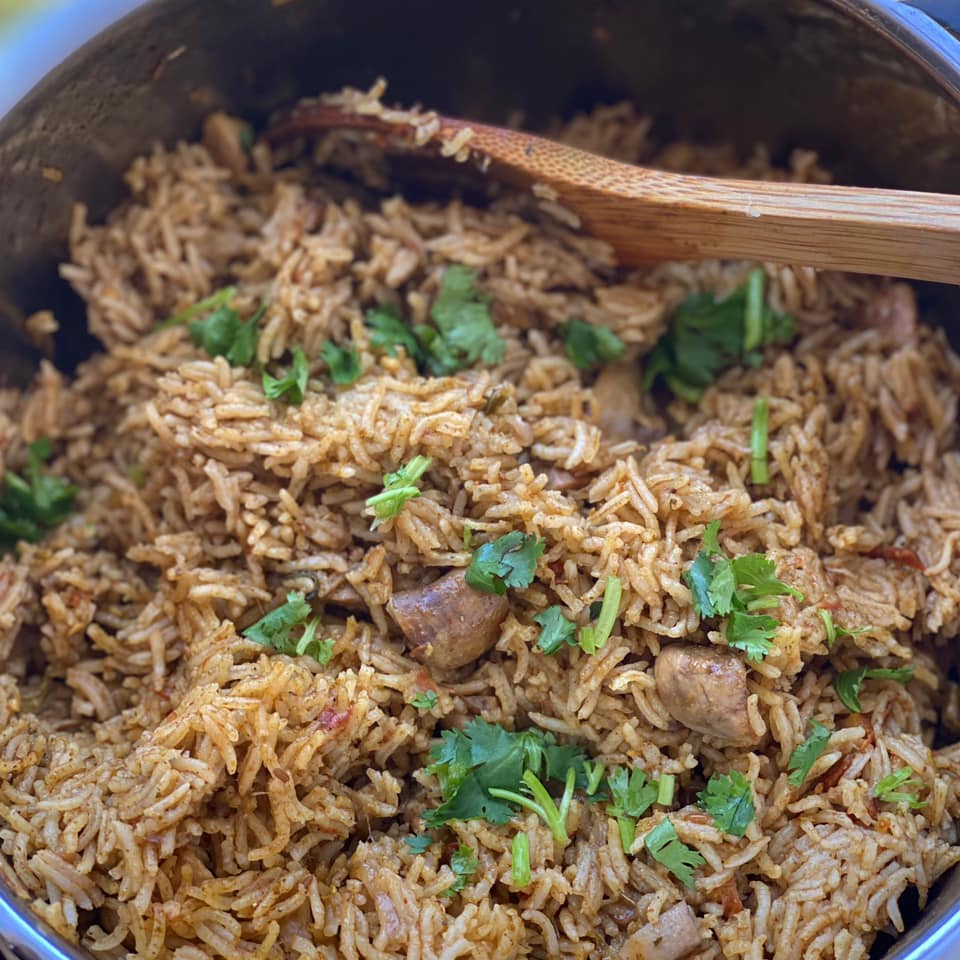
 heartwhich makes me cook next time!

mushroomBiryani

To be honest, it does take time to cook biryani than many easy 10 minutes food. I even don’t like to post time consuming recipes but it is so tasty that I could not resist myself not posting it. The best thing about biryani is that it tastes great even the next day and the day after. It will save you from cooking for next three days and it will never be like you are tasting leftover food! Awesome right?

Mushroom Biryani-5

Biryani is one of the most favorite dishes. My mom has never cooked mushroom when I was a kid, so I used to be hesitant to eat or cook them. Then had it when I went out with friends and I found it tasty and no harm cooking them 🙂 . May be I will cook this for her sometime 🙂 and also I realized that I don’t have a lot of mushroom recipes somehow. I always add them to noodles and pastas but I don’t tend to make them on weekends 🙂 somehow and here is the mushroom Recipes that I have – Mushroom Pepper Mini Quesadilla, Malai Pepper Mushroom with some colourful mushrooms.

I have some good biryani collection recipes. 🙂 If you would like to view it – Restaurant style vegetable Biryani, Paneer Biryani, Hyderabadi Egg Biryani, Restaurant style Lamb Biryani, Prawn Biryani.

To make it vegan, skin the yogurt or replace with vegan yogurt. And also replace ghee with oil.

Mushroom Biryani-2

Print
Mushroom Biryani
Author: Suganya Hariharan
Recipe type: Main
Cuisine: Indian
Prep time:  20 mins
Cook time:  45 mins
Total time:  1 hour 5 mins
Serves: 3 cups
 
Ingredients
  • • Oil – 1tbsp
  • • Bay leaf – ½
  • • Cinnamon – 1 thin piece
  • • Cloves – 3
  • • Cardamom pods -2
  • • Yogurt – 2 tbsp
  • • Basmati Rice – 3 cups
  • • Biryani Masala – 1 tbsp
  • • Red chilli powder – 1 tsp
  • • Garlic – 4, chopped
  • • Green chilli – 2, slit into two

    for garnish:
  • • Saffron – ½ tsp dissolved in ½ cup warm milk
  • • Ghee – 2 tbsp (or oil)
  • • Mint – 2 tbsp finely chopped (to garnish)

    For fried onions:
  • • Onions – 2 small onions, ½ cup, sliced thinly
  • • Oil – to fry (3 - 4 tbsp)

    For rice masala:
  • • Cashew nuts – 6
  • • Khus khus (white poppy seeds) – ½ tbsp.
  • • Cumin seeds/ jeera – ½ tbsp
  • • Fennel seeds – 1 tbsp.
  • • Garlic – 4 pods
  • • Ginger – 1 inch
  • • Green chilli – 6
  • • Tomato – ½, medium sized, chopped
  • • Mint – ½ cup, chopped finely
  • • Coriander leaves – ½ cup, chopped finely.
Instructions
  1. Wash and soak rice for atleast 30 -40 minutes.

    For Fried onions:
  2. Heat a pan with oil, add the sliced onions and cook in medium heat till turn golden brown. Stir in the middle so that it does not stick to the bottom. Set aside.

    For masala:
  3. Grind the garlic, ginger, mint, coriander, cashews, poppy seeds, fennel seeds, tomatoes, cumin seeds, chillis with two tbsp. of water into a smooth paste.
  4. Now take a big pan, add oil or ghee in medium heat, add the spices (cardamom, bay leaf, cinnamon, cloves), and add garlic and chillies and sauté for a minute. Now add the grinded paste and sauté them till the raw smell leaves and little oil oozes out.
  5. Now add the mushroom, yogurt, chilli powder, biryani powder and mix well. I always move the skillet away from the heat when adding yogurt which prevents it from curdling.
  6. Now after returning the skillet back to the stove, add the rice and salt and water. ( Quantity of water to be added is for one cup of rice , it is 1.5 cups of water). Mix well and close the lid tight and keep it in medium heat for 10 minutes. Now add the marinated fried onions and chopped mint for garnish and keep it in low for 5 minutes.
  7. Drizzle the saffron milk over the rice and Switch off, and keep it closed for another 5 minutes. They will help the rice to get the saffron flavors and vice versa.
Wordpress Recipe Plugin by EasyRecipe
3.2.2885

It taste great with a raita (Garlic Raita / Cucumber carrot Raita), or Mirchi ka salan or even plain biryani will taste delicious 🙂

Mushroom Biryani-3

Filed Under: RICE/BIRYANI VARIETIES, VEGAN Tagged With: Biryani Recipe without marination, biryani recipes, Indian biryani recipe, Mushroom Biryani recipe, Mushroom recipes, Mushroom Vegetarian recipe, quick Biryani recipe, Tasty biryani recipe, vegan biryani recipe, Vegetarian biryani recipe

Page 12 of 19
« Previous 1 … 7 8 9 10 11 12 13 14 15 16 17 … 19 Next »
  1. Pages:
  2. «
  3. 1
  4. ...
  5. 9
  6. 10
  7. 11
  8. 12
  9. 13
  10. 14
  11. 15
  12. 16
  13. 17
  14. 18
  15. 19
  16. »
  • « Previous Page
  • 1
  • …
  • 10
  • 11
  • 12
  • 13
  • 14
  • …
  • 19
  • Next Page »
  • Facebook
  • Google+
  • Instagram
  • Pinterest
  • Twitter

LOOKING FOR SOMETHING?

logo
Food Advertisements by
logo
Food Advertisements by

Categories

STAY CONNECTED

  • Facebook
  • Google+
  • Instagram
  • Pinterest
  • Twitter

SUBSCRIBE BY EMAIL

SEARCH RELISH THE BITE

logo
Food Advertisements by

Copyright © 2025 · Lifestyle Pro Theme on Genesis Framework · WordPress · Log in