• Home
  • Page Layouts
  • Page Templates
  • Theme Colors
    • Lifestyle Pro Blue
    • Lifestyle Pro Green
    • Lifestyle Pro Mustard
    • Lifestyle Pro Purple
    • Lifestyle Pro Red
    • Lifestyle Pro Teal

Relish The Bite

Taste of happiness

  • HOME
  • ABOUT
  • RECIPE INDEX
    • SNACKS & APPETIZERS
    • BREAKFAST
    • BAKED RECIPES
    • LUNCH & DINNER
      • RICE/BIRYANI VARIETIES
      • SIDES
        • DRY CURRY/STIR-FRY
        • SOUTH INDIAN CURRY/KUZHAMBU
        • NORTH INDIAN CURRY/DAL
        • RAITA/DIPS/CHUTNEY
        • Soups/Salads
      • PASTA PIZZA & TACOS
      • BREAD
      • CHINESE ASIAN INSPIRED
    • NON-VEG RECIPES
    • DESSERTS
    • BEVERAGES
  • SNACKS
  • BREAKFAST
  • NON-VEG RECIPES
  • RICE/BIRYANI VARIETIES
  • LAMB
  • SOUTH INDIAN CURRY/KUZHAMBU
  • VEGAN
  • NORTH INDIAN CURRY/DAL
  • DRY CURRY/STIR-FRY
  • PASTA & TACOS
  • CHINESE ASIAN INSPIRED
  • BAKED RECIPES
  • COLLECTIONS
  • BREAD
  • BEVERAGES
  • DESSERTS
  • FESTIVAL RECIPES
    • SNACKS & APPETIZERS
    • SWEETS/DESSERTS
  • RESOURCES
    • HOW TO START A BLOG
    • TITBITS
    • PRESS
  • CONTACT
You are here: Home / Archives for Indian

Coconut Barfi/Coconut Fudge

September 28, 2014 by Suki 8 Comments

Coconutbarfiname

Coconutbarfiname
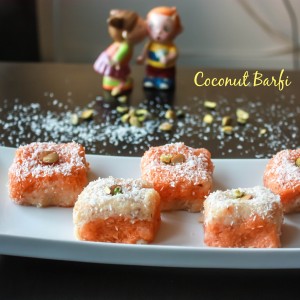
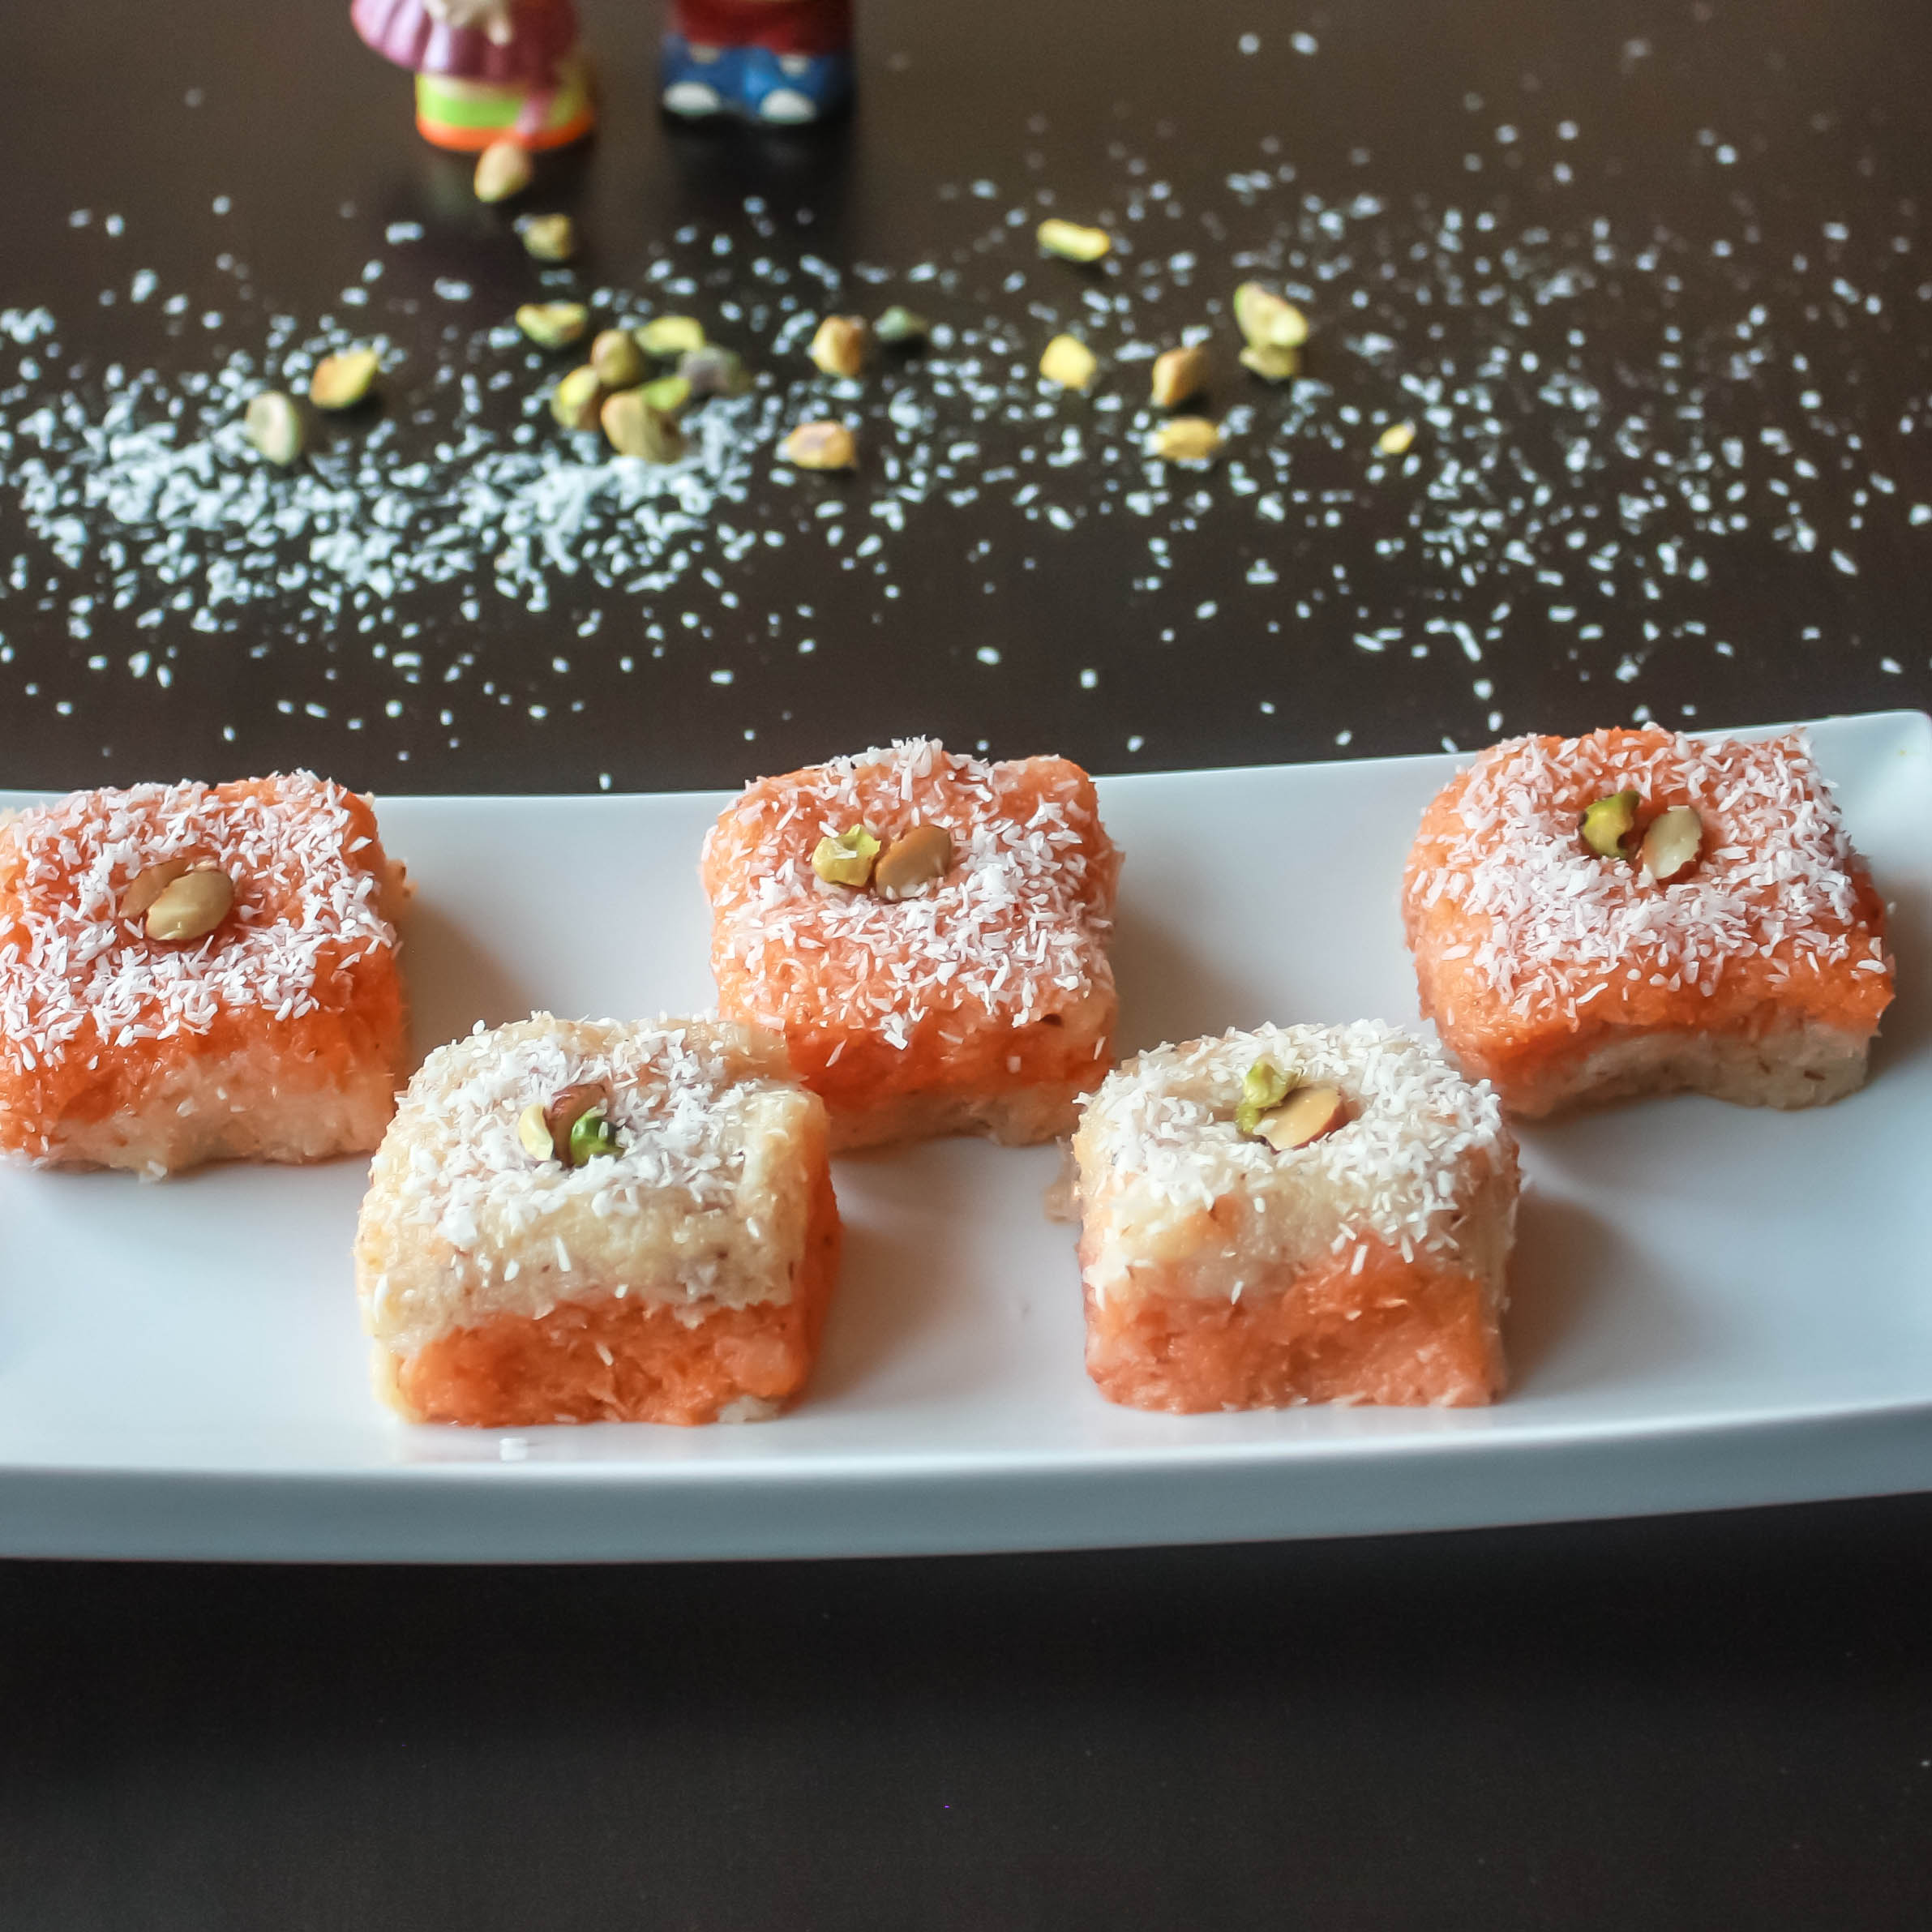
You will love this dish if you love coconut. It’s made with just coconut and sweetened condensed milk. Isn’t that simple ;). It is usually made during diwali time.  Or you can make it for any festival. You can make them even if there is no festival, no harm :). Kids love coconut a lot. 

Coconutbarfifinal-2

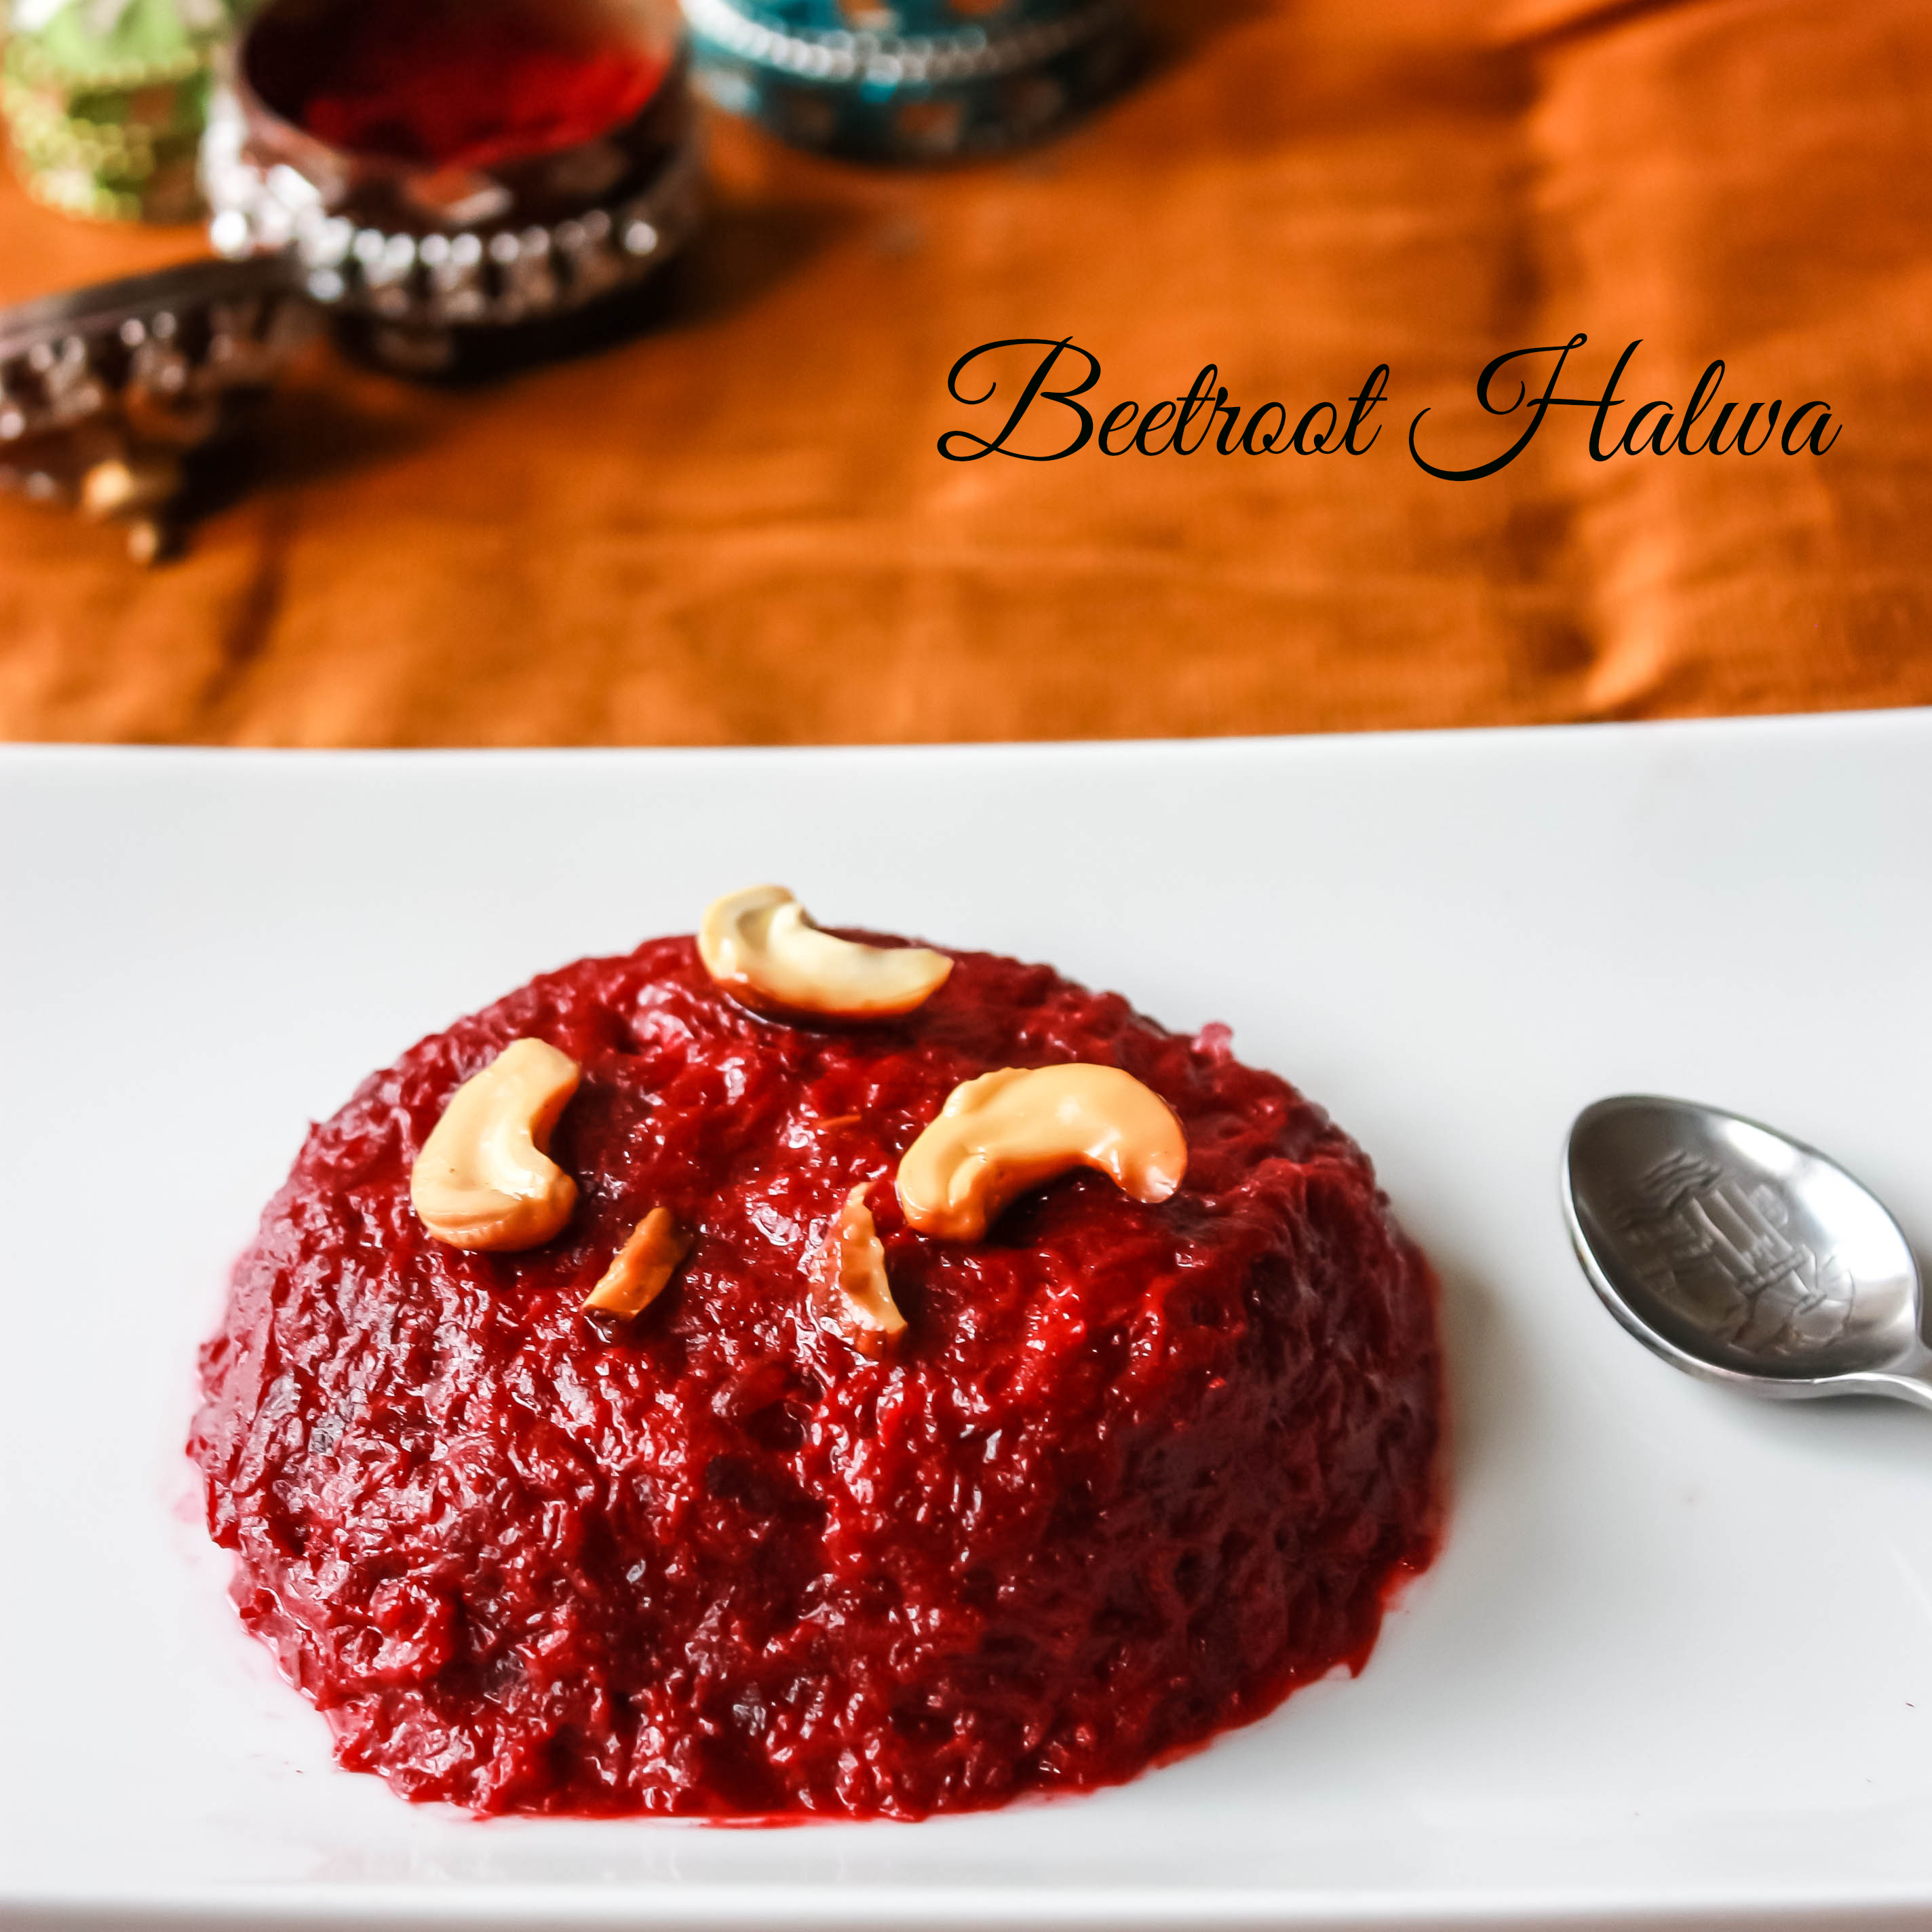
I made them with desiccated coconut. Generally freshly grated coconut makes better barfi. But I used desiccated coconut and found this simple and delicious. There are different ways to make this. But this is my personal way to do a quick coconut barfi. I just wanted to add color to it and try, so added saffron. You can even color powder, but I would say NO. Adding color is not good for health. So I would always prefer saffron.

For cardamon powder, I always grind cardamon and sugar together.

Now the recipe:

5.0 from 1 reviews
Print
COCONUT BARFI/COCONUT SAFFRON SWEET
Author: Suganya Hariharan
Recipe type: Dessert
Cuisine: Indian
Prep time:  60 mins
Cook time:  15 mins
Total time:  1 hour 15 mins
Serves: 6
 
Ingredients
  • Sweetened Condensed milk – 1 cup
  • Desiccated coconut – 1½ cup
  • Ghee/Butter – 1 tsp
  • Milk – 2 tbsp
  • Cardamon – 2, crushed
  • Sugar – 1 tsp
  • Almonds/pistachios – 5, chopped
  • Desiccated coconut – ¼ cup for rolling
Instructions
  1. Dissolve saffron powder in hot water and set aside.
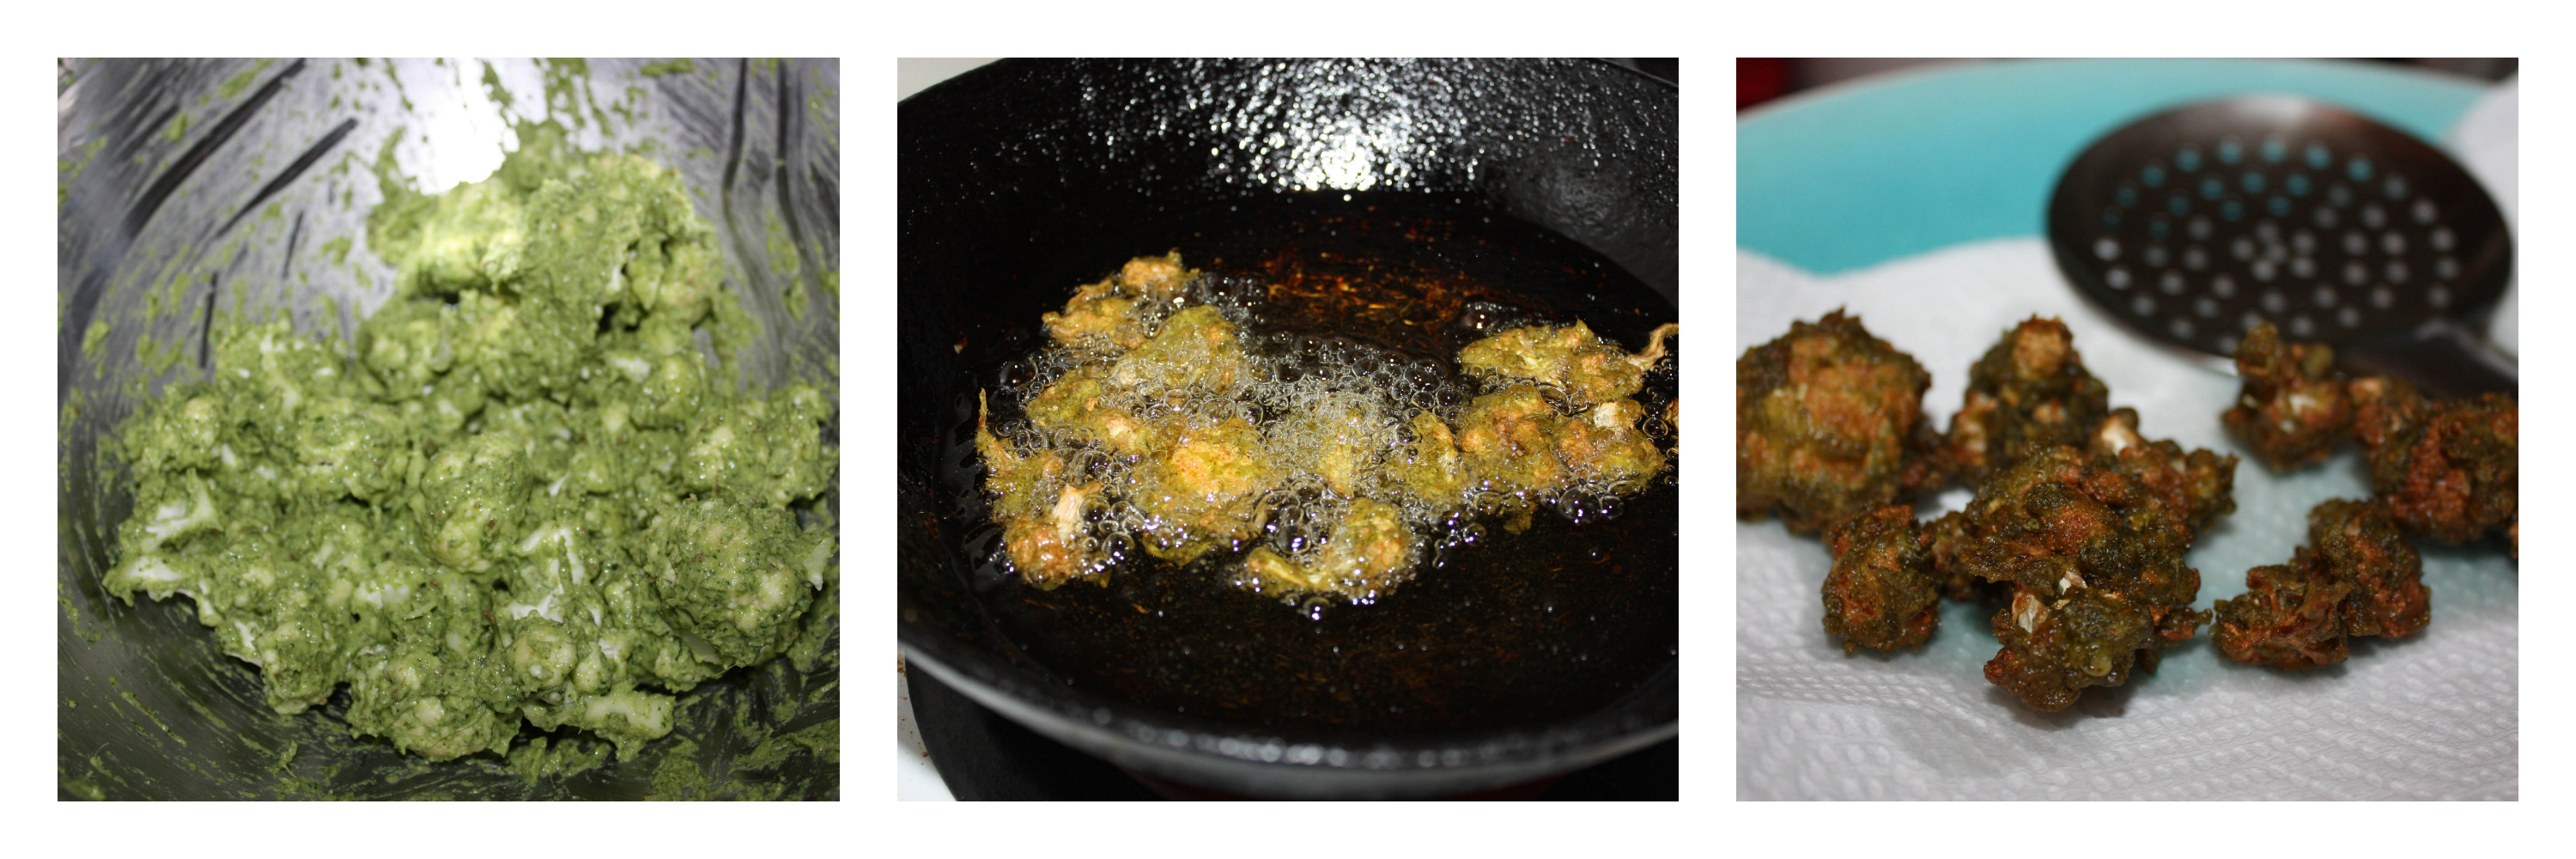
  2. Heat the ghee and toast the almonds/pistachios till it turns golden. Drain and keep it aside.
  3. To the same pan, add the 1-cup of desiccated coconut. Toast for a minute.
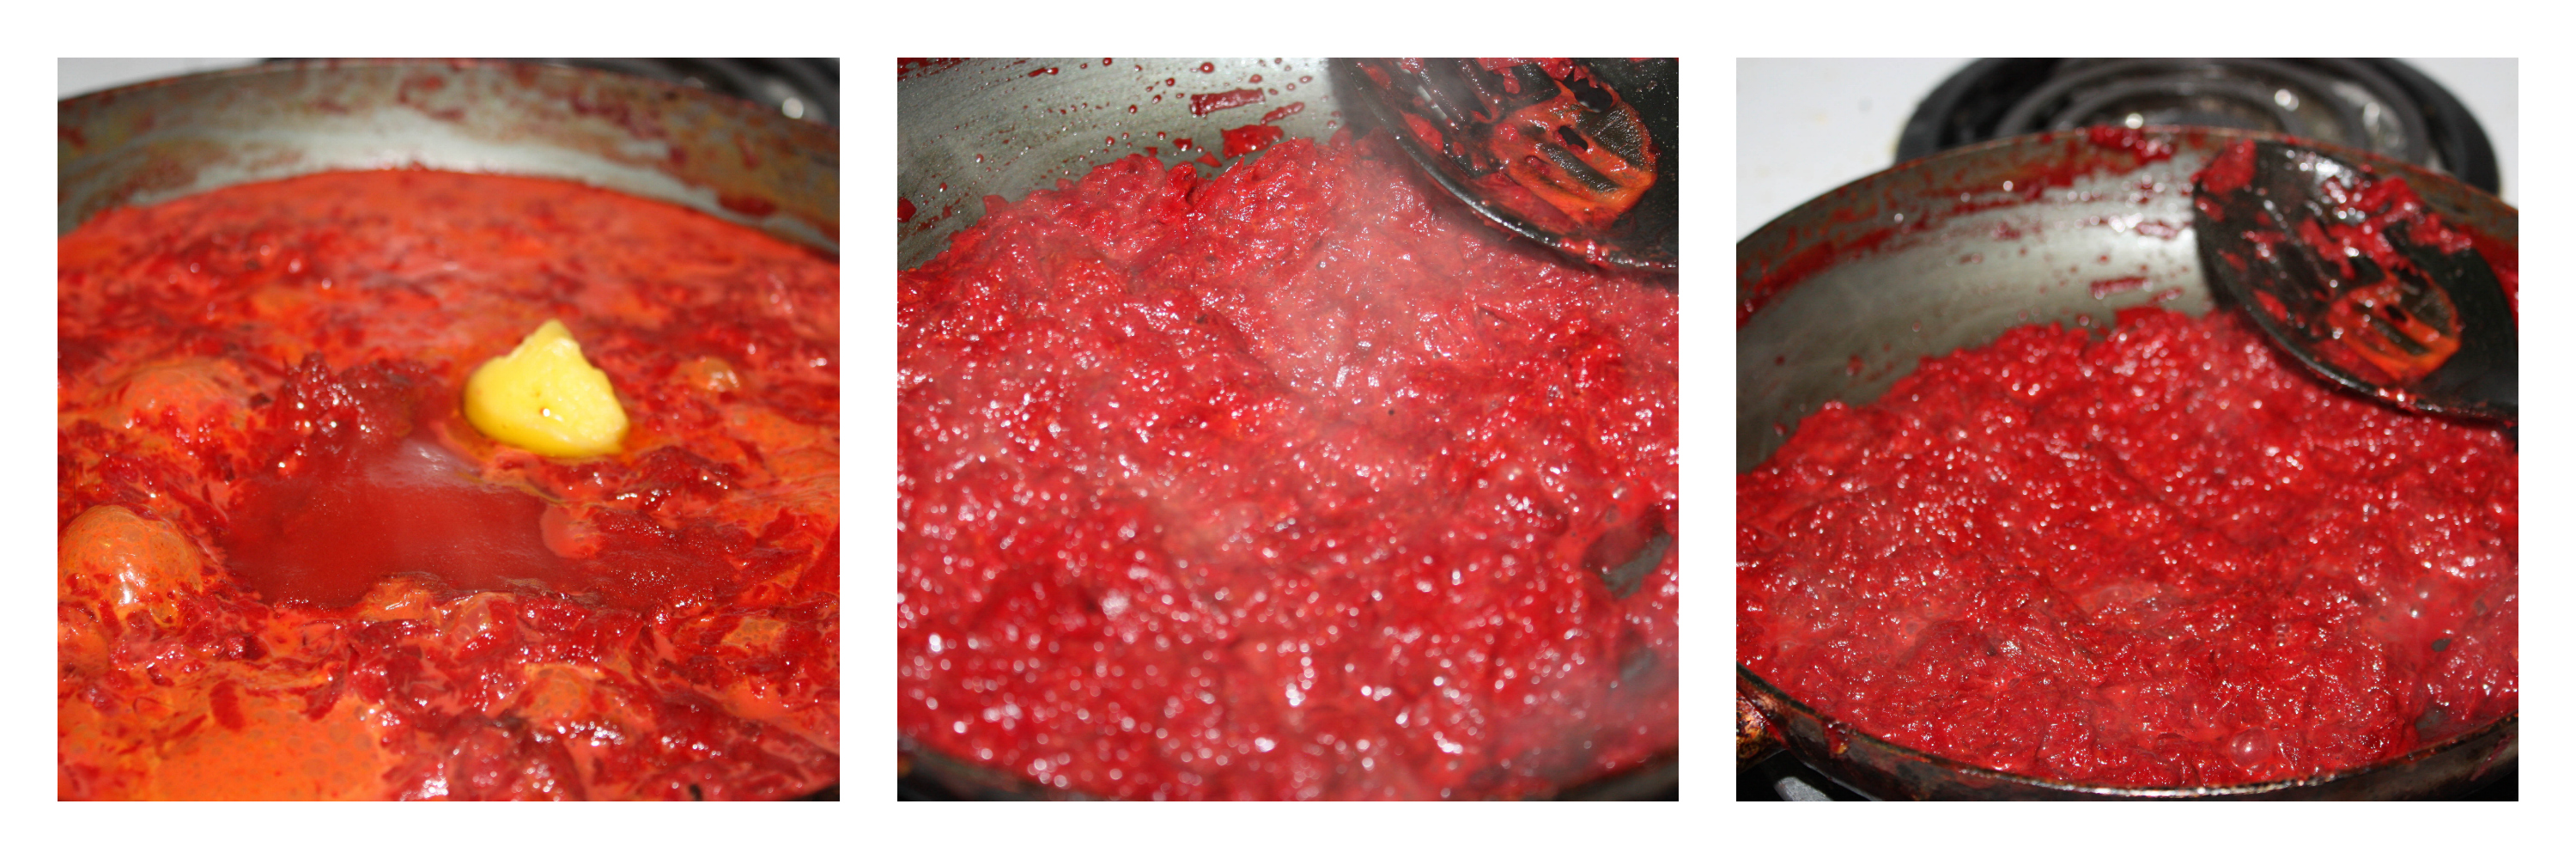
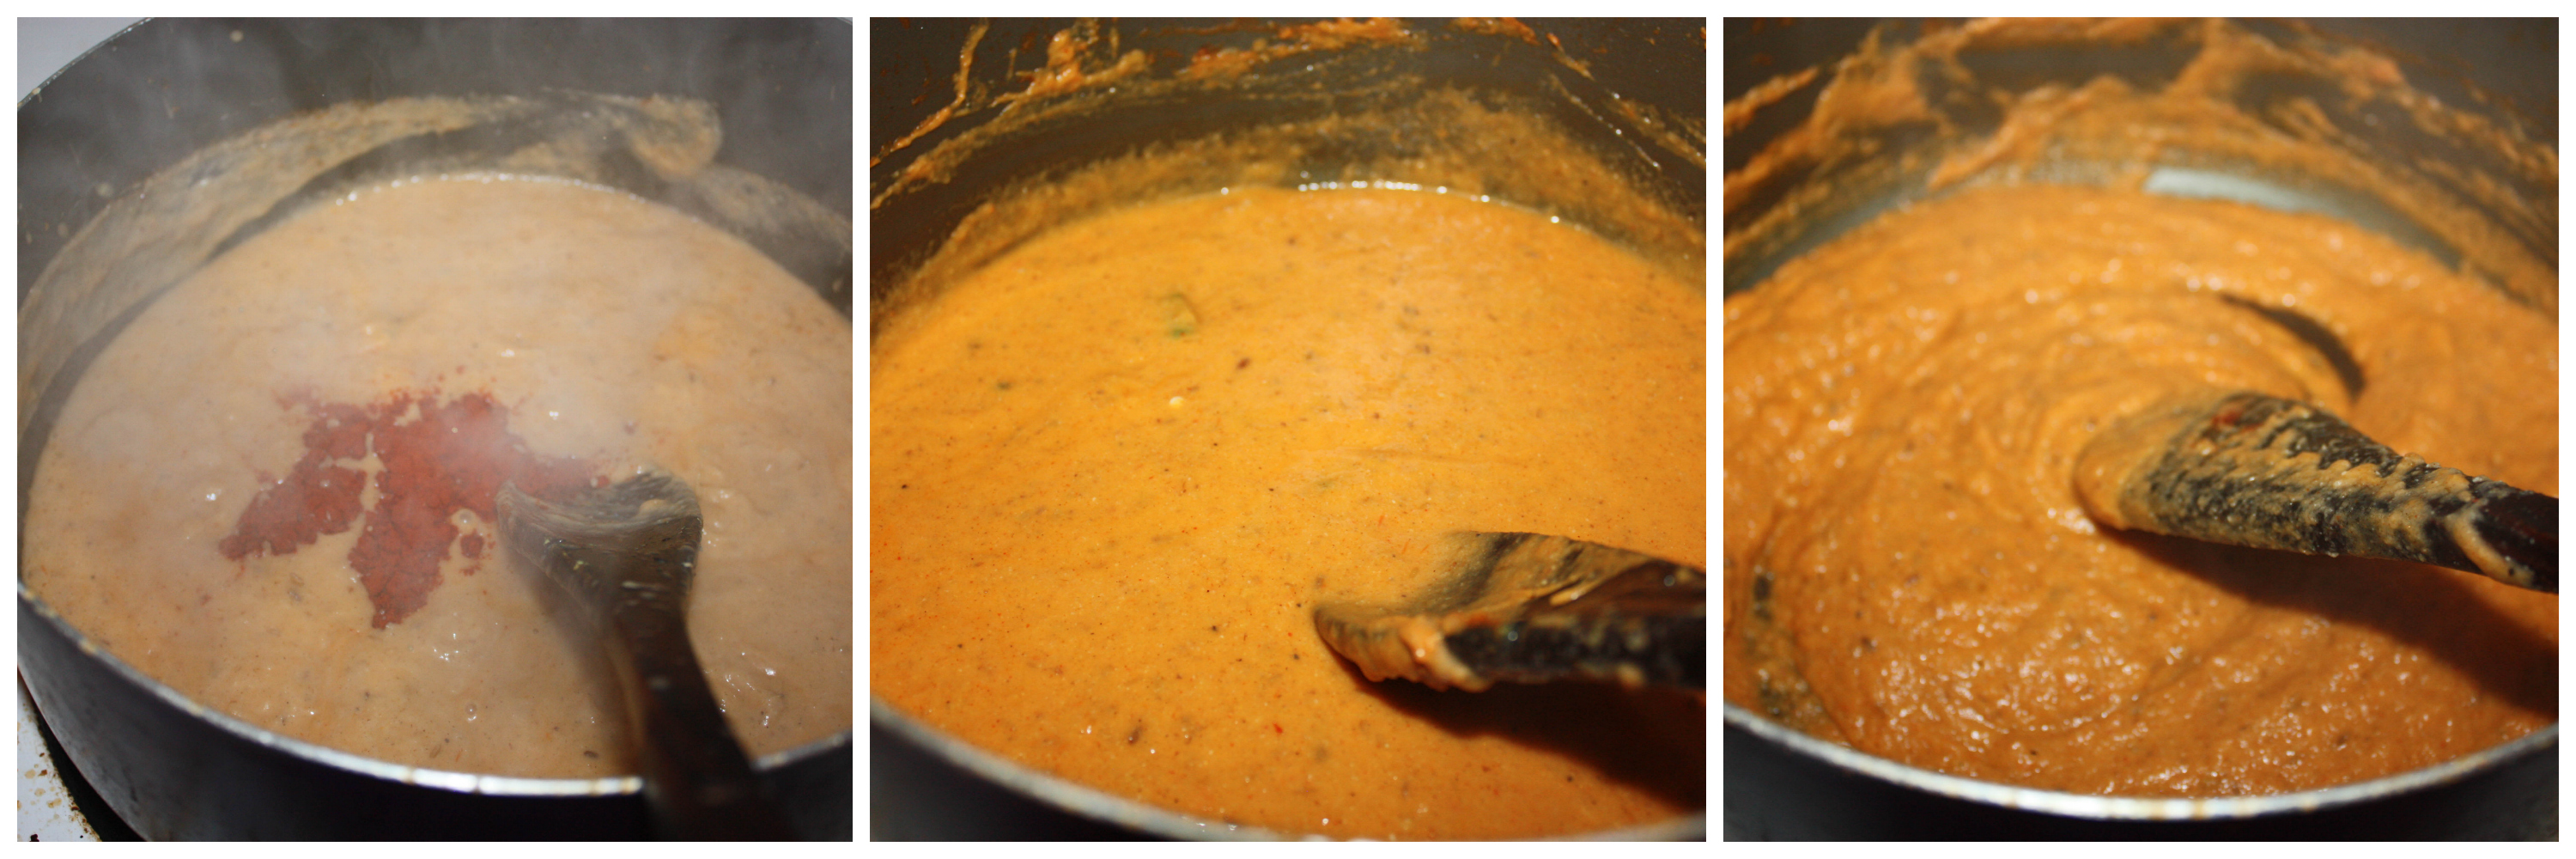
  4. To the same pan, pour the condensed milk on it. Mix well and cook on low flame.
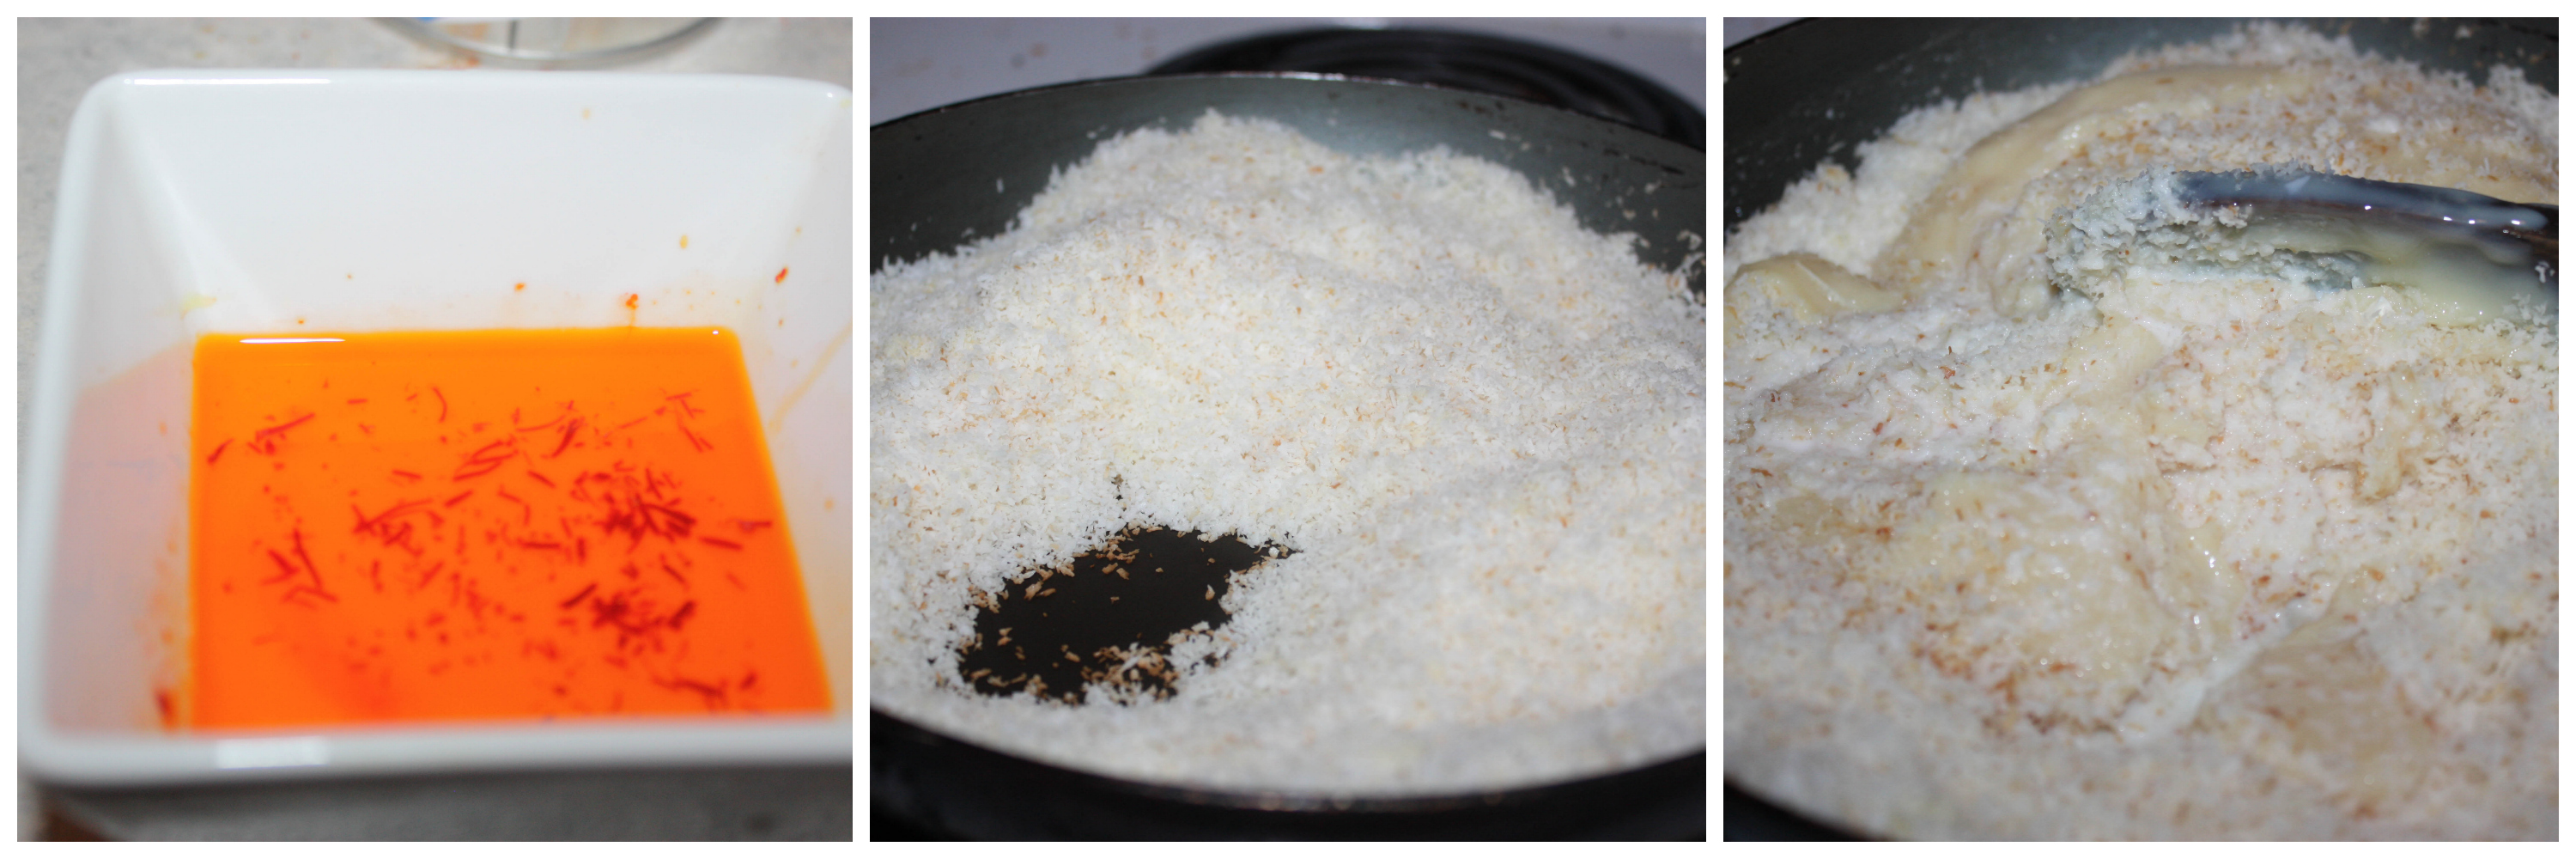
  5. Crush the cardomon and sugar. Add it to the pan and add the two tbsp of milk.
  6. Cook it until the mixture gets quite thick. It will take around 6 mins. If you have doubt to when you can switch off the heat, it is when the spatula will refuse to get stir any more and mixture will almost stick to your spatula.br]
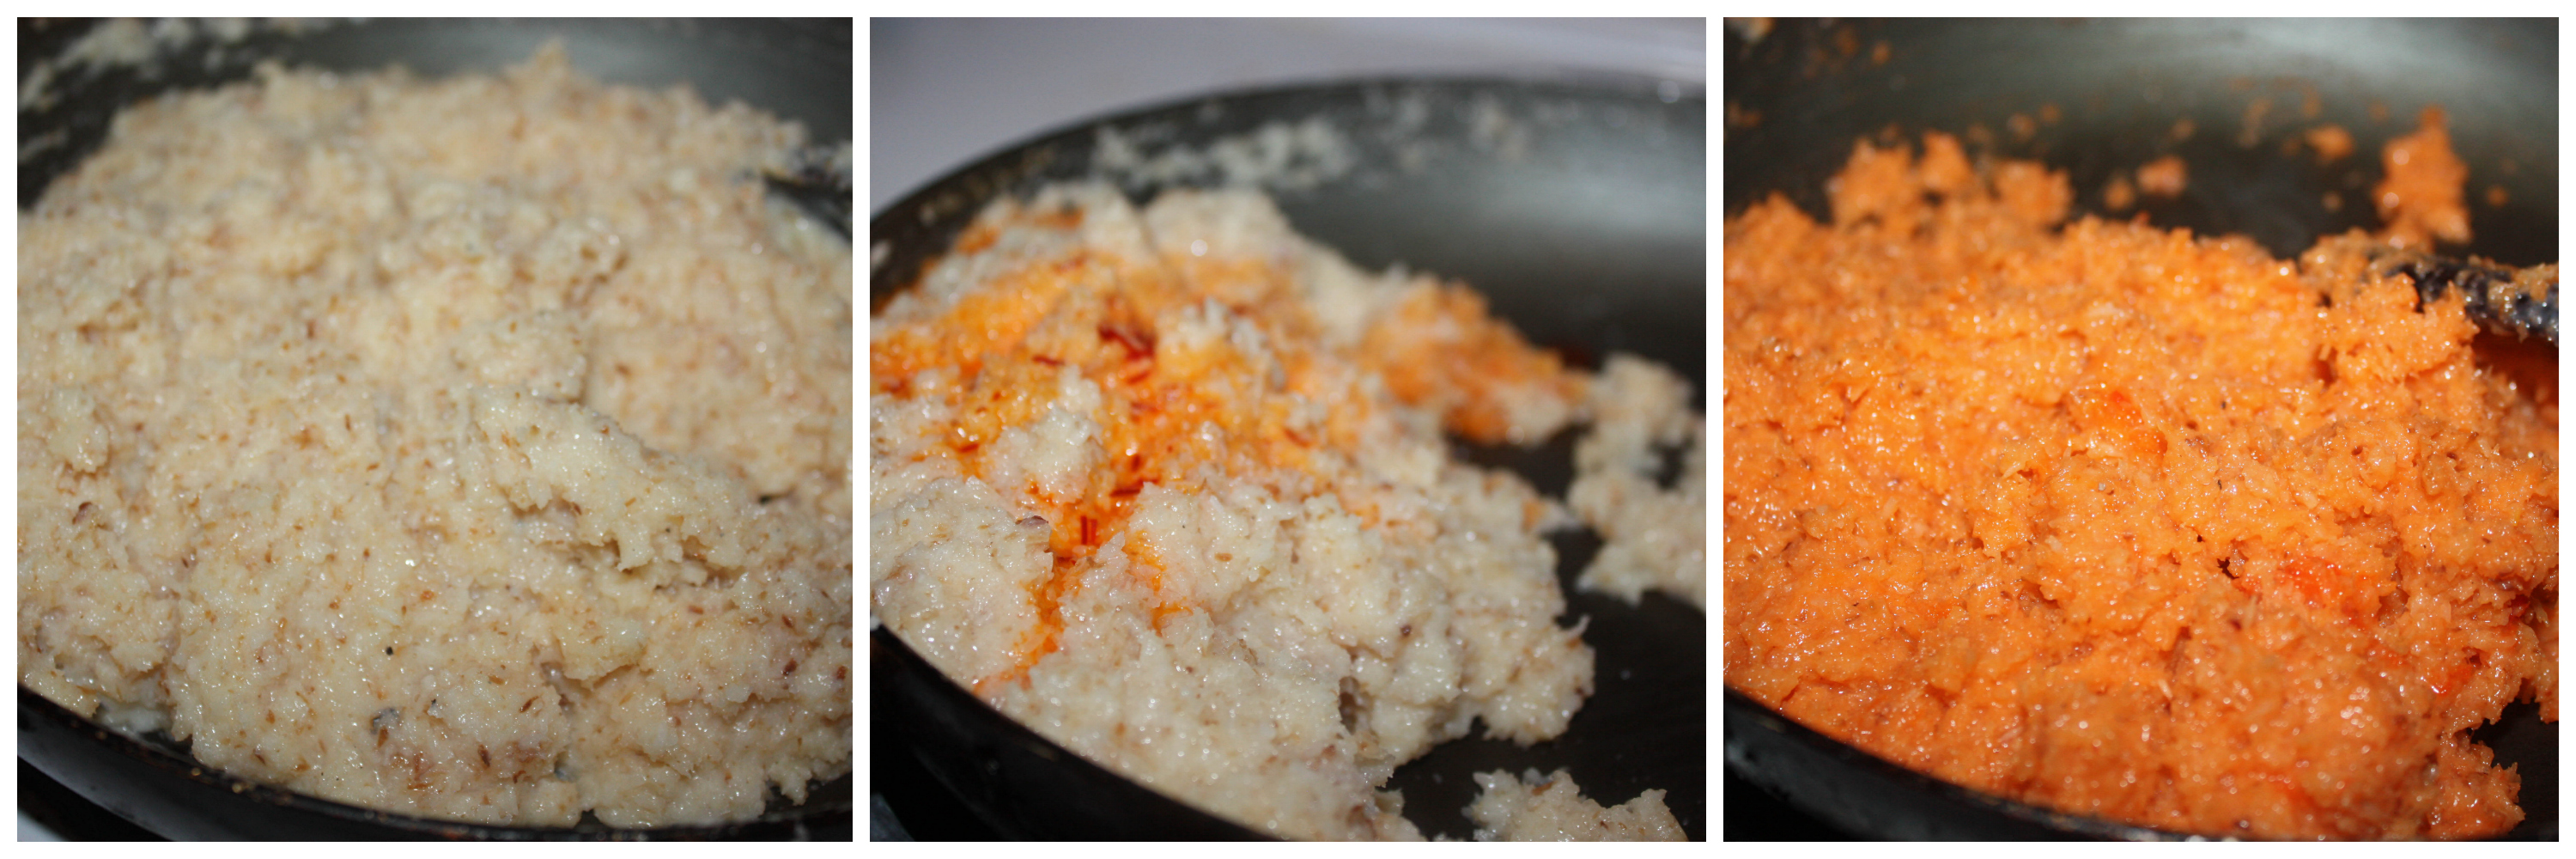
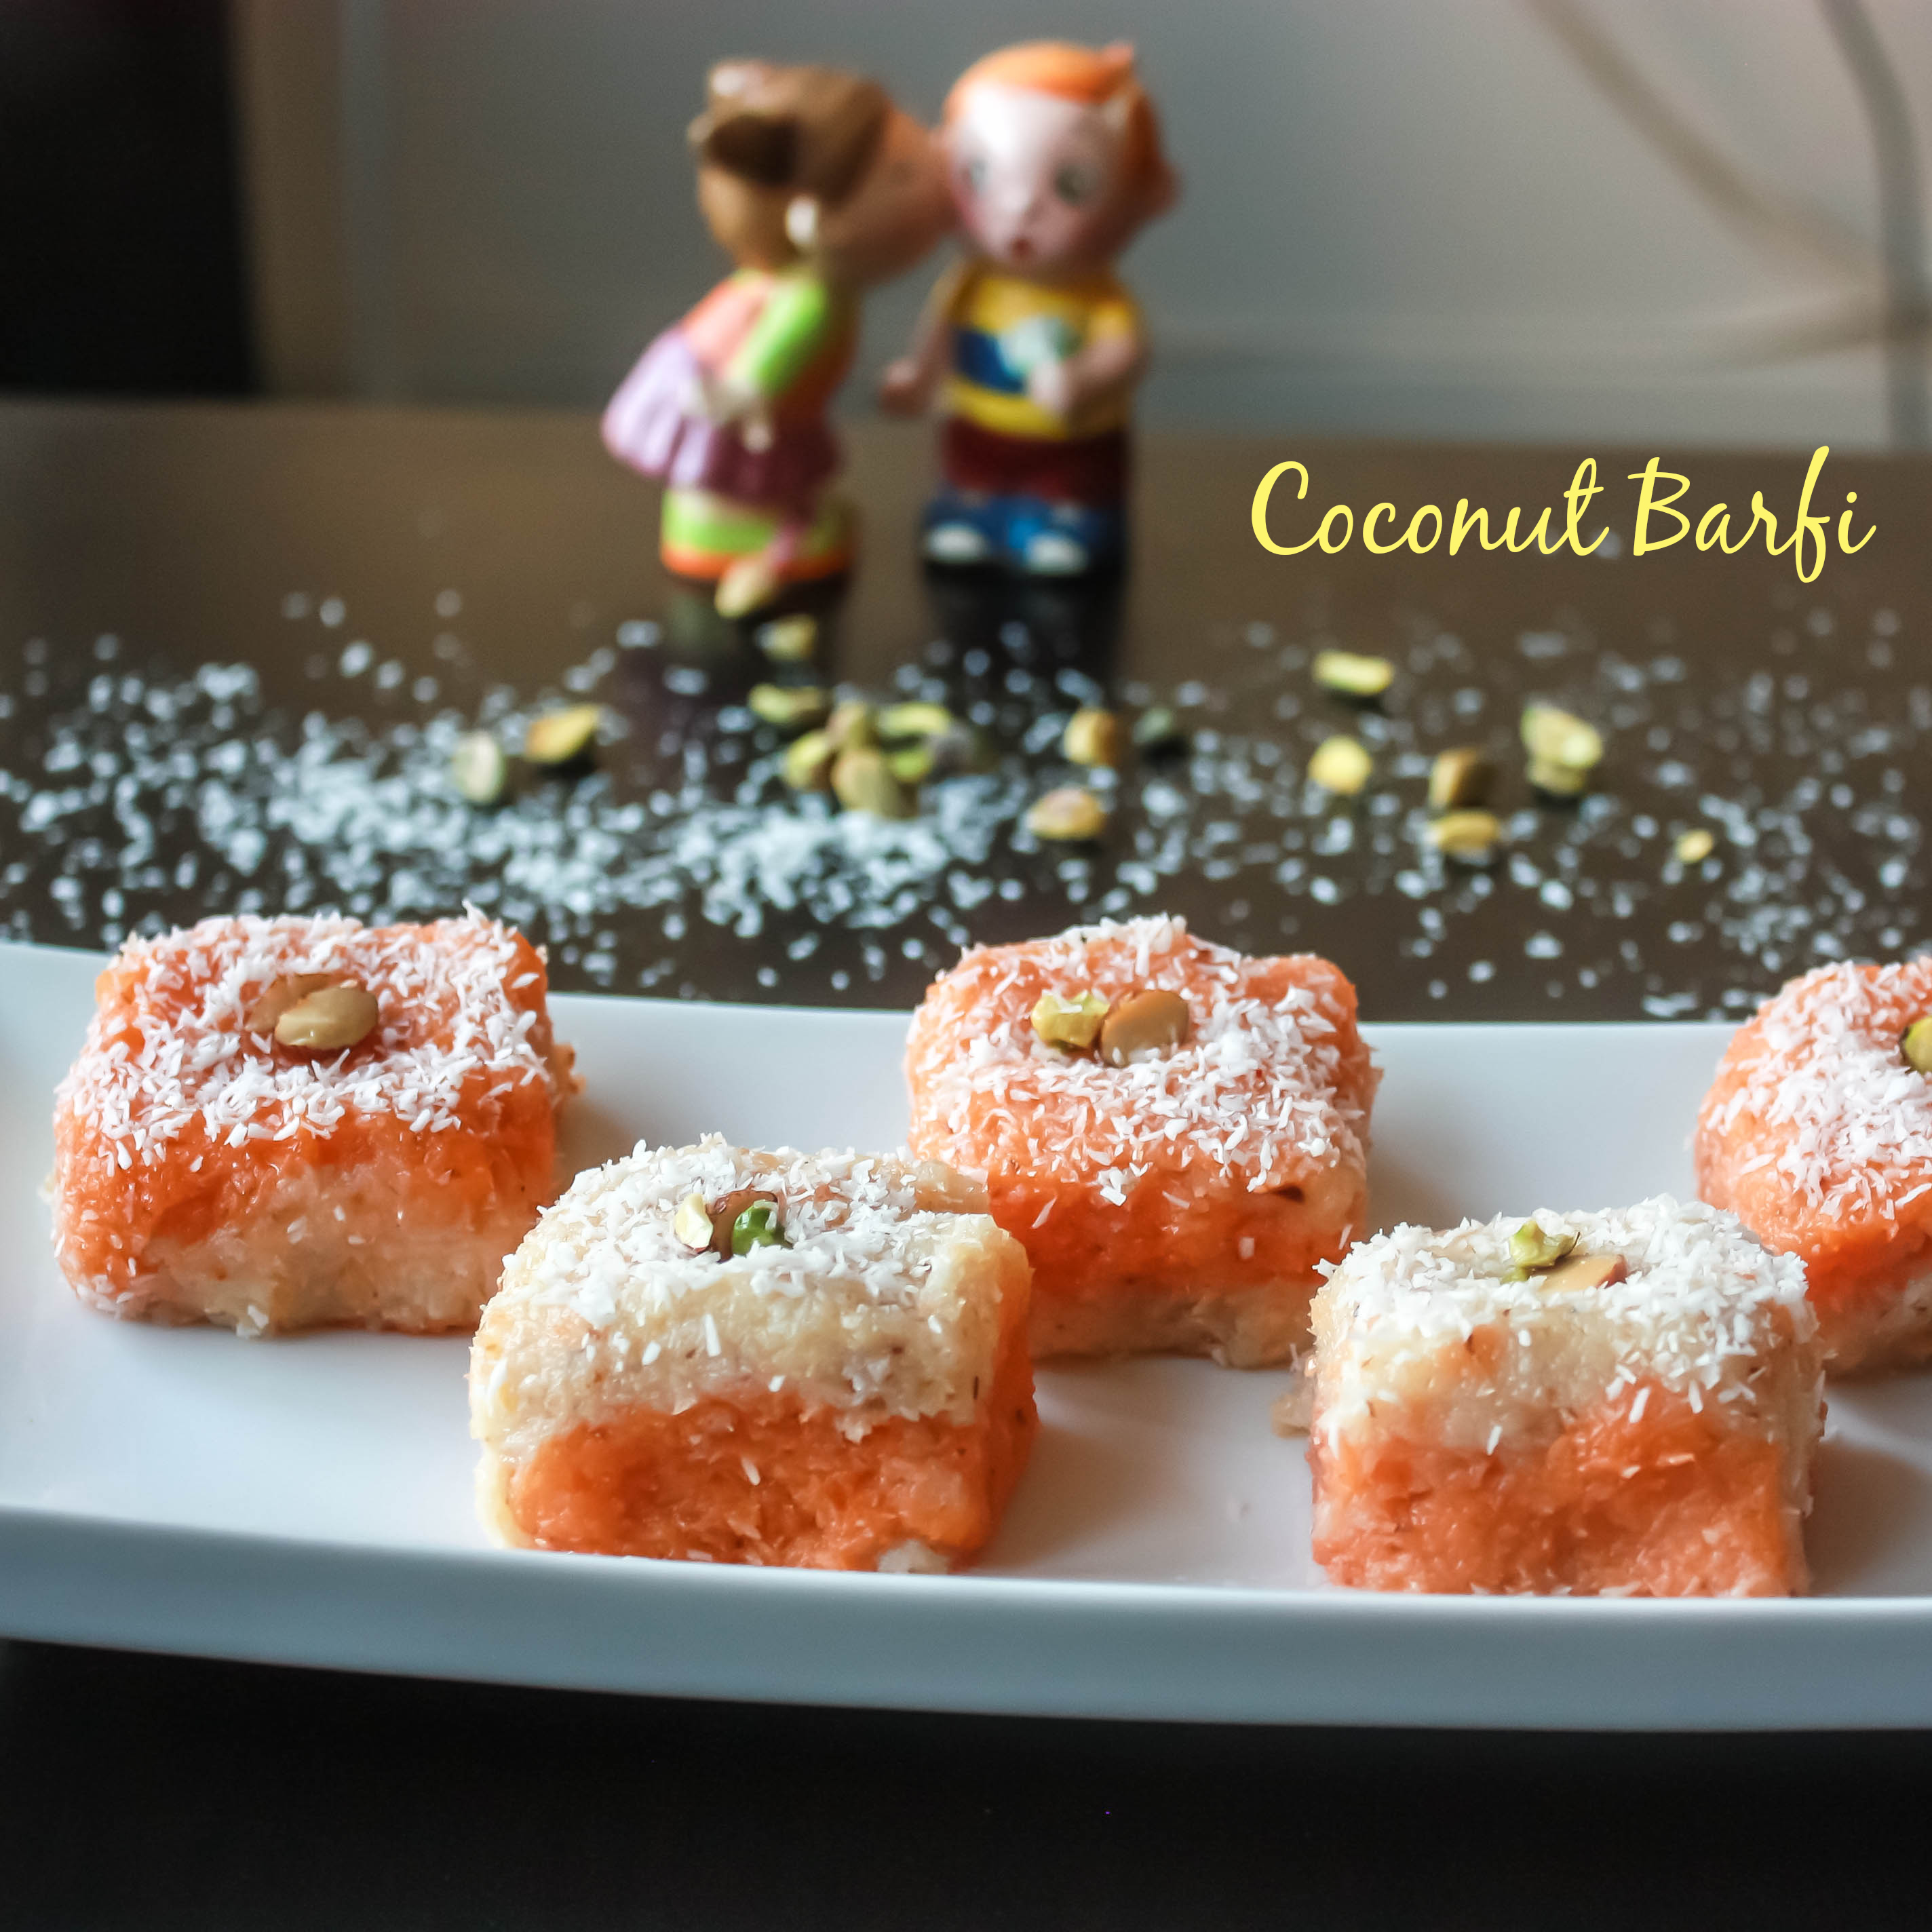
  7. Divide the mixture into two equal parts, and keep one part aside. And add saffron water to the other and stir it till the water gets evaporated. Switch off the mixture when it is in right consistency.
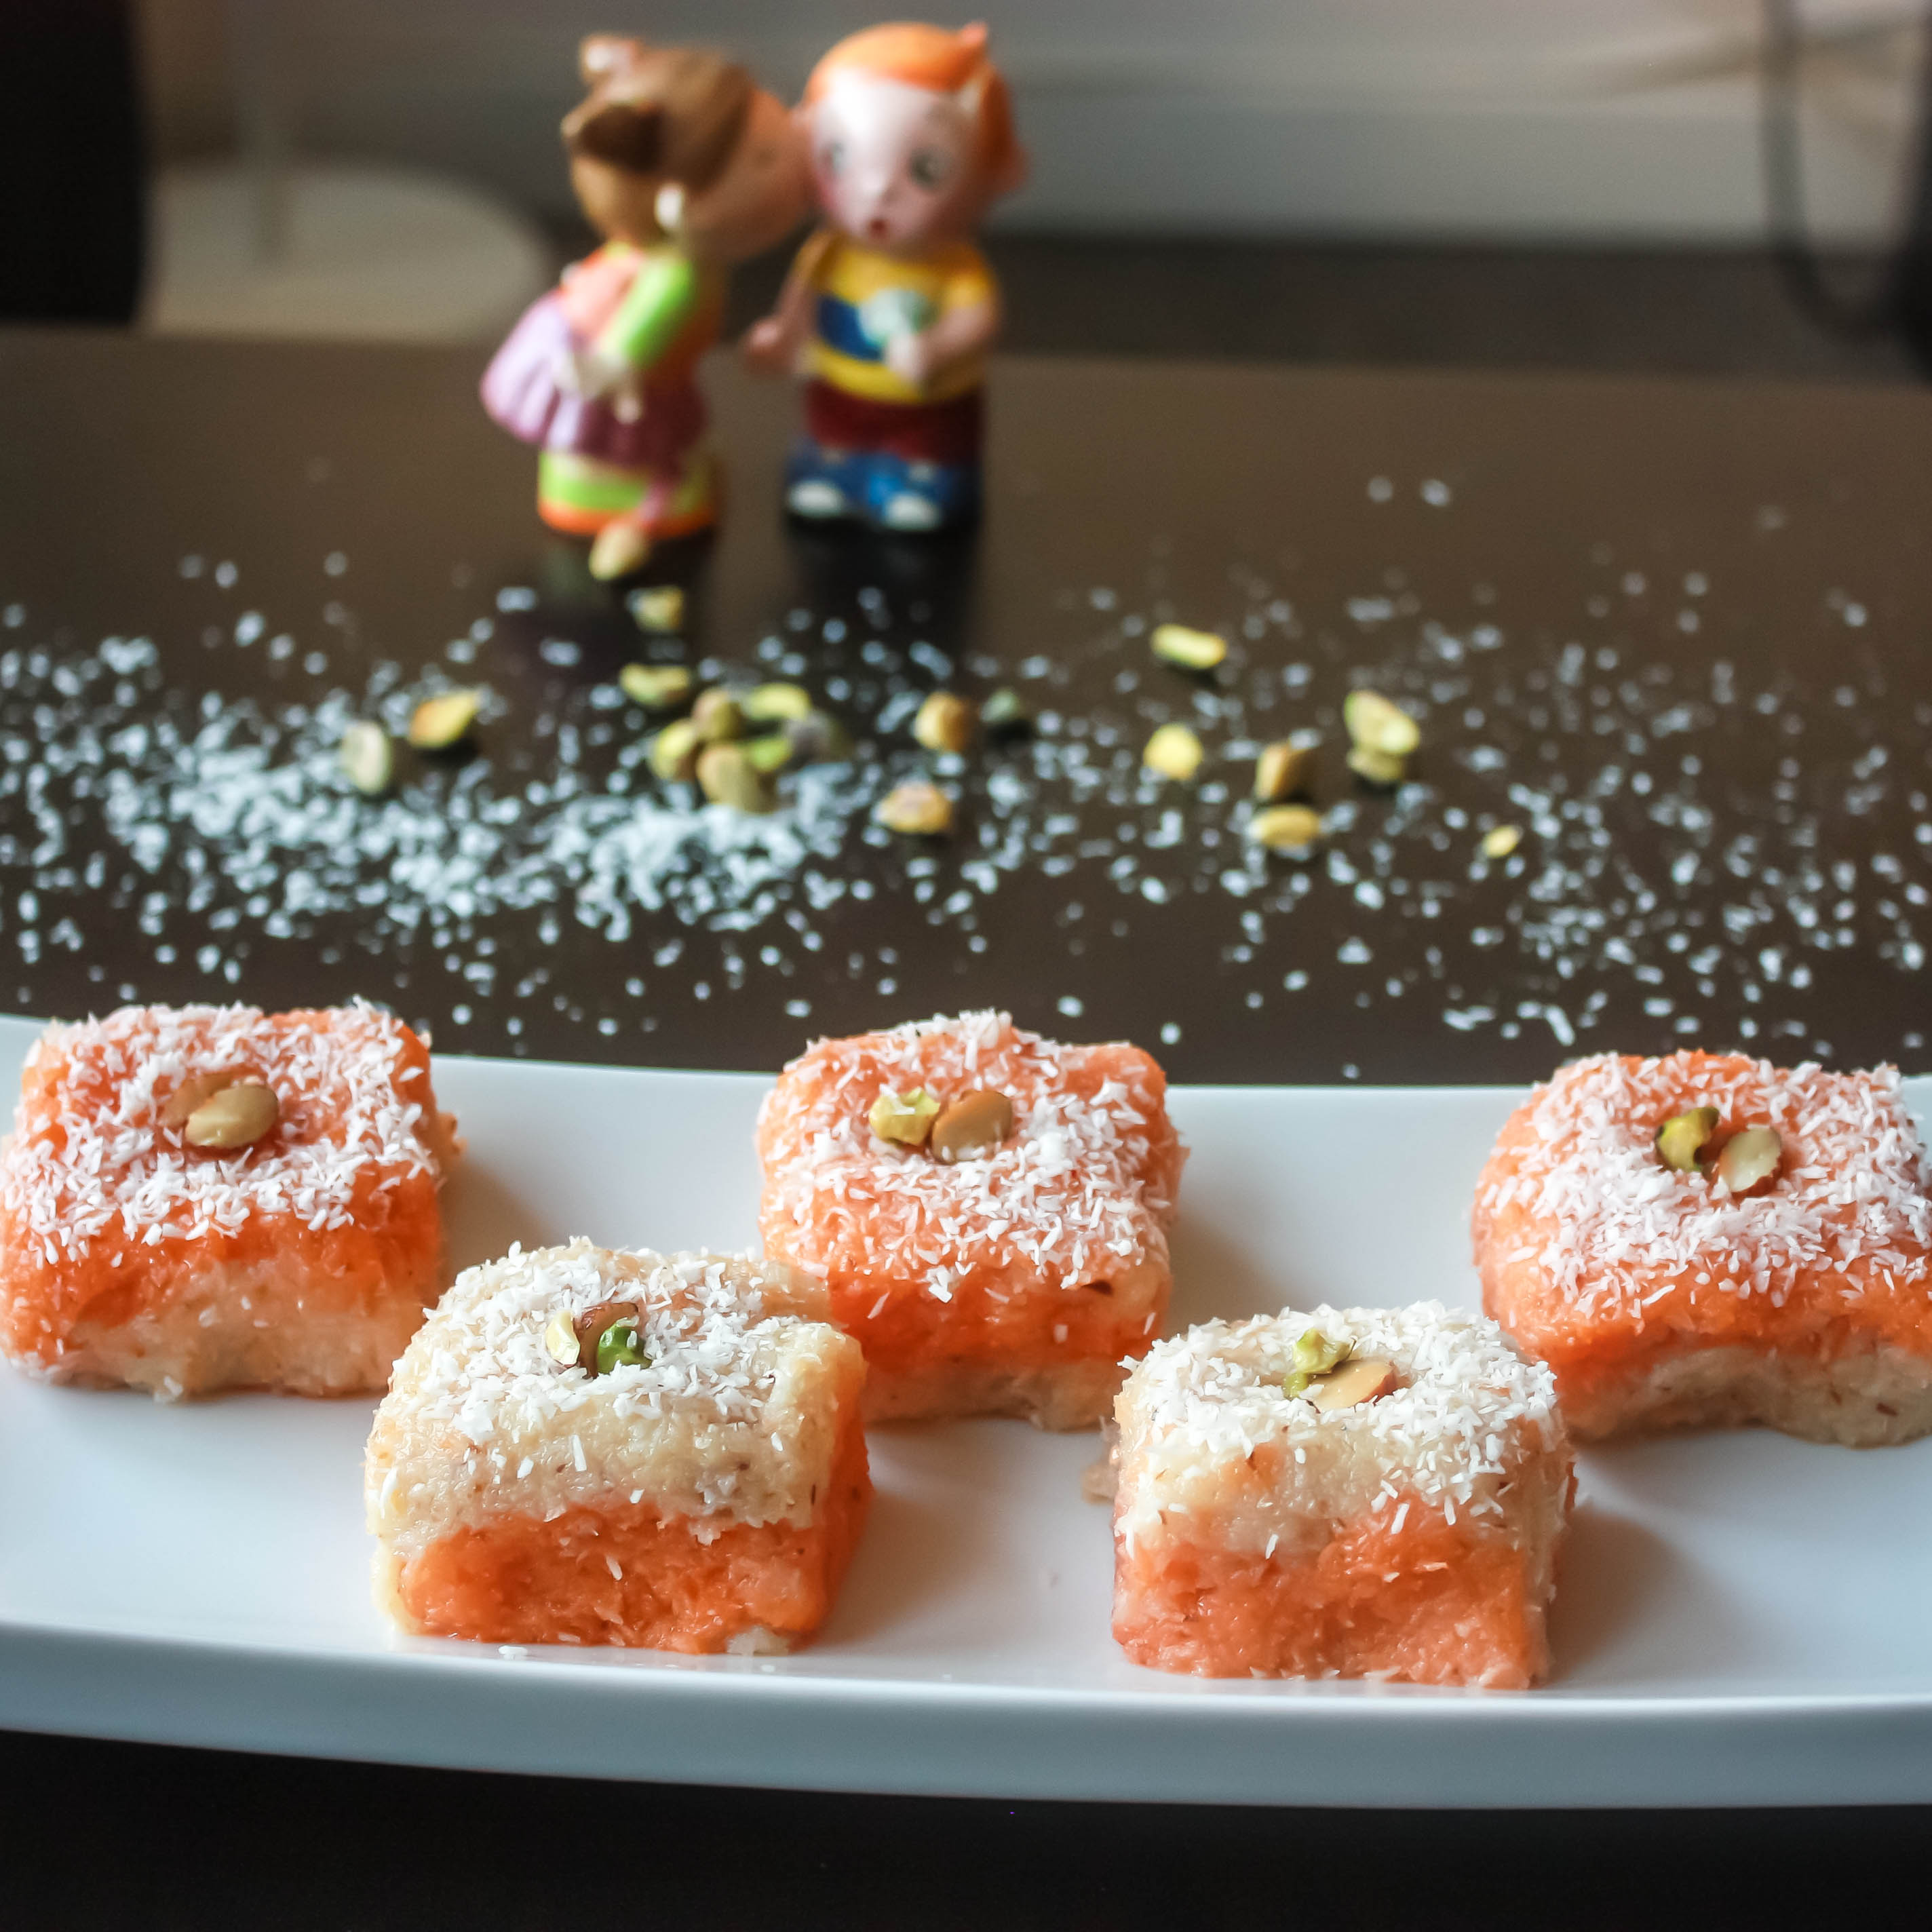
  8. On a butter-greased plate, add the saffron mixture, tap it with a ghee-coated spatula to flatten it. Top with the plan coconut mixture and flatten top.
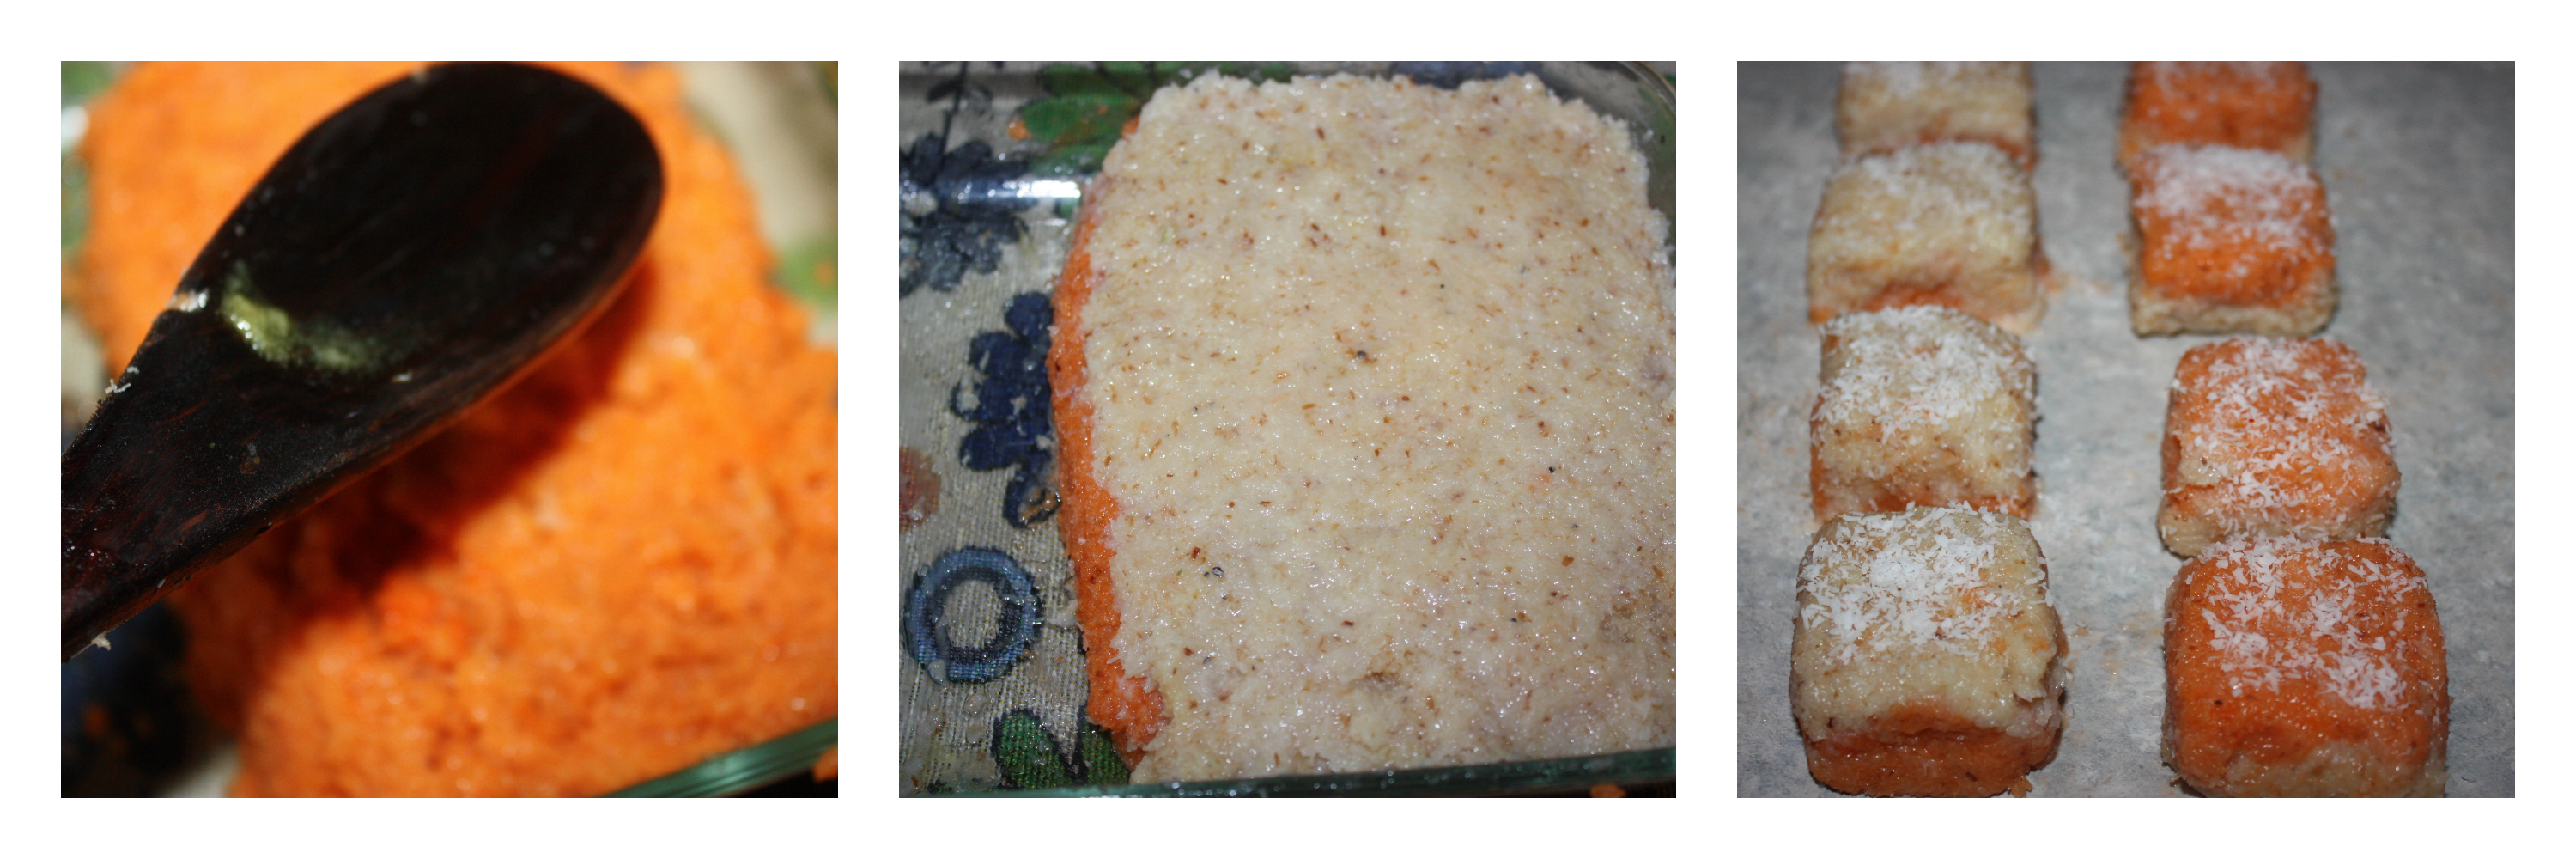
  9. Place it in fridge to cool for an hour. Then cut the mixture into square shaped or desire shape.
  10. Season with some desiccated coconut and toasted almonds/pistachios.
  11. You can store them in airtight container up to four days. I refrigerate them as it is coconut based dish.
Notes
1. If you have doubt to when you can switch off the heat, it is when the spatula will refuse to get stir any more and mixture will almost stick to your spatula.
2. You can also use fresh coconut but you can’t store it for long time. So I prefer to use desiccated coconut. And also you have to cook the fresh coconut for a longer time since fresh coconut can be moister.
3. Use ghee/ butter greased spatula to flatten it. Even use a ghee coated knife to cut it easily.
Wordpress Recipe Plugin by EasyRecipe
3.2.1311

Coconutbarfifinal-3

Filed Under: DESSERTS, SWEETS/DESSERTS Tagged With: barfi sweet, coconut sweet, dessert recipes, indian dessert recipes, indian diwali sweets, indian sweet, navrathri recipe

Mint & Tofu Whole Wheat Paratha

September 26, 2014 by Suki Leave a Comment

Tofu_Paratha_name

Tofu_Paratha_nameIt’s a whole wheat bread stuffed with mint and tofu. I often make different type of parathas at home. I make them with almost any vegetable I have in my refrigerator. I just now realized that I have not posted any of it. I will post them one by one.

Parathas can be had as a brunch, lunch or dinner. It taste great with any vegetable curry like paneer makhanwala, malai methi paneer or even with simple pickle or raita. You can replace the same recipe with any vegetable of your choice. But be careful sometimes some vegetable has water retained inside, so you should use less water when you mix the dough. I am here always to answer your questions!

Reason behind mint and tofu paratha is because I had some leftover tofu after the Red Thai Tofu Curry. So I thought of using them on a healthy way. And used mint just to give some extra kick to it. Mint parathas are always good.

I did not use any salt in this recipe. I always don’t add salt to my paratha or chapathi recipe. Its almost the same and healthy. For making/frying the parathas in the pan, you can fry with sunflower oil, sesame oil or ghee. I fry the parathas sometimes with no oil or sometimes with sesame oil. But for guests, I make with ghee 😀

Print
MINT & TOFU WHOLE WHEAT PARATHA
Author: Suganya Hariharan
Recipe type: Main
Cuisine: Indian
Prep time:  20 mins
Cook time:  20 mins
Total time:  40 mins
Serves: 6 parathas
 
Ingredients
  • For the dough
  • Wheat flour - 1 cup
  • Oil -1 tbsp
  • Salt
    For the stuffing:
  • Tofu – 1 cup, crumbled or grated
  • Mint – ¼ cup finely ch0pped (small size)
  • Ginger - 1 tsp finely chopped ginger
  • Green Chilli- 1 finely chopped
  • Cumin /Jeera seeds - 1 tsp
  • Methi dry leaves – 2 tsp
  • Chilli powder - ½ tsp
  • Garam masala powder - ½ tsp
  • Coriander powder - 1 tsp
  • Salt needed (I did not use any)
Instructions
  1. Mix all ingredients under “for the stuffing”. Keep it aside.
  2. Take the 1 cup of wheat flour, add 1 tbsp oil, salt needed (optional) and make soft dough by adding water little by little. Make it a point that you did not add extra water or else it will become sticky. If so, add some extra flour and knead again. Adjust the wheat flour and water alternatively. When it is kneaded well, soft and not sticky, cover it and let it sit for 20 minutes.
  3. Now make 5 to 6 equal sized balls out of that dough.
  4. Roll into small chapathi, place a tbsp of stuffing on the top, bring the edges together and join them in the center.
  5. Now sprinkle some flour so that you can roll it easily. Roll gently into a paratha about 7-8 inches diameter. Tearing may happen in few places, but that’s very much ok. But make sure there is not a lot of dough that tears up.
  6. Place the paratha on a hot griddle. Wait for bubbles to appear, then apply a tsp of oil /ghee on the top and flip it over.
  7. Spread oil on the other side and cook both sides well till brown spots appear.
  8. Remove and serve it with curries/pickle or raita.
Wordpress Recipe Plugin by EasyRecipe
3.2.1311

Serve it with curry, raita or pickle.

Filed Under: BREAD/PARATHA, VEGAN Tagged With: chapathi recipe. indian recipe, indian bread recipe, mint recipe, tofu, tofu mint paratha, tofu paratha

Cucumber Carrot Raita/Cucumber carrot yogurt dip

September 24, 2014 by Suki Leave a Comment

Cucumber_carrot_raita_name2

CucumberCarrotRaita_name1Cucumber raita is one of the simple and easy recipes. Cucumber raita rehydrates body and replenishes daily vitamins. Actually you don’t have a recipe. It’s just you need to mix them all together. But it’s one of the raita you can even have direct without no rice or roti. You can have this as side to rotis, biryani or as a dip. It taste great as a dip.

Some squeeze out the water and directly add the grated cucumber to the curd but I like to add it to retain its nutritional values. You can just make plain cucumber raita. But I wanted to make it more healthy and colorful by adding carrot.

You can make raitas with pretty much any vegetable. You can make onion raita, pomegranate raita, boondi raita, okra raita, carrot raita, mango raita, pineapple raita..  etc. My favorite is boondi raita. And the next is cucumber raita. It’s very good for health.

Print
CUCUMBER CARROT RAITA
Author: Suganya Hariharan
Recipe type: Sides
Cuisine: Indian
Prep time:  10 mins
Total time:  10 mins
Serves: 4
 
Ingredients
  • Cucumber – ½ medium sized
  • Carrot – ½ medium sized
  • Curd/plain yogurt – 1 cup
  • Roast Cumin seeds powder - 1 tsp
  • Chaat masala – 1 tsp (optional)
  • Salt – as needed
  • Coriander – to garnish
Instructions
  1. Wash the cucumber. Peel the cucumber and chop it very finely.
  2. Wash the carrot. Peel the carrot and chop it very finely
  3. In a bowl, beat the yogurt till smooth.
  4. Add the cucumber and carrot to the yogurt.
  5. Add the cumin powder,chaat masala and salt.
  6. Garnish with coriander leaves.
Notes
1. You can spice it up by sprinkling some chilli powder.

2. You can even grate the cucumber instead of chopping. But I like to feel the cucumber in my mouth.
Wordpress Recipe Plugin by EasyRecipe
3.2.1311

It serves best as a dip, as a side for rice, biryani or roti. Healthy to have as a snack.

Cucumber_carrot_raita_name2

Filed Under: RAITA/DIPS/CHUTNEY Tagged With: carrot cucumber yogurt, carrot raita, cucumber raita, cucuumber carrot raita, healthy snack, healthy yogurt, raita recipe

Chickpeas sundal/ Kondakadalai sundal

September 24, 2014 by Suki 2 Comments

ChickpeasSundal_name

ChickpeasSundal_nameChickpeas Sundal is a common recipe in south India. It is made with boiled chickpeas and tempered with blended spices. You can make the same recipe with black channa or with any lentils. It is very simple and a healthy snack. I did this for navrathri.  I have explained about Navrathri on my peanut sundal recipe😉 If someone wants to read :D. The most common sundal recipes for festivals are chickpeas sundal and green peas sundal. But you don’t need a festival to do this. 😉   this is a basic sundal version that we make for navarathri.

If you are using fresh Chana, soak them overnight. You can use it next day. I used the frozen channa so it was even easier. You can use this recipe to make any variety of sundal recipes. Just replace with those lentils/beans.

You can serve this as a snack or as a side dish for rasam.

5.0 from 1 reviews
Print
CHICKPEAS SUNDAL/ KONDAKADALAI SUNDAL
Author: Suganya Hariharan
Recipe type: Side dish, festival
Cuisine: Indian
Prep time:  5 mins
Cook time:  10 mins
Total time:  15 mins
Serves: 4
 
Ingredients
  • Fresh /Frozen chickpeas - 1 cup
  • Salt - To taste
    To blend to a coarse paste:
  • Grated coconut - 2tbsp
  • Green chillies -2 small
  • Coriander - 1 tbsp
  • Ginger- small piece. Very small.
  • Jeera - ½ tsp
    Temper:
  • Oil - 2tsp
  • Mustard seeds - 2tsp
  • Curry leaves - 6
  • Red chilli - 1
  • Hing - a pinch
Instructions
  1. If you are using fresh dried variety of chickpeas, then soak them overnight or atleast for 4 hrs. Pour enough water,salt and pressure cook for 3 whistles. The skin might come out, just discard them. I am using frozen chickpeas, so i just washed them and kept it aside.
  2. Transfer the ingredients listed under "to blend to a coarse paste" into a blender and blend them to a coarse paste. set aside.
  3. Heat a pan with the oil; add the list under "temper" in that pan.
  4. Add the chickpeas and salt, toss them for two minutes. Add the blended mixture on top of it. Saute them for two - three minutes until the raw smell of green chillies leaves. Switch off and serve !!!
Wordpress Recipe Plugin by EasyRecipe
3.2.1311

Chickpeas sundal

Filed Under: SNACKS & APPETIZERS FESTIVAL, VEGAN Tagged With: chick peas snack, chickpeas recipes, chickpeas sundal, festival recipes, INDIAN RECIPE, kondakadalai nack, kondakadalai sundal, navrathri recipes

Verkadalai Sundal/Peanut snack

September 24, 2014 by Suki Leave a Comment

Peanutsundal_name

PeanutSundal_name
Verkadalai sundal (peanut sundal) is a guilt-free protein rich snack made with peanuts and loaded with homemade spice powder. It is quick to prepare and peanuts are rich in protein. This sundal is made by boiling peanuts and then tempering with few spices. It’s a healthy snack. It is one of the sundal varieties made during the 9 days of the Navrathri festival. “Nava” means 9 and “rathri” means “Nights”. It is celebrated by making steps with dolls called “Gollu” and guests are invited to come and sing devotional songs in their house. They offer snacks & sweets as Prasad.  I have grown up watching this festival at my place. My mom used to be so busy these 9 days and she used to drag me wherever she goes, she makes me sing in the houses I visit, they give me in return some snacks and gifts :D. My mom used to dress me up each day differently as if I am participating for a fancy dress competition and she will send me with my sister to neighborhood places to invite them for our gollu 😀 It’s so funny and nice to relish all those memories.


Roasted salted peanuts will not work for this recipe. Otherwise you can use any kind of peanuts readily available in market. Peanuts are very healthy, simple and delicious. Most houses have peanuts at their house. So, you don’t have to go shopping for this.  Raw mango gives an extra kick to sundal 🙂 I like to add it but I could not find it nearby, add grated ones if you get it.

Sundals are simple to make and a healthy snack. So even if you don’t keep gollu 😉 like me, do make sundal and eat.

Today being the second day of navrathri, here goes my recipe:


Print
VERKADALAI SUNDAL/ PEANUT SNACK
Author: Suganya Hariharan
Recipe type: Side dish
Cuisine: Indian
Cook time:  15 mins
Total time:  15 mins
 
Ingredients
  • Peanut – 1 cup
  • Salt – as needed
  • Asafoetida – a pinch
  • Grated coconut – 3 tbsp
    To roast and grind:
  • Oil – 1 tsp
  • Channa dal/ kadalai paruppu – 1 tbsp
  • Coriander seeds – 1 tsp
  • Pepper – 1 tsp
  • Red Chilli – 2
  • Jeera/cumin seeds – 1 tsp
  • Asafoetida – a pinch
    To temper:
  • Oil – 2 tsp
  • Mustard – 1 tsp
  • Urad dal – 2 tsp
  • Curry Leaves – few
Instructions
  1. Soak peanuts for an hour (optional). Pressure cook peanuts with water just enough to immerse the channa completely. Add salt and asafoetida. Pressure cook for 4 or 5 whistles in a medium flame. Switch it off, drain and keep it aside. Keep it moist.
  2. Heat a kadai and roast the ingredients under “to roast & grind” in the same order as mentioned. Roast until the channa dal turns golden in colour. Blend it when it cools.
  3. Heat the same kadai and temper with the items under “to temper” table. Add the drained cooked peanuts.Stir well.
  4. Add the powdered masala and coconut. Mix well again for a minute in the medium flame.
Notes
1. When you grind them, add jeera and asafetida finally as it will burn.
2. If you use fresh peanuts, no need to soak. Just pressure cook with salt.
Wordpress Recipe Plugin by EasyRecipe
3.2.1311

peanut_sundal_recipe

Filed Under: DRY CURRY SIDE DISH/ STIR-FRY, SNACKS & APPETIZERS FESTIVAL, VEGAN Tagged With: festival special, healthy, healthy savory peanut snack, indian peanut snacks, navrathri special, peanut snack, Peanut Sundal, peanut vegan snacks, perfect snack.Indian snacks, quick navrathri recipes, quick navrathri sundal recipes, quick navrathri vegan recipes, QUick snack recipes, side dish, verkadalai sundal

Cauliflower Malligae/ Cauliflower Fry

September 16, 2014 by Suki 2 Comments

Cauliflowermalligae

CauliflowermalligaeCauliflower malligae is a dish famous in Mangalore. The cauliflower is marinated in garlic mint coriander paste and deep-fried. It is a perfect appetizer. The renowned dish in India using cauliflower is gobi 65. It is a fried cauliflower dish where the cauliflower/gobi marinated in chilli powder and deep fried.I will post the recipe of that soon.  So, this cauliflower malligae recipe is something distinct and tasty.

I heard about this recipe on a cookery show, so just tweaked it here and there. It is a very quick, easy recipe. It’s too hard to resist without having them when frying. that’s the biggest problem 😉 when I drop the next set in oil, I keep munching the fried ones 🙂 . You will understand when you fry them. And you can have them as snack or for jeera rice.

The paste that we use here is fresh grinded paste. You can store it for 4-5 days. It can be served as chutneys for dosa,paniyaram. Can even be used to prepare biryani. Can be used for variety rice by just sautéing them and adding it to rice, it taste great.

You can replace this cauliflower with any vegetable for this paste. Try aloo( potato), broccoli, mushroom, babycorn. Everything will be extraordinary. Even simple onion would be great when marinated in this paste and fried.

It is kid friendly as its not spicy. You can spice up the recipe more/less by adding/reducing green chillies.

Print
CAULIFLOWER MALLIGAE / CAULIFLOWER
Author: Suganya Hariharan
Recipe type: Appetizer
Cuisine: Indian
Prep time:  15 mins
Cook time:  25 mins
Total time:  40 mins
Serves: 4
 
Ingredients
  • Cauliflower - 1 medium
  • Rice flour – ½ cup
  • Corn flour – 1 tbsp
  • Salt – as needed[b]To grind:Mint – ½ cup
  • Coriander – ½ cup
  • Green chillies - 6
  • Garlic – 5
  • Ginger – ½ inch
  • Cumin -1/2 tbsp
  • Curry leaves – 5-6
  • Garnish: curry leaves/ onion/ lemon
Instructions
  1. Wash and separate the cauliflower florets from cauliflower. Cut them bite size pieces. You don’t want it to be big chunks, as it’s hard to boil as we are just frying in oil and not boiling. Soak the cauliflower in hot water for 3 minutes to remove any insects.
  2. Grind all the ingredients under “to grind” in a blender to a smooth paste. Add 1 tbsp of water when blending. Don’t add more.
  3. Take a broad vessel; add the cauliflower, rice flour, corn flour, salt and the blended paste. Mix them well. Add water if needed. Set aside for 15 minutes.
  4. Heat oil in a pan, add the cauliflower batch by batch and fry them in a medium flame. You can fry them till they look crispy outside.
  5. Finally add the curry leaves in the oil and fry them.
  6. Garnish with curry leaves,onion and lemon.
Notes
1. You can increase/ decrease green chillies according to your spice level.
2. If you want it crispier, add more rice flour.
3. If you have grounded the paste watery, add more corn flour.
Wordpress Recipe Plugin by EasyRecipe
3.2.1311

Serve hot as a snack or as a side for jeera/ghee rice.

Filed Under: DRY CURRY SIDE DISH/ STIR-FRY, SIDES, VEGAN Tagged With: appetizer, cauliflower fry recipes, cauliflower malligae, Cauliflower recipe, crispy, indian appetizer, indian snack recipes, mangalore recipes

Beetroot Halwa

September 15, 2014 by Suki 7 Comments

Beetroot halwa-name1Beetroot halwa – It is a scrumptious pudding made from grated beetroot simmered in milk, spiced with cardamom and finished with roasted nuts. It is one of the easiest recipes you can make for festivals. Navratri( dusshera) and diwali are nearing by, so I thought it would be a helpful to post it now. And I was celebrating the first month of blogging yesterday through a sweet recipe, beetroot halwa :). yippee! So just made a simple delectable sweet:).

Halwa is a very popular indian dessert. The name originates from an Arabic word “Halwa” which means “sweet”. There are many varieties of halwa like carrot halwa, bettroot halwa and bottle guard halwa. The most popular among them is “carrot halwa”.Beetroot halwa is prepared in the same manner as carrot/gajar halwa. Sweetened condensed milk is optional; I had it in refrigerator after I did the “coconut ladoo”. So, wanted to use it.

Beets are highly nutrious and healthy. It is a great dish for kids. Kids don’t love beetroot a lot, so it  is a good way to sneak it into their diet. Even beetroot tikki/ beetroot paratha are good ideas to make them have this veggie.

3.0 from 1 reviews
Print
BEETROOT HALWA/ BEETROOT SWEET
Author: Suganya Hariharan
Recipe type: Dessert
Cuisine: Indian
Prep time:  10 mins
Cook time:  25 mins
Total time:  35 mins
Serves: 6
 
Ingredients
  • Beetroot – 3 or 2 ½, grated beetroot.
  • Whole Milk – 3 cups
  • Sugar – 5 - 6 tbsp – adjust as required
  • Sweetened condensed milk – 1 tbsp
  • Cardamon – 4 crushed and powdered (I grind it in mortar-pestle with a tsp of sugar)
  • Cashews – 8 broken
  • Badham – 5 sliced/flaked
  • Ghee – 1 ½ - 2 tbsp
Instructions
  1. Rinse, peel and grate the beetroots using hand grater.
  2. Heat a non-stick pan on a low to medium flame and drop the grated beetroots in the pan, sauté them for about ten minutes.
  3. Add the milk and sweetened condensed milk and keep boiling for ten minutes. Keep on stirring at regular intervals so that the mixture does not stick to the pan. The milk will boil and evaporate.
  4. When the milk is reduced to 80%, add the sugar, ghee to the halwa mixture. Stir well and continue to simmer. Keep on stirring them.
  5. Meanwhile, heat a small pan, add a spoon of ghee, and roast the cashews and badham and sauté till golden brown.
  6. Top the beetroot with the roasted nuts. Mix well and switch off when all the milk has evaporated.
Notes
1. You can add grated carrot, it adds extra sweetness and more delicious and healthy.
2. Sweetened condensed milk is optional; I had it in refrigerator after I did the “coconut ladoo”. So, wanted to use it.
3. Switch off only when all the milk has been evaporated.
Wordpress Recipe Plugin by EasyRecipe
3.2.1311

Serve the halwa hot/cold. You can serve it warm with vanilla ice cream.

Beetroot halwa-name1

Filed Under: DESSERTS, SWEETS/DESSERTS Tagged With: Beet recipes, beetroot receipes, beetroot recipes, diwali recipes, festival resipes, healthy dessert healthy sweet, navrathri dessert recipes, sweet recipes

Potato Sukka/ Potato Dry roast

September 5, 2014 by Suki 8 Comments

Potato Sukka_Relishthebite-8_name

Potato_Sukka_withname

Potatoes are the easiest ones to cook and also one of the most favourite vegetables of all especially the kids. And it’s really hard to go wrong with recipes when we have potato as our ingredient. It will be tasty always. There are loads of ways to do potato roast. I usually have this potato sukka with roti or rasam. There are lots of dishes that we can do with potato. This one is my personal favourite. All the herbs and spices go well into the potato and makes it even more tastier. It is simple and tasty to eat having a lot of flavors going into our mouth 🙂 If you see, all the veggies i used are sliced and not chopped. Thats a secret of this dish 😉 i would say!


5.0 from 1 reviews
Print
Potato Sukka
Author: Suganya Hariharan
Recipe type: Sides
Cuisine: Indian
Prep time:  5 mins
Cook time:  20 mins
Total time:  25 mins
Serves: 4
 
Ingredients
  • Oil – 2 tbsp
  • Mustard seeds – 1 tsp
  • Urad dal – 1 tsp
  • Cumin seeds – 1 tbsp
  • Onions – 1 sliced
  • Garlic pods – 6 sliced finely
  • Ginger – 1 inch sliced finely
  • Green chillies – 2 sliced finely
  • Curry leaves – 8 sliced finely
  • Coriander leaves – ½ cup chopped finely
  • Turmeric Powder – ½ tsp
  • Potatoes – 4 sliced
  • chilli powder – 1 ½ tbsp
  • salt
Instructions
  1. Heat some oil in a pan, add mustard seeds and urad dal and wait till it crackles.
  2. Add the cumin seeds,onions,garlic, ginger, green chillies, curry leaves, coriander leaves, salt and turmeric powder. Fry them till the onions get slightly brown.
  3. Add the potatoes and chilli powder. Pour ⅛ cup of water. Close the lid and boil them in medium flame.
  4. Open it after ten minutes and mix them. Wait till the bottem parts of potatoes get little brown evenly. Mix them and switch it off.
Notes
1. Do not add more water. You don't want the potatoes to be mushy for this recipe.
2. Slice the vegetables at equal length , it will give great presentation to the whole dish.
Wordpress Recipe Plugin by EasyRecipe
3.2.1311


It goes well with rotis,rice or with dal or rasam.

Potato Sukka_Relishthebite-7

Filed Under: DRY CURRY SIDE DISH/ STIR-FRY, SIDES, VEGAN Tagged With: chilli, curry, dinner, garlic, lunch, onions, poriyal, potato, side, sidedish

Lasooni Dal Tadka/ Tempered lentils

September 5, 2014 by Suki Leave a Comment

Lasoonidal_Relishthebite-4_name

Lasoonidal_Relishthebite-4_nameIt’s an authentic culinary dish from North Indian cuisine. It’s an easy way of dal tadka (lentil) with the flavors of garlic in it. It has only a handful of ingredients but yet the garlicky flavor and the spices in the fragrance ghee make the dish finger licking good for all seasons. This lasooni dal is made of pigeon pea lentils/tuvar dal. If you like garlic in your dish, you will just love this recipe. I would say its one of the easiest recipes.  And lahsun means garlic. 🙂

Dal can be made in different ways using different dal like Normal simple dal, dal tadka, dal fry using different dal.

I usually don’t like to add tomatoes in this dal recipe. I don’t want that tangy flavor in all my dal recipes. I want garlic to be the overpowering ingredient here. If you prefer a slight tangy flavor, you can squeeze lemon juice finally. That will really do the job.

Vegan note: Replace ghee with oil and taste this amazing dal 🙂

This can be served with rice, basmathi rice, jeera rice, roti.

Print
LASOONI DAL TADKA
Author: Suganya Hariharan
Recipe type: Main
Cuisine: Indian
Prep time:  5 mins
Cook time:  20 mins
Total time:  25 mins
Serves: 4
 
Ingredients
  • Tuvar dal/pigeon pea lentils – 1 cup
  • Onions – 1 finely chopped
  • Garlic – 2 tbsp
  • Green chillies – 2 chopped
  • Turmeric – 1 tsp
  • Asafetida/hing – pinch
  • Salt – as needed
  • Water – 3 cups for pressure-cooking the lentils
    [For tempering]
  • Ghee – 1.5 tbsp
  • Garlic – 1 tbsp finely chopped
  • Cumin powder – 1tsp
  • Red chilli powder – 1 tsp
  • Garam masala – 1 tsp
  • Coriander leaves - 1 tbsp finely chopped for garnish
  • Lemon – squeeze a little for garnish
Instructions
  1. Add washed tuvar dal, onions, garlic, green chillies, turmeric, little salt and asafetida in the pressure cooker with water.
  2. Pressure-cook the lentils for 10 whistles till you get a mashable smooth consistency.
  3. When it’s pressure-cooked, open the cooker and check if the consistency is ok. If not mash it, add little water and boil for two minutes. Or leave it.
  4. Heat ghee/oil in a pan. Ghee gives great flavors to dal but. Sometimes I use oil too. Add chopped garlic. Sauté the garlic for a minute till it becomes lightly browned. Add red chilli and sauté for few seconds.
  5. Switch off the flame, add red chilli powder,cumin powder, asafetida/hing, garam masala and dry methi leaves. Stir and pour the entire tempering on the dal.
  6. Garnish with chopped coriander and squeeze lemon. Check for salt and serve lasuni dal tadka hot with steamed rice and a potato fry. You can also serve this with rotis/naan.
Notes
1. When you boil the dal, just add little salt. Yu can always add salt later when you taste and when needed.
2. If the gravy is thick, and id you want it more in liquid form, you can add water and boil for two minutes.
3. You can use ghee/oil for tempering. But ghee gives great flavors to dal but. Sometimes I use oil too.
Wordpress Recipe Plugin by EasyRecipe
3.2.1311

Lasoonidal_Relishthebite-name_5

Filed Under: NORTH INDIAN GRAVIES/DAL/CURRY, SIDES, VEGAN Tagged With: dal recipe, garlic dal recipe, garlic recipe, lasooni dal tadka recipe, lasuni dal, lentil recipe, lentils, quick dal recipe, quick indian recipe, tempering recipe

Bharwan Bhindi/ Stuffed Okra

September 2, 2014 by Suki 9 Comments

Stuffedokra_Relishthebite_name_final

Stuffedokra_Relishthebite_name_finalBharwan Bhindi is stuffed okra. In Hindi, Bharwan means stuffed and Bhindi means okra. Okra’s are stuffed with a spicy delicious filling. In this dish, okra’s are slit and stuffed with masala. When the okra gets cooked with the masala, it gives exotic flavours. It’s a beautiful change from the usual okra/bhindi sabzi.

It greats taste when we eat with roti’s or rice with rasam, dal. It’s a tasty recipe from Indian kitchen that tastes best when we have it as a side for rice. I make it a point to cook okra once in two weeks at least as it’s my favorite veggie and it’s a staple at my home. So, I would like to develop a lot of variations with the veggie. I started stuffing this veggie with a teaspoon watching one of my favorite show on TV :D, and then I lost my patience and started to dig my hands to stuff the okra. It was much quicker.

For this recipe, you need to take tender okra, remove the head, cut them in the center, stuff them and pan fry. You are using besan flour for the masalas to stay inside okra. Try to use a bigger/wider pan so that u can turn it in the middle.

5.0 from 1 reviews
Print
BHARWAN BHINDI / STUFFED OKRA
Author: Suganya Hariharan
Recipe type: Side dish
Cuisine: Indian
Prep time:  10 mins
Cook time:  20 mins
Total time:  30 mins
Serves: 4
 
Ingredients
  • Small okra/bhindi - 300gms
  • Oil- 2 tbsp
  • Asafetid /hing - ¼ tsp
    To Saute & grind
  • Grated fresh/desiccated coconut - 3tbsp
  • Peanuts - 2 tbsp
  • White sesame seeds - ½ tbsp
  • Red chili – 2
  • Coriander seeds – 1 tbsp
    To mix:
  • Besan flour – 3 tbsp
  • Sambhar powder - 1 tbsp
  • Coriander powder - 1 tsp
  • Turmeric powder - 1 tsp
  • Dry mango powder/amchur - 1tsp
  • Ginger garlic paste – 1tsp
  • Salt - to taste
  • Sugar - ½tsp
Instructions
  1. Wash okra well and pat dry. Cut both ends of okra and make a slit in center along the length of okra. Keep it aside.
  2. In a pan, add the "to sauté & grind" ingredients and dry roast. Now blend them nicely.
  3. Mix the blended mixture with besan flour, sambhar powder, coriander powder, turmeric powder, dry mango powder,ginger garlic paste,sugar and salt.
  4. Add some little oil/salt to make the blended mixture a paste. Add little less salt as we are going to sprinkle salt at the end.
  5. Stuff each of the okra with prepared mixture and keep aside.
  6. Heat oil in pan and add asafoetida, then stuffed okra. Keep the okras in the pan so that the masalas are upwards as this way the masalas stay inside okra.
  7. Cover with a lid and cook them on a low flame. Turn them occasionally to cook evenly from all sides and also to turn it soft.
  8. Sprinkle two times little water to make it get cooked and this will shallow fry the okras.
  9. And sprinkle 1 tsp of salt and 1 tsp of sugar in the middle of the process for the okras to have
  10. Switch off. It took around fifteen minutes for me.
Notes
1. Make sure you don’t add water.
2. I used nonstick pan, so that it does not stick anywhere easily. ☺ Otherwise, stir it once in a while.
3. For this recipe, try to use tender okra.
4. If you want the process to be even simpler, just stuff with sambhar powder, besan flour mix. You can add idli gunpowder, chilli powder, it still gives good taste.
5. Try to use a bigger pan so that u can turn it in the middle.
Wordpress Recipe Plugin by EasyRecipe
3.2.1311

Stuffedokra_Relishthebite1_name

Serve warm with hot rice , rasam or roti.

Filed Under: DRY CURRY SIDE DISH/ STIR-FRY, SIDES, VEGAN Tagged With: bharwan bhindi, bhindi dish, dinner, indian dish, lunch, north indian dishes, okra, okra dishes, spicy side dish, stuffed dish, stuffed okra, vegan dish, vegetarian dishes, vendakkai dish

Chettinadu Meen Kuzhambu/ Fish Curry

September 1, 2014 by Suki 6 Comments

Meen_Kuzhambu_Relishthebite_name

Meen_Kuzhambu_Relishthebite_nameMeen Kuzhambu is a very popular and traditional south Indian fish curry. It is very spicy and it has rich flavour. Traditionally it’s cooked in clay or earthen pot, where the fish is cooked in spicy gravy of onions, tomatoes, tamarind and spices sautéed in sesame oil. It’s a classic dish with intense flavors. Eating this would never stop them from licking their fingers 😉 Really!!!!

Cooking this dish in earthen pot is the highlight of the dish and it really enhances the taste. But I don’t think I can do that from Canada. So if you are from India or any place where you can do with the earthen pot, please do so  🙂

The dish is usually rested for some time and then eaten as it helps the fish in absorbing the flavors into it and makes it more juicy and soft.

On healthy note, fishes are rich in iron, calcium; provide good vitamins with less carbohydrate and cholesterol. It makes wonderful addition to any nutritious diet and is always better than eating meat or poultry.

I have another fish curry homestyle which is one of my famous recipes in the blog.

Taste great with rice and spinach with lentils (Spinach dal). Take a cup of hot rice and warm fish curry, mix well and serve with fish fry as side dish or spinachdal or spinach molagootal.

5.0 from 1 reviews
Print
CHETTINADU MEEN KUZHAMBU / FISH CURRY
Author: Suganya Hariharan
Recipe type: Dinner
Cuisine: Indian
Prep time:  10 mins
Cook time:  40 mins
Total time:  50 mins
Serves: 6
 
Ingredients
  • Marinate:
  • Fish – 7
  • Turmeric powder – 1 tsp
  • salt – 1 tbsp
  • Lemon juice – 1 tbsp
    To grind:
  • Small onions -6 chopped roughly
  • Tomato – 2 Chopped roughly
  • Coconut – ¼ cup
  • Fennel seeds – 1 tsp
  • Poppy seeds soaked in water – 1 tsp
  • Coriander seeds – 1 tbsp
  • Garlic – 4
  • Ginger – ½ inch
    To temper:
  • Oil – 1½ tbsp
  • Mustard seeds – 1 tsp
  • Fenugreek – 1 tsp
  • Red chilli – 1
  • Asafetida - a pinch
  • Curry leaves - 6
  • Shallots/Small onion – 5
  • Big onion – 1 chopped nicely
  • Garlic – 5 chopped
  • Turmeric powder – 1 tsp
  • Chilli powder – 1 tbsp
  • Coriander powder – 1 tbsp
  • Tamarind – Lemon sized
Instructions
  1. Soak tamarind in warm water (around 1 /2 cup), extract pulp and keep aside.
  2. Clean fish and marinate the fish in turmeric, salt and lemon juice under “marinate” section. Keep aside.
  3. Take the “to grind” ingredients and Sauté the chopped onion, when its translucent, add the chopped tomatoes. Grind the sautéed onions, tomatoes with other ingredients in the “to grind” items. Keep it aside.
  4. Add oil in a pan, add mustard seeds, and allow it to splutter. Then add fenugreek, red chilli, curry leaves, asafoetida, onions and garlic. Sauté for two - three minutes, then add the blended paste, chilli powder and coriander powder. Sauté for a minute.
  5. Now add the tamarind pulp. Add some more water, I added 2 more cups (adjust according to the thickness you want) and add required salt. Allow it to boil for 20-25 minutes.
  6. When oil gets separated, add the marinated fish pieces. Allow it to boil for five minutes.
  7. I usually don’t boil for more than five minutes. You switch off the flame the fifth minute and serve after an hour at least. That will help the fish to get cooked well.
  8. Garnish them with coriander leaves.
Notes
1. The fish usually will cook faster so be careful not to break them into pieces. So make sure you don’t boil them longer.
2. Give resting time for at least an hour or two. It even taste better the next day.
3. Try to use sesame oil as it gives great flavours to this curry in specific.
Wordpress Recipe Plugin by EasyRecipe
3.2.1311


It goes extremely well with any rice, dosa and rotis.

Meen_Kuzhambu_Relishthebite-2_name

Filed Under: NON-VEG RECIPES Tagged With: Chennai Fish curry, chettinadu fish uzhambu, fish curry, Fish curry hotel recipe, fish curry indian, fish curry south indian style, Fish kuzhambu, fish kuzhambu south indian, fish recipes, fish restaurant style, home style fish curry, Indian fish curry, Indian spicy curry, meen kulambu chettinad recipe, meen kulambu recipes, meen kulambu with coconut, spicy recipes, step by step fih kuzhambu recipe

Paneer Makhanwala

August 31, 2014 by Suki 6 Comments

Paneer_Makhanwala_Relishthebite_name1

Paneer_Makhanwala_Relishthebite_name2Paneer cubes in a buttery nutty creamy tangy flavor. It is a rich dish with really tasty ingredients. Paneer dishes are always a real treat for vegetarians. I have heard people say that Paneer makhani,paneer butter masala and paneer makhanwala are same and its just the name which differs. But I personally feel paneer butter masala and paneer makhanwala is different in the method of preparation and also its taste. I will soon post the recipe of paneer butter masala and you will know the difference. I am not sure what is the originality of each dish. ;)Whats there in the name, its the taste which matters a lot 😉 Right?

My friends came over from Ottawa for the weekend, so did this for them. I made it with roti. And they really loved it clap
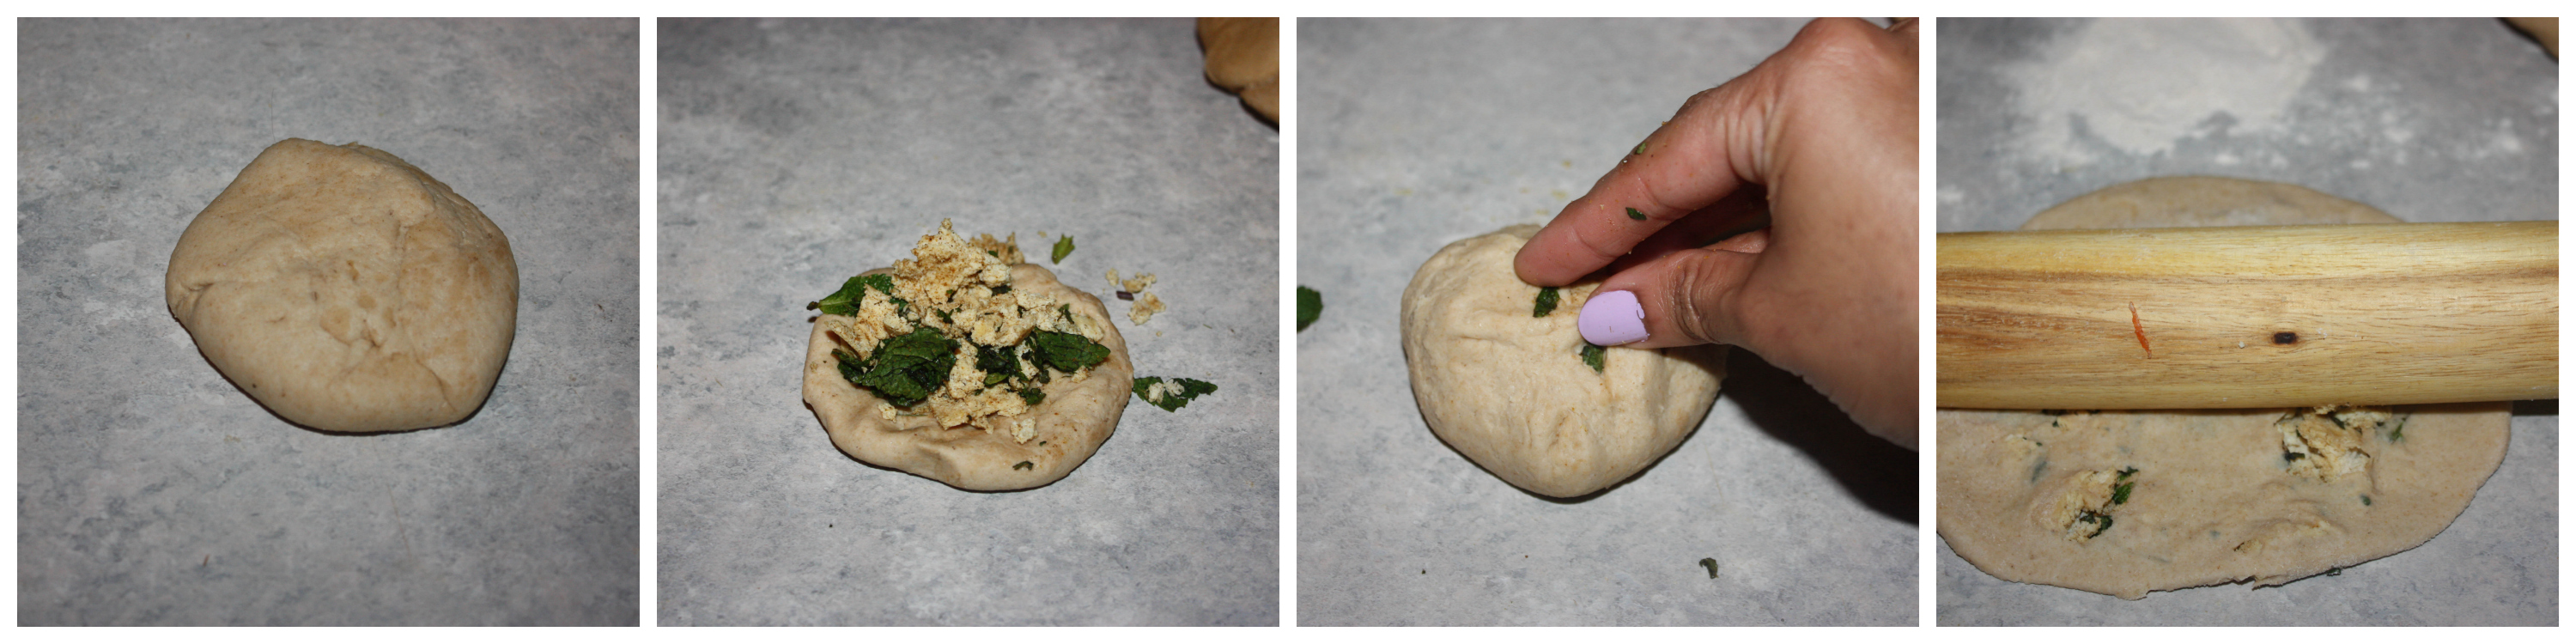
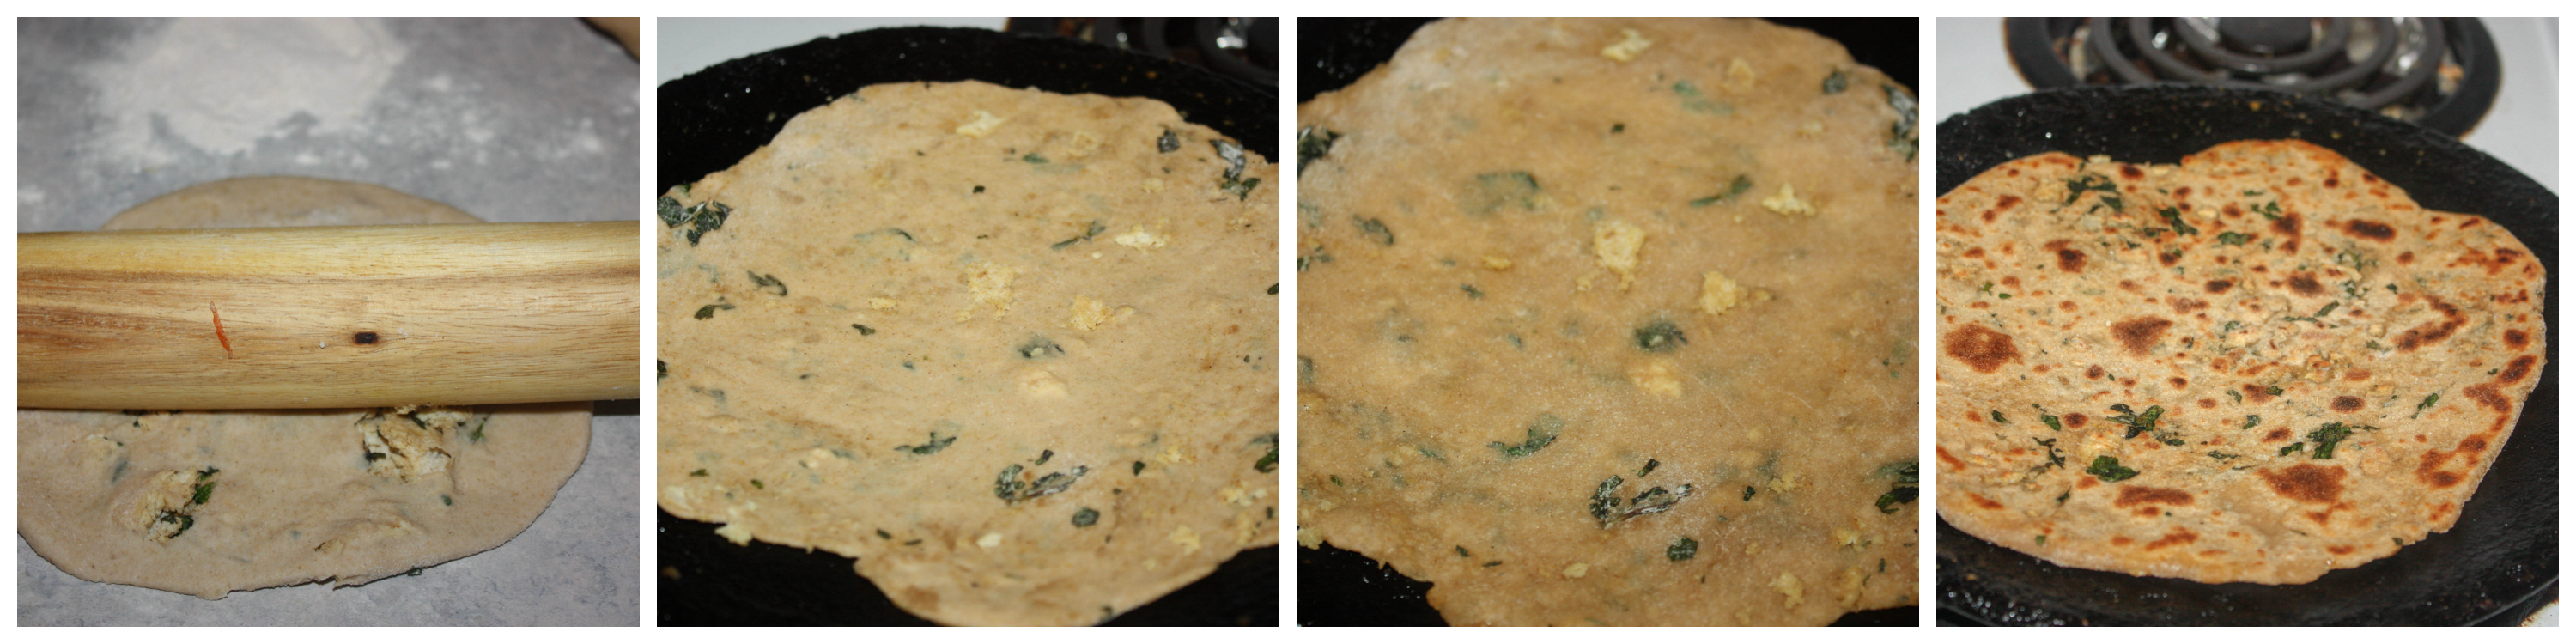
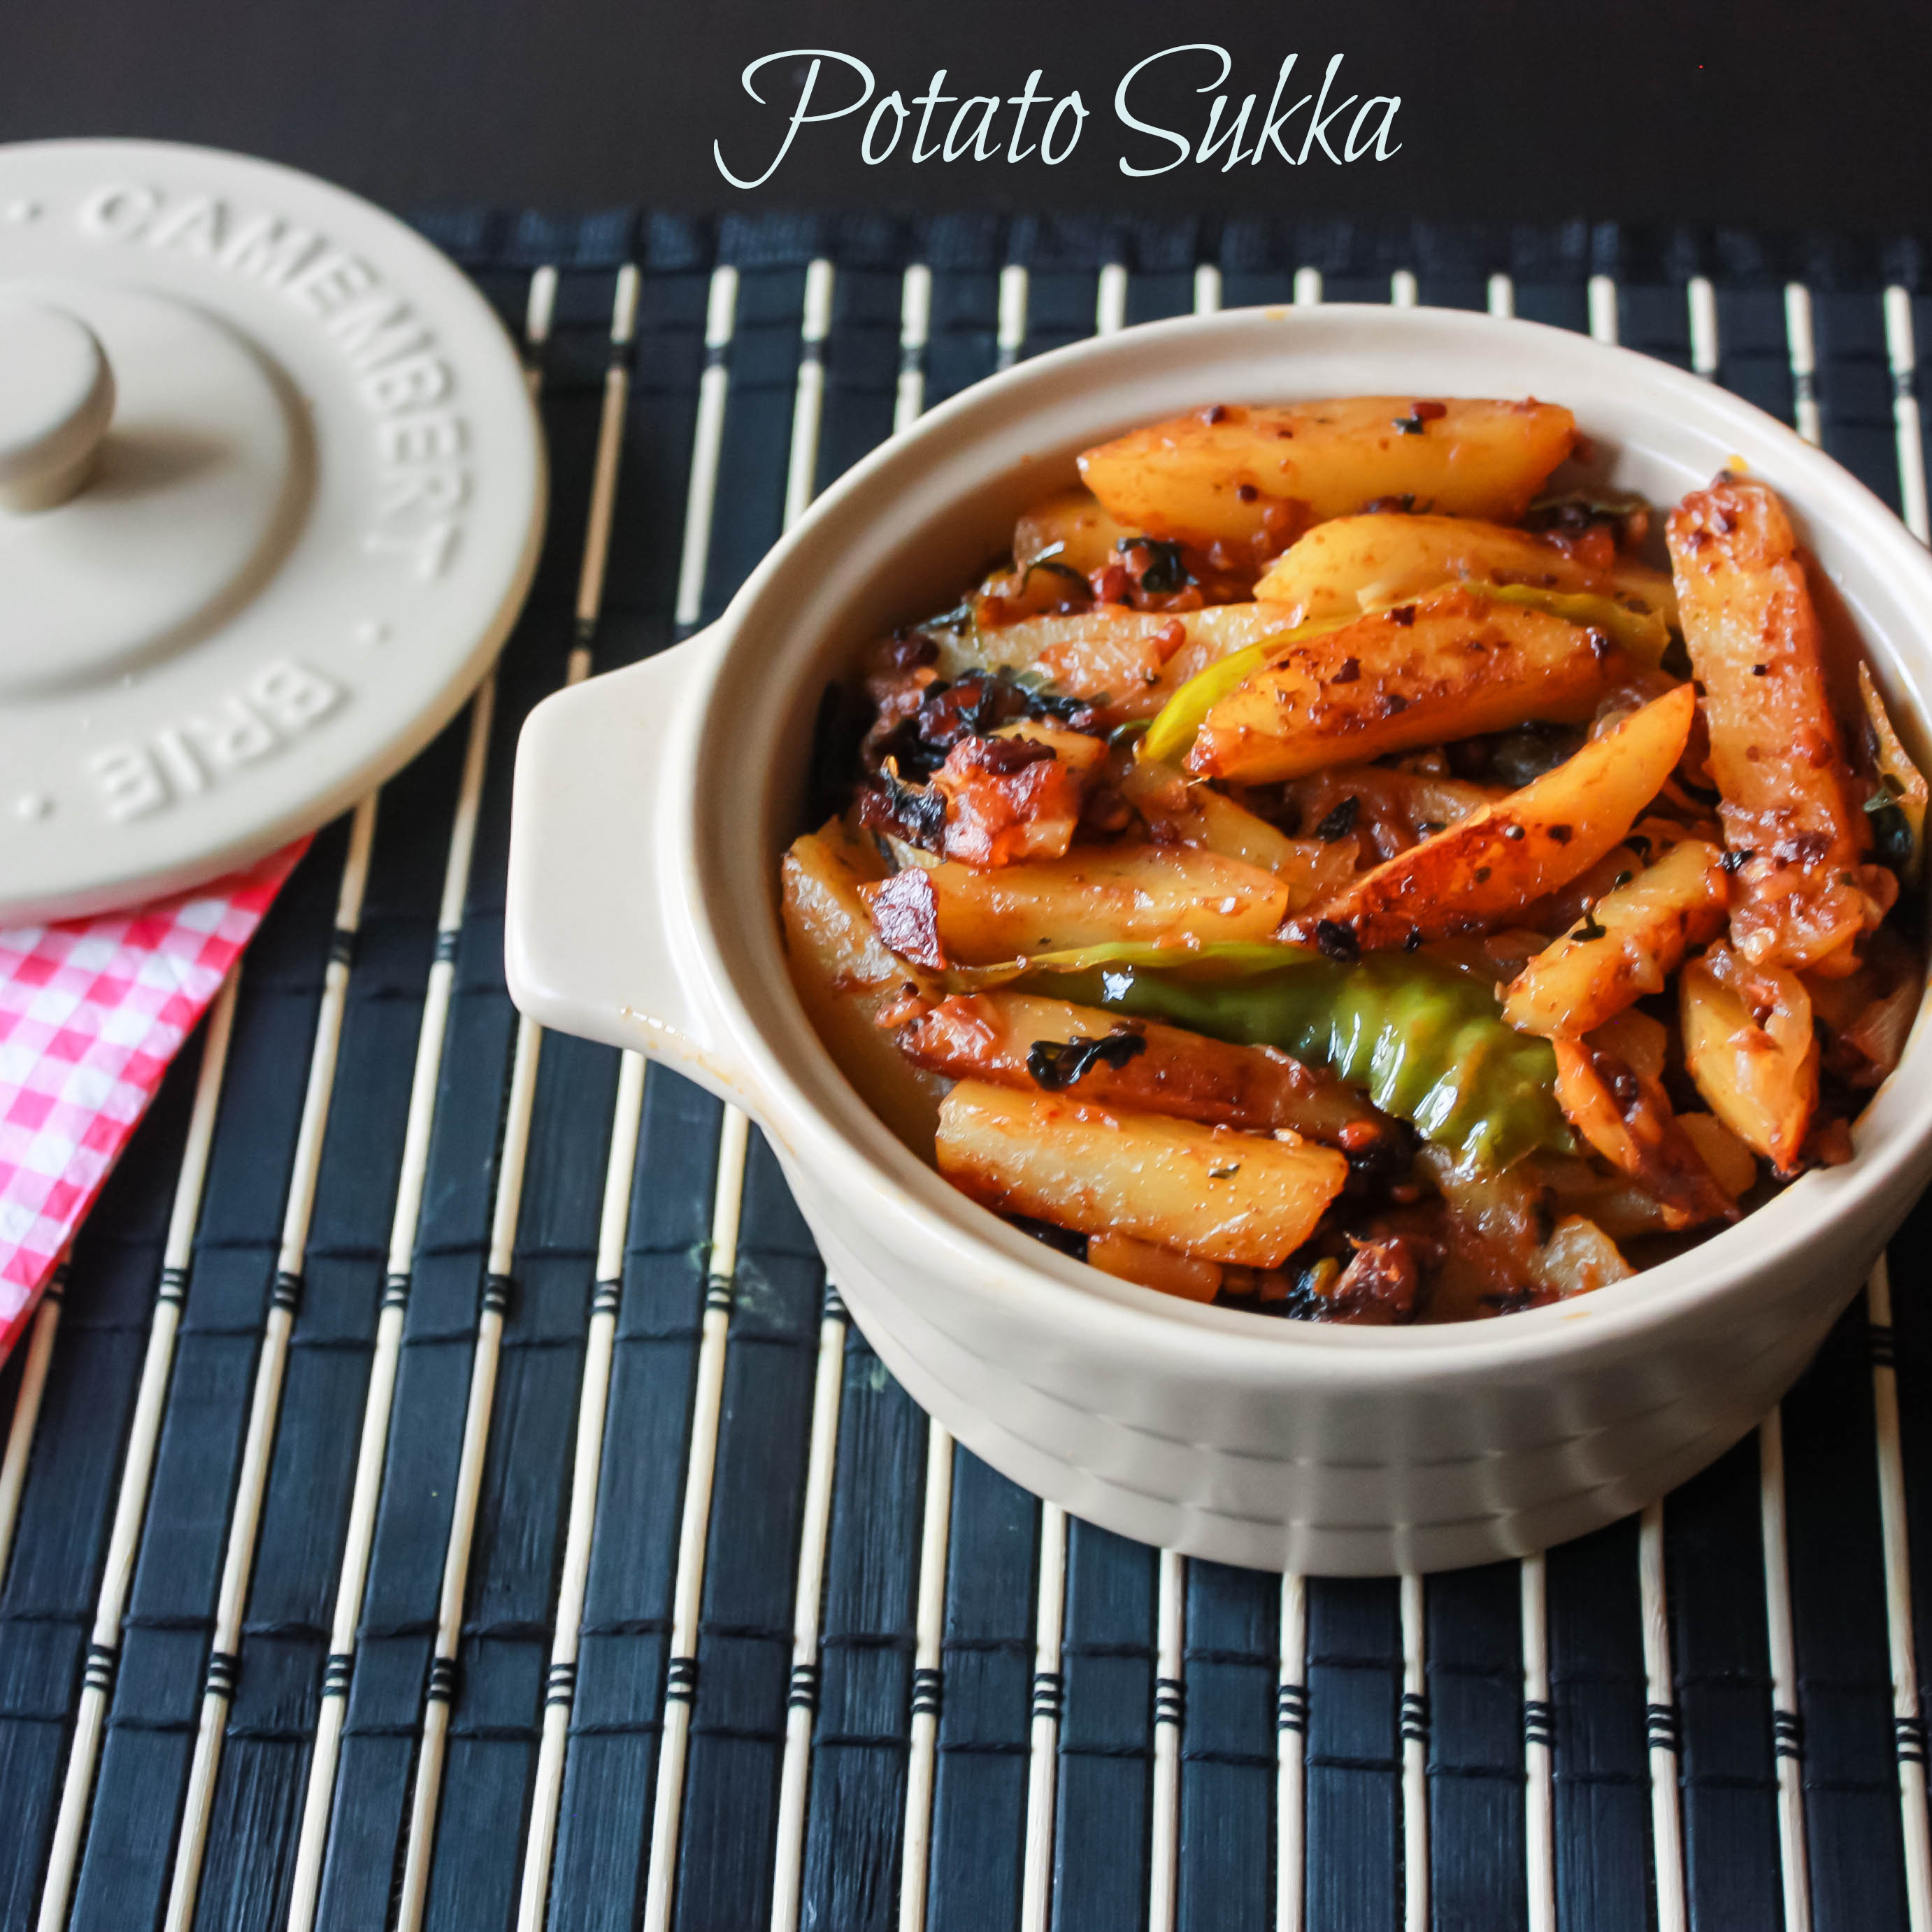
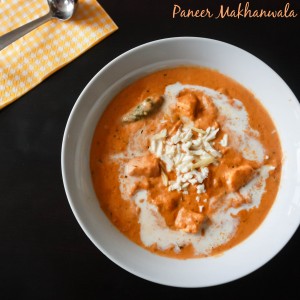
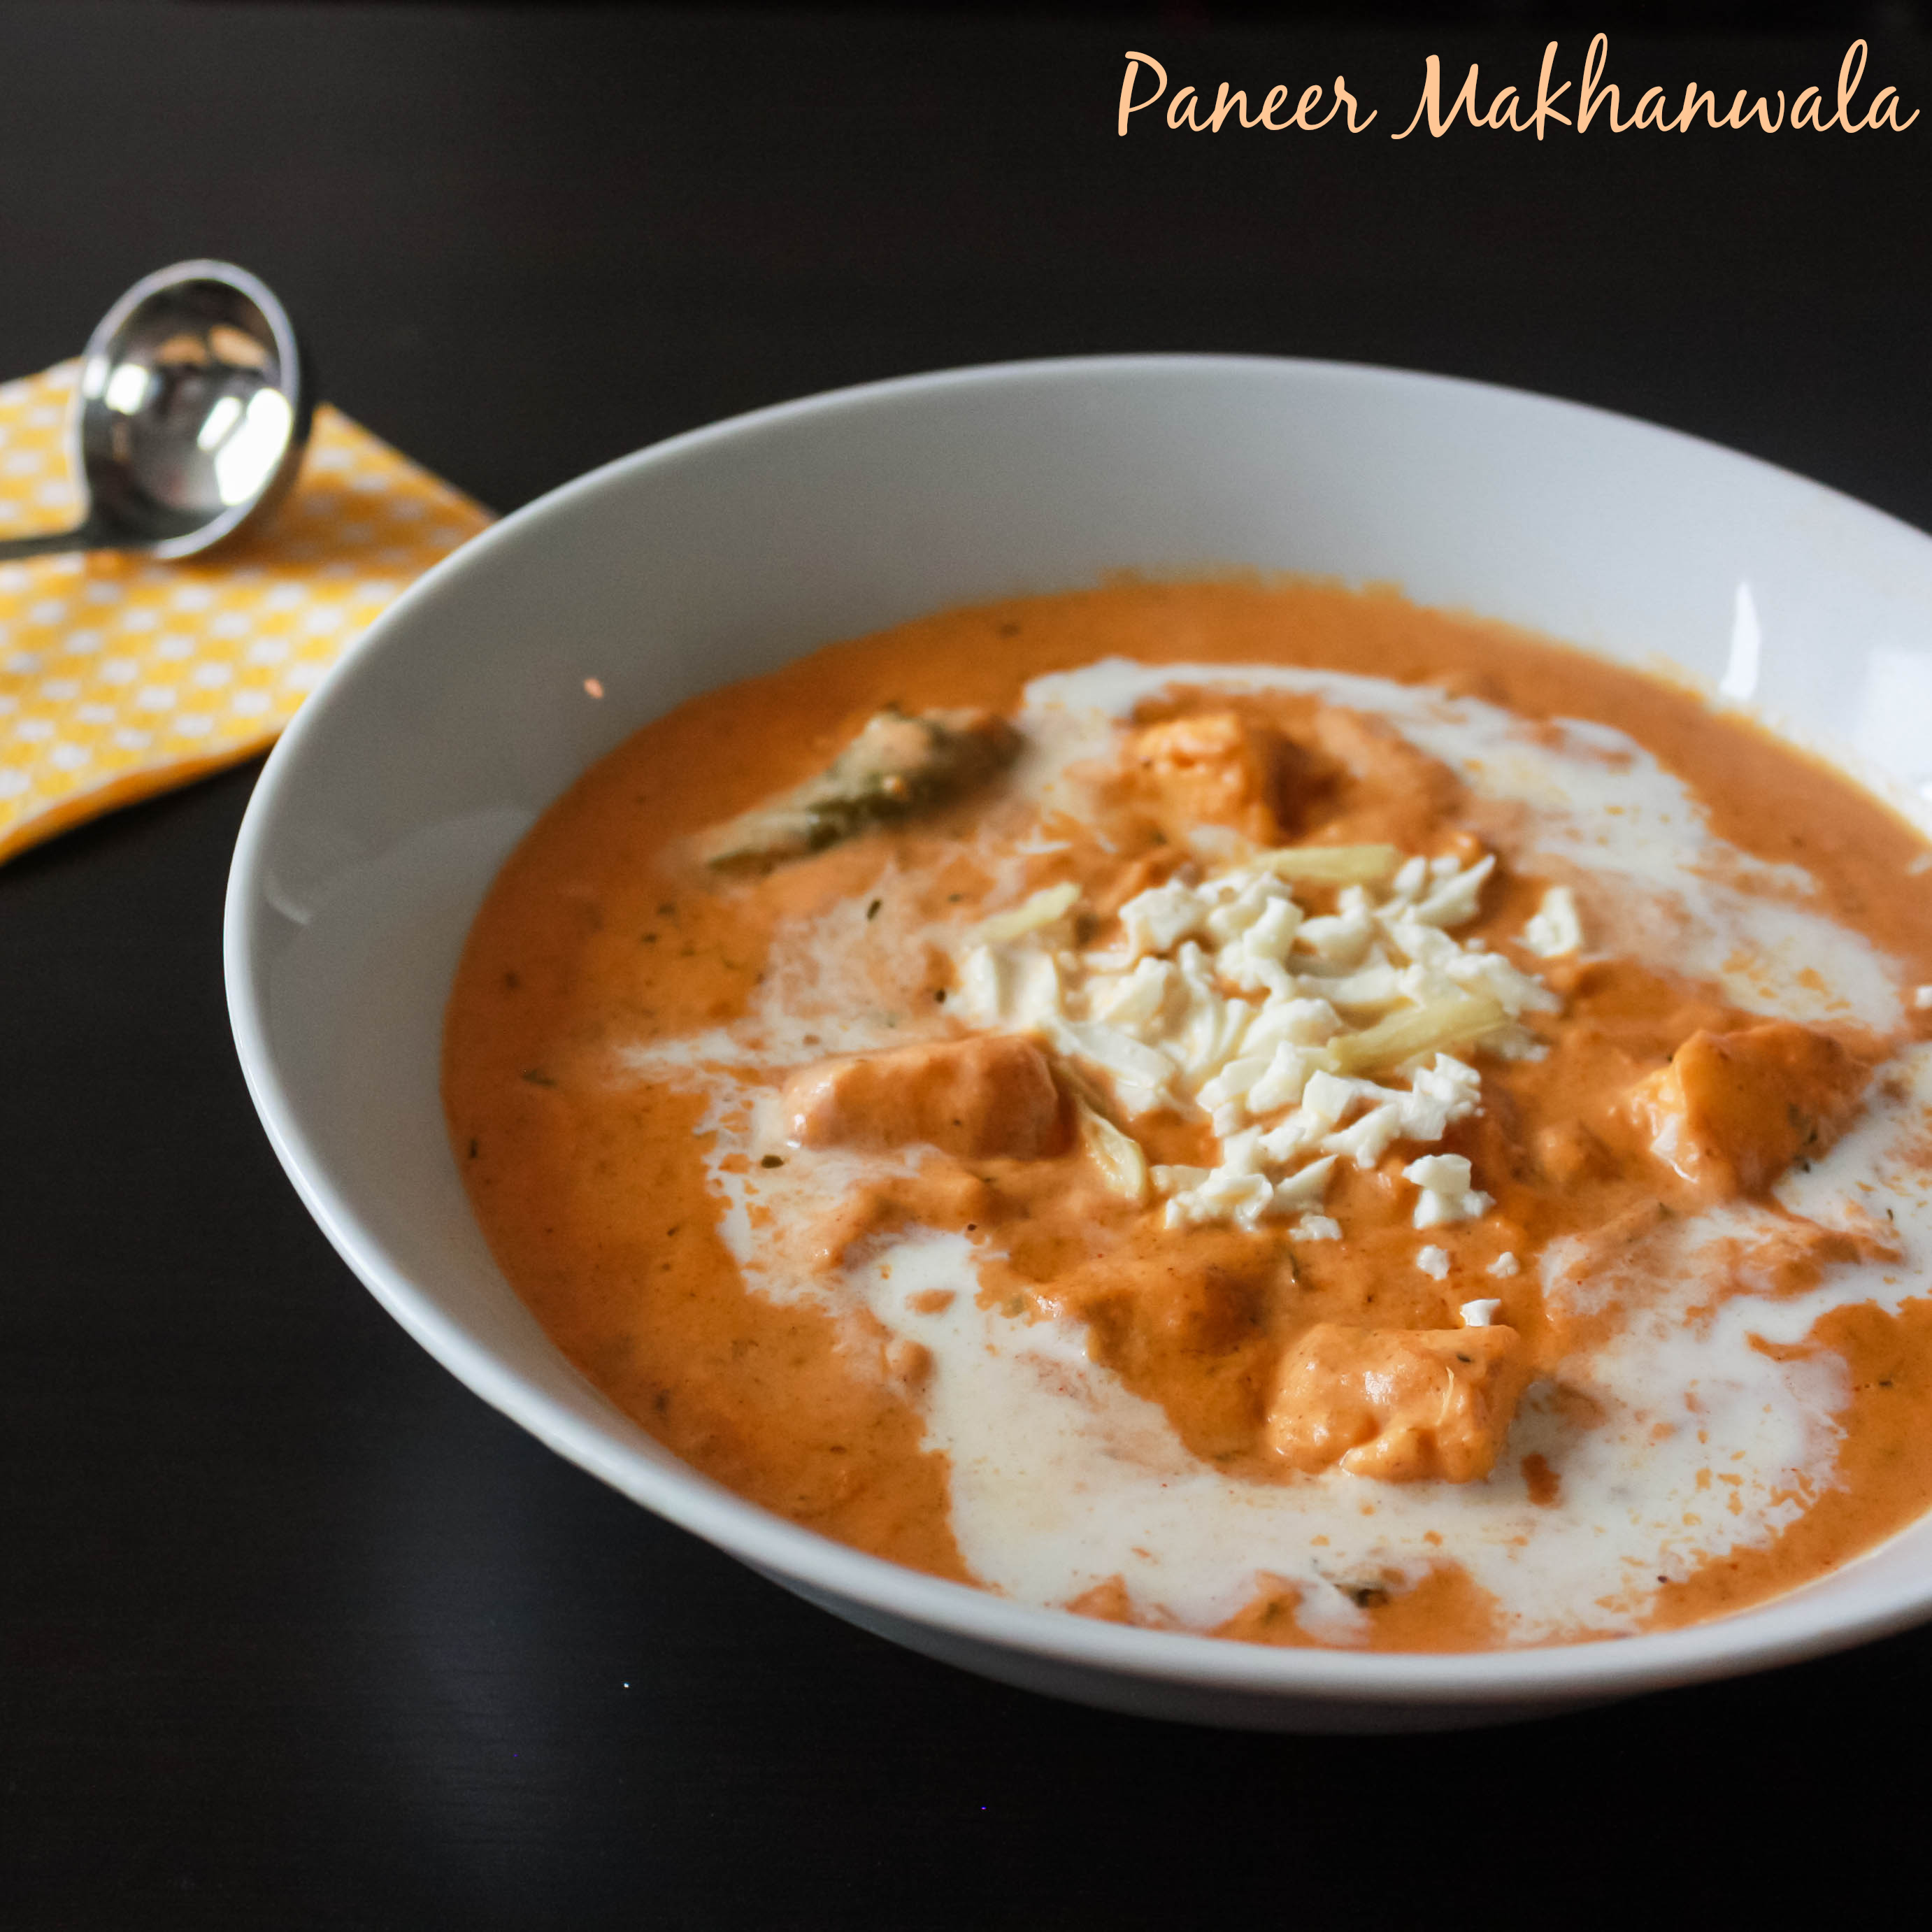
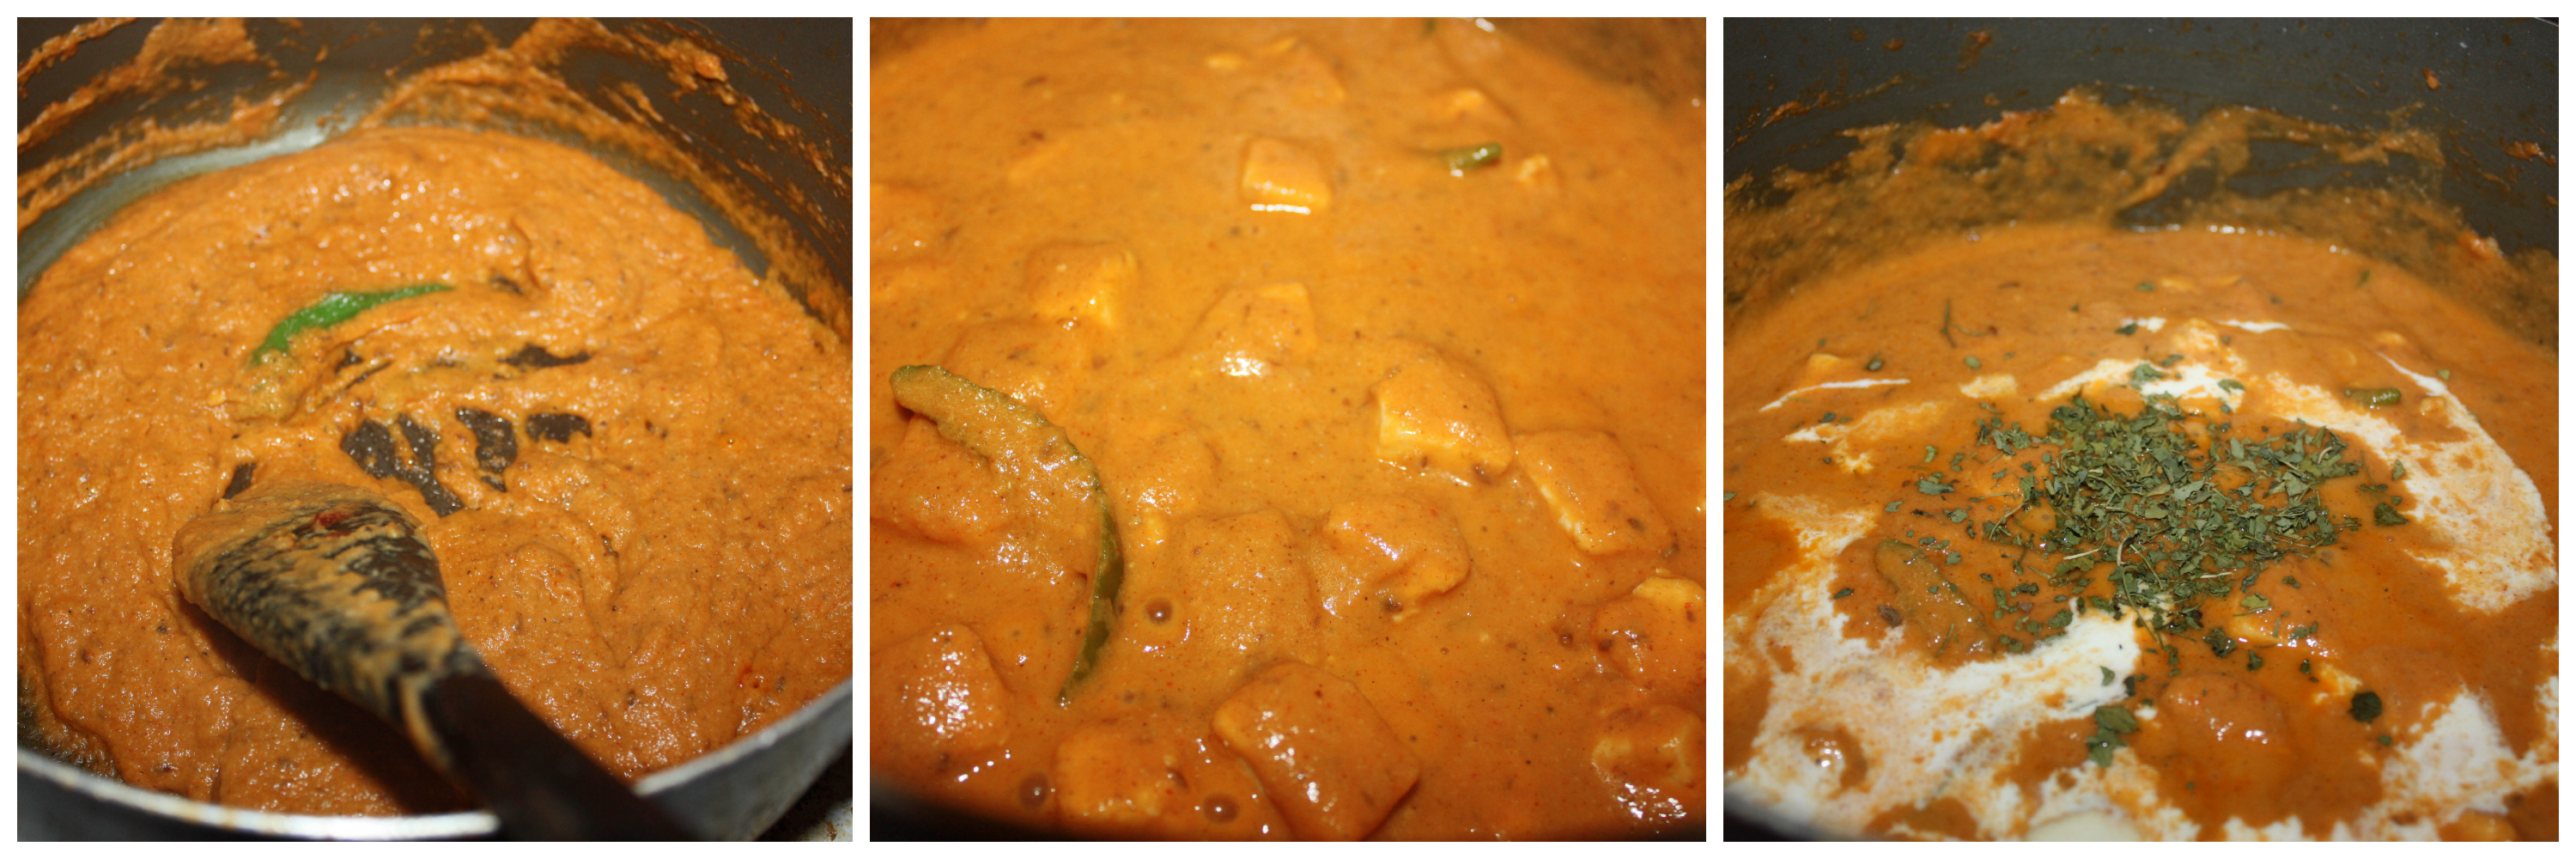
. Happy ME ! 😀 When there is guest over and I wanted to do vegetarian dishes, I will make it a point to do atleast one paneer dish ;). It goes well with any kind of pulav, jeera rice, naan,roti or any kind of bread you fancy.

You can always skip the ingredients a bit if you don’t have that specific ingredient at home. You can do this recipe with tofu,chicken,potato instead of paneer. Never be afraid to try new flavors in your cookingthumbsup. I always believe in that. 🙂

It taste great with peas pulao, veg fried rice Indian or parotta.

I have a collection of paneer recipes to look and my other favorite paneer recipes: Butter paneer curry, paneer sandwich, and paneer dumplings

5.0 from 1 reviews
Print
PANEER MAKHANWALA
Author: Suganya Hariharan
Recipe type: Indian
Cuisine: Indian
Prep time:  5 mins
Cook time:  30 mins
Total time:  35 mins
Serves: 4
 
Ingredients
  • For the gravy:
  • Onion - 1 Chopped
  • Tomato - 2 Chopped
  • Garlic - 5 Chopped
  • Ginger - ½ inch Chopped
  • Cinnamon - 1
  • Cardomon - 2 whole
  • Cashews - 7 whole
  • Almond - 7 whole
  • Jeera - 1 Tbsp
  • Salt - As needed
  • Water - 2 cups
    [other]
  • Unsalted Butter - 2 Tbsp
  • Paneer - 250gms
  • Chilli Powder - 1 Tbsp
  • Green Chilli - 1 Slit
  • Kasturi Methi - 1 tbsp
  • Garam Masala Powder - 1 tsp
  • Sugar - ½ tsp
  • Water - 1½ cups
    [Garnish]
  • Paneer - 1 Tbsp Grated
  • Ginger - ½ inch, Juilenne
  • Cream - 1 Tbsp
  • Salt - As needed
Instructions
  1. Mix the chopped onions, tomatoes, cashews, almonds, garlic, ginger, cinnamon, cardomon, jeera, salt and water in a pan.
  2. Cook for about 15- 20 minutes on a medium flame till everything gets cooked. Allow this to cool.
  3. Then add everything in a blender. Blend them into a smooth paste with not even small pieces of cashews on it.
  4. Heat butter in the same pan.
  5. Add the jeera, blended makhani paste and stir well.
  6. Add chilli powder. (If you want rich color, you can add kashmiri chilli powder. I used normal one)
  7. Stir well &sauté the masala on a medium flame till the butter ooze out. It has to be sauted really well till butter ooze out.
  8. Add paneer, methi leaves, chilli powder,cream,water and boil for ten minutes.
  9. Switch off the flame. Garnish with paneer, ginger and cream.
Notes
1. You can use coriander to garnish as well.
2. Close the lid when you add paneer and water at the end as it will splash out some gravy outside as it boils.
3. You can also fry paneer in butter/oil before you add them.
Wordpress Recipe Plugin by EasyRecipe
3.2.1311


It taste great with peas pulao, veg fried rice Indian or parotta.or any kind of bread you fancy.


Paneer_Makhanwala_Relishthebite_name1

Filed Under: NORTH INDIAN GRAVIES/DAL/CURRY, SIDES Tagged With: Almonds, best paneer recipes, butter, cashews, cream, Gravies, Homemade, Indian, Nuts, PANEER, paneer best indian recipes, paneer butter masala recipes, Paneer Dishes, paneer north indian recipes, paneer recipes restaurant style, paneer recipews, RichCreamyDish, tasty, vegetarian paneer indian recipes, vegetarian party recipes

Page 18 of 19
« Previous 1 … 13 14 15 16 17 18 19 Next »
  1. Pages:
  2. «
  3. 1
  4. ...
  5. 12
  6. 13
  7. 14
  8. 15
  9. 16
  10. 17
  11. 18
  12. 19
  13. »
  • « Previous Page
  • 1
  • …
  • 16
  • 17
  • 18
  • 19
  • Next Page »
  • Facebook
  • Google+
  • Instagram
  • Pinterest
  • Twitter

LOOKING FOR SOMETHING?

logo
Food Advertisements by
logo
Food Advertisements by

Categories

STAY CONNECTED

  • Facebook
  • Google+
  • Instagram
  • Pinterest
  • Twitter

SUBSCRIBE BY EMAIL

SEARCH RELISH THE BITE

logo
Food Advertisements by

Copyright © 2025 · Lifestyle Pro Theme on Genesis Framework · WordPress · Log in